

Defy GEMINI MULTI FUNCTION THERMOFAN Owner's Manual

Owner’s
Manual
GEMINI MULTI FUNCTION THERMOFAN
EYE LEVEL OVEN
CONTENTS
2 Introduction
2 Unpacking
2 Cupboard Design
2 Safety Advice
3 Installation
3 Electrical Installation
4 The Control Panel
4 Automatic Oven Timer/Clock
7 Multi Function Oven
10 Maintenance
11 Problem Check
11 Owner’s Responsibility
11 Features and Benefits
12 Service
www.defy.co.za

INTRODUCTION
Congratulations on the purchase of this quality appliance. We, the manufacturer, trust
that you will enjoy many years of trouble free use. Please read these instructions carefully
before using the oven. This book will provide you with information on how to operate
and care for your appliance in order that you gain the maximum benefit from it.
UNPACKING
• Please ensure that packaging material is disposed of in a responsible manner. Plastic
bags should be cut up to prevent children playing with them and accidentally
suffocating.
• Remove all packing from the oven cavity and position the accessories.
• If the appliance is damaged in any way, do not use it. Report the damage to your
dealer, who will take the necessary corrective action.
CUPBOARD DESIGN
• Cooking appliances generate considerable heat. The layout and materials of the
mounting cabinet should take account of the characteristics of the oven.
• Surfaces immediately adjacent to the oven should be able to withstand temperatures
of up to 100°C without delaminating or discolouring.
• Gemini ovens exhaust through a vent in the upper part of the handle. The vent at the
bottom of the handle is an air intake.
• Gemini ovens are designed for installation with cupboard doors which provide at least
100mm. clearance alongside and above the oven. Overhead doors may be subjected to
heat as well as condensation if moist foods are being cooked.
• Note that the oven doors are reversible and may hinge from the left or right. Consult
the nearest Defy Service Centre and they will advise the correct procedure.
SAFETY ADVICE
• Only use the appliance for preparing food.
• Always keep children away from the appliance when it is in use.
• Do not leave hot fat or oil unattended. If overheating occurs, these could catch fire.
• Switch off the power at the mains in the event of a fault or when cleaning the oven.
• Do not store flammable items in the oven. If the oven is inadvertently switched on,
these could catch fire.
• Never cover the bottom oven element with aluminium foil. Cooking times will be
affected and the oven enamel could be damaged.
• Avoid spilling fruit juice, particularly citrus, on the appliance as it could damage the
enamel.
• Always keep the oven door gaskets clean as this will enable the door to seal properly.
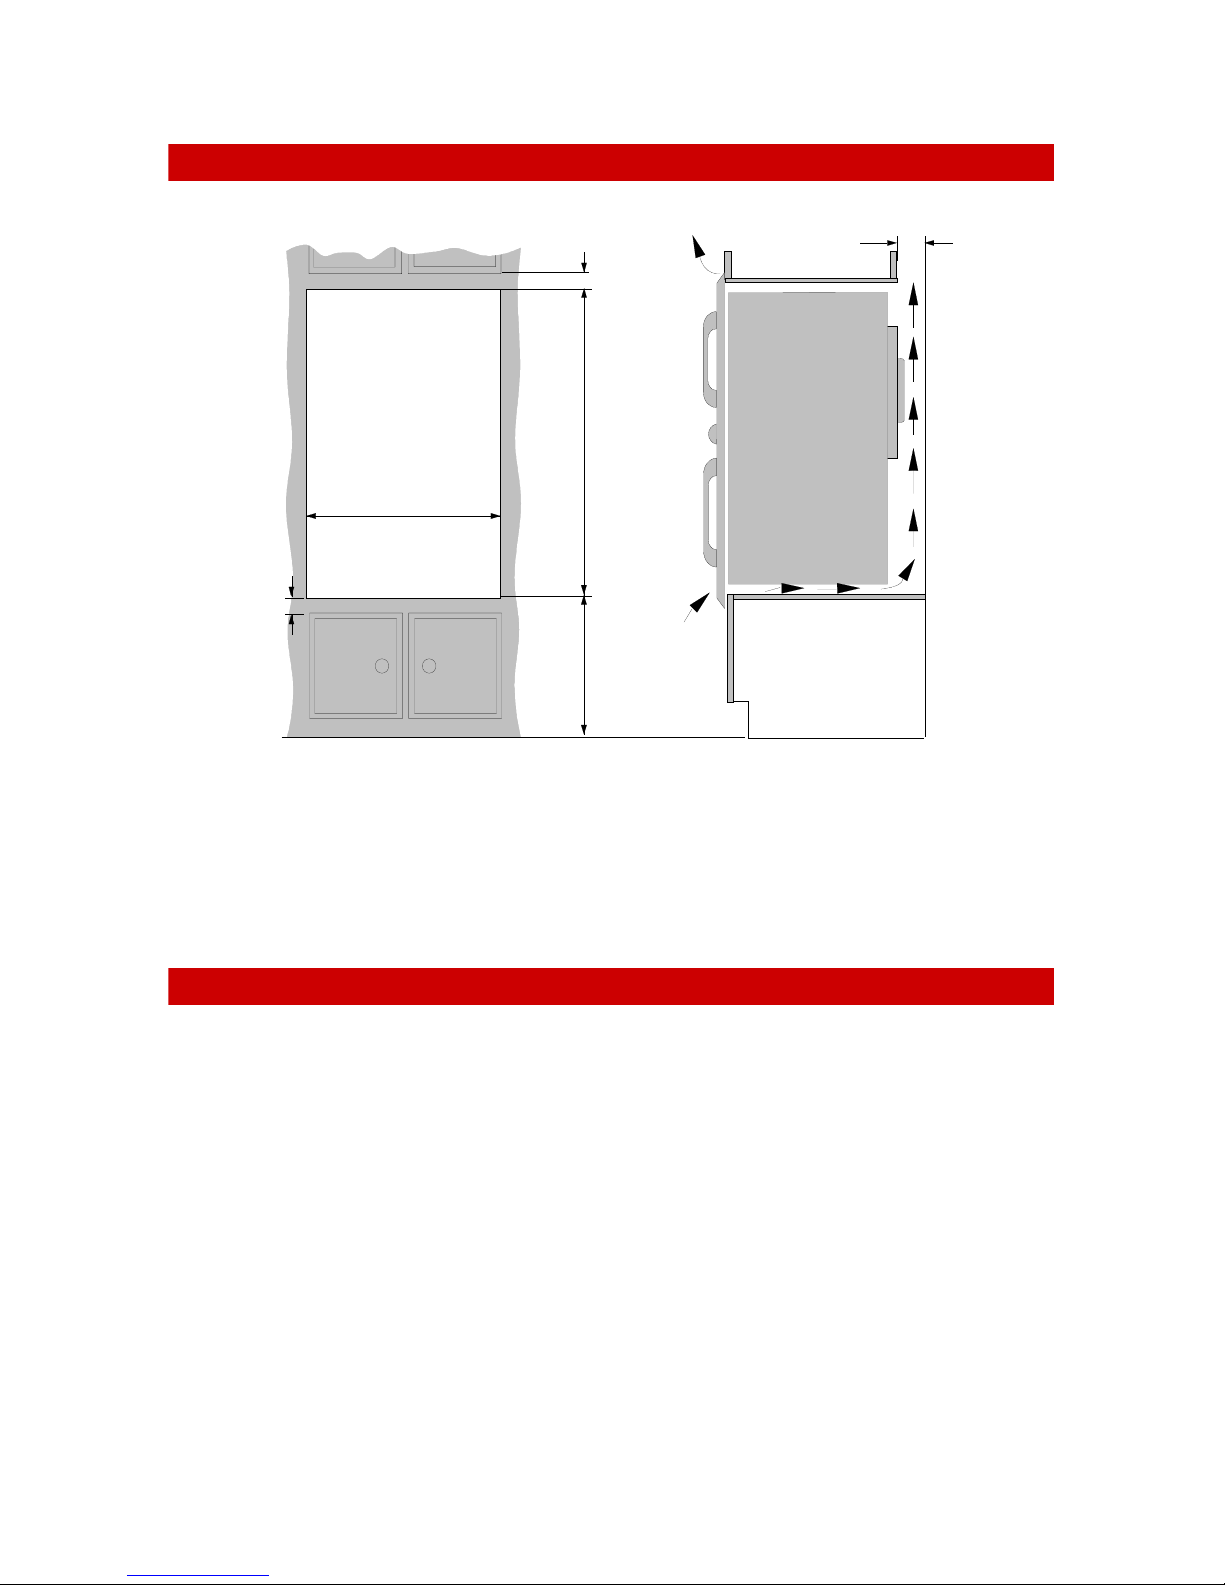
INSTALLATION
32
60
+_3
0
Aperture
1085 H x 700 W x 580 D
700
32
+_3
Aperture
0
+_3
1085
0
Aperture
+_3
600
0
Above floor
level
Floor
Typical section showing
ventilation requirements
• Support the oven in front of the aperture and make the electrical connection before
installing. This will ensure enough cable length for subsequent servicing.
• Unscrew and remove the top and bottom trims to expose the fixing holes.
• Secure the oven to the cabinet using suitable screws. (Fasteners are not provided.)
• Replace the top and bottom trims.
ELECTRICAL INSTALLATION
“This appliance must be earthed and the manufacturer and the seller do
not accept responsibility for any damage due to incorrect installation or
electrical connection.”
Earth leakage
This appliance should not be connected through an earth leakage system.
Refer to S.A.B.S. 0147.
Connection to the power supply must be carried out by a licensed electrician, who will
ensure that the oven is correctly connected and safely earthed. The rated current is printed
on the serial number label attached to the oven bottom trim.
The appliance must be connected to the mains through a double pole isolating switch
which has a minimum clearance between the contacts of 3 mm. in both poles.
A means for disconnection must be provided in the fixed wiring.
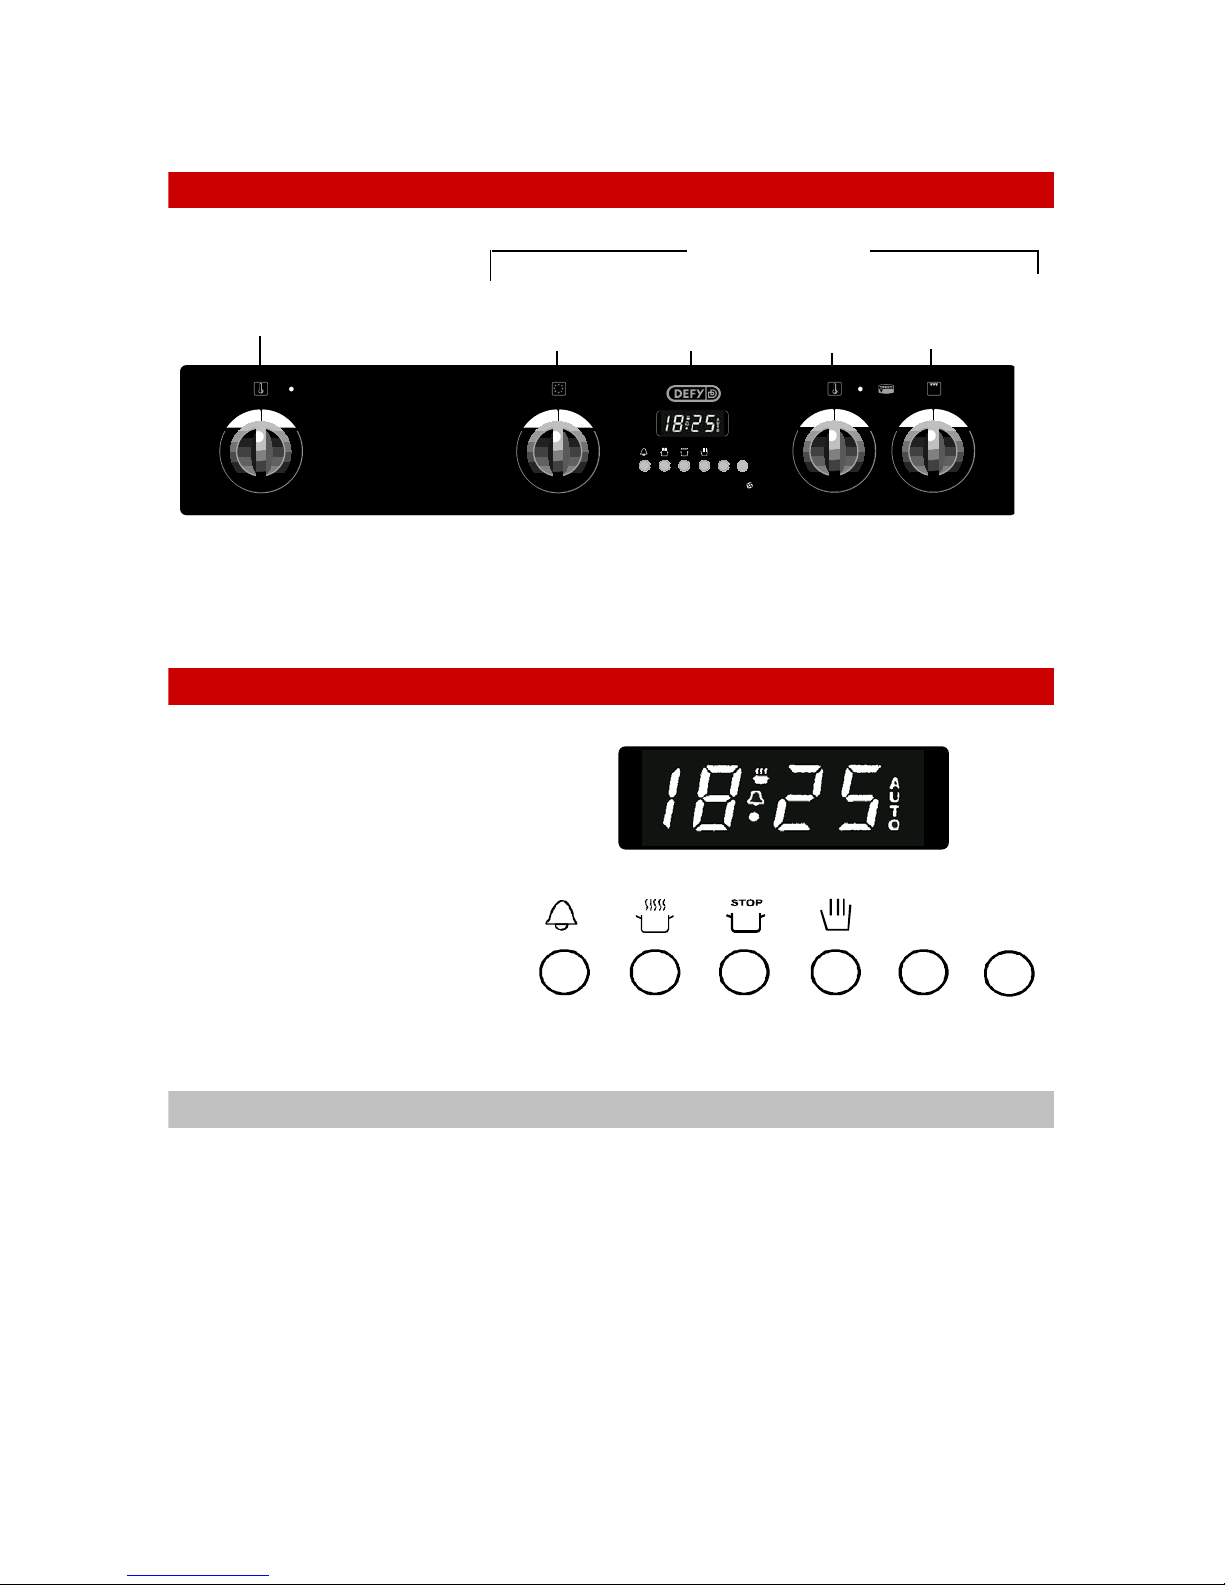
THE CONTROL PANEL
TOP OVE N
THE RM OS TA T
AND INDICATOR
LIGHT
0
8
1
MULTIFUNCTION
SELECTOR
0
AU TOM AT IC
OVEN TIMER
AND CLOCK
GEMINI MULTI - FUNCTION
BOTTOM OVEN
12:45
THE OVEN THERMOSTATS ARE MARKED DOWN TO 70°C.
WHEN SET TO THIS POSITION, THE OVENS MAY BE USED AS WARMERS
AUTOMATIC OVEN TIMER / CLOCK
BUTTON FUNCTIONS
1 = MINUTE MINDER
2 = COOKING PERIOD
3 = STOP TIME
4 = MANUAL CONTROL
5 = SUBTRACT
6 = ADD
MULTI-FUNCTION
THE R M OSTA T AN D
INDICATOR LIGHT
-
+
THERM FAN
VARIABLE
GRILL
S
0
8
1
0
8
1
-
+
65 4321
SETTING THE TIME OF DAY
• When the power is first connected ( or after a power failure), the clock display will
flash 00.00.
• To set the clock, press buttons 1 and 2 and hold them down.
• Press button 5 or 6 until the correct time of day is displayed.
• Release the buttons. The clock is now set.
• Please note that the clock has a 24 hour display.
• For example 3.00 PM will be displayed as 15.00.
 Loading...