

Page 1
TOP LOADER
Automatic Washing Machine
DTL139
DTL140
DTL141
DTL142
Users Manual
Record in the space below the listed information for future reference.
SERIAL NUMBER*******************************..
DATE OF PURCHASE*****************************...
PURCHASED FROM******************************..
****************************************.
The manufacturer strives for continuous improvement. For this reason, the text and
illustrations in this manual are subject to change without notice.
Page 1
Page 2
Contents
Introduction 3
Important safety Instructions 4
Know your washing machine 6
Accessories 6
Installation 7
Control Panel 9
Initial Use 10
Normal Usage 11
How to use Function and Program 12
Various functions 13
Preset 13
Remember 13
Blanket 13
Two Step 14
Child lock 14
Multiple Water Power 14
Delete End of Buzzer 14
Water Level 14
Drain Residual Water 14
Using Detergents, Softeners, & Bleach 15
Trouble Shooting 16
Care & maintenance 17
Technical Specifications 17
Owners responsibility 18
Things to be done for Energy saving 18
Disposing of the old washing machine 18
Service Centres 19
Warranty 20
Page 2
Page 3
1 Introduction
Dear customer,
Your new Defy Top Loader washing machine was manufactured in a state of the art facility
and has passed the strictest quality control procedures.
Please read this manual carefully before using your washing machine for the first time and
then store it within easy reach for future reference.
This manual will provide you with information on how to operate and care for your washing
machine to gain the maximum benefit from it.
We trust you will enjoy years of trouble free use.
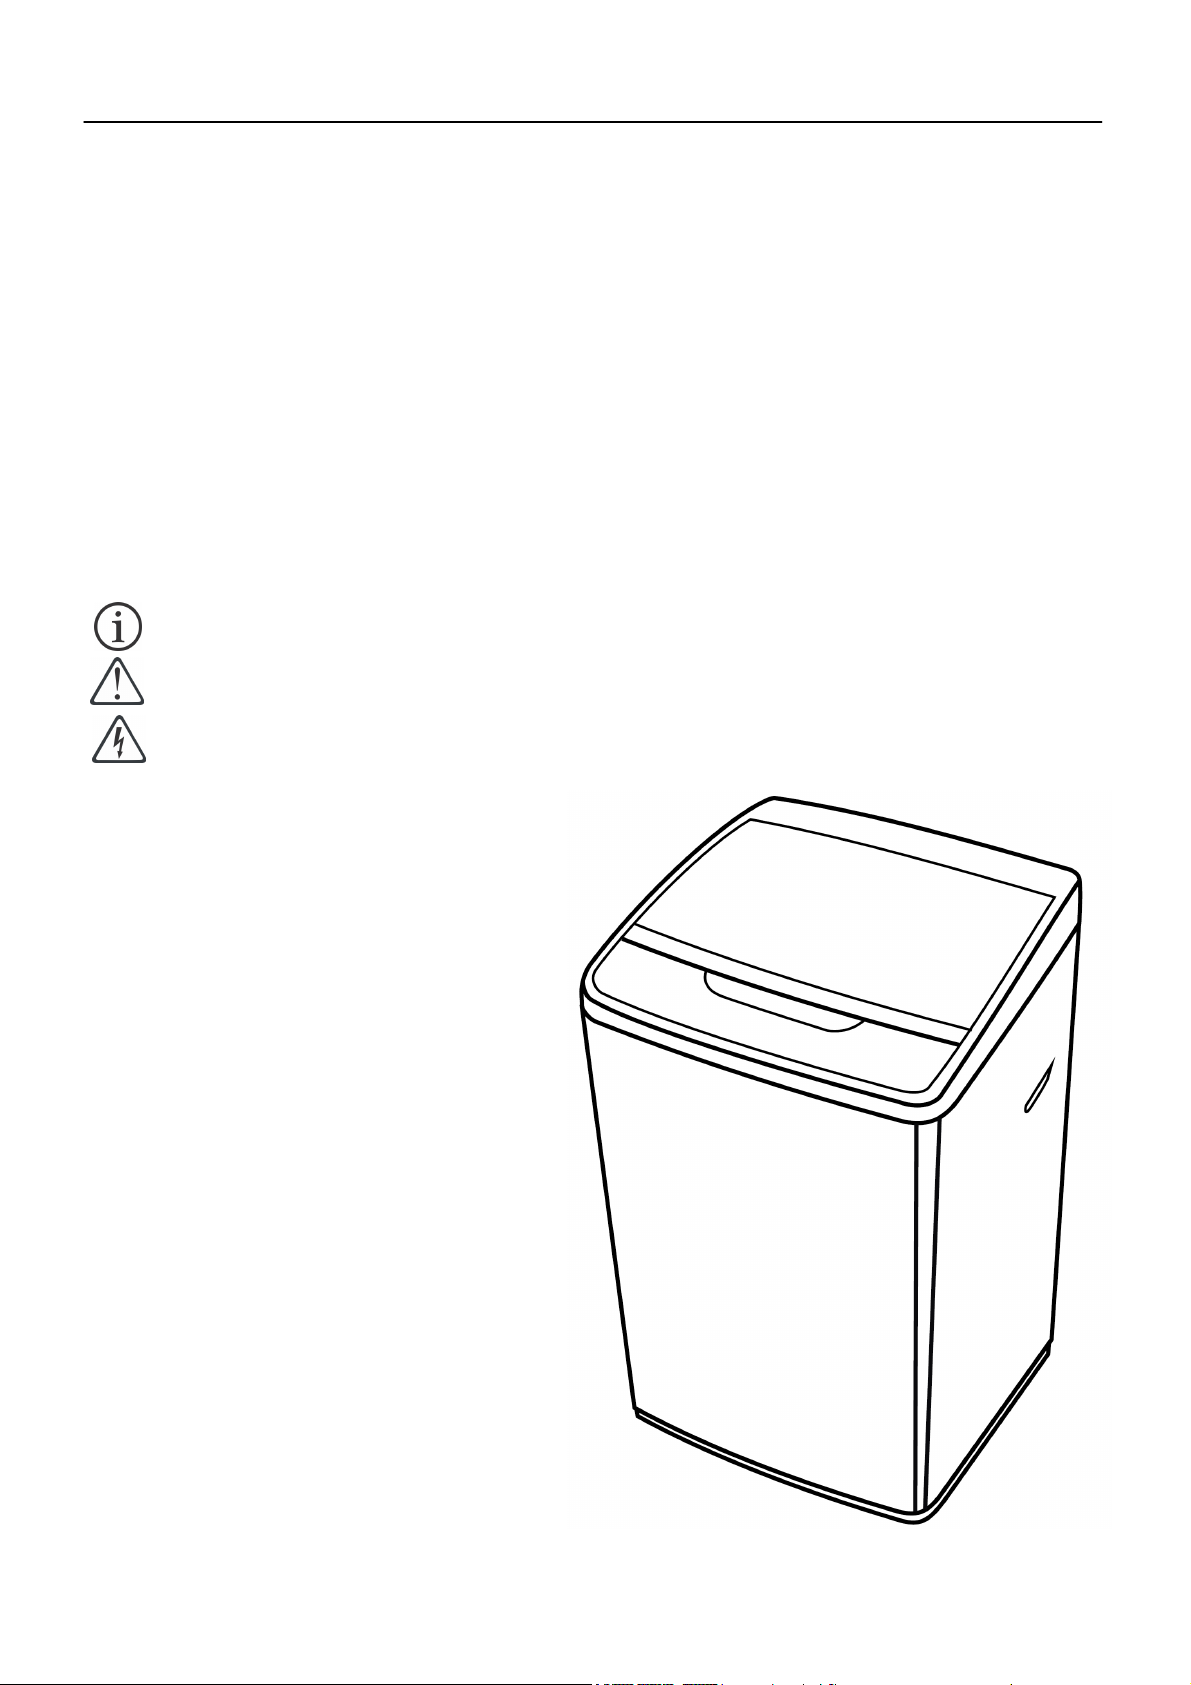
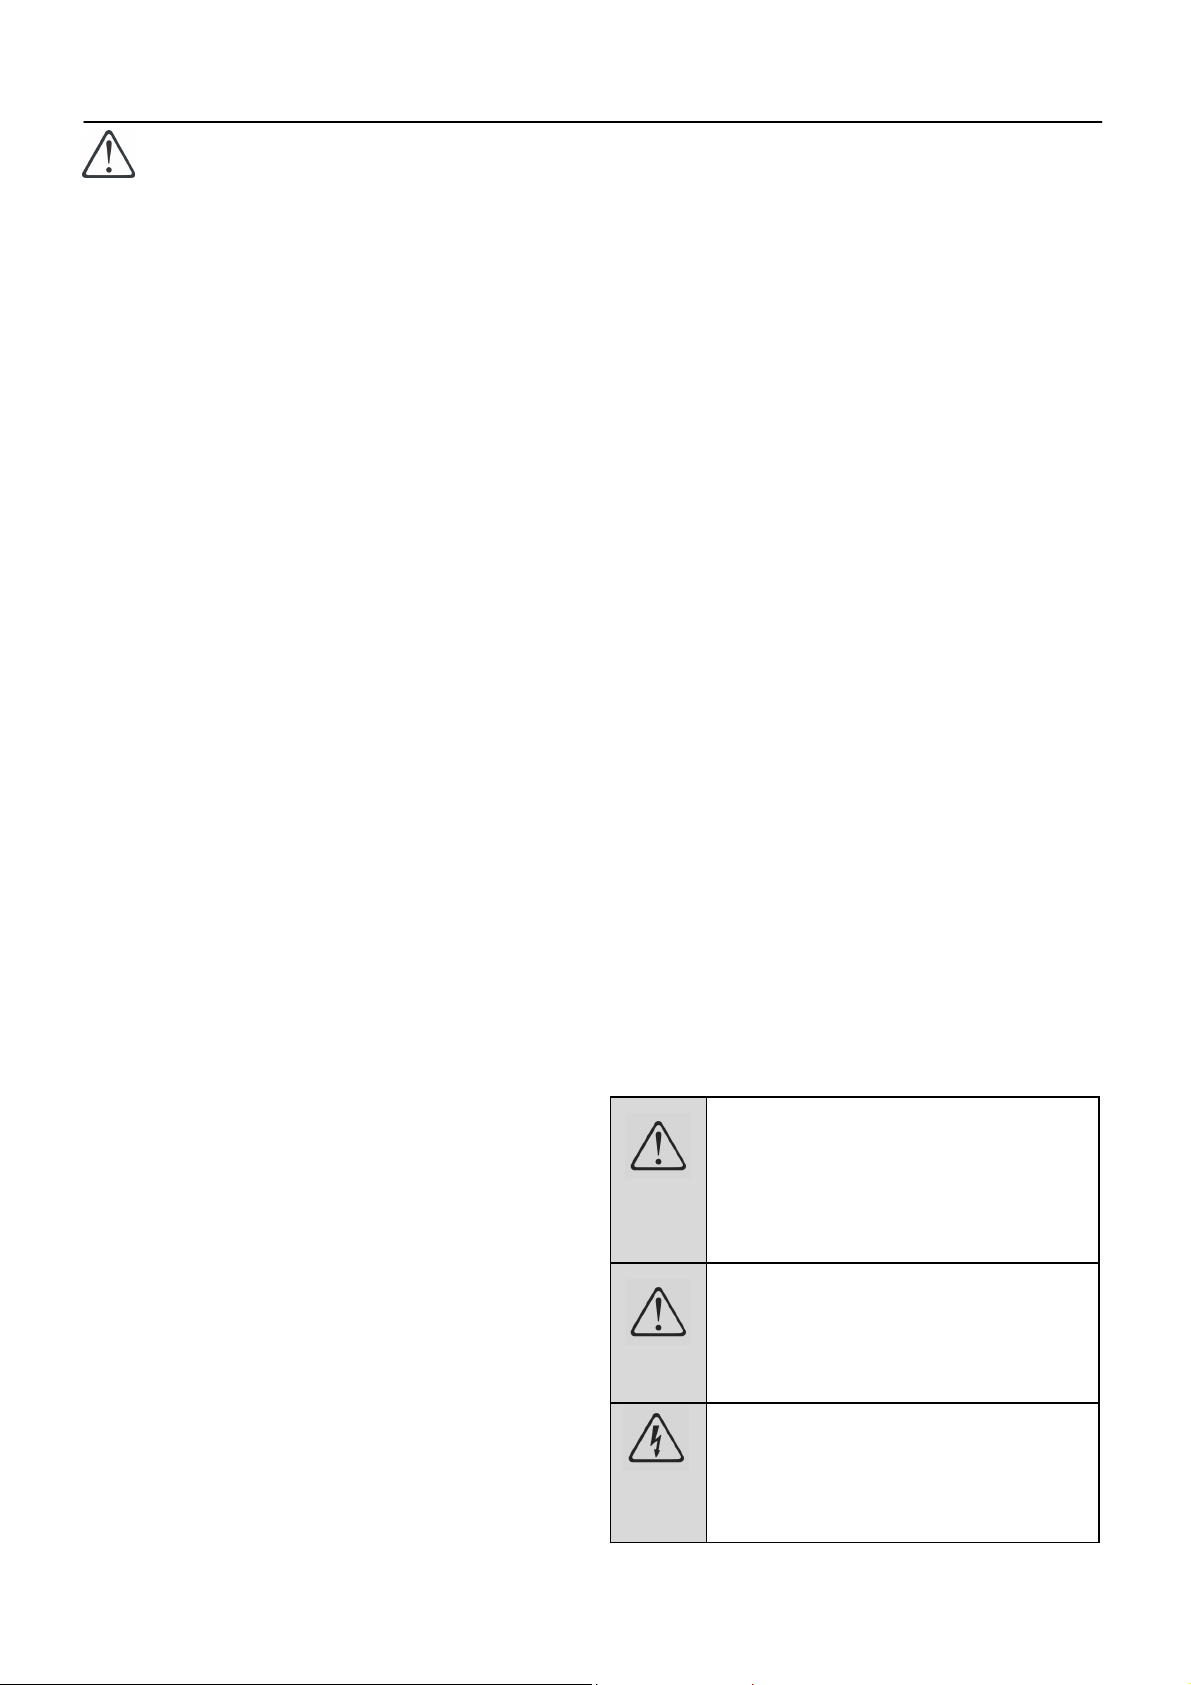
EXPLANATION OF SYMBOLS
Important information
Warning—Hazardous situations
Warning—Electric shock
PLEASE REGISTER YOUR PRODUCT AT
www.defy.co.za
DEFY APPLIANCES (PTY) LTD
P.O.BOX 12004
JACOBS
DURBAN
4026
SOUTH AFRICA
Page 3
Page 4
2 Important safety instructions
General safety
• This washing machine is not intended
for use by persons (including children)
with reduced physical, sensory or
mental capabilities or lack of
experience and knowledge unless they
have been given supervision or
instruction concerning the use of the
washing machine by a person
responsible for their safety.
• Children should be supervised to
ensure that they do not play with the
washing machine.
• Never place the washing machine on a
carpeted floor. Lack of airflow beneath the
machine could cause overheating.
• In case of a malfunction or maintenance
work, disconnect the washing machine
from the electrical mains immediately.
Repairs must only be made by a qualified
technician.
• Before washing, check all clothes for
loose buttons and tears. Check pockets
for coins , pins or other small articles.
Close zips and fasteners. Wash small
articles inside a pillow case.
• Do not wash clothes stained with or
soaked in petrol, thinners, kerosene,
vegetable oil or any other flammable
liquids. Nor should any of these liquids be
added to the wash water as they
constitute a fire hazard or there may be a
risk of an explosion.
• Only use the machine for washing fabrics.
Do not attempt to wash plastic leather or
fibreglass. Sort and separate clothes by
fabric, colour and degree of dirt.
• Use detergents, softeners and
supplements suitable for top loading
automatic washing machines only.
• Always unplug the machine from the wall
socket when it requires cleaning or
service. Only permit qualified persons to
repair or install parts in the washer.
• Do not use water which is hotter than
50 degrees Celsius as this may deform
plastic parts of the machine. which
could result in injury, electric shock or
water leakage.
• The water supply and draining hoses
must be securely fastened and remain
undamaged to prevent water leakage.
• Check the water supply hose connection
by turning on the water before washing
and ensure there is no water leakage.
• Follow the instructions on the textile tags
and on the detergent package.
• Installation and repairing procedures must
be carried out by an Authorized Service
Agent. Repairs carried out by incompetent
persons create a user risk: There may be
a risk of accidental fire. If the washer
operates abnormally, it may cause an
injury. The Manufacturer shall not be held
liable for damages that may arise from
procedures carried out by unauthorized
persons.
• Do not expose the machine to any type
of flame or put cigarettes or any
volatile substances on the machine
top. The machine may catch fire or the
machine may be deformed due to its large
number of plastic components.
• Do not install the machine in a
bathroom or very humid place.
Doing so may cause a malfunction or
result in a short circuit and there is a risk
of an electric shock.
• Never wash the machine by spreading
or pouring water onto it! Avoid spraying
water on to the control panel and back of
the machine. There is the risk of an
electric shock, and it may cause the
machine to malfunction.
Warning! Never reach into or put
your hands into the wash/spin tub
whilst the machine is operating. If
you reach into the wash/spin tub
serious injury could result. Wait
until all motion stops.
Warning! If the wash/spin tub does
not stop within 15 seconds after
the washer lid is opened, turn off
the washer immediately and call an
authorised service person.
Warning! The machine must be
unplugged during installation,
maintenance, cleaning and
repairing procedures to avoid the
risk of an electric shock.
Page 4
Page 5

• Do not wash, rinse or spin water proof
fabrics such as sleeping bags,
raincoats, car covers etc. Washing
these types of materials may lead to injury
through abnormal vibration during
spinning or damage may result to the
washing machine, wall, floor and clothes.
• Keep hands and feet away from the
bottom of the washing machine when it is
in use to avoid the risk of injury.
• Do not stand on the washing machine or
place weight on the washing machine.
Damage to the washing machine may
result and there is a risk of personal
injury.
• Turn off the water supply at the tap when
the washing machine is not in use to
minimise the risk of damage that could
arise from water leakage. Unplug the
washing machine if it is not going to be
used for a long period of time.
Intended use
• The washing machine must only be used
domestically and for the purposes for
which it was designed.
Children's safety
• Electrical products are dangerous for
children. Keep children away from the
washing machine when it is in use. Use
child lock to prevent children from
tampering with the washing machine
controls.
• Store all detergents and additives in a
safe place away from the reach of the
children by closing the cover of the
detergent container or sealing the
detergent package.
• Do not allow children to play on or in the
machine. if a child accidentally falls into
the wash/spin tub, serious injury could
occur. Close the lid when leaving the
room where the machine is located.
• Keep children away from the washing
machine and keep boxes or steps well
away from the washing machine to
prevent children from stepping up and
accessing the controls, lid and wash tub
of the washing machine.
Transportation of the machine
1. Unplug the machine before transporting it.
2. Remove water drain hose and water
supply hose connections.
3. Drain all remaining water from the
machine.
Unpacking
• Remove all packaging and dispose of it in
a responsible manner. Plastic bags
should be cut up to prevent children
playing with them and accidentally
suffocating.
• Open the wash-tub lid and remove all the
accessories stored in the wash tub.
• Do not attempt to operate the machine
while any of the packaging is still in place.
Electrical connection
• The washing machine must be earthed
and the manufacturer and seller do not
accept responsibility for any damage due
to incorrect electrical connection.
• Connection must comply with national
regulations.
• The washing machine should be plugged
into a 16 Amp, 230-240V~50Hz earthed 3
pin wall socket. If the current value of the
fuse or breaker in the house is less than
16 Amps, have a qualified electrician
install a 16 Amp fuse.
Ensure that the power plug and power
cord are properly connected.
• Never touch the plug with wet hands!
• Never unplug by pulling on the cable,
always pull out by grabbing the plug.
• Do not operate a damaged washing
machine. Consult with your nearest DEFY
service centre should you have any
concerns.
• If the power cable is damaged, it must be
replaced by the manufacturer, after sales
service or a similarly qualified person.
• Never plug the washing machine into the
wall socket during installation. Death or
serious injury may result.
• For safety reasons, the wall socket and
the plug should be accessible after
installation.
• Do not make connections via extension
cables or multi-plugs.
Warning: Installation and electrical
connections of the machine must
be carried out by an Authorized
Service Agent. The Manufacturer
shall not be held liable for damages
that may arise.
Page 5
Page 6
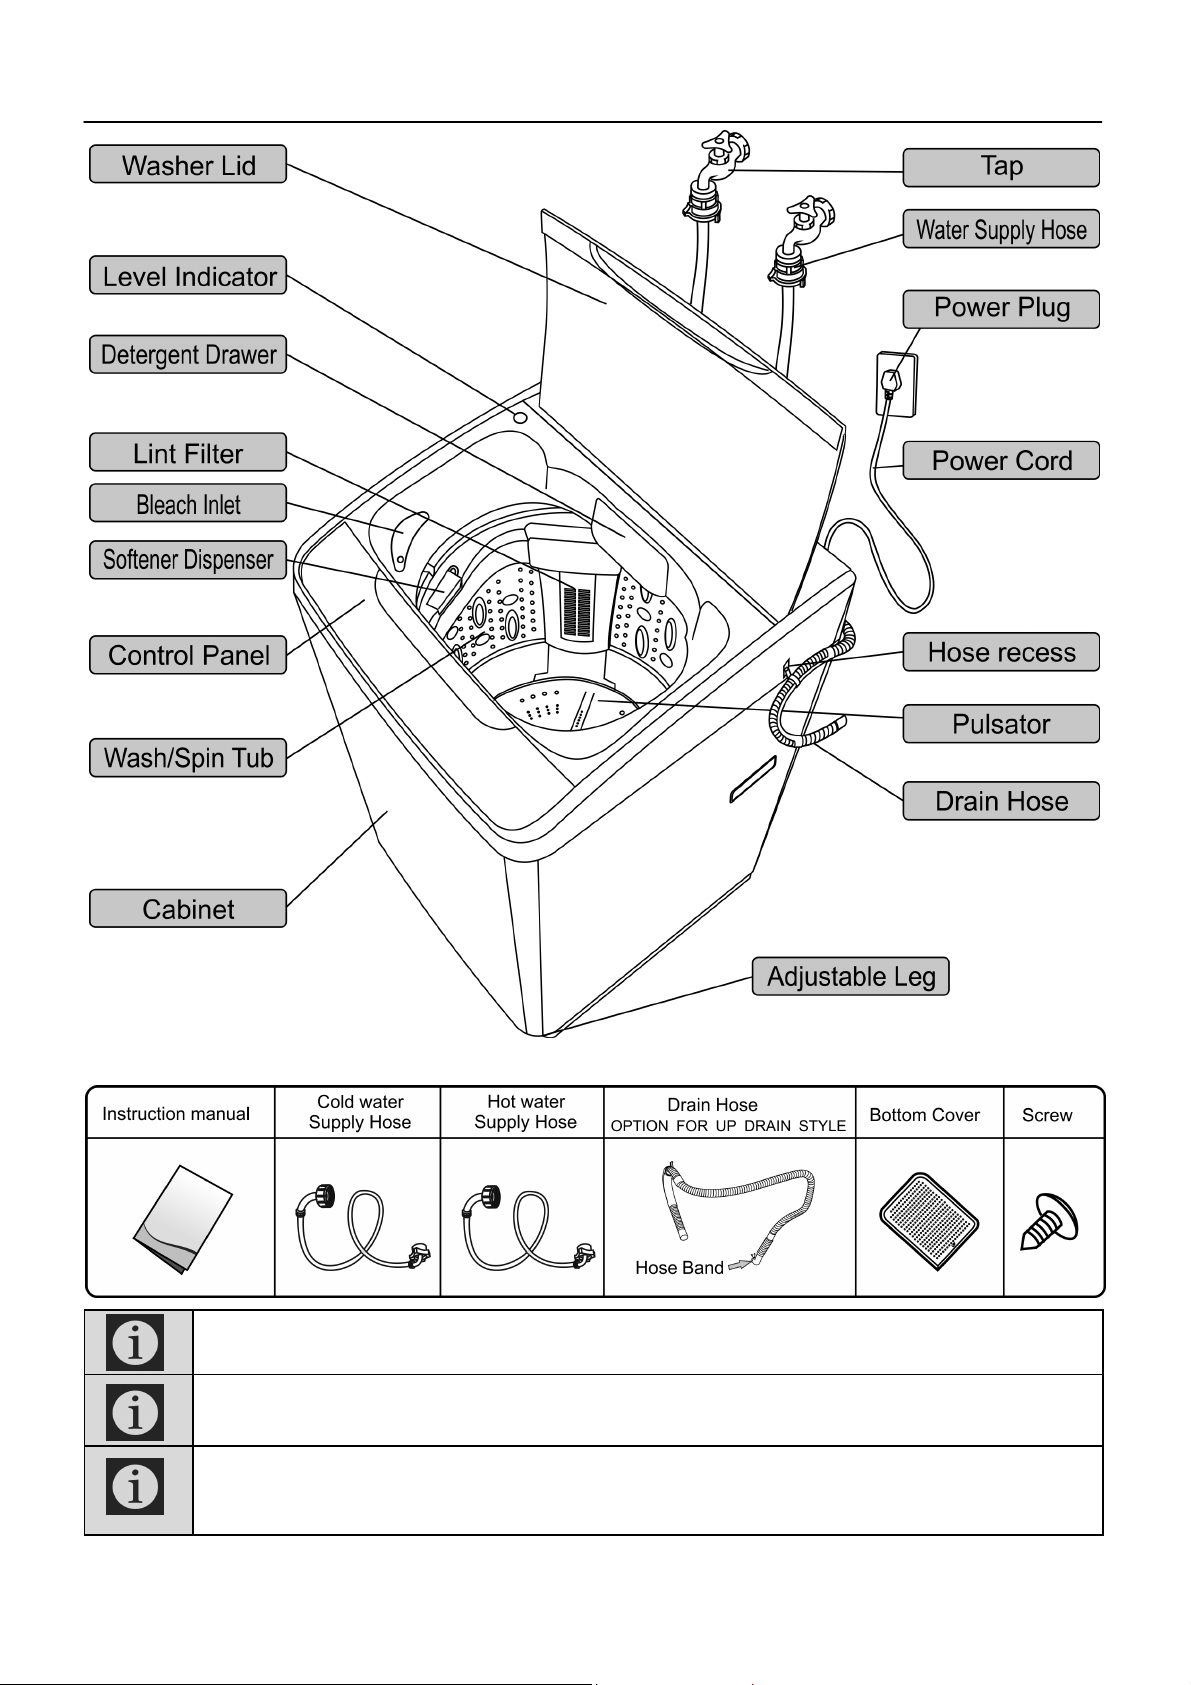
3 Know your washing machine
Accessories
Page 6
The manufacturer strives for continuous improvement. For this reason, technical
specifications, text and illustrations in this manual are subject to change without notice.
Figures in this manual are schematic and may not match your machine exactly.
Values stated on the machine labels or in the documentation accompanying it are obtained
in laboratory conditions in accordance with the relevant standards. Depending on
operational and environmental conditions of the machine, these values may vary.
Page 7

4 Installation
Installation and electrical connections of the
machine must be carried out by an
Authorized Service Agent. Review
information in the user manual and ensure
that the electricity, water supply and water
drainage systems are appropriate before
calling an Authorized Service Agent. If they
are not, call a qualified technician and
plumber to have any necessary
arrangements carried out.
Preparation of location, electrical, tap
water and waste water installations of
the machine are the customer's
responsibility.
Warning: Installation and electrical
connections of the machine must be
carried out by an Authorized Service
Agent. The Manufacturer shall not be
held liable for damages that may arise.
Warning: Prior to installation, visually
check if the machine has any defects
on it. If so, do not have it installed. A
damaged machine is a safety risk.
Ensure that the water inlet, discharge
hoses and power cable are not folded,
pinched or crushed, during or after
installation or cleaning procedures.
Installing the bottom cover
1. Unplug the power cord of the machine.
2. Carefully lay the front side of the machine
on a soft mat or cushion. (Be careful not
to dent the frame)
3. Slide the bottom cover into the retainers
and push the cover all the way in.
4. Fasten the bottom cover with the supplied
screw.
5. Carefully move the machine back into the
upright position.
Page 7
Appropriate installation location
• Place the machine on a rigid floor that has
sufficient load carrying capacity.
• Choose a well ventilated dry location out
of direct sunlight.
• Do not place the machine on the power
cable.
• Do not install the machine at places where
the temperature may fall below 0ºC.
• Place the machine at least 10 mm away
from the edges of other furniture.
• Hot and cold water taps should be located
within 1 metre of the inlet valves.
Adjust the adjustable leg of the machine if
necessary to ensure that the machine is
level. The maximum permissible inclination
of the ground surface is 2 degrees. A
machine that is not levelled and is unstable
will vibrate and generate excessive noise.
Warning: Do not place the machine
on a rug or carpeted floor as this may
restrict ventilation openings at the
bottom of the machine.
Warning: Do not use old or used water
inlet hoses on the new machine It may
cause stains on your laundry.
Connecting the water supply
1. Check that the sealing washers are
correctly seated.
2. Attach the curved end of the water supply
hose to the inlet valve of the machine,
tighten the coupling nuts by hand. Never
use a tool when tightening the nuts.
3. Attach the straight end of the hose to the
tap. Tighten the coupling nuts by hand.
4. Open the taps fully after completing the
hose connection and check for water
leaks. If there are any leaks, turn off the
tap and remove the nut. Retighten the nut
carefully after checking the seal. To
prevent water leakages and damages
caused by them, keep the taps closed
when the machine is not in use.
Page 8

Warning: Ensure that the cold and hot
water connections are made correctly
when installing the machine.
The hose should not be twisted, bent or
squeezed shut and must not be stepped on.
Warning: Do not use water that is
hotter than 50ºC
Fitting the water supply hose to the
washing machine:
Hold the hose and turn the nut clockwise.
Firmly hand tighten the nut.
2. Pull the outlet end of the drain hose
upwards and fix it with the hose clamp on
the rear of the washing machine cabinet.
3. When the machine is not in use, hang the
drain hose on the recess on the right side
of the machine cabinet. When the
machine is in operation, place the outlet
end of the drain hose into the sink or a
dedicated drainage outlet.
To remove the hose, switch off the tap and
then turn the nut counter clockwise.
Fitting the drain hose
1. Compress the two ears of the drain hose
clamp with your hands and connect the
drain hose to the pump outlet. Fix the
clamp in place.
CAUTION: Ensure the height of drain
hose is not less than 700 mm. The
machine will not operate properly if
the hose is less than 700 mm high.
Page 8
Warning: The drain hose must be
securely fitted for good water flow
and to avoid risk of flooding or injury.
Page 9

5 Control panel
Page 9
Page 10

6 Initial use
Before first use of the machine, ensure
that all preparations are made in
accordance with the instructions in
sections “Important safety instructions”
and “Installation”.
To prepare the machine for washing laundry
for the first time, perform a drum cleaning
(maintenance wash) procedure as outlined in
the care and maintenance section on page
17 of this manual.
PREPARATION
• Close all zippers, snaps and hooks to
prevent them from snagging other articles.
• Remove pins, and other hard items to
prevent them from scratching the
machine.
• Empty all pockets, remove all items in
pockets such as coins, pens and paper
clips, and turn pockets inside out and
brush pockets. Such objects may damage
the machine and cause noise.
• Put small size clothes such as infant's
socks and nylon stockings in a laundry
bag or pillow case.
• Place curtains in the wash tub without
compressing them. Remove curtain
attachment items.
• Turn down cuffs and turn synthetic knits
inside out.
• Tie strings and sashes so they will not
tangle.
• Treat spots and stains before washing.
• Tough stains must be treated properly
before washing. If unsure, check with a
dry cleaner.
• Use only dyes/colour changers and
limescale removers suitable for machine
wash. Always follow package instructions.
• Wash trousers and delicate laundry
turned inside out.
• Keep laundry items made of Angora wool
in the freezer for a few hours before
washing. This will reduce pilling.
• Laundry that has been soiled with flour,
lime dust, milk powder, etc. must be
shaken off before placing into the
machine. Dusts and powders on the
laundry may build up on the inner parts of
the machine in time and can cause
damage.
Page 10
SORTING
Mix large and small items in each load.
Separate heavily soiled items from lightly
soiled ones.
Separate dark colours from light colours.
Separate colourfast items from non
colourfast ones.
Separate robust fabrics from delicate.
Separate whites from coloured fabrics.
LOADING
Lift the washer lid.
Arrange the articles to be washed loosely
round the perimeter of the tub.
Load evenly as an off balance load may
cause unnecessary vibrations.
Use a large load programme when washing
permanent press garments. These items
need more space to move than heavy items
such as jeans and towels.
Do not overload the machine as this will
result in poor cleaning, increased creasing
and excessive lint formation.
Correct load capacity
The maximum load capacity depends on the
type of laundry, the degree of soiling and the
washing program desired.
Warning: If loading of the laundry
has been incorrectly done, noise
and vibration problems may occur
in the machine.
Some water may have remained
in the machine due to the quality
control processes in the
production of the machine. It is not
harmful for the machine.
Warning: Use only detergents
manufactured specifically for top
loader washing machines.
When using detergent, softener,
starch, fabric dye, bleach or
limescale remover, read the
manufacturer's instructions on the
package carefully and follow the
dosage values. Use a measuring
cup if available.
Page 11

7 Normal usage
1. Preparation
• Connect the Drain hose. Connect the
water supply hose to the tap and open the
tap. Plug the Power Cord into the wall
socket. load the laundry into the washer.
2. Press the POWER ON/OFF button.
3. Press the START / PAUSE button.
• The sensor tests the clothes weight
automatically. (For NORMAL/CUSTOM/
HEAVY DUTY)
The proper water power, water level, wash/
4. Use the recommended amount of
detergent specific to your model as indicated
in the charts below.
5. Close the washer lid
• If the washer lid is not closed before
spinning commences, the washer buzzer
will emit an alarm and the washing
machine will stop working.
Too much detergent results in poor
rinsing and too little detergent results in
poor washing.
spin time and rinse times are automatically
applied.
Recommended amount of detergent: DTL139/DTL140
Recommended amount of detergent: DTL141/DTL142
Page 11
Page 12

8 How to use Function and Program
Preparation:
1. Fit the drain hose, open the water supply tap. Plug the power cable into the wall socket,
place clothes inside the wash tub.
2. Press the POWER ON/OFF button.
3. Press the FUNCTION button and choose the function most suited to the clothing to be
washed. Please refer to the chart below on FUNCTION & CHOOSING A PROGRAM
GUIDE.
4. Press the SELECT button and choose the cycle you require. The light will move rightwards.
SOAK→WASH→RINSE→SPIN→PRESET
5. Press the SET button to choose the SOAK, WASH, SPIN times and RINSE type and RINSE
times.
• SOAK time indicates: 0→5→10→**→35→40 minutes
(This function is not available for the DELICATE/BLANKET functions).
• WASH time indicates: 0→1→2→**→19 →20 minutes..
• Number of RINSE times indicates: 0→1→2→3→4 (Number of rinse times).
• SPIN time indicates: 0→1→2→**→8→9 minutes. (Except for the DELICATE function).
0→1→2→3 minutes (For the DELICATE function).
6. Press the WATER LEVEL button, choose the appropriate water level and then add the
detergent into the detergent dispenser or add the detergent into the wash tub. (Do not allow
the detergent to come into contact with the clothes).
7. Press the START/PAUSE button.
8. Close the washer lid.
• To change FUNCTION or SELECT during operation, please switch off the power, switch the
power back on and choose the function required.
FUNCTION & CHOOSING A PROGRAM GUIDE
Programme operation status
FUNCTION Suitable clothes
CUSTOM
NORMAL
All types of clothes 10 min. Rinse 2 Times 5
Normal clothes 5-12 min. Rinse 2 Times 5-6
Washing time
(minutes)
Rinsing Type
Spinning Time
(minutes)
HEAVY DUTY
QUICK
BLANKET
DELICATE
Page 12
Dirty clothes 7-14 min. Rinse 2 Times 7-8
Lightly soiled
clothes
Blanket or bulky 12 min. Rinse 2 Times 8
Underwear and
articles with
embroidery
15 min. Rinse 1 Time 3
6 Rinse 2 Times 2
Page 13

9 Various Functions
PRESET
1. Open the tap and load the laundry into the
wash tub, ensure that the drain hose has
been correctly fitted.
2. Press the POWER On/OFF button.
3. Select the required FUNCTION, SELECT
and WATER LEVEL.
4. Press the PROCESS button until the
PRESET light flashes, press SET to
select the required PRESET time (the
time washing will be finished).
• PRESET indication:
6→7→8→**24→0→1**5 hours
5. Press the START/PAUSE button.
6. Add the detergent into the detergent
dispenser or add the detergent into the wash
tub. (Do not allow the detergent to come into
contact with the clothes). Close the washer
lid.
• All the lights except PRESET will switch
off after approximately one minute has
elapsed.
• PRESET confirm: Press the SET button to
indicate the programs selected, these will
light up for approximately 5 seconds as a
reminder of the programs chosen.
• PRESET cancel or to change: PRESET is
cancelled automatically when the machine
is powered off; Switch the power on and
set PRESET again to change it.
• This function is not available for the
DELICATE function.
BLANKET
1. Press the POWER/ON OFF on and
ensure that the drain hose has been
correctly fitted.
2. Open the tap and press the FUNCTION
button until the BLANKET light flashes.
3. Dissolve the detergent with around 5L
warm water (approximately 30ºC) and
pour into the wash tub of the washing
machine.
4. Fold up the blanket as per the illustrations
and place it into the wash tub.
Fold the blanket lengthways in two.
Fold four times in the same direction.
REMEMBER FUNCTION
When selecting NORMAL, CUSTOM or
HEAVY DUTY, 30 seconds after starting, the
machine will remember these programs and
will start with these programs the next time
the machine is powered on.
• This function is not available for the
DELICATE or BLANKET function.
• PRESET and WATER LEVEL will not be
remembered.
• WASH, RINSE and SPIN for the
CUSTOM program will be remembered.
• The memory will be lost if plug is
removed.
Page 13
Roll up the blanket.
Place the blanket into the wash tub with the
edges of the blanket facing downwards.
5. Press the START/PAUSE button.
6. Close the washer lid.
Page 14

TWO STEP
WATER LEVEL
The water inlet is controlled in 2 steps:
The first step (1) is with a lesser amount of
water, thus the density of the detergent is
higher than normal. After washing for a
period of time, the second step is activated
(2) and the machine allows the rest of the
water in.
For example, the water level was set at 5,
the machine may give level 2, for step (1),
then the rest of the water level 3, for step (2).
• This function will not be activated when
selecting water level 1 or 2, and the
DELICATE or BLANKET function.
• When SOAK is selected, this function will
not be activated after soaking.
CHILD LOCK
Press the POWER ON/OFF button to switch
on the power, and press the WATER LEVEL
button for 4 seconds until a sound from the
buzzer emits.
To restore, repeat the above or pull out the
plug. When CHILD LOCK is set, CHILD
LOCK on the control panel lights up
indicating E5. If the washer lid is opened
during washing the alarm will buzz for
approximately 5 seconds.
MULTIPLE WATER POWER
This button allows you to choose the
required water level during the WASH/
RINSE process.
How to set the water level:
Press SELECT until the WASH light flashes,
Press the WATER LEVEL button to choose
the required water level,
Press the SET button to set the wash time.
Press the SELECT button until the RINSE
light flashes,
Press the WATER LEVEL button to choose
the required water level,
Press the SET button to set the RINSE times
and RINSE type.
Press the SELECT button until the SPIN
light flashes,
Press the SET button to set the SPIN time.
Finally press the START/PAUSE button
The machine will start operating according to
the set wash water level and rinse water
level.
Press the WATER POWER button to adjust
the water current during washing or rinsing.
Press it once again, the digital display
indicates H0 (standard water power), H1,
H2, H3, H4, (stronger, H4 being the
strongest); L1, L2, L3, L4 (weaker, L4 being
the weakest).
Note: This function cannot be set for the
DELICATE or BLANKET modes.
DELETE END OF BUZZER
Press the POWER ON/OFF button to power
on the machine.
Press and hold down the START/PAUSE
button for 4 seconds until a sound emits
from the buzzer. To restore the End Buzzer
sound repeat the above steps.
Page 14
DRAIN RESIDUAL WATER
With this function selected, the drain
valve will be opened to drain the residual
water 9 minutes after the program has
finished.
How to drain residual water:
Press POWER ON/OFF to switch the
washer on, hold the PROCESS button for
more than 4 seconds until the buzzer
sounds.
Page 15

10 Using Detergents, Softener & Bleach
Detergent
• Add a measured amount of detergent to
the detergent drawer.
• Use only detergent specifically
recommended for top loading washers
and follow the manufacturer’s instructions.
Choosing the detergent type
• The type of detergent to be used depends
on the type and colour of the fabric.
• Use different detergents for coloured and
white laundry.
• Wash delicate clothes with special
detergents only.
• When washing dark coloured clothes and
quilts, use a liquid detergent.
• Wash woollens with special detergent
made specifically for woollens.
liquid detergent
• Add liquid detergent into the detergent
drawer before washing. If the liquid
detergent has lost its “fluidity”, dilute it
with water before pouring it into the
detergent drawer.
• Note: in order to avoid residual detergent
build up, clean the detergent drawer every
2-3 months.
Adjusting detergent amount
• The amount of detergent to be used
depends on the amount of laundry, the
degree of soiling and water hardness.
• Do not use amounts exceeding the
dosage quantities recommended on the
detergent package to avoid problems of
excessive foam and poor rinsing.
• Use less detergent for small amounts or
lightly soiled clothes.
Using gel and tablet detergent
• If the gel detergent thickness is not fluidal
or it is a capsule liquid tablet, place it
directly into the wash tub before washing.
• Place tablet detergents into the detergent
drawer or directly into the wash tub before
washing.
Page 15
Tablet detergents may leave residues
in the detergent compartment. If this
should occur, place the tablet
detergent in amongst the laundry
near the lower part of the wash tub
for future washes.
Using softener
• Add softener into the softener dispenser
before washing. The softener will flow into
the inner drum in all standard programs
except the delicate program.
• Avoid spilling undiluted softener onto the
clothes in the wash tub as it may damage
them.
• If the softener has lost its “fluidity”, dilute it
with water before pouring it into the
softener dispenser.
Note: in order to avoid residual softener
build up, clean the softener dispenser every
2-3 months.
How to use bleach
If required, add a measure of liquid chlorine
bleach to the bleach inlet. Avoid spilling
bleach onto the clothes in the machine as
undiluted bleach may damage them.
1. Dilute bleach with twice the volume of
water. Use only a little amount of bleach
and rinse clothes well to avoid skin
irritation. Do not pour bleach onto clothes.
2. Read and carefully follow the directions
and warnings regarding the use of bleach.
3. Do not use bleach for coloured fabrics.
4. Do not use bleach and detergents by
mixing them.
Using starch
• Add liquid starch, powder starch or fabric
dye into the softener compartment.
• Do not use softener and starch together in
a washing cycle.
• Wipe the inside of the machine with a
damp and clean cloth after using starch.
Using limescale remover
• When required, use limescale removers
manufactured specifically for washing
machines only.
When using detergent, softener,
starch, fabric dye, bleach or limescale
remover read the manufacturer's
instructions on the package carefully
and follow the dosage values. Use a
measuring cup if available.
Important: Use only detergents
manufactured specifically for top
loader washing machines.
Page 16

11 Trouble shooting
Problem
The machine
does not work
at all.
Water does not
flow into the
wash/spin tub.
Water does not
drain.
The machine
does not spin.
Problem
indicator
Where to Check
Check the POWER ON/OFF button.
Check the START/PAUSE button.
Check whether in the PRESET mode.
Check that the power cord is securely plugged in.
Check whether there has been a power failure.
Check whether there is blown fuse or tripped circuit breaker.
Check whether the tap is open.
Check to see if the water supply has been cut off.
Check whether the metal filter in the inlet filter is clogged.
Check to see that the water pressure is not too low.
Check that the height of the drain hose is above 700 mm.
Check that the height of the drain hose is not above 1000 mm.
Check that the drain hose is not kinked or obstructed.
Check to see if the drain hose is too high off the ground.
Check to see if the water outlet is clogged.
Check to see that the laundry is evenly distributed and that it has not
clumped on one side of the wash/spin tub.
Check whether the washer is on a level surface.
Close the washer lid. Ensure the lid is not being obstructed from
closing.
Machine does
not wash.
Other problems.
NOTE: The problem indicators can be cleared by pressing the START/PAUSE button once. To clear
the emergency stop press the START/PAUSE button again to restart the operation.
Warning: If the problem cannot be eliminated, even after the instructions have been
Check whether the CHILD LOCK is on.
Close the washer lid.
Press the POWER ON/OFF button to turn off the power.
Please call your nearest DEFY service agent or your dealer.
followed, consult with your dealer or Authorized Service Agent. Never try to repair a
non functional machine yourself.
The following conditions are normal to the operation of the washer and are not faults:
1. During washing or rinsing there is water
inlet into the wash tub. This is due to a
water level decrease, the machine will
compensate by automatically adding
water in this case.
2. The spin tub stops and starts at the
beginning of the spinning cycle. This is
intermittent spinning for more effectual
spinning.
3. Water inlet and rinsing occur during
spinning. This is due to the automatic lean
correction that compensates for uneven
4. There is a sound like water flowing after
spinning. This is due to the balancing
liquid in the balance ring which helps
reduce vibration during the spinning
process.
5. The control panel remains warm after the
machine has been powered off. This is
due to the “Remember” function circuitry
operating.
6. A power failure during a washing cycle:
The machine could not complete the
cycle. Please reset the washing cycle.
distribution of clothing in the wash tub.
Page 16
Page 17

12 Care and maintenance
Maintenance wash
It is advisable to do a maintenance wash or
“boil out” once a month if you use your
machine frequently.
If you use your machine less frequently then
a maintenance wash 3 to 4 times a year
should be sufficient. Please proceed as
follows:
1) Dose your machine with a standard dose
of detergent, or use 100 grams of
Dishwasher detergent, NOT WASHING
SODA
2) Programme the machine to the longest,
hottest wash.
3) Without loading any washing, allow the
machine to run through the full cycle.
Technical specifications
Model No. DTL139 DTL140 DTL141 DTL142
Dimension WxDxH (mm) 520x545x907 520x545x907 570x585x950 570x585x950
Net weight 31kg 31kg 37kg 37kg
Power output 330W 330W 400W 400W
Spin Speed (rpm) 850 850 850 850
Water Capacity (High) 50 Litres 50 Litres 60 Litres 60 Litres
Water consumption 120L/cycle 120L/cycle 148L/cycle 148L/cycle
Required water pressure 0.03~0.8MPa 0.03~0.8MPa 0.03~0.8MPa 0.03~0.8MPa
Electricity consumption 0.102kWh/cycle 0.102kWh/cycle 0.127kWh/cycle 0.127kWh/cycle
Rated voltage 230-240V~50Hz 230-240V~50Hz 230-240V~50Hz 230-240V~50Hz
Inner Tub Stainless Steel Stainless Steel Stainless Steel Stainless Steel
Inner Tub dimensions (Diameter/H) 318x424 mm 318x424 mm 335x460 mm 335x460 mm
Display LED Display LED Display LED Display LED Display
Delay Start 0~24h 0~24h 0~24h 0~24h
Wash noise 58db 58db 58db 58db
Spin noise 62db 62db 62db 62db
Colour White Metallic White Metallic
Page 17
Page 18

13 Owners Responsibility
SINCE THE FOLLOWING ARE NOT
FACTORY FAULTS, THEY ARE THE
OWNER’S RESPONSIBILITY
• Damage to the exterior finish, breakage of
components, damage through improper
use or installation of the washing machine
or damage caused by moving the washing
machine.
Before calling a Service technician or
your dealer, please check the following:
• Is the machine plugged into the wall
socket? Is the house circuit breaker on?
• Is the machine switched on? Has the
washer lid been closed properly?
• Is the detergent dose correct? Is the filter
clean? Is the tap open?
• Is there a water supply to the home? Have
any of the hoses been twisted or kinked?
Things to be done for energy saving
• Always follow the instructions on the
detergent packaging.
• Wash slightly soiled laundry at low
temperatures.
• Use faster programmes for small
quantities of lightly soiled laundry.
Disposing of the washing machine
• This washing machine has been
manufactured with high quality parts and
materials which can be reused and are
suitable for recycling.
• Do not dispose of the machine with
normal domestic waste at the end of its
service life.
Please consult with your local authorities.
• Should you at any time in the future
scrap the washing machine, cut the
power cord and take measures to
render the door inoperative thereby
preventing children, when playing,
getting trapped inside.
Page 18
Ensure parts and accessories are Installed according to the directions given in this
instruction manual.
The manufacturer strives for continuous improvement. For this reason, technical
specifications, text and illustrations in this manual are subject to change without
notice.
Figures in this manual are schematic and may not match your machine exactly.
Values stated on the machine labels or in the documentation accompanying it are
obtained in laboratory conditions in accordance with the relevant standards.
Depending on operational and environmental conditions of the machine, these
values may vary.
Page 19

14 Service Centres
BLOEMFONTEIN
CAPE TOWN
DURBAN
EAST LONDON
JOHANNESBURG
Commercial Head Office,
Administration, Distribution, National Groups,
Tel. Sales, Contracts and Credit.
POLOKWANE
PORT ELIZABETH
PRETORIA.
160 Long Street, Hilton,
Bloemfontein 9301.
Tel. 051 400 3900
Bloemfontein.Service@defy.co.za
5A Marconi Rd.
Montague Gardens, 7441.
Tel. 021 528 3000
CapeTown.Service@defy.co.za
35 Intersite Avenue,
Umgeni Business Park, Durban 4051.
Tel. 031 268 3300
Durban.Service@defy.co.za
16 Bowls Rd. Arcadia,
East London 5201.
Tel. 043 743 7100
EastLondon.Service@defy.co.za
Cnr. Mimetes & Kruger Sts. Denver ext.12
Johannesburg. 2094.
Tel. 011 621 0200 or 011 621 0300
Gauteng.Service@defy.co.za
87 Nelson Mandela Drive.
Superbia 0699.
Tel. 0152 92 1166 / 7 / 8 / 9.
Polokwane.Service@defy.co.za
112 Patterson Road,
North End, Port Elizabeth 6001.
Tel. 041 401 6400
PortElizabeth.Service@defy.co.za
Block A1 Old Mutual Industrial Park.
Cnr. D.F.Malan Drive & Moot Str.
Hermanstad. 0082.
Tel. 012 377 8300
Pretoria.Service@defy.co.za
OTHER AREAS ARE SERVICED BY OVER 200 AUTHORISED AGENTS. FOR FURTHER
DETAILS PLEASE CONSULT THE NEAREST REGIONAL DEFY TECHNICAL SUPPORT
CENTRE
Page 19
Page 20

15 Warranty
This certificate is issued by DEFY APPLIANCES LIMITED manufacturers of Defy and
Ocean products, hereinafter the Company, to the original purchaser only, of the appliance
described on the certificate and shall constitute the only warranty given in respect of this
appliance.
The Company warrants to the original purchaser that for a period of TWO YEARS from
date of purchase the appliance is free from defect under normal domestic use, both in
workmanship and material, subject to the following conditions.
1. Repair or replacement of any part of this appliance, found by the Company to be
defective, shall be at the election of the Company. The Company reserves the right to
effect such service through any of its Service Divisions or Authorised Service Dealers.
The cost of such service shall be borne by the Company in full, provided that the
appliance is located no further than 50km from a Company Service Centre or an
Authorised Service Dealer. Where the appliance is located beyond the 50km radius, the
purchaser shall be liable for the standard travelling charges, as determined by the
Company.
2. Vitreous enamelware, fuses and lamps are specifically excluded from these warranties. It
is an express condition of these warranties that the purchaser takes due care and
attention in the use and maintenance of the appliance. Abuse, misuse in conflict with
operating instructions, connection to incorrect voltages and subjection to commercial use
shall release the Company from its obligations.
3. This warranty shall become void and cease to operate if the appliance is dismantled by,
or any repairs to the appliance are effected by any persons not duly authorised by the
Company, or if substitute parts not approved by the Company are used in the appliance,
or if the serial number of the appliance is removed.
4. The Company shall not be responsible for damages resulting from fire, flood, civil
disturbances or any Act of God. The Company shall not, in terms of these warranties be
responsible nor held liable for any consequential loss or damage of any kind caused by or
due to the failure or malfunction of the appliance.
5. The Company shall not be responsible for transportation or other costs other than those
incurred within the provisions of Point 1 of this Certificate.
6. These warranties shall not apply to the appliance if it is purchased or used beyond the
borders of the Republic of South Africa, Namibia, Botswana, Swaziland and Lesotho.
7. Where service is requested under warranty and no fault or defect can be found by the
Company, all costs incurred will be for the purchaser's account.
8. This Certificate as well as your invoice will serve as proof of purchase. For the purpose
of warranty, it will be essential to produce this Certificate and invoice. Failure to do so, will
render the purchaser liable for service costs.
KEEP THIS CERTIFICATE AND SALES INVOICE AS
PROOF OF PURCHASE FOR WARRANTY PURPOSES.
Page 20
 Loading...