

Page 1
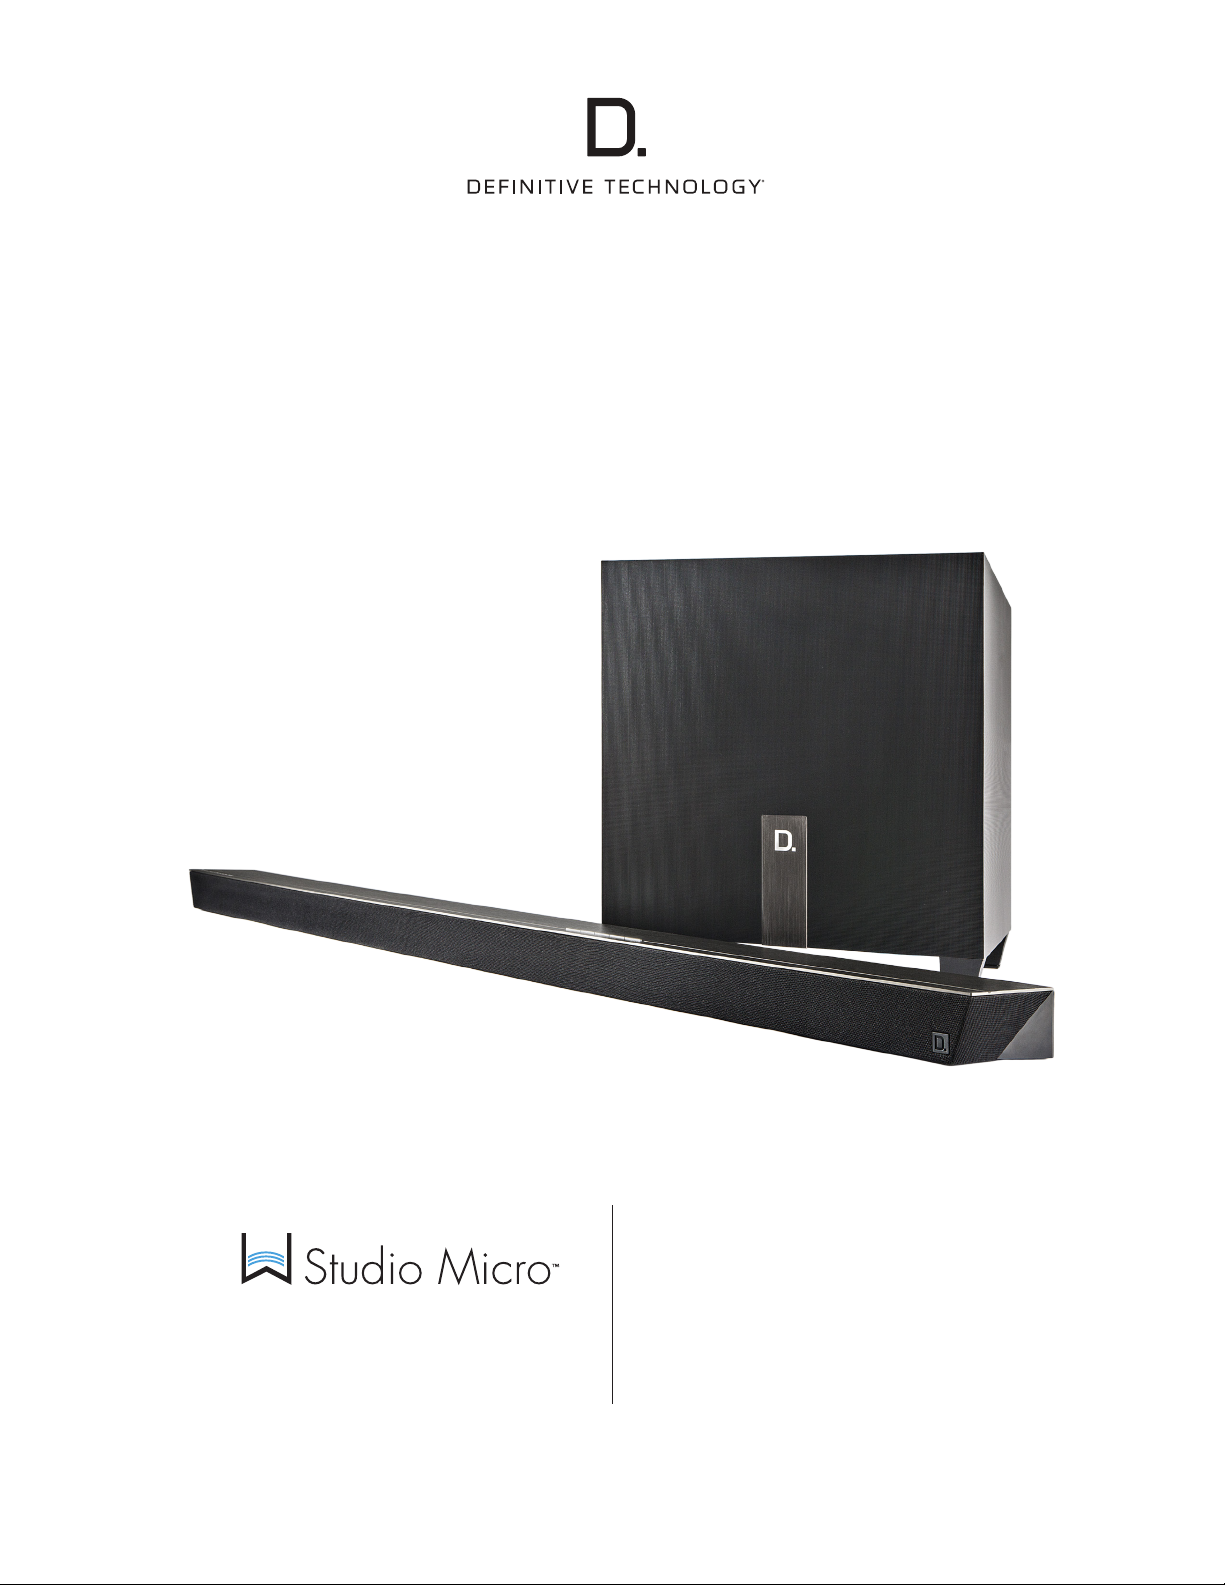
Wireless Collection
Ultra-Slim 3.1 Wireless Sound
Bar & Music Streaming System
Owner’s Manual
Page 2
Contents
What’s In the Box 3
Connecting the W Studio to Your TV 4
Sound Bar Button Controls 4
Input/Output Guide 5
Remote Control Functionality 6
Using Your TV or Cable/Satellite Remote to Control
the W Studio Micro 6
Streaming Music to the W Studio Micro 7
How to Set Up the W Studio Micro on Your Wi-Fi Network 7
More Wi-Fi Streaming Information 8
Additional Connectivity Information 9
W Studio Micro Specications 9
Frequently Asked Questions 10
Technical Assistance 10
IR Remote Control Function and Data List 11
Superior Room-Filling Sound From a Compact
Music Streaming Sound Bar System
The W Studio Micro delivers cutting-edge, high-resolution Wi-Fi streaming
audio in a compact, high-performance sound bar system, complete with
wireless subwoofer. But don’t be fooled by its ultra-slim size—it’s capable
of lling even large rooms with the audiophile-grade Denitive Technology
acoustic signature.
Experience the dynamic, immersive performance of Denitive Technology’s
proprietary Spatial Array™ audio technology for TV shows, movies or music.
At only 1.75” tall, the exquisite, ultra-slim prole of the W Studio Micro sound
bar blends seamlessly with any at panel TV installation. Plus, the compact
wireless W Studio Micro subwoofer goes anywhere in your room, and
delivers waves of deep, low-end bass with no wire clutter.
DTS Play-Fi technology lets you stream high-quality music through your home
network directly to the W Studio Micro sound bar. Use the W Studio Micro
alone, or with other products from the Wireless Collection using the open
architecture of the DTS Play-Fi standard. Enjoy your favorite online
music streaming services, or your own personal digital audio library.
Control everything easily with our free app, directly from your smartphone,
tablet or PC.
www.definitivetech.com
Once again, Denitive Technology raises the standard to achieve superior
audio performance with exceptional design and innovative technology.
The Denitive Technology Wireless Collection
The W Studio Micro is part of Denitive Technology’s Wireless Collection.
The Wireless Collection delivers the same high performance audio as
Denitive Technology’s traditional wired loudspeakers, in new Wi-Fi streaming
loudspeakers, ampliers and adapters. Thanks to DTS Play-Fi® technology, the
Wireless Collection from Denitive Technology is an elegant, sophisticated
and wireless way to ll your home with audiophile-grade music.
2
Page 3

Unpacking Your W Studio Micro
Please unpack the components carefully, removing the subwoofer and sound
bar as indicated on the carton instructions. We recommend saving all cartons
and packing materials in case you move, or should you need to ship your
W Studio Micro.
What’s In the Box
Included in your W Studio Micro carton:
1. Sound bar
2. Wireless subwoofer
3. Power cable for sound bar
4. Power supply for sound bar
5. Power cable for subwoofer
6. Optical audio cable
7. Remote control (battery included)
8. Setup guide & important
product information booklet
1
2
owner’s manual
3
5
4
6
7 8
www.definitivetech.com
3
Page 4

Connecting the W Studio Micro to Your TV
For optimal performance, place or mount your W Studio Micro sound
bar in one of these locations:
• Directly under your TV, in front of the TV’s base
• On the wall directly above or below your wall-mounted TV
Wall Mounting
The W Studio Micro sound bar has two built-in keyhole slots so you
can wall-mount it beneath your wall-mounted television.
Note: Please make sure to use wall anchors that are of suitable
load-bearing capacity.
Connecting Your W Studio Micro to Your TV
1. Carefully unbox the W Studio Micro sound bar and subwoofer.
2. Place the sound bar on a flat surface below your TV. Connect the
power cable to the sound bar. Then connect the power cable to
the power supply. Finally, plug the power supply into a wall socket.
3. You can place the wireless subwoofer anywhere in your room
with access to an AC outlet, even inside an audio cabinet.
Optimal blending is achieved when the subwoofer is placed at the
front of your room, to the left or right of the sound bar.
4. Now, connect the included optical cable from your TV to the back
of the sound bar.
5. Adjust your TV’s audio settings to ensure it sends the audio signal to
external speakers. This usually turns OFF the TV’s internal speakers,
which is mandatory for good audio performance.
6. Power on the sound bar and subwoofer. Enjoy!
Note: More inputs available for your preferred setup.
Connecting the Wireless Subwoofer
The included W Studio Micro subwoofer is engineered for easy
set-up. When it powers up, it will automatically receive its wireless
signal from the sound bar. You can place the wireless subwoofer
anywhere in your room with access to an AC outlet.
To connect the wireless subwoofer to the W Studio Micro system,
simply plug the subwoofer into a nearby AC outlet and switch the
main power switch to ON.
owner’s manual
3. Turn the subwoofer’s main power switch back to ON.
4. Note the Power and Status LEDs on the rear panel of the
subwoofer. The Status LED will flash until paired. The Power LED
will turn green upon pairing. Two green LEDs mean the subwoofer
has successfully paired.
5. A successful tone will sound when the subwoofer has
successfully paired.
Sound Bar Button Controls
1. Power: Press to turn on/off the sound bar.
2. Source (Symbol ): Press to switch between OPT 1, OPT 2 and AUX 3
Three LED lights correspond to each of the three source inputs. Example:
You want to play a Blu-ray disc and are currently playing another source
on OPT 1. Your Blu-ray player is connected to source input OPT 2.
Simply touch this switch once to select the input.
Note: When advancing more than one source, please allow for a few
seconds of delay.
3. Down Volume: Press – to decrease volume of sound bar, a row of LED’s
displays the volume level. It takes 4–5 presses to change the LED, but
you will hear that the volume is decreasing.
4. Up Volume: Press + to increase volume of sound bar, you will see a
corresponding change in the LED display.
5. Play/Pause: Press to play/pause when streaming music; press to mute
when using sources 1, 2 or 3 for watching TV/movies.
If the wireless subwoofer stops receiving an audio signal, follow these
instructions to re-establish the connection:
1. Turn the subwoofer’s main power switch to OFF and wait
15 seconds.
2. Press the SYNC button on the back of the
W Studio Micro sound bar for three seconds.
Note: Pairing must happen within 30 seconds of pushing the SYNC
button. If nothing is paired during this time, the process will time out
via a failed tone.
www.definitivetech.com
4
Page 5

Input/Output Guide
owner’s manual
2 3
1
1
POWER
USB
OPT
2
OPT
4
1. Power: Insert power cable here.
2. USB: Use to charge a USB powered device, for manual firmware
updates or to create a hardwired Ethernet connection using a USB
Ethernet adapter.
3. OPT 1: Use for TOSLINK optical audio output connection from the TV
set to the sound bar.
Note: Most TV’s cannot pass a Dolby Digital or DTS 5.1 channel
audio signal through an optical audio output connection. They can
only pass 2 channel stereo through Toslink. The W Studio Micro will
simulate a surround experience, but it will not be as effective as when
processing a true 5.1 digital surround signal. This hookup method
offers convenience: most functions (including source switching) can
be done through one remote control, such as your cable box or TV
remote. But you won’t get the best system sound quality, or be able
to use all of the features of the W Studio Micro, including your OSD
(on-screen displays).
4. OPT 2: Use for TOSLINK optical audio output connection from the TV
set to the sound bar.
Note: Most TV’s cannot pass a Dolby Digital or DTS 5.1 channel
audio signal through an optical audio output connection. They can
only pass 2 channel stereo through Toslink. The W Studio Micro will
simulate a surround experience, but it will not be as effective as when
processing a true 5.1 digital surround signal. This hookup method
offers convenience: most functions (including source switching) can
be done through one remote control, such as your cable box or TV
remote. But you won’t get the best system sound quality, or be able
to use all of the features of the W Studio Micro, including your OSD
(on-screen displays).
5 7
3
REPEATER
AUX
SUB OUT
6 8
IR
IR IN
WI-FI
SETUP
9 10
SUB
SYNC
Note: Some older TV’s have only an analog output connection. In this
scenario, the TV does all the switching between sources and the W
Studio Micro is always set to INPUT #3. A Dolby Digital or DTS
digital audio signal cannot be passed through a TV’s analog output
connection. The best audio signal quality that can be reproduced
using this method is two-channel stereo audio. This method is
the least-preferred connection method of the those described in
this section.
Note: You can also connect a smartphone, tablet or other mp3 player
using the 3.5mm mini jack to the sound bar.
6. SUB OUT: For hardwiring the subwoofer if you desire.
7. IR REPEATER: Relays signals from additional connected devices
(cable box, Blu-ray player, etc.) to the sound bar.
8. IR IN: For custom installations: the IR input is more likely to be used
with a home automation system, like Crestron or Control 4. This is
often just an electrical connection to a piece of equipment.
9. WI-FI SETUP: For use when re-establishing a connection between
the sound bar and your home’s Wi-Fi network.
10. SUB SYNC: For use when re-establishing a wireless connection
between the sound bar and the subwoofer.
5. AUX 3: All sources into your TV with 3.5mm analog mini-jack to
the sound bar.
www.definitivetech.com
5
Page 6

owner’s manual
Remote Control Functionality Using Your TV or Cable/Satellite Remote
to Control the W Studio Micro
Power on/off
OPT 1
Volume up
Volume down
Optimized
listening mode
for music
Center channel
volume up/down
Mute
OPT 2
AUX 3
Optimized listening
mode for TV &
movies
Subwoofer volume
up/down
While the W Studio Micro works best with the included remote control,
programming your sound bar to respond to another remote control is an
easy process that may be more convenient for you. To program each basic
command to another remote, you must use the following instructions.
Note: While programming the sound bar, ignore anything that may be
displayed on the TV screen.
1. Make sure the sound bar is turned on with the front of the sound bar
showing a solid dim white LED.
2. Press and hold the “< >” button on the sound bar button panel for
5 seconds.
• The bar will chime indicating that you have entered the “learning”
mode, followed by a short LED light show.
3. Press and release the “Volume +” button on the W Studio Micro remote
while pointing it at the sound bar.
4. Now, while holding your TV or Cable/Satellite remote control 6” to
12” from the sound bar, press the “Volume +” button on that remote.
• The “Volume +” command has been learned if you see several LEDs on
the front of the sound bar blink and you hear 2 chimes.
• While still in “learning” mode, repeat Step 3 and Step 4 for each
remote command that you want to program (ex. Volume --, Mute,
Power, etc.).
5. Once you’re done programming the remote, press and hold the “< >”
button on the W Studio Micro sound bar for 5 seconds to save all of the
commands. You’re done.
Important notes:
If your bar fails to learn a remote command, the “Power” LED on the sound
bar will blink white 3 times. While still in “learning” mode, carefully repeat
the steps above to have your additional remote relearn the command.
You can only program one additional remote control (TV, satellite, cable
box, etc.) at a time.
Code Erasing Procedure:
If you have programmed your sound bar to respond to a remote
control and you no longer want it to do so, erase the codes by
pressing the “< >” button on the sound bar for 10 seconds. Previously
learned codes have been successfully erased when the “Power” LED
flashes white several times and a tone is heard.
This procedure removes ALL of your additional remote control’s
programming. If you only need to change the programming for some
commands, follow the steps detailed above to redo any previous
programming.
Note: The sound bar will always respond to the provided
remote control.
www.definitivetech.com
If you have any further questions on these processes, please call us
at 800-228-7148.
6
Page 7

owner’s manual
Streaming Music to the W Studio Micro
Your Home Network
The Wireless Collection uses your home ’s Wi-Fi network to connect streaming
devices and speakers, and uses the Denitive Technology App to control
the audio streamed to each DTS Play-Fi-enabled speaker or device.
System Requirements for Basic
Streaming Connections
It all begins by building a wireless home network, preferably one with a
high-speed Internet connection. Here’s what you’ll need to connect your
W Studio Micro to your network:
• A high-speed Internet connection.
• A wireless router rated 802.11n or better.
• An Android device with version 2.2 operating system or newer
OR an iOS device with version 6.0 operating system or newer.
• Your wireless network password (if required).
For the Best DTS Play-Fi Experience
• For the fastest streaming performance, especially when streaming to
multiple speakers simultaneously, an 802.11ac router is recommended.
• DTS Play-Fi uses Windows 7, 8,8.1 & 10. DTS Play-Fi is not available
for XP or Vista at this time. DTS Play-Fi is not available for MAC OS X at
this time.
• Ensure your DTS Play-Fi-enabled device is within wireless reach of your
router, or that the signal is not hindered by concrete, brick, or other
dense walls. Check the quality of your connection by looking at the
Wireless Strength icon on the Denitive Technology App.
Your Wi-Fi Connection
To ensure the easiest setup during this procedure, consider placing your
W Studio Micro sound bar close to your Internet-connected wireless router.
When the setup is completed, you will be able to move your
W Studio Micro sound bar to its permanent location.
1. Use the included power cable to connect the W Studio Micro sound bar
to a nearby power outlet.
2. Turn the unit ON using the Power button on the front panel of the sound
bar, or on the Remote Control.
3. The rightmost White LED on the front panel will blink QUICKLY for
about 15 seconds, after which it will begin to pulse SLOWLY.
4. The slowly pulsing light means your device is ready to connect to your
Wi-Fi network.
5. If the Wi-Fi LED is not pulsing slowly, press and hold the Wi-Fi setup
button (located on the rear panel of the unit) for eight seconds, until you
hear the second tone. Your W Studio Micro sound bar is now ready to
be connected to your network.
6. Now download the Denitive Technology App from the Apple App
Store or Google Play Store.
Launch the App and follow the instructions. (See instructions on next page.)
Need Help? Get In Touch With Us!
If you have any questions, please contact us directly through our Denitive
Technology Acionado hotline at 1-800-223-5246 or email info@
DenitiveTech.com.
Download Our FREE Apps
Download the Denitive Technology App from the Apple App Store or
Google Play Store.
Utility App
How to Set Up the
W Studio Micro on Your
Wi-Fi Network
iOS Device Instructions
1. Launch the Denitive Technology app.
2. Go to Setup > Add Play-Fi Device Click on the device and hit next
within the app to take you to setup instruction screens.
3. Exit the Denitive Technology app and go to your Settings on your
iOS device.
4. Select Wi-Fi. Ensure that Wi-Fi is enabled. Once enabled,
choose the device listed with “PlayFi2Device,” followed by six
alphanumeric characters.
5. Once selected, exit the Settings menu and return to the Denitive
Technology App to select your wireless network. (If password
protected, enter your password.)
6. When your sound bar is connected to the network, the Wi-Fi light on
the front of the sound bar will change from blinking to a solid white.
7. You’re connected! From here, feel free to rename your device with
one of the preset names, create your own custom name.
www.definitivetech.com
7
Page 8

owner’s manual
Android Device Instructions
1. Launch the Denitive Technology app.
2. The app will automatically nd your device and prompt you to set it up.
Tap the “Set up” button. If the app was running in the background and
then brought back into the foreground, the app will not do this search
automatically. In this case, go to Settings > More Settings > Add
Play-Fi Device.
3. If your Wi-Fi network is protected, enter the password. The app will
connect the device to the network.
4. When your device is connected to the network, the Wi-Fi light on the front
of the sound bar will change from blinking to a solid white.
5. You’re connected! From here, feel free to rename your device with one of
the preset names, create your own custom name.
Download the Denitive Utility App
The Denitive Technology Utility App is not required for daily music streaming
use, but it does give you exclusive access to extended functionality, including
Product Firmware Updates and EQ Settings
(Custom EQ settings for the W Amp only can help tailor audio for any listening
space.). We recommend you download the FREE Denitive Technology Utility
App now. It’s available from the App Store or
Google Play Store.
STOP! Register Your W Studio Micro Now to Benet From
Software Updates
The Denitive Technology App will prompt you to register your product. Why
register? Because it ensures your access to the latest software and rmware
updates, which will keep your W Studio Micro on the cutting edge of
improving technology. On the home page of the Denitive Technology App,
scroll down to “Acionado Services” and follow the instructions to “Register.”
Registering your product now also gives you exclusive FREE access to the DTS
Play-Fi Premium Play driver, which will allow you to stream to multiple speakers
and zones from your PC. See next section.
Downloading the DTS Play-Fi PC App
• Visit https://Play-Fi.com/apps/windows/
• Click on “Download Free Version”
• Once downloaded to PC, DTS Play-Fi logo will show up
in your Task Manager
• Click on DTS Play-Fi driver
• Click on any zone to begin controlling
DTS Play-Fi allows you to stream from your computer over your network to
a single streaming speaker or device. In order to expand your DTS Play-Fi
streaming capabilities to multiple devices, we recommend that you Register
your product (see previous section), or call the Denitive Technology Acionado
hotline at 1-800-223-5246, to gain FREE access to the Premium Play-Fi
driver for multi-zone control capabilities.
File Formats & File Quality Supported by DTS Play-Fi
Denitive Technology chose the DTS Play-Fi platform because of its extreme
exibility and high quality.
DTS Play-Fi Accepted File Formats:
• mp3 (MPEG Layer III)
• m4a and aac (Advanced Audio Coding)
• FLAC (Free Lossless Audio Codec)
• wav (Waveform Audio File)
• ALAC (Apple Lossless)
DTS Play-Fi File Quality:
• Plays all format bitrates up to 24bit/192kHz.
• Some down-sampling may occur to ensure virtually lossless distribution
throughout a home network.
Now that you have downloaded the Denitive Technology Apps and
the DTS Play-Fi PC App, and your W Studio Micro is connected to your
network, you’re ready to start streaming!
More Wi-Fi Streaming Information
Use the Denitive Technology App to control your streaming entertainment.
1. Open the Denitive Technology App
2. Select the Denitive Technology product you’d like to listen to
3. Select your preferred audio source
(Pandora, Internet Radio, Music on your device)
4. Then select the content you’d like to hear
You will be able to choose from your personal audio library (music stored
on your phone, tablet or computer), Internet Radio (over 37,000 channels
in virtually any genre) or Online Music Services like Pandora, Spotify,
Sirius XM (for the most updated list of Online Music Sources for your
streaming enjoyment, visit denitivetech.com).
To access Spotify, you must access the “Spotify Connect” feature with a
Premium Services subscription on the Spotify app.
Services like KKBox, QQMusic and Deezer are available internationally in
select countries.
Primary vs. Secondary Speakers
When you stream the same music to a group of multiple Play-Fi enabled
speakers simultaneously, the rst speaker you select in the group becomes
the primary speaker for that group. All Play-Fi enabled products added to
that group become secondary zones until that group is broken up or until
the primary zone is unselected. A primary/secondary relationship among
all products in a group synchronizes all your speakers down to onemillisecond, thereby eliminating annoying echo effects. We recommend
for best performance that you select as your rst device the DTS Play-Fienabled product that has the strongest signal strength.
www.definitivetech.com
8
Page 9

owner’s manual
Adding Additional Speakers or Components
With the Denitive Technology Wireless Collection, you can easily
create a whole-house wireless streaming music system. Connect a W Adapt
streaming adapter to your home theater receiver or processor to stream audio
to your existing sound system, or the W Amp streaming amplier to send
streaming audio to a pair of hard-wired passive loudspeakers.
1. From the Denitive Technology App home page, choose “Settings.”
2. From the “Settings” screen, choose “Add DTS Play-Fi Device.”
3. Follow the app’s instructions to add the device to your list.
Additional Connectivity Information
Maximum Number of Rooms/Zone Supported
Eight separate wireless source devices (smartphones, tablets, etc.), each with
its own source, are supported simultaneously and any wireless source device
can stream to eight playback devices. Due to the bandwidth limitations of
most wireless networks, we do not recommend more than 16 wireless DTS
Play-Fi products on the Wi-Fi network at a given time. With hard-wired
Ethernet connections (customary for audio/video rack systems or in custom
installation congurations), up to 256 devices can be theoretically supported.
Call the Denitive Technology Acionado hotline at 1-800-223-5246 for
more information.
Dual-Band Capability
Denitive Technology Wireless Collection products all have “dual-band”
capabilities. The most commonly used wireless band -- 2.4 GHz – can
often times be congested and slow, especially in environments where you
have many routers sending wireless signals (ex. mixed-use developments
like apartment buildings). We would recommend switching your device
to the alternate 5 GHz band if your router offers this choice as it will offer
a more dependable streaming experience. The 5 GHz band is less likely
to be congested, and offers much higher throughput. It’s best to choose 5
GHz when rst setting up your device. However, note that the downside to
using the 5GHz band is that it offers shorter range (distance) and may not
penetrate thick walls as sufciently.
Need Help? Call Us!
Call the Denitive Technology Acionado hotline at 1-800-223-5246
Wired Ethernet Connection
A hard-wired Ethernet connection can provide a faster transfer rate than a
wireless connection. Selected Denitive Technology Wireless Collection
products have a dedicated Ethernet port for this purpose. Those that do not
will have a USB Port. Using a USB-to-Ethernet adapter will allow you to
connect these products directly to your router.
Working with NAS Drives, PCs, and Mac Devices
The Denitive Technology App is capable of recognizing any Media Server
or NAS (Network Attached Storage) drive that is broadcasting over your
home network and that’s congured for open access using the DLNA (Digital
Living Network Alliance) protocol. Using the DTS Play-Fi PC App, Denitive
Technology Wireless Collection products will play any le capable of being
played by the Windows operating system, including all music services. See
“Downloading the DTS Play-Fi PC App” on previous page to learn more.
Because Mac OS X devices don’t support DLNA, third-party software (Twonky,
Plex or Servio) must be downloaded to make them visible to the network. Once
downloaded, all locally stored content on OSX-based devices will show up
within the Denitive Technology App under “Media Server.”
W Studio Micro Specications
Driver Complement - Bar (4) 1” x 3” mid-woofers w/ neodymium magnets; (3)
Number of channels 3.1
Dimensions: Bar
Inputs/Outputs Optical inputs (2); AUX input (1); IR input (1); IR
Wireless Input DTS Play-Fi/Denitive App
Wireless Connectivity 2.4GHz, 5GHz, 802.11n router or better
Power Output: Bar 96 watts
Supported Surround
Formats
Driver Complement:
Subwoofer
Dimensions: Subwoofer 14” H x 12.54” W x 12.54” D
Power Output:
Subwoofer
Basic Troubleshooting
Under “Settings” on the Denitive App home page, you will nd a category
called Troubleshooting. This link will take you to the DTS Play-Fi Knowledge
Base [https://play-.com/faq?/support]. Quite often, a Wi-Fi streaming
issue can be traced back to router or network performance. As always, for
help answering any of your questions, please call the Acionado hotline at
1-800-223-5246.
IMPORTANT NOTE: Router speeds and ranges that a manufacturer
lists are determined under ideal operating conditions. A router’s
signal can be affected by device distance, intervening walls and
their construction materials.
1” aluminum dome tweeters w/ neodymium magnets
1.78” H x 43.39” W x 3.25” D
(45.2mm H x 1102 mm W x 82.55mm D)
(height includes the feet)
output (1); USB for rmware updates and Ethernet
connection (1) (when used with USB-to-Ethernet
adapter, not provided)
Dolby Digital®, DTS
(1) 8” long throw woofer in ported enclosure
(355.6mm H x 318.5 mm W x 318.5mm D)
50 watts
®
www.definitivetech.com
9
Page 10

Frequently Asked Questions (FAQ)
1. Q: I just purchased this product, and a part is missing. What
should I do?
Answer: You have several options. You can contact the dealer
who sold you the product, or you can e-mail or call us. Please
provide us with the serial number of your product; a description
of what part is missing; and the name of the dealer you
purchased the product from. Customers outside the US and
Canada should contact the Definitive Importer in your country.
Our list of international distributors can be found here: http://
www.definitivetech.com/Dealers/International.aspx
2. Q: How do I get in touch with Definitive Technology support?
Answer: You can e-mail info@definitivetech.com or call (800)
228-7148 (US and Canada), +1 (410) 363-7148 (all other
countries). Tech support is offered only in English.
3. Q: What is Definitive’s web site address?
Answer: www.definitivetech.com
4. Q: I believe something is wrong, and the product needs service.
What do I do?
Answer: You have several options. You can contact the dealer
who sold you the product, or you can e-mail or call us. Please
provide us with the serial number of your product a description of
what part is missing and the name of the dealer you purchased
the product from. Customers outside the U.S. and Canada should
contact the Definitive Technology importer in your country: http://
www.definitivetech.com/Dealers/International.aspx
owner’s manual
8. Q: Where should I put the subwoofer?
Answer: We encourage subwoofer experimentation! Your
subwoofer and room interact to create the bass that you hear
and feel. In general, placing the subwoofer along the wall,
or in a corner, will reinforce the bass response and create a
often higher output, but less natural listening experience. The
subwoofer is wireless, so try different places in the room until
you are satisfied with the bass that you experience.
9. Q: Should I mount the bar below, or above, my TV set?
Answer: The bar can be placed either above, or below, the
TV set, but close to ear level will sound best.
10. Q: Can the sound bar be mounted to TV brackets that
feature pivoting arms?
Answer: Yes, but make sure that you leave enough
clearance below the TV to mount the sound bar! The
combined weight of the TV, the bracket, and the W Studio
Micro sound bar MUST be less than the rated weight
capacity of the TV mount being used.
NOTE: If the trouble-shooting tips above do not help you resolve your
issue, it could be a rmware issue. Please ensure that all devices in your
system have up-to-date rmware. With many of todays “Smart” (internet
connected) TVs, Blu-ray players, and game systems, this can be as easy
as going into a menu and instructing the device to check for updates. We
recommend installing any and all updates when they become available
for all your devices.
5. Q: I want to order a replacement remote control. How do I
do that?
Answer: You have several options. You can contact the dealer
who sold you the product, or you can e-mail or call us. Please
provide us with the serial number of your product, and the name
of the dealer you purchased the product from. Customers outside
the U.S. and Canada should contact the Definitive Technology
importer in your country: http://www.definitivetech.com/
Dealers/International.aspx
6. Q: Does the W Studio Micro support 3D video?
Answer: This product does not have HDMI inputs. But if a 3D
source is connected to the TV via HDMI and the TV is connected
to the sound bar via TOSLINK, then 3D playback will
be possible.
7. Q: How do I set the crossover and channel balance settings?
Answer: You don’t need to make any crossover settings or
adjustments. The W Studio Micro is a complete system, with
subwoofer and main system crossover points already preset. You
can use the Remote Control to adjust “center channel” and “bass”
volume levels.
Service
IMPORTANT: Service and warranty work on your Denitive product will
normally be performed by the Denitive Technology retailer or importer.
If, however, you wish to return the product to us, please contact us rst,
describing the problem and requesting proper authorization. Please note:
Denitive phone and email technical support is offered only in English.
Product Servicing
The address given in this booklet is the address of our ofces. Under no
circumstances should loudspeakers be shipped to our ofces or returned
without contacting us rst and obtaining return authorization. For more
information, send an e-mail to info@DenitiveTech.com.
Technical Assistance
Contact Us Directly
Please contact the Denitive Technology Wireless Collection Customer
Service and Technical Support Group at 1-800-223-5246. To best assist
you we are available seven days a week, Monday – Friday from 9 a.m.
to 9 p.m. and on Saturdays and Sundays from 10 a.m. to 6 p.m. You can
also contact us by email at info@DenitiveTech.com.
www.definitivetech.com
10
Page 11

owner’s manual
IR Remote Control Function and Data List
W Studio Micro’s remote control codes are discrete IR (Infrared) codes. Custom installers may want to have access to the standard
codes that enable the W Studio Micro’s remote functions to be programmed into a universal controller. Below are the remote control
function and data lists for these functions:
IR Remote Control Function and Data list for the W Studio Micro Sound Bar
Standard Codes
NEC Transmission Format using Denitive Technology Custom Code (A): 0x0A56
BUTTON Screen Print FUNCTION: W Studio DECIMAL Ccode Ccode’ Dcode Dcode’
Power power symbol Power toggle: On / Off (standby) 136 0x0A 0x56 0x88 0x77
Mute mute symbol Power toggle: On/Off (standby) 138 0x0A 0x56 0x8A 0x75
SRC1 Select: Source ‘Input 1’ 150 0x0A 0x56 0x96 0x69
SRC2 Select: Source ‘Input 2’ 151 0x0A 0x56 0x97 0x68
SRC3 Select: Source ‘Input 3’ 152 0x0A 0x56 0x98 0x67
CENTER + CENTER + Center Level: adjust Up (+) 192 0x0A 0x56 0xC0 0x3F
CENTER - - CENTER Center Level: adjust Down (-) 193 0x0A 0x56 0xC1 0x3E
VOLUME + VOLUME + Master Volume: adjust Up (+) 212 0x0A 0x56 0xD4 0x2B
VOLUME - - VOLUME Master Volume: adjust Down (-) 208 0x0A 0x56 0xD0 0x2F
BASS + BASS + Subwoofer Level: adjust Up (+) 214 0x0A 0x56 0xD6 0x29
BASS - - BASS Subwoofer Level: adjust Down (-) 210 0x0A 0x56 0xD2 0x2D
MOVIE MOVIE Select: ‘Movie’ audio DSP
MUSIC MUSIC Select: ‘Music’ audio DSP
processing mode
processing mode
140 0x0A 0x56 0x8C 0x73
141 0x0A 0x56 0x8D 0x72
Custom Code Data Code
IR Remote Control Function and Data list for the W Studio Micro Sound Bar
Discrete Codes
NEC Transmission Format using Denitive Technology Custom Code (B): 0x0A58
NAME FUNCTION: W Studio DECIMAL Ccode Ccode’ Dcode Dcode’
Power ON DISCRETE_POWER_ON 87 0x0A 0x58 0x57 0xA8
Power OFF DISCRETE_POWER_OFF 88 0x0A 0x58 0x58 0xA7
Mute DISCRETE_MUTE 92 0x0A 0x58 0x5C 0x6D
Unmute DISCRETE_UNMUTE 93 0x0A 0x58 0c5D 0xA2
Custom Code Data Code
IR codes in Philips Pronto format are available through our customer support group.
Please contact them at info@DenitiveTech.com or 800-228-7148.
Note: When programming a macro for your home automation system, the W Studio Micro can be
powered on with any of the source select remote commands (SRC1, SRC2, SRC3).
www.definitivetech.com
11
Page 12

Denitive Technology
1 Viper Way
Vista, CA 92081
410-363-7148
800-228-7148
www.denitivetech.com
email: info@DenitiveTech.com
twitter: @DenitiveTech
Safety and warranty information is in a separate booklet.
TECHNOLOGY ACKNOWLEDGEMENTS
Manufactured under license from Dolby Laboratories. Dolby and the double-D
symbol are trademarks of Dolby Laboratories. Manufactured under license under
U.S. Patent Nos: 5,956,674; 5,974,380; 6,487,535 & other U.S. and
worldwide patents issued & pending. DTS, the Symbol, & DTS and the Symbol
together are registered trademarks & DTS Digital Surround and the DTS logos are
trademarks of DTS, Inc. © DTS, Inc. All Rights Reserved.
Google Play is a trademark of Google Inc.
Apple and the Apple logo are trademarks of Apple Inc., registered in the U.S. and
other countries. App Store is a service mark of Apple Inc.
For DTS patents, see http://patents.dts.com. Manufactured under license from DTS,
Inc. DTS, Play-Fi, the Symbol, and Play-Fi together in combination with the Symbol
are trademarks of DTS, Inc. DTS and Play-Fi are registered trademarks of DTS, Inc.
© DTS, Inc. All Rights Reserved.
All other trademarks are the property of their respective owners.
 Loading...