

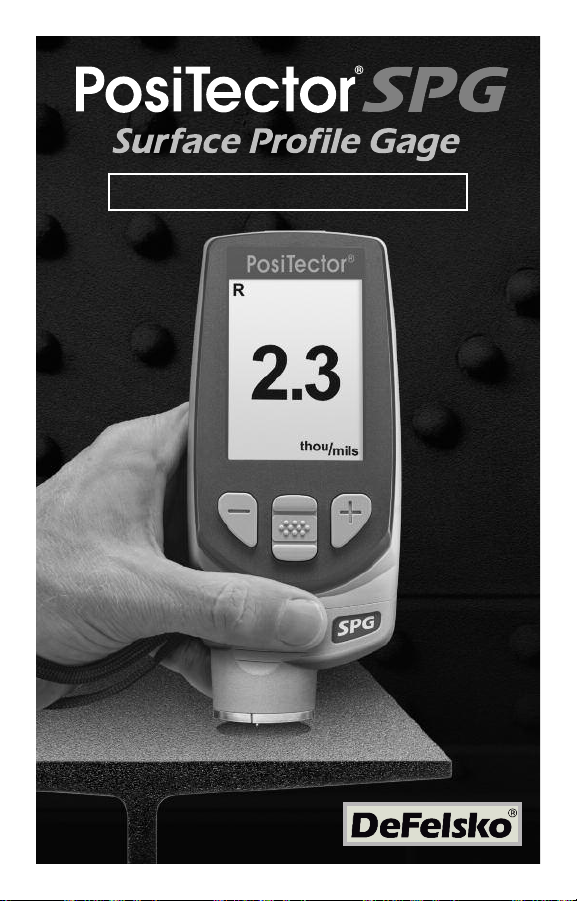
Page 1
Quick Guide v. 1.1
Page 2
Introduction
Introduction
Th
e P
osiTe
c
tor
S
ur
fa
c
e P
r
ofile
Ga
ge
(S
P
G)
i
s
a
han
d
el
ec
tron
i
c
i
ns
trum
en
t
tha
t
m
e
as
u
re
s
the
pe
ak
-to-v
the
s
urfa
c
e
profi
l
e
of
a
bras
i
v
e
b
l
as
t
c
l
e
an
m
ed
n
d p
rob
b
a
s
i
c
fu
a
nua
l
of a
b
o
dy
(S
tand
a
rd or
A
d
v
a
n
c
ed
) a
Th
i
s
Qui
c
k
Gui
de
s
um
m
ari
z
es
m
e
n
t. Downl
oad the
fu
l
www
.d
e
fel
s
k
o.c
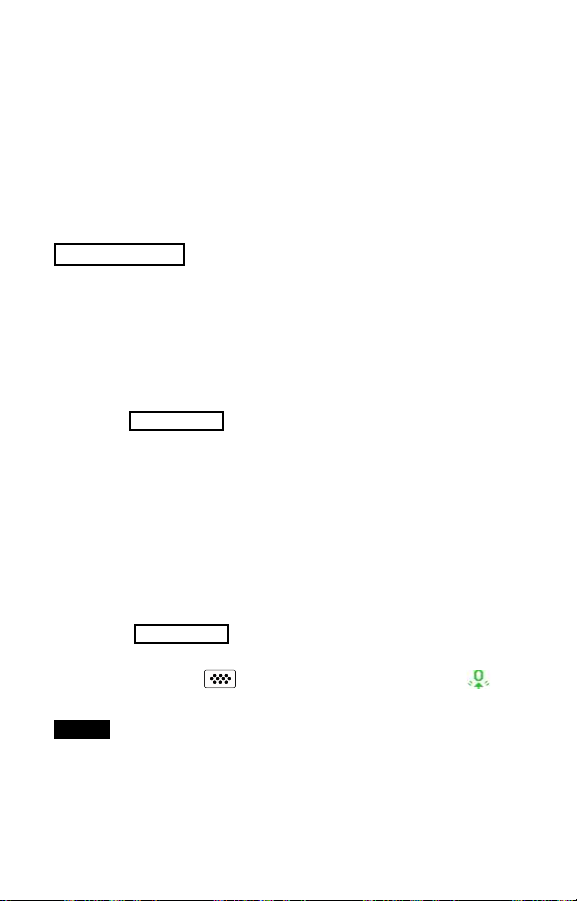
The PosiTector SPG powers-up when the center navigation
button is pressed. To preserve battery life, the instrument
powers down after approximately 5 minutes of no activity. All
settings are retained.
1. Remove the protective rubber cap from probe.
2. Power-up Gage by pressing the center navigation button.
3. Place the glass plate onto a stable, flat surface. Take several
measurements. If the average is greater than ±5 µm (0.2 mil),
Zero the instrument (see pg. 4).
4. Place the probe FLAT on the surface to be measured such that
the tip of the probe reaches into the bottom of a profile valley.
HOLD STEADY. The Gage will BEEP twice and display the
measurement.
5. Lift the probe from the surface between measurements.
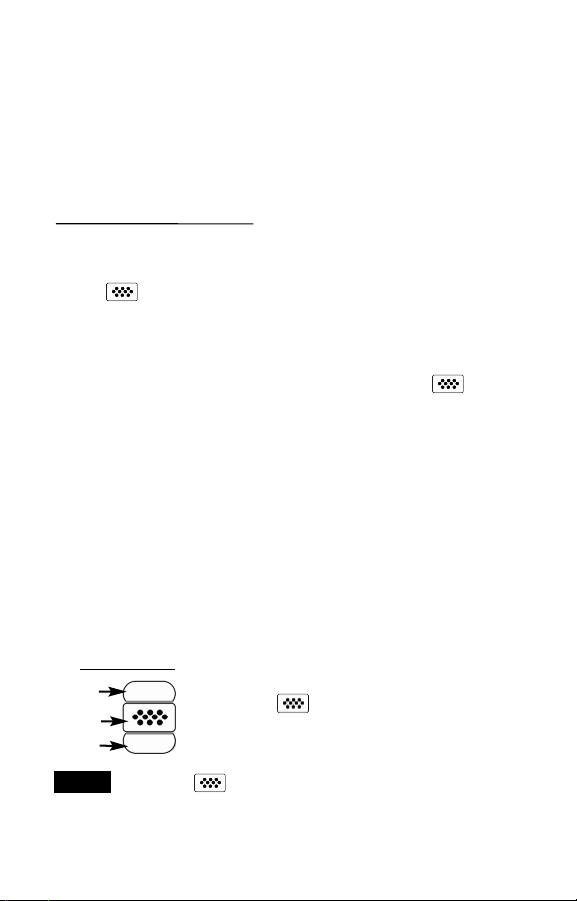
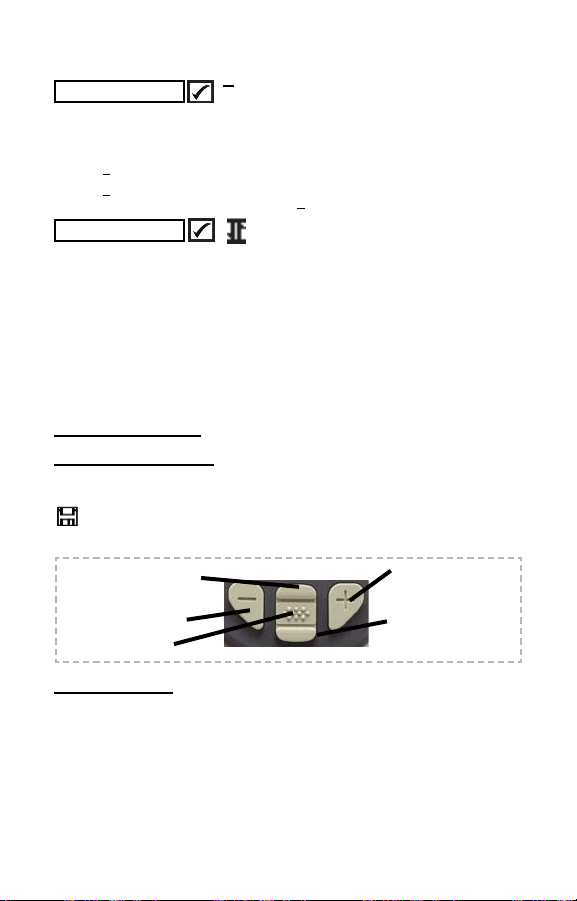
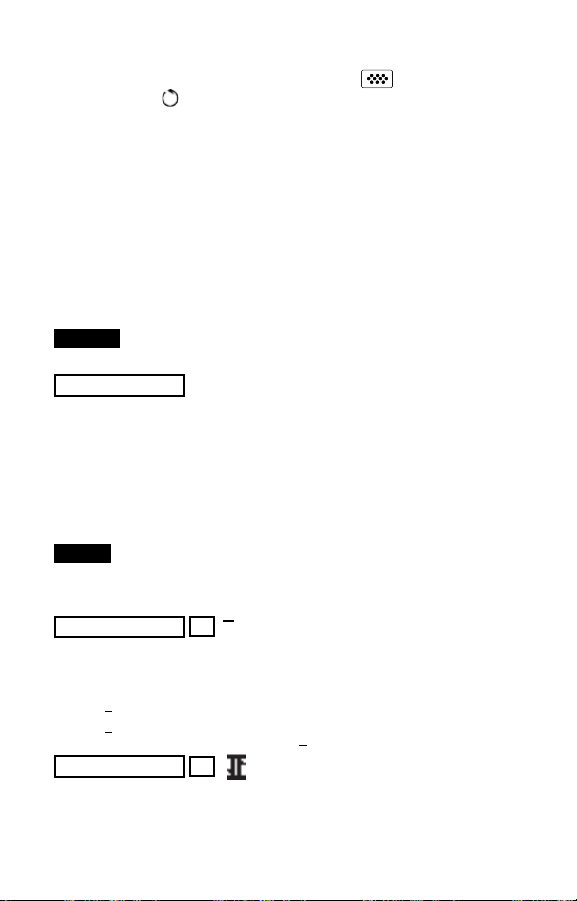
Gage functions are menu controlled. To access the Menu, powerup the gage, then press the center navigation button.
Navigation Button
Up
Center
Down
l
o
m
/m
anua
Menu Operation
Menu Operation
To navigate, use the Up and Down buttons to
scroll and to SELECT.
Select Exit to exit from any menu.
the
i
n
s
tru
c
ti
on
l
s
Quick Start
Quick Start
e.
nc
at:
s
urfac
ti
al
e
o
ns
-hel
l
e
y
h
e
i
g
ht
s
.
It
c
on
s
i
s
o
f
the
i
n
s
tru
d
of
ts
-
NOTE:
The center button is purposely recessed to help
eliminate unintentional powering-up of the gage.
2
Page 3

Probe
Probe
T
o
d
i
s
c
o
n
n
e
c
t
a
p
r
o
b
e
f
r
o
m
a
b
o
d
y
,
p
o
w
e
r
-
d
o
w
n
t
h
i
n
s
t
r
u
m
e
n
t
a
n
d
s
l
i
d
e
t
h
e
p
l
a
s
t
i
c
p
r
o
b
e
h
o
r
i
z
o
n
t
a
l
l
y
(
i
n
t
h
e
d
i
r
e
c
t
i
o
n
o
f
t
h
e
a
r
b
o
d
y
.
R
e
v
e
r
s
e
t
h
e
s
e
s
t
e
p
s
t
o
W
h
e
n
p
o
w
e
r
e
d
-
u
p
,
t
h
e
d
e
t
e
r
m
i
n
e
s
w
h
i
c
h
s
e
l
f
-
c
h
e
c
k
NOTE:
The supplied probe tip has a 60° angle to comply with
most test standards including ASTM D 4417 B. An optional 30°
angle tip with replacement tool is available for special applications
or to comply with Australian Standard AS 3894.5.
Additionally, the PosiTector accepts a number of probe types
including magnetic and eddy current coating thickness, surface
profile, environmental and ultrasonic wall thickness probes.
For the latest information on probe interchangeability, see
www.defelsko.com/probes
.
t
y
p
e
o
f
p
r
r
a
t
t
a
c
h
a
P
o
s
i
T
e
c
o
b
e
i
s
a
t
c
o
w
)
a
w
a
y
n
e
w
p
r
o
t
o
r
a
u
t
o
t
a
c
h
e
d
a
n
e
o
n
n
e
c
t
o
r
f
r
o
m
t
h
e
b
e
.
m
a
t
i
c
a
l
l
y
d
d
o
e
s
a
Calibration
I
n
s
t
r
u
m
e
n
t
c
a
l
i
b
r
a
t
i
o
n
i
s
t
y
p
i
c
a
l
l
y
d
o
n
e
b
y
t
h
e
m
a
n
u
f
a
c
t
u
r
e
r
q
u
a
l
i
f
i
e
d
l
a
b
.
A
l
l
p
r
o
b
e
s
i
n
c
l
u
d
e
a
C
e
r
t
i
f
i
c
a
t
e
o
f
C
a
l
i
b
r
a
t
i
o
n
.
Verification of Accuracy
I
n
s
t
r
u
m
e
n
t
a
c
c
u
r
a
c
y
i
s
v
e
r
i
f
i
e
d
u
s
i
n
g
t
h
e
i
n
c
l
u
d
e
d
m
e
t
a
l
s
h
i
m
a
g
l
a
s
s
z
e
r
o
p
l
a
t
e
.
E
n
s
u
r
e
t
h
a
t
t
h
e
g
l
a
s
s
p
l
a
t
e
a
n
d
s
h
i
a
n
d
d
i
r
t
f
r
e
e
b
e
f
o
r
e
u
s
e
.
P
l
a
c
e
t
h
e
p
l
a
t
e
o
n
t
o
a
s
t
a
b
l
e
,
f
l
a
t
s
u
m
e
a
s
u
r
e
m
e
n
t
s
.
I
f
t
h
e
a
v
e
r
a
g
e
i
s
g
r
t
h
e
i
n
s
t
r
u
m
e
n
t
(
s
e
e
b
e
l
o
w
N
e
x
t
,
p
l
a
c
e
t
h
e
m
e
t
a
l
s
e
n
s
u
r
i
n
g
t
h
e
p
r
b
e
t
w
e
e
n
s
h
o
u
l
d
b
t
h
e
s
h
i
m
o
t
h
e
s
h
i
m
e
w
i
t
h
i
n
.
h
b
e
n
e
e
d
l
’
s
“
l
e
g
s
”
.
t
h
e
c
o
m
e
)
.
i
m
o
v
e
r
e
T
b
t
t
o
u
c
h
e
s
h
e
a
v
e
r
i
n
e
d
t
o
l
e
r
a
t
e
r
t
h
a
n
h
e
g
l
a
s
s
t
h
e
g
l
a
a
g
e
o
f
s
e
r
a
n
c
e
s
o
m
f
a
c
e
.
T
a
±
s
v
f
k
5
µ
m
(
0
.
p
l
a
t
e
a
n
s
d
p
l
a
t
e
i
e
r
a
l
m
e
a
b
o
t
h
t
h
e
n
a
r
e
c
l
e
a
e
s
e
v
e
r
2
m
i
l
)
,
z
e
m
e
a
s
u
n
t
h
e
a
r
e
s
u
r
e
m
e
n
g
a
g
e
a
n
o
r
d
n
a
l
r
o
r
e
a
t
s
d
3
Page 4
If not, see Returning for Service (pg. 9). Metric example: gage
tolerance is ±5% or ±5 µm whichever is greater. The 76 µm shim
tolerance is ±5 µm. So the average of several measurements
should be between 66 and 86 microns. Inch example: gage
tolerance is ±5% or ±0.2 mils whichever is greater. The 3 mil shim
tolerance is ±0.2 mils. So the average of several measurements
should be between 2.6 and 3.4 mils.
Zero Menu
Zero Menu
Zero
T
h
e
P
o
s
i
T
e
c
t
o
r
S
P
G
h
a
s
o
n
l
y
o
n
e
a
d
j
u
s
t
m
e
n
t
p
o
i
n
t
a
t
z
e
r
o
.
T
z
e
r
o
p
o
i
n
t
c
a
n
f
o
u
n
d
Glass Plate Zero
S
e
t
t
i
n
g
a
d
j
u
s
t
m
1
.
S
e
l
e
2
.
P
r
e
u
s
e
d
3
.
R
e
p
m
e
a
s
t
h
e
a
v
Factory Zero
I
f
a
g
l
a
t
h
e
f
a
c
1
.
S
e
2
.
P
r
e
n
a
v
i
g
a
p
p
e
a
NOTE:
p
a
r
t
i
c
u
g
a
g
e
s
b
u
n
d
e
r
t
h
e
t
h
e
G
a
g
e
n
t
m
e
t
Zero
c
t
s
s
t
h
e
(
+
t
o
o
b
t
a
i
n
e
a
t
e
d
l
y
u
r
e
m
e
n
t
,
e
r
a
g
e
o
f
s
s
p
l
a
t
e
t
o
r
y
z
e
r
o
l
e
c
t
s
s
t
h
e
d
a
l
o
t
i
o
n
b
u
t
r
o
n
t
h
e
T
h
e
f
a
c
a
r
l
y
a
f
t
e
h
o
u
l
d
b
e
e
Z
e
h
o
)
a
m
t
h
a
o
r
s
Zero
w
t
o
L
C
t
o
r
z
s
e
t
u
s
i
n
g
o
n
e
o
f
t
w
o
m
e
t
h
o
d
s
.
B
o
t
h
e
r
o
m
e
n
u
o
p
t
i
o
n
.
t
o
z
e
r
o
o
n
t
h
e
g
l
a
s
s
p
l
a
t
e
d
:
f
r
o
m
t
h
e
m
b
u
t
t
o
n
t
o
s
e
l
e
c
t
t
n
a
v
e
r
a
g
e
e
a
s
u
r
e
e
g
a
g
e
l
l
e
n
r
a
e
w
t
h
e
Z
e
r
o
s
u
i
t
a
b
l
e
t
t
i
n
g
c
a
n
f
r
n
b
u
t
t
o
n
.
x
x
x
x
D
.
y
z
e
r
o
p
r
o
b
e
t
r
o
e
d
o
n
h
,
t
y
p
i
c
a
l
l
t
h
e
g
l
a
i
l
l
c
a
l
c
u
r
e
a
d
i
n
g
s
m
o
o
t
h
,
b
e
r
e
s
t
o
o
m
t
h
e
m
t
o
s
e
l
e
c
t
T
h
e
f
a
c
s
e
t
t
i
n
g
m
i
p
e
x
c
h
a
t
h
e
i
n
c
l
u
d
e
n
u
.
e
n
u
m
b
y
l
e
3
.
s
s
p
l
a
t
a
t
e
a
Z
e
s
t
a
k
e
n
.
h
a
r
d
s
u
r
f
r
e
d
:
e
n
u
.
“
R
e
s
e
t
”
t
o
r
y
c
a
l
i
a
y
n
o
t
n
g
e
.
F
o
r
e
d
g
l
a
s
s
m
i
s
t
h
e
p
r
e
f
r
o
f
r
e
a
d
e
.
A
f
t
e
r
r
a
a
b
a
o
w
h
i
c
h
c
e
i
s
n
o
n
d
p
r
e
s
s
r
a
t
i
o
n
i
c
l
w
a
y
s
b
b
e
s
t
a
c
c
p
l
a
t
e
.
h
e
t
h
o
d
s
a
e
r
r
e
d
z
e
i
n
g
s
t
o
b
t
h
e
l
a
r
e
p
r
e
s
e
n
t
a
v
a
i
l
a
b
l
t
h
e
c
e
n
t
o
n
i
i
i
i
i
w
e
p
r
e
c
i
s
u
r
a
c
y
,
t
h
e
r
e
r
o
e
s
t
t
s
e
,
e
r
i
l
l
e
,
e
4
Page 5
Setup Menu
Setup Menu
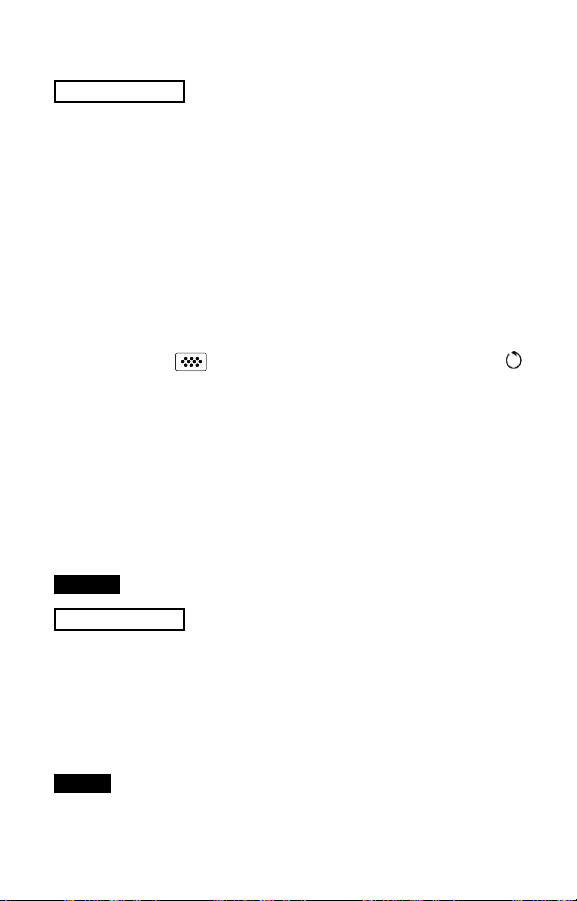
Reset
Reset (soft reset) restores factory settings and returns the
instrument to a known condition. The following occurs:
- All batches, stored measurements, images, and batch names
are erased.
- The zero adjustment is returned to the factory setting. Since
this may not always be a precise zero, the gage should be
checked on the glass plate.
- Menu settings are returned to the following:
Memory = OFF
Statistics Mode = OFF
Perform a more thorough Hard Reset by powering down the
instrument, waiting several seconds, then simultaneously holding
both the center and (+) buttons until the Reset symbol
appears. This returns the instrument to a known, “out-of-the-box”
condition. It performs the same function as a menu Reset with
addition of:
- Bluetooth Pairing info is cleared.
- Menu settings are returned to the following:
Units = microns
Flip Display = Normal
Auto Sync = OFF
White on Black = OFF
USB Drive= ON
NOTES:
Selects the type of batteries used in the Gage from a choice of
“Alkaline”, “Lithium” or “NiMH” (Nickel-metal hydride
rechargeable). If NiMH is selected, the Gage will trickle charge the
batteries while connected via USB to a PC or optional AC charger.
The battery state indicator icon is calibrated for the selected
battery type. No damage will occur if the wrong battery type is
selected.
NOTE:
rechargeable batteries.
Date, Time and WiFi are not affected by either Reset.
Battery Type
DeFelsko recommends the use of eneloop (NiMH)
Hi Lo Alarm = OFF
Bluetooth = OFF
Language = English
Battery Type = Alkaline
Backlight = Normal
Bluetooth Streaming = OFF
5
Page 6
Statistics Menu
Statistics Menu
Statistics
A statistical summary will appear on the display. Remove the last
measurement by pressing the (-) button. Press (+) to clear
statistics.
x - Average
- Maximum Value
↑
HiLo Alarm
Allows the Gage to visibly and audibly alert the user when
measurements exceed user-specified limits.
The PosiTector SPG has internal memory storage for recording
measurement data. Stored measurements can be reviewed
on-screen or accessed via computers, tablets and smart phones.
Measurements are date and time-stamped.
x
σ - Standard Deviation
- Minimum Value
↓
Memory Management
Memory Management
Standard models store up to 250 readings in one batch.
Advanced models store 100,000 readings in up to 1,000
batches. “New Batch” closes any currently opened batch and
creates a new batch name using the lowest available number. The
icon appears. New batch names are date stamped when they
are created.
Scroll through display
modes (Advanced only)
Delete last reading
Access the Menu
Create a new batch
(Advanced only)
Restore brightness
after dimming
(Advanced only)
Screen Capture
Press both (-)(+) buttons at any time to capture and save an image
copy of the current display. The last 10 screen captures are stored
in memory and can be accessed when connected to a computer
(see PosiSoft USB Drive pg. 7).
6
Page 7

NOTE:
This Quick Guide summarizes the basic functions
of the Gage. Download the full instruction manual at:
www.defelsko.com/manuals
SmartBatch™
This menu option sets-up the PosiTector SPG to comply with
various standards and test methods published by organizations
including ASTM, SSPC, ISO, IMO, US Navy, SANS and AS.
For instructions on how to use the Smart Batch™ feature, see
www.defelsko.com/smartbatch
Accessing Stored Measurements Data
Accessing Stored Measurements Data
PosiSoft solutions for viewing, analyzing and reporting data:
PosiSoft USB Drive - connect the PosiTector to a PC/Mac using
the supplied USB cable to access and print stored readings, graphs,
photos, notes and screen captures. No software or internet
connection required. USB Drive must be selected. (see pg. 8)
PosiSoft.net - a free web-based application offering secure
centralized storage of PosiTector readings. Access your data from
any web connected device. Go to: www.PosiSoft.net
PosiSoft Software - Desktop Software for downloading, viewing
and printing your measurement data.
PosiSoft Mobile (Advanced models only) - access readings, graphs,
capture photos and update annotations through WiFi enabled
devices, such as tablets, smart phones and computers.
7
Page 8
Connect Menu
Connect Menu
Sync Now
When selected, Gage immediately synchronizes stored
measurement data via USB, Bluetooth or WiFi to PosiSoft.net.
(PosiSoft Desktop Manager and an internet connection are
required when using USB or Bluetooth.)
Auto SYNC
Allows the Gage to automatically synchronize with PosiSoft.net
when initially connected to the internet via a PC running PosiSoft
Desktop Manager or a local WiFi network.
Additional measurements added to memory while connected are
synchronized only when the USB cable is disconnected, then
reconnected or when the Sync Now option is selected.
USB Drive
The Gage uses a USB mass storage device class which provides
a simple interface to retrieve data in a manner similar to USB flash
drives, cameras or digital audio players.
NOTE:
When connected, power is supplied through the USB
cable. The batteries are not used and the body will not
automatically power down. If rechargeable (NiMH) batteries are
installed, the Gage will trickle charge the batteries.
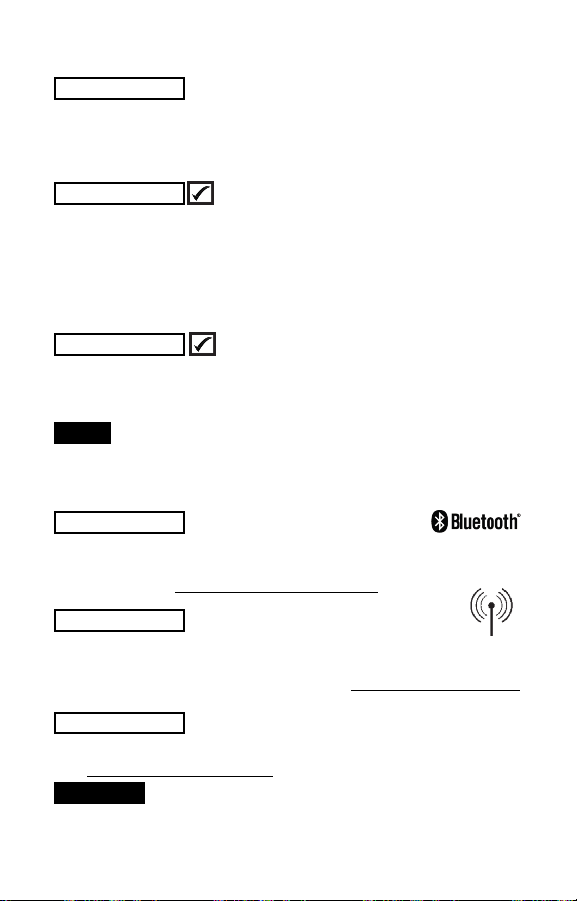
Bluetooth
Allows individual readings to be sent to a computer, printer or
compatible device as they are taken using Bluetooth wireless
technology. See www.defelsko.com/bluetooth
WiFi
Allows wireless communication with devices such as tablets,
smart phones and computers connected to your local wireless
network or portable mobile hot spot. See www.defelsko.com/WiFi
(Advanced models only)
(Advanced models only)
Updates
Determines if a software update is available for your Gage.
See www.defelsko.com/update
WARNING:
update (see pg. 5)
The Gage may perform a Hard Reset after an
8
Page 9

Returning for Service
Returning for Service
Before returning the Gage for service…
1.Install new or newly recharged batteries in the proper alignment
as shown within battery compartment.
2.Examine the probe tip for dirt or damage. The probe tip should
move up and down freely. The metal plate surrounding the
probe tip should be smooth and free from burrs and foreign
material.
3.Perform a Hard Reset. (pg. 5)
4.Place the metal shim over the glass plate and attempt a
measurement.
If you must return the Gage for service, describe the problem fully
and include measurement results, if any. Be sure to also include
the probe, your company name, company contact, telephone
number and fax number or email address.
Website: www.defelsko.com/support
Limited Warranty, Sole Remedy
Limited Warranty, Sole Remedy
and Limited Liability
and Limited Liability
DeFelsko's sole warranty, remedy, and liability are the express
limited warranty, remedy, and limited liability that are set forth on
its website: www.defelsko.com/terms
www.defelsko.com
© DeFelsko Corporation USA 2012
This manual is copyrighted with all rights reserved and may not be reproduced or transmitted, in whole
or part, by any means, without written permission from DeFelsko Corporation.
DeFelsko and PosiTector are trademarks of DeFelsko Corporation registered in the U.S. and in other
countries. Other brand or product names are trademarks or registered trademarks of their respective
holders.
Every effort has been made to ensure that the information in this manual is accurate. DeFelsko is not
responsible for printing or clerical errors.
All Rights Reserved
9
Page 10
Guia rápida v. 1.0
Page 11

Introducción
Introducción
E
l
P
os
iTe
ctor
S
ur
fa
ce P
r
ofile
Ga
ge
(S
P
G)
e
s
u
n i
ns
trum
e
el
e
de
l
abra
u
na s
E
s
Des
www
c
tró
p
erfi
s
i
v
ond
ta gu
c
argue el
.defel
ni
os
ía rá
c
o p
o
rtáti
l
qu
e
m
i
de l
a di
s
ta
n
c
i
a e
ntre l
a c
l
d
e
u
n
a s
up
e
rfi
c
i
e de
s
u
p
e
rfi
c
i
e
s
i
ue
i
on
on
rpo
es
es
(S
bá
en
l
tanda
s
:
a.
. E
s
s
tá form
pi
m
k
o.c
da re
anual
om
/m
s
um
ad
de i
a
n
o por u
e
l
as
ns
truc
ua
l
s
n c
func
c
re
i
m
p
i
ad
a
s
rd
o
i
c
as
del
i
nto
s
ta y
e
l
v
on
d
trum
a
v
an
c
ed
) y
en
to
c
A
ns
Inicio rápido
El PosiTector SPG se enciende al pulsar el botón central
Para ahorrar energía, el instrumento se apagará tras unos 5
minutos de inactividad. Se conservarán todas las
configuraciones.
1. Retire la tapa de protección de la sonda.
2. Encienda el Medidor pulsando el botón central .
3. Coloque la placa de vidrio en una superficie plana y estable.
Realice varias mediciones. Si la media es mayor que ±5 µm
(0.2 mil), ponga a cero el instrumento (consulte Pág. 4).
4. Coloque la sonda PLANA en la superficie que desea medir de
tal manera que la punta de la sonda alcance el punto más bajo
del perfil. MANTÉNGALO FIJO. El medidor emitirá un sonido
dos veces y mostrará el resultado de la medición.
5. Levante la sonda de la superficie entre mediciones.
l
l
e
.
2
Page 12

Sonda
P
a
r
a
d
e
s
c
o
n
e
c
t
a
r
u
n
a
s
o
n
d
a
d
e
l
c
y
t
i
r
e
d
e
l
c
o
n
e
c
t
o
r
d
e
p
l
(
e
n
d
i
r
e
c
c
i
ó
n
c
o
n
e
C
u
a
n
a
u
t
o
a
u
t
o
L
a
s
o
l
a
m
a
3
0
°
p
a
r
a
a
c
t
a
r
u
n
a
n
d
o
s
e
m
á
t
i
c
a
m
e
n
c
o
m
p
r
o
b
a
n
d
a
s
u
m
i
y
o
r
í
a
d
e
l
c
o
n
h
e
r
r
a
c
u
m
p
l
i
r
c
á
l
a
f
l
e
c
h
a
u
c
n
a
m
o
)
e
v
a
s
o
n
d
e
n
c
i
e
n
d
t
e
e
l
t
i
p
o
i
ó
n
.
i
s
t
r
a
d
a
t
i
e
s
n
o
r
m
a
s
i
e
n
t
a
d
e
n
l
a
n
o
r
m
u
s
t
i
c
o
d
e
l
a
a
a
n
i
a
h
a
c
i
a
a
f
u
.
,
e
l
d
e
s
o
n
d
a
e
u
n
á
n
g
u
n
c
l
u
y
e
n
d
o
s
u
s
t
i
t
u
c
i
ó
a
u
s
t
r
a
l
i
a
Calibración
E
l
f
a
b
r
i
c
a
n
t
e
o
u
n
l
a
b
o
r
a
t
o
r
i
o
c
u
a
l
i
f
i
d
e
c
a
l
i
b
r
a
c
i
ó
n
.
T
o
d
a
s
l
a
s
c
s
o
n
d
a
s
i
n
c
Comprobación de precisión
L
a
p
r
e
c
i
s
i
ó
n
d
e
l
i
n
s
t
r
u
m
e
n
t
o
s
e
v
c
e
r
o
d
e
v
i
d
r
i
o
.
A
s
e
g
ú
r
e
s
e
m
p
l
e
o
.
C
o
l
ó
q
u
e
l
a
s
e
n
S
i
l
a
(
c
o
n
s
A
c
o
n
l
a
m
e
"
p
a
t
i
l
e
n
t
r
e
v
e
a
D
T
o
l
e
r
t
o
l
e
r
a
d
e
v
a
I
n
g
l
e
g
r
a
n
d
q
u
e
l
m
e
d
i
a
e
s
u
l
t
e
m
á
s
t
i
n
u
a
c
i
ó
n
d
i
c
i
ó
n
c
o
l
a
s
"
d
e
l
a
l
a
s
t
o
l
e
r
a
e
v
o
l
u
c
i
o
n
a
n
c
i
a
d
e
l
n
c
i
a
d
e
l
a
r
i
a
s
m
e
d
i
s
a
:
T
o
l
e
r
a
e
.
L
a
t
o
l
e
a
m
e
d
i
a
d
e
u
n
a
s
u
p
e
a
,
n
g
n
i
c
e
r
m
a
y
o
r
q
u
d
e
l
a
n
t
e
)
.
c
o
l
o
q
u
e
l
l
a
p
u
n
t
a
a
l
g
a
.
L
a
c
i
a
s
c
o
m
p
a
r
a
R
e
n
s
t
r
u
m
e
n
t
g
a
l
g
a
d
e
i
o
n
e
s
d
e
b
n
c
i
a
d
e
l
i
n
r
a
n
c
i
a
d
e
v
a
r
i
a
s
m
e
d
e
q
u
e
a
m
f
i
c
i
e
p
l
a
n
a
e
±
5
µ
m
(
a
g
a
l
g
a
d
e
m
b
p
o
e
s
l
e
d
e
l
a
s
o
n
d
e
d
i
a
d
e
v
i
n
a
d
a
s
d
e
a
r
a
c
i
ó
n
(
p
e
s
+
/
-
5
%
7
6
µ
m
e
s
d
e
s
e
r
e
t
r
u
m
e
n
t
o
a
g
a
l
g
a
d
e
d
i
c
i
o
n
e
s
e
r
p
o
,
a
p
a
g
u
e
e
l
i
n
s
t
r
u
m
e
n
t
s
o
n
d
a
e
n
s
e
n
t
i
d
e
r
a
.
I
n
v
P
o
s
i
T
e
c
o
n
e
c
l
o
d
e
6
A
S
T
M
n
p
a
r
a
n
a
A
S
a
d
o
h
a
l
u
y
e
n
C
r
i
f
i
c
a
c
b
a
s
e
s
y
e
s
t
a
0
.
2
m
i
m
e
t
a
l
s
a
t
o
c
a
a
r
i
a
s
m
l
a
p
l
a
c
a
g
i
n
a
o
+
/
-
5
+
/
-
5
µ
n
t
r
e
6
6
e
s
+
/
-
5
3
m
i
l
s
d
e
b
e
d
o
i
e
r
t
a
l
o
s
p
c
t
o
r
d
t
0
3
r
o
b
l
)
n
8
m
%
e
e
a
d
a
y
r
e
a
°
e
n
s
u
p
D
4
4
1
7
B
a
p
l
i
c
a
c
i
o
8
9
4
.
5
.
á
n
n
o
r
m
a
e
r
t
i
f
i
c
a
d
o
n
l
a
g
a
l
g
a
t
á
n
l
i
m
p
i
a
s
l
e
.
R
e
a
l
i
c
,
p
o
n
g
a
a
o
b
r
e
l
a
p
l
a
d
o
l
a
p
l
a
e
d
i
c
i
o
n
e
s
a
y
l
a
g
a
l
g
)
.
E
j
e
m
p
l
µ
m
l
o
q
u
e
.
D
e
t
a
l
y
8
6
m
i
c
r
a
o
+
/
-
0
.
2
e
s
+
/
-
0
.
2
s
e
r
e
n
t
r
e
o
h
o
r
i
z
o
n
t
a
l
a
s
o
s
p
a
r
a
t
e
r
m
i
n
a
r
á
l
i
z
a
r
á
u
n
a
u
n
t
a
p
a
r
a
c
u
m
p
l
i
r
c
o
.
E
x
i
s
t
e
u
n
n
e
s
e
s
p
l
m
e
n
t
e
e
l
i
c
o
m
s
n
d
e
C
a
l
i
b
r
a
m
e
t
á
l
i
c
a
y
s
e
c
a
s
a
e
v
a
r
i
a
s
m
c
e
r
o
e
l
i
n
c
a
d
e
v
i
d
r
a
d
e
v
i
d
r
i
d
e
b
e
r
í
a
e
a
.
S
i
e
s
t
o
e
n
e
s
c
a
l
s
e
a
m
a
s
a
n
e
r
a
q
u
.
E
j
e
m
p
l
o
m
i
l
s
l
o
q
u
m
i
l
s
.
D
e
2
.
6
y
3
.
4
n
a
p
u
n
t
a
d
e
e
c
i
a
l
e
s
o
s
t
r
u
m
e
n
t
o
c
i
ó
n
.
y
l
a
p
l
a
c
a
n
t
e
s
d
e
s
u
e
d
i
c
i
o
n
e
s
.
s
t
r
u
m
e
n
t
o
i
o
y
r
e
a
l
i
c
e
o
e
n
t
r
e
l
a
n
a
g
e
t
m
s
c
o
n
t
r
a
r
s
e
n
o
e
s
a
s
i
,
M
e
t
r
i
c
a
:
r
a
n
d
e
.
L
a
l
a
m
e
d
i
a
e
n
e
s
c
a
l
a
e
s
e
a
m
a
s
a
l
m
a
n
e
r
a
i
l
s
.
Puesta a cero
E
l
P
o
s
i
T
e
c
t
o
r
c
e
r
o
p
e
n
c
u
e
u
e
d
e
r
e
n
t
r
a
n
e
n
S
P
G
t
i
e
n
e
s
ó
l
o
u
n
p
u
n
t
o
d
e
a
j
u
s
t
e
a
c
e
r
o
.
E
l
p
u
n
t
a
l
i
z
a
r
s
e
u
t
i
l
i
z
a
n
d
o
u
n
o
d
e
l
o
s
m
é
t
o
d
o
s
.
e
l
m
e
n
ú
C
e
r
o
.
A
o
m
b
o
s
s
e
3
Page 13

Placa cero de vidrio
E
l
m
é
t
o
d
o
p
r
e
f
e
r
i
d
o
p
a
r
a
a
j
u
s
t
a
r
a
c
e
r
o
e
s
u
t
i
l
i
z
a
r
l
a
p
l
a
c
a
v
i
d
r
i
o
.
1
.
S
e
l
e
c
c
i
o
2
.
P
u
l
s
e
e
o
b
3
.
e
l
l
a
Cero de fábrica
S
i
s
u
a
1
.
2
.
c
a
N
s
i
e
l
a
s
r
e
a
Reset (reinicio parcial) restaura la configuración de fábrica y
restablece en el instrumento una condición conocida. Ocurre lo
siguiente:
- Todas las series y las mediciones almacenadas, imágenes y
series se borrarán.
- El ajuste a cero quedará restablecido según el cero de fábrica.
Ya que no siempre es un cero preciso, el medidor deberá
comprobarse en la placa de vidrio.
- Las configuraciones del menú serán de nuevo las siguientes:
l
t
e
n
e
r
u
n
R
e
a
l
i
c
e
m
e
d
i
d
o
r
s
m
e
d
i
d
a
n
o
t
i
e
n
e
a
v
e
y
d
u
r
S
e
l
e
c
c
i
o
P
u
l
s
e
e
l
i
b
r
a
c
i
ó
n
O
T
A
:
-
E
m
p
r
e
p
r
e
o
n
d
a
.
P
l
i
z
a
r
s
e
c
Reset
Memoria = OFF
Modo Estadisticas = OFF
Cero
n
e
e
n
e
b
o
t
ó
n
(
+
)
p
a
r
a
s
e
l
e
c
a
m
e
d
i
a
(
n
o
v
a
r
i
a
s
m
e
d
i
c
a
l
s
c
m
a
,
p
n
e
l
b
o
d
e
l
r
e
c
i
s
o
a
r
a
o
n
c
c
u
l
a
r
á
u
n
e
r
o
t
o
m
a
a
n
o
u
n
a
u
e
d
e
r
e
s
Zero
t
ó
n
“
R
e
s
f
á
b
r
i
c
a
s
t
a
b
l
e
c
i
m
,
p
a
r
t
i
c
u
u
n
a
m
a
y
l
a
p
l
a
c
a
d
Menú Configuración
Menú Configuración
c
r
m
a
l
m
e
n
t
i
o
n
e
s
d
e
d
p
t
l
a
C
e
r
o
q
u
e
a
s
.
l
a
c
a
d
e
v
a
u
r
a
r
e
l
e
n
e
e
t
”
y
e
l
a
p
a
r
e
i
e
n
t
o
d
e
r
m
e
n
t
e
o
r
p
r
e
c
i
s
e
v
i
d
r
i
o
f
l
m
e
n
ú
.
i
o
n
a
r
e
l
n
ú
e
l
a
r
i
d
c
e
l
m
b
o
c
e
l
c
t
r
a
i
ó
a
c
m
3
)
.
p
l
a
c
a
d
e
e
r
r
t
r
e
s
n
i
l
v
p
r
e
s
e
n
t
a
i
o
o
u
n
a
o
ó
á
,
Limites = OFF
Bluetooth = OFF
s
d
e
f
á
b
r
e
n
ú
.
n
c
e
n
t
r
a
e
n
l
a
p
a
r
o
d
e
f
á
l
a
s
u
s
t
i
t
e
l
c
e
r
o
i
t
a
d
a
.
e
r
o
d
e
l
e
i
d
r
i
o
.
T
r
r
á
l
a
m
e
d
u
p
e
r
f
i
c
i
i
c
a
d
e
e
l
n
t
a
l
l
a
.
b
r
i
c
a
p
u
u
c
i
ó
n
d
e
d
e
l
m
e
d
c
t
u
r
a
s
p
a
a
s
l
a
ú
l
t
i
m
i
a
d
e
t
o
d
e
a
p
r
o
p
i
a
s
t
a
m
a
n
e
E
l
i
c
o
n
o
e
d
e
n
o
i
s
l
a
p
u
n
t
a
d
o
r
d
e
b
e
d
e
r
a
a
,
a
s
d
a
r
a
:
d
e
e
r
d
e
r
á
4
Page 14
Reinicie apagando el instrumento, esperando varios segundos y
pulsando simultáneamente el botón central y (+) hasta que el
símbolo Reset aparezca. Esto restablecerá el instrumento a su
condición conocida de fábrica. Realiza la misma función que el
Reinicio y además:
- Borra la información de la conexión Bluetooth
- Las configuraciones del menú serán de nuevo las siguientes:
Unidades = microns
Voltear LCD = Normal
Auto Sync = OFF
White on Black = OFF
USB Drive= ON
NOTAS:
Tipo de bateria
Selecciona el tipo de baterías utilizadas en el Medidor entre
"Alcalina""Litio" o "NiMH" (Níquel - metal híbrido recargable). Si se
ha seleccionado NiMH el Medidor cargará las baterías poco a
poco si está conectado por USB a un PC o a un cargador opcional
CA. La selección correcta calibra el icono indicador del estado de
la batería para el tipo de batería. No habrá daños si el tipo de
batería seleccionado es erróneo.
NOTA:
recargables.
Un resumen estadístico aparecerá en la pantalla. Pulse el botón
(-) para borrar la última medida. Oprima (+) para borrar las
estadísticas.
Permite al Medidor avisar al usuario visual y auditivamente cuando las
medidas se salgan de los límites determinados por el usuario.
- La fecha y hora no cambiarán al realizar un Reinicio.
DeFelsko recomienda el uso de eneloop (NiMH) baterías
Menú Estadísticas
Menú Estadísticas
Estadisticas
x - Promedio
- Valor máximo
↑
Limites
x
Idioma = Inglés
Tipo de bateria = Alcalina
Backlight = Normal
Bluetooth Streaming = OFF
σ - Desviación Estándar
- Valor mínimo
↓
5
Page 15

Organización de la Memoria
Organización de la Memoria
El PosiTector SPG puede registrar lecturas en la memoria para la
impresión a la impresora inalámbrica Bluetooth opcional, la
transferencia a un ordenador (pág. 6) o la sincronización con
PosiTector.net. Las lecturas son con fecha y hora en que se
toman.
Desplazamiento por
los modos de visualización (sólo
Advanced)
Eliminar última lectura
Acceso al menú
Crear una nueva
serie (sólo Advanced)
Restauración del brillo si se ha bajado
(sólo Advanced)
Los modelos Standard almacenan hasta 250 lecturas en una serie.
Los modelos Advanced almacenan 100,000 lecturas en hasta
1,000 series. "New batch" (Nueva serie) cierra cualquier serie
abierta y crea un nuevo nombre de serie con el número siguiente
más bajo. Aparecerá el icono . Los nombres de series nuevas
quedarán registrados con la fecha en que se crearon.
SmartBatch™
Esta opción de menú permite al PosiTector SPG cumplir con
varias normas y métodos de organizaciones como ASTM, SSPC,
ISO, IMO, Armada de los Estados Unidos, SANS y AS.
Las instrucciones de empleo de SmartBatch™ se encuentran en
www.defelsko.com/smartbatch
6
Page 16

La salida de lecturas guardadas
La salida de lecturas guardadas
De almacenamiento masivo USB - conectar su PosiTector a un
PC / Mac mediante el cable USB para acceder e imprimir las
lecturas almacenadas y gráficos. No hay conexión a Internet o el
software necesario.
PosiTector.net - un servicio gratuito basado en la aplicación que
ofrece un almacenamiento seguro centralizado de las lecturas de
espesor. Acceder a su lectura desde cualquier dispositivo
conectado. www.PosiTector.net
Menú Conectar
Menú Conectar
Sync Now
Inicia de manera inmediata la sincronización con PosiTector.net al conectar
(Bluetooth o USB) a un PC con acceso a Internet con PosiTector Desktop
Manager.
Auto SYNC
Determina si el Medidor debe sincronizar con PosiTector.net si está
conectado a un PC con acceso a Internet con PosiTector Desktop Manager.
Medidas adicionales agregados a la memoria mientras se está
conectado se sincronizan cuando el cable USB se desconecta y
luego vuelve a conectar o cuando se Connect>Sync Now está
seleccionado.
USB Drive
El Medidor utiliza un dispositivo de almacenamiento masivo USB que
proporciona una interfaz sencilla para recuperar los datos de manera
semejante a un USB Flash, una cámara o un reproductor digital de audio.
NOTA:
Cuando está conectado, la alimentación se obtiene a
través del cable USB. Las baterías no estarán en uso y la base no
se apagará automáticamente. Si dispone de baterías recargables
(NiMH), el Medidor las cargará poco a poco.
Bluetooth
Permite enviar lecturas individuales a un ordenador o dispositivo portátil
con tecnología Bluetooth. Vea www.defelsko.com/bluetooth
(Sólo para modelos avanzados)
7
Page 17

Updates
Determina si hay actualizaciones disponibles de software para su
medidor debe estar conectado a un PC con acceso a Internet con
PosiTector Desktop Manager. www.defelsko.com/update
El instrumento puede realizar un arranque en frío (pág.
NOTA:
4) después de la actualización.
Devolución para reparaciones
Devolución para reparaciones
Antes de devolver el instrumento para reparaciones...
1.Ponga baterías nuevas o recién recargadas en el
compartimento de las baterías según instrucciones.
2.Examine la punta de la sonda por si está sucia o dañada. La
punta de la sonda deberá poder moverse hacia arriba y hacia
abajo sin dificultad. La placa de metal que rodea la punta de la
sonda deberá ser suave y estar limpia de rebabas y cuerpos
extraños.
3.Realice un Reinicio (Pág. 4).
4.Coloque la galga de metal sobre la placa de vidrio e intente una
medición.
Si debe devolver el instrumento para reparaciones, rellene el formulario e incluya el formulario de servicio de
www.defelsko.com/support
con el instrumento.
8
Page 18

Garantía limitada, solución única y
Garantía limitada, solución única y
obligación limitada
obligación limitada
La garantía única de DeFelsko, la solución, y la obligación son
la garantía limitada expresa, la solución y la obligación limitada
expuestas en su sitio web:
www.defelsko.com/terms
www.defelsko.com
© DeFelsko Corporation USA 2011
Este manual está protegido por copyright. Todos los derechos de este manual están reservados y no
podrá ser parcial o totalmente reproducido o transmitido por ningún medio sin el consentimiento previo
por escrito de DeFelsko Corporation.
DeFelsko y PosiTector son marcas comerciales de DeFelsko Corporation registradas en los EE.UU. y
en otros países. Otras marcas o nombres de productos son marcas comerciales o registradas de sus
propietarios respectivos.
Se han tomado todas las precauciones posibles para asegurar la precisión de toda la información contenida en este manual. DeFelsko no aceptará responsabilidad por errores tipográficos o de impresión.
Reservados todos los derechos.
9
Page 19

Kurzanleitung v. 1.0
Page 20

Einleitung
Einleitung
D
a
s
Pos
i
Te
c
tor
Sur
fa
c
e
Pr
ofi
l
e
Ga
ge
el
v
w
A
Di
z
un
ek
on
u
dv
u
Obe
rd
es
s
am
te
troni
a
s
rfl
e
n
.
Es b
nc
ed) und e
e
K
m
en.
r:
www
c
h
e
s
Ha
n
dm
es
s
ge
rät, d
a
s
a
l
s
äc
h
en
m
i
s
s
t, di
e
st
i
nem
ur
z
anl
ei
tung
S
i
e
k
.de
fe
l
s
k
e durc
e
h
t
a
u
s e
fas
n
in
e
ns
o
r.
s
t
di
e
d
i
e
v
ol
/m
anua
S
ö
n
ne
o
.c
om
h
e
m
l
l
s
Rei
Ge
G
r
undfunk
s
tän
h
e
ru
P
n
i
g
h
d
i
ge
n
te
un
ä
rl
rofi
u
a
g
se
B
l
s
s
ti
onen
ed
de
(SPG)
l
e
h
trah
(St
i
enu
n.
ist
e Ra
b
eh
d
a
rd
anl
G
an
o
ei
uti
e
e
de
d
er
äts
tu
re
di
l
en
a
n
des
ngs
Schnellstart
Das Gerät PosiTector SPG wird durch Drücken der mittleren
Navigationstaste eingeschaltet . Um die Lebensdauer der
Batterie zu verlängern, schaltet sich das Gerät nach etwa 5
Minuten, wenn es nicht benutzt wird, wieder ab. Alle Einstellungen
bleiben dabei erhalten.
1.Nehmen Sie die Schutzkappe vom Sensor ab.
2.Das Gerät wird durch Drücken der mittleren Navigationstaste
3.Legen Sie die Glasplatte auf eine stabile, flache Unterlage.
4.Setzen Sie den Sensor FLACH auf die zu messende Oberfläche
5.Heben Sie den Sensor zwischen den Messungen von der
eingeschaltet
Führen Sie mehrere Messungen durch. Wenn der Mittelwert
größer als ±5 µm (0.2 mil) ist, muss das Instrument genullt
werden (siehe Seite 2).
auf, sodass die Spitze des Sensors in einer Profilsenke sitzt.
RUHIG HALTEN. Die Profillehre PIEPT zweimal und zeigt die
Messung an.
Oberfläche ab.
in
fe
l
t
e
r
n
g
2
Page 21

Sonde
U
m
e
i
n
e
n
S
e
n
s
o
r
v
o
m
G
e
h
S
i
e
d
a
s
G
e
r
ä
t
a
b
S
e
n
s
o
r
s
w
F
ü
S
c
N
a
d
e
D
i
e
d
e
3
0
e
r
h
a
r
d
a
s
E
i
n
h
r
i
t
t
e
i
n
u
c
h
d
e
m
E
n
S
e
n
s
o
r
t
y
m
i
t
g
e
l
i
e
f
n
°
e
m
e
i
s
t
e
n
-
S
p
i
t
z
e
m
ä
l
t
l
i
c
h
.
D
i
e
u
a
g
e
r
e
c
h
t
s
e
t
z
e
n
e
m
g
e
k
e
h
r
i
n
s
c
h
a
l
t
e
n
p
u
n
d
f
ü
h
r
r
t
e
S
e
n
s
o
P
r
ü
f
n
o
r
m
e
i
t
e
i
n
e
m
E
s
e
e
n
t
s
p
r
i
ä
n
d
z
i
e
h
e
(
i
n
P
f
e
i
l
r
i
n
e
s
n
e
u
t
e
r
R
e
i
h
e
b
e
s
t
i
m
m
t
t
e
i
n
e
n
S
e
r
s
p
i
t
z
e
h
a
t
n
,
e
i
n
s
c
h
r
c
l
s
a
t
z
w
e
r
k
z
h
t
a
u
c
h
d
Kalibrierung
Ü
b
l
i
c
h
e
r
w
e
i
s
e
w
i
r
d
d
a
s
q
u
a
l
i
f
i
z
i
e
r
t
e
n
L
a
b
K
a
l
i
b
r
i
e
r
z
e
o
u
g
n
i
s
.
G
r
k
a
l
i
b
r
i
e
Nachweis der Genauigkeit
D
i
e
G
e
n
a
u
i
g
k
e
i
t
d
e
s
G
e
r
ä
t
e
s
w
i
r
u
n
d
d
e
r
N
u
l
l
p
l
a
t
t
e
a
u
G
l
a
s
p
l
a
t
t
e
u
n
L
e
g
e
n
S
i
e
m
e
i
s
t
D
a
w
o
e
i
n
s
e
B
e
i
s
t
m
e
D
M
m
i
M
e
d
h
r
e
r
e
M
e
,
h
.
l
s
m
u
s
s
d
a
s
n
n
l
e
g
e
n
b
e
i
S
i
e
d
a
e
m
B
e
r
e
i
e
n
S
i
e
b
i
s
p
i
e
l
:
D
M
D
i
e
7
6
u
h
r
e
r
e
n
M
e
S
-
T
o
l
e
r
a
n
S
h
i
m
T
o
s
s
u
n
g
e
n
s
s
d
d
i
e
S
c
h
i
e
G
l
a
s
p
l
a
s
u
n
g
e
n
d
u
I
n
s
t
r
u
m
e
n
S
i
e
d
i
e
M
r
a
u
f
a
c
h
t
c
S
l
e
h
z
w
i
s
c
h
i
t
t
e
b
e
i
R
-
T
o
l
e
r
a
n
z
m
S
h
i
m
T
s
s
u
n
g
e
n
z
b
e
t
r
ä
g
t
±
e
r
a
n
z
b
e
t
o
l
l
t
e
n
z
w
i
d
G
l
a
s
n
a
c
e
i
b
e
s
a
u
b
e
t
t
e
a
u
f
e
i
n
r
c
h
.
W
e
n
n
t
g
e
n
u
l
l
t
w
e
t
a
l
l
s
c
h
e
i
b
n
m
ü
s
s
e
n
e
n
d
e
n
S
t
ü
c
k
s
e
n
d
u
s
5
r
s
n
b
e
t
r
ä
g
t
±
5
o
l
e
r
a
n
z
b
o
l
l
t
e
n
z
w
i
%
o
d
e
r
±
ä
g
t
±
0
.
2
c
h
e
n
2
.
6
u
Nullung des Gerätes
D
i
e
P
r
o
f
i
l
l
e
h
r
e
P
o
s
i
T
e
c
t
o
r
N
u
l
l
.
D
e
r
N
u
l
l
p
u
n
k
t
w
e
r
d
e
n
.
B
e
i
d
e
M
e
t
h
S
k
a
n
n
a
u
f
o
d
e
n
s
i
n
d
u
s
e
z
u
t
r
e
n
n
e
n
,
s
c
h
a
l
t
e
n
d
e
n
P
l
a
s
t
i
k
s
t
i
c
h
t
u
n
g
)
e
n
S
e
n
s
n
f
o
l
g
e
w
d
a
s
P
o
s
l
b
s
t
t
e
s
t
d
e
i
n
e
n
W
i
e
ß
l
i
c
h
d
e
e
u
g
f
ü
r
S
e
m
a
u
s
t
r
e
r
ä
t
v
o
r
t
.
A
l
l
e
m
i
t
H
i
l
f
e
h
g
e
w
i
e
s
e
r
u
n
d
s
t
a
e
s
t
a
b
i
l
e
d
e
r
M
i
t
t
e
e
r
d
e
n
(
s
e
ü
b
e
r
d
,
d
a
s
s
d
i
e
e
g
e
n
d
e
r
g
z
u
r
W
%
o
d
e
r
e
t
r
ä
g
t
±
5
s
c
h
e
n
6
6
0
.
2
m
i
l
j
e
M
i
l
.
S
o
d
n
d
3
.
4
m
P
G
h
a
t
z
w
e
i
v
e
i
m
N
u
l
e
v
o
m
G
e
h
o
r
s
w
e
r
d
i
e
d
e
r
h
o
l
i
T
e
c
t
o
r
a
u
r
c
h
.
i
n
k
e
l
v
o
n
6
r
A
S
T
M
D
o
n
d
e
r
a
n
w
a
l
i
s
c
h
e
n
S
m
H
e
r
s
t
S
e
n
s
o
d
e
r
m
i
t
g
e
l
n
u
,
i
e
i
±
n
r
l
-
i
.
S
t
e
l
l
e
n
b
f
r
e
i
s
i
n
d
f
l
a
c
h
e
U
l
w
e
r
t
g
r
ö
ß
h
e
u
n
t
e
n
e
G
l
a
s
p
l
a
S
e
n
s
o
r
n
a
S
c
h
e
i
b
e
a
r
t
u
n
g
n
a
5
u
m
j
e
n
u
m
.
S
o
d
u
n
d
8
6
M
n
a
c
h
d
e
m
,
e
r
D
u
r
c
h
s
i
l
s
w
e
r
d
e
n
u
r
e
i
n
e
n
s
c
h
i
e
d
e
n
M
e
n
ü
z
u
n
c
k
e
r
d
e
s
ä
u
s
e
a
b
.
e
n
d
i
e
s
e
t
.
u
t
o
m
a
t
i
s
c
h
0
°
u
n
d
e
n
t
s
p
r
i
c
h
t
s
4
4
1
7
B
.
e
n
d
u
n
g
e
n
t
e
r
e
.
n
e
)
t
b
c
a
c
.
e
a
n
d
a
r
d
A
S
l
l
e
r
o
d
e
e
n
b
e
s
i
f
e
r
t
e
n
M
e
S
i
e
s
i
c
h
e
r
t
e
r
l
a
g
e
.
F
r
a
l
s
±
5
µ
.
t
e
u
n
d
m
d
e
l
d
i
e
G
l
e
r
ü
h
r
t
.
W
h
(
S
e
i
t
e
c
h
d
e
m
,
w
e
r
D
u
r
c
h
s
i
k
r
o
n
.
I
n
c
w
a
s
g
r
ö
ß
e
h
n
i
t
t
a
u
s
E
i
n
s
t
e
l
l
A
r
t
e
n
e
f
i
n
d
e
n
.
o
E
s
i
s
t
e
i
n
e
w
a
h
l
w
e
i
s
e
3
8
9
4
.
5
.
r
e
i
n
e
m
t
z
e
n
e
i
n
t
a
l
l
s
c
h
e
i
b
e
,
d
a
s
s
d
i
e
ü
h
r
e
n
S
i
e
m
(
0
.
2
m
i
l
)
e
s
s
e
n
S
i
e
a
e
h
p
,
s
p
l
a
t
t
e
i
n
n
n
n
i
c
h
t
,
8
)
.
M
e
t
r
i
c
a
s
g
r
ö
ß
e
r
c
h
n
i
t
t
a
u
s
B
e
i
s
p
i
e
l
:
r
i
s
t
.
D
i
e
3
m
e
h
r
e
r
e
n
u
n
k
t
b
e
i
i
n
g
e
s
t
e
l
l
t
3
Page 22

Glasplatte Null
D
a
s
E
i
n
s
t
e
l
l
e
n
d
e
s
N
u
l
l
w
e
r
t
e
s
d
e
s
G
e
r
ä
t
e
s
a
u
f
e
i
n
e
r
G
l
a
s
p
l
a
t
t
e
d
i
e
b
e
v
o
r
z
u
g
t
e
N
u
l
l
u
n
g
s
m
e
t
h
o
d
e
:
1
.
W
ä
h
l
e
n
S
i
e
a
u
s
d
e
m
M
e
n
ü
l
ul
N
2
.
D
r
ü
c
k
e
n
S
i
e
d
i
e
(
+
)
T
a
s
t
e
,
u
m
d
i
e
f
ü
r
d
i
e
B
e
s
t
i
m
m
t
y
p
i
s
c
h
e
r
w
e
i
s
3
.
M
e
s
s
e
n
b
e
r
M
e
S
e
c
h
n
e
t
d
i
s
s
u
n
g
e
n
d
u
e
3
.
i
e
w
i
e
d
e
e
r
P
r
o
f
i
l
l
e
h
a
r
s
t
e
l
l
t
.
d
n
g
d
e
s
M
h
o
l
t
d
i
e
G
r
e
e
i
n
e
n
N
.
i
e
A
n
z
a
h
l
d
e
r
M
e
s
s
w
e
r
t
e
i
t
t
e
l
w
e
r
t
s
v
e
r
w
l
a
s
p
l
a
t
t
e
.
N
a
c
u
l
l
w
e
h
r
t
,
d
e
r
d
e
a
e
n
d
e
t
w
e
d
e
r
l
e
t
z
t
e
n
M
i
t
t
e
l
w
e
u
s
z
u
w
ä
h
l
e
r
d
e
n
s
o
l
l
e
n
M
e
s
s
u
n
r
t
a
l
l
e
r
N
Werkseinstellung des Nullwertes
W
e
n
n
k
e
i
n
e
G
l
a
s
p
l
a
t
t
e
o
d
e
r
g
e
e
i
g
n
e
t
e
g
l
a
t
t
e
,
h
a
r
t
e
O
b
e
r
f
l
ä
c
h
e
V
e
r
f
ü
g
u
w
e
r
d
e
n
1
.
W
ä
2
.
D
r
ü
u
n
d
d
d
a
s
K
A
n
z
e
i
Hinweis:
i
m
m
e
r
g
w
u
r
d
e
.
G
l
a
s
p
l
a
n
g
s
t
e
h
t
,
k
a
n
n
d
i
e
N
u
l
l
e
i
n
s
t
e
l
l
u
n
g
d
e
s
W
e
r
k
e
s
w
i
e
d
.
h
l
e
n
S
c
k
e
n
r
ü
c
k
e
n
a
l
i
b
r
i
g
e
.
-
E
s
e
n
a
u
F
ü
r
e
t
t
e
k
a
l
i
Null
i
e
a
u
s
d
e
m
M
e
n
ü
.
S
i
e
d
i
e
"
N
a
c
h
u
n
t
e
n
"
-
T
a
s
t
e
,
u
m
"
S
i
e
d
i
e
m
i
t
t
l
e
r
e
e
r
s
y
m
b
o
l
f
i
s
t
m
ö
g
l
i
c
h
,
d
a
i
s
t
,
b
e
i
n
e
b
b
r
i
e
r
t
s
s
o
n
d
e
r
s
e
d
s
s
e
r
e
G
w
e
r
d
e
n
.
Setup Menü
Setup Menü
N
ü
r
d
i
e
W
e
s
d
i
e
W
e
r
k
a
e
s
n
n
,
w
e
n
n
n
a
u
i
g
k
e
i
t
R
a
v
i
g
a
t
i
o
n
r
k
s
e
i
n
s
t
e
e
i
n
s
t
e
l
l
u
n
g
e
i
n
e
S
e
n
s
s
o
l
l
t
e
m
i
t
e
e
s
e
t
"
a
u
s
t
a
s
t
e
.
E
l
l
u
n
g
i
n
d
e
s
N
u
l
l
p
o
r
s
p
i
t
z
e
a
H
i
l
f
e
d
e
r
z
r
h
e
r
g
e
s
t
s
z
u
w
ä
h
l
s
e
r
s
c
h
e
d
e
r
L
C
u
n
k
t
e
s
n
i
u
s
g
e
t
a
u
s
b
e
i
g
e
f
ü
g
t
Reset
Reset (Soft-Reset) stellt die Werkseinstellungen wieder her und führt das
Gerät zu bekannten Einstellungen zurück. Folgendes geschieht:
- Alle Blöcke, gespeicherten Messungen, Abbildungen, und Blocknamen
werden gelöscht.
- Die Nulleinstellung wird auf die Werkseinstellung zurückgesetzt. Da dies
nicht immer der genaue Nullwert sein kann, sollte die Profillehre auf
einer Glasplatte überprüft werden.
- Die Menüeinstellungen werden wie folgt zurückgesetzt:
i
s
t
n
,
n
,
g
,
u
l
l
-
u
r
e
l
l
t
e
n
i
n
t
D
-
c
h
t
c
h
t
e
n
Speicher = AUS
StatistiK-Modus = AUS
HiLo Alarm = AUS
Bluetooth = AUS
4
Page 23

Sie können ein noch gründlicheres Hard-Reset durchführen,
warten Sie einige Sekunden indem Sie das Gerät ausschalten,
und dann gleichzeitig die mittlere Taste und die (+) Taste
drücken, bis das Reset -Symbol erscheint. Dies führt das Gerät
zu einer bekannten Serieneinstellung zurück. Dabei geschieht das
Gleiche wie bei einem Menü-Reset und zusätzlich wird die:
- Bluetooth - Paarung gelöscht.
- Die Menüs werden wie folgt eingestellt:
Einheiten = micron
LCD drehen = Normal
Auto Sync = AUS
Umkehren LCD = AUS
Sprache = Englisch
Batterietyp = Alkaline
Backlight = Normal
Bluetooth Streaming = AUS
USB Drive= EIN
:
IS
-Datum und Zeit werden von keiner der beiden
WE
IN
H
Reset-Arten beeinflusst.
Batterietyp
Mit dieser Funktion wählen Sie den im Messgerät verwendeten Batterietyp.
Es besteht die Auswahl zwischen “Alkaline”, “Lithium” oder “NiMH” (NickelMetal-Hydrid). Wenn NiMH ausgewählt wurde, puffert das Messgerät die
Batterien während es über USB an einen PC oder wahlweise an ein
Ladenetzteil angeschlossen ist. Wird die richtige Auswahl getroffen, wird
das Batteriesymbol auf den Batterietyp eingestellt. Es entsteht kein
Schaden, wenn der falsche Batterietyp ausgewählt wird.
HINWEIS:
DeFelsko empfiehlt die Verwendung von eneloop
(NiMH)-Akkus.
Statistik-Menü
Statistik-Menü
Statistik
Eine statistische Zusammenfassung wird auf dem Display erscheinen.
Nehmen Sie die letzte Messung durch Drücken der Taste (-). Drücken Sie
(+), um aussagekräftige Statistiken.
x - Durchschnitt
- Maximum Wert
↑
x
σ - Standardabweichung
- Minimum Wert
↓
HiLo Alarm
Ermöglicht die Gage zu sicht-und hörbar den Benutzer, wenn Messungen
vom Benutzer angegebenen Grenzwerte überschreiten.
5
Page 24

Speicherverwaltung
Speicherverwaltung
Die PosiTector SPG können Messwerte im Speicher für das
Drucken mit dem optionalen Bluetooth Wireless DruckerAufzeichnung, Übertragung an einen Computer (S. 6) oder die
Synchronisierung mit PosiTector.net. Die Messwerte werden mit
einem Zeitstempel versehen, wie sie getroffen werden.
Blättern Sie durch
Anzeige-Modi
(Advanced)
Löschen letzte Lesung
Besuchen Sie das Menü
Erstellen Sie eine
neue Charge
(Advanced)
Restore brightness
after dimming
(Advanced)
Standardmodelle bis zu 250 Messwerte in einer Charge.
Weiterentwickelte Modelle speichern 100,000 Messwerte in bis zu
1,000 Chargen. "Gremlins" schließt alle aktuell geöffneten Batch
und erstellt eine neue Batch-Namen mit der niedrigsten
verfügbaren Nummer. Das Symbol erscheint. New BatchNamen sind Datumsstempel, wenn sie erstellt werden.
SmartBatch™
Dieser Menüpunkt ermöglicht es dem PosiTector SPG den
verschiedenen Normen und Testmethoden gerecht zu werden, die
von den Organisationen wie z.B. ASTM, SSPC, ISO, IMO, US
Navy, SANS und AS herausgegeben werden.
Sie finden die Bedienungsanleitung für Smart Batch™ in
www.defelsko.com/smartbatch
6
Page 25

Ausgeben gespeicherten Messwerte
Ausgeben gespeicherten Messwerte
USB-Massenspeicher - schließen Sie Ihr PosiTector an einen PC / Mac mit
dem mitgelieferten USB-Kabel zugreifen und drucken gespeicherten
Messwerte und Grafiken. Keine Software oder Internet-Verbindung
erforderlich.
PosiTector.net - eine kostenlose Web-basierte Anwendung bietet sicheren
zentralisierten Speicherung von Messwerten. Greifen Sie auf Ihre Lesungen
von jedem Web angeschlossenen Gerät. www.PosiTector.net
Verbindungs Menü
Verbindungs Menü
Sync Now
Dies startet sofort die Synchronisierung mit dem PosiTector.net, wenn das
Gerät (über Bluetooth oder USB) mit einem internetfähigen PC verbunden
ist, auf dem der PosiTector Desktop Manager.
Auto SYNC
Diese Funktion bestimmt, ob das Gerät mit PosiTector.net synchronisieren
soll, wenn das Gerät mit einem internetfähigen PC verbunden ist, auf dem
der PosiTector Desktop Manager.
Weitere Messungen, die dem Messgerätespeicher während der Verbindung
hinzugefügt werden, werden nur synchronisiert, wenn das USB-Kabel nicht
angeschlossen ist, und dann wieder angeschlossen wird, oder wenn
Verbinde>Sync Now ausgewählt wurde.
USB Drive
Das Messgerät verwendet eine Geräteklasse für den USB-Massenspeicher,
die eine einfache Schnittstelle bietet, um Daten in einer Weise abzurufen,
die ähnlich wie bei den USB-Sticks, Fotoapparaten, oder den digitalen
Audioplayern ist.
HINWEIS:
Wenn es angeschlossen ist, geschieht die
Stromversorgung über das USB-Kabel. Die Batterien werden nicht
benötigt und das Grundgerät wird nicht automatisch
heruntergefahren. Wenn wiederaufladbare Batterien (NiMH)
installiert sind, dann puffert das Gerät die Batterieladung.
Bluetooth
Dies ermöglicht es, Messwerte, so wie sie aufgenommen werden, an einen
Computer oder ein kompatibles Handgerät zu senden, indem man die
Bluetooth -Drahtlostechnik nutzt. www.defelsko.com/bluetooth
(Erweiterte Modelle)
7
Page 26

Updates
Bestimmt, ob ein Software-Update ist verfügbar für Ihr Instrument.
Muss ein Internet angeschlossenen PC läuft PosiTector Desktop
Manager angeschlossen werden. www.defelsko.com/update
HINWEIS:
Bevor Sie das Gerät zur Wartung zurücksenden…
1.Setzen Sie neue oder frisch geladene Batterien mit der richtigen
Polung in das Batteriefach ein, so wie gezeigt.
2.Untersuchen Sie die Spitze des Sensors nach Schmutz oder
Beschädigung. Die Sensorspitze sollte sich frei nach oben und
unten bewegen. Die Metallplatte sollte um die Sensorspitze
herum glatt und frei von Grat und Fremdkörpern sein.
3.Führen Sie ein Hard-Reset durch (S. 4).
4.Legen Sie die Metallscheibe auf die Glasplatte und versuchen
Sie eine Messung durchzuführen.
Wenn Sie das Gerät zur Wartung zurücksenden müssen, füllen
Sie bitte das Service-Formular aus, das Sie unter
www.defelsko.com/support
es dem Gerät bei.
Das Instrument kann ein Hard Reset (S. 4) nach
dem Update durchzuführen.
Rücksendung zur Wartung
Rücksendung zur Wartung
herunterladen können und legen Sie
8
Page 27

Begrenzte Garantie, alleinige Abhilfe und
Begrenzte Garantie, alleinige Abhilfe und
beschränkte Haftung
beschränkte Haftung
DeFelsko alleinige Garantie, Abhilfe und Haftung sind ausdrücklich auf die Garantieleistung, Abhilfe und beschränkte Haftung
begrenzt, so wie es in ihrer Website dargelegt ist.
www.defelsko.com/support
www.defelsko.com
© DeFelsko Corporation USA 2011
Dieses Handbuch ist urheberrechtlich geschützt. Es darf ohne schriftliche Genehmigung der DeFelsko
Corporation weder insgesamt noch in Teilen in irgendeiner Weise vervielfältigt oder weitergegeben werden.
DeFelsko und PosiTector sind in den USA und anderen Ländern eingetragene Warenzeichen der
DeFelsko Corporation. Alle anderen Marken- und Produktnamen sind Marken oder eingetragene
Marken der jeweiligen Besitzer.
Die in dieser Betriebsanleitung enthaltenen Informationen wurden nach bestem Wissen und Gewissen
zusammengestellt. Für Druck- oder Bearbeitungsfehler übernimmt DeFelsko keine Verantwortung.
Alle Rechte vorbehalten.
9
Page 28

Guide d’utilisation v. 1.0
Page 29

Introduction
Introduction
L
’
a
pp
arei
l
P
os
iTec
tor
S
ur
fa
ce
P
r
ofile
Ga
ge
(S
P
G)
e
s
i
ns
d
e s
(S
tan
Ce
l
’
a
ppare
www
tru
gui
m
e
urfa
dard o
de
i
.defe
nt él
c
e de s
u
d’
l
.
Té
l
s
k
e
c
tro
ni
q
u
e po
rta
bl
e
q
ui
m
es
u
re l
a
d
i
s
urfac
e
s
g
re
nai
l
l
é
e
s
. Il
Av
an
c
é) e
t d
’
un
e
uti
l
i
s
ati
on
r
éc
ez
api
l
e
m
od
a
n
ua
l
s
l
é
c
h
arg
o
.c
om
/m
s
tul
e d
on
s
de
.
e
l
es
’
em
pl
o
e
fonc
i
tanc
c
om
po
s
e
ti
ons
de
c
o
m
p
l
e
t
d
à l
e pi
’
u
bas
’
n
ad
t
c
-v
a
l
l
b
o
îti
e
re
s
s
Démarrage rapide
Le PosiTector SPG est mis sous tension lorsque le bouton de
navigation central est appuyé. Pour économiser la batterie,
l’instrument est mis automatiquement hors tension après environ
5 minutes d’inactivité. Tous les paramètres sont conservés.
1.Retirer le capuchon de protection en plastique de la sonde
2.Mettre l’instrument sous tension en pressant le bouton de
navigation central
3.Placer la plaque en verre sur une surface plane et stable.
Prendre plusieurs mesures. Si la moyenne est supérieure à ±5
µm (0.2 mil), réinitialiser l’instrument (voir la page 4).
4.Placer la sonde à plat sur la surface à mesurer de sorte que la
pointe de la sonde atteigne le fond d'une vallée du profil. NE
PAS BOUGER. L’instrument émet un signal sonore à deux
reprises et affiche la mesure.
5.Soulever la sonde de la surface entre chaque mesure.
un
ée
er
de
e:
2
Page 30

Sonde
P
o
u
r
r
e
t
i
r
e
r
l
a
u
n
e
s
o
n
d
e
c
o
r
p
l
’
i
n
s
t
r
u
m
e
n
t
h
o
r
s
t
e
n
s
i
o
n
d
e
l
a
s
o
n
d
e
h
b
o
î
t
i
U
n
e
a
u
t
o
a
u
t
o
L
a
p
d
e
s
e
s
t
a
p
p
l
3
8
9
4
o
e
r
.
I
n
v
e
r
s
e
r
f
o
i
s
s
m
a
t
i
q
u
e
m
e
c
o
n
t
r
ô
l
e
.
o
i
n
t
e
d
e
l
n
i
a
o
r
m
e
s
d
’
e
d
i
s
p
o
n
i
b
l
e
c
a
t
i
o
n
s
s
p
.
5
.
r
i
z
o
n
t
a
l
e
m
c
e
s
é
t
a
p
e
o
u
s
t
e
n
n
t
l
e
t
y
p
e
s
o
n
d
e
f
o
u
s
s
a
i
,
y
c
o
m
e
n
o
p
t
i
o
é
c
i
a
l
e
s
,
o
p
u
i
s
f
a
i
r
e
e
n
t
(
d
a
n
s
s
p
o
u
r
c
o
s
i
o
n
,
l
e
d
e
s
o
n
d
r
n
i
e
a
u
n
p
r
i
s
l
a
n
o
n
a
v
e
c
u
p
o
u
r
r
Étalonnage
L
’
é
t
a
l
o
n
n
a
g
e
d
e
l
’
i
n
s
t
r
u
m
e
n
t
e
s
t
n
l
a
b
o
r
a
t
o
i
r
e
q
u
a
l
i
f
i
é
.
T
o
d
’
É
t
a
l
o
n
n
a
g
e
.
u
o
t
e
s
l
e
s
s
o
Vérification de l’exactitude
L
’
e
x
a
c
t
i
t
u
d
e
d
e
l
’
i
n
s
t
r
u
m
e
n
t
e
s
t
c
o
l
a
p
l
a
q
u
e
d
e
m
i
s
e
à
z
é
r
c
a
l
l
e
s
o
i
e
n
t
p
a
P
l
a
c
e
z
l
a
p
l
m
e
s
l
’
i
n
s
P
l
a
v
e
i
l
z
o
n
d
o
i
t
l
a
c
s
y
s
v
a
l
e
m
o
y
E
x
e
l
a
v
A
i
n
3
.
4
a
u
r
e
s
.
S
i
t
r
u
m
e
n
t
à
c
e
r
e
n
s
u
i
t
l
a
e
a
t
è
m
a
s
m
e
n
t
à
c
e
q
f
o
r
m
é
e
p
ê
t
r
e
c
o
m
p
l
e
.
S
i
n
o
n
,
m
e
m
é
t
r
i
u
r
l
a
p
l
u
s
e
n
n
e
d
e
p
p
l
e
e
n
p
o
l
e
u
r
l
a
p
l
i
,
l
a
m
o
y
e
i
l
s
.
o
r
f
a
i
t
e
m
e
n
t
q
u
e
s
u
r
u
l
a
m
o
y
e
n
z
u
a
r
q
é
l
u
n
n
é
r
o
(
v
o
i
r
c
l
a
c
a
l
e
m
e
l
a
p
o
i
n
t
r
l
e
s
“
b
o
r
i
s
e
d
a
n
s
l
a
v
o
i
r
l
a
s
e
c
u
e
:
l
a
t
o
l
é
l
e
v
é
e
.
L
a
u
s
i
e
u
r
s
m
u
c
e
:
l
a
t
o
l
é
s
é
l
e
v
é
e
.
n
e
d
e
p
l
u
n
e
n
v
e
r
r
e
.
p
r
o
p
r
e
s
a
n
e
s
u
r
f
a
c
e
e
s
t
s
u
i
-
d
e
s
s
o
u
s
é
t
a
l
l
i
q
u
e
e
d
e
l
a
s
o
d
s
”
d
e
l
a
c
t
o
l
é
r
a
n
c
e
t
i
o
n
"
R
e
t
o
r
a
n
c
e
d
e
l
t
o
l
é
r
a
n
c
e
e
s
u
r
e
s
d
e
r
a
n
c
e
d
e
L
a
t
o
l
é
r
a
n
s
i
e
u
r
s
m
e
Mise à zéro de l’instrument
L
e
P
o
s
i
T
e
c
t
o
r
S
P
G
p
o
s
s
è
d
e
L
e
p
o
i
n
t
z
é
r
o
p
e
u
t
ê
t
s
u
i
v
a
n
t
e
s
d
u
r
m
e
n
u
Z
é
e
d
é
f
i
n
i
e
r
o
.
d
u
b
o
î
t
i
e
r
,
m
e
t
t
r
e
d
’
a
b
o
r
g
l
i
s
s
e
r
e
t
s
o
r
t
i
r
l
e
l
e
s
e
n
s
n
n
e
c
t
e
r
P
o
s
i
e
c
o
n
n
e
a
n
g
l
e
à
r
m
e
A
S
T
u
n
o
u
t
i
l
é
p
o
n
d
r
e
r
m
a
l
e
m
e
n
d
e
s
s
o
t
r
ô
l
e
e
n
V
e
i
l
l
e
z
à
v
a
n
t
t
o
u
t
e
p
l
a
n
e
p
é
r
i
e
u
r
e
)
.
s
u
r
l
a
p
l
n
d
e
t
o
u
c
a
l
e
.
L
a
m
d
e
l
'
a
p
p
u
r
p
o
u
r
e
'
a
p
p
a
r
e
i
l
d
e
l
a
c
a
l
v
r
a
i
t
ê
t
r
e
l
'
a
p
p
a
r
e
i
c
e
d
e
l
a
s
u
r
e
s
d
e
u
n
s
e
u
l
n
u
t
i
l
i
s
a
c
d
e
l
a
f
l
è
c
h
u
n
e
n
o
u
v
T
e
c
t
o
r
c
t
é
e
e
t
e
6
0
°
c
o
n
f
o
M
D
4
4
1
7
d
e
r
e
m
à
l
a
n
o
r
n
t
r
é
a
l
i
s
é
n
t
f
o
u
r
n
i
e
u
t
i
l
i
s
a
n
t
u
c
e
q
u
e
l
a
e
u
t
i
l
i
s
a
t
i
o
e
t
s
t
a
b
l
e
à
±
5
µ
a
q
u
e
e
n
h
e
l
a
p
l
a
o
y
e
n
n
e
a
r
e
i
l
c
u
m
n
t
r
e
t
i
e
n
"
(
e
s
t
d
e
±
5
e
7
6
µ
m
e
c
o
m
p
r
i
s
l
e
s
t
d
e
±
5
c
a
l
e
3
m
v
r
a
i
t
ê
t
r
e
p
o
i
n
t
d
’
a
n
t
u
n
e
d
d
o
n
n
e
c
t
e
u
e
e
d
r
p
m
p
s
n
n
m
v
q
d
u
p
%
s
e
c
e
r
)
h
o
r
s
d
u
l
l
e
s
o
n
d
e
.
é
t
e
r
m
i
n
e
x
é
c
u
t
e
u
n
m
é
m
e
n
t
à
l
a
p
l
u
p
a
r
B
.
U
n
e
p
o
l
a
c
e
m
e
n
t
e
a
u
s
t
r
a
a
r
l
e
f
a
b
r
i
c
a
v
e
c
u
n
e
c
a
l
e
m
é
p
l
a
q
u
e
e
n
.
.
P
r
e
n
d
r
e
(
0
.
2
m
i
e
r
r
e
e
t
m
e
u
e
e
n
v
e
r
e
l
%
i
o
j
r
p
l
u
s
i
e
u
r
s
é
e
à
l
a
t
o
l
a
g
e
8
)
.
E
x
o
u
±
5
µ
m
t
d
e
±
5
µ
m
e
n
t
r
e
6
6
o
u
±
0
.
2
l
s
e
s
t
d
e
m
p
r
i
s
e
e
n
u
s
t
e
m
e
n
s
d
e
u
x
m
t
i
n
t
e
à
3
0
°
p
o
u
r
l
e
s
l
i
e
n
n
e
A
S
a
n
t
o
u
u
n
C
e
r
t
i
f
i
c
a
t
t
a
l
l
i
q
u
e
e
t
v
e
r
r
e
e
t
l
a
p
l
u
s
i
e
u
r
s
l
)
,
m
e
t
t
r
e
s
u
r
e
z
e
n
e
d
a
n
s
l
a
m
e
s
u
r
e
s
é
r
a
n
c
e
d
e
e
m
p
l
e
e
n
s
e
l
o
n
l
a
.
A
i
n
s
i
,
l
a
e
t
8
6
µ
m
.
m
i
l
s
s
e
l
o
n
±
0
.
2
m
i
l
s
.
t
r
e
2
.
6
e
t
t
à
z
é
r
o
.
é
t
h
o
d
e
s
3
Page 31

Plaque en verre de mise à zéro
L
a
m
i
s
e
à
z
é
r
o
d
e
l
’
i
n
s
t
r
u
m
e
n
t
s
u
r
l
a
p
l
a
q
u
e
d
e
v
e
r
r
e
e
s
t
m
é
t
h
o
d
e
d
’
a
j
u
s
t
e
m
e
n
t
à
p
r
i
v
i
l
é
g
i
e
r
:
1
.
S
é
l
e
c
t
i
o
n
n
e
z
d
a
n
s
l
e
m
e
n
u
Zero
2
.
P
r
e
s
s
e
z
l
e
b
o
u
t
o
n
(
+
)
p
o
u
r
s
é
l
e
à
u
t
i
l
i
s
e
r
p
o
u
r
o
b
t
e
n
i
r
u
n
m
3
.
P
r
e
n
d
r
e
p
l
u
s
i
e
u
r
s
m
e
d
e
r
n
i
è
r
e
m
e
s
u
r
m
o
y
e
n
n
Remise à zéro d’usine
S
i
a
u
c
u
n
n
’
e
s
t
d
i
s
1
.
S
é
l
e
2
.
P
r
e
s
(
R
é
i
n
i
t
i
L
’
i
c
ô
n
e
R
EM
ARQU
s
o
i
t
p
a
s
p
o
i
n
t
e
d
ê
t
r
e
r
e
m
Reset
L’option Reset (réinitialisation logicielle) restaure les paramètres
d’usine et remet l’instrument à une condition connue. Les
événements suivants se produisent:
- Les lots, les mesures enregistrées, les images et les noms de
lots sont supprimés.
- L’ajustement du zéro est remis à la valeur usine. Comme cela
peut ne pas toujours être un zéro précis, l’instrument doit être
contrôlé sur la plaque en verre.
- Les paramètres du menu sont réinitialisés comme suit:
Mémoire = Désactivé
Mode statistiques = Désactivé
e
e
d
e
t
o
u
t
e
p
l
a
q
u
p
c
a
t
e
i
e
o
n
i
b
l
e
,
l
e
t
i
o
n
n
e
z
s
e
z
l
a
f
l
i
s
e
r
)
e
t
d
o
a
'
é
t
a
l
o
n
n
E:
I
l
e
u
j
o
u
r
s
p
s
o
n
d
e
.
s
à
z
é
r
o
Menu de configuration
Menu de configuration
s
,
l
’
i
n
s
t
r
u
m
e
s
l
e
s
m
e
e
n
v
e
r
r
e
r
é
g
l
a
g
e
Zer
o
l
è
c
h
e
v
e
r
p
p
u
y
e
z
s
a
g
e
u
s
i
n
e
s
t
p
o
s
s
i
r
s
b
é
c
i
s
,
p
a
r
P
o
u
r
u
n
e
u
r
l
a
p
l
a
c
o
y
e
n
n
e
,
u
r
e
s
s
u
r
e
n
t
c
a
l
c
u
s
u
r
e
s
p
r
i
o
u
s
u
r
f
d
u
z
é
r
o
d
d
a
n
s
s
l
e
b
a
s
u
r
l
e
b
o
u
t
a
p
p
l
e
q
u
e
l
e
t
i
c
u
l
i
è
r
e
m
m
e
i
l
l
e
u
q
r
u
e
e
n
v
e
Alarme HiLo = Désactivé
Bluetooth = Désactivé
.
t
i
o
n
n
e
r
l
e
n
o
m
b
r
h
a
b
i
t
u
e
l
a
p
l
a
q
u
l
e
u
n
Z
é
s
e
s
.
a
c
e
d
u
r
e
’
u
s
i
n
e
p
l
e
m
e
n
u
p
o
u
r
s
o
n
d
e
n
a
a
r
a
î
t
s
u
r
r
é
g
l
a
g
e
e
n
t
a
p
r
è
e
p
r
é
c
i
s
r
r
e
f
o
u
r
e
l
l
e
m
e
n
t
3
.
e
e
n
v
e
r
r
r
o
q
u
i
r
e
s
u
f
f
i
s
a
m
e
u
t
ê
t
r
e
r
.
é
l
e
c
t
i
o
n
n
v
i
g
a
t
i
o
n
s
i
n
l
’
é
c
r
a
n
L
d
u
z
é
r
o
u
n
c
h
a
n
o
n
,
l
’
i
n
s
t
r
i
e
.
d
e
m
e
s
u
e
.
A
p
r
è
s
p
r
é
s
e
n
t
e
m
e
n
t
l
i
s
e
s
t
a
u
r
é
:
e
r
“
R
e
s
e
c
e
n
t
C
D
.
d
’
u
s
i
n
e
g
e
m
e
n
t
u
m
e
n
t
d
l
a
r
e
l
a
l
a
s
e
t
”
r
a
l
n
e
d
e
o
i
t
4
Page 32

Procédez à une réinitialisation matérielle (Hard Reset) plus complète en
mettant l’instrument hors tension. Attendre quelques secondes, puis
appuyez simultanément sur les boutons du milieu et (+) jusqu’à ce
que le symbole de Réinitialisation apparaisse. Cette opération remet
l’instrument dans un état connu, dit “après déballage”. Elle exécute la même
fonction que l’option de menu Reset avec en plus
- L’annulation de la synchronisation Bluetooth
- Les paramètres du menu sont réinitialisés comme suit:
és = microns
Unit
Affichage inversé = Normal
Auto Sync = Désactivé
Inverse LCD = Désactivé
USB Drive= Activée
REMARQUE:
Type de piles
Sélectionne le type de piles utilisées dans l’appareil entre
“Alcaline”, “Lithium” ou “NiMH” (Nickel-hydrure métallique
rechargeable). Si NiMH est sélectionné, l’instrument commence
à charger les piles après sa connexion via USB avec un PC ou un
chargeur CA facultatif. L’icône de l’indicateur d’état de la batterie
est calibré pour le type de batterie. Aucun dommage ne survient si
un type de pile erroné est sélectionné.
REMARQUE:
rechargeables eneloop (NiMH).
Statistiques
Un résumé statistique apparaît à l’écran. Supprimer la dernière
mesure en appuyant sur le bouton (-). Presser (+) pour supprimer
les statistiques.
Limites HiLo
Permet à l’appareil d’alerter l’utilisateur de façon visuelle et sonore lorsque
les mesures dépassent les limites préalablement fixées.
- La date et l’heure ne sont pas affectées par
une Réinitialisation.
DeFelsko recommande l’utilisation de piles
Menu Statistiques
Menu Statistiques
x
x - Moyenne
- Valeur maxi
↑
Langue = Anglais
Type de piles = Alcalines
Rétro-éclairage = Normal
Bluetooth Streaming = OFF
σ - Ecart-type
- Valeur mini
↓
5
Page 33

Mode mémoire
Le PosiTector SPG pouvez enregistrer des lectures en mémoire pour une
impression à l'imprimante sans fil Bluetooth en option, le transfert vers un
ordinateur (p. 6) ou la synchronisation avec PosiTector.net. Les lectures
sont horodatés comme ils sont pris.
Défilement à travers
les modes d’affichage
(Avancé uniquement)
Suppression de la
dernière valeur
mesurée nouveau lot
Accès au menu
Mode mémoire
Création d’un nouveau lot
(Avancé uniquement)
Restauration de la
luminosité après
atténuation (Avancé
uniquement)
Les Modèles standard stockent jusqu’à 250 mesures dans un
seul lot.
Les Modèles avancés stockent 100 000 mesures dans un
maximum de 1 000 lots. Un “nouveau lot” clôt chaque lot ouvert et
crée un nouveau lot avec le dernier numéro disponible.L’icône
apparaît. Les nouveaux noms de lots sont horodatés au fur et à
mesure de leur création.
SmartBatch™
Cette option de menu configure le PosiTector SPG pour se
conformer avec les différentes normes et méthodes d’essai
publiées par des organismes tels que ASTM, SSPC, ISO, IMO, US
Navy, SANS et AS.
Pour toute instruction relative à l’utilisation de la fonction Smart
Batch™, consultez le site www.defelsko.com/smartbatch
6
Page 34

Téléchargement des mesures sur un PC
Téléchargement des mesures sur un PC
Stockage de masse USB - Connectez votre PosiTector à un
PC/Mac en utilisant le câble USB fourni pour accéder et imprimer
les valeurs de mesure et les graphiques enregistrés. Aucun logiciel
ni aucune connexion Internet n’est requise.
PosiTector.net - Application Web offrant un stockage centralisé sécurisé des
valeurs de mesure d’épaisseur. Vous pouvez accéder à vos valeurs de
mesure à partir d’un PC connecté au Web. www.PosiTector.net
Menu Connexion
Menu Connexion
Sync Now
Cette fonction démarre immédiatement la synchronisation avec
PosiTector.net une fois connecté (via USB ou Bluetooth) à un PC connecté
à Internet disposant de l’application PosiTector Desktop Manager.
Auto SYNC
Cette fonction synchronise automatiquement l’appareil avec
PosiTector.net après s’être connecté à un PC lui-même connecté
à Internet disposant de l’application PosiTector Desktop Manager.
Les mesures supplémentaires ajoutées à la mémoire au moment
de la connexion sont synchronisées uniquement si le câble USB
est débranché, puis rebranché ou lorsque la fonction Connexion
> Sync Now est utilisée.
USB Drive
L’instrument utilise une unité de stockage de masse USB qui
fournit une interface simple pour récupérer les données de la
même manière que les lecteurs flash USB, les appareils
photographiques ou les lecteurs audio numériques.
REMARQUE:
électrique est assurée par le câble USB. Les piles ne sont pas utilisées et le
boîtier n’est pas automatiquement mis hors tension. Si des piles
rechargeables (NiMH) sont installées, l’instrument procède à la charge des
piles.
Bluetooth
Cette fonction permet de transmettre des valeurs de mesure individuelles
vers un PC ou un dispositif compatible via la technologie sans fil Bluetooth.
Voir www.defelsko.com/bluetooth
Lorsque l’instrument est connecté, l’alimentation
(Modèles avancés uniquement)
7
Page 35

Updates
Cette fonction détermine si une mise à jour du logiciel est
disponible pour votre appareil. L’appareil doit être branché à un PC
connectéàInternet via l’application PosiTector Desktop Manager.
Voir www.defelsko.com/update
REMARQUE:
matérielle (page 4) après la mise à jour.
Avant de retourner l’instrument pour entretien…
4.Installez des piles neuves en respectant l’orientation correcte
précisée dans le compartiment des piles.
2.Examinez la pointe de la sonde en cas d’encrassement ou de
dommage. La pointe de la sonde doit pouvoir bouger librement
vers le haut et le bas. La plaque métallique entourant la pointe
de la sonde doit être lisse et sans bavures et/ou matières
étrangères.
3.Procédez à une Réinitialisation (page 4).
4.Placez la cale métallique sur la plaque en verre et procédez à
une mesure.
Si vous devez retourner l’instrument pour entretien, veuillez remplir et joindre avec l’instrument le formulaire d’entretien disponible
à l’adresse www.defelsko.com/support
L'instrument peut effectuer une réinitialisation
Retour pour entretien
Retour pour entretien
.
8
Page 36

Garantie limitée, recours unique et
Garantie limitée, recours unique et
responsabilité limitée
responsabilité limitée
La garantie, les recours et la responsabilité de DeFelsko se limitent aux
dispositions du site Internet de l’entreprise: www.defelsko.com/terms
www.defelsko.com
© DeFelsko Corporation États-Unis 2011
Tous droits réservés
Le présent manuel est protégé par des droits de propriété intellectuelle. Tous droits réservés. Toute
reproduction ou transmission intégrale ou partielle, de quelque manière que ce soit sans l'autorisation
écrite de DeFelsko Corporation est interdite.
DeFelsko et PosiTector sont des marques déposées par DeFelsko Corporation aux États-Unis et dans
d'autres pays. Les autres marques et les autres noms de produits sont des marques, déposées ou non,
qui appartiennent à leurs propriétaires respectifs.
Tous les efforts ont été faits pour que les informations contenues dans le présent manuel soient
exactes. DeFelsko décline toute responsabilité concernant les erreurs d'impression ou les erreurs
typographiques.
9
Page 37

Simple. Durable. Accurate.
www.defelsko.com
© DeFelsko Corporation USA 2012
This manual is copyrighted with all rights reserved and may not be
All Rights Reserved
reproduced or transmitted, in whole or part, by any means, without
written permission from DeFelsko Corporation.
DeFelsko, PosiTector and PosiSoft are trademarks of DeFelsko
Corporation registered in the U.S. and in other countries. Other brand
or product names are trademarks or registered trademarks of their
respective holders.
Every effort has been made to ensure that the information in this manual
is accurate. DeFelsko is not responsible for printing or clerical errors.
 Loading...