

Page 1
Page 1 of 6
DZ 16365 12.08.10
Page 2

Dee Zee Running Board Installation Instructions
Congratulations on your purchase of a quality Dee Zee product. Dee Zee is
recognized as having the highest quality running boards and accessories on the
market today. We have earned this reputation by offering our customers a
product they can be proud to place on their vehicles. Dee Zee meets all the
criteria of manufacturing a custom-fit product which guarantees it to be the
easiest product to install.
Note: Please take time to read all of the instructions before beginning this installation.
Cleaning instructions: To maintain the bright finish of your Dee Zee running board, clean with
a mild detergent and use a high-grade automotive type wax. DO NOT USE ABRASIVE
CLEANERS ON THIS PRODUCT!
If you should happen to have any questions with this product or you have an installation
question, please feel free to call us at:
1-800-779-8222
If you would like to find out more information on Dee Zee’s products, please feel free to visit
our website at:
WWW.DEEZEE.COM
Page 2 of 6
DZ 16365 12.08.10
Page 3
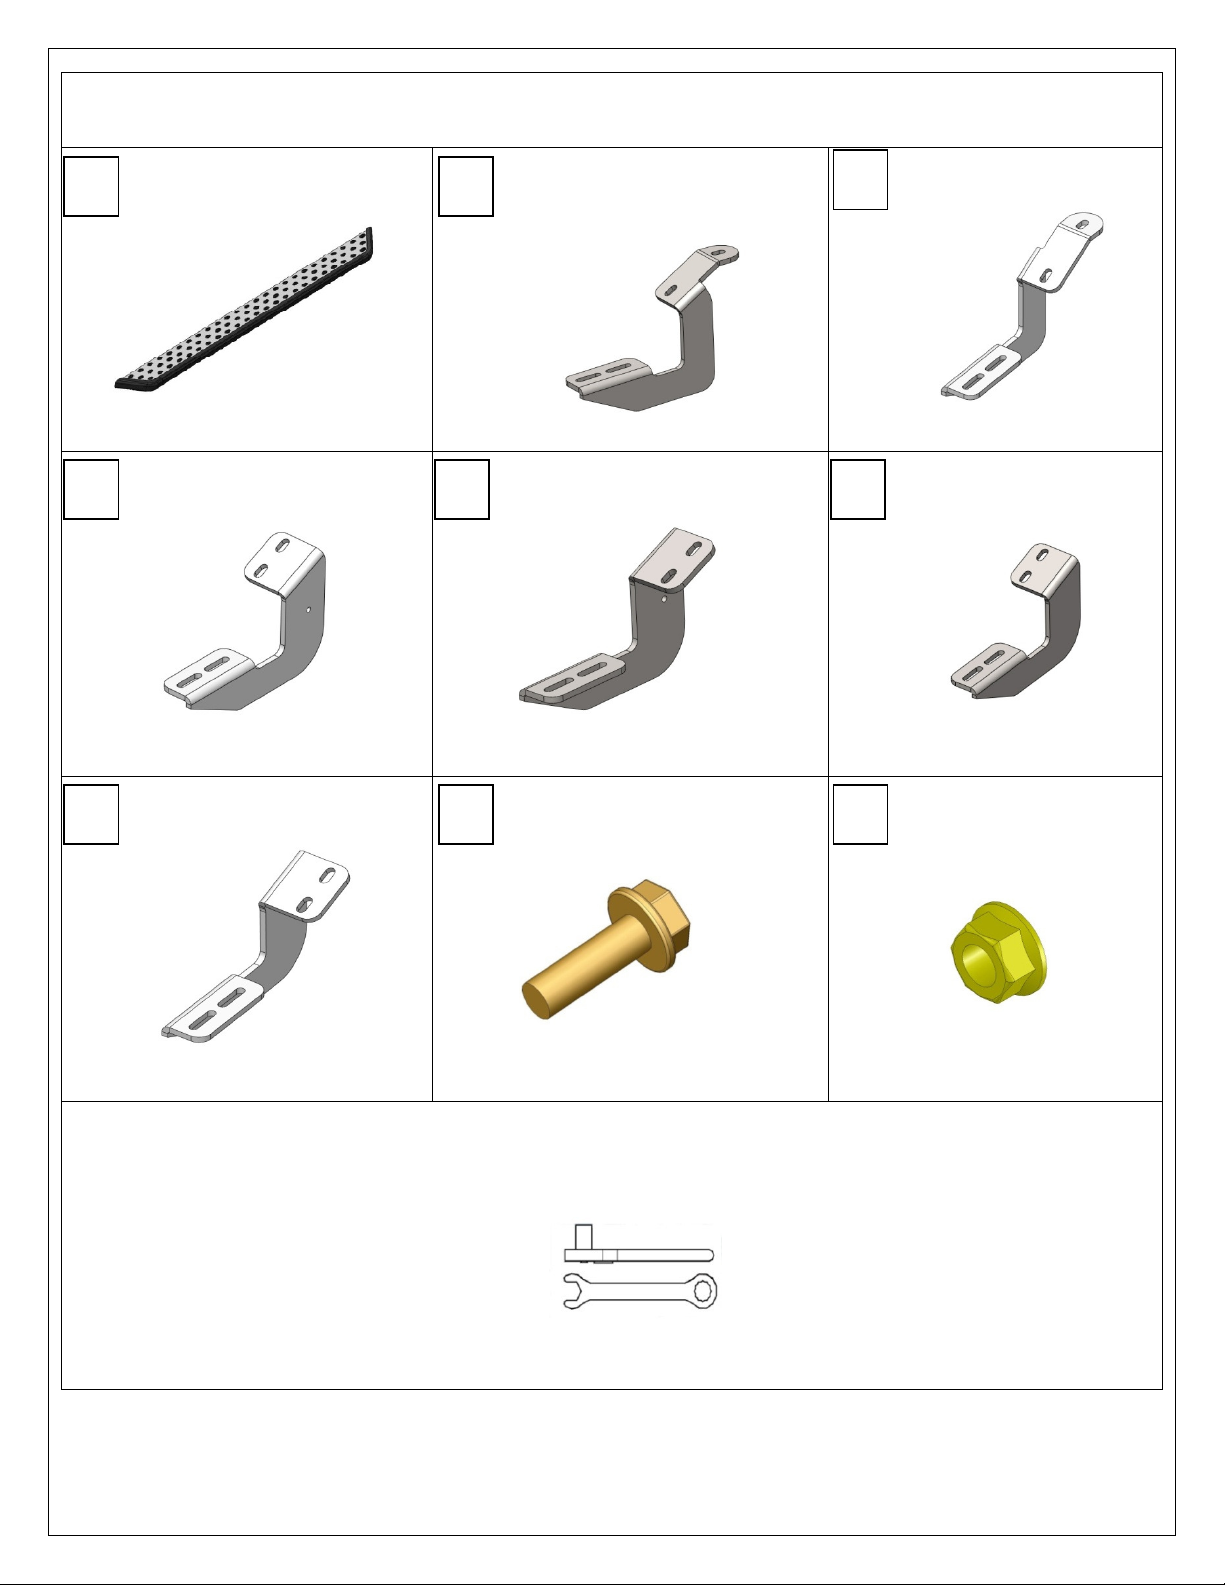
NXt Running Board
A
B
C
B 1827LP
D
B 1904LP
E
B 1904RP
F
B 1905LP
H
I
G
B 1905RP
Ratchet / Wrench
(2007 – Current) Tundra Pickup
Various
NXt Running Board
Passenger Side Bracket
X2
Rocker Panel
B 1660P
B 1903LP
Passenger Side Bracket
X1
Driver Side Bracket
B 1903RP
Passenger Side Bracket
X1
B1904LP
Passenger Side Bracket
Tools Required
X1
X1
PN 525
8mm X 25mm Flange
Head Bolt
13mm
X1
8mm Hex Flange
X1
X12 X12
PN 526
Page 3 of 6
DZ 16365 12.08.10
Page 4
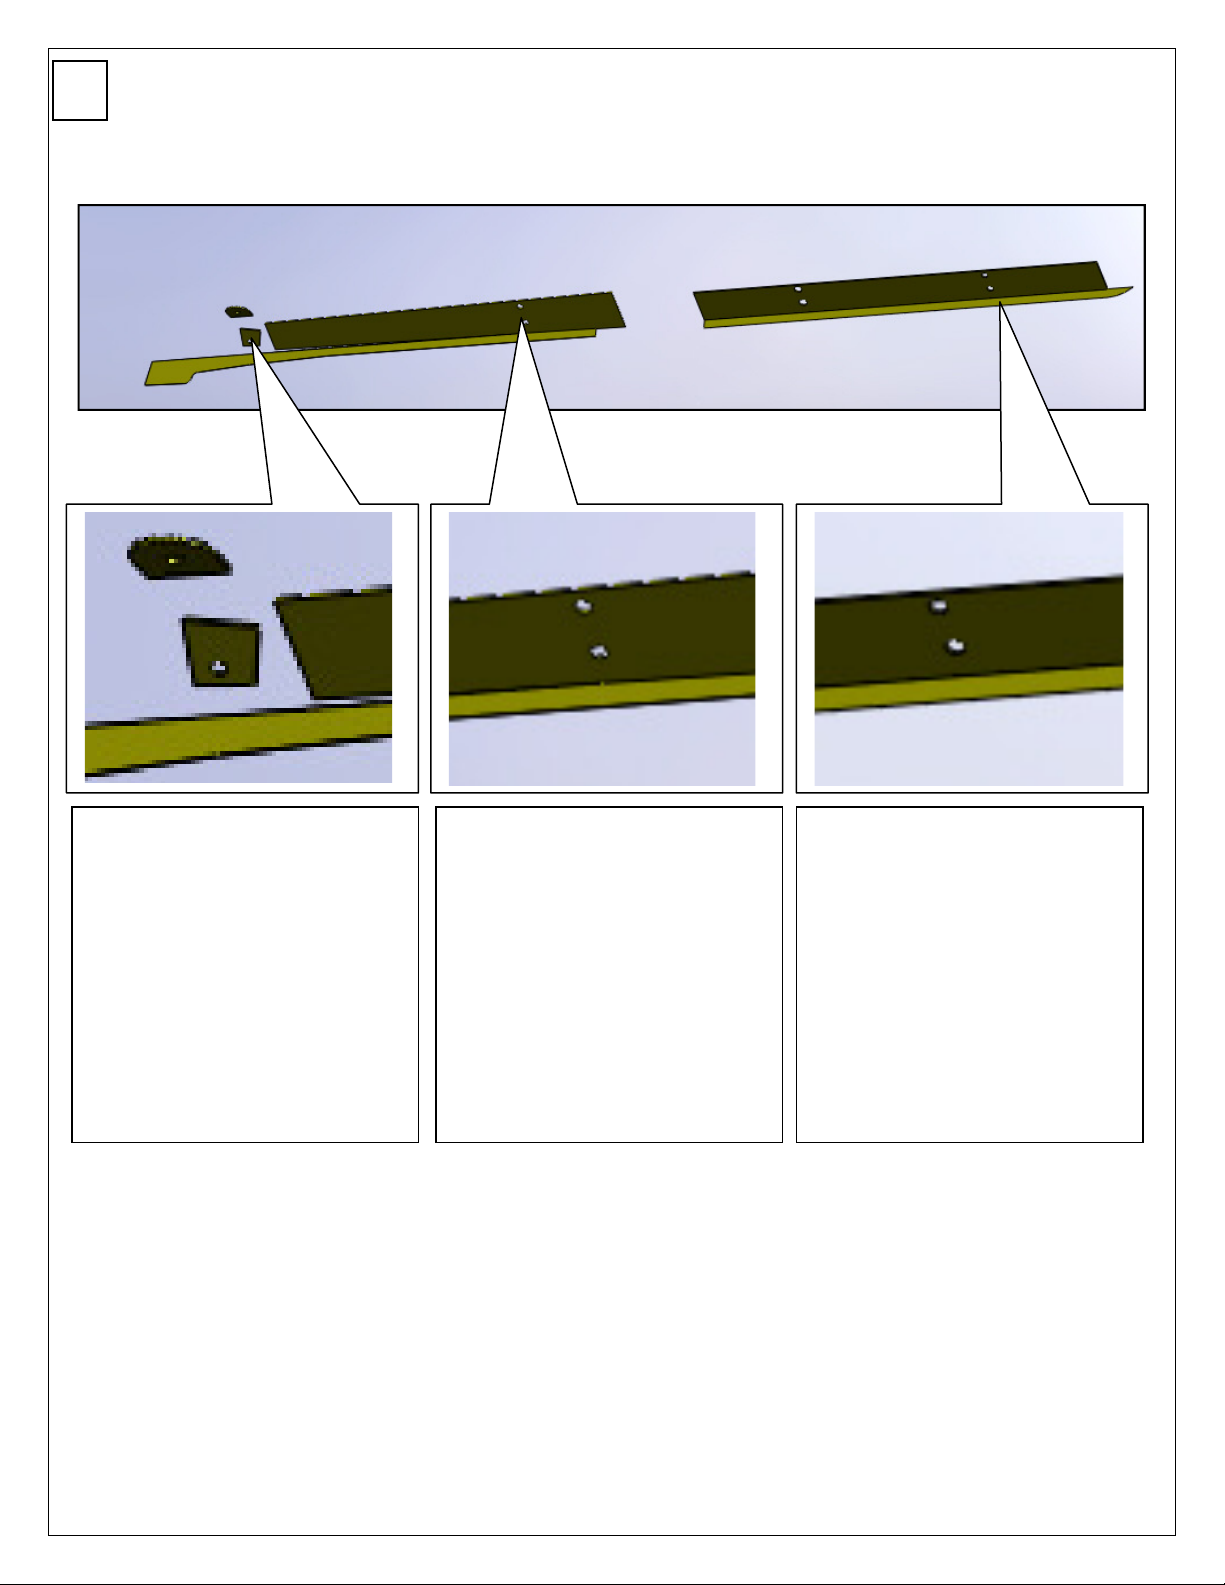
1
NOTE: The vehicle will have preset
NOTE: The vehicle will have preset
NOTE: The vehicle will have preset
Passenger Side Shown
Front Rear
threads in this location for
mounting the running board
bracket.
A
threads in this location for
mounting the running board
bracket.
threads in this location for
mounting the running board
bracket.
.
NOTE: FOR STANDARD CAB APPLICATIONS, THE MIDDLE BRACES (D & E) WILL BE USED
AS THE REAR BRACE. THE STANDARD CAB WILL ONLY USE 2 BRACES PER SIDE,
THEREFORE BRACES F &G MAY BE DISCARDED.
Page 4 of 6
DZ 16365 12.08.10
Page 5

2
H H
H H
13mm wrench
E
NOTE: THE MIDDLE BRACKET
C
H
CONTAINS AN IDICATIOR HOLE TO
DIFERENTIATE FROM REAR
BRACKET.
G
H
Page 5 of 6
DZ 16365 12.08.10
Page 6

3
I I
I
4
13mm wrench
A
I
REPEAT STEPS 1-3 FOR DRIVER SIDE USING BRACKETS B, D, AND F.
I
I
Page 6 of 6
DZ 16365 12.08.10
Page 7

PASSENGER FRONT
DRIVER FRONT
BRACE
BRACE
*** TUBES SOLD SEPARATELY
VARIOUS
X2
B 1903RP
X1
B 1903LP
X1
PASSENGER MIDDLE
DRIVER MIDDLE
PASSENGER REAR
DRIVER REAR
BRACE
6" OVAL SIDE STEP INSTALLATION
TOYOTA TUNDRA 2009-CURRENT
A B C
B 1904RP
X1
B 1904LP
X1
B 1905RP
X1
B 1905LP
X1
FROM TUBE
X8
FROM TUBE
X8
PN 525
X12
BOLT PACK
X12
BOLT PACK
X12
SIDE STEP TUBE
D F
NOTE: THE MIDDLE BRACE NOTE: THE MIDDLE BRACE
HAS A HOLE TO IDENTIFY IT. HAS A HOLE TO IDENTIFY IT.
H I J
8mm X 25mm
FLANGE HEAD BOLT
BRACE
8mm U-NUT 8mm X 20mm
BRACE
FLANGE HEAD BOLT
GE
BRACE
1 of 5 4/6/2013
Page 8

WRENCH/RATCHET
13mm
Locate the brace mounting location under the rocker panel.
The passenger side of the crew cab is shown. The front of the vehicle is to the left in the picture.
TOOLS REQUIRED
The regular cab will only have 2 mounting location. It will use the front and middle brace.
For regular cab installations, the rear brace can be discarded.
Your vehicle may already have bolts in the mounting locations. If it does, remove and discard these bolts.
1
2 of 5 4/6/2013
Page 9

Attach the brackets as shown below using the long 8mm bolt [H].
2
Tighten bolts with a 13mm Socket or wrench.
3 of 5 4/6/2013
Page 10

Once the brackets are in place, set the tube on the braces and adjust as necessary front to back.
Look under the tube to determine which sets of slots
will be used to attach the tube to the braces.
The crew cab passenger tube is shown.
The front of the vehicle is to the left in the picture.
3
Remove the tube and install the 8mm U-nuts [I] that were supplied with the tubes into the
slots identified in the previous step. Use 2 U-nuts per brace location.
4
4 of 5 4/6/2013
Page 11

Set the tube back on the brackets and slide the U-nuts in the tube slots so that they align
with the mounting slots in the braces. Repeat at all mounting locations.
Attach the tube to the braces using the 8mm x 20mm bolts [J] that were supplied
with the tube step. Tighten bolts with a 13mm wrench or socket. Repeat at all mounting locations.
5
Make sure all bolts are tightened. Repeat steps for other side.
5 of 5 4/6/2013
 Loading...