


ARIA
INSTALLATION INSTRUCTIONS
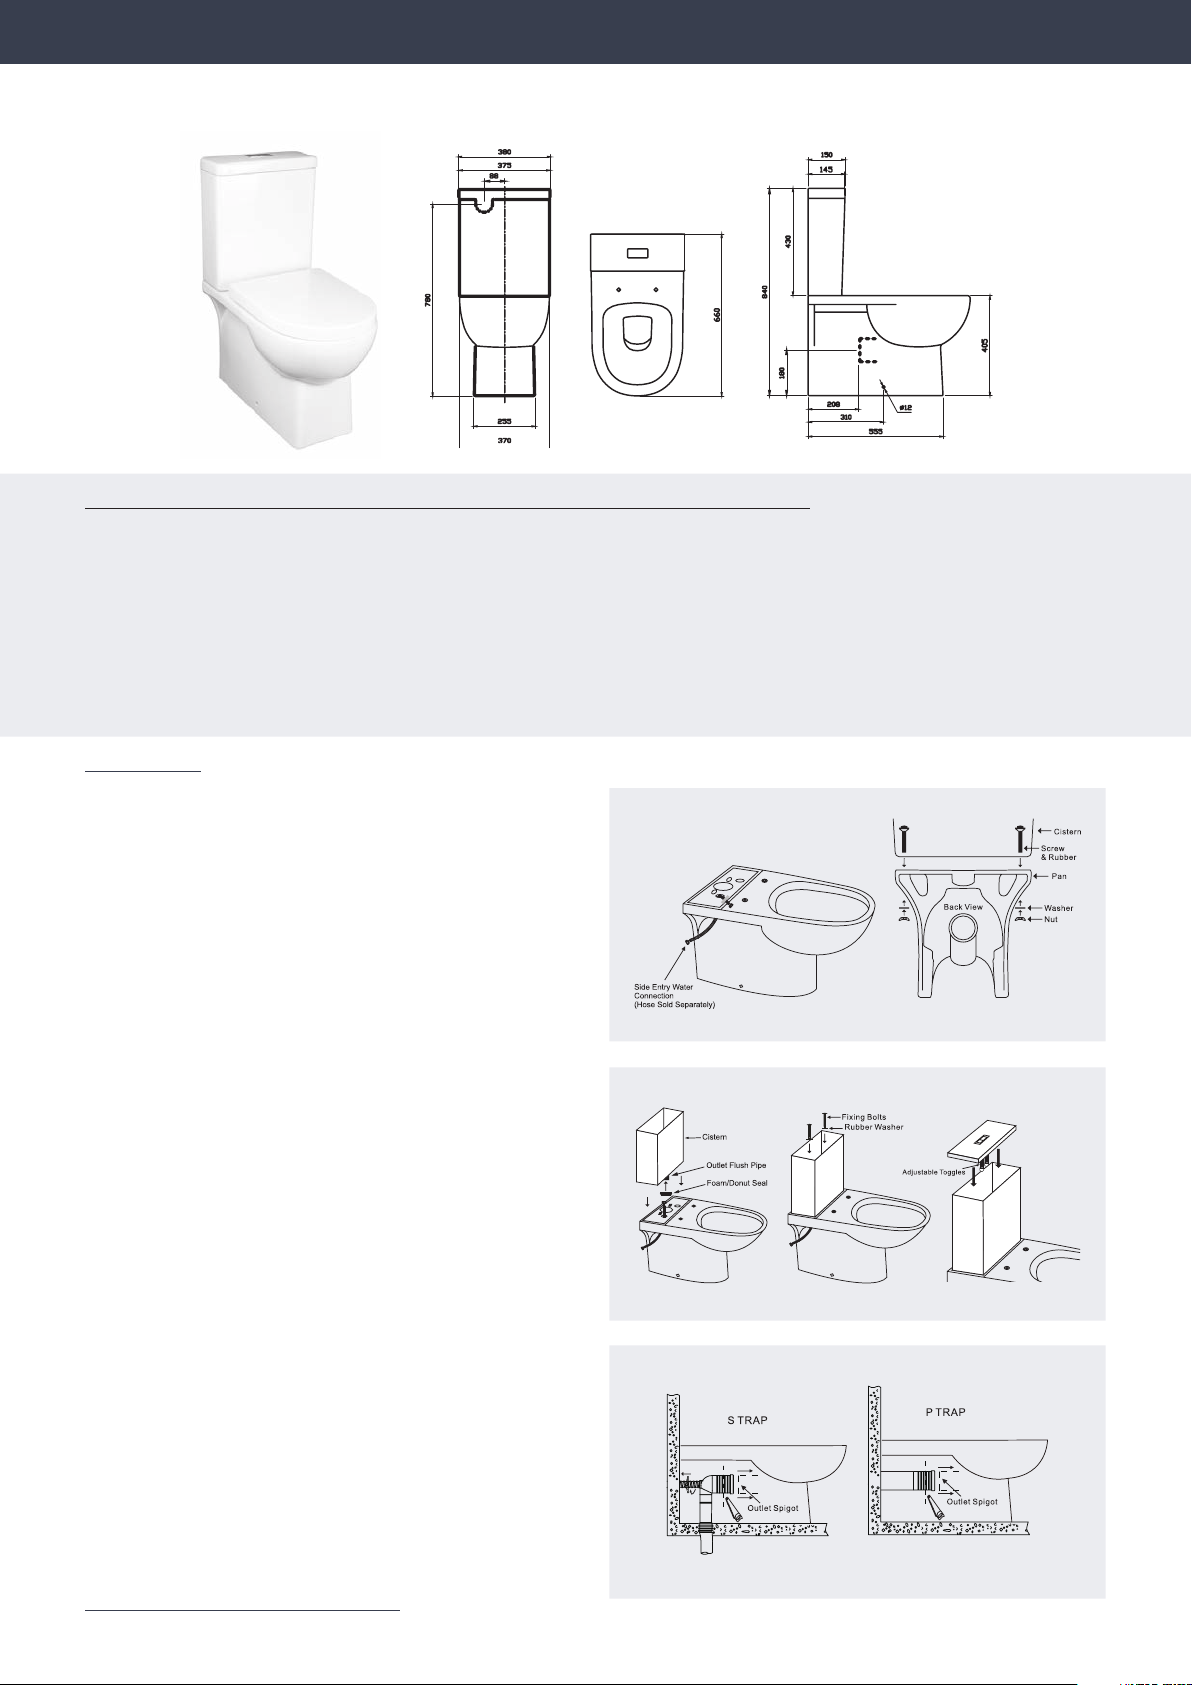
ARIA
BACK TO WALL UNIVERSAL TOILET SUITE
PRE INSTALLATION CHECKS - THIS PRODUCT MUST BE INSTALLED BY A LICENSED PLUMBER
1. Check that the toilet is compatible with your current set out requirements. This Overture has a set out distance of 90-180mm
for S Trap and 180mm for P Trap.
2. This toilet comes with an S Trap Vario Bend. P Trap connection IS NOT PROVIDED.
3. Before installing your new toilet please make sure you have received all items and that they are undamaged. Any damage
claims after installation WILL NOT BE ACCEPTED.
4. Check that the floor and wall are level and perpendicular.
5. This product is configured for bottom/side entry. For rear entry you need to purchase a rear entry kit (sold separately).
ARTSWFS
INSTALLATION
1. Feed a flexible connecting hose (sold separately) through
the side entry and through the top of the Pan.
2. Floor Fixing Kit - measure and install the floor fixing kit
(see instructions in kit). DO NOT INSTALL the external locking
SS screw at this stage.
3. Ensure the Foam/Donut Seal is placed over the Outlet Flush
Pipe on the base of the Cistern.
4. Connect the Water Supply Hose to the base of the Cistern
Inlet Valve.
5. Connect the Cistern and Pan together and lock into place
using the fixing bolts provided (the outlet flush valve can be
removed to assist with the bolt assembly by turning it anti
clockwise and then lifting it out).
6. Insert the Vario Bend onto the Pan Outlet Spigot.
If trimming is required work out the measurement and
mark the cutting line.
7. Check the measurements and then cut the Vario Bend to
the correct length.
8. Place Rubber Seal and Cover over the front of the Vario
Bend and install, ensure that the sewer connection is
connected correctly and a good seal has been achieved.
9. Install the Flush Buttons onto the Cistern lid.
NOTE NOTE -
offset collars and slab adapters.
Before fixing the toilet to the floor, connect the water
supply and ensure that the toilet is working correctly by
doing several flush tests, checking for leaks. Once you are
confident that there are no leaks and the toilet is working
correctly install the Pan into the Floor Fixing Kit provided
and apply a bead of Wet Area Silicone around the base of
the Pan (you will need to allow for the recommended drying
time). Install the seat after the Silicone has dried.
Refer to Seat installation instructions.
Button toggles can be adjusted
This toilet is not suitable to be used with some
 Loading...