

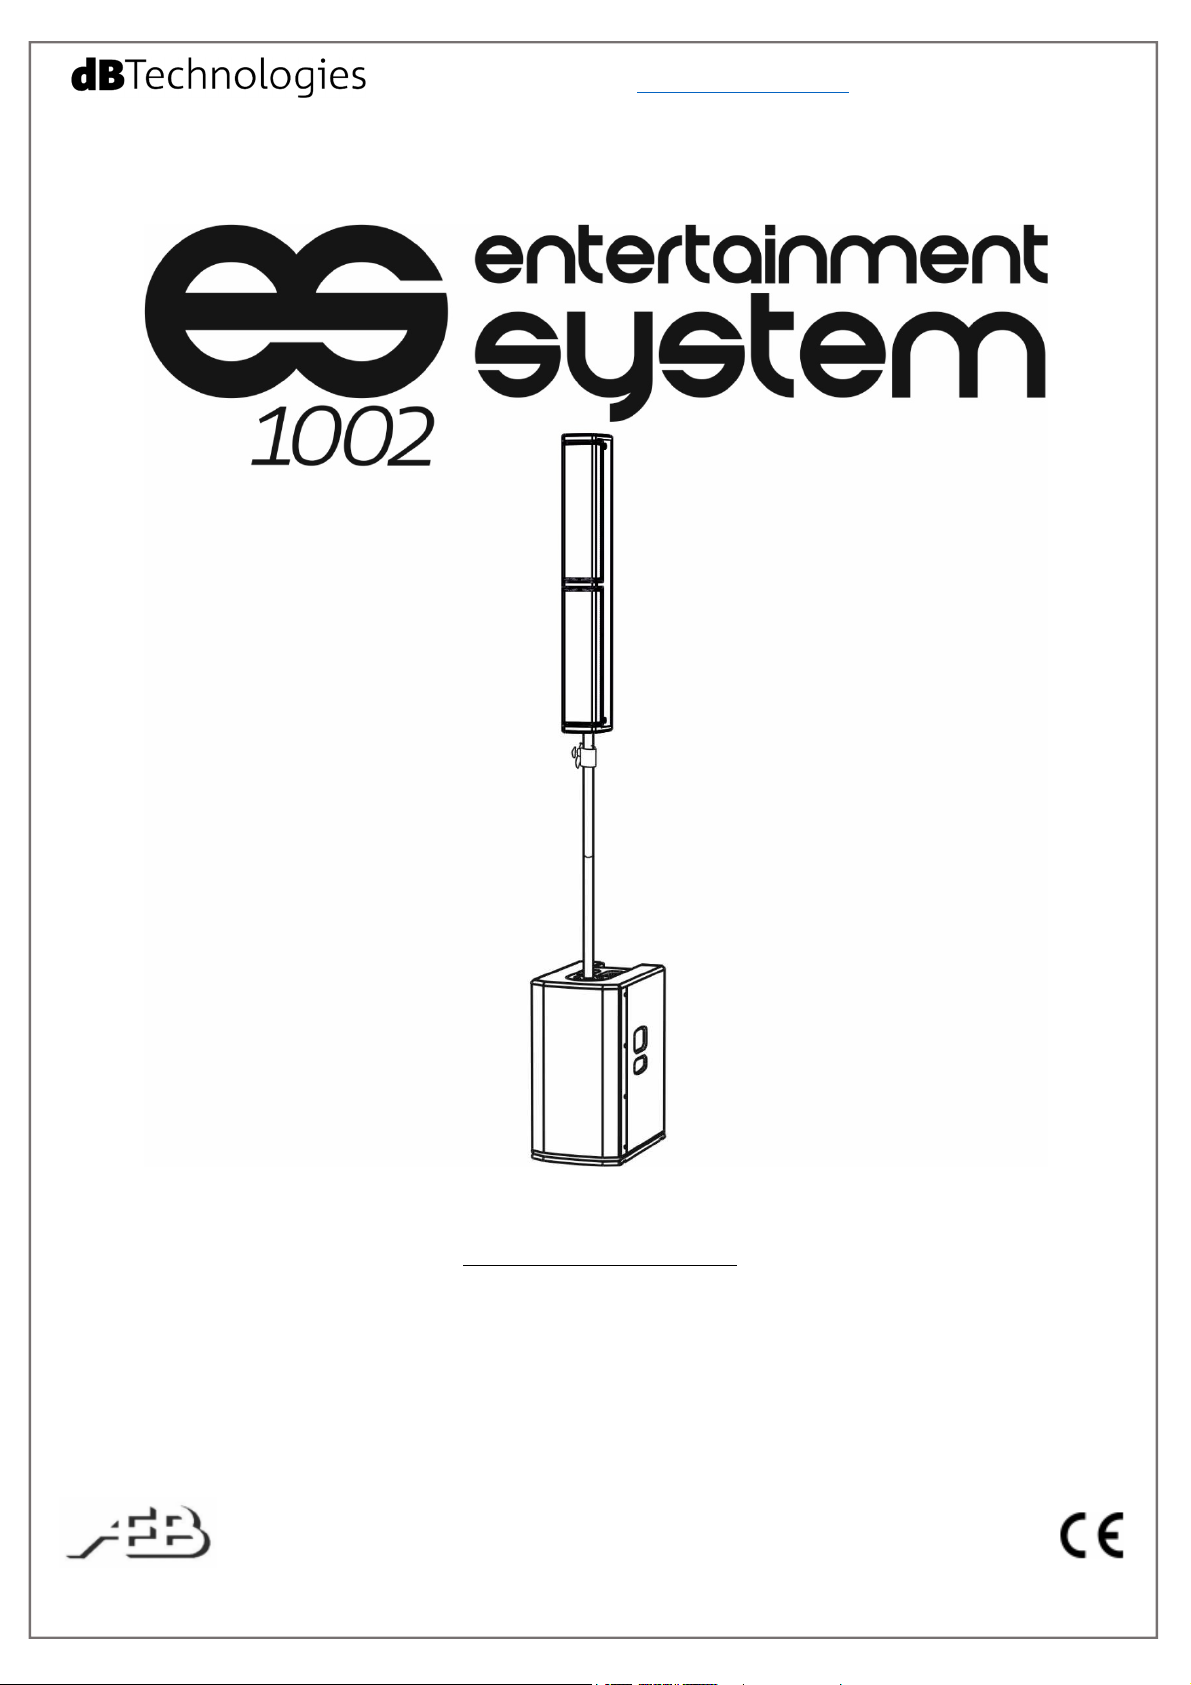
Page 1
www.dbtechnologies.com info@dbtechnologies-aeb.com
Quick start user manual
Section 1
The warnings in this manual must be observed together with the "USER MANUAL - Section 2".
Le avvertenze nel presente manuale devono essere osservate congiuntamente al “MANUALE D’USO - Sezione2”.
Die Warnungen in diesem Handbuch müssen in Verbindung mit der "BEDIENUNGSANLEITUNG - Abschnitt 2" beobachtet
werden”.
Les avertissements specifiés dans ce manuel doivent être respectés ainsi que les "CARACTERISTIQUES TECHNIQUES Section 2"
Las advertencias del presente manual se deben tener en cuenta conjuntamente con las del “MANUAL DEL USUARIO” Sección 2”.
A.E.B. Industriale Srl Via Brodolini, 8 Località Crespellano 40053 VALSAMOGGIA BOLOGNA (ITALIA)
Tel +39 051 969870 Fax +39 051 969725 www.dbtechnologies.com info@dbtechnologies-aeb.com
ES1002 cod. 420120265Q rev.1.0
Page 2
www.dbtechnologies.com info@dbtechnologies-aeb.com
Thank you for choosing a dBTechnologies Product!
The new ES1002 is a powerful and versatile active audio system. It can be easily set up and it comes with one
subwoofer (2 x 12” woofers) and one column top (8 x 4” mid-woofers, with Logarithmic Curved Column Array
technology). The powerful class-D DIGIPRO® G3 amplifier can handle up to 900 W RMS and the I/O section allows
connecting up to 2 inputs (1 XLR mono and 1 RCA stereo connections with independent volume controls). The userfriendly control interface helps the user to tune precisely the system in different scenarios, thanks to 8 DSP presets.
Main cabling accessories are also included.
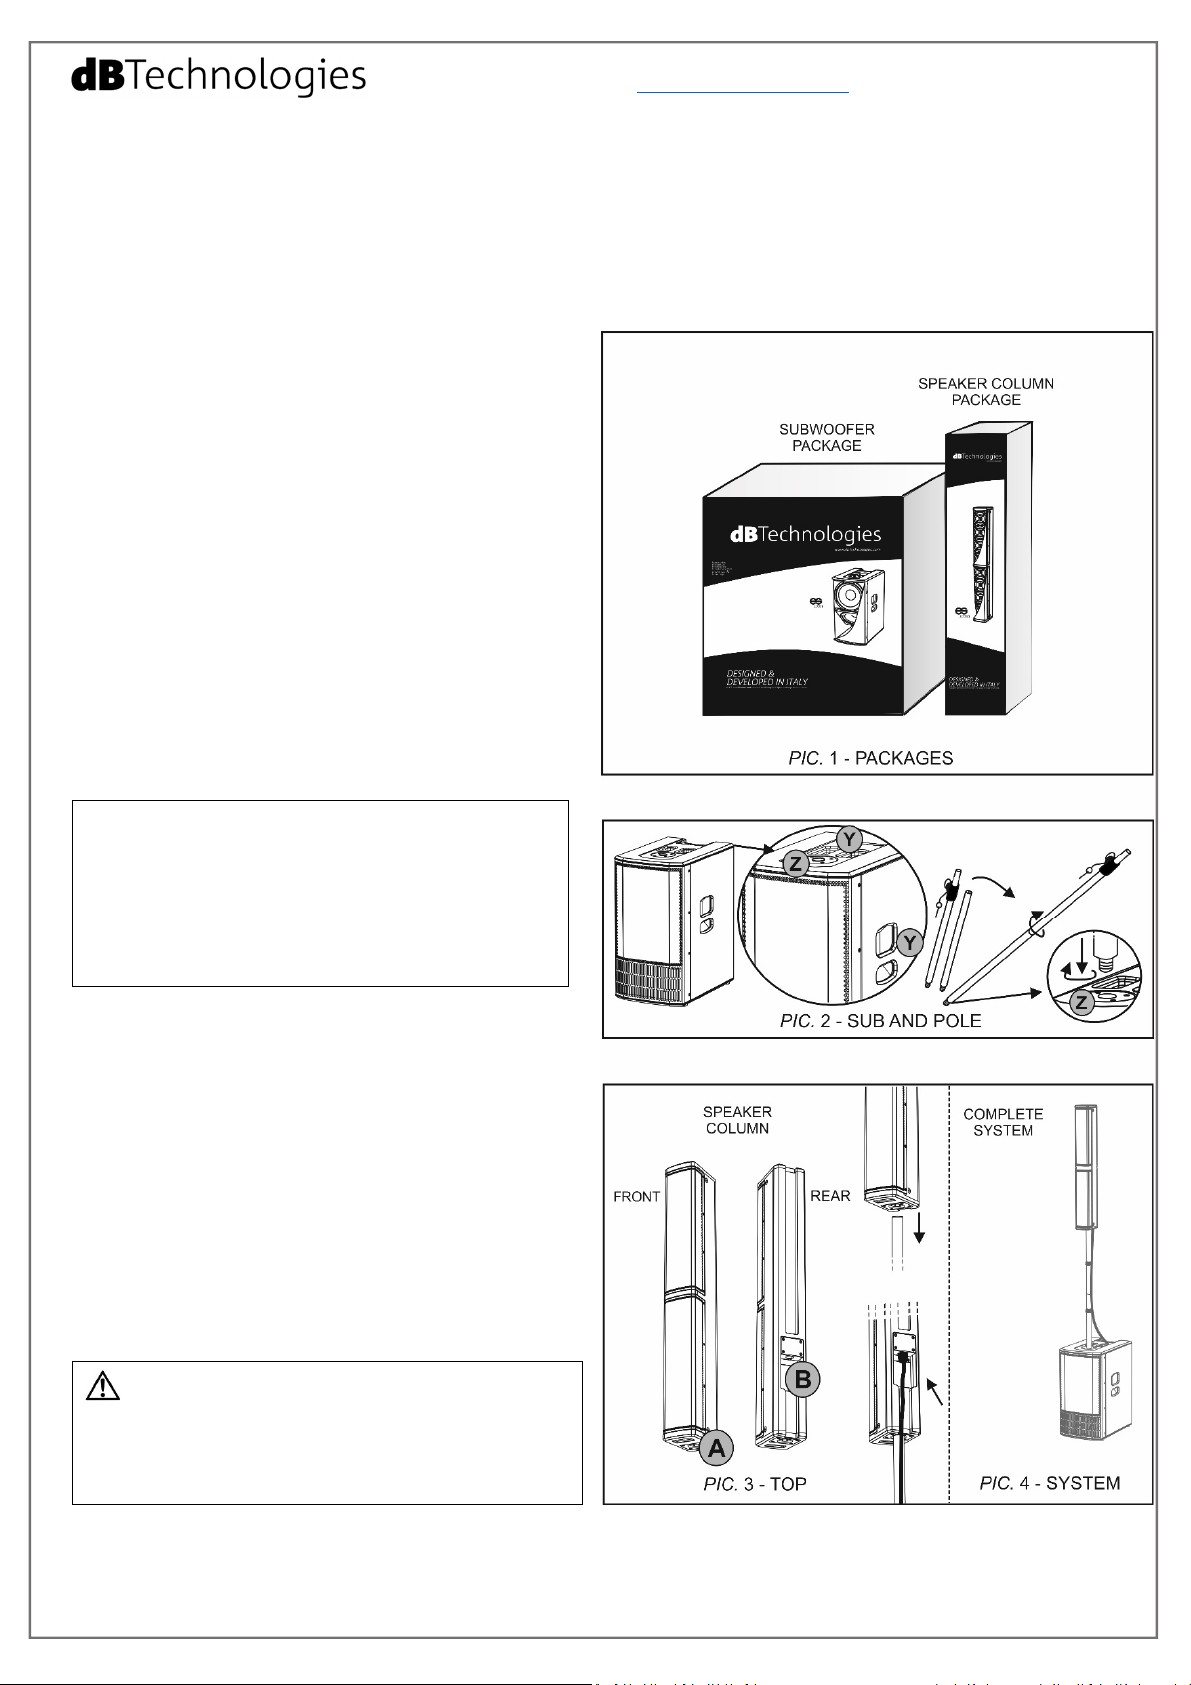
1) Unpacking
The packages in which the system is boxed are two
(see picture 1).
The first package contains:
-No. 1 subwoofer ES1002S SUB, with 3 handles [Y] one
on the top and two on the sides) and one M20
threaded hole [Z] on the top for pole-mounting (see
picture 2).
-No. 1 telescopic pole. It is composed of 2 screw-on
pieces, it has to be mounted on the top side of the
ES1203SUB ([Z] threaded hole) (picture 2).
-No. 1 audio cable, with speak-on connectors, which
is 2.5 m (8.2 feet) long.
-No. 1 mains cable, with VDE connector.
-No. 2 cable clips
-This quick-start and warranty documentation
-No. 1 100-120V~ 50-60Hz fuse
WARNING
The speaker is supplied with a mounted fuse for operation
within the 220-240V~ range. If you need to operate in the
110-120V~ voltage range:
1. Disconnect all connections, including the power supply.
2. Wait for 5 minutes.
3. Replace the fuse with the one provided in the package
for the 100-120V~ range
The second package contains:
-No. 1 column speaker.
It has one 36 mm hole for pole-mounting [A] in the
bottom side and one [B] rear speak-on connector
(picture 3).
2) Mount the system
- Assemble the telescopic pole (screwing the two
pieces together), and screw it in the [Z] threaded hole
of subwoofer with right-handed movement.
- Insert the [A] hole of the speaker column in the
telescopic pole and adjust the final height (picture 4).
WARNING
- YOU MUST ANCHOR THE SYSTEM TO THE GROUND WITH
STRAPS AND SUITABLE MECHANICAL MEANS (NOT SUPPLIED).
-NEVER USE THE HANDLES TO SUSPEND THE SYSTEM!
ES1002 cod. 420120265Q rev.1.0
Page 3

USE THE SUPPLIED SPEAKER COLUMN ONLY WITH
www.dbtechnologies.com info@dbtechnologies-aeb.com
3) I/O and Control panel
In the rear side of ES1002S SUB the user can find the
control panel and the mains section of the system
(pictures 5, 6):
1 - MIC/LINE INPUT (XLR or TRS connector)
2 – VOLUME MASTER CONTROL
3 – LINE/MIC SWITCH
4 – LINK OUTPUT (XLR connector)
5 – RCA STEREO INPUT (L, R)
6 – AUX VOLUME
7 – STATUS LED (Limiter, ON Signal)
8 – DSP PRESET ROTARY CONTROL
9 - TOP OUTPUT
10 – VDE MAINS INPUT (AUTO-RANGE)
11 – ON/OFF POWER SWITCH
12 – MAINS FUSE
4) ES1002 cabling
- Link the SPEAKER COLUMN connector [B] to the TOP
OUTPUT [9] of the ES1002S SUB, using the supplied
speak-on cable. Mount the two cable clips to the pole
to organize the cabling.
WARNING
-USE ONLY ES1002 SUPPLIED CABLE.
ES1002S SUBWOOFER
- MAKE SURE THAT THE SYSTEM IS SECURELY INSTALLED IN A
STABLE POSITION TO AVOID ANY INJURIES OR DAMAGES TO
PERSONS OR PROPERTIES.
-
5) Setup, turn on and I/O settings
- Connect the desired inputs (with proper cables and
connectors), using [1] XLR and [5] RCA inputs.
- If needed, link the output [4] to the input of a second
system or to a stage monitor (as example), with a
proper cable (XLR connectors).
Choose the right DSP PRESET, using the rotary [8]:
FLAT - Designed specifically where a flat response is
required. In this case the output signal is coherent to
the input one.
BASS BOOST – Useful to improve the bass presence
BASS REDUCTION - Designed for the use in room with
reverberation issues
PLAYBACK – Preset suitable to use music from MP3
players, CDs or other sources with emphasis on high
frequencies.
SPEECH - Designed to enhance speech intelligibility.
This preset emphasizes middle and high frequencies.
LONG THROW – The medium-high frequencies are
enhanced, to get the longest propagation of the sound.
HPF 80 Hz – Apply a high pass filter with 80 Hz cutoff
frequency (the subwoofer presence is partially
limited)
HPF 120 Hz - Apply a high pass filter with 120 Hz cutoff
frequency (the subwoofer presence is strongly
limited)
- Insert the VDE connector of the supplied mains cable
in MAINS INPUT [10], connect the plug to the power,
and turn on the POWER switch [11].
- The ON Signal LED start blinking, signaling the
presence of audio signal (when applied). Adjust the
volume controls [2], [6].
Check the complete user manual on www.dbtechnologies.com
for further information about the system and available
accessories.
Scarica il manuale completo da www.dbtechnologies.com per
ogni ulteriore informazione sul sistema e sugli accessori
disponibili.
Für weitere Informationen und verfügbares Zubehör lesen sie
bitte die vollständige Bedienungsanleitung unter
www.dbtechnologies.com.
Vérifiez le manuel de l'utilisateur complet sur
www.dbtechnologies.com pour des informations
complémentaires du système et des accessoires disponibles.
Compruebe el manual de usuario completo sobre
www.dbtechnologies.com para la información adicional sobre el
sistema y accesorios disponibles.
ES1002 cod. 420120265Q rev.1.0
Page 4

Scan with your QR Reader
Download the complete user manual from the site:
www.dbtechnologies.com info@dbtechnologies-aeb.com
Technical Data
Speaker Type: Bi-amped Mono system
Usable Bandwidth [-10 dB]: 43 – 20000 Hz
Frequency Response [-3 dB]: 56 – 18000 Hz
Max SPL (1 m): 130,7 dB
MF-HF mid-woofer: 8 x 4"
MF-HF voice coil: 25 mm
MF-HF type: Neodymium
LF: 2 x 12” (subwoofer)
LF Voice Coil: 64 mm
Crossover frequency: 160 Hz (24 dB/oct)
Horizontal dispersion: 97°
Vertical dispersion: 60° (asymmetrical: +20°/-40°)
Amplifier
Amp Technology: DIGIPRO® G3
Amp Class: Class-D
RMS Power: 900 W
Operating voltage:
220-240V~ (50-60 Hz) or 100-120V~ (50-60 Hz)
Processor and user interface
Controller: 24 bit - 48 kHz
Limiter: Peak, Thermal, RMS
Controls: DSP rotary encoder, volume controls,
MIC/LINE switch
Input / Output
Mains connections: VDE
Signal Input: (Balanced/Unbalanced) 1 x Combo IN
(MIC/LINE) 1 x RCA (stereo)
Signal Out: SPEAKON out to ES1002 TOP, (Balanced) 1x
XLR OUT (LINK)
Mechanics
Housing: Wooden boxes
Grille: Full metal grille
Pole Mount: Yes, 36 mm (M20 threaded hole)
Handles: 3 (subwoofer, 2 on sides 1 on top)
Width [sub/ top]: 360 mm (14.17 in) / 110 mm (4.33 in)
Height [sub/ top]: 680 mm (26.77 in) / 905 mm (35,63 in)
Depth [sub/ top]: 545 mm (21.46 in) / 160 mm (6.30 in)
Weight [sub/ top]: 29.3 kg (64.59 lbs) / 5.8 kg (12.79 lbs)
App to download the
complete User Manual
www.dbtechnologies.com/EN/Downloads.aspx
EMI CLASSIFICATION
According to the standards EN 55103 this equipment is designed and suitable to operate in E3 (or lower E2, E1) Electromagnetic environments.
FCC CLASS B STATEMENT ACCORDING TO TITLE 47, PART 15, SUBPART B, §15.105
This equipment has been tested and found to comply with the limits for a Class B digital device, pursuant to part 15 of the FCC Rules.
These limits are designed to provide reasonable protection against harmful interference in a residential installation.
This equipment generates, uses and can radiate radio frequency energy and, if not installed and used in accordance with the instructions, may
cause harmful interference to radio communications.
However, there is no guarantee that interference will not occur in a particular installation. If this equipment does cause harmful interference
to radio or television reception, which can be determined by turning the equipment off and on, the user is encouraged to try to correct the
interference by one or more of the following measures:
1. Reorient or relocate the receiving antenna.
2. Increase the separation between the equipment and receiver.
3. Connect the equipment into an outlet on a circuit different from that to which the receiver is connected.
4. Consult the dealer or an experienced radio/TV technician for help.
Changes or modifications not expressly approved by the party responsible for compliance could void the user's authority to operate the
equipment.
WARNING: Make sure that the loudspeaker is securely installed in a stable position to avoid any injuries or damages to persons or properties.
For safety reasons do not place one loudspeaker on top of another without proper fastening systems. Before using the system check all the
components for damages, deformations, missing or damaged parts that may compromise safety during installation. If you use the loudspeakers
outdoor avoid spots exposed to bad weather conditions. Contact dB Technologies for accessories to be used with speakers. dBTechnologies
will not accept any responsibility for damages caused by inappropriate accessories or additional devices.
Features, specification and appearance of products are subject to change without notice.
dBTechnologies reserves the right to make changes or improvements in design or manufacturing without assuming any obligation to change
or improve products previously manufactured.
ES1002 cod. 420120265Q rev.1.0
 Loading...