

Page 1
DRIVERIGHT® STAINLESS STEEL STRAP MOUNTING INSTRUC-
TIONS
(For use with Heavy-Duty DriveRight® Installation Kits)
Assembly Parts:
• Stainless Steel Cable Tie
• Stainless Steel Magnet Mount
• Magnet
• Neoprene Rub ber Strip
Tools Required: To assure that sufficient tension is applied to the stainless steel cable tie to prevent slip ping of the Magnet Holder Assembly, a
tensioning tool must be used.
Two tensioning tools are available:
• The “Screwdriver” type
• The “Squeeze Handle” type
If the “screwdriver type is u s ed, sn ips or cu tte rs will be n eeded to trim the
stainless steel cable tie.
INSTALLATION INSTRUCTIONS
NOTE:Once the end of the cable tie is inserted into the clasp, it cannot be removed. Do
this only when you are ready.
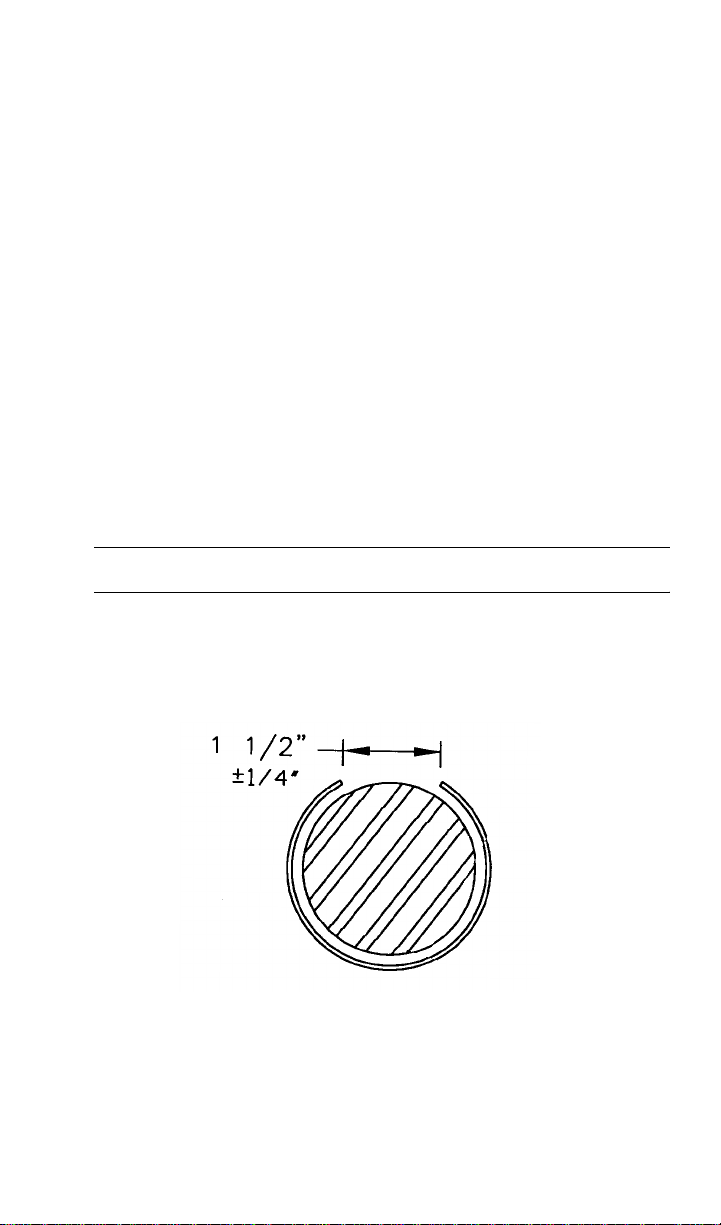
1. Measure the neoprene rubber strip. Wrap it around the drivesh aft at the location where the magnet is to be placed. Cut the rubber strip squarely so that a
1.5” gap is left between the ends. This gap is where the magnet should be
placed.
1
Page 2
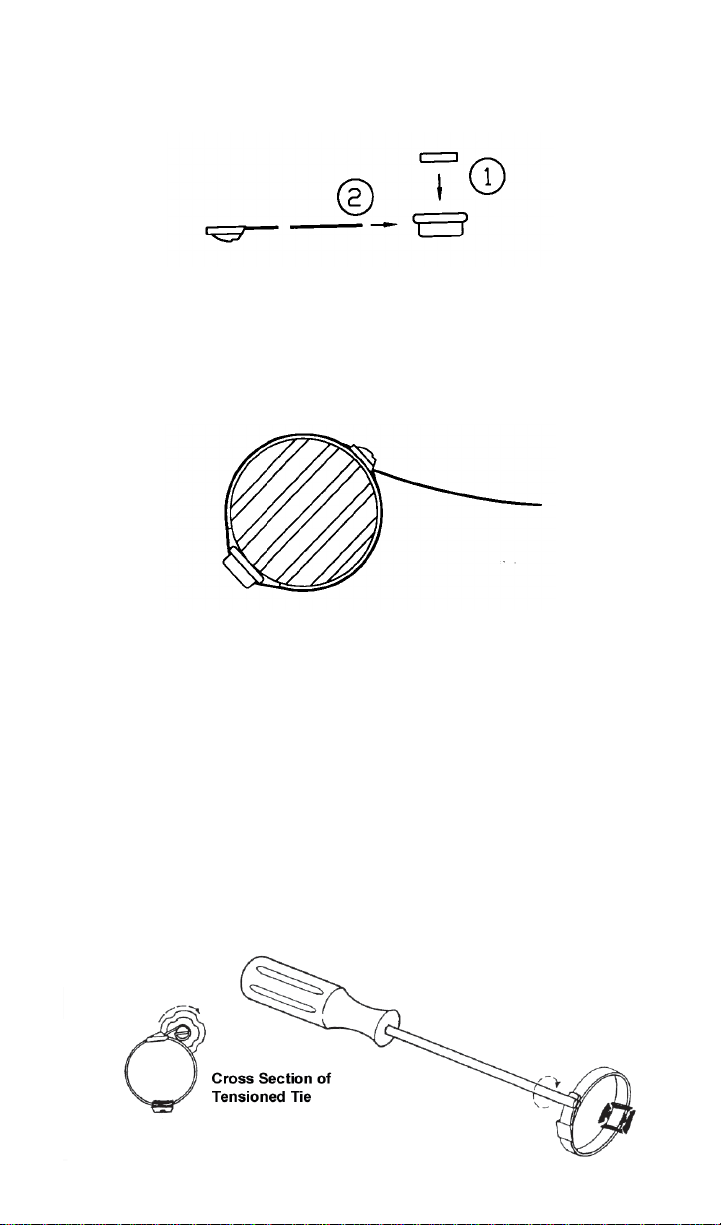
2. Install the magnet into th e holder an d slide the stainless steel cable tie into the
holder, securing the magnet inside. Note th e orientation of the clasp to the
holder.
3. Place the neoprene rubber strip around the driveshaft and loosely wrap the
stainless steel cable t ie ove r the ru bbe r strip, positionin g th e magn et hold er in
the 1.5” gap (the magnet holder should rest directly on the shaft). Insert the
end of the stainless steel cable tie into the clasp and slowly tighten. Position
the clasp 180° from the magnet on the shaft. When everything is properly in
position, tighten the cable tie by hand.
4. Proceed to the tightening instructions for the tightening tool you have.
“SCREWDRIVER” TYPE TIGHTENING TOOL
1. Trim the stainless steel cable tie using cutters or tin snips so that 2” remains
protruding from the clasp.
2. Insert the end of the stainless st eel cable tie into the slot at the end of t he
tightening tool. Grip th e tool by the handle and hold the magnet in place.
Slowly twist the tool to furthe r tighten the ca ble tie. Rotate the tool so tha t the
tool tip goes down toward the clasp and under the remaining tie.
3. When the desired amount of tension has been reached and the magnet is
secure, slide the tool out of the center of the coil. Flatten the rolled coil
against the shaft.
2
Page 3

“SQUEEZE HANDLE” TYPE TIGHTENING TOOL
Slide the installation tool over the stainless steel cable tie as shown and squeeze
the handle to apply te nsion. If the handl e is all the way closed and more te nsion
is needed, release the handle and slide the tool towards the clasp. Again squeeze
the handle until jthe desired tension has been reached. To cut off the end of the
cable tie, hold tension and twist (either clockwise or counterclockwise).
3
Page 4

P/N 07395.058, Rev. C. 2/10/2003
E
Copyright Davis Instruments Corp. 2003 All Rights Reserved.
DriveRight is a registered trademark of Davis Instruments Corp.
3465 Diablo Avenue, Hayward, CA 94545-2778
510-732-9229 • Fax: 510-732-9188
-mail: info@davisnet.com • www.davisnet.com
4
 Loading...