


User Guide:
Open Mesh OM2PV4
Version 1.0
1
Table of Contents |
|
|
1. |
Creating a CloudTrax Network .................................................................................................. |
3 |
2. |
Configuring a CloudTrax network............................................................................................ |
10 |
3. |
Monitoring, Management and Troubleshooting..................................................................... |
16 |
4. |
Additional Resources............................................................................................................... |
18 |
5. |
Product Specifications............................................................................................................. |
19 |
6. |
Appendix A: FCC Statement .................................................................................................... |
20 |
7. |
Appendix B: IC Statement ....................................................................................................... |
21 |
8. |
Appendix C: CE Statements ..................................................................................................... |
22 |

Creating a CloudTrax network
Overview: what we’re doing
This guide is intended to help you set up your first cloud-managed wireless mesh network
with CloudTrax. CloudTrax is a free cloud-based network controller that makes it easy for anyone to build, manage, and monitor wireless networks from anywhere in the world.
This guide will assist you in setting up a new network on the CloudTrax web application. For easier, faster setup, use the CloudTrax for iOS or CloudTrax for Android apps. No matter which version you start with, you can switch between the web and mobile apps seamlessly.
Here’s what’s about to happen:
1.We’ll create a master login on CloudTrax.com that will allow you to build, manage and monitor multiple networks in one place.
2.We’ll create a new network on CloudTrax.
3.We’ll add access points to the network.
4.We’ll physically install the access points.
5.We’ll do some basic network configuration.
This guide is not intended to cover every aspect of CloudTrax. To learn more about planning your network, view the Cloudtrax Network Planning Guide.
What you’ll need
To set up your network, you’ll need the following:
3

1.One or more CloudTrax-compatible wireless devices, such as the OM2P or MR1750.
2.An Internet connection with at least one Ethernet port available on your modem or router, and one Ethernet cable.
3.A computer with a browser pointed to www.cloudtrax.com, or an iOS or Android device running the CloudTrax app.
Terminology
We’ll make this process as easy and nontechnical as possible. Here are a few key words that will help.
Network: A group of computers or devices that can talk to each other (in our case, wirelessly). Gateway: A CloudTrax-compatible router that is connected to the Internet (usually through a DSL, cable, or LAN connection).
Repeater: A CloudTrax-compatible router that is not connected to the Internet that repeats the signals from local computers and other access points to the gateway.
Access point: A generic name for an CloudTrax-compatible router/access point which can be either a Gateway or a Repeater. You may also see these called "Nodes."
All CloudTrax devices configure themselves: they become gateways or repeaters depending on if they are connected to the Internet or not.
Step 1: Create a Master Login
The first time you use CloudTrax, you need to create a Master Login. This account will be your login for all networks you create.
From CloudTrax.com, click the “Create account” link just below the login fields. You’ll see a page similar to the one below.
4
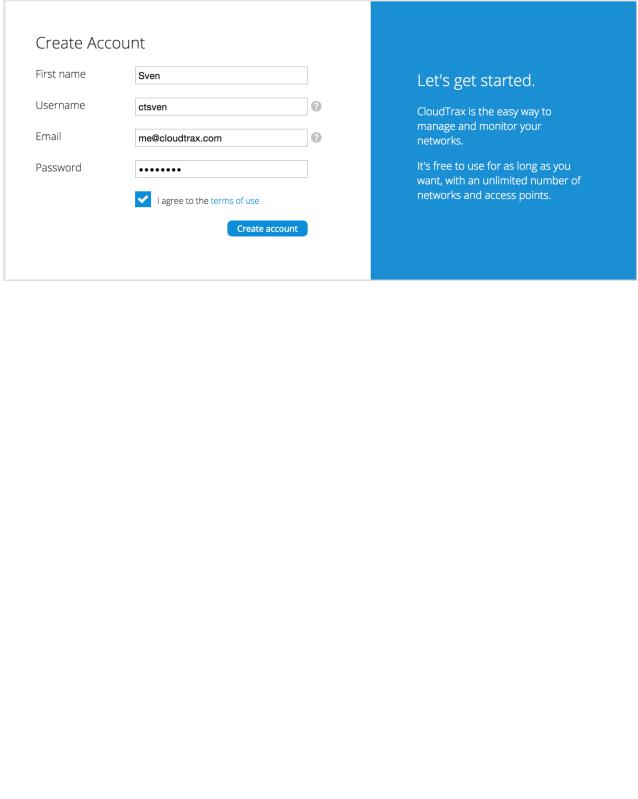
Fill in the following information:
First Name: We’ll use this to address you in email correspondence.
Username: This is your master login you will use to access ALL networks you create. It allows you to login once and edit/view all your networks. It MUST be different from your network name(s) which you will create in a second step. You may want to use your company name here.
Email: You’ll receive an email at this address asking you to verify this master login to continue.
Password: This is your master administrator password. It can be used with the above login name to access all of your networks. Make this password different from the individual network passwords you’ll create later.
When finished, click “Create/Edit” to save your account settings. In a few moments, you’ll receive an email asking you to confirm the account you just created. Just click on the “Verify Account” link to create your new CloudTrax Master Login.
Step 2: Create a new network
You’ll automatically be taken to a page, similar to the one below, to create your first network.
5
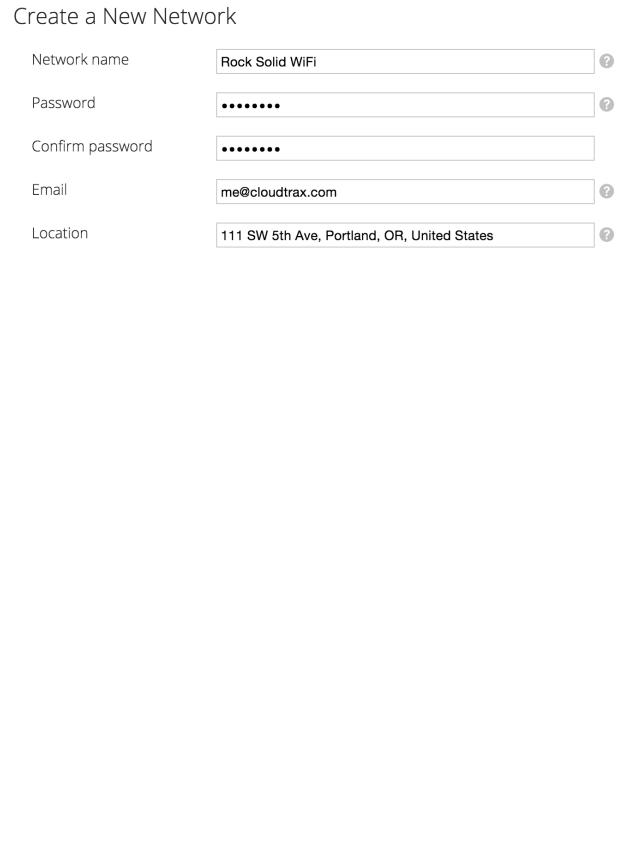
Fill in the following information:
Network name: This is the name you want to give this specific network. You will use this name to make changes to the network, display reports, etc.
Password: This is the password for local administrators and should be different from your master account login. This limits access and prevents users from making changes to your network.
Email: Enter your email address or the address of a local administrator to contact. We will never share this with others.
Network Location: Enter a street address for the first access point. To add access points, you will be shown a map that you click on to place access points. By entering an address here, you will be centered on the correct location for your network.
Email for Notifications: Enter the email addresses, separated by spaces, for all people you’d like to receive “outage” notifications. These are sent hourly.
When finished, click “Create” to save your new network settings.
Step 3: Add access points to your network
It’s time to let CloudTrax know which access points you want to include in the network. Adding them to CloudTrax will allow you to manage and monitor the access points from anywhere.
Navigate to the Manage > Access Points screen.
6

There are three options to add access points to your network: click the "Add New" button to add access points one at a time by clicking on a map, or use the down arrow to the right of that to add access points in bulk.
If you add access points the default way, you’ll be taken to the Map tab of the Access Points page. A Google map, centered on the address you entered when you created the network, will show a popup to enter your first access point. You can often (depending on location) click the “Satellite” view button and zoom in for a closer look.
Fill in the following information:
Name: Enter a name for this access point. This name is used to reference its location and will be displayed in reports. It does not affect users.
MAC address: A MAC address is a sequence of 12 numbers and the letters A-F often separated by colons (Eg: 00:02:6F:8A:B2:6E). This can be found on a label on the bottom of the router and on the side of the product box.
7
 Loading...