

Page 1
1
Page 2

Table of Contents
FCC COMPLIANCE STATEMENT ............................................................ 5
WARNINGS AND PRECAUTIONS .......................................................... 5
WARRANTY ......................................................................................... 6
TANDARD WARRANTY ................................................................................ 6
S
T
WO YEAR WARRANTY ................................................................................ 6
DISPOSAL ............................................................................................ 7
CHAPTER 1 PRODUCT OVERVIEW...................................................... 8
1.1 FEATURES ....................................................................................... 8
CHAPTER 2 CONNECTIONS AND CONTROLS ...................................... 9
2.1 REAR PANEL.................................................................................... 9
2.2 F
2.3 LED
CHAPTER 3 OSD MENU ................................................................... 17
RONT PANEL ................................................................................ 11
INDICATOR ............................................................................. 15
3.1 LANGUAGE ................................................................................... 18
3.2 DISPLAY MODE.............................................................................. 18
Real-Time Mode ............................................................................... 19
Standard Mode................................................................................. 19
3.3 DATE AND TIME ............................................................................. 19
Date Format ..................................................................................... 20
Time Zone ......................................................................................... 20
Time Setup ........................................................................................ 20
Daylight Saving Time ........................................................................ 21
3.4 DISK MANAGEMENT ....................................................................... 21
USB Disk Formatting ........................................................................ 23
3.5 A/V MANAGEMENT ....................................................................... 26
2
Page 3

A/V Pass Through ............................................................................. 27
Color Range ...................................................................................... 27
3.6 RECORDING / SNAPSHOT ................................................................. 28
Video Quality .................................................................................... 28
Snapshot Quality .............................................................................. 28
Auto Save ......................................................................................... 29
HDCP Mode ...................................................................................... 29
3.7 W
ATERMARK ................................................................................ 30
Watermark Type .............................................................................. 30
Position ............................................................................................. 31
Display Scale ..................................................................................... 31
3.8 T
IMER RECORDING ......................................................................... 32
Mode ................................................................................................ 32
Recording Time ................................................................................. 33
3.9 F
3.10 R
3.11 P
IRMWARE UPGRADE ..................................................................... 33
ESTORE TO FACTORY DEFAULT ........................................................ 34
RODUCT INFORMATION ................................................................. 35
Name your own HDR-1 ..................................................................... 35
CHAPTER 4 BASIC OPERATION ........................................................ 37
4.1 R
ECORD ....................................................................................... 37
Instant Recording during Gameplay ................................................ 37
Pause and Resume Recording .......................................................... 37
4.2 CAPTURE ...................................................................................... 38
Quick Snapshot during Gameplay .................................................... 38
4.3 INSTANT PLAYBACK ........................................................................ 39
Image Capture during Video Playback ............................................. 39
4.4 MEDIA STUDIO .............................................................................. 40
Recorded Video Post-Edit ................................................................. 42
Recorded Video Export ..................................................................... 45
3
Page 4

CHAPTER 5 APPENDICES ................................................................. 48
APPENDIX 1 GPI INPUT ............................................................................ 48
APPENDIX 2 RS-232 COMMAND SET .......................................................... 49
PPENDIX 3 FIRMWARE UPDATE ................................................................ 50
A
A
PPENDIX 4 FREQUENTLY-ASKED QUESTIONS ............................................... 51
PPENDIX 5 DIMENSIONS .......................................................................... 55
A
A
PPENDIX 6 SPECIFICATIONS ...................................................................... 56
SERVICE AND SUPPORT ..................................................................... 58
Disclaimer of Product & Services
The information offered in this instruction manual is intended as a guide only. At all times, Datavideo
Technologies will try to give correct, complete and suitable information. However, Datavideo Technologies
cannot exclude that some information in this manual, from time to time, may not be correct or may be
incomplete. This manual may contain typing errors, omissions or incorrect information. Datavideo
Technologies always recommend that you double check the information in this document for accuracy
before making any purchase decision or using the product. Datavideo Technologies is not responsible for any
omissions or errors, or for any subsequent loss or damage caused by using the information contained within
this manual. Further advice on the content of this manual or on the product can be obtained by contacting
your local Datavideo Office or dealer.
4
Page 5

FCC Compliance Statement
This device complies with part 15 of the FCC rules. Operation is subject to the following
two conditions:
(1) This device may not cause harmful interference, and
(2) This device must accept any interference received, including interference that may
cause undesired operation.
Warnings and Precautions
1. Read all of these warnings and save them for later reference.
2. Follow all warnings and instructions marked on this unit.
3. Unplug this unit from the wall outlet before cleaning. Do not use liquid or aerosol
cleaners. Use a damp cloth for cleaning.
4. Do not use this unit in or near water.
5. Do not place this unit on an unstable cart, stand, or table. The unit may fall,
causing serious damage.
6. Slots and openings on the cabinet top, back, and bottom are provided for
ventilation. To ensure safe and reliable operation of this unit, and to protect it
from overheating, do not block or cover these openings. Do not place this unit on a
bed, sofa, rug, or similar surface, as the ventilation openings on the bottom of the
cabinet will be blocked. This unit should never be placed near or over a heat
register or radiator. This unit should not be placed in a built-in installation unless
proper ventilation is provided.
7. This product should only be operated from the type of power source indicated on
the marking label of the AC adapter. If you are not sure of the type of power
available, consult your Datavideo dealer or your local power company.
8. Do not allow anything to rest on the power cord. Do not locate this unit where the
power cord will be walked on, rolled over, or otherwise stressed.
9. If an extension cord must be used with this unit, make sure that the total of the
ampere ratings on the products plugged into the extension cord do not exceed the
extension cord rating.
10. Make sure that the total amperes of all the units that are plugged into a single wall
outlet do not exceed 15 amperes.
11. Never push objects of any kind into this unit through the cabinet ventilation slots,
as they may touch dangerous voltage points or short out parts that could result in
risk of fire or electric shock. Never spill liquid of any kind onto or into this unit.
12. Except as specifically explained elsewhere in this manual, do not attempt to
service this product yourself. Opening or removing covers that are marked “Do Not
Remove” may expose you to dangerous voltage points or other risks, and will void
your warranty. Refer all service issues to qualified service personnel.
5
Page 6

13. Unplug this product from the wall outlet and refer to qualified service personnel
under the following conditions:
a. When the power cord is damaged or frayed;
b. When liquid has spilled into the unit;
c. When the product has been exposed to rain or water;
d. When the product does not operate normally under normal operating
conditions. Adjust only those controls that are covered by the operating
instructions in this manual; improper adjustment of other controls may result
in damage to the unit and may often require extensive work by a qualified
technician to restore the unit to normal operation;
e. When the product has been dropped or the cabinet has been damaged;
f. When the product exhibits a distinct change in performance, indicating a need
for service.
Warranty
Standard Warranty
• Datavideo equipment is guaranteed against any manufacturing defects for one
year from the date of purchase.
• The original purchase invoice or other documentary evidence should be supplied
at the time of any request for repair under warranty.
• Damage caused by accident, misuse, unauthorized repairs, sand, grit or water is
not covered by this warranty.
• All mail or transportation costs including insurance are at the expense of the
owner.
• All other claims of any nature are not covered.
• Cables & batteries are not covered under warranty.
• Warranty only valid within the country or region of purchase.
• Your statutory rights are not affected.
Two Year Warranty
• All Datavideo products purchased after 01-Oct.-2008
qualify for a free one year extension to the standard
Warranty, providing the product is registered with
Datavideo within 30 days of purchase. For information
on how to register please visit www.datavideo.com or contact your local
Datavideo office or authorized Distributors
• Certain parts with limited lifetime expectancy such as LCD Panels, DVD Drives,
Hard Drives are only covered for the first 10,000 hours, or 1 year (whichever
comes first).
6
Page 7

Any second year warranty claims must be made to your local Datavideo office or one of
its authorized Distributors before the extended warranty expires.
Disposal
For EU Customers only - WEEE Marking
This symbol on the product or on its packaging indicates that
this product must not be disposed of with your other household
waste. Instead, it is your responsibility to dispose of your waste
equipment by handing it over to a designated collection point
for the recycling of waste electrical and electronic equipment.
The separate collection and recycling of your waste equipment
at the time of disposal will help to conserve natural resources
and ensure that it is recycled in a manner that protects human health and the
environment. For more information about where you can drop off your waste
equipment for recycling, please contact your local city office, your household waste
disposal service or the shop where you purchased the product.
CE Marking is the symbol as shown on the left of this page. The
letters "CE" are the abbreviation of French phrase "Conformité
Européene" which literally means "European Conformity". The
term initially used was "EC Mark" and it was officially replaced by
"CE Marking" in the Directive 93/68/EEC in 1993. "CE Marking" is
now used in all EU official documents.
7
Page 8

Chapter 1 Product Overview
The HDR-1 is a standalone HD Recorder box which allows you to record and playback
HD video without using any PC. The box is equipped with one HDMI Input and one
HDMI Output with the video recorded in MP4 (H.264+AAC) file format.
One major advantage of the HDR-1 is its ability to use it independently of a PC by
simply connecting it to an HDMI video source. The HDR-1 records from a range of
devices, including HDMI digital camcorder and camera, IP cam, game console, PC Game
(720p recommended) and etc. It definitely makes video recording and viewing easier.
1.1 Features
• Capture HD Video Up to 1080p30
• Instant & Timer Recording
• Video Pass Through Support
- 480i/480P/576i/576P
- 720P@50/60, 1080i@50/60
- 1080P@50/60/24
• 1080P 30 frame recorder (Recording quality up to 1080p/30fps (Playback on TV
show 1080i/60fps))
• Supported playback and record file formats:MP4 (H.264+AAC)
• Support GPI and RS-232 control
• USB Port for external power input from external Power Bank
• Support 3D video Recorder (Top-and-bottom, Side-by-side Half)
• Support 3D Pass through (BD 3D H.264-MVC 3D structures supported, Top-and-
bottom, Side-by-side)
• Storage device auto detect & setup
• Recorder Bit rate: 3~20Mbps depend on resolution
• Record video to USB flash drive with NTFS file format
• Built-in video Editor
• Time zone & Date-time selection
• HDMI 1.4b Compatibility
8
Page 9
Chapter 2 Connections and Controls
Power Bank IN
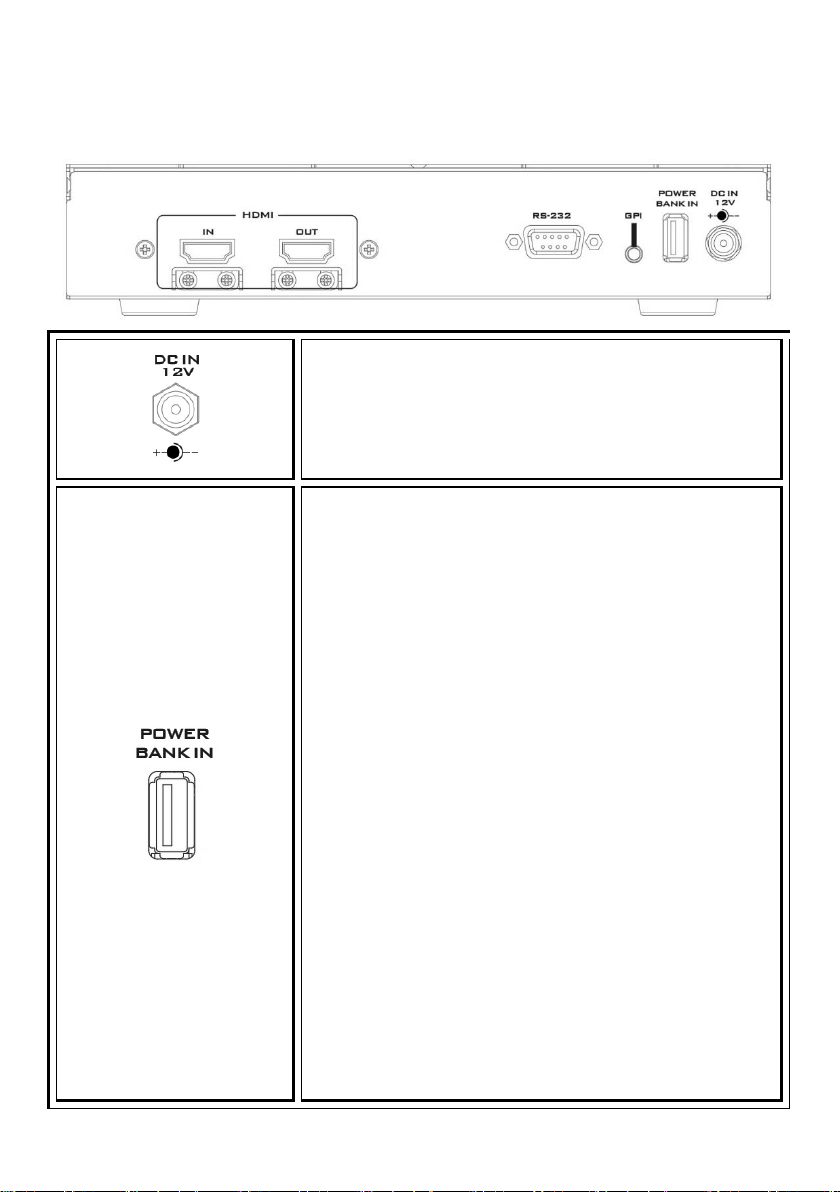
2.1 Rear Panel
DC IN
DC in socket connects the supplied 12V / 19W PSU. The
connection can be secured by screwing the outer
fastening ring of the DC In plug to the socket.
Connect an external portable USB power supply to
POWER BANK IN port. The connected external portable
USB power supply will start to provide power to the
HDR-1 when the DC power supply fails.
The HDR-1 with the USB thumb drive plugged in requires
approximately 1000mA of current. Ideally, if the power
bank capacity is 100mAh, it should be able to last for 1
hour when the DC power is disconnected from the HDR-
1. However, there is also some power loss to be taken
into consideration so in reality, the maximum transfer
rate is less than 1000mAh and the power bank should
last less than an hour.
When connecting the DC power and the power bank at
the same time, the Power Bank IN port will drain the
power bank at a rate of 100mAh. Ideally, if the power
bank capacity is 100mAh, the power bank should be able
to sustain the device operation for 10 hours. However,
there is also some power loss to be taken into
consideration so in reality, the transfer rate is less than
1000mAh and the power bank should last less than 10
hours.
9
Page 10
Warning: The power bank is mainly used for emergency
power supply and sustains the device operation in the
start flashing red and as the flashing
event of unexpected DC power loss. The power bank,
however, is not used for powering the HDR-1 recording.
Hence, when the DC power is disconnected, the power
button LED will then
gets faster, it means the Power Bank IN port starts to
drain your power bank at a faster rate. You should either
try to reconnect the DC power or stop recording to avoid
file corruption before the power is cut unexpectedly.
Note: File will be corrupted if recording is interrupted
due to unexpected power outage.
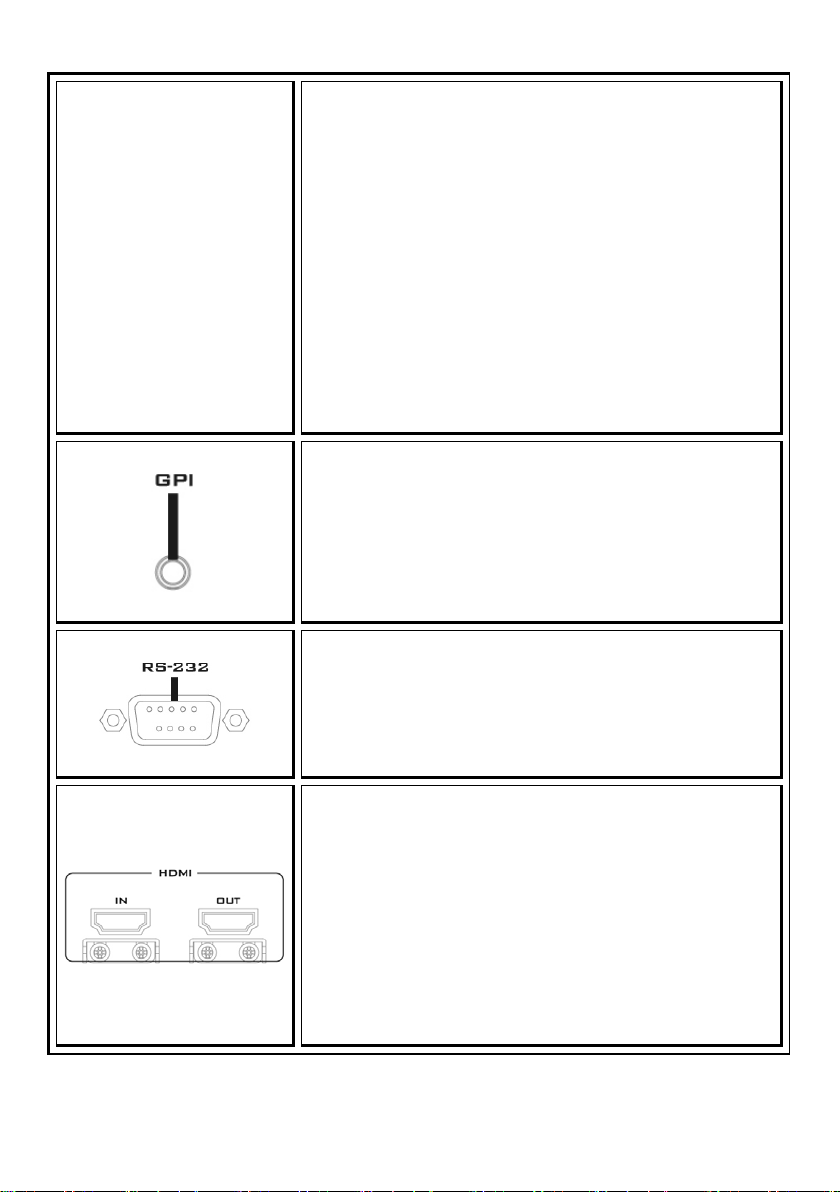
GPI Input
GPI input accepts external control signal to trigger
Start/Stop recording.
Note: Please use Pulse Trigger only.
RS-232 Communication Port
RS-232 communication port accepts external control
signal.
HDMI Input and Output Port
HDMI digital video input and output port.
Note: While the recording is in progress, if the HDMI
input is disconnected, the recording will stop. After the
input is reconnected and restored, the HDR-1 will start to
record again, but the audio and video of the content
recorded will become out of sync.
10
Page 11
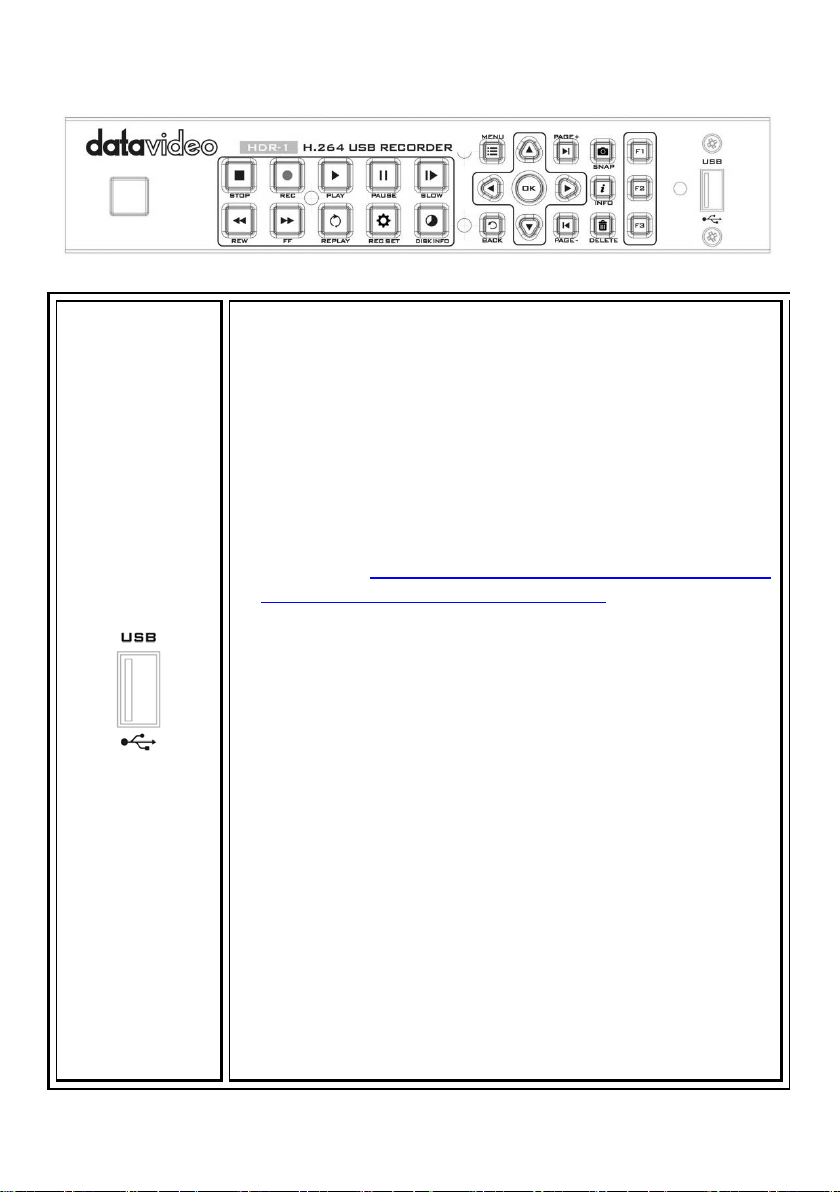
2.2 Front Panel
USB Port
Connects external USB storage device.
We recommend hard drives with at least 500G capacity
If recording to a thumb drive, please use a USB 3.0 thumb
The HDR-1 only supports MBR disk (GPT disk is not supported).
Recommended hard drives are listed as follows:
Toshiba V63700-B 750G USB 3.0
I-O DATA HDPC-CUT500S 500G USB3.0
WD WDBBEP0010BBK-01 1T USB3.0
WD WDBY8L0020BBK-01 2T USB3.0
The HDR-1 does NOT support USB Hubs, card readers, FAT
format, NAS, and devices with more than 2TB capacity.
Note: The performance of “thumb drives” varies. Many of these
devices are optimized for “read” operations, while the HDR-1
requires sustained “write” capabilities. For best results, especially
at higher recording data rates, powered USB drives are
recommended.
Note: The DC power of the HDR-1 is only sufficient to power a
“USB thumb drive”, thus you need an external power supply to
power the portable hard disk (HDD/SSD) to work with the HDR-1.
drive make sure the thumb drive’s write speed is at least 45
MB/s.
Please format your disk to NTFS file system on your PC first
and connect the formatted disk to the HDR-1. We recommend
“HP USB Disk Storage Format Tool” which can be downloaded
from the link
Format-Tool/3000-2094_4-10974082.html.
http://download.cnet.com/HP-USB-Disk-Storage-
11
Page 12
Power Button
Press to power ON the device.
Note: When the DC power is disconnected while the power bank
is connected to the Power Bank IN port, the power button LED
will start flashing red. The flashing will get faster, indicating that
the Power Bank IN port is draining the power bank at a faster
rate. LED will be OFF when the power bank is fully drained out.
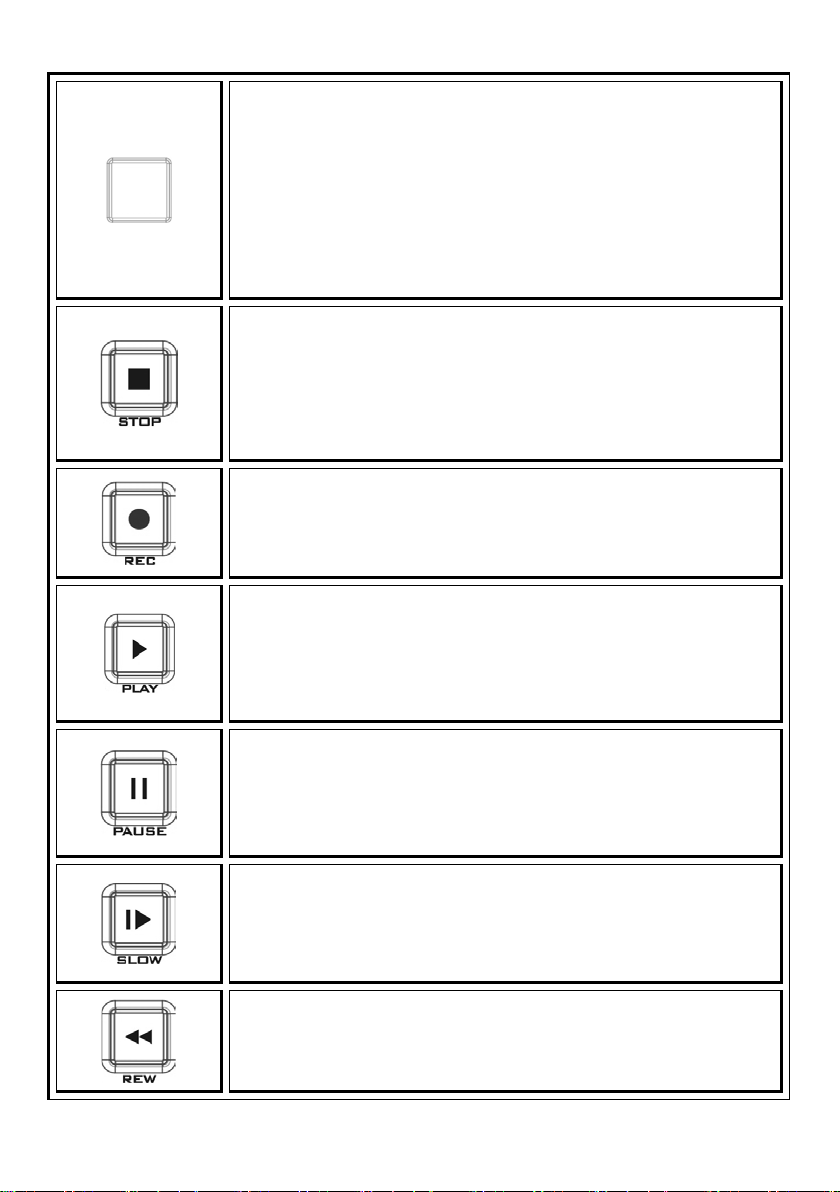
STOP Button
Press to stop recording or playback.
Note: Approximately 10 seconds of video file processing time is
required after recording is stopped.
RECORD Button
Press to start video recording; press again to stop video
recording.
PLAY Button
Press to start video playback.
If the device is in fast forward or rewind mode, press to resume
normal speed playback.
PAUSE Button
In record mode, press to pause recording.
In playback mode, press to pause playback.
SLOW PLAY Button
Press to play the video in slow mode (1/2x); press again to enter
frame-by-frame playback mode.
REWIND Button
Press to rewind at 2x/4x/8x/16x/32x speed.
12
Page 13
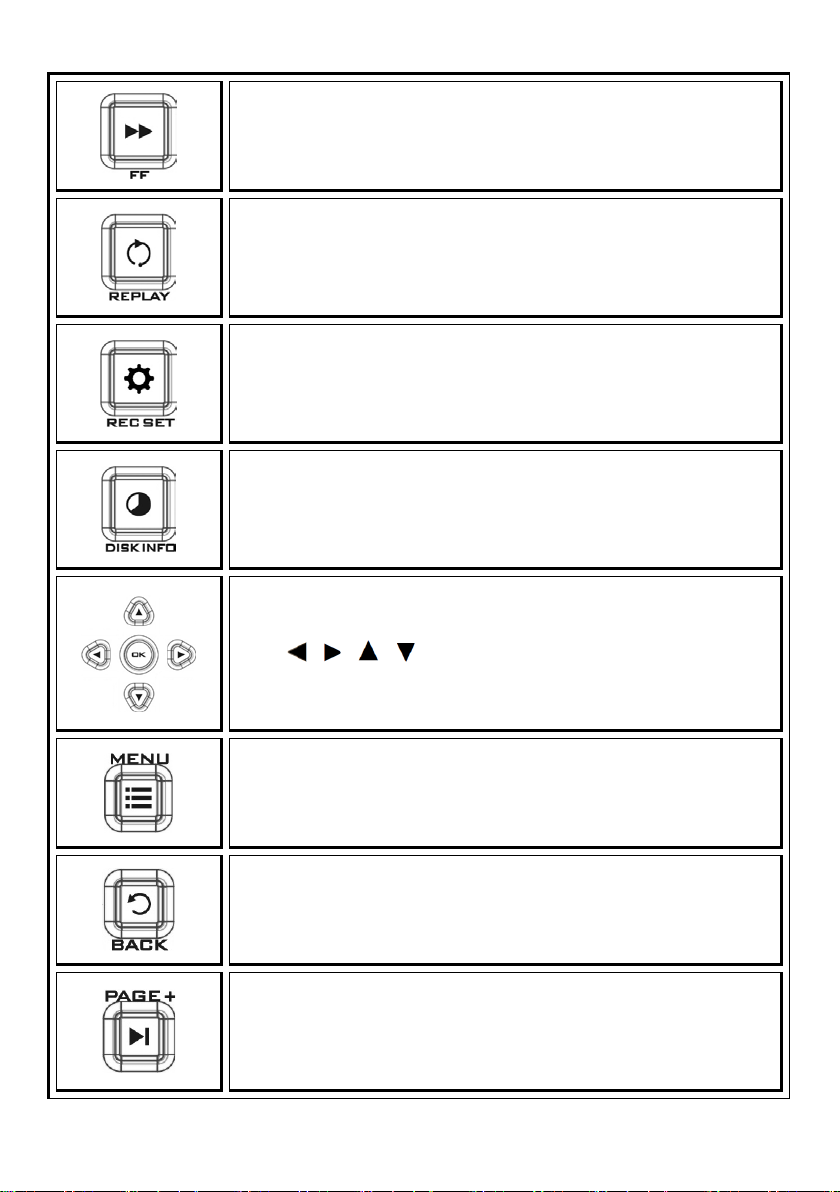
FAST FORWARD Button
On the video screen and file thumbnail view (OSD Menu), press to
Press to fast forward at 2x/4x/8x/16x/32x speed.
REPLAY Button
Press to play the latest recorded file or view the last captured
image.
RECORD SETTING Button
Press to enter the record setting menu directly.
DISK INFO Button
Press to display the disk information. Press again to hide it.
Navigation Buttons
Press / / / buttons to move among options; press OK
to confirm a selection.
MENU Button
Press to access the main menu. Press again to exit.
BACK Button
Press to exit the current page and return to the previous page, or
go back to the video image.
PAGE FORWARD Button
go to the next page.
13
Page 14
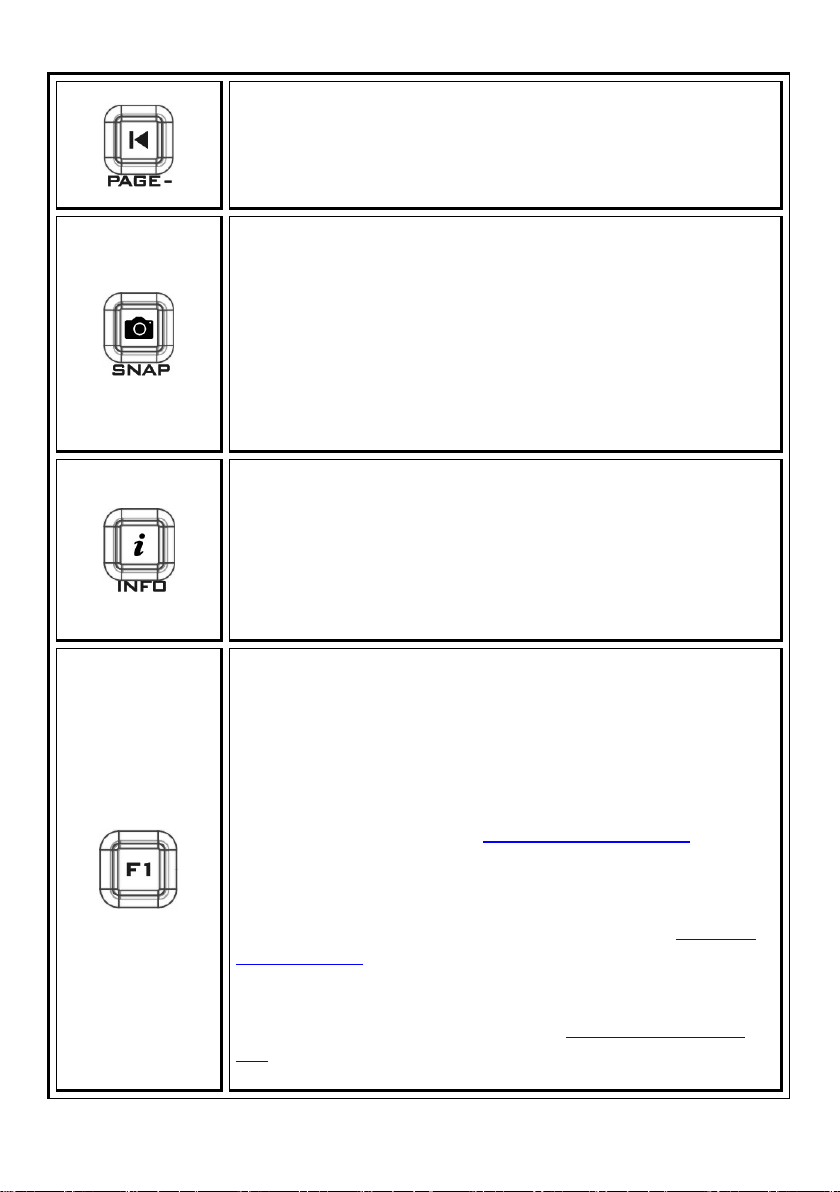
PAGE BACKWARD Button
On the video screen and file thumbnail view (OSD Menu), press to
return to the previous page.
SNAPSHOT Button
Press to take a snapshot during gameplay or video playback.
Long press to activate continuous capture mode. Five snapshots
will be taken at one time.
Note: Each snapshot should be taken with an interval of 5
seconds otherwise snapshot will fail.
INFO Button
Press to display information. In record standby mode, pressing
the INFO button will display system information. In playback
mode, pressing the INFO button will display file playback
information.
F1 Button (FUNCTION 1)
On the main page of the MENU, press F1 to safely remove USB
disk drive.
While in the directory view of the Media Studio of the MENU,
press F1 to sort the files by file name, file size, file format and by
modified date. Please refer to Section 4.4 Media Studio
for
details.
On the File Name Change page, press F1 to switch between
characters, numerals and symbols. Please refer to the
Recorded
Video Post-Edit section for details.
In the Video Edit Mode, press F1 to switch between Scene Search
and Segment Search. Please refer to the
Recorded Video Post-
Edit section for details.
14
Page 15
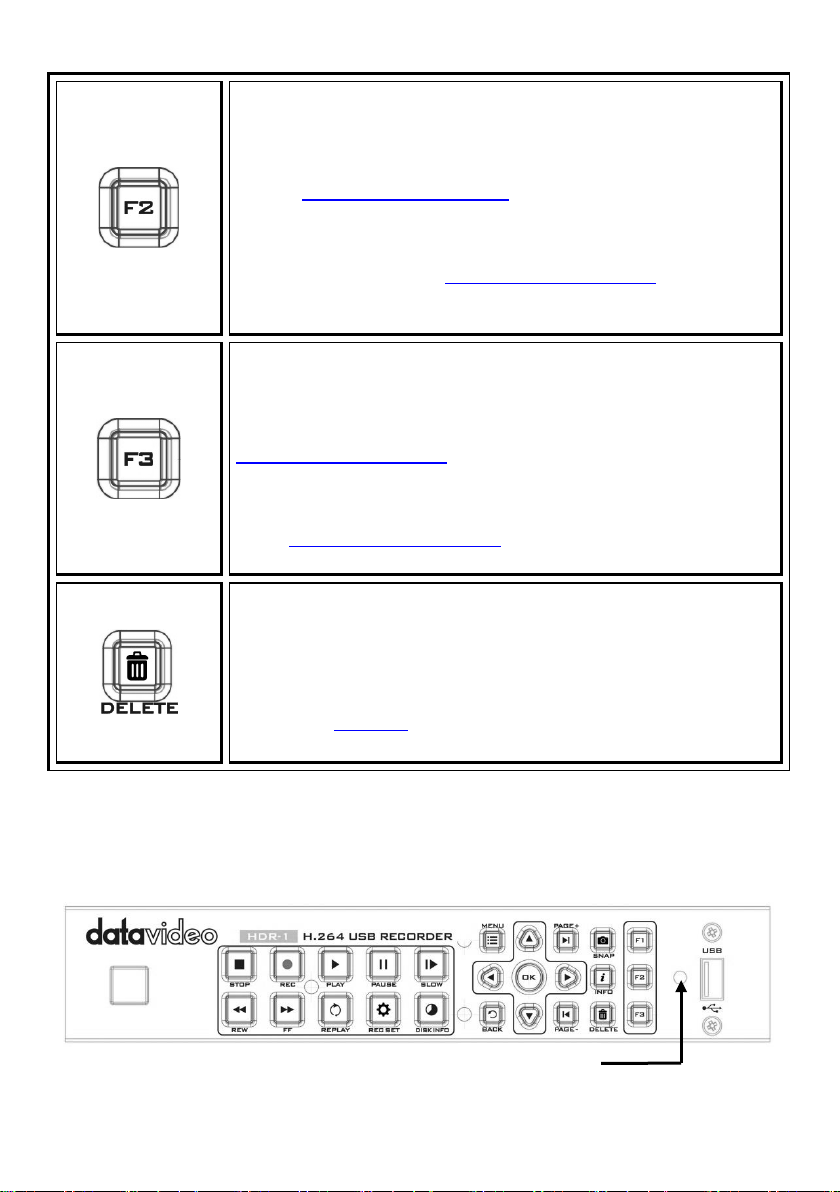
F2 Button (FUNCTION 2)
LED Indicator
While in the directory view of the Media Studio of the MENU,
press F2 to switch between list mode and thumbnail mode. Please
refer to Section 4.4 Media Studio
In the Video Edit Mode, press F2 to clear all marks made on the
video. Please refer to the Recorded Video Post-Edit
details.
F3 Button (FUNCTION 3)
While in the directory view of the Media Studio of the MENU,
press F3 to edit or change the selected video. Please refer to the
Recorded Video Post-Edit
In the Video Edit Mode, press F3 to export the video. Please refer
to the Recorded Video Post-Edit
DELETE Button
Press to delete the selected files.
On the File Name Change view, press to clear all texts. Please
refer to the Post-Edit
section for details.
section for file name change procedure.
for details.
section for details.
section for
2.3 LED Indicator
The LED indicator on the front panel shows the device status.
15
Page 16

Status
Indication
Powered ON
Flashing green
Ready to record / snapshot
Solid green
Recording
Flashing red in breathing pace
Take a snapshot
Flashes red once
Unable to record /snapshot
Flashes red twice
No source
Flashes red twice
Source is available
Solid green
Power off in progress
Flashing green
Record pause
Solid red
Record finishing in progress
Red flashing rapidly
Lower power
Red and green flashing alternately
Powered off with A/V pass through ON
Solid orange
16
Page 17
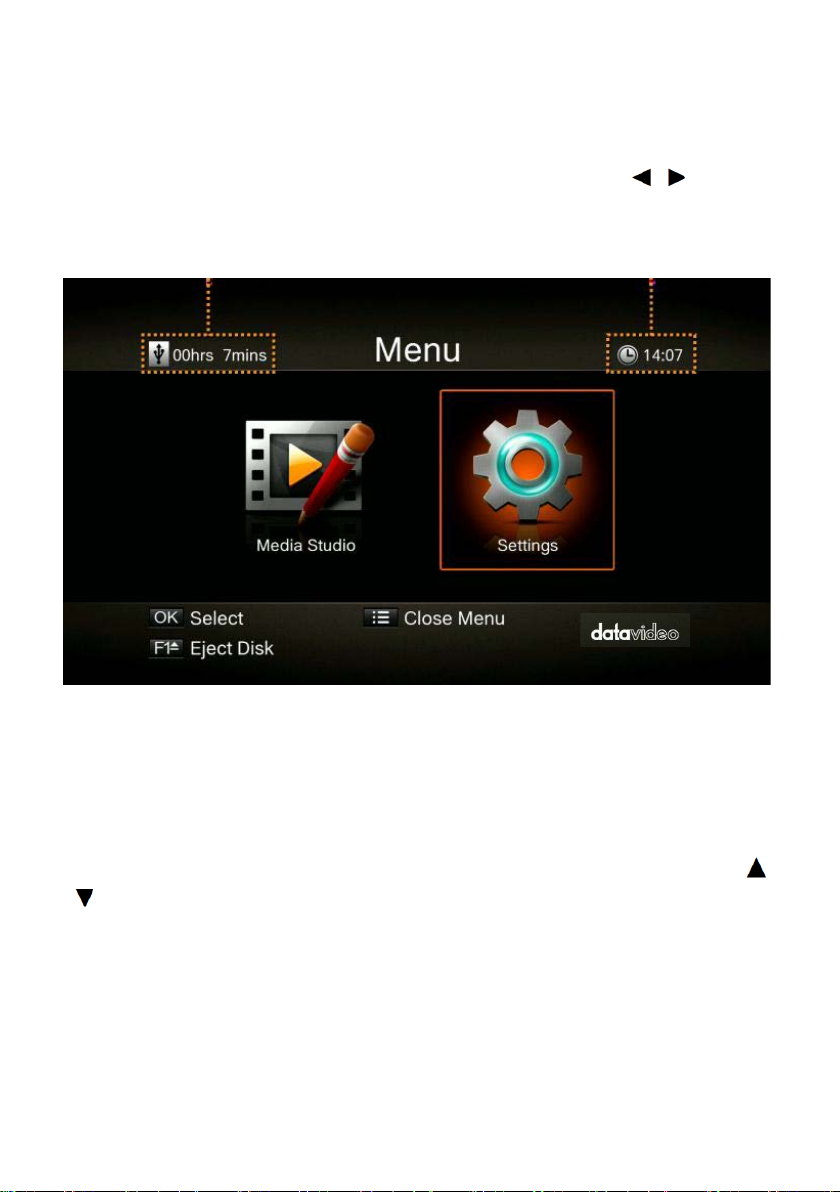
Chapter 3 OSD Menu
Press BACK button to return to the video
screen
Press F1 to safely remove the storage
Remaining Time for Recording
Current Time
Under the menu, you can check and manage both your recorded files and snapshots,
and customize your preferences. Upon pressing the MENU button, you will be able to
see the main page as depicted in the diagram below. After that, press / buttons
to select Settings. Press OK to enter Settings option.
device.
Note: If the thumb drive is not safely removed from the HDR-1, your PC might fail to
read files from your thumb drive.
After entering Settings menu, you will be able to see the page as shown below. Use
/ buttons to select menu items and press OK to enter the selected option. Press
BACK to return to the previous page.
17
Page 18
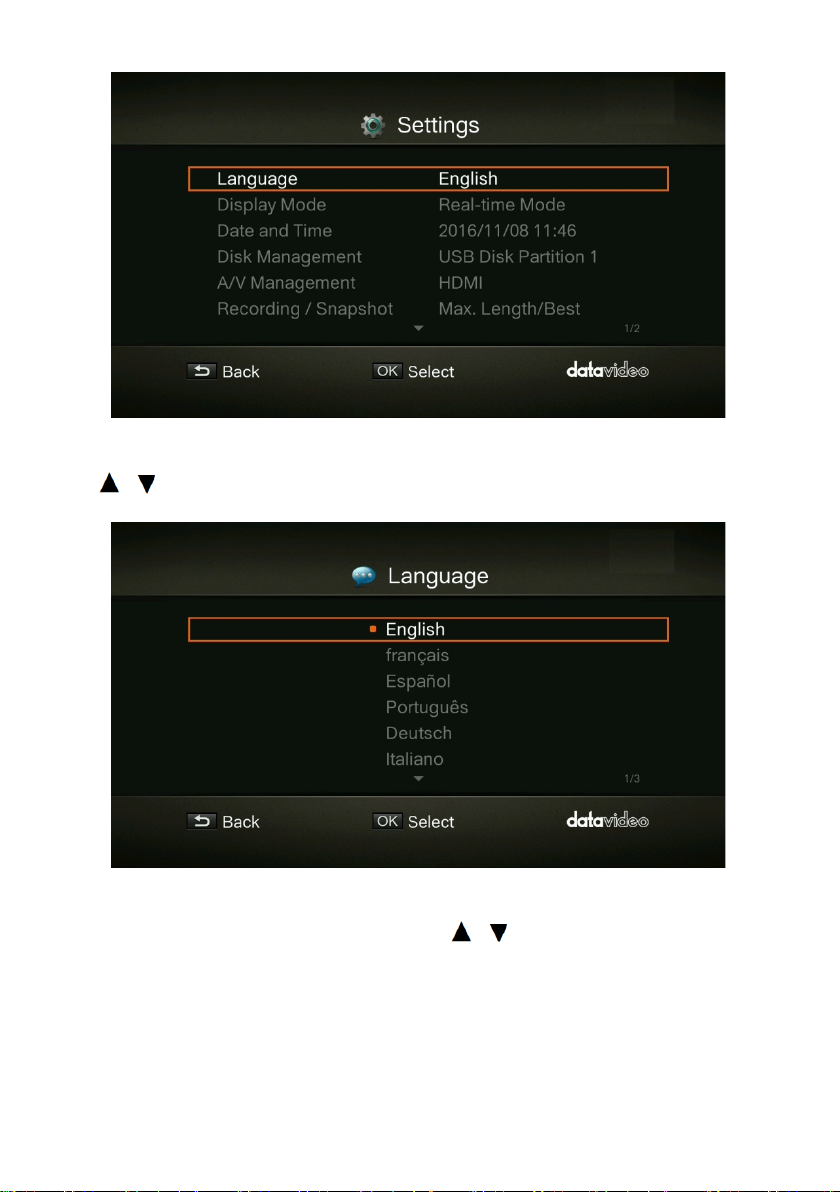
3.1 Language
Use / buttons to select your preferred language. Press OK to confirm.
3.2 Display Mode
The default mode is set as real-time mode. Use / buttons to switch between realtime and standard mode.
18
Page 19

Real-Time Mode
Real-time mode lets you play games with zero delay. No recording or snapshot status
will be shown on screen. All capture work will run in the background. However, if any
problem occurs during the capturing process, OSD will automatically jumps out. Press
the MENU button to check OSD and track capture status.
Standard Mode
In standard mode, on-going recordings will be shown in the upper right corner of the
screen for approximately five seconds. As there will be slight delay in game, standard
mode is recommended for set-top box.
3.3 Date and Time
As shown in the diagram below, once in the Date and Time option, use / buttons
to select an item for configuration. Press OK to confirm.
19
Page 20

Date Format Use / buttons to select a preferred date format. Press OK to confirm.
Time Zone
Use / buttons to move among options and select your area. Press OK to confirm.
Use / buttons to move among options and select your time zone. Press OK to
confirm.
Time Setup
Use / buttons to move among options and / buttons to adjust date and
time. Press OK to confirm.
20
Page 21

Daylight Saving Time Use / buttons to enable/disable Daylight Saving Time. Press OK to confirm.
Note: To use this function, a network connection is required.
3.4 Disk Management
Step 1: Use / buttons to select Storage Destination and press OK to change your
current desired default storage device for both recorded files and snapshots.
21
Page 22

indicates normal write speed of selected partition.
indicates low write speed of selected partition.
To Make sure recording functions properly, be sure to select partition with normal
write speed.
Step 2: Use / buttons to select the preferred default storage device and press OK
to confirm.
Step 3: Use / buttons to select a folder and press OK to confirm.
Step 4: Press F1 to save the setting.
22
Page 23

USB Disk Formatting
After entering Settings menu, you will be able to see the page as shown below. Use
/ buttons to select Disk Management and press OK to enter the highlighted option.
Press BACK to return to the previous page.
Step 1: Use / buttons to select Disk Information and press OK to enter.
Step 2: Use / buttons to select USB Disk Partition1 and press OK to enter.
23
Page 24

Step 3: As shown in the diagram below, you will be able to view the USB Disk Partition
1 information and press F1 to start formatting the disk.
Step 4: You will be warned that all data on the disk will be erased after formatting.
Please OK if you are sure to continue.
24
Page 25

Step 5: Do not disconnect the power or remove the USB storage device as the disk is
being formatted.
25
Page 26

Step 6: The disk formatting is complete when you see the prompt as illustrated in the
diagram below. Press OK to confirm.
3.5 A/V Management
Use / buttons to move among options. Press OK to confirm.
26
Page 27

A/V Pass Through Use / buttons to enable/disable A/V Pass Through. Press OK to confirm.
Note: The default setting is Off to comply to the power-saving regulation. If this
function is enabled, the HDR-1 still outputs signal when the HDR-1 is off. If this function
is disabled, the HDR-1 does not output signal when the HDR-1 is off.
Color Range
Use / buttons to toggle between off, limited and full. Press OK to confirm.
27
Page 28

3.6 Recording / Snapshot
Video Quality
Use / buttons to toggle among various video quality options (Optimal / Good /
Maximum recording length). Press OK to confirm.
Snapshot Quality
Use / buttons to toggle among various snapshot quality options (Best / Better /
Good). Press OK to confirm.
28
Page 29

Auto Save
Use / buttons to switch between Auto Save function ON/OFF.
HDCP Mode
Use / buttons to select Default option (HDCP Mode ON) or By Device Signal
(HDCP Mode OFF).
Note: If video source is HDCP-protected, images will NOT be shown properly.
29
Page 30

3.7 Watermark
Add your selected watermark to your videos. You can customize the display of the
watermark by setting up the type, position and also scale.
• Press BACK button to go back to the previous level.
• Press OK to enter the next level.
• Press F1 to preview the watermark.
Watermark Type
Use / buttons to select from the listed watermark types. Press OK to confirm the
selection. Press BACK button to return to the previous page.
30
Page 31

Position
Use / buttons to select from the listed watermark positions. Press OK to save the
change. Press the BACK button to return to the previous page.
Display Scale
Use / buttons to select the display scale. You can either select Full or Shrink.
Press OK to save the change. Press the BACK button to return to the previous page.
31
Page 32

3.8 Timer Recording
Allows you to schedule the HDR-1 to start recording at a particular time and record
only a certain length of time.
Mode
Use / buttons to select from the listed recording type. Press OK to confirm the
selection. The options are Off (timer recording OFF), 1 Time (timer recording once) and
Daily (repeat timer recording everyday).
32
Page 33

Recording Time
Use / buttons to move among options and / buttons to adjust start time
and recording length. Press OK to save changes. Press BACK button to return to the
previous page.
3.9 Firmware Upgrade
Follow the steps below to upgrade the firmware via USB storage device.
Step 1: Please visit the Datavideo official website www.datavideo.com
latest version of firmware. Firmware file is usually available on the product page.
Step 2: Extract the files by unzipping the package. Copy the firmware files to the root
directory of your USB storage device, and then connect it to the HDR-1.
33
to download the
Page 34

Step 3: Press F1 to start the firmware upgrade process. Press the BACK button to abort
the operation and return to the previous page.
Step 4: Once the firmware upgrade process has completed, press OK to restart the
HDR-1.
Note: The HDR-1 automatically detects whether a different version of firmware is
available for upgrade or rollback.
A few things to note before the upgrade:
• The firmware upgrade process takes approximately 10-14 minutes to complete.
• Firmware upgrade requires at least 256MB free space on the USB 3.0 flash drive.
• If any problems are encountered during the firmware upgrade, please clear all the
data stored on your USB storage device and repeat the above procedure.
• NEVER power off the device or unplug the power supply or remove the USB
storage device during the firmware upgrade process. If the firmware upgrade is
interrupted for any reason, the device may crash.
3.10 Restore to Factory Default
Press F1 to restore default factory settings. Press the BACK button to abort the
operation.
34
Page 35

3.11 Product Information
This page provides product information, including product name, model number and
firmware version. Press F1 to edit the displayed name.
Name your own HDR-1
Press / buttons to select characters. Press / buttons to move between
character fields. Press F1 to switch between different input modes (capital letter, small
letter and symbols). Press DELETE button to delete the character.
After confirming the name entered, press OK to save the change.
To change the product name, go to Menu Product Name.
35
Page 36

The display name will show up when you enable watermark function (When a specific
type of watermark is selected).
36
Page 37

Chapter 4 Basic Operation
This chapter guides you to record video, capture images and instantly play files.
4.1 Record
The HDR-1 displays video in real-time and standard modes. If you prefer to display
record status at the top right corner of the screen, you can change the default realtime mode to the standard mode before recording. Go to Menu Settings Display
Mode (refer to section 3.2
Instant Recording during Gameplay
Press to activate instant recording. Press again or to stop recording.
for details).
Pause and Resume Recording
You can skip unwanted footages and resume recording. Only the footages you
recorded will be saved and those skipped clips will be deleted automatically.
Press to pause recording. Press again or to continue recording.
37
Page 38

4.2 Capture
Image capture function on the HDR-1 is described as follows.
Quick Snapshot during Gameplay
Press to capture current image. Long press to activate continuous capture
mode. The HDR-1 will take 5 snapshots at one time.
38
Page 39

4.3 Instant Playback
Press to play the latest recorded file or view the last captured image.
Press to stop the playback. Press to skip forward 30 seconds. Press to skip
backward 10 seconds.
Image Capture during Video Playback
You can activate screen snapshot during video playback. The three methods described
below will guide you how you can use this function.
Method 1:
• Press to capture current image.
Method 2:
• Press to play the video in slow motion (1/2x). Press again to view the
video frame by frame.
• Press to capture your desired image.
Method 3:
• Press to pause the playback.
• Press to go to previous frames.
• Press to go to next frames.
• Press to capture your desired image.
39
Page 40

4.4 Media Studio
You can check both recordings and snapshots captured by the HDR-1 in “Media Studio”.
Video: MP4 (Codec: H.264 format with AAC audio)
Image: JPEG
Press OK to enter Media Studio as shown below. Use the navigation buttons / /
/ to select among items.
40
Page 41

- Press F1 to sort the files by file name, file size, file format and by modified
date.
- Press F2 to switch between list mode and thumbnail mode.
- Press to go to the next page. Press to return to the previous page.
- Press to directly access the main menu.
• Video Playback
- Press or OK to start playing the selected video.
- Press or OK to pause the playback. Press or OK to resume playback.
41
Page 42

- Press to play the video in slow motion (1/2X).
- Press to rewind at 2X, 4X, 8X, 16X and 32X speed.
- Press to fast forward at 2X, 4X, 8X, 16X and 32X speed.
- Press to play the file at normal speed (1X) when slow motion, rewind, or
fast forward is active. Press to stop the playback.
- Press to display the file playback information.
Note: Only video files captured by the HDR-1 are supported.
• Snapshots Viewing
- Press or OK to view the selected image.
- Press or to return.
Note: Only image files captured by the HDR-1 are supported.
Recorded Video Post-Edit
This section shows you how to cut and recombine video recorded by the HDR-1.
• Select a Video
Use the navigation buttons / / / to select the file you would like to edit.
42
Page 43

• Change File Name / Edit
Press F3 to edit or change the selected video.
• Change File Name
Input the file name by pressing / buttons to select characters, numerals or
symbols. Press / buttons to move between character fields.
Press F1 to switch between different input modes (capital letter, small letter and
symbols).
Press to go back to cancel the change you make.
43
Page 44

Press OK to save the name change.
Press button to clear all texts.
• How to edit
An instruction on how to edit a video will be displayed, press OK to start editing.
In Edit Mode, you can cut and recombine your selected video. To cut the video, you
will need to create one or more segments within the video.
44
Page 45

Step 1
To locate a scene, use the navigation
buttons / / / or to search
the scene. You can also use / on the
left of the screen to search the scene by
specific hour, minute, and second.
Press OK to mark or unmark the scene.
Step 2
Repeat Step 1 to create a segment.
Press OK to keep or delete the segment.
Press F1 to switch between search scene and segment search.
Press F2 to clear all marks you made on the video.
Press F3 to export the video.
Note: The HDR-1 automatically
recombines the segments you choose to
keep during editing.
Recorded Video Export
After editing of the recorded video is complete, press F3 to export the video. The
estimated export time varies by different storage disks. Calculate your export time
based on the actual disk size.
Press OK to export the video.
Press to continue editing.
45
Page 46

While the export is in progress, the bar in the middle of the prompt window shows the
progress of the video export and the estimated complete time required.
Press to cancel video export.
Press F1 to hide the export information.
After the recorded video is successfully exported, press OK to exit the Edit Mode. Press
to exit or F1 to continue editing.
46
Page 47

47
Page 48

Chapter 5 Appendices
Appendix 1 GPI Input
The HDR-1 can be connected to external control devices (SE-700 or SE-1200 MU) via a
simple contact closure GPI switch.
The GPI interface is a 3.5mm Jack Socket which is situated on the rear panel of the
HDR-1. Contact closure between the Outer and Inner contacts on the jack plug will
trigger a user selected event.
SAFETY FIRST The cabling required needs to be designed specifically to connect the
HDR-1 to the chosen external control devices as they are not all the same. The
cabling required can be made by yourself or a competent technician. Please speak
with your Dealer or local Datavideo office to get further help and advice.
48
Page 49

Appendix 2 RS-232 Command Set
Command
Name
Response
Response data
00h, 11h, 11h
Device Type Request
12h, 11h, 00h,
00h, 23h
20h, 00h, 20h
Stop
10h, 01h, 11h
ACK
20h, 01h, 21h
Play
10h, 01h, 11h
ACK
20h, 02h, 22h
Record
10h, 01h, 11h
ACK
20h, 10h, 30h
Fast Forward
10h, 01h, 11h
ACK
20h, 20h, 40h
Fast Rewind
10h, 01h, 11h
ACK
21h, 11h, 00h, 32h
Pause
10h, 01h, 11h
ACK
Communication format:
Mode: no synchronization
Character Length:
Data Rate: 38400 BAUD
Parity: Odd parity
Command Format:
CMD1, CMD2, DATA bytes, Checksum
Summary List of Commands:
49
Page 50

Appendix 3 Firmware Update
Datavideo usually releases new firmware containing new features or reported bug fixes
from time to time. Customers can either download the HDR-1 firmware as they wish or
contact their local dealer or reseller for assistance.
This section outlines the firmware upgrade process which should take approximately
10 minutes to complete.
The existing HDR-1 settings should persist through the firmware upgrade process,
which should not be interrupted once started as this could result in a non-responsive
unit.
HDR-1 Firmware Update Procedure
Step 1: Please visit the Datavideo official website www.datavideo.com
latest version of firmware. Firmware file is usually available on the product page.
Step 2: Extract the files by unzipping the package. Copy the firmware files to the root
directory of your USB storage device, and then connect it to the HDR-1.
Step 3: Enter the “Firmware Upgrade” option, and press F1 to start the firmware
upgrade process. Press the BACK button to abort the operation and return to the
previous page.
to download the
Step 4: Once the firmware upgrade process has completed, press OK to restart the
HDR-1.
50
Page 51

Appendix 4 Frequently-Asked Questions
No.
Problems
Solutions
1
Why can’t HDR-1 record normally
plugged into the HDR-1?
The HDR-1 only supports NTFS format, so
NTFS before use.
2
I have formatted my disk to NTFS
problem?
Please first check if your disk is
3
When the HDR-1 records to
The performance of “thumb drives”
4
My portable hard disk is not
The DC power of the HDR-1 is sufficient
(HDD/SSD) to work with the HDR-1.
5
What can I do when the HDR-1
1. Please reinstall the device driver. If
10974082.html
This section describes problems that you may encounter while using HDR-1. If you have
any questions, please refer to related sections and follow all suggested solutions. If
problem still exists, please contact your distributor or the service center.
after the USB thumb drive is
format but still getting error
prompt (Make sure the NTFS disk
driver has been correctly
installed) when connected to the
HR-1. How can I solve this kind of
different USB thumb drives,
sometimes the write will fail and
the recording will be interrupted.
powered after connected to the
USB port on the front panel of
the HDR-1.
cannot detect the storage
device?
please format your USB thumb drive to
encrypted. Please note, since the HDR-1
only supports MBR and the encrypted
disk uses GPT (GUID Partition Table), the
only solution to this problem is to
reformat your disk to an MBR disk.
varies. Many of these devices are
optimized for “read” operations, while
the HDR-1 requires sustained “write”
capabilities. For best results, please use a
USB 3.0 thumb drive with a write speed
faster than 45 MB/s.
to power one “USB thumb drive” only,
thus you need an external power supply
to power the portable hard disk
there are too many files saved on the
disk, the HDR-1 might need a longer time
to detect the disk.
2. Please reformat the disk to NTFS on
your PC and then reconnect the NTFS
disk to the HDR-1. We recommend using
the “HP USB Disk Storage Format Tool”
to do the formatting. Please download
the tool from the link below.
http://download.cnet.com/HP-USB-DiskStorage-Format-Tool/3000-2094_4-
51
Page 52

6
Why is the HDR-1 still displaying
remaining capacity of 9XX MB
full?
This is because the recording format is
so this is normal.
7
After the 32GB thumb drive is
This is because the post-edit function
edit time.
8
What can the customer do if he
meets the recommended spec?
The customer can buy a purely SD card
9
Will I see any power issue when I
Yes! This is because removable hard disks
thus be power issues.
10
If the customer happens to need
We recommend getting a thumb drive
labelled with the write speed but it
even after the 32G thumb drive is
VBR and approximately 1GB of space
must be reserved as the recording buffer
full, you will be prompted that
the recommended edit time is 6
minutes upon file editing.
However, in fact, the file cannot
be edited.
cannot find a thumb drive that
use a removable hard disk?
a thumb drive, what are the
recommended specifications?
requires some free space to function,
thus it is normal that you cannot use the
post-edit function after the thumb drive
is full. The 6-minute recommended edit
time is the estimated time required for
post-editing. The length of
recommended edit time is related to the
size of the recorded file, and the bigger
the file, the longer the recommended
reader that also reads a Class 10 SD card.
made by different manufacturers have
different power consumptions and also,
the cables provided by those
manufacturers are different, there will
with a write speed of 45 MB/sec or
above.
Technical Descriptions
1. The HDR-1 requires a sustaining write
speed of 10 MB/sec and most of the offthe-shelf thumb drives are either not
labelled of the write speed or only
labelled with the read speed.
2. The HDR-1 only requires the thumb
drive to have a write speed of 10 MB/sec
but why does Datavideo recommend a
thumb drive with a write speed of 45
MB/sec?
This is because even the thumb drive is
52
Page 53

usually refers to the maximum write
speed and not the minimum write speed.
alternative.
11
Why the recorded file resolution
The HDR-1 supports 1080p60 input
resolution is only 1080p30.
12
What is the HDR-1’s longest and
The longest recording time is 14 hours
the record button will be deactivated.
13
The video display disappears
Please unplug the HDMI cable and then
reappear.
14
Does the HDR-1 support
replay?
The HDR-1 can only edit and play the file
Importing other files may cause errors.
15
Does the HDR-1 support PS3,
No, the HDR-1 cannot record 5.1 Dolby
works as a pass through device.
We have found that the current off-theshelf thumb drives need to have at least
a write speed of 45 MB/sec to be able to
work with the HDR-1.
3. Why do you recommend the SD card
reader when thumb drive is not
available?
This is because the Class 10 label on the
SD card represents the minimum write
speed so if you are unable to find a
thumb drive that meets the
requirements, please use the SD card
reader with the SD card as another
is only 1080p30 when my input
video resolution is 1080p60?
shortest record time?
after the PS4 HDCP is disabled.
imported video or photos for
XBOX Dolby 5.1 and 24p video
format?
resolution but the HDMI output only
supports 1080i, thus the recorded file
and recording will stop once the longest
recording time is reached. The user will
receive a prompt message. The shortest
recording time is 6 seconds during which
plug back in, the video display will
that is recorded by the HDR-1 itself.
or 24p video format. Please set the audio
to auto on the play station’s setting
menu screen in order to output the
correct audio format (PCM Stereo).
However, you may use Dolby 5.1 or 24p
video format when the HDR-1 is OFF and
53
Page 54

16
Why is recording interrupted?
This means that the HDR-1 has detected
that the write performance of your
NTFS hard disk replacement.
17
Why does the record LED start to
When the record LED starts to flash
disk replacement before recording stops.
18
Why is the audio and video of the
While the recording is in progress, if the
become out of sync.
19
The HDR-1 fails to record when
The HDR-1 currently supports dual audio
Dolby, DTS and etc are detected.
20
Can the HDR-1 record 5.1
The HDR-1 can only record two audio
records two audio channels only.
21
Why can’t the system detect the
Please check if the firmware file is still on
the thumb drive is repaired.
storage device is extremely poor, which
is the direct cause of interrupted
recording. Hence we recommend an
flash rapidly during recording?
recorded content out-of-sync?
the source contains multiple
audio channels.
channels of high-quality audio?
firmware during the upgrade
process?
rapidly, it means your storage device will
be used up very soon. Recording could
stop in a few minutes after the storage
space is depleted. Please find a new hard
HDMI input is disconnected, the
recording will stop. After the input is
reconnected and restored, the HDR-1 will
start to record again, but the audio and
video of the content recorded will
channel recording only and will fail to
record if multiple audio channels such as
channels so if the signal source is of
multiple audio channels, the HDR-1 still
the thumb drive. This is because if the
HDR-1 detects that the thumb drive is
not safely removed on the PC, the system
will display a repair message and the
firmware file will be removed (previously
recorded file will NOT be deleted) after
54
Page 55

Appendix 5 Dimensions
All measurements in millimeters (mm)
55
Page 56

Appendix 6 Specifications
Video Input
HDMI Type A x 1
Video Output
HDMI Type A x 1
DC IN
DC Jack
Storage
USB Port x 1 (Female Type A / USB 2.0 Compliant)
Power Bank IN
USB Port x 1 ( Female type A)
Control
RS-232 / GPI (Pulse Trigger: Record Start / Stop)
Coding Spec
Container
MP4
H.264 + AAC
Audio Coding
AAC
Stereo 16 bit 48KHz 128Kbps
USB Storage Device Condition
File System
NTFS
Storage Speed
Minimum write speed > 45 MBytes
Features
Recording
Function
Record, Play/Pause, Fast Forward, Rewind, Previous Clip, Next Clip,
Recall Slow Motion
Profile Main/High Profile
Video Coding H.264 4:2:0
Interfaces
480i60 Main profile Level 4.1
480p60 Main profile Level 4.1
576i50 Main profile Level 4.1
576p50 Main profile Level 4.1
720p50 Main profile Level 5.0
720p60 Main profile Level 5.0
1080i50 High profile Level 4.1
1080i60 High profile Level 4.1
1080p50 High profile Level 5.0
1080p60 High profile Level 5.0
HD: 1080P
20Mbps/18Mbps/15Mbps
HD: 720P 20Mbps/15Mbps.10Mbps
HD: 1080i
15Mbps/12Mbps/10Mbps
SD: 576P/480P/576i/480i
7.5Mbps/5Mbps/3Mbps
56
Page 57

Video and Audio Display / Record Mode
Pass through
Recording Mode
1080P@24
Dolby Digital
X
X
X
X
1080P@50
1080P@50
1080i@50
1080P@25
1080i@50
1080P@60
1080P@60
1080i@60
1080P@30
1080i@60
1080i@50
1080i@50
1080i@50
1080i@50
1080i@50
1080i@60
1080i@60
1080i@60
1080i@60
1080i@60
720P@50
720P@50
720P@50
720P@50
720P@50
720P@60
720P@60
720P@60
720P@60
720P@60
576P
576P
576P
576P
576P
480P
480P
480P
480P
480P
576i
576i
576i
576i
576i
Video Audio
Real Time
Mode
Standard
Mode
Audio
Record
Format
Video
Auto: PCM
2Ch
Manually:
RAW 5.1Ch
PCM 2Ch
& DTS
480i 480i 480i 480i 480i
Playback
Mode
57
Page 58

Service and Support
58
 Loading...