

Page 1

DVS-100/200 Installation Guide
DVS-100/200 can be installed on any system running the Ubuntu 14.04 64 bit Linux operating
system, the guide below covers some common installation scenarios.
The installation procedure for DVS-100 and DVS-200 is the same. Once installed the software will be
running in free mode (DVS-100) you must install a valid licence to enable DVS-200 features.
Contents
System resource recommendations ................................................................................................... 2
On-Premise Installations ................................................................................................................ 2
Cloud hosting installations ............................................................................................................. 2
Hosting Examples ...................................................................................................................... 2
Installation Walkthroughs.................................................................................................................. 3
Digital Ocean ................................................................................................................................. 3
Installation on Amazon AWS Cloud .............................................................................................. 10
Generic Installation Instructions (All Providers) ............................................................................... 16
Automated Script ........................................................................................................................ 16
Manual installation (Advanced Users) .......................................................................................... 16
Prerequisites............................................................................................................................ 16
Packages .................................................................................................................................. 16
Page 2

System resource recommendations
Network Speed
Viewers (Per Instance)
10 Mbps
8
100 Mbps
80
1000 Mbps
800
Hosting Plan
Viewers (Per Instance)
$5 USD PM
50
$10 USD PM
150
Hosting Plan
Viewers (Per Instance)
M1.small
120
M1.medium
285
m1.xlarge
570
The guide below makes some recommendations on system specifications, please use these as
guidelines only. We assume one 1Mbps video stream with 96Kbps audio, the max viewer count is
per instance (per server).
On-Premise Installations
8GB of RAM and a SSD (Solid state drive) is recommended for larger audiences, approximate
network limitations are as below.
Add more instances or additional network interfaces as audience size increases
For encoding / transcoding HD video we recommend a 4 core 7th generation i7 CPU and 8GB ram at
minimum.
Cloud hosting installations
Hosting Examples
Digital Ocean
Digital Ocean is ideal for scenarios with low viewer counts.
All Digital Ocean instances share a 1Gbps connection to the internet, Digital Ocean recommend
consistently not exceeding 300Mbps I/O.
Add more instances as audience size increases
Amazon AWS
Add more instances as audience size increases
Page 3

Hosting Plan
Viewers (Per Instance)
Managed Dedicated I
800
Massive Grid
Massive grid offer affordable dedicated servers with dedicated 1Gbps connectivity.
Add more instances as audience size increases
Installation Walkthroughs
Digital Ocean
Visit www.digitalocean.com and sign up for a new account
Once you have created your account click the ‘Create Droplet’ button
Page 4

You will see the page below.
First give your Droplet a hostname, here I have chosen DVSS.
Page 5

Next choose a size, the size required depends on how many users you need to serve. Use the guide
at the begging of this document to help with selection.
Next select the region closest to you for best performance.
Page 6

Finally you need to select an image, please choose Ubuntu 14.04 x64.
Ignore the ‘Available Settings’ and ‘Add SSH Keys (optional)’ sections and create the droplet.
Page 7
Once the droplet has been created you will see the page below. We are now ready to install the
stream server software.
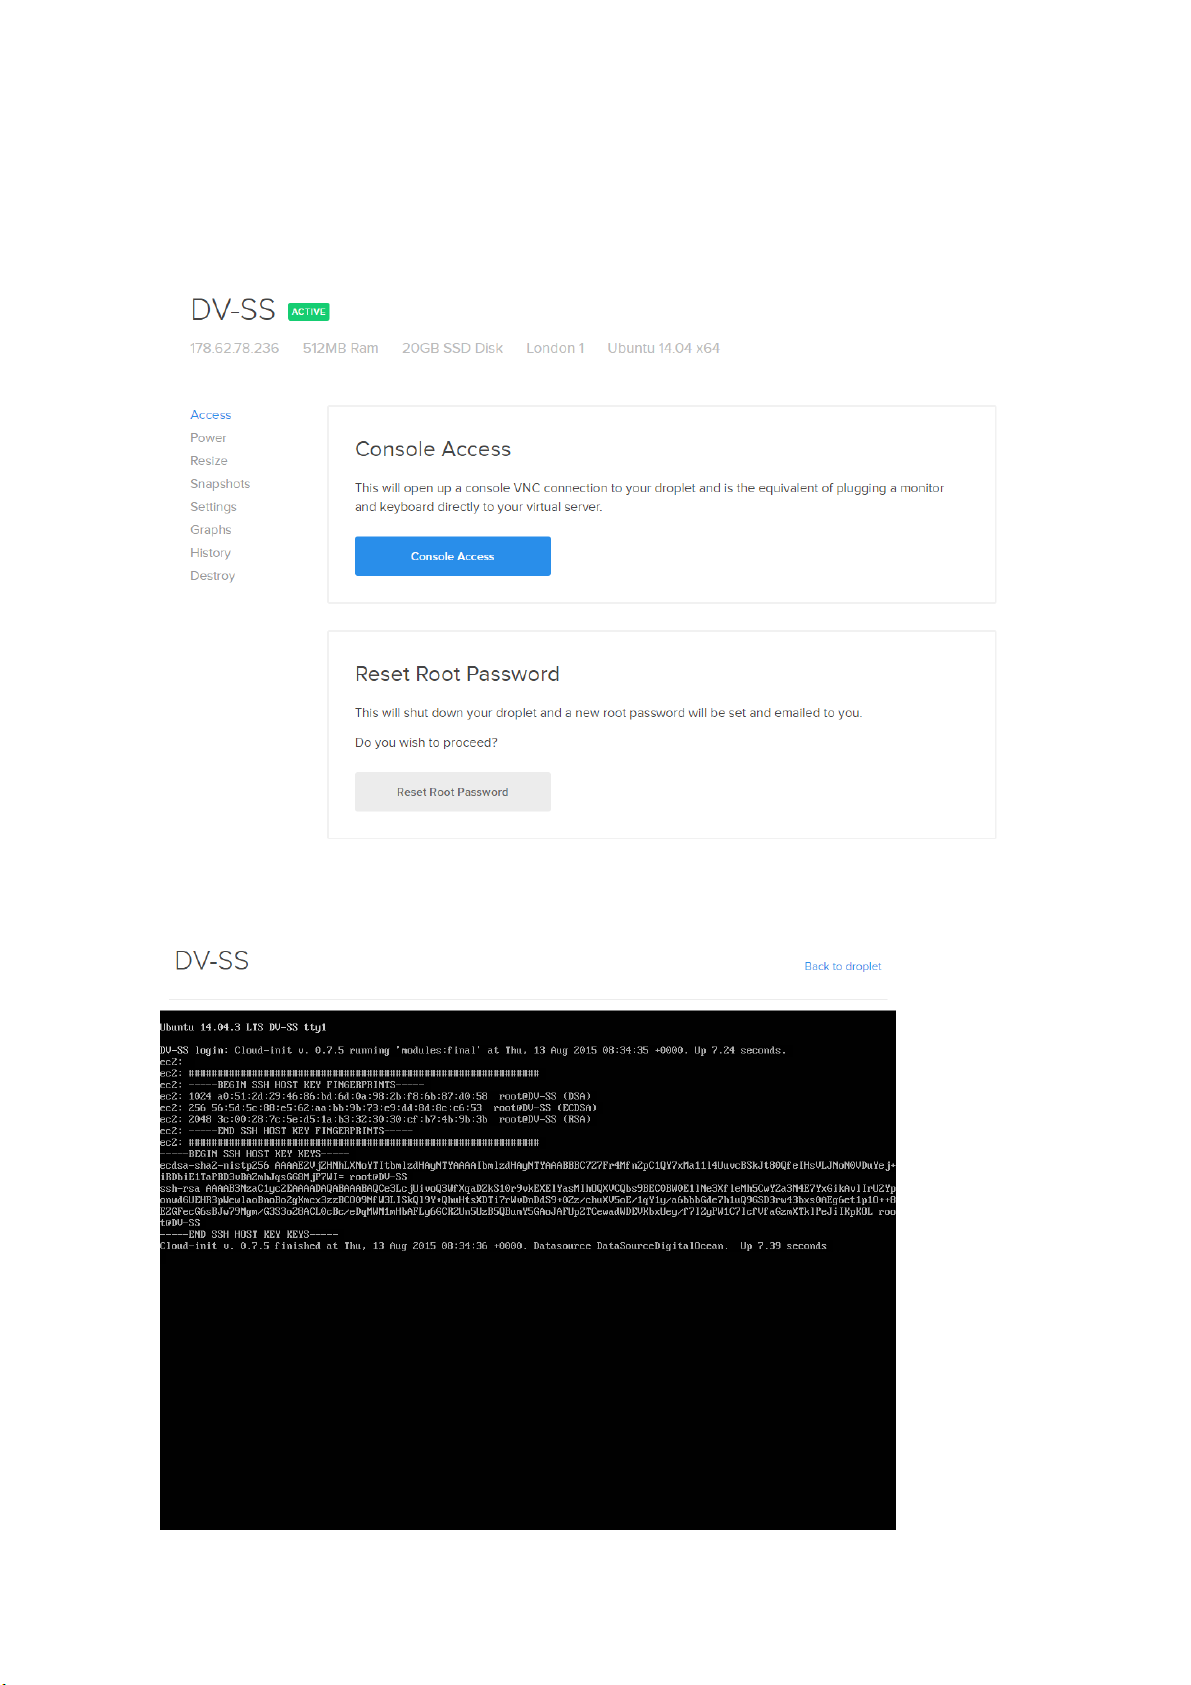
Click the blue ‘Console Access’ button, you will see the page below
Page 8

Hit return on the keyboard and you will be asked to login. The username and password for your
server will have been e-mailed to you by Digital Ocean. Enter your username and hit the return key,
then enter your password and again hit the return key to login (please note you will not see any
characters appear on screen when typing your passwords).
You will be asked to change your password the first time you login, please ensure you use a
password that is at least 10 characters long it should be uppercase and lowercase and contain
characters such as $%&@# for security.
Once logged in type the commands below in order, hit return after each command.
wget http://updates.datavideo.co.uk/install-dvss.sh
bash install-dvss.sh
Page 9

You will see the message below once the installation is complete.
Now simply enter the IP address displayed into a web browser to access the login page.
The default credentials are:
User: admin
Password: 000000
After logging in you will see the software is running in free (DVS-100) mode, to enable DVS-200
features you need a valid licence.
Page 10

Installation on Amazon AWS Cloud
Visit http://aws.amazon.com and sign up for a new account
Once you have created your account sign in and you will see the page below
First change the region in the top right corner to the region where you would like to setup your
cloud server
Page 11

Now click the ‘EC2’ link under compute to the left of the page
Click the ‘Launch Instance’ button
Page 12

Select the Ubuntu 14.04 64 bit image as shown below
Now select your instance type, the size required depends on how many users you need to serve. Use
the guide at the begging of this document to help with selection.
One you have selected and instance size proceed and click the ‘Review and Launch’ button.
Page 13

Click the ‘Edit security groups’ link
Add two new custom TCP rules for ports 80 and 1935 as shown below.
Click the ‘Review and launch’ button again
Click the ‘Launch’ button
You will see the prompt blow. Choose to create a new key pair and give the key pair a name.
Page 14

Click the ‘Download Key Pair’ button and save the file somewhere safe (you will need it later) before
clicking the ‘Launch Instance’ button. You will see the page below, click the ‘View Instances’ button
to proceed.
Select ‘Connect’ from the actions menu
You will see the prompt below. Follow the instructions to connect to your instance via SSH.
Page 15

Once connected via SSH execute the following commands on the server.
wget http://updates.datavideo.co.uk/install-dvss.sh -O - | bash
Once installation is complete enter the instances public IP or public DNS into a web browser to
connect to the DVS-200 web interface.
The default credentials are:
User: admin
Password: 000000
After logging in you will see the software is running in free (DVS-100) mode, to enable DVS-200
features you need a valid licence.
Page 16

Generic Installation Instructions (All Providers)
Automated Script
The following command can be executed on any system running the Ubuntu 14.04 64 bit Linux
operating system.
Ensure the system has internet access and execute the commands below as the root user to install
DVS-200.
wget http://updates.datavideo.co.uk/install-dvss.sh -O - | bash
After a successful installation the stream server’s web interface will be running on port 80.
Manual installation (Advanced Users)
Prerequisites
libasound2 libyaml-0-2 libass4 libmp3lame0 libopencore-amrnb0 libopencore-amrwb0 libopus0
libpulse0 libsdl2-2.0-0 libsoxr0 libspeex1 libva-drm1 libva-x11-1 libva1 libvdpau1 libwavpack1
libx264-142 libxcb-shape0 libxcb-shm0 libxv1 libxvidcore4 libluajit-5.1-2 libluajit-5.1-common
libdouble-conversion1 liblz4-1 libpq5 libsnappy1 php5-fpm php5-cli binutils ghostscript gsfonts
imagemagick-common libavahi-client3 libavahi-common-data libavahi-common3 libboostcontext1.54.0 libboost-filesystem1.54.0 libboost-program-options1.54.0 libboost-regex1.54.0
libboost-system1.54.0 libboost-thread1.54.0 libc-client2007e libcups2 libcupsfilters1 libcupsimage2
libfftw3-double3 libgd3 libgflags2 libgoogle-glog0 libgs9 libgs9-common libijs-0.35 libjasper1 libjbig0
libjbig2dec0 libjemalloc1 libjpeg-turbo8 libjpeg8 liblcms2-2 liblqr-1-0 libltdl7 libmagickcore5
libmagickwand5 libmcrypt4 libmemcached10 libmysqlclient18 libonig2 libpaper-utils libpaper1
libsqlcipher0 libtbb2 libtiff5 libunwind8 libvpx1 libxpm4 libxslt1.1 mlock mysql-common popplerdata
Packages
http://updates.datavideo.co.uk/updates/debian/hhvm_3.15.2~trusty_amd64.deb
http://updates.datavideo.co.uk/updates/debian/ffmpeg_3.1.4+git1~trustyubuntu1_amd64.deb
http://updates.datavideo.co.uk/updates/debian/nginx-dvss_1.8.0-4ubuntu34_amd64.deb
http://updates.datavideo.co.uk/updates/debian/nginx-dvss-webui_1.12ubuntu25_all.deb
Page 17

 Loading...