

Page 1

EXHAUST SYSTEM
B ENGINE
A
EX
SECTION EX
CONTENTS
PREPARATION .............................. .................... ......... 2
Commercial Service Tools ........................................ 2
EXHAUST SYSTEM ................................................... 3
EXHAUST SYSTEM
Checking Exhaust System ........................................3
Removal and Installation ..........................................3
REMOVAL .............................................................4
INSTALLATION .....................................................4
INSPECTION AFTER INSTALLATION ..................5
C
D
E
F
G
H
I
J
K
M
L
Revision: 2005 July 2005 FX
EX-1
Page 2
PREPARATION
PREPARATION PFP:00002 Commercial Service Tools ABS005Z4
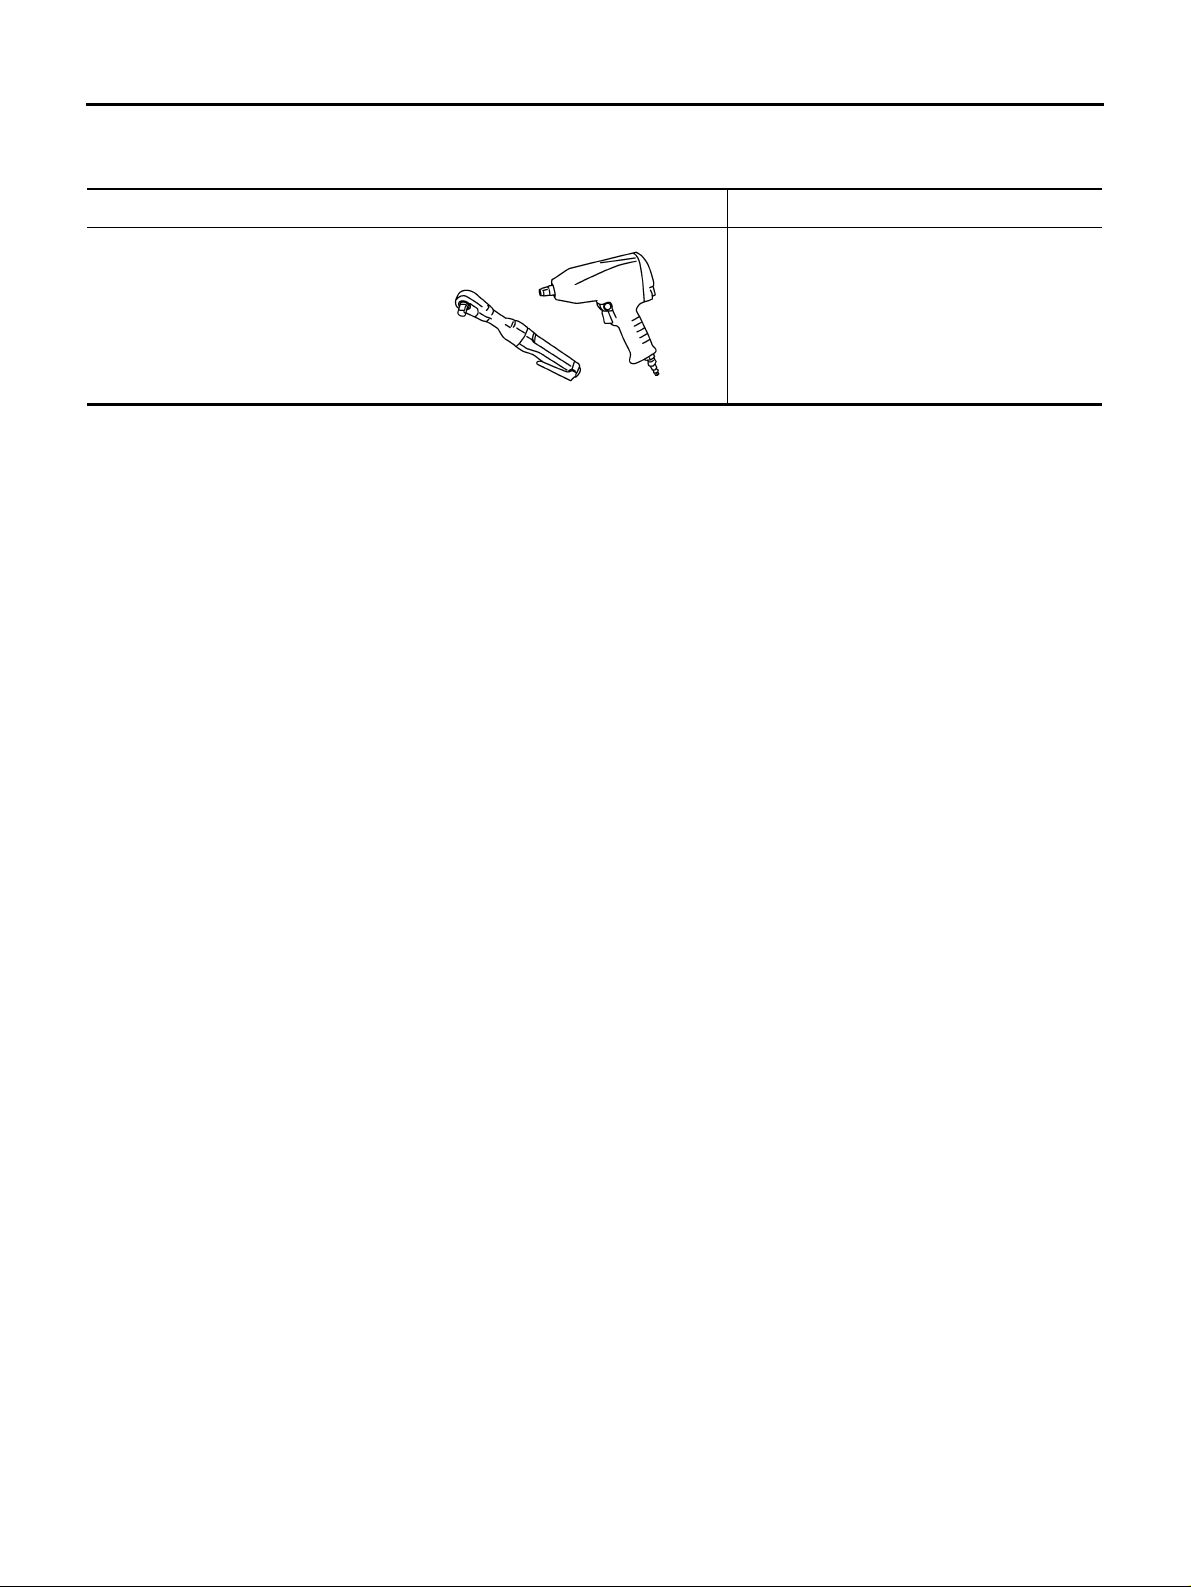
Tool name Description
Power tool Loosening nuts and bolts
PBIC0190E
Revision: 2005 July 2005 FX
EX-2
Page 3
EXHAUST SYSTEM
EXHAUST SYSTEM PFP:20100
Checking Exhaust System ABS005Z5
Check exhaust pipes, muffler and mounting for improper attachment,
leaks, cracks, damage or deterioration.
● If anything is found, repair or replace damaged parts.
SMA211A
Removal and Installation ABS005Z6
CAUTION:
● Be sure to use genuine exhaust system parts or equivalents which are specially designed for heat
resistance, corrosion resistance, and shape.
● Perform the opera tion with the exha ust sys tem fully cooled down beca use the system will be hot
just after engine stops.
● Be careful not to cut your hand on the heat insulator edge.
A
EX
C
D
E
F
G
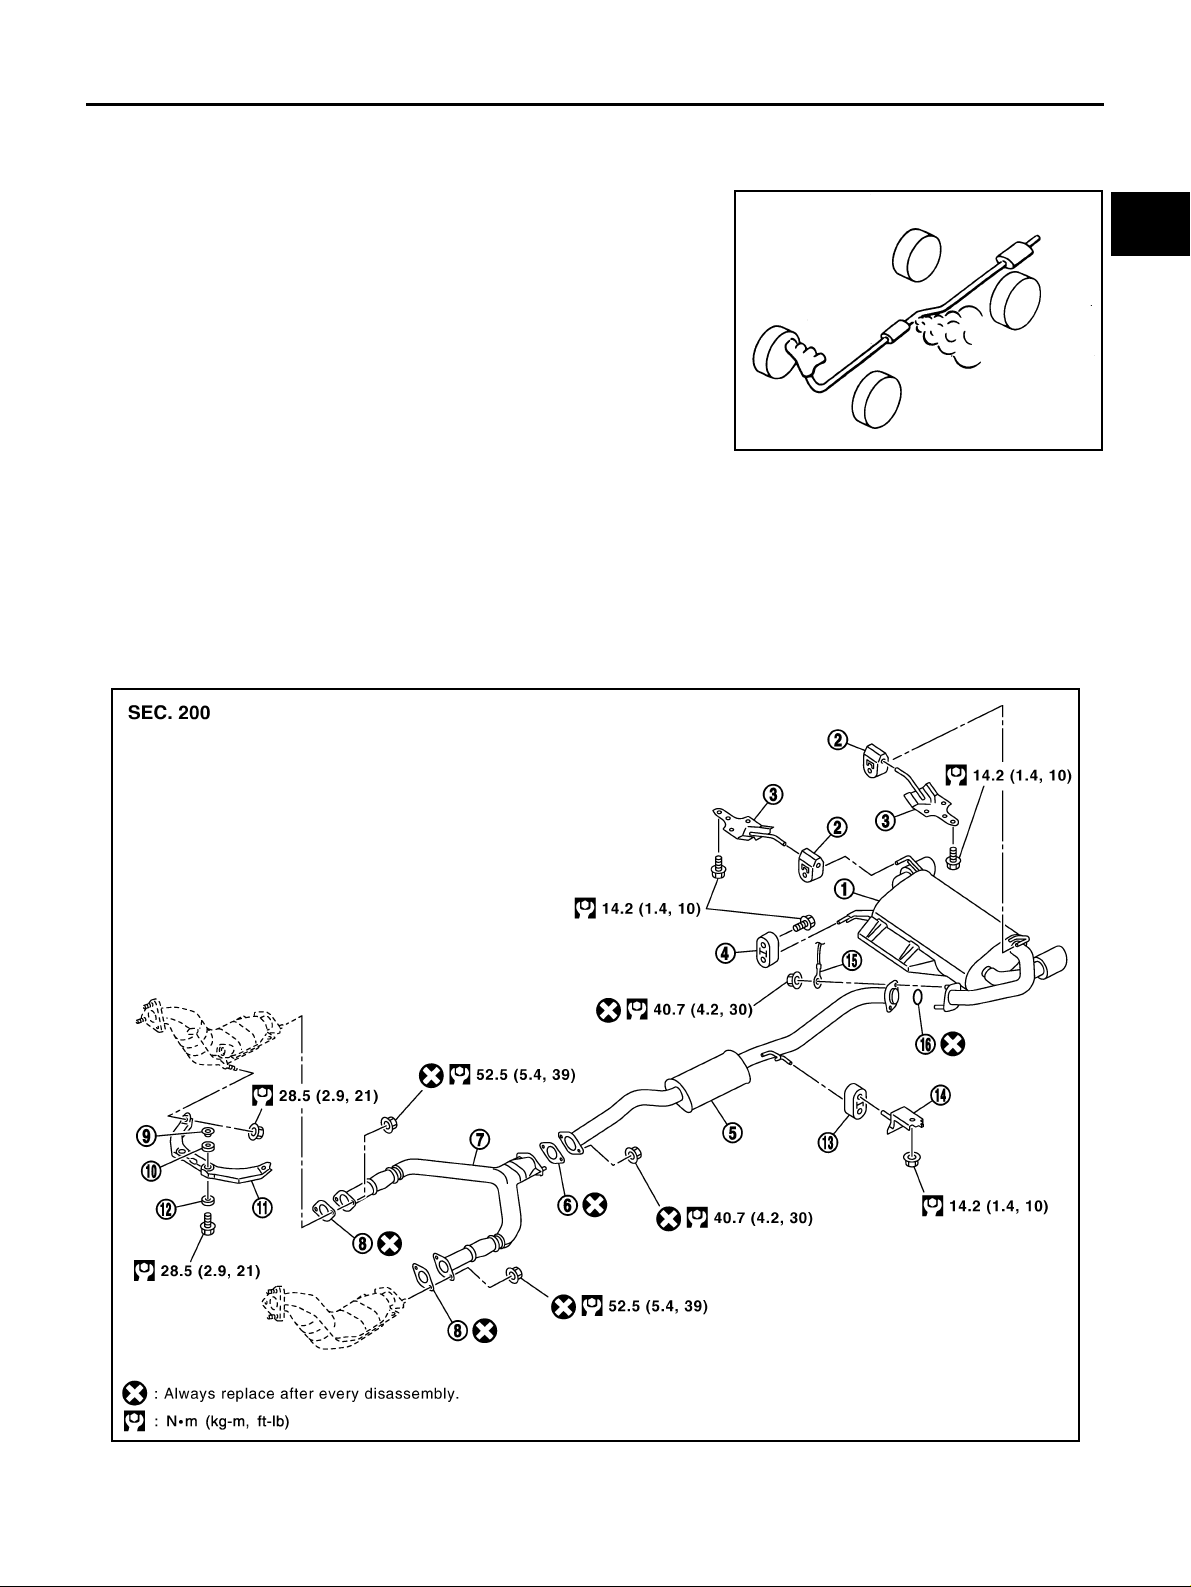
VQ35DE
H
I
J
K
L
M
PBIC1583E
1. Main muffler 2. Mounting rubber 3. Main muffler mounting bracket
4. Mounting rubber 5. Center muffler 6. Gasket
7. Exhaust front tube 8. Gasket 9. Collar
Revision: 2005 July 2005 FX
EX-3
Page 4
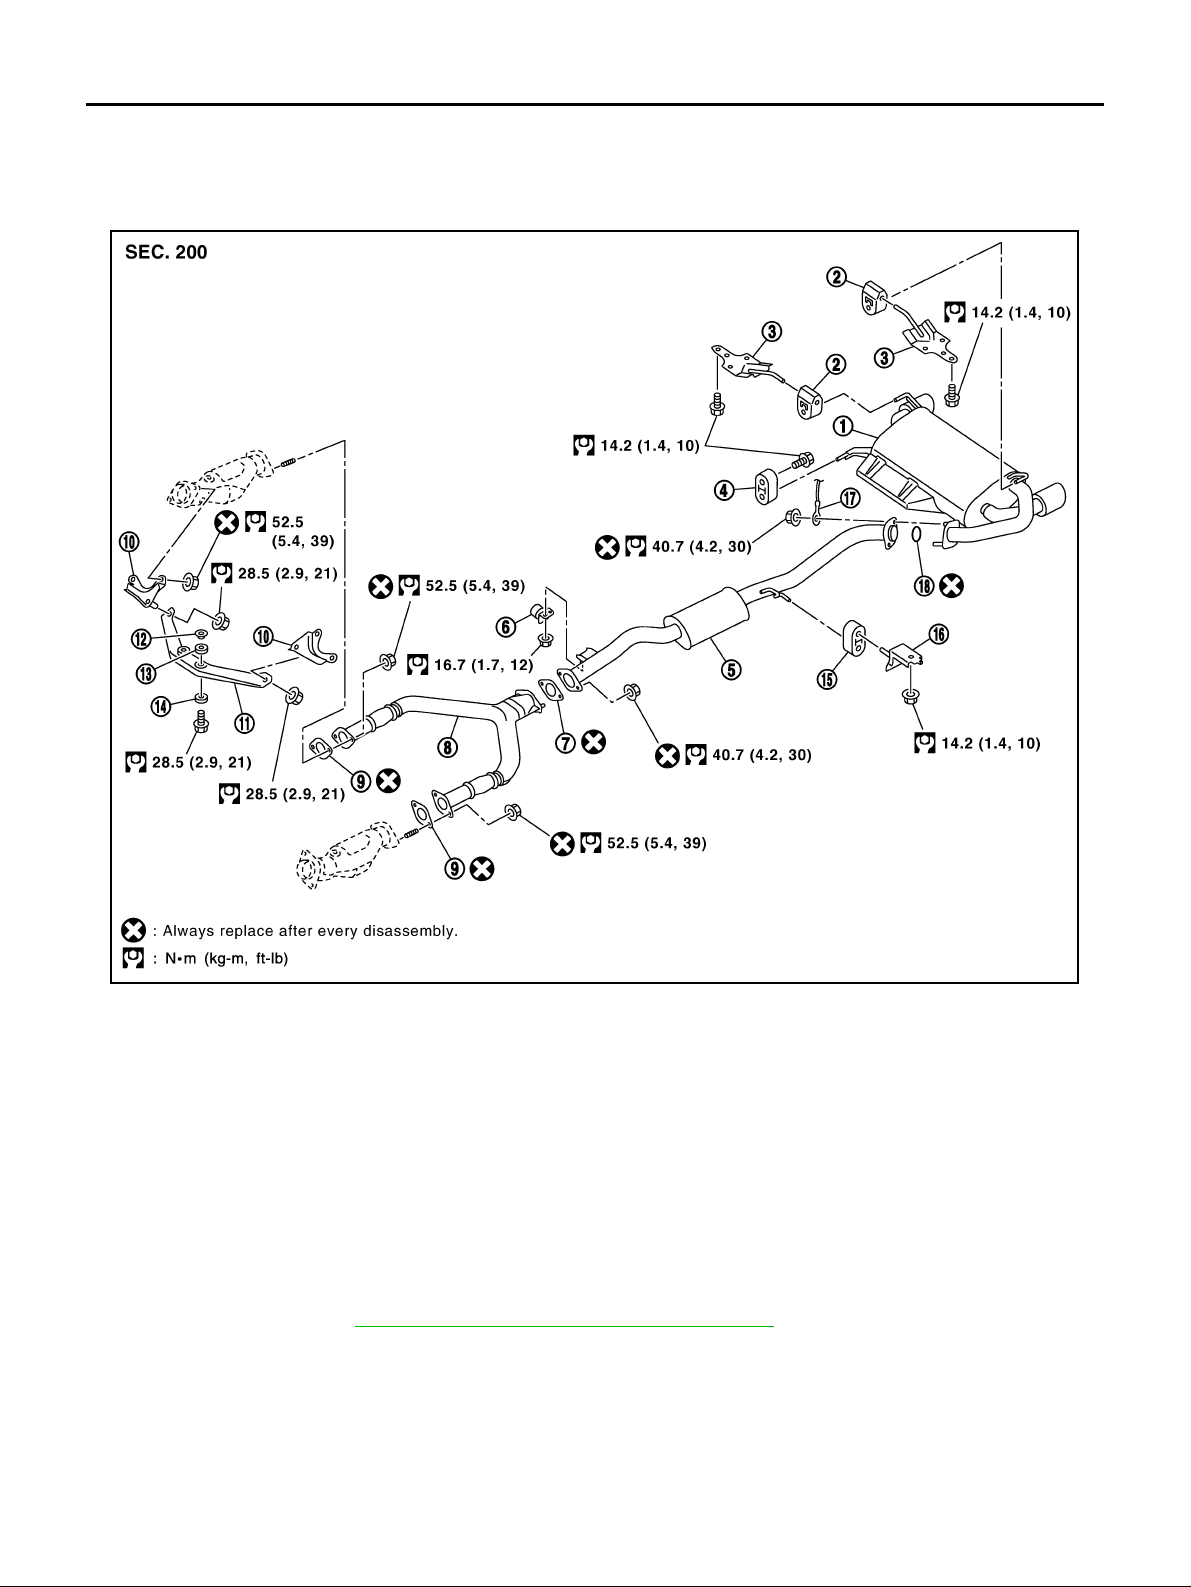
EXHAUST SYSTEM
10. Grommet 11. Exhaust mounting bracket 12. Grommet
13. Mounting rubber 14. Bracket 15. Ground cable
16. Ring gasket
VK45DE
1. Main muffler 2. Mounting rubber 3. Main muffler mounting bracket
4. Mounting rubber 5. Center muffler 6. Dynamic damp er
7. Gasket 8. E x haust front tube 9. Gasket
10. Mounting bracket 11. Exhaust mounting bracket 12. Collar
13. Grommet 14. Grommet 15. Mounting rubber
16. Bracket 17. Ground cable 18. Ring gasket
REMOVAL
● Disconnect each joint and mounting using power tool.
● When removing main muffler, remove main muff ler mounting bracket bolts.
● Remove exhaust mounting bracket as follows:
1. Re move engine rear undercover.
2. Re move front cross bar. FSU-6, "
FRONT SUSPENSION ASSEMBLY" .
3. Remove exhaust mounting bra ck et .
INSTALLATION
Note the following, and install in the reverse order of removal.
PBIC1775E
Revision: 2005 July 2005 FX
EX-4
Page 5
EXHAUST SYSTEM
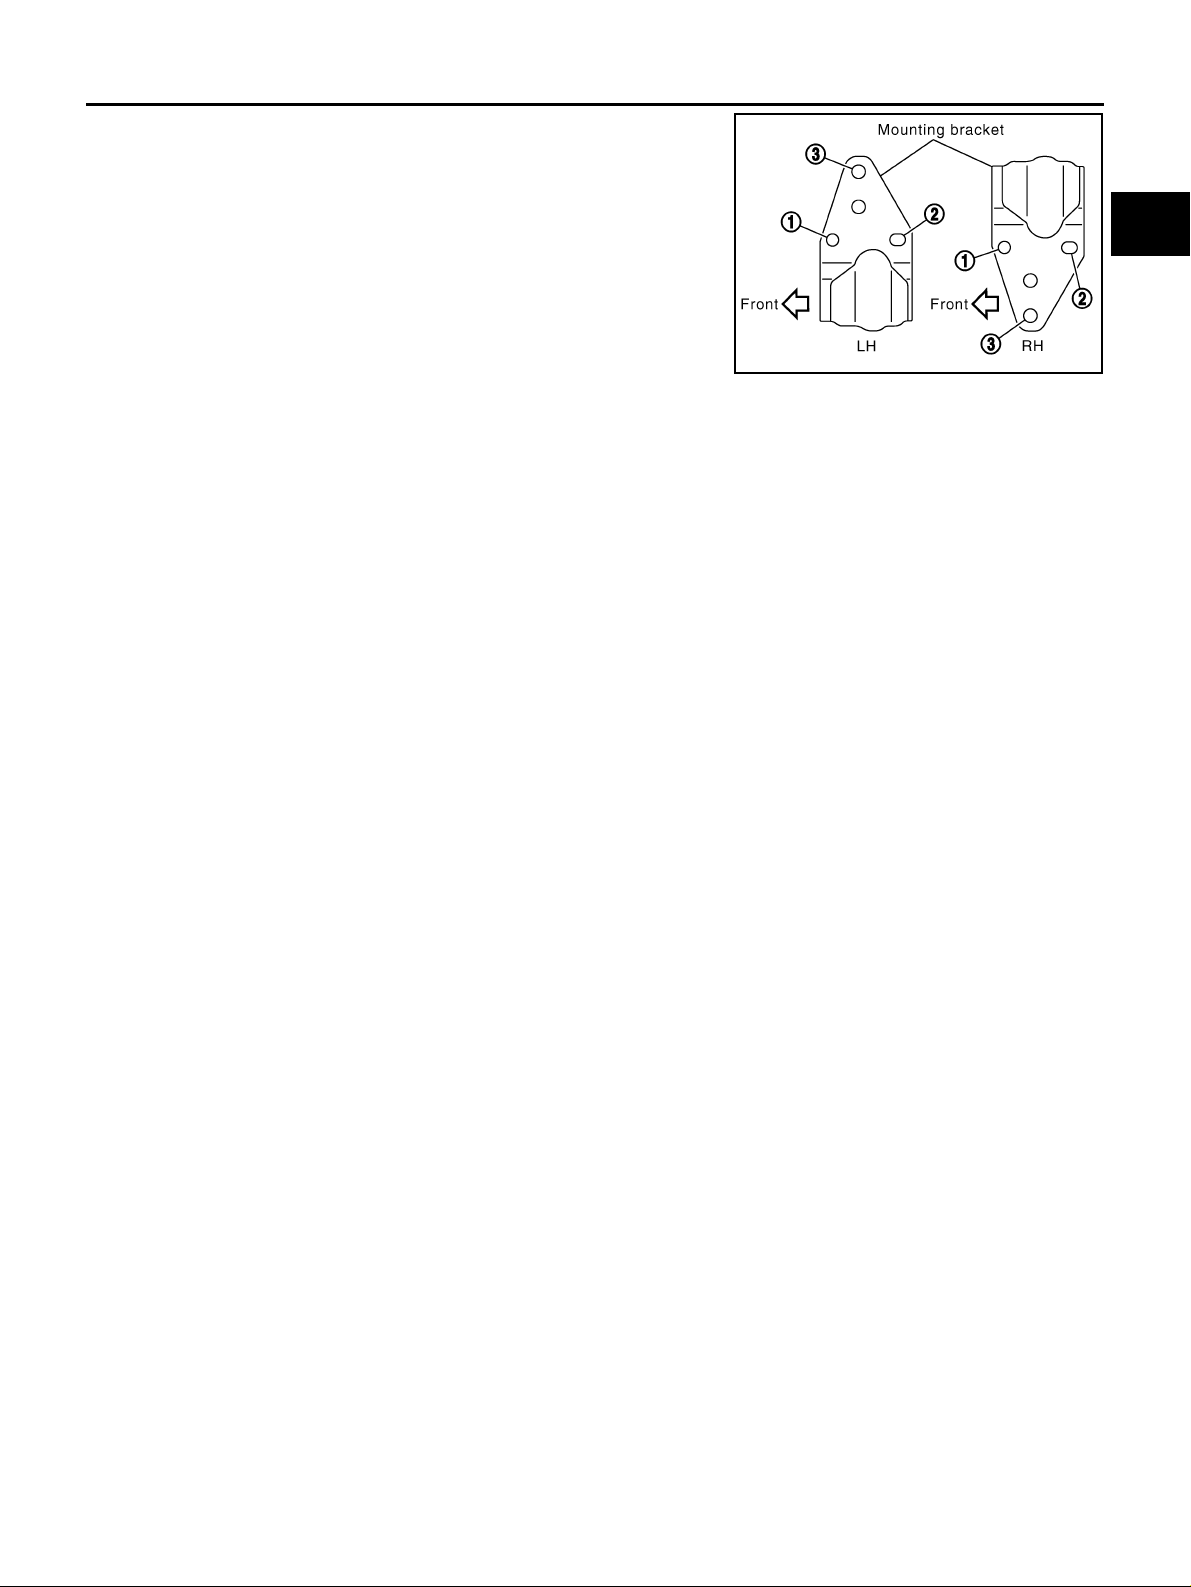
● Tighten main muffler mou nting bracket bol ts in numerical orde r
as shown in the f igure.
PBIC1049E
CAUTION:
● Always replace exhaust tube gaskets with new ones when reassembling.
● If heat insulator is badly deformed, repair or replace it. If deposits such as mud pile up on the heat
insulator, remove them.
● When installing heat insulator av oid large gaps or interference between heat insulato r and each
exhaust pipe.
● Remove deposits from the sealing surface of each connection. Connect them securely to avoid
gases leakage.
● Temp orarily tighten mou nting nuts on the exhaust manifold side and mounting bolts on the vehi-
cle side. Check each part for unu sual interference, a nd then tighten them to the specified torque.
● When installing each mounting rub ber, avoid twisting or unusual extens ion in up/dow n and right/
left directions.
A
EX
C
D
E
F
G
H
INSPECTION AFTER INSTALLATION
● Make sure clearance between tail tube and bumper is even.
● With engine running, check exhaust tube joints for gas leakage and unusual noises.
● Check to ensure that mounting brackets and mounting rubbers are installed properly and free from undue
stress. Improp er installation could result in excessive noise and vibration.
I
J
K
L
M
Revision: 2005 July 2005 FX
EX-5
Page 6

EXHAUST SYSTEM
Revision: 2005 July 2005 FX
EX-6
 Loading...