


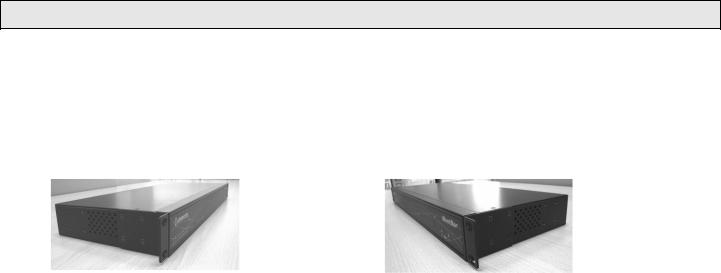
iBootBar
Installation and Operations
Version 1.5
Scope of this Document:
This document covers the installation and operations of Dataprobe’s iBootBar series of remote power control units. The following models are covered in this document:
Model |
Power Feed / Total Capacity |
Outlets |
Control |
iBB-N15 |
NEMA 15 Amp |
8 x NEMA 5-15 |
IP Control, Serial Control |
iBB-N15-M |
NEMA 15 Amp |
8 x NEMA 5-15 |
IP Control, Serial Control, Internal Modem |
iBB-2N15 |
2 x NEMA 30 Amp |
8 x NEMA 5-15 |
IP Control, Serial Control |
iBB-2N15-M |
2 x NEMA 30 Amp |
8 x NEMA 5-15 |
IP Control, Serial Control, Internal Modem |
iBB-N20 |
NEMA 20 Amp |
8 x NEMA 5-15 |
IP Control, Serial Control |
iBB-N20-M |
NEMA 20 Amp |
8 x NEMA 5-15 |
IP Control, Serial Control, Internal Modem |
iBB-2N20 |
2 x NEMA 40 Amp |
8 x NEMA 5-15 |
IP Control, Serial Control |
iBB-2N20-M |
2 x NEMA 40 Amp |
8 x NEMA 5-15 |
IP Control, Serial Control, Internal Modem |
iBB-C10 |
IEC C14 10 Amp |
8 x IEC C13 |
IP Control, Serial Control |
iBB-C10-M |
IEC C14 10 Amp |
8 x IEC C13 |
IP Control, Serial Control, Internal Modem |
iBB-2C10 |
2 x IEC C14 20 Amp |
8 x IEC C13 |
IP Control, Serial Control |
iBB-2C10-M |
2 x IEC C14 20 Amp |
8 x IEC C13 |
IP Control, Serial Control, Internal Modem |
iBB-C20 |
IEC C20 20 Amp |
8 x IEC C13 |
IP Control, Serial Control |
iBB-C20-M |
IEC C20 20 Amp |
8 x IEC C13 |
IP Control, Serial Control, Internal Modem |
iBB-2C20 |
2 x IEC C20 40 Amp |
8 x IEC C13 |
IP Control, Serial Control |
iBB-2C20-M |
2 x IEC C20 40 Amp |
8 x IEC C13 |
IP Control, Serial Control, Internal Modem |
Ref: iBootBar_1.5_v031212e
Technical Support Hotline: (201) 934-5111 tech@dataprobe.com
Main: 201-934-9944 Website: dataprobe.com

Table of Contents
Important Safety Instructions |
4 |
Quick Start |
5 |
General Overview |
6 |
Installation |
8 |
Rack Mounting
Ethernet
Serial Port
Dial Line
Expansion
Power Source
Configuration |
10 |
Setup and Control Utility |
|
Command Line Interface |
|
Setting the IP Address |
|
Basic Operation |
13 |
Web Interface
Command Line Interface
Outlet Commands
User Commands
Device Commands
Group Commands
Web Server Commands
Telnet Commands
AutoPing Commands
Event Commands
Firmware Upload Commands
Email Commands
Time Commands
Advanced Operation |
26 |
DTMF Control
Timed Events
Auto Ping
Email Notification
SNMP
Firmware Upgrades
Password Recovery
Setup and Control Utility
Specifications |
34 |
Compliance Statements |
35 |
Modem Certifications |
36 |
SNMP MIB |
37 |
Technical Support, Warranty |
38 |
iBootBar V1.5x |
Page 3 |
|
|

Important Safety Information
When using this product, basic safety precautions should always be followed to reduce the risk of fire, electric shock, and injury to persons, including the following:
Disconnect all power cords before servicing!
1.Read and understand all instructions.
2.Follow all warnings in the manual and marked on the product.
3.Unplug this product from the wall outlet before cleaning. Do not use liquid cleaners or aerosol cleaners. Use a damp cloth for cleaning.
4.Do not use this product in an outdoor environment or near water, for example, near a bath tub, wash bowl, kitchen sink, or laundry tub, in a wet basement, or near a swimming pool.
5.Do not place this product on an unstable cart, stand, or table. The product may fall, causing serious damage to the product.
6.Slots and openings in this product and the back or bottom are provided for ventilation to protect it from overheating, these openings must not be blocked or covered. The openings should never be blocked by placing the product on the bed, sofa, rug, or other similar surface. This product should never be placed near or over a radiator or heat register. This product should not be placed in a built-in installation unless proper ventilation is provided.
7.This product should be operated only from the type of power source indicated on the marking label. If you are not sure of the type of power supply to your home, consult your dealer or local power company.
8.This product is equipped with a three wire grounding type plug, a plug having a third (grounding) pin. This plug will only fit into a grounding type power outlet. This is a safety feature. If you are unable to insert the plug into the outlet, contact your electrician to replace your obsolete outlet. Do not defeat the safety purpose of the grounding type plug. Do not use a 3-to-2 prong adapter at the receptacle; use of this type adapter may result in risk of electrical shock and/or damage to this product.
9.Do not allow anything to rest on the power cord. Do not locate this product where the cord will be abused by persons walking on it.
10.Do not overload wall outlets and extension cords as this can result in the risk of fire or electric shock.
11.Never push objects of any kind into this product through slots as they may touch dangerous voltage points or short out parts that could result in a risk of fire or electrical shock. Never spill liquid of any kind on the product.
12.To reduce the risk of electrical shock, do not disassemble this product, but take it to a qualified serviceman when some service or repair work is required. Opening or removing covers may expose you to dangerous voltages or other risks. Incorrect re-assembly can cause electric shock when the appliance is subsequently used.
13.Unplug this product from the wall outlet and refer servicing to qualified service personnel under the following conditions:
a)When the power supply cord or plug is damaged or frayed.
b)If liquid has been spilled into the product.
c)If the product has been exposed to rain or water.
d)If the product does not operate normally by following the operating instructions. Adjust only those controls, that are covered by the operating instructions because improper adjustment of other controls may result in damage and will often require extensive work by a qualified technician to restore the product to normal operation.
e)If the product has been dropped or has been damaged.
f)If the product exhibits a distinct change in performance.
14.Avoid using a telephone (other than a cordless type) during an electrical storm. There may be a remote risk of electric shock from lightning.
15.Do not use the telephone to report a gas leak in the vicinity of the leak.
16.Do not exceed the maximum output rating of the auxiliary power receptacle.
Page 4 |
iBootBar V1.5x |
|
|

Quick Start
Front Panel
 Outlet Status
Indicators
Rear Panel – NEMA Versions
2nd Linecord and Circuit Breaker on -2N Models
Linecord for |
Circuit Breaker |
NEMA Models |
|
Rear Panel – IEC Versions
IEC C-14 (10 Amp) or
IEC C-20 (20 Amp) Inlets
Reset Pushbutton |
Mains (Inlet) Power |
(Recessed) |
Indicators |
Expansion for Cluster
Configurations
8 NEMA 5-15
Outlets
2nd Inlet and Circuit Breaker on -2C Models
8 IEC C13 Outlets
Serial |
|
(DCE) |
Phone |
|
|
Network |
Line |
(10/100) |
(Modem |
|
Versions) |
Quick Start Defaults
IP address
User Credentials
Command Line Quick Start: To view outlet status
To turn on off outlet 1 To reboot outlet 2
192.168.0.254
Username: admin
Password: admin
iBootBar> get outlets iBootBar> set outlet 1 off iBootBar> set outlet 2 cycle
iBootBar V1.5x |
Page 5 |

General Overview
8 Independently controllable outlets The iBootBar (iBB) series is designed to provide power distribution and remote power control. Each iBB allows eight outlets to be independently switched on and off for reboot, energy management and security. The iBB has many features to make the management of power distribution simple and cost effective:
Dual power inputs for redundant power feeds (some models)
Models with dual inputs (iBB-2N- or iBB-2C-) have two inlets (mains). Each main feeds four outlets Inlet A supports outlets 1-4 and Inlet B feeds 5-8. Dual power inlet models can be used to support higher current devices, as each inlet can carry its rated load, doubling the amperage of a single inlet device. Dual Inlet models can also be used to source power from two redundant sources, with each source feeding a power supply of a single device.
Support for dual redundant powered |
In addition to two power sources, pairs of outlets can be linked together |
devices |
to allow simultaneous control. This allows a single command to power |
|
down devices with dual redundant power supplies. |
Web Browser Control |
Simple web browser interface is easy to use and provides complete |
|
status information and control of the outlets, and groups. |
Telnet/Serial CLI control |
Telnet and serial access use the same Command Line Interface (CLI ) |
|
structure and syntax to completely configure the iBootBar, or multiple |
|
iBootBars in a cluster configuration. |
Multiple users with assigned rights |
Up to 16 users can be assigned administrator or user only rights, plus |
and simultaneous control |
access to specific outlets and groups. Users only see the outlets and |
|
groups they are assigned to. |
Multiple iBootBar |
Up to 16 iBootBars can be linked together and controlled from a single |
Cluster Configuration |
web or CLI interface. One master iBootBar provides the |
|
communication to the users and continuously receives status |
|
information from the rest of the iBootBars in the cluster. Up to 128 |
|
outlets can be controlled in this manner from one IP address. |
Grouping of outlets for simultaneous management
AutoPing for automatic reboot of crashed systems
Real-Time event control
Multiple outlets, across multiple iBootBars in clustered configurations can be linked together in named groups and managed together. This allows for example, power cycling all devices of a certain type together.
Up to 16 systems can be continuously monitored with AutoPing, with automatic power control upon loss of contact. Reboot crashed systems, or provide auto power-up or –down for environmental controls, and notification systems.
Set automatic power actions based on your schedule. Restart systems every day to reduce memory bloat. Power up resources only when needed for energy management, lifecycle extension or security.
Internal Modem Option, Data or DTMF Control (some models)
Models with Suffix –M have internal modems with approvals in 36 countries. The modem supports data calls from terminal devices using the CLI, and direct dial from a tone telephone for simple on/off control when more sophisticated means are not available.
Page 6 |
iBootBar V1.5x |
|
|

SNMP manageable |
Setup and Control functions can be linked to any SNMP v1 compatible |
|
manager. The iBootBar MIB is downloadable from the website. |
Syslog reporting |
All activity can be reported to a syslog compatible server. |
iBootBar Cluster Configuration
Phone plus IP control
iBootBar V1.5x |
Page 7 |
Installation
Rack Mounting
The iBootBar is designed for mounting in a standard 19” equipment cabinet.
1.There are two L-shape brackets marked as “L” and “R”, install the “L” bracket on the left side of the iBB chassis then the “R” bracket on its right side.
Installed L bracket: |
Installed R bracket: |
2. Install the iBB to the standard 19-inch rack.
Ethernet
The iBootBar has a 10/100 Ethernet port. The default address is 192.168.0.254
Serial Port
The iBootBar has a 9 pin D subminiature connector for RS-232 serial control. The connector is configured as DCE for direct connection to a laptop or other terminal device. Default serial parameters are 115,200 bps, 8 data, no parity, 1 stop bit (115200,8,n,1).
Serial Port pinout: |
Pin No |
Description |
|
1 |
Data Carrier Detect |
|
2 |
Receive Data |
|
3 |
Transmit Data |
|
4 |
Data Terminal Ready |
|
5 |
Signal Ground |
|
6 |
Data Set Ready |
|
7 |
Request to Send |
|
8 |
Clear to Send |
|
9 |
Ring Indicator |
|
|
|
Dial Line
Models with suffix –M have an internal modem. This modem supports both data and DTMF control. The modem is approved for use in 36 countries. See Appendix for complete modem certifications. In models without the modem, this jack is not used.
Expansion
The dual Expansion ports allow multiple iBootBars to be linked together and managed from a single point. The expansion connector is 6 wire modular jack. iBootBars can be connected together in a daisy-chain or ring configuration. Up to 16 iBootBars can be clustered together and managed from a single web page or console session. Use 6 conductor data cable to connect iBootBars for cluster configurations. Configuration settings determine whether the iBootBar is the Master or Expansion.
Page 8 |
iBootBar V1.5x |
|
|

Power Source
The iBB-N15 <and iBB-N15-M> provides a linecord for connection to a 15 Amp 115VAC service. The total maximum current load for all outlets on the iBB-N15 cannot exceed 12 Amps.
The iBB-2N15<-M> provides two linecords for connection to 15 Amp 115VAC services. The total maximum current load for outlets on any linecord cannot exceed 12 Amps. Each linecord distributes power to four outlets.
The iBB-N20<-M> provides a linecord for connection to a 20 Amp 115VAC service. The total maximum current load for all outlets on the iBB-N20 cannot exceed 16 Amps.
The iBB-2N20<-M> provides two linecords for connection to 20 Amp 115VAC services. The total maximum current load for outlets on any linecord cannot exceed 16 Amps. Each linecord distributes power to four outlets.
The iBB-C10<-M> is for international applications and can be used on 100V to 240VAC. The iBB-C10 provides an IEC 320 style universal inlet for connecting a detachable power cord. A standard IEC to CEE7 European cord set is supplied with the unit for use on 10 Amp 240VAC service*. The total maximum current load for all outlets cannot exceed 12 Amps at 115VAC or 10 Amps when used at 240VAC.
The iBB-2C10<-M> is for international applications and can be used on 100V to 240VAC. The iBB-2C10 provides two IEC 320 style universal inlets for connecting a detachable power cord. Two standard IEC to CEE7 European cord sets are supplied with the unit for use on 10 Amp 240VAC service*. The total maximum current load for outlets on any linecord cannot exceed 12 Amps at 115VAC or 10 Amps when used at 240VAC. Each linecord distributes power to four outlets.
The iBB-C20<-M> is for international applications and can be used on 100V to 240VAC. The iBB-C20 provides an IEC 320 style universal inlet for connecting a detachable power cord. A standard IEC to CEE7 European cord set is supplied with the unit for use on 20 Amp 240VAC service*. The total maximum current load for all outlets cannot exceed 16 Amps.
The iBB-2C20<-M> is for international applications and can be used on 100V to 240VAC. The iBB-2C20 provides two IEC 320 style universal inlets for connecting a detachable power cord. Two standard IEC to CEE7 European cord sets are supplied with the unit for use on 16 Amp 240VAC service*. The total maximum current load for outlets on any linecord cannot exceed 16 Amps. Each linecord distributes power to four outlets.
* Power cords for other countries are available from your local source. If a power cord with a different terminating plug is required, be sure it is properly rated and meets all the required local electrical standards.
iBootBar V1.5x |
Page 9 |

Configuration
Setup & Control Utility
The iBootBar Setup and Control Utility (SCU) utility provides the easiest means to find and configure your iBootBar for use. The SCU can:
1.Automatically discover multiple iBootBars on a local network
2.Add additional iBootBars, not on the local network
3.Download existing configurations from installed iBootBars
4.Save existing configurations for later use or as backup
5.Open saved configurations for change management
6.Clone saved configurations for replication of similar configurations in multiple iBootBars
7.Upload modified configurations to iBootBars
8.Control Power Outlets on one or more iBootBars throughout the network
The iBootBar Setup and Control utility is available on the iBootBar CD or download it from
http://dataprobe.com/ibootbartools.html
iBootBar Setup and Control Utility
The Setup and Control Utility only operates with iBootBars attached to the network. iBootBars in a cluster configuration can be configured using the setup and control utility, if they are attached to the network.
Page 10 |
iBootBar V1.5x |
Command Line Interface
All configuration parameters are set using the Command Line Interface (CLI). The CLI is accessed through the network, using a telnet client, or through the serial port, or data modem using a terminal client. In iBootBar clusters, all remote iBootBars can be configured and managed through the connection to the Master iBootBar. It is also possible to access, configure and control any Expansion iBootBars directly.
Open a telnet client and point it to the current IP Address of the iBootBar. (Factory Default is 192.168.0.254)
Connect to the Serial port or via PSTN connection to the modem (-M versions) (Factory Default is 115200,8,n,1)
Upon connection, press Enter, then enter the username and password when prompted (Factory Default for username and password is admin)
A complete list of commands and syntax is found on page 16.
Setting the IP Address
iBootBars comes with factory default IP address 192.168.0.254.
There are three techniques to setting the IP address of the iBootBar.
1.Terminal Client software via Telnet, Serial, Modem.
2.Automatically from a DHCP Server
3.ARP / Ping (factory default)
To configure the mode to set the IP address, access the iBootBar’s command line interface (CLI) and use the set ipmode command as indicated below.
Setting the IP address using CLI
These are the basic commands to set the network parameters. After setting these parameters, the iBootBar will need to be rebooted for the settings to take effect. Any command that requires rebooting of the iBootBar will provide a prompt to do so. All commands may be entered as required before rebooting.
Example: Telnet to default IP address 192.168.0.254
iBootBar Rev 1.3a.228
User Name: admin
Password: *****
iBootBar > set ipaddress 192.168.1.3 Reboot Required!
OK
iBootBar > set subnet 255.255.255.0 Reboot Required!
OK
iBootBar > set gateway 192.168.1.7 Reboot Required!
OK
iBootBar > reboot
IP Address = 192.168.1.3
Once the IP address is set, the following command can be used to prevent DHCP or ARP-Ping from altering it:
Set ipmode static
iBootBar V1.5x |
Page 11 |
Setting the IP address from a DHCP Server
A DHCP server will automatically assign an IP address (dynamic address) as well as Subnet Mask and Gateway to the iBootBar.
To enable this feature, configure the iBootBar with the command set ipmode dhcp
Then reboot the iBootBar, or enter the command reboot
To find the IP address of the iBootBar you will need to query your DHCP server and locate the MAC address of the iBootBar in the DHCP server’s IP / MAC table. You can also access the CLI and use the get network command, or use the Discover provision of the iBootBar Setup and Control Utility.
Setting the IP address using ARP / Ping
The ARP / Ping technique uses a PC running a command line (DOS Window) to set the IP Address. To set the IP address using ARP, connect the iBootBar to your local network and apply power. The IP address to be assigned to iBootBar must be use the same subnet as the computer assigning the address. ARP does not work across routed or switched networks.
To set the IP address using ARP, the hardware (MAC) address must be known. This address is located on the bottom of the unit. The syntax for the MAC address is: nn-nn-nn-nn-nn-nn
Windows (98 and Later)
1.Access the iBootBar CLI and enter the set ipmode arp ping command
2.On a PC, open a DOS window. (Run: Command)
3.Type the following command:
arp -s <IP Address> <MAC Address>
Where <IP Address> is the desired IP address (in dotted decimal) for the iBootBar and the <MAC address> is the MAC Address of the iBootBar. The MAC Address of the iBootBar is located on the rear of the unit.
Example: arp -s 63.211.86.165 |
00-50-c2-05-01-c1 |
<enter> |
||
|new IP addr| |
|--- |
MAC addr---- |
| |
|
4.Ping the iBootBar to program the IP address into the iBootBar. Type: ping <IP Address>
Note: If the ping command returns “host not responding” 4 times then the address has not been programmed properly. Check the IP or MAC Address for typographical errors. Repeat step 2. If the problem persists, contact the Dataprobe Tech Support.
5.Delete the entry from the ARP cache by typing: arp -d <IP Address>
6.Ping the iBootBar to confirm that it has been programmed.
If the iBootBar fails to respond, repeat steps 2-4 above. If the problem persists, contact Dataprobe Tech Support.
Unix, Linux, MAC and others
Consult your systems administrator for information on how to set an IP Address. The unit should be pinged after the IP Address has been set to confirm proper operation.
Other Configuration Settings
All parameters are set using the CLI. See Page 16 for a complete list.
Page 12 |
iBootBar V1.5x |
 Loading...