

Page 1
92-2587-01 Rev.A
Wired/Wireless LAN Option
Page 2

Page 3
Overview
This document describes the installation and use of the Wired/Wireless LAN option for the I-
Class Mark II printer. Follow the steps to begin installing the option.
For safety and to avoid equipment damage, turn OFF the power switch and
CAUTION
unplug the AC power cord from the printer before starting this installation.
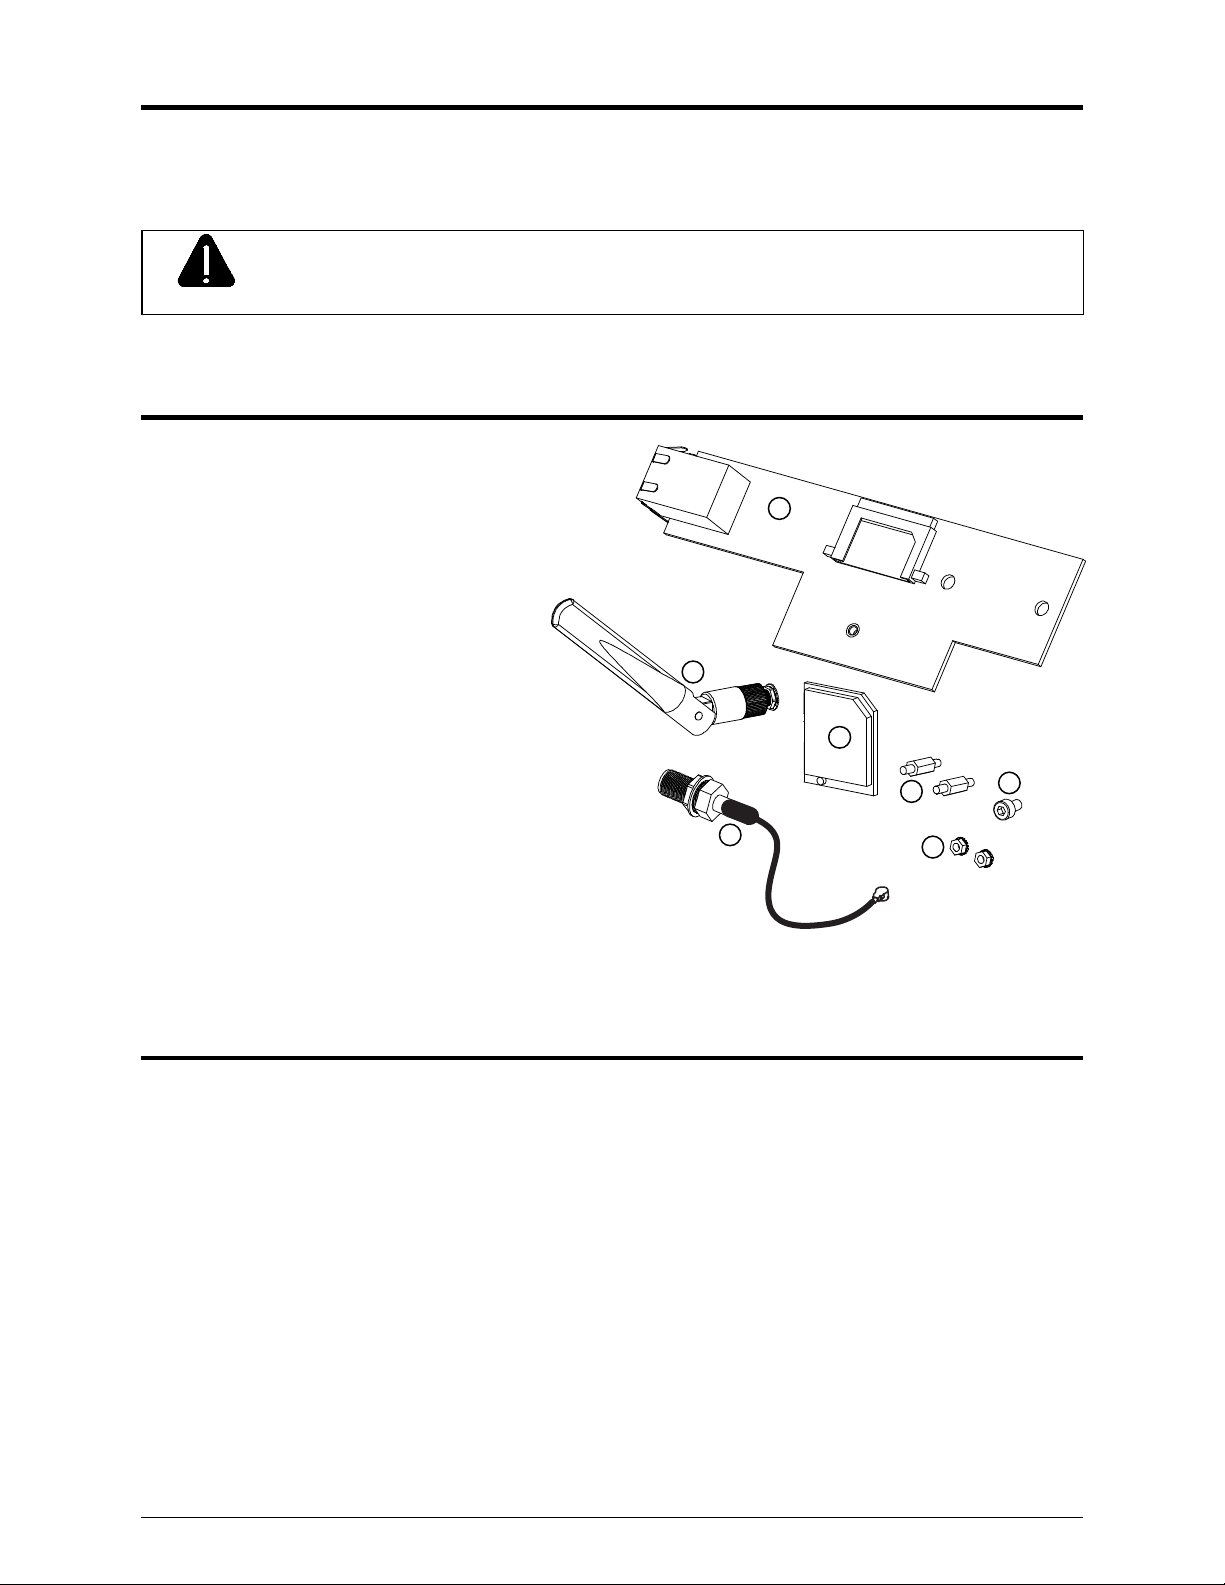
Contents
This kit contains the following items:
LAN Card Assembly
Wireless Module (wireless kits only)
Antenna Connector (wireless kits only)
Antenna (wireless kits only)
Standoff, 6mm Hex (2)
Locking Nut, 5.5mm (2)
Screw, 2.5mm Socketed Hex
1
4
2
5
3
6
7
Tools Required
To install this option, you will need:
Philips screwdriver
5mm Hex Driver
5.5mm Hex Driver
6mm Hex Driver
2.5mm Hex Key
5/16” or 8mm Wrench
3
Page 4

Installing the Option
Install the LAN Card as described below:
A) Turn off and disconnect the power cord from the printer. Remove the three Screws
from the left side cover of the printer.
B) Open the printer’s cover, loosen (do not remove) the two Screws on the inside of the
printer and lift the Cover Assembly up and off the printer.
Cover
Assembly
Screws
Screws
4
Page 5

C) Remove the 5mm Screw and Cover
Plate from the rear of the printer.
Cover Plate
5mm Screw
D) Install the two 6mm Standoffs into the main board in the locations shown.
6mm
Standoffs
5
Page 6

E) Install the LAN Card into the printer. First insert the “Port” end into the cut-out in the
rear of the printer. Then pivot the LAN Card onto the two Standoffs.
F) Install the two 5.5mm Nuts.
5.5mm
Nuts
G) LAN Card installation is complete. If your kit contains the Wireless Option, Proceed to
“Installing Wireless Module and Antenna” on the next page. Otherwise re-install the
printer’s cover and refer to the Operator’s Manual for connection and configuration
information.
6
Page 7

Installing Wireless Module and Antenna
Install the Wireless Module and Antenna as described below::
A) Orient the Wireless Module as shown and insert it into the Module Connector, be sure
the Wireless Module is fully seated.
B) Install the 2.5mm Socketed Hex Screw in the hole directly below the Wireless Module.
Wireless
Module
Socket
Wireless
Module
2.5mm Socketed
Hex Screw
C) Remove the Nut and Washer from the Antenna Connector.
Nut
Washer
Antenna
Connector
7
Page 8

D) Insert the Antenna Connector through the hole in the printer’s Back Panel.
E) Re-install the Nut and Washer onto the Antenna Connector and tighten using a 5/16”
or 8mm Wrench.
F) Connect the Antenna Connector Wire to the connector on the Wireless Module.
Back
Panel
Washer
Nut
Antenna
Connector
Antenna
Connector
Wire
Wireless
Module
8
Page 9

G) Screw the Antenna onto the Antenna Connector and pivot the Antenna up for best
reception.
Antenna
Antenna
H) Wireless installation is complete. Re-install the printer’s cover and refer to the
Operator’s Manual for connection and configuration information.
9
Page 10

 Loading...