

Page 1
r
e
c
i
n
s
# DPPB120
Portable USB Blender
i
p
e
s
i
d
e
!
Instruction Manual | Recipe Guide
Page 2
Page Title
Page 3

Portable USB Blender
Important Safeguards ................................................................... 4-9
Parts & Features ............................................................................... 10
Using Your Portable USB Blender ........................................... 12-15
Tips & Tricks ............................................................................... 16-17
Layering Guide ................................................................................ 18
Cleaning & Maintenance ............................................................... 19
Recipes ....................................................................................... 21-35
FCC Compliance Statement .......................................................... 36
Industry Canada Statement ........................................................... 37
Customer Support .......................................................................... 38
Warranty ........................................................................................... 39
a
e
t
m
h
s
a
d
e
h
t
!
Page 4

Page Title
IMPORTANT SAFEGUARDS
IMPORTANT SAFEGUARDS: PLEASE
READ AND SAVE THIS INSTRUCTION
AND CARE MANUAL.
When using electrical appliances, basic safety precautions should be
followed, including:
• Read all instructions carefully.
• Remove all packaging and labels
from appliance prior to use.
• To protect against risk of electrical
shock, do not put cord, plugs,
or appliance in or near water or
other liquids.
• For any maintenance other
than cleaning, please contact
StoreBound directly at
1-800-898-6970 from 9AM – 9PM
EST Monday – Friday, or by email at
[email protected].
• Keep appliance away from children
when in use.
• Unplug the appliance from the
charger during assembly, during
disassembly, and before cleaning.
Do not use appliance while
plugged into the charger.
• Avoid contact with moving parts.
• Do not operate this appliance with
a damaged charging cable, after
the appliance malfunctions, or is
damaged in any manner.
• Only use attachments that are
recommended or sold by the
appliance manufacturer.
• Do not leave this appliance
unattended while it is operating.
• Do not let the charging cable hang
over the edge of tables, counters,
or touch hot surfaces.
• Always make sure that the Bottle
is locked securely in place before
engaging the motor. Do not
remove the Bottle before the
blender is nished operating.
• Make sure that the motor stops
completely before disassembling.
• Do not place your ngers or other
foreign objects into the appliance
∙ 4 ∙
Page 5

IMPORTANT SAFEGUARDS
Page Title
while it is operating. If food
becomes lodged in the blades,
turn off before trying to remove
the ingredients.
• Do not use the appliance if any of
the parts are damaged.
• Do not use without the Lid in place.
• Keep hands and utensils away
from moving blades while
appliance is engaged to reduce
the risk of severe injury or damage
to the Blender.
• The blades in the Blender are
sharp. Handle carefully. Do not
touch the blades in the base of the
Bottle with bare hands.
• Do not place the appliance on or
near a hot gas plate, hot electric
burner, or in a heated oven.
• When cleaning, do not submerge
the Blending Base (with electrical
parts) in any liquid; instead use a
soft, wet cloth to wipe down. The
Base is NOT dishwasher safe.
• Do not operate the Blender when
the Bottle is empty, as this may
damage the blender.
• Do not put your Blender in a
microwave oven or freezer.
• Do not put anything carbonated
in your Blender, as this may cause
pressure to build up that could
result in a mess, damage to the
blender or possible injury.
• Do not let food sit in your Blender
to long periods of time, as this may
lead to fermentation which can
build pressure in the Bottle to the
point of damage or possible injury.
• Do not use hot liquids over
120°F/49°C, as this can cause
damage to the jar and base.
• Make sure the Lid is closed tightly
during blending to prevent liquid
from splashing out.
• Keep hands and utensils out of the
Bottle while the motor is running
to prevent injuries or damages.
• Keep the blending time below 2
minutes to prevent the motor from
overloading or overheating. If the
motor stops abruptly, allow the
motor temperature to decrease
before continuing to blend.
• Always place soft or liquid
ingredients in the Blender before
adding hard ingredients or ice
cubes.
∙ 5 ∙
Page 6

IMPORTANT SAFEGUARDS
• Wait until the blades come to a
complete stop before removing
the Bottle.
• This appliance can be used by
persons with reduced physical,
sensory or mental capabilities
or lack of experience of
knowledge, if they have been
given supervision or instruction
concerning use of the appliance
in a safe way and understand the
hazards involved.
• This appliance is not a toy. Do not
let children use this appliance.
Close supervision is necessary
when any kitchen appliance is
used by or near children.
• StoreBound shall not accept
liability for damages caused by
improper use of the appliance.
IMPORTANT SAFEGUARDS: PLEASE
READ AND SAVE THIS INSTRUCTION
AND CARE MANUAL.
∙ 6 ∙
Page 7

IMPORTANT SAFEGUARDS
GARANTIES IMPORTANTES:
VEUILLEZ LIRE ET CONSERVER CE
MODE D’EMPLOI ET D’ENTRETIEN
L’utilisation d’appareils électriques nécessite de prendre des mesures de
sécurité de base, y compris:
• Lisez attentivement les instructions.
• Retirez tous les emballages et
étiquettes de l’appareil avant
de l’utiliser.
• Pour éviter tout risque de choc
électrique, n’immergez pas le
cordon, les ches ou l’appareil dans
de l'eau ou tout autre liquide.
• Pour tout travail d’entretien autre
que le nettoyage, veuillez contacter
StoreBound directement au
1-1-800-898-6970, de 9h à 21h
HNE, du lundi au vendredi, ou par
courriel à l'adresse
[email protected].
-Gardez l'appareil hors de portée
des enfants lorsqu'il est utilisé.
-Débranchez l'appareil du
chargeur pendant le montage,
pendant le démontage et avant le
nettoyage. N'utilisez pas l'appareil
lorsqu'il est branché au chargeur
• Évitez tout contact avec les pièces
en mouvement.
• N'utilisez pas cet appareil avec
un câble de charge endommagé,
après un dysfonctionnement de
l'appareil, ou s'il est endommagé
de quelque manière que ce soit.
• N'utilisez que les accessoires
recommandés ou vendus par le
fabricant de l'appareil.
• Ne laissez PAS l'appareil sans
surveillance lorsqu'il est en marche.
• Ne laissez pas le cordon pendre
de la table ou d'un comptoir, ou
toucher des surfaces chaudes.
∙ 7 ∙
Page 8

Page Title
garanties importantes
• Assurez-vous toujours que la
Bouteille est bien verrouillée en
place avant d'engager le moteur.
Ne retirez pas la Bouteille avant la
n du fonctionnement du mixeur.
• Assurez-vous que le moteur s'arrête
complètement avant de
le démonter.
• Ne mettez pas vos doigts ou
d'autres objets étrangers dans
l'appareil pendant qu'il fonctionne.
Si des aliments se logent dans les
lames, éteignez l'appareil avant
d'essayer de retirer les ingrédients.
• N'utilisez pas l'appareil si l'une de
ses pièces est endommagée.
• Ne pas utiliser sans le Couvercle
en place.
- Gardez les mains et les
ustensiles à l'écart des lames en
mouvement lorsque l'appareil
est en marche an de réduire le
risque de blessures graves ou de
dommages au mélangeur.
- Les lames du Mélangeur sont
tranchantes. Manipulez-les avec
précaution. Ne touchez pas les
lames situées à la base de la
Bouteille à mains nues.
• Ne placez pas l'appareil sur ou près
d'une plaque de gaz chaude, d'un
brûleur électrique chaud ou dans
un four chauffé.
• Lors du nettoyage, n'immergez
pas le socle de mixage (avec les
pièces électriques) dans un liquide
; utilisez plutôt un chiffon doux et
humide pour l'essuyer. La Base
n’est PAS lavable au lave-vaisselle.
• Ne faites pas fonctionner le
Mélangeur lorsque la Bouteille est
vide, car cela pourrait endommager
le blender.
• Ne mettez pas votre Mélangeur
dans un four à micro-ondes ou un
congélateur.
• Ne mettez rien de gazeux dans
votre mélangeur, car cela pourrait
provoquer une pression qui
pourrait entraîner un dégât,
endommager le mélangeur ou
éventuellement blesser quelqu'un.
• Ne laissez pas les aliments reposer
dans votre Mélangeur pendant
de longues périodes, car cela
peut entraîner une fermentation
qui peut faire monter la pression
dans la Bouteille au point de
l'endommager ou de blesser.
∙ 8 ∙
Page 9

Page Titlegaranties importantes
• N'utilisez pas de liquides chauds
à plus de 120°F/49°C, car cela
pourrait endommager le pot et
la base.
• Veillez à ce que le Couvercle soit
bien fermé pendant le mixage
pour éviter toute projection
de liquide.
• Gardez les mains et les ustensiles
hors de la Bouteille lorsque le
moteur est en marche pour éviter
les blessures ou les dommages.
• Maintenez la durée du mélange en
dessous de 2 minutes pour éviter
que le moteur ne soit surchargé
ou ne surchauffe. Si le moteur
s'arrête brusquement, laissez la
température du moteur diminuer
avant de poursuivre le mélange.
• Placez toujours les ingrédients
mous ou liquides dans le
Mélangeur avant d'ajouter les
ingrédients durs ou les glaçons.
• Attendez que les lames s'arrêtent
complètement avant de retirer
la Bouteille.
• Cet appareil peut être utilisé
par des personnes dont les
capacités physiques, sensorielles
ou mentales sont réduites ou
qui manquent d'expérience ou
de connaissances, si elles ont
reçu une supervision ou des
instructions concernant l'utilisation
de l'appareil en toute sécurité
et si elles comprennent les
risques encourus.
• Cet appareil n’est pas un jouet. Ne
laissez pas d’enfants utiliser cet
appareil. Une étroite surveillance
est nécessaire lorsqu’un appareil
est utilisé par ou à proximité
d'enfants.
• StoreBound n'accepte pas la
responsabilité des dommages
causés par une utilisation
inappropriée de l'appareil.
GARANTIES IMPORTANTES:
VEUILLEZ LIRE ET CONSERVER CE
MODE D’EMPLOI ET D’ENTRETIEN
∙ 9 ∙
Page 10
Page Title
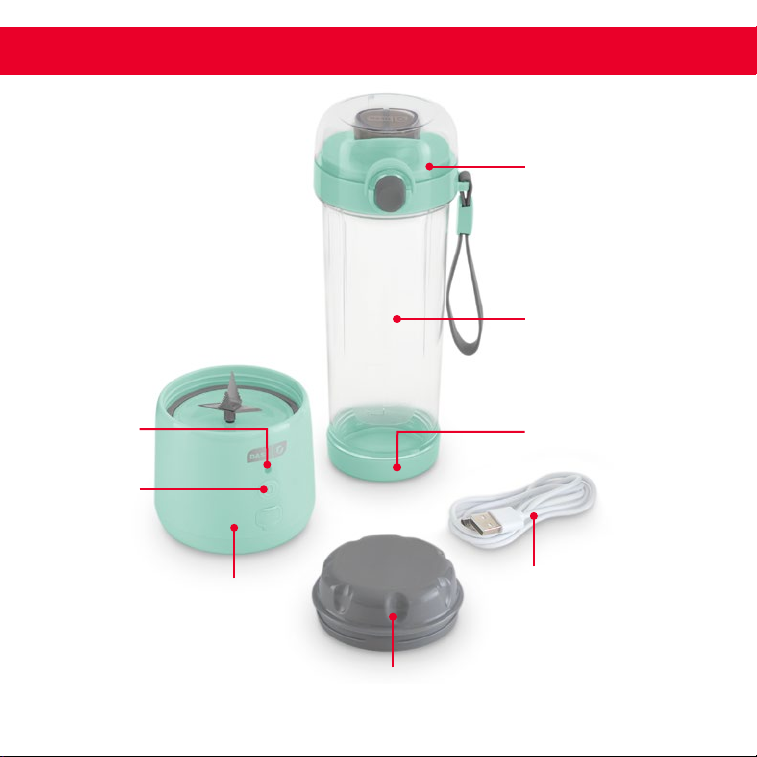
parts & Featuresparts & Features
Drinking Lid
with Strap
™
Tritan
Plastic Bottle
Indicator
Power
Button
∙ 10 ∙
Light
Blending
Base
Bottom Cap
USB-A to
USB-C
Charging
Cable
Blade Cover
Page 11
using your Mini Bundt® maker
using your Mini Bundt® maker
Page Title
using your Mini Bundt® maker ∙ 11
using your Mini Bundt® maker ∙ 11
Page 12
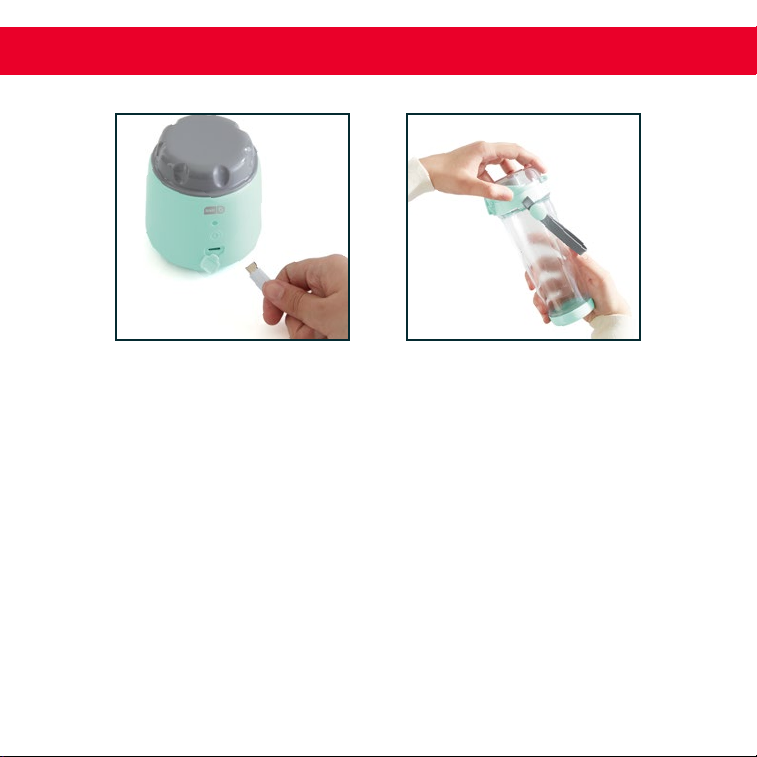
Page Titleusing your Mini Bundt®
using your Portable USB Blender
∙ 12 ∙
A
To charge your Portable USB Blender, plug the USB-C side of your
1
Charging Cable into the Blending Base (photo A) and the USB-A
side of the Cable into any compatible power adapter.
Remove the Drinking Lid from the top of the Bottle. Make sure
2
the Bottom Cap is properly attached to the bottom of the Bottle
(photo B).
B
Page 13
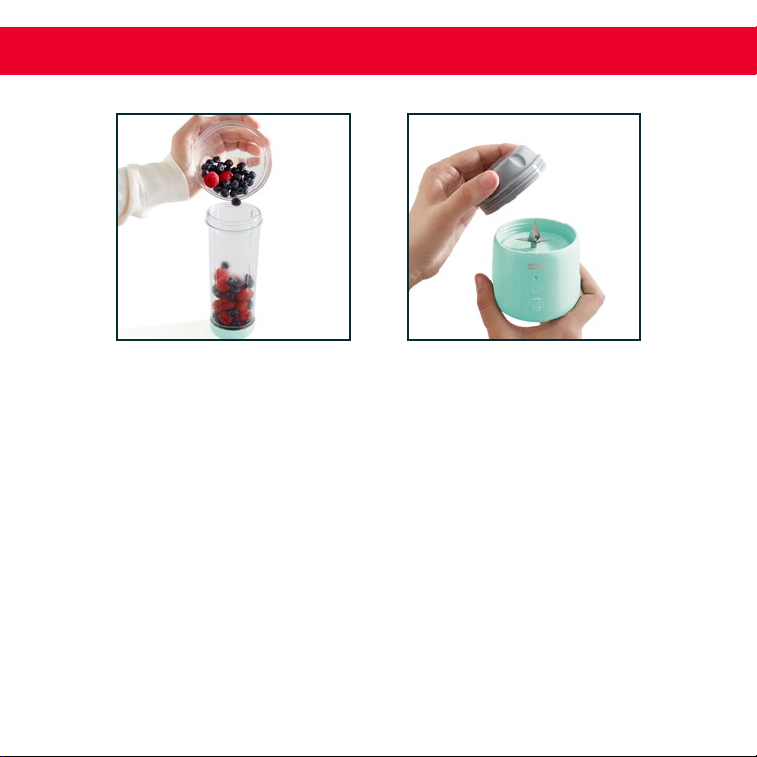
using your Portable USB Blender
Page Titleusing your Mini Bundt® maker
C
Fill the Bottle with what you’d like to blend (photo C). For best
3
performance, see our Layering Guide on Page 18.
Unscrew and remove the Blade Cover from the Blending Base
4
(photo D).
D
∙ 13 ∙
Page 14
Page Title
using your Portable USB Blender
FE
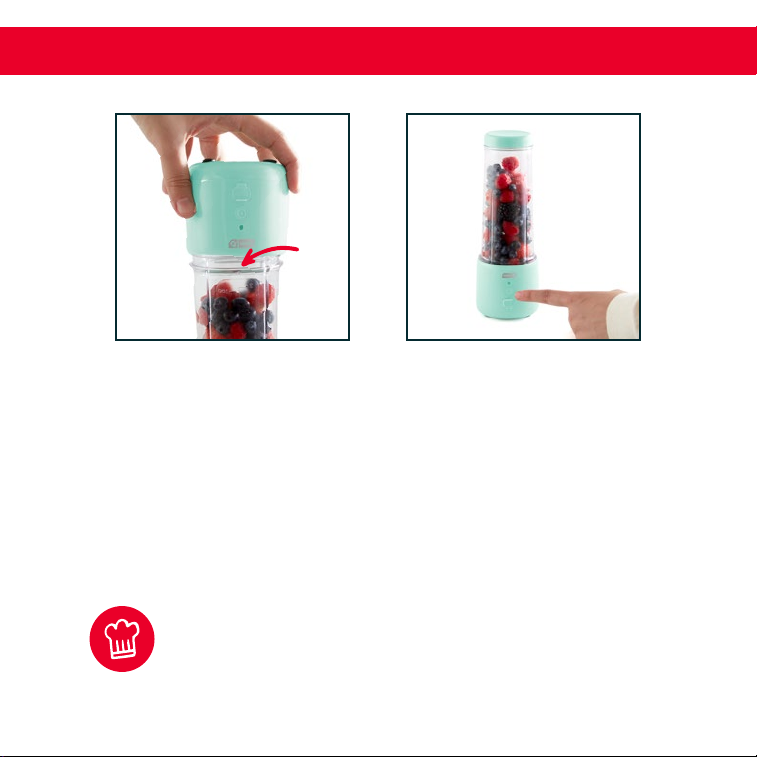
Screw the Base to the top of the Bottle, making sure the small arrow
5
on the Bottle is aligned with the Power Button (photo E). Once the
Bottle and Base are properly aligned, the Indicator Light will blink
once: this means you’re ready to blend!
Flip your Blender over and press the Power Button to start a 40
6
second blending cycle (photo F). Press the Power Button again to
stop blending earlier than that.
!
p
i
T
f
e
h
C
To help blend your ingredients, we recommend gently
shaking the blender while it is active.
∙ 14 ∙
Page 15
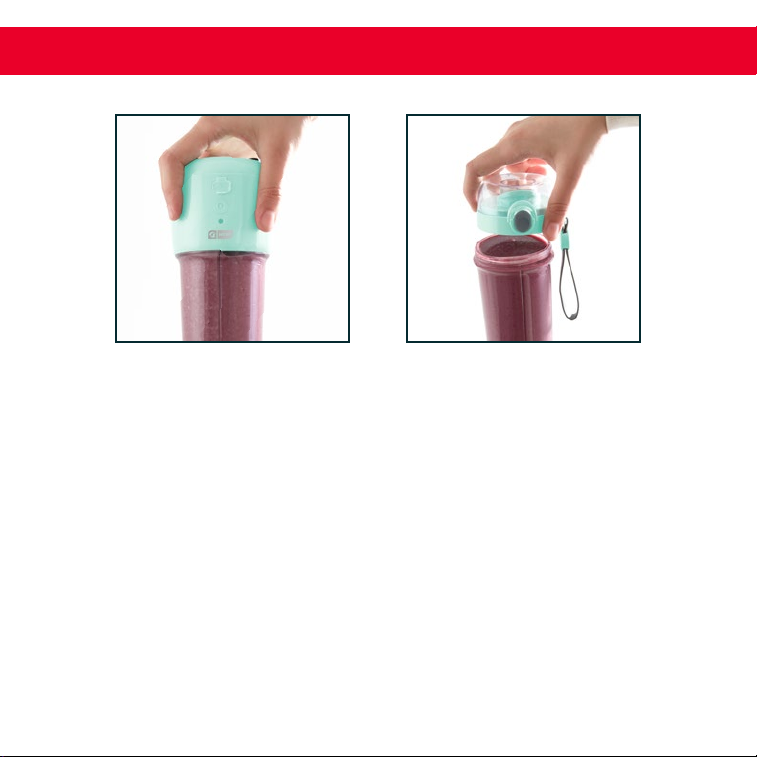
Page Titleusing your Portable USB Blender
HG
Once blending has stopped, ip your Blender over and unscrew the
7
Base from the Bottle (photo G).
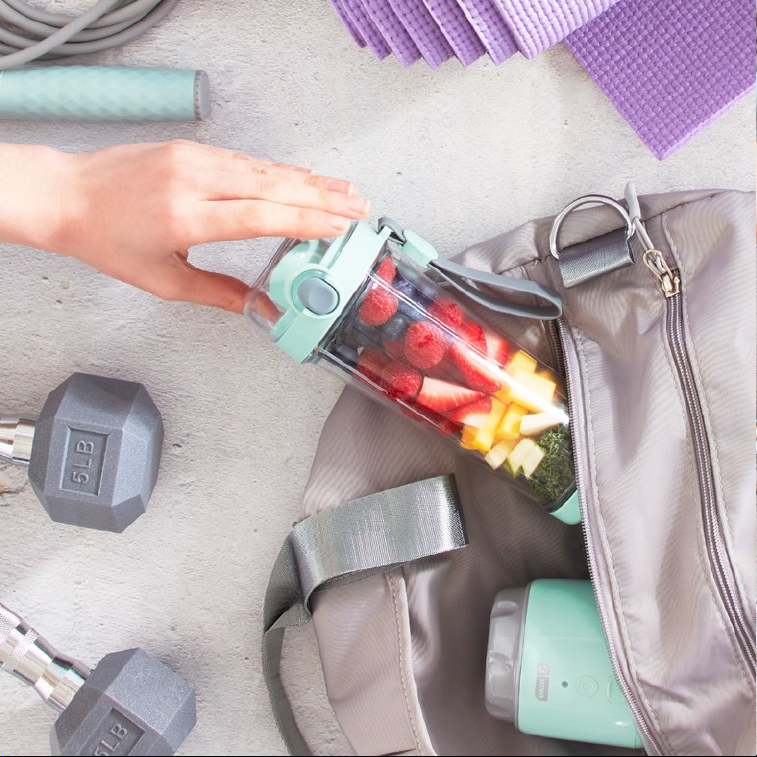
Reattach the Drinking Lid to the Bottle and enjoy (photo H)!
8
After cleaning your Blending Base, be sure to reattach the Blade
9
Cover to avoid injury and for easy transportation and storage.
Page 16
tips & tricks
Blending
• Remove fruit peels, pits and seeds before blending. Allow
frozen fruit to thaw for at least 15 minutes before blending.
Tip: try prepping your smoothie with frozen fruit the night
before and let it thaw in the fridge overnight.
• For best performance, do not blend anything bigger than
½ - 1” sized pieces.
• For best performance, when blending fresh or frozen fruit,
mix 1:1 with water or milk.
• Do not blend meat, hard, sticky or dry foods.
• When blending ice, be sure to blend 1:1 with water.
Use the smallest sized ice possible.
Charging
To extend the life of your Portable USB Blender, we recommend:
• Using the included USB-C Charging Cable to charge it. If lost
or misplaced, a non-fast charging USB-C charging cable will
work ne. DO NOT use a fast charging USB-C charging cable
to charge the Portable USB Blender.
• Charging your Blender once every 2-3 months to keep the
rechargeable battery fresh.
• Do NOT use the Blender while it is plugged in and/or charging.
∙ 16 ∙
Page 17
tips & tricks
Indicator Light
The Indicator Light can blink and show a variety of colors,
depending on the situation:
• Blink once when the Bottle and Blending Base are aligned.
• Blinks 2-3 times when the base and jar aren't aligned: the
blender will not turn on.
• Lights up when blending.
• Red light ashes 8 times: battery is dead.
• White light slowly ashes while it is charging.
• Fully charged: white light will stay on until the charger
is removed.
• Blender shuts off and red light ashes 4 times: food is stuck/
overload protection.
∙ 17 ∙
Page 18
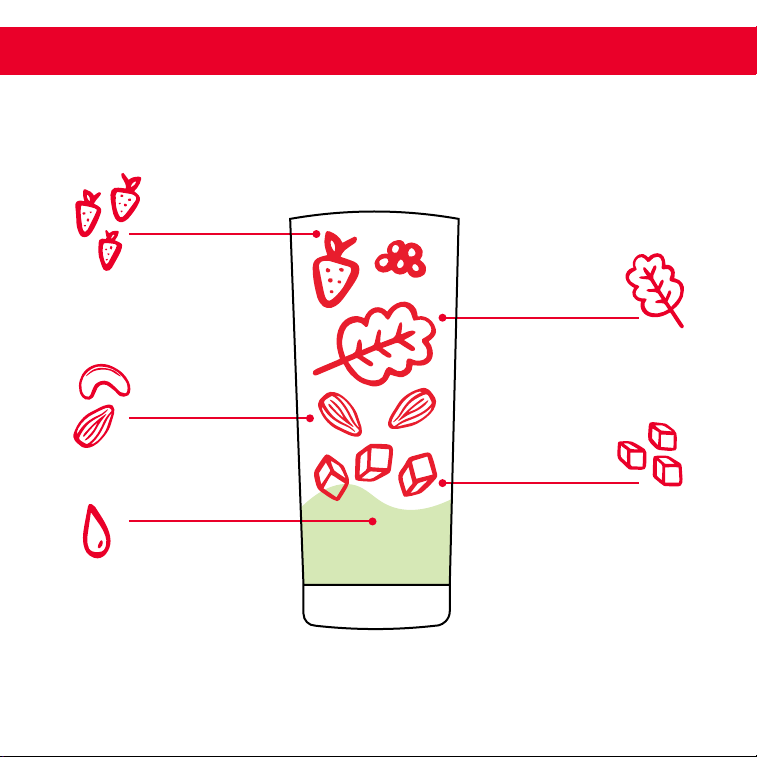
Layering Guide
Once your Bottle is packed, attach the Blending Base, ip and blend!
FRESH FRUITS
& VEGETABLES
Remove any peels,
pits and seeds
NUTS & SEEDS
LIQUIDS
Add liquid in
any order
LEAFY GREENS
FROZEN FRUITS
½ - 1” sized pieces &
let frozen fruit thaw
ICE &
∙ 18 ∙
Page 19

Page Titlecleaning & maintenance
The Bottle, Drinking Lid, Bottom Cap, and Blade Cover are all top-rack
dishwasher safe. The Blending Base is NOT dishwasher safe. Wipe down
the Blending Base with a wet cloth to clean.
For a quick and easy way to clean the blades, add warm water (about
the bottle) and a drop of dish soap to your assembled blender and run a
blending cycle. When nished, pour out soapy water and rinse.
NEVER touch the blades. Clean using the above method or a nylon
cleaning brush.
2
⁄3 of
∙ 19 ∙
Page 20
Page 21

RECIPE
GUIDE
Follow us!
@bydash | recipes, videos, & inspiration
@unprocessyourfood | veg & vegan-friendly meals
Page 22
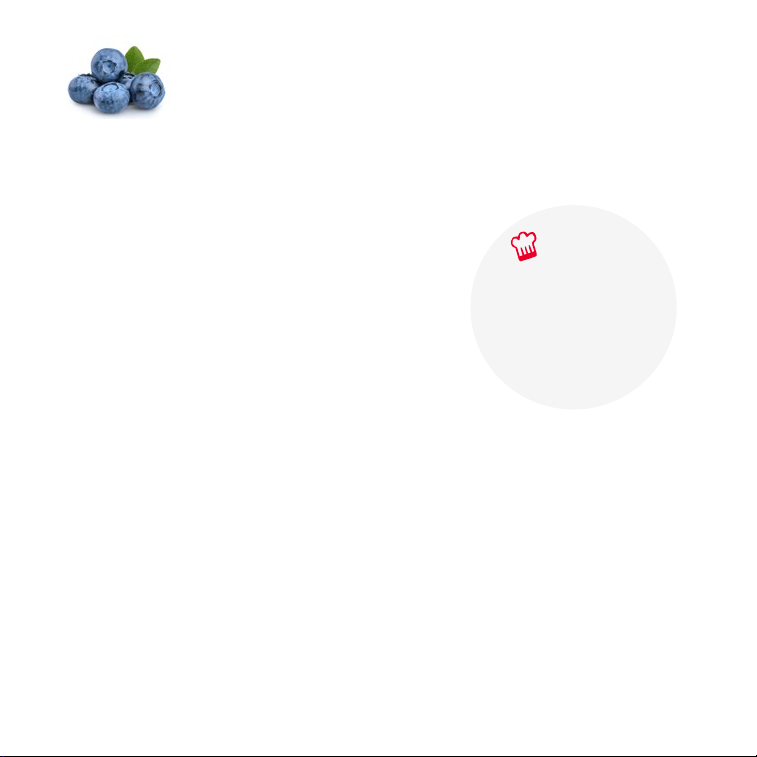
Breakfast
Energy Smoothie
Ingredients:
¼ cup frozen blueberries
½ banana
¼ cup oats
½ tsp vanilla
1 cup milk of choice
Add a scoop of your
favorite protein powder
for an extra kick!
C
T
f
e
h
Directions:
1. Place all ingredients in your Blending Bottle in the order listed in the Ingredients.
Screw the Blending Base into the top of the Bottle and ip it.
2. Turn on the blender and tilt it back and forth one time to distribute the ingredients.
3. Blend to desired consistency.
∙ 22 ∙
i
p
!
Page 23

Carrot Cake Smoothie
Ingredients:
½ frozen banana
1 small carrot chopped or shredded
1 pitted date, cut into pieces
¼ vanilla
1 cup milk of choice
dash of cinnamon
dash of ginger
dash of nutmeg
Directions:
1. Place all ingredients in your Blending Bottle in the order listed in the Ingredients.
Screw the Blending Base into the top of the Bottle and ip it.
2. Turn on the blender and tilt it back and forth one time to distribute the ingredients.
3. Blend to desired consistency.
∙ 23 ∙
Page 24
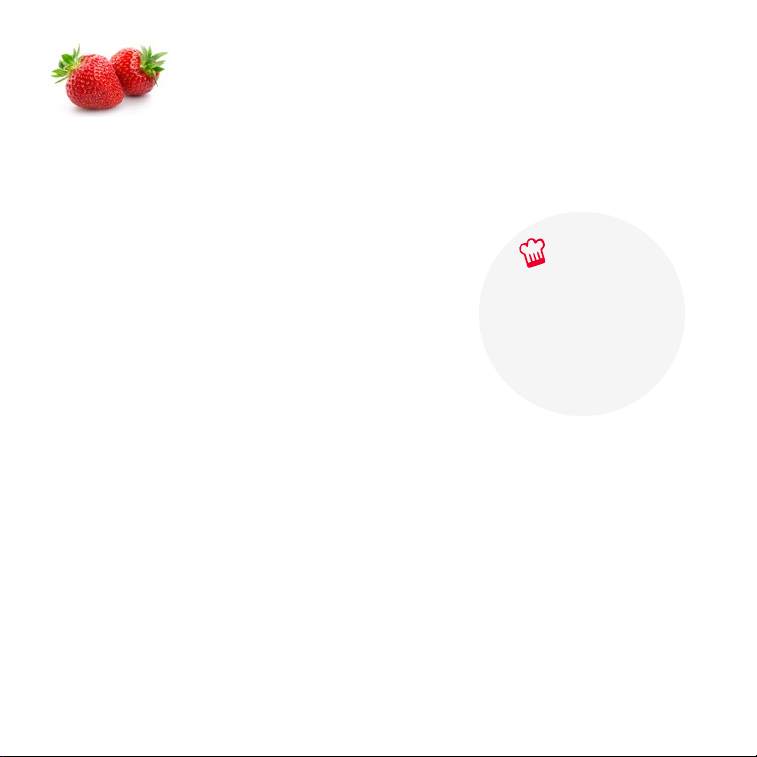
Strawberry
Smoothie Bowl To Go
Ingredients:
¾ cup frozen sliced strawberries
¼ yogurt
1 tbsp maple syrup,
¾ cup milk of choice
1 tbsp chia seeds
Add a scoop of your
favorite protein powder
for an extra kick!
Directions:
1. Place all ingredients in your Blending Bottle in the order listed in the Ingredients.
Screw the Blending Base into the top of the Bottle and ip it.
2. Turn on the blender and tilt it back and forth one time to distribute the ingredients.
3. Blend to desired consistency.
4. Serve and top your bowl how you like it! We recommend granola, nuts, seeds,
dried fruit, honey, fresh fruit, or coconut akes.
∙ 24 ∙
C
T
f
e
h
i
p
!
Page 25

Green Dream Machine
Ingredients:
¼ cup baby kale
½ frozen banana
¼ avocado
1 tbsp maple syrup
1 tbsp chia seeds
1 cup milk of choice
Directions:
1. Place all ingredients in your Blending Bottle in the order listed in the Ingredients.
Screw the Blending Base into the top of the Bottle and ip it.
2. Turn on the blender and tilt it back and forth one time to distribute the ingredients.
3. Blend to desired consistency.
∙ 25 ∙
Page 26

Mango Turmeric
Smoothie
Ingredients:
½ frozen banana
½ cup frozen mango
1 cup coconut water
1 inch turmeric peeled and chopped or ¼ tsp powdered turmeric
fresh black pepper
Directions:
1. Place all ingredients in your Blending Bottle in the order listed in the Ingredients.
Screw the Blending Base into the top of the Bottle and ip it.
2. Turn on the blender and tilt it back and forth one time to distribute the ingredients.
3. Blend to desired consistency.
∙ 26 ∙
Page 27
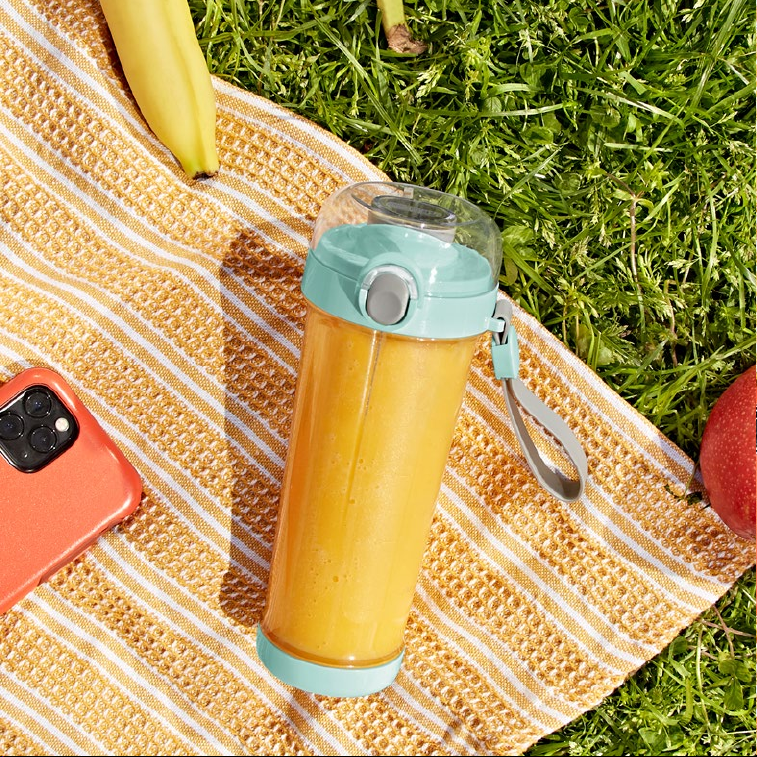
∙ 27 ∙
Page 28

Cherry Almond Chia
Protein Smoothie
Ingredients:
½ cup frozen cherries
1 scoop vanilla protein powder
1 tsp vanilla
¼ tsp almond
1 tsp chia seeds
1 cup milk of choice
Directions:
1. Place all ingredients in your Blending Bottle in the order listed in the Ingredients.
Screw the Blending Base into the top of the Bottle and ip it.
2. Turn on the blender and tilt it back and forth one time to distribute the ingredients.
3. Blend to desired consistency.
∙ 28 ∙
Page 29
Vegan Mango-Coconut
Green Smoothie
Ingredients:
½ cup spinach
½ cup frozen mango
½ frozen banana
¾ cup orange juice
½ cup coconut milk
1 tbsp maple syrup
Directions:
1. Place all ingredients in your Blending Bottle in the order listed in the Ingredients.
Screw the Blending Base into the top of the Bottle and ip it.
2. Turn on the blender and tilt it back and forth one time to distribute the ingredients.
3. Blend to desired consistency.
∙ 29 ∙
∙ 29 ∙
Page 30

Pesto sauce
Ingredients:
⅓ cup pine nuts,
½ cup oil
2 cloves garlic
¼ cup fresh grated Parmesan
½ tsp salt
½ cup lemon juice
1 cup fresh basil
fresh black pepper to taste
Directions:
1. Place all ingredients in your Blending Bottle in the order listed in the Ingredients.
Screw the Blending Base into the top of the Bottle and ip it.
2. Turn on the blender and tilt it back and forth one time to distribute the ingredients.
3. Blend to desired consistency. If the pesto sauce is too thick and won’t blend, add
more oil or lemon juice to thin it out until it blends smoothly.
∙ 30 ∙
Page 31
T
f
e
i
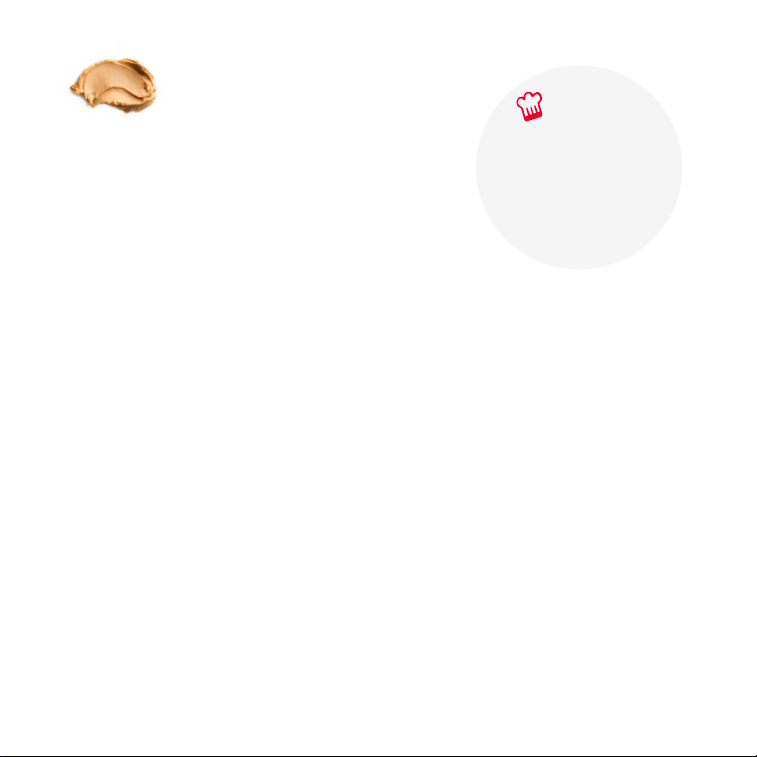
PB&J Smoothie
Ingredients:
¼ cup frozen raspberries
1 tbsp creamy peanut butter
1 cup milk of choice
pinch of salt
h
C
Add a scoop of your
favorite protein powder
for an extra kick!
p
!
Directions:
1. Place all ingredients in your Blending Bottle in the order listed in the Ingredients.
Screw the Blending Base into the top of the Bottle and ip it.
2. Turn on the blender and tilt it back and forth one time to distribute the ingredients.
3. Blend to desired consistency.
∙ 31 ∙
Page 32

Coffee Protein Shake
Ingredients:
1 cup milk of choice
1 scoop protein powder
2 tsp espresso powder
½ tsp vanilla
Directions:
1. Place all ingredients in your Blending Bottle in the order listed in the Ingredients.
Screw the Blending Base into the top of the Bottle and ip it.
2. Turn on the blender and tilt it back and forth one time to distribute the ingredients.
3. Blend to desired consistency.
∙ 32 ∙
Page 33
∙ 33 ∙
Page 34
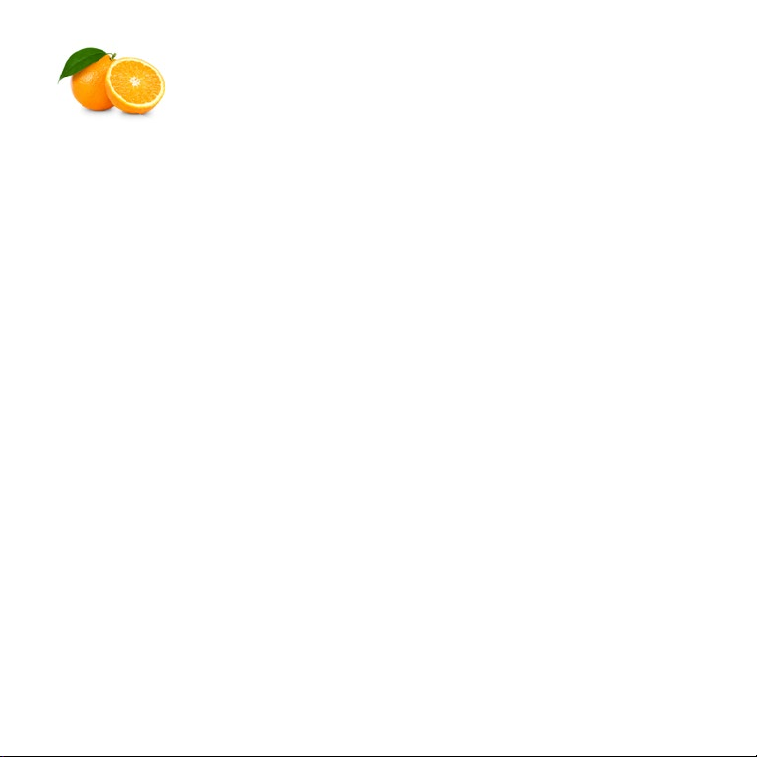
Orange Creamsicle
Smoothie
Ingredients:
½ frozen banana
2 orange sections, peeled
½ cup yogurt
½ cup orange juice
2 tsp vanilla
Directions:
1. Place all ingredients in your Blending Bottle in the order listed in the Ingredients.
Screw the Blending Base into the top of the Bottle and ip it.
2. Turn on the blender and tilt it back and forth one time to distribute the ingredients.
3. Blend to desired consistency.
∙ 34 ∙
Page 35

Oat Milk L at te
Ingredients:
½ cup cold coffee
½ cup water
2 tbsp rolled oats
1 tbsp maple syrup
Directions:
1. Place all ingredients in your Blending Bottle in the order listed in the Ingredients.
Screw the Blending Base into the top of the Bottle and ip it.
2. Turn on the blender and tilt it back and forth one time to distribute the ingredients.
3. Blend to desired consistency.
∙ 35 ∙
Page 36

FCC COMPLIANCE STATEMENT
This device complies with part 15 of the FCC Rules. Operation is subject to
the following two conditions:
(1) This device may not cause harmful interference, and
(2) this device must accept any interference received, including
interference that may cause undesired operation.
NOTE: This equipment has been tested and found to comply with the
limits for a Class B digital device, pursuant to part 15 of the FCC Rules.
These limits are designed to provide reasonable protection against
harmful interference in a residential installation. This equipment generates,
uses and can radiate radio frequency energy and, if not installed and used
in accordance with the instructions, may cause harmful interference to
radio communications. However, there is no guarantee that interference
will not occur in a particular installation. If this equipment does cause
harmful interference to radio or television reception, which can be
determined by turning the equipment off and on, the user is encouraged
to try to correct the interference by one or more of the following measures:
• Reorient or relocate the receiving antenna.
• Increase the separation between the equipment and receiver.
• Connect the equipment into an outlet on a circuit different from that to
which the receiver is connected.
• Consult the dealer or an experienced radio/TV technician for help.
∙ 36 ∙
Page 37

INDUSTRY CANADA STATEMENT
CAN ICES-3 (B)/NMB-3(B)
This device complies with Industry Canada licence-exempt RSS
standard(s). Operation is subject to the following two conditions:
(1) This device may not cause interference, and
(2) This device must accept any interference, including interference that
may cause undesired operation of the device.
Le présent appareil est conforme aux CNR d’Industrie Canada applicables
aux appareils radio exempts de licence. L’exploitation est autorisée aux
deux conditions suivantes:
(1) l’appareil ne doit pas produire de brouillage, et
(2) l’utilisateur de l’appareil doit accepter tout brouillage radioélectrique
subi, même si le brouillage est susceptible d’en compromettre le
fonctionnement.
∙ 37 ∙
Page 38
customer support
feel good
guarantee
Dash values quality and workmanship and stands behind this
product with our Feel Good Guarantee
™
our commitment to quality, visit bydash.com/feelgood.
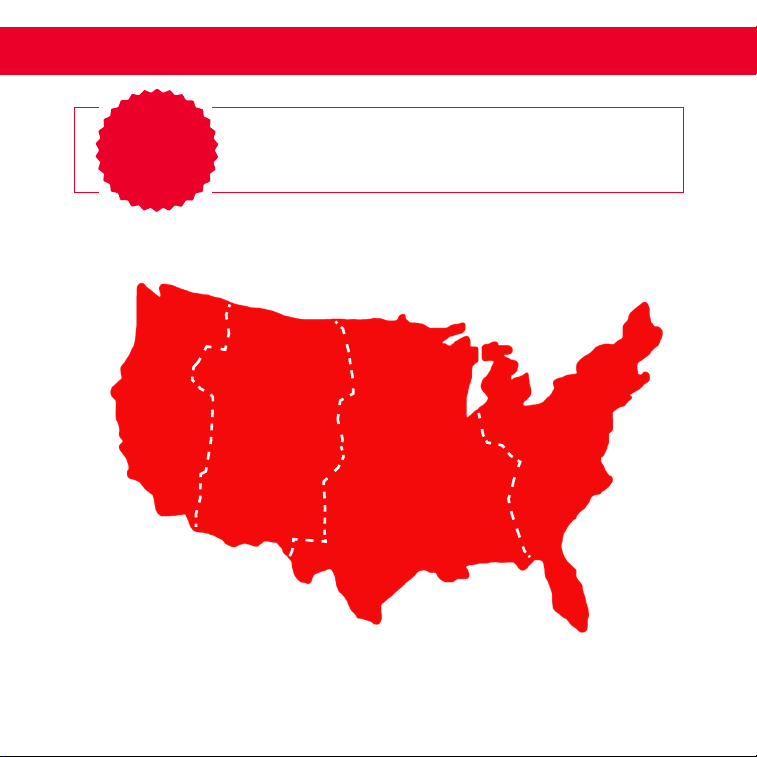
Our customer support teams in the US and Canada are at
your service Monday - Friday during the times below.
Contact us at 1 (800) 898-6970 or [email protected]
™
. To learn more about
6am –
6pm
7am –
7pm
8am –
9am –
9pm
8pm
Hey Hawaii! You can reach our customer service team from 3AM to 3PM.
And also, Alaska, feel free to reach out from 5AM to 5PM.
∙ 38 ∙
Page 39

warranty
STOREBOUND, LLC – 1 YEAR LIMITED WARRANTY
Your StoreBound product is warranted to be free from defects in material and workmanship for a period of
one (1) year from the date of the original purchase when utilized for normal and intended household use.
Should any defect covered by the terms of the limited warranty be discovered within one (1) year, StoreBound,
LLC will repair or replace the defective part. To process a warranty claim, contact Customer Support at
1-800-898-6970 for further assistance and instruction. A Customer Support agent will assist you by
troubleshooting minor problems. If troubleshooting fails to x the problem, a return authorization will be
issued. Proof of purchase indicating the date and place of purchase is required and should accompany the
return. You must also include your full name, shipping address, and telephone number. We are unable to
ship returns to a PO box. StoreBound will not be responsible for delays or unprocessed claims resulting from
a purchaser’s failure to provide any or all of the necessary information. Freight costs must be prepaid by
the purchaser.
Send all inquiries to [email protected].
There are no express warranties except as listed above.
REPAIR OR REPLACEMENT AS PROVIDED UNDER THIS WARRANTY IS THE EXCLUSIVE REMEDY OF
THE CUSTOMER. STOREBOUND SHALL NOT BE LIABLE FOR ANY INCIDENTAL OR CONSEQUENTIAL
DAMAGES OR FOR BREACH OF ANY EXPRESS OR IMPLIED WARRANTY ON THIS PRODUCT EXCEPT
TO THE EXTENT REQUIRED BY APPLICABLE LAW. ANY IMPLIED WARRANTY OF MERCHANTABILITY OR
FITNESS FOR A PARTICULAR PURPOSE ON THIS PRODUCT IS LIMITED IN DURATION TO THE DURATION
OF THIS WARRANTY.
Some states do not allow the exclusion or limitation of incidental or consequential damages, or limitations
on how long an implied warranty lasts. Therefore, the above exclusions or limitations may not apply to you.
This warranty gives you specic legal rights and you may also have other rights, which vary from state to state.
REPAIRS
DANGER! Risk of electric shock! The Dash Portable USB Blender is an electrical appliance.
Do not attempt to repair the appliance yourself under any circumstances.
Contact Customer Support regarding repairs to the appliance.
TECHNICAL SPECIFICATIONS
Power Rating 7.4V (9.62WH)
Stock#: DPPB120_20220517_v1
Made in China
Made
without
B PA
∙ 39 ∙
Page 40

1-800-898-6970 | @bydash | bydash.com
 Loading...