


GREEK
YOGURT MAKER
instruction manual & recipe guide
bydash.com

2
Yogurt is a good source of protein! An average eight-ounce serving of live and active culture yogurt contains approximately 20 % of the USDA recommended daily value for protein.

Table of Contents |
3 |
|
|
Greek Yogurt Maker
Safety Guidelines |
4-5 |
What’s Inside |
6-7 |
How To |
13 |
Before You Start |
12 |
Making Yogurt |
14 |
About Greek Yogurt |
15 |
Making Your Yogurt |
16 |
Going Greek |
19 |
Tips & Tricks |
20 |
Troubleshooting Yogurt |
22 |
Recipes |
|
Flavoring Guide |
24 |
Breakfast |
26-27 |
Appetizers & Dips |
28-29 |
Dressings & Marinades |
30-31 |
Entrées & Main Dishes |
32-33 |
Desserts |
34-37 |
Customer Support |
38 |
Warranty Information |
39 |
|
|
|
|

4 |
Safety First |
|
|
Important Safety Guidelines
Please Read and Save this Instruction and Care Manual
When using electrical appliances, basic safety precautions should be followed, especially the following:
•Remove all bags and packaging from the appliance before use.
•Make sure to turn off before removing the cord from the wall.
•Do not put your hands or other objects into the yogurt maker while it is in operation. If food spills on the heating platform make sure the yogurt maker is turned off and cooled down before cleaning.
•Do not touch hot surfaces: use handles or knobs.
•Do not use the appliance if any of the parts are damaged.
•Do not use without lid or containers in place.
•Keep hands and utensils away from heating platform while making yogurt to reduce the risk of severe injury or damage to the yogurt maker.
•Do not place on or near a hot gas burner, hot electric burner, or in a heated oven.
•When cleaning the base, do not submerse in any liquid, instead use a soft damp cloth to wipe down.
•Be certain lid is securely in place before operating appliance.
•Appliance is not intended for children. Keep appliance away from children when in use.
•To minimize risk of food borne illness, do not consume yogurt that has been stored in the refrigerator for more than 10 days.
•Do not put the main base of the appliance in the refrigerator.
•Do not use expired yogurt, expired milk, flavored yogurt, yogurt with other
ingredients in it, or liquid yogurt with this appliance.
INTENDED USE
•This appliance is intended only for yogurt production.
•This appliance is only intended for household use.
•Do not use appliance outdoors, or for commercial purposes.
•All other uses are deemed to be improper and can result in property damage or even in personal injury.
•StoreBound shall not accept liability for damages caused by improper use of the appliance.
•When using the appliance, check whether the voltage used is consistent
bydash.com

Safety First |
5 |
|
|
with the nominal voltage of the appliance.
•This appliance is not intended for use by persons (including children) with reduced physical, sensory or mental capabilities, or lack of experience and knowledge, unless they have been given supervision or instruction concerning use of the appliance by a person responsible for their safety.
•
•
Children should be supervised to ensure that they do not play with the appliance.
Close supervision is necessary when any appliance is used by or near children.
•Do not operate any appliance with a damaged cord or plug or after the appliance malfunctions, or has been damaged in any manner.
•The use of accessory attachments not recommended by the appliance manufacturer may result in fire, electric shock or injury to persons.

6 |
What’s Inside |
|
|
Dash Greek Yogurt Maker
Congratulations! We hope that you’re excited to start making delicious, unprocessed Greek Yogurt at home with your new Dash Greek Yogurt Maker.
before you start
Making yogurt at home can be a fun & rewarding activity. The first few times you use your Dash Greek Yogurt Maker, you may want to experiment with different types of milk, yogurt cultures and cooking times to see how these factors change the flavor of the yogurt that you make.
Your Dash Greek Yogurt Maker has been specially designed to be easy to use, easy to clean and compact. For your convenience, all of the components can be stored right inside the Main Base.
1.Main Lid
2.Container Lid (fits both containers)
3.Greek Strainer
4.Small Container
5.Large Container
6.Main Base
7.Control Panel
8.Cord & Plug
9.Cord Storage
bydash.com

The Dash Greek Yogurt Maker |
7 |
|
|
1
2
3
4
5
6
7
8
9
8
Setting the timer
Setting the Timer
|
|
|
ST |
|
|
|
|
|
|
U |
O |
|
|
||
C |
|
|
M |
||||
|
|
00:00 |
|
|
|||
|
|
|
HRS MINS |
|
|||
S |
|
|
|
|
|
|
P |
T |
|
|
|
|
O |
||
|
A |
|
|
T |
|
||
|
|
|
RT /S |
|
|
||
|
|
ST |
|
|
|
|
|
U |
O |
|
|||
C |
|
|
|
M |
||
S |
|
|
|
|
|
P |
T |
|
|
|
O |
||
|
A |
|
|
T |
|
|
|
|
RT /S |
|
|
||
How To Use The Digital LCD Timer
1. Getting Started
To begin using your Dash Greek Yogurt Maker, plug the appliance into a nearby power outlet and add your recipe ingredients as suggested in the
Yogurt Recipe Table on Page 18. For safety purposes, do not allow the appliance’s cord to hang over the edge of a countertop, or come within the reach of children.
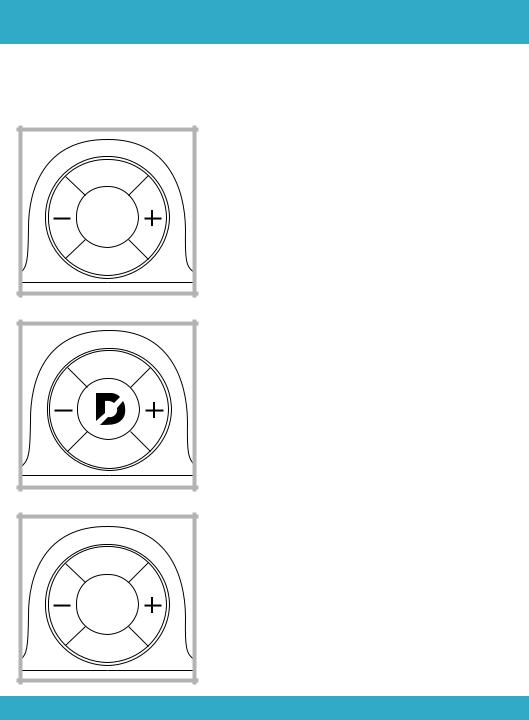
2. Setting the Timer
After plugging-in your Dash Greek Yogurt Maker, the letter “D” will display on the appliance’s LCD Panel for 3-seconds. At this point, your Dash Greek Yogurt Maker enters into “Standby Mode” and is ready
for use.
|
|
|
|
|
|
|
|
3. Standby Mode |
|
|
|
|
|
|
|
|
Once in Standby Mode, your Dash Greek Yogurt |
|
|
|
ST |
|
|
|
Maker will display “00.00” in the LCD Panel. Now |
|
|
|
|
|
|
|
|
||
|
|
U |
O |
|
|
|||
C |
|
|
|
M |
you can set the LCD Panel’s timer (in 30 minute |
|||
|
|
|
|
|
|
|
|
|
|
|
|
|
|
|
|
|
increments) based on the cooking time(s) |
|
|
00: 30 |
|
suggested in the Yogurt Recipe Table on Page 18. |
||||
|
|
|
HRS |
MINS |
|
|
||
S |
|
|
|
|
|
|
P |
|
T |
|
|
|
|
O |
|
||
|
A |
RT |
|
T |
|
|
||
|
|
|
/S |
|
|
|
||
bydash.com |
|
|
|
|
|
|
|
|

Operating your Greek Yogurt Maker |
9 |
|
|
|
|
|
ST |
|
|
|
|
|
|
U |
O |
|
|||
C |
|
|
|
M |
|||
|
|
00: 30 |
|
||||
|
|
|
HRS |
MINS |
|
||
S |
|
|
|
|
|
|
P |
T |
|
|
|
|
O |
||
|
A |
RT |
|
T |
|
||
|
|
|
/S |
|
|
||
C |
M |
|||
|
11:00 |
|
|
|
|
|
HRS MINS |
|
|
S |
|
|
|
P |
T |
|
O |
||
|
A |
T |
|
|
|
|
RT /S |
|
|
4. LCD Panel Timer
The LCD Panel’s timer is easy to set. Pressing the “+” setting on the dial will add 30 minutes to the LCD timer. Pressing the “–” setting on the dial will subtract 30 minutes from the LCD timer.
You can set the LCD’s timer based on suggested cooking times in the Yogurt Recipe Table, or using your own custom recipes. You can easily save a custom time setting by entering your cooking time and pressing the CUSTOM setting on the dial (see
Using the CUSTOM Setting on the LCD Panel on page 10.)
5. Starting the Yogurt Maker
After you have set the LCD’s timer based on the suggested cooking times in the Yogurt Recipe Table, press the START/STOP button to launch the Dash Greek Yogurt Maker; this will begin the process to create delicious yogurt.
Please note that once you have launched the Dash Greek Yogurt Maker by pressing the START/STOP button, the LCD will begin by displaying your total cooking time and countdown in one-minute increments until the fermentation process is completed.
For example, if you set the LCD timer for 8 hours, the display will count backwards from 08:00 to 07:59 to 07:58, etc. until the timer reaches 00:00.

10
U |
T |
|
||
|
O |
|||
C |
S |
|
M |
|
|
|
|
||
9:30
HRS MINS
S
Setting the Timer continued...
Custom Setting on the LCD Panel
Setting the Timer - continued...
6.Using the CUSTOM Setting on the LCD Panel
To use the CUSTOM setting on the LCD Panel, first follow Steps 1–4 on the previous page.
7.Setting a Custom Time
After you have pre-set your custom time setting in 30 minute increments, press the CUSTOM button on the LCD dial. Pressing the CUSTOM setting will save/ store your custom time in the system’s memory for future use.
Please note that the CUSTOM button can only store
(1) one pre-set fermentation setting at a time.
|
ST |
|
|
|
U |
O |
|
||
C |
|
|
M |
|
|
9:30 |
|
|
|
|
HRS MINS |
|
|
|
A |
|
|
|
P |
|
|
O |
||
|
T |
|
||
|
RT /S |
|
|
|
8. Using a Custom Time
To use your pre-stored CUSTOM setting, press the CUSTOM button, followed by the START/STOP button on the LCD dial.
9. Setting a New Custom Time
Input a new time following Step 2, Setting the Timer on page 8 and press the CUSTOM setting. This will erase your previous CUSTOM time setting and replace it with your new CUSTOM time setting.
bydash.com
11
Yogurt is believed to be easier to digest than milk. Many people who cannot tolerate milk, either because of a protein allergy or lactose intolerance, are reported to enjoy yogurt.

12 |
Before You Start |
|
|
Before you start
Clean your Dash Greek Yogurt Maker and all it’s components prior to its first use!
•Wash all the containers with mild soap and water. Rinse them well prior to using your Dash Greek Yogurt Maker.
•Use a damp cloth to wipe down the Main Base of the Dash Greek Yogurt Maker.
•The nesting Containers and Container Lid may be cleaned in the dishwasher.
•Hand-wash the Greek Strainer with warm soapy water.
•Do not use abrasive scrubbers, sponges, or chemical cleaners as they may damage the finish of the yogurt maker.
•DO NOT SUBMERGE the Main Base in water.
maintenance
•Before cleaning your Dash Greek Yogurt Maker, unplug the appliance and let it cool down completely.
•To avoid any lingering food odors, clean & dry the appliance immediately after using.
•When not in use, store your Dash Greek Yogurt Maker in a clean, dry cabinet or pantry.
bydash.com
 Loading...