

Page 1
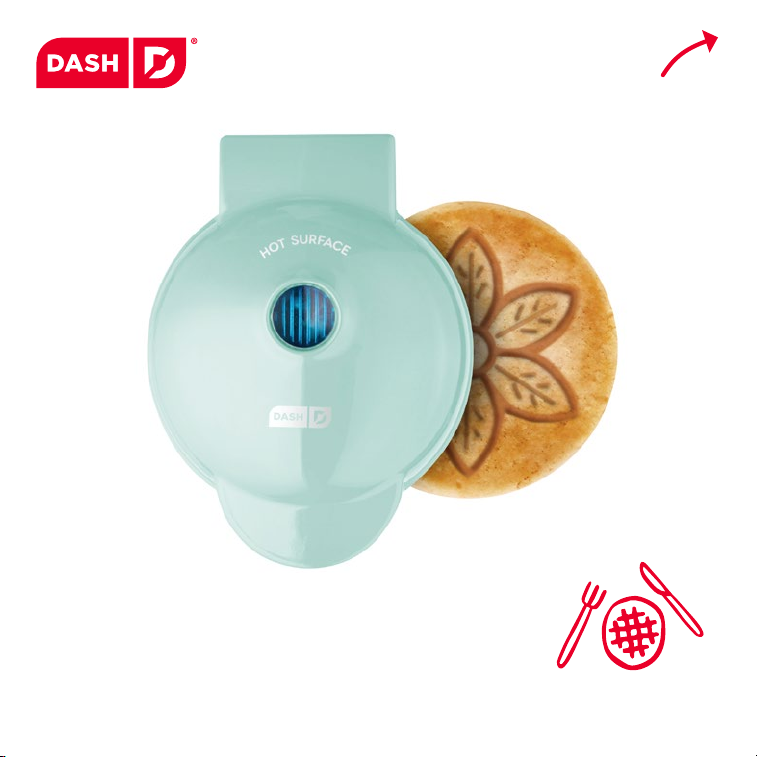
#DMWF001
Flower
mini WAFFLE MAKER
Instruction Manual | Recipe Guide
r
e
c
i
p
e
s
s
i
d
e
!
i
n
Page 2

2 ∙ page title
Flower
mini waffle MAKER
Important Safeguards ................................................................... 4-9
Parts & Features.............................................................................. 10
Using Your Flower Mini Wafe Maker .................................... 12-14
Cleaning & Maintenance ............................................................... 15
Troubleshooting ........................................................................ 16 -17
Recipes ........................................................................................19-25
Customer Support ......................................................................... 26
Warranty .......................................................................................... 27
Page 3

IMPORTANT SAFEGUARDS IMPORTANT SAFEGUARDS
IMPORTANT SAFEGUARDS: PLEASE
READ AND SAVE THIS INSTRUCTION
AND CARE MANUAL.
When using electrical appliances, basic safety precautions should be followed,
including:
• Read all instructions.
• Remove all bags and packaging
from appliance before use.
• Never leave appliance unattended
when in use.
• Make sure the appliance is cleaned
thoroughly before using.
• Do not use appliance for other than
intended use. For household use
only. Do not use outdoors.
• Warning: Hot surfaces! Never touch
the Cooking Surface or Cover
while appliance is in use. Always lift
and lower the Cover by the Cover
Handle.
• DO NOT lift the Cover so that your
arm is over the Cooking Surface as
it is hot and may cause injury. Lift
from the side.
• To prevent the risk of re, electric
shock, or personal injury, do not
put cord, plug, or appliance in or
near water or other liquids. The
Flower Mini Wafe Maker is NOT
dishwasher safe.
• Never use abrasive cleaning agents
to clean your appliance as this may
damage the Flower Mini Wafe
Maker and its non-stick Cooking
Surface.
• Do not operate this appliance with
a damaged cord, damaged plug,
after the appliance malfunctions,
is dropped, or damaged in any
manner. Return appliance to
the nearest authorized service
facility for examination, repair or
adjustment.
• DO NOT use the Flower Mini Wafe
Maker near water or other liquids,
with wet hands, or while standing
on a wet surface.
• For maintenance other than
cleaning, please contact StoreBound
directly at 1-800-898-6970 from
7AM – 7PM PST Monday – Friday or by
email at [email protected].
• Do not use metal utensils on the
Cooking Surface as this will damage
the non-stick surface.
• This appliance is not intended for
use by persons (including children)
with reduced physical, sensory,
or mental capabilities, or lack of
experience and knowledge unless
they are provided with supervision
and instruction concerning use
of the appliance by a person
responsible for their safety.
• Do not place appliance on or near
a hot gas burner, hot electric burner,
or in a heated oven.
• Be cautious when moving an
appliance containing hot oils or
other hot liquids.
• Refrain from using attachments
that are not recommended by the
appliance manufacturer, as this
may result in re, electric shock,
or personal injury.
• Allow the Flower Mini Wafe Maker
to cool completely before moving,
cleaning, or storing.
• Close supervision is necessary
when any appliance is used by or
near children.
• Do not let the cord touch hot
surfaces or hang over the edge
of tables or counters.
• Always be sure to unplug the
appliance from outlet prior to
moving, cleaning, storage, and
when not in use.
∙ 5 ∙∙ 4 ∙
Page 4

MESURES DE SÉCURITÉ IMPORTANTESIMPORTANT SAFEGUARDS
• StoreBound shall not accept liability
for damages caused by improper
use of the appliance.
• Improper use of the Flower Mini
Wafe Maker can result in propert y
damage or even in personal injury.
• This appliance has a polarized plug
(one blade is wider than the other).
To reduce the risk of elec tric shock,
this plug will t in a polarized outlet
only one way. If the plug does not
completely t in the outlet, reverse
the plug. If it still does not fit,
contac t a qualified electrician.
Do not attempt to modify the plug
in any way.
• A short power supply cord is to
be provided to reduce the risk
resulting from becoming entangled
in or tripping over a longer cord.
An extension cord may be used
if care is exercised in its use. If
an extension cord is used, the
marked electrical rating of the
extension cord should be at least
as great as the electrical rating of
the appliance. If the appliance is of
the grounded type, the extension
cord should be a grounding
3-wire cord. The extension cord
should be arranged so that it will
not drape over the countertop or
tabletop where it can be pulled
on by children or tripped over
unintentionally.
IMPORTANT SAFEGUARDS: PLEASE
READ AND SAVE THIS INSTRUCTION
AND CARE MANUAL.
MESURES DE SÉCURITÉ IMPORTANTES:
VEUILLEZ LIRE ET CONSERVER CE
MANUEL D’UTILISATION
Lors de l’utilisation d’appareils électriques, des précautions élémentaires
de sécurité doivent être respectées, notamment:
• Lisez toutes les instructions.
• Retirez tout sac ou emballage de
l’appareil avant utilisation.
• Ne laissez jamais l’appareil sans
surveillance pendant son utilisation.
• Assurez-vous que l’appareil est
minutieusement nettoyé avant
utilisation.
• N’utilisez pas l’appareil en dehors
de son utilisation prévue. Pour
usage ménager uniquement. Ne
l’utilisez pas à l’extérieur.
• AVERTISSEMENT: Surfaces
chaudes ! Ne touchez jamais la
surface de cuisson ou le couvercle
pendant l’utilisation de l’appareil.
Soulevez et baissez toujours le
couvercle à l’aide de sa poignée.
• NE soulevez PAS le couvercle pour
que votre bras se trouve au-dessus
de la surface de cuisson brûlante,
car cela pourrait entraîner des
blessures. Soulevez par le côté.
• An d’éviter les risques de feux,
d’électrocution, ou de dommages
corporels, ne mettez pas le cordon,
la prise ou l’appareil dans ou à
proximité de l’eau ou d’autres
liquides. Le mini gaufrier n’est PAS
lavable en machine.
• N’utilisez jamais des produits
d’entretien abrasifs pour nettoyer
l’appareil, car cela pourrait
endommager le mini gaufrier et sa
surface de cuisson anti-adhérente.
• N’utilisez pas cet appareil
avec un cordon ou une prise
∙ 7 ∙∙ 6 ∙
Page 5

MESURES DE SÉCURITÉ IMPORTANTESMESURES DE SÉCURITÉ IMPORTANTES
endommagé(e), ou si l’appareil
est défaillant, s’il est tombé ou
endommagé de quelque façon.
Pour toute inspection, réparation
ou ajustement, ramenez l’appareil
au détaillant agréé le plus proche.
• N’utilisez PAS le mini gaufrier à
proximité de l’eau ou d’autres
liquides, avec des mains mouillées,
ou si vous vous tenez sur une
surface mouillée.
• Pour toute question liée à l’entretien
autre que le nettoyage, veuillez
contacter StoreBound directement
au 1-800-898-6970 de 7 à 19 heures,
du lundi au vendredi, ou par courriel
à [email protected].
• N’utilisez pas d’ustensiles en métal
sur la surface de cuisson car cela
endommagerait la surface antiadhérente.
• Cet appareil n’est pas prévu pour
être utilisé par des personnes
(enfants compris) ayant des
capacités physiques, sensorielles
ou mentales réduites, ou
manquant d’expérience et de
connaissances, à moins qu’elles
ne soient supervisées et instruites
sur l’utilisation de cet appareil par
une personne responsable de leur
sécurité.
• Ne placez pas l’appareil sur ou à
proximité d’un brûleur à gaz ou
électrique, ou d’un four chaud.
• Faites attention lorsque vous
déplacez un appareil contenant des
huiles chaudes ou d’autres liquides
chauds.
• Évitez d’utiliser des accessoires
qui ne sont pas recommandés par
le fabricant de l’appareil, car ils
pourraient entraîner un feu, une
électrocution ou un dommage
corporel.
• Laissez le mini gaufrier refroidir
complètement avant tout
déplacement, nettoyage ou
entreposage.
• Une attention particulière doit
être apportée quand l’appareil est
utilisé par ou à proximité d’enfants.
• Ne laissez pas le cordon toucher
des surfaces chaudes ou pendre au
niveau des bords de tables ou
de comptoirs.
• Assurez-vous toujours de
débrancher l’appareil de la prise
électrique avant tout déplacement,
nettoyage ou entreposage.
• StoreBound n’est nullement
responsable des dommages causés
par une mauvaise utilisation de
l’appareil.
• Une mauvaise utilisation du
mini gaufrier peut entraîner des
dommages matériels ou même des
dommages corporels.
• Cet appareil a une che polarisée
(un des brins est plus large que
l’autre). An de réduire le risque
d’électrocution, cette che ne
s’insère dans la prise électrique
que d’une façon. Si la che ne
s’insère pas complètement dans
la prise, inversez la che. Si elle ne
s’insère toujours pas, contactez un
électricien qualié. N’essayez pas
de modier la che de quelque
façon que ce soit.
• Un cordon d’alimentation court doit
être fourni an d’éviter le risque
d’emmêlement ou de trébuchement
lié aux cordons plus longs. Une
rallonge peut être utilisée à condition
de faire attention. Si une rallonge
est utilisée, la puissance électrique
indiquée sur la rallonge doit être
au moins aussi grande que celle de
l’appareil. Si l’appareil est connecté
à la terre, la rallonge doit être un
cordon tripolaire avec prise de
terre. La rallonge doit être disposée
de manière à ne pas reposer sur le
comptoir ou sur la table où elle peut
être tirée par un enfant ou source
de trébuchement involontaire.
MESURES DE SÉCURITÉ IMPORTANTES:
VEUILLEZ LIRE ET CONSERVER CE
MANUEL D’UTILISATION
∙ 9 ∙∙ 8 ∙
Page 6
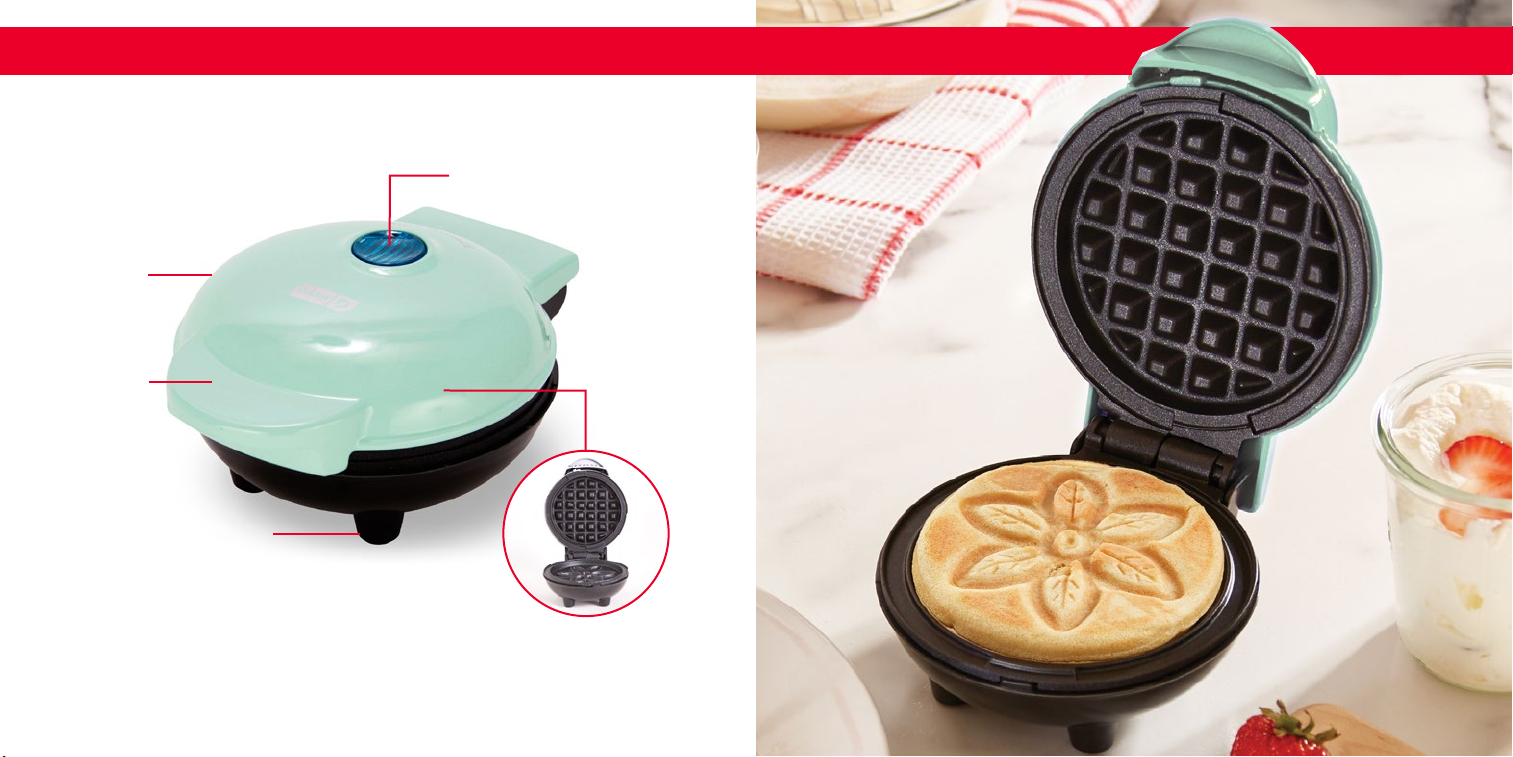
parts & Features
Cover
Cover
Handle
Non-Slip Feet
Indicator Light
∙ 10 ∙
Cooking Surfaces
Page 7
using your Flower mini Waffle makerusing your Flower mini Waffle maker
Before rst use, remove all packaging material and thoroughly wipe down
your Flower Mini Wafe Maker. DO NOT submerge the Mini Maker in water
when cleaning!
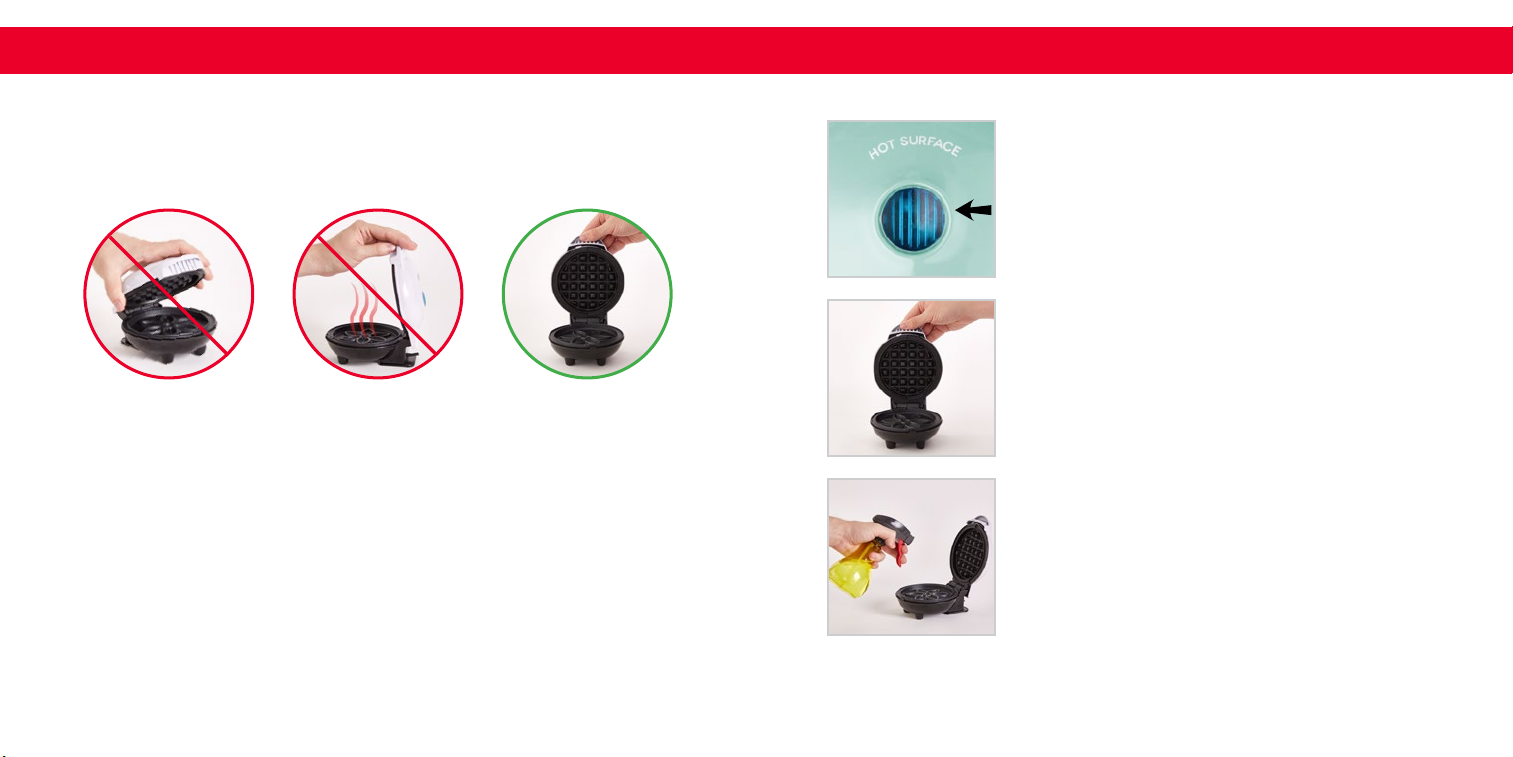
Never touch the
Cooking Surface
or Cover while
appliance is in use.
DO NOT lift the
Cover so that your
arm is over the
Cooking Surface as
it is hot and may
cause injur y.
Always lif t and lower
the Cover by the
Cover Handle. Lift
from the side.
1
Place the appliance on a stable and dry surface.
Plug the cord into a power outlet. The Indicator
Light will illuminate, signaling that the Flower Mini
Wafe Maker is heating up.
2
Once the Cooking Surface reaches the optimal
cooking temperature, the Indicator Light will
automatically shut off. Now, you’re ready to
get cooking!
3
Carefully lift the Cover by the Cover Handle
and spray both Cooking Surfaces with a small
amount of cooking spray.
∙ 12 ∙ ∙ 13 ∙
Page 8

cleaning & maintenanceusing your Flower mini Waffle maker
4
Place or pour batter onto the Cooking Surface and
close the Cover.
5
Once wafe is cooked to your preference,
carefully remove it from the Cooking Surface with
a heat-resistant nylon or silicone cooking utensil.
NOTE: Do not use metal utensils to remove or place
food on the Cooking Surface as this will damage
the non-stick surface.
6
When you have nished cooking, unplug your
Flower Mini Wafe Maker and allow it to cool before
moving or cleaning.
Always allow the appliance to cool completely before moving, cleaning, or
storing. DO NOT submerge appliance in water or any other liquids. Never use
abrasive cleaning agents to clean your appliance as this may damage the
Flower Mini Wafe Maker.
In order to keep your Flower Mini Wafe Maker in pristine working order,
thoroughly clean the appliance after each use. This will prevent the build-up of
food or oil.
• Unplug Flower Mini Wafe Maker and allow it to cool completely.
• Using a damp, soapy cloth, wipe down the Cooking Surface and Cover.
Thoroughly rinse the cloth and wipe again.
• Thoroughly dry Flower Mini Wafe Maker before storing.
• If there is food burned onto the Cooking Surface, pour on a little cooking oil
and let sit for 5 to 10 minutes. Scrub the Cooking Surface with a sponge or
soft bristled brush to dislodge food. Use a damp, soapy cloth to wipe down
the Cooking Surface. Thoroughly rinse the cloth and wipe again. If any
food remains, pour on cooking oil and let sit for a few hours, then scrub
and wipe clean.
• Never use abrasive cleaning agents to clean your appliance as this may
damage the Flower Mini Wafe Maker and its non-stick Cooking Surface.
∙ 15 ∙∙ 14 ∙
Page 9

troubleshootingtroubleshooting
While Dash products are durable, you may encounter one or more of the
problems listed below. If the issue is either not solved by the solutions
recommended below or not included on this page, please contact our
Customer Support Team at 1-800-898-6970 or [email protected].
1. The light on the Flower Mini Wafe Maker keeps shutting off.
• This is normal. During the cooking process, the heating element will
automatically turn on and off to regulate the temperature and ensure
that the Cooking Surface does not get too hot or cold. When this
occurs, the Indicator Light turns on and off.
2. How do I know when the Flower Mini Wafe Maker is heated and ready to
use?
• When the Wafe Maker reaches the optimal temperature, the Indicator
Light shuts off and that means you’re ready to get cooking!
3. There is no On/Off Button. How do I turn the Flower Mini Wafe Maker
off and on?
• To turn on, simply plug in the power cord. When you’re done cooking,
turn off the Flower Mini Wafe Maker by unplugging it.
4. When using my Flower Mini Wafe Maker, the Cover gets very hot.
Is this normal?
• Yes, this is completely normal. When using your Wafe Maker, always lift
and lower the Cover by the Cover Handle. To prevent personal injury,
DONOT lift the Cover so that your arm is over the Cooking Surface as
it is hot and may cause injury. Lift from the side.
5. After using my Flower Mini Wafe Maker a few times, food is starting
tostick to the surface. What is happening?
• There is probably a build-up of burnt food residue on the Cooking
Surface. This is normal, especially when cooking with sugar. Allow
the appliance to cool fully, pour on a little cooking oil and let sit for
5–10minutes. Scrub Surface with a sponge or soft bristled brush to
dislodge food. Use a damp, soapy cloth to wipe down the Cooking
Surface. Rinse the cloth and wipe again. If food remains, pour on
cooking oil and let sit for a few hours, then scrub and wipe clean.
6. The Indicator Light will not turn on and the Cooking Surface is failing
toheat.
• Ensure that the power cord is plugged into the power outlet.
• Check to make sure the power outlet is operating correctly.
• Determine if a power failure has occurred in your home, apartment
or building.
∙ 17 ∙∙ 16 ∙
Page 10
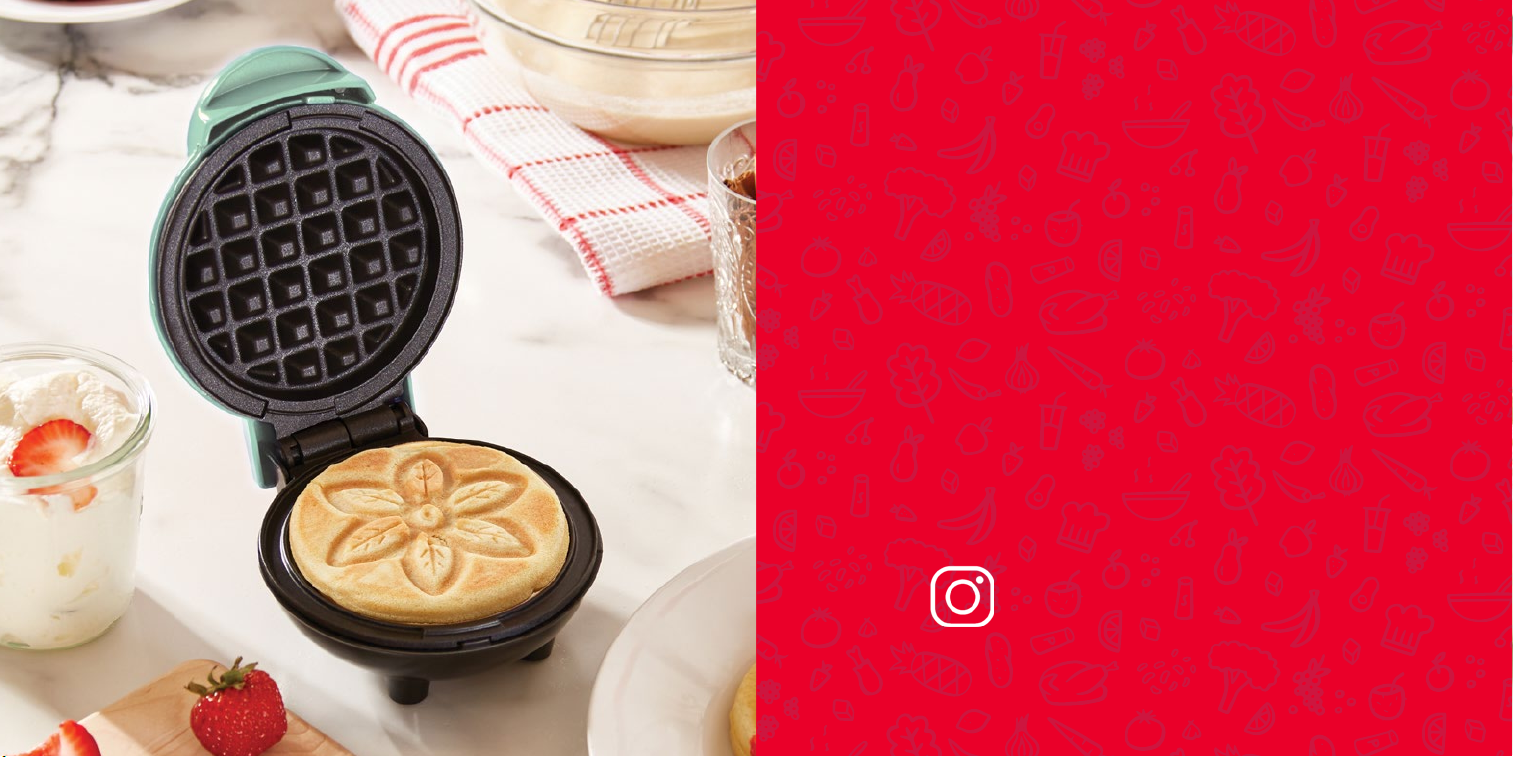
Flower mini waffle maker
RECIPE
guide
Follow us @unprocessyourfood
for recipes, videos, & daily inspiration
Page 11

Chocolate
classic
waffles
Ingredients:
1 cup our
1 tbsp sugar
2 tsp baking powder
¼ tsp salt
1 egg
1 cup milk
2 tbsp melted butter or vegetable oil
Directions:
In a medium bowl, sift the our, sugar, baking powder, and salt. Whisk the egg,
milk, and melted butter in a separate bowl. Add the wet ingredients to the dry
and mix until just incorporated.
Grease the Flower Mini Wafe Maker with butter or coat with a light coat of
cooking spray. Pour ¼ cup of the batter into the Flower Mini Wafe Maker and
cook until golden brown. Repeat with the remaining batter.
Serve with a drizzle of maple syrup and fresh berries.
waffles
Ingredients:
¾ cup all-purpose our
2 tbsp sugar
¼ cup unsweetened cocoa powder
2 tbsp melted butter
1 cup buttermilk
½ tsp baking powder
¼ tsp baking soda
1 large egg
½ cup chocolate chips
Directions:
In a medium bowl, sift together the our, sugar, cocoa powder, baking powder, and
baking soda.
Whisk the egg, butter, and buttermilk in a separate bowl. Mix the wet ingredients with
the dry. Gently fold in the chocolate chips.
Spray or grease the Flower Mini Wafe Maker with oil. Pour 2 tablespoons of the
batter into the Wafe Maker and cook until crispy. Repeat until all of the batter is used.
Serve the wafes with vanilla ice cream, strawberries, and powdered sugar.
2120
Page 12

waffle
cinnamon roll
biscuit pizza
Ingredients:
2 cups all-purpose our
1 tbsp baking powder
¾ cup milk
½ tsp salt
½ cup cold butter, cut into small chunks
pepperoni and shredded mozzarella cheese (or preferred llings)
Directions:
Sift together the our, baking powder, and salt. Add the butter and use a pastry
cutter or fork to cut butter into the our until it is a coarse crumb. Stir in the
milk. Roll your dough out on a oured surface so that it is ½ inch thick. Cut out
as many 3 inch circles as possible. Alternatively, you can use premade biscuit
dough instead of making dough from scratch. Slice each premade biscuit in half
so that they are about ½ thick and then proceed with directions.
Cut dough circles horizontally just enough so that you can stuff the biscuit with
the pepperoni and mozzarella. After you have put in your llings, seal the biscuit
by pinching the edges of the dough. Cook them in the Flower Mini Wafe Maker
until golden and crispy. Serve with a side of marinara sauce for dipping.
22 23
waffles
Ingredients:
Classic Wafe Recipe (see ingredients on page 20)
1¼ tsp cinnamon
½ tsp vanilla extract
Cream Cheese Icing
2 tbsp butter, melted
2 tbsp cream cheese, softened
½ cup powdered sugar
¼ tsp vanilla extract
2–3 tbsp milk
Directions:
Make the Classic Wafes batter (see page 20). Stir in the cinnamon and ½ teaspoon of
vanilla extract. Pour ¼ cup of the batter into the Flower Mini Wafe Maker and cook until
golden brown.
Repeat with the remaining batter.
In a medium bowl, mix the butter and cream cheese until well-combined. Stir in the
powdered sugar, vanilla extract, and milk.
Drizzle the icing over the wafes and serve warm.
Page 13

More Recipe IdeasMore Recipe Ideas
recipe idea ingredients cooking time
Protein Wafe
Cornbread Wafe ¼ cup cornbread batter 6–8 min
Mashed Potato Bite 3 tbsp mashed potatoes 5 min
Smore Biscuit
Grilled Cheese
Apple Pie
Classic Wafe Recipe (page 20)
1 scoop protein powder
1 refrigerated biscuit dough,
sliced lengthwise
2 squares milk chocolate
5 mini marshmallows
2 slices white or wheat bread,
buttered
2 slices American cheese
(2) 4” circles pie crust
2 tbsp chunky applesauce
dash of cinnamon & nutmeg
4–6 min
5–7 min
5 min
5–7 min
recipe idea ingredients cooking time
1 egg, beaten
Wafe Omelette
Chocolate Chip
Cookie
Cheesy Cauliower
Wafes
Wafe Quesadilla 3 tbsp mashed potatoes 4–6 min
2 tbsp chopped veggies
1 tbsp grated Swiss cheese
2 tbsp cookie dough 5 min
1 cauliower, nely chopped
¼ cup cauliower mix
¼ breadcrumbs
2 eggs
½ cup grated Parmesan Cheese
5 min
5 min
∙ 25 ∙∙ 24 ∙
Page 14

feel good
guarantee
Dash values quality and workmanship and stands behind this
product with our Feel Good Guarantee
™
our commitment to quality, visit bydash.com/feelgood.
Our US-based customer support team is at your service
Monday - Friday during the times below.
Reach us at 1 (800) 898-6970 or [email protected]
™
. To learn more about
7am –
7pm
8am –
8pm
9am –
10am –
10pm
9pm
Hey Hawaii! You can reach our customer service team from 5AM to 5PM.
And also, Alaska, feel free to reach out from 6AM - 6PM.
warrantycustomer support
STOREBOUND, LLC – 1 YEAR LIMITED WARRANTY
Your StoreBound product is warranted to be free from defects in material and workmanship for a period of
one (1) year from the date of the original purchase when utilized for normal and intended household use.
Should any defect covered by the terms of the limited warranty be discovered within one (1) year, StoreBound,
LLC will repair or replace the defective part. To process a warranty claim, contact Customer Support at
1-800-898-6970 for further assistance and instruction. A Customer Support agent will assist you by
troubleshooting minor problems. If troubleshooting fails to x the problem, a return authorization will be
issued. Proof of purchase indicating the date and place of purchase is required and should accompany the
return. You must also include your full name, shipping address, and telephone number. We are unable to
ship returns to a PO box. StoreBound will not be responsible for delays or unprocessed claims resulting
from a purchaser’s failure to provide any or all of the necessary information. Freight costs must be prepaid
by the purchaser.
Send all inquiries to [email protected].
There are no express warranties except as listed above.
REPAIR OR REPLACEMENT AS PROVIDED UNDER THIS WARRANTY IS THE EXCLUSIVE REMEDY OF
THE CUSTOMER. STOREBOUND SHALL NOT BE LIABLE FOR ANY INCIDENTAL OR CONSEQUENTIAL
DAMAGES OR FOR BREACH OF ANY EXPRESS OR IMPLIED WARRANTY ON THIS PRODUCT EXCEPT
TO THE EXTENT REQUIRED BY APPLICABLE LAW. ANY IMPLIED WARRANTY OF MERCHANTABILITY
OR FITNESS FOR A PARTICULAR PURPOSE ON THIS PRODUCT IS LIMITED IN DURATION TO THE
DURATION OF THIS WARRANTY.
Some states do not allow the exclusion or limitation of incidental or consequential damages, or
limitations on how long an implied warranty lasts. Therefore, the above exclusions or limitations may
not apply to you. This warranty gives you specic legal rights and you may also have other rights, which
vary from state to state.
REPAIRS
DANGER! Risk of electric shock! The Dash Flower Mini Wafe Maker is an electrical appliance.
Do not attempt to repair the appliance yourself under any circumstances.
Contact Customer Support regarding repairs to the appliance.
TECHNICAL SPECIFICATIONS
Voltage 120V ~ 60Hz
Power Rating 350W
Stock#: DMWF001_191003_V1
∙ 27 ∙∙ 26 ∙
Page 15

1-800-898-6970 | @unprocessyourfood | bydash.com
 Loading...