

Page 1
r
i
e
n
c
s
i
p
e
s
i
d
e
!
#DCAF200
Tasti-Crisp Air Fryer
Instruction Manual | Recipe Guide
Page 2
Tasti-Crisp Air Fryer
Important Safeguards .................................................................... 4-7
Parts & Features .............................................................................. 8-9
Using Your Tasti-Crisp Air Fryer ............................................... 10-14
Tips & Tricks ..................................................................................... 15
Time & Temperature Charts ..................................................... 16-17
Cleaning & Maintenance ............................................................... 18
Troubleshooting ........................................................................ 20-21
Recipes ....................................................................................... 22-37
Customer Support .......................................................................... 38
Warranty ........................................................................................... 39
a
e
t
m
h
s
a
d
e
h
t
!
3
Page 3

IMPORTANT SAFEGUARDS
IMPORTANT SAFEGUARDS
IMPORTANT SAFEGUARDS: PLEASE READ AND
SAVE THIS INSTRUCTION AND CARE MANUAL.
When using electrical appliances, basic safety precautions should be followed, including:
• Read all instructions.
• Remove all bags and packaging from appliance
before use.
• Do not use appliance outdoors or for commercial
purposes.
• Never leave appliance unattended when
in use.
• Only use the appliance on a stable,
dry surface.
• Make sure the appliance is cleaned thoroughly
before using.
• Do not touch hot surfaces. Use handles.
• To protect against electrical shock to not immerse
cord or plugs or appiance in water or other liquid.
• Do not use appliance for other than its intended
use. For household use only.
Do not use outdoors.
• Close supervision is necessary when any
appliance is used by or near children. Children
should be supervised to ensure that they do not
play with the appliance.
• Do not operate this appliance with a damaged
cord, damaged plug, after the appliance
malfunctions, is dropped, or damaged in
any manner. Return appliance to the nearest
authorized service facility for examination, repair,
or adjustment.
• For maintenance excluding cleaning,
please contact StoreBound directly at 1-800-8986970 from 7AM-7PM PT Monday-Friday or by
important safeguards
email at [email protected].
• Do not place appliance on or near a hot gas
burner, hot electric burner, or in a heated oven.
Extreme caution must be used when moving an
appliance containing hot oil or other hot liquids.
Always attach plug to appliance rst, then plug
cord into the wall outlet. To disconnect, turn any
control to “off,” then remove plug from wall outlet.
Do not use appliance for other than intended use.
• Refrain from using attachments that are not
recommended by the appliance manufacturer, as
this may result in re, electric shock, or personal
injury.
• Do not let the cord touch hot surfaces or hang
over the edges of tables or counters.
• This appliance is not intended for use by
persons (including children) with reduced
physical, sensory, or mental capabilities, or
lack of experience and knowledge unless they
are provided with supervision and instruction
concerning use of the appliance by a person
responsible for their safety.
• Always be sure to unplug the appliance from the
outlet prior to moving, cleaning, storage, and
when not in use.
• StoreBound shall not accept liability for damages
caused by improper use of
the appliance.
• Improper use of the appliance can result in
property damage or personal injury.
• This appliance has a polarized plug (one blade
is wider than the other). To reduce the risk of
electric shock, this plug will t in a polarized
outlet only one way. If the plug does not
completely t in the outlet, reverse the plug. If it
still does not t, contact a qualied electrician. Do
not attempt to modify the plug in any way.
• Turn the appliance OFF, then unplug from the
outlet when not in use, before assembling or
disassembling parts and before cleaning. To
unplug, grasp the plug and pull from the outlet.
Never pull from the power cord.
• A short power supply cord is to be provided
to reduce the risk resulting from becoming
entangled in or tripping over a longer cord. An
extension cord may be used if care is exercised
in its use. If an extension cord is used, the
marked electrical rating of the extension cord
should be at least as great as the electrical rating
of the appliance. The extension cord should
be arranged so that it will not drape over the
countertop or tabletop where it can be pulled on
by children or tripped over unintentionally. If the
appliance is of the grounded type, the cord set
or extension cord should be a grounding-type
3-wire cord.
• To avoid burns, use extreme caution when
removing accessories or disposing of
hot grease.
• When not in use, always unplug the unit. Do not
store any materials other than manufacturer’s
recommended accessories in this appliance.
• Do not place any of the following materials in the
AirCrisp™: paper, cardboard, plastic and similar
products.
• Do not cover any part of the oven with metal foil.
This will cause overheating of the oven.
• Oversize foods, metal foil packages and utensils
must not be inserted in the Air Fryer.
as they may involve a risk of re or
electric shock.
• Do not allow the appliance to be covered by
or touch ammable materials such as curtains,
draperies or walls, when in operation. Do not
store any items on top of the appliance when in
operation. Do not operate under wall cabinets.
• Do not clean with metal scouring pads.
• Do not attempt to dislodge food when the
appliance is plugged into electrical outlet.
• Use recommended temperature settings for all
cooking/baking, roasting and air frying.
IMPORTANT SAFEGUARDS: PLEASE READ AND
SAVE THIS INSTRUCTION AND CARE MANUAL.
4
5
Page 4

MESURES DE SÉCURITÉ IMPORTANTES MESURES DE SÉCURITÉ IMPORTANTES
MESURES DE SÉCURITÉ IMPORTANTES: VEUILLEZ
LIRE ET CONSERVER CE MANUEL D’UTILISATION
Lors de l’utilisation d’appareils électriques, des précautions élémentaires de sécurité doivent
être respectées, notamment:
• Lisez toutes les instructions.
• Retirez tous les sacs et emballages de l’appareil
avant utilisation.
• N’utilisez pas cet appareil à l’extérieur ou à des
ns commerciales.
• Ne laissez jamais l’appareil sans surveillance
lorsqu’il est utilisé.
• Utilisez l’appareil uniquement sur une surface
stable et sèche.
• Assurez-vous que l’appareil est nettoyé à fond
avant de l’utiliser.
• Ne pas utiliser cet appareil pour un usage autre
que celui auquel il est destiné. Pour usage
domestique seulement. Ne pas
utiliser à l’extérieur.
• Une surveillance étroite est nécessaire lorsqu’un
appareil est utilisé par ou à proximité d’enfants.
Les enfants doivent être surveillés pour s’assurer
qu’ils ne jouent pas avec l’appareil.
• Ne pas utiliser cet appareil avec un cordon
ou une che endommagé, après un
dysfonctionnement de l’appareil, une chute ou
un dommage quelconque. Renvoyez l’appareil à
un centre de service agréé le plus proche pour
un examen, une réparation ou
un réglage.
• Pour tout entretien autre que le nettoyage,
veuillez contacter StoreBound directement
au 1-800-898-6970 de 7h à 19h du lundi
au vendredi ou par courrier électronique à
[email protected].
• Ne placez pas l’appareil sur ou à proximité d’un
brûleur à gaz chaud, d’un brûleur électrique
chaud ou dans un four chauffé. Une extrême
important safeguards
prudence doit être utilisée lors du déplacement
d’un appareil contenant de l’huile chaude ou
d’autres liquides chauds. Attachez toujours
d’abord la che à l’appareil, puis branchez le
cordon dans la prise murale. Pour déconnecter,
éteignez toutes les commandes, puis retirez
la che de la prise murale. N’utilisez pas cet
appareil pour un usage autre que celui prévu.
• Évitez d’utiliser des accessoires qui ne sont pas
recommandés par le fabricant de l’appareil car
cela pourrait provoquer un incendie, un choc
électrique ou des blessures.
• Ne laissez pas le cordon toucher des
surfaces chaudes ou pendre des bords de tables
ou de comptoirs.
• Cet appareil n’est pas destiné à être utilisé
par des personnes (y compris des enfants)
ayant des capacités physiques, sensorielles ou
mentales réduites, ou manquant d’expérience
et de connaissances, à moins qu’une personne
responsable de leur sécurité ne les supervise et
ne les instruise.
• Assurez-vous toujours de débrancher l’appareil
de la prise avant de le déplacer,
de le nettoyer, de le ranger et lorsqu’il n’est pas
utilisé.
• StoreBound n’acceptera aucune responsabilité
pour les dommages causés par une utilisation
incorrecte de l’appareil.
• Une utilisation inappropriée de l’appareil peut
entraîner des dommages matériels, voire
corporels.
• Cet appareil est doté d’une che polarisée (une
lame est plus large que l’autre). Pour réduire
les risques d’électrocution, cette che ne peut
être insérée dans une prise polarisée. Si la
che n’entre pas complètement dans la prise,
inversez-la. Si le problème persiste, contactez
un électricien qualié. N’essayez pas de
modier la che de quelque manière que ce
soit.
• Éteignez l’appareil, puis débranchez-le de la
prise lorsqu’il n’est pas utilisé, avant d’assembler
ou de désassembler des pièces et avant de
le nettoyer. Pour débrancher, saisissez la che
et retirez-la de la prise. Ne tirez jamais sur le
cordon d’alimentation.
• Un cordon d’alimentation court doit être fourni
an de réduire les risques d’enchevêtrement
ou de trébuchement sur un cordon plus long.
Une rallonge peut être utilisée si elle est
utilisée avec soin. Si une rallonge est utilisée,
le calibre électrique indiqué doit être au moins
égal à celui de l’appareil. La rallonge doit être
disposée de manière à ne pas se poser sur le
comptoir ou la table, où elle pourrait être tirée
par des enfants ou faire trébucher dessus par
inadvertance. Si l’appareil est du type mis à
la terre, le cordon ou la rallonge doit être un
cordon à 3 ls.
• Pour éviter les brûlures, soyez extrêmement
prudent lorsque vous retirez des accessoires ou
que vous vous débarrassez de la
graisse chaude.
• Lorsqu’il n’est pas utilisé, débranchez toujours
MESURES DE SÉCURITÉ IMPORTANTES: VEUILLEZ
LIRE ET CONSERVER CE MANUEL D’UTILISATION
l’appareil. Ne stockez pas de matériaux autres
que les accessoires recommandés par le
fabricant dans cet appareil.
• Ne placez aucun des matériaux suivants dans
le four à friteuse: papier, carton, plastique et
produits similaires.
• Ne recouvrez aucune partie du four avec une
feuille métallique. Cela provoquerait une
surchauffe du four.
• Les aliments surdimensionnés, les emballages
en feuille de métal et les ustensiles ne doivent
pas être introduits dans le four, car ils peuvent
entraîner un risque d’incendie ou de choc
électrique.
• Ne laissez pas l’appareil en contact avec des
matériaux inammables, tels que des rideaux,
des rideaux ou des murs, pendant qu’il est en
marche. Ne rangez aucun objet sur le dessus de
l’appareil lorsqu’il est en marche. Ne pas utiliser
sous des armoires murales.
• Ne pas nettoyer avec des tampons à récurer en
métal.
• N’essayez pas de déloger des aliments lorsque
l’appareil est branché sur une
prise électrique.
• Utilisez les réglages de température
recommandés pour toutes les étapes de
cuisson / cuisson au four, de rôtissage et de
friture à l’air.
6 7
Page 5
PARTS & FEATURES PARTS & FEATURES
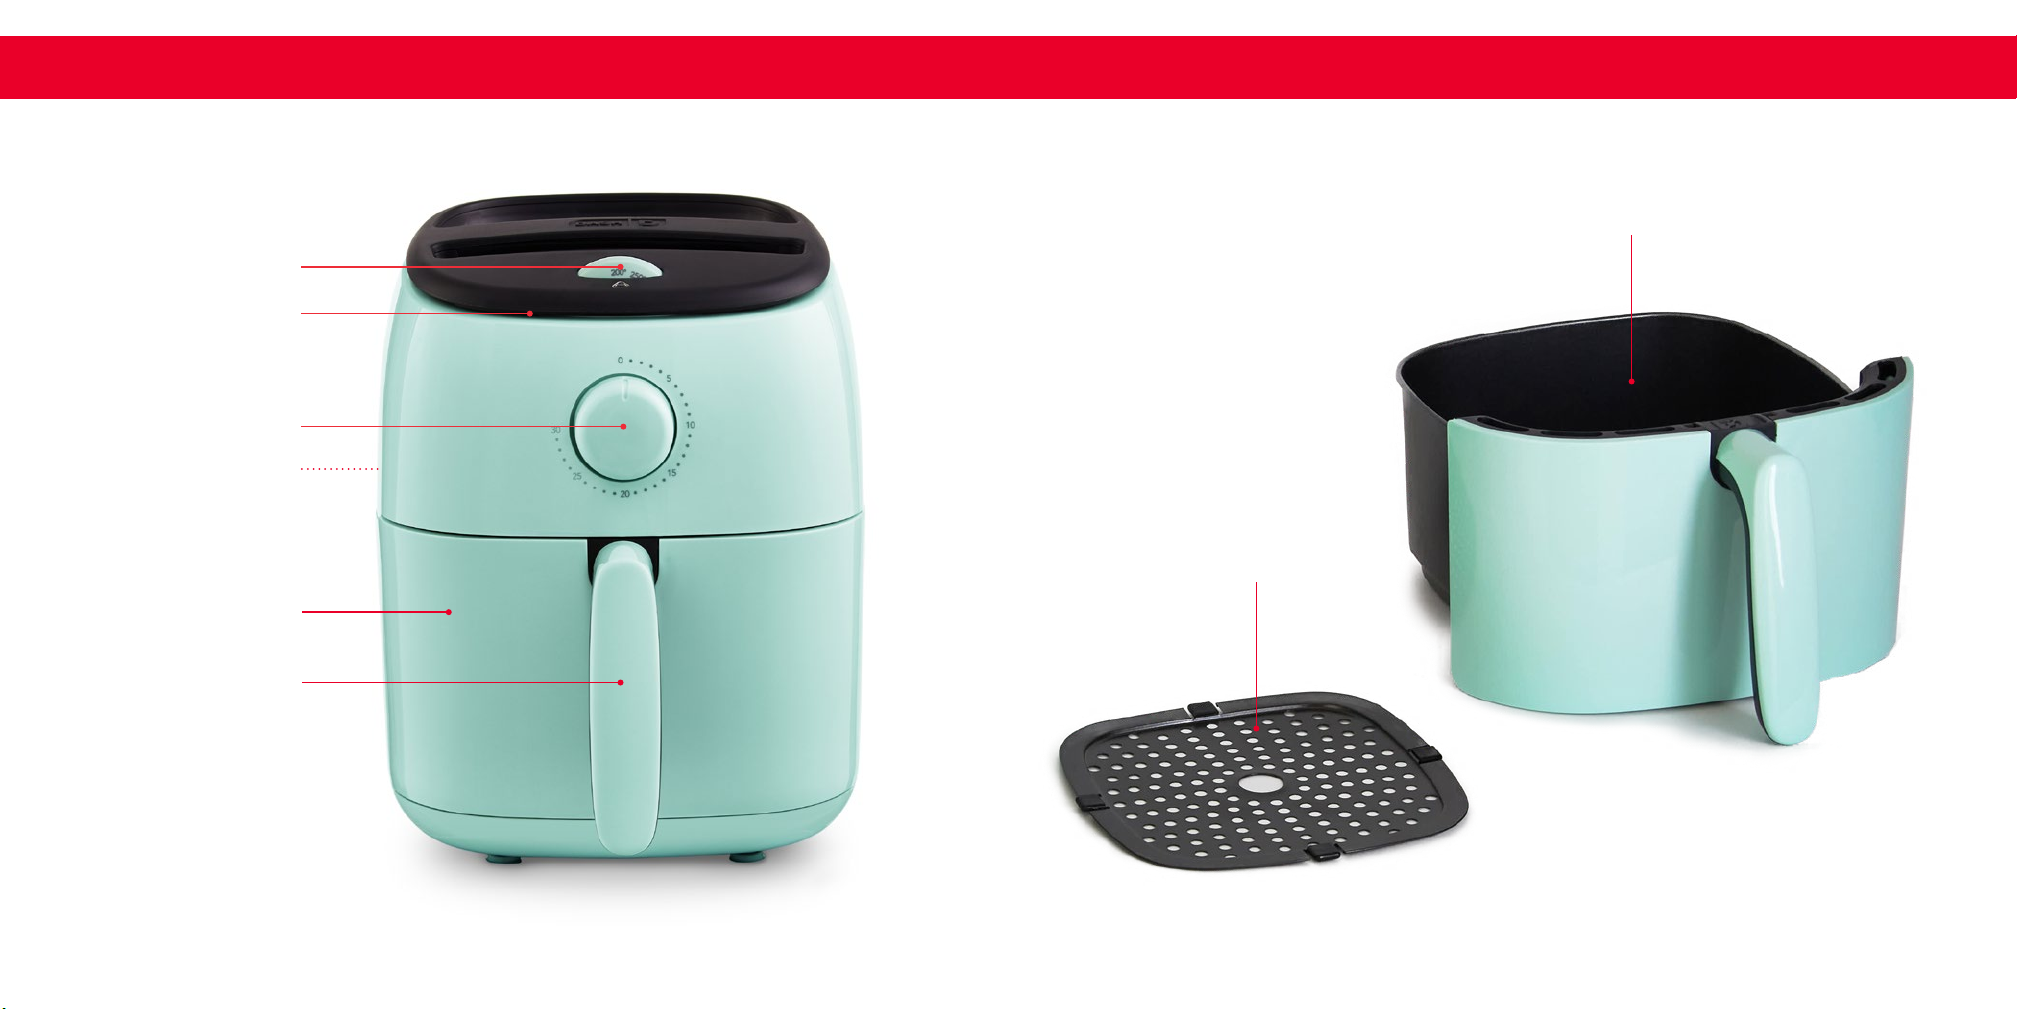
Crisper Drawer
Temperature Dial
Air Inlet
Timer Dial
Air Outlet
(Reverse Side)
Crisper Tray
Crisper Drawer
Crisper Drawer Handle
9 8
Page 6
Using Your Tasti-Crisp Air fryer
BEFORE USING YOUR AIR FRYER
• Remove all packaging materials.
• Check that the Air Fryer has no visible damage and no parts are missing.
• Before using the appliance for the rst time or before using it af ter prolonged storage, wash and dry
the appliance and any accompanying accessories. See “Cleaning & Maintenance” for instructions.
Using Your Tasti-Crisp Air fryer
using YOURy air fryer
A B
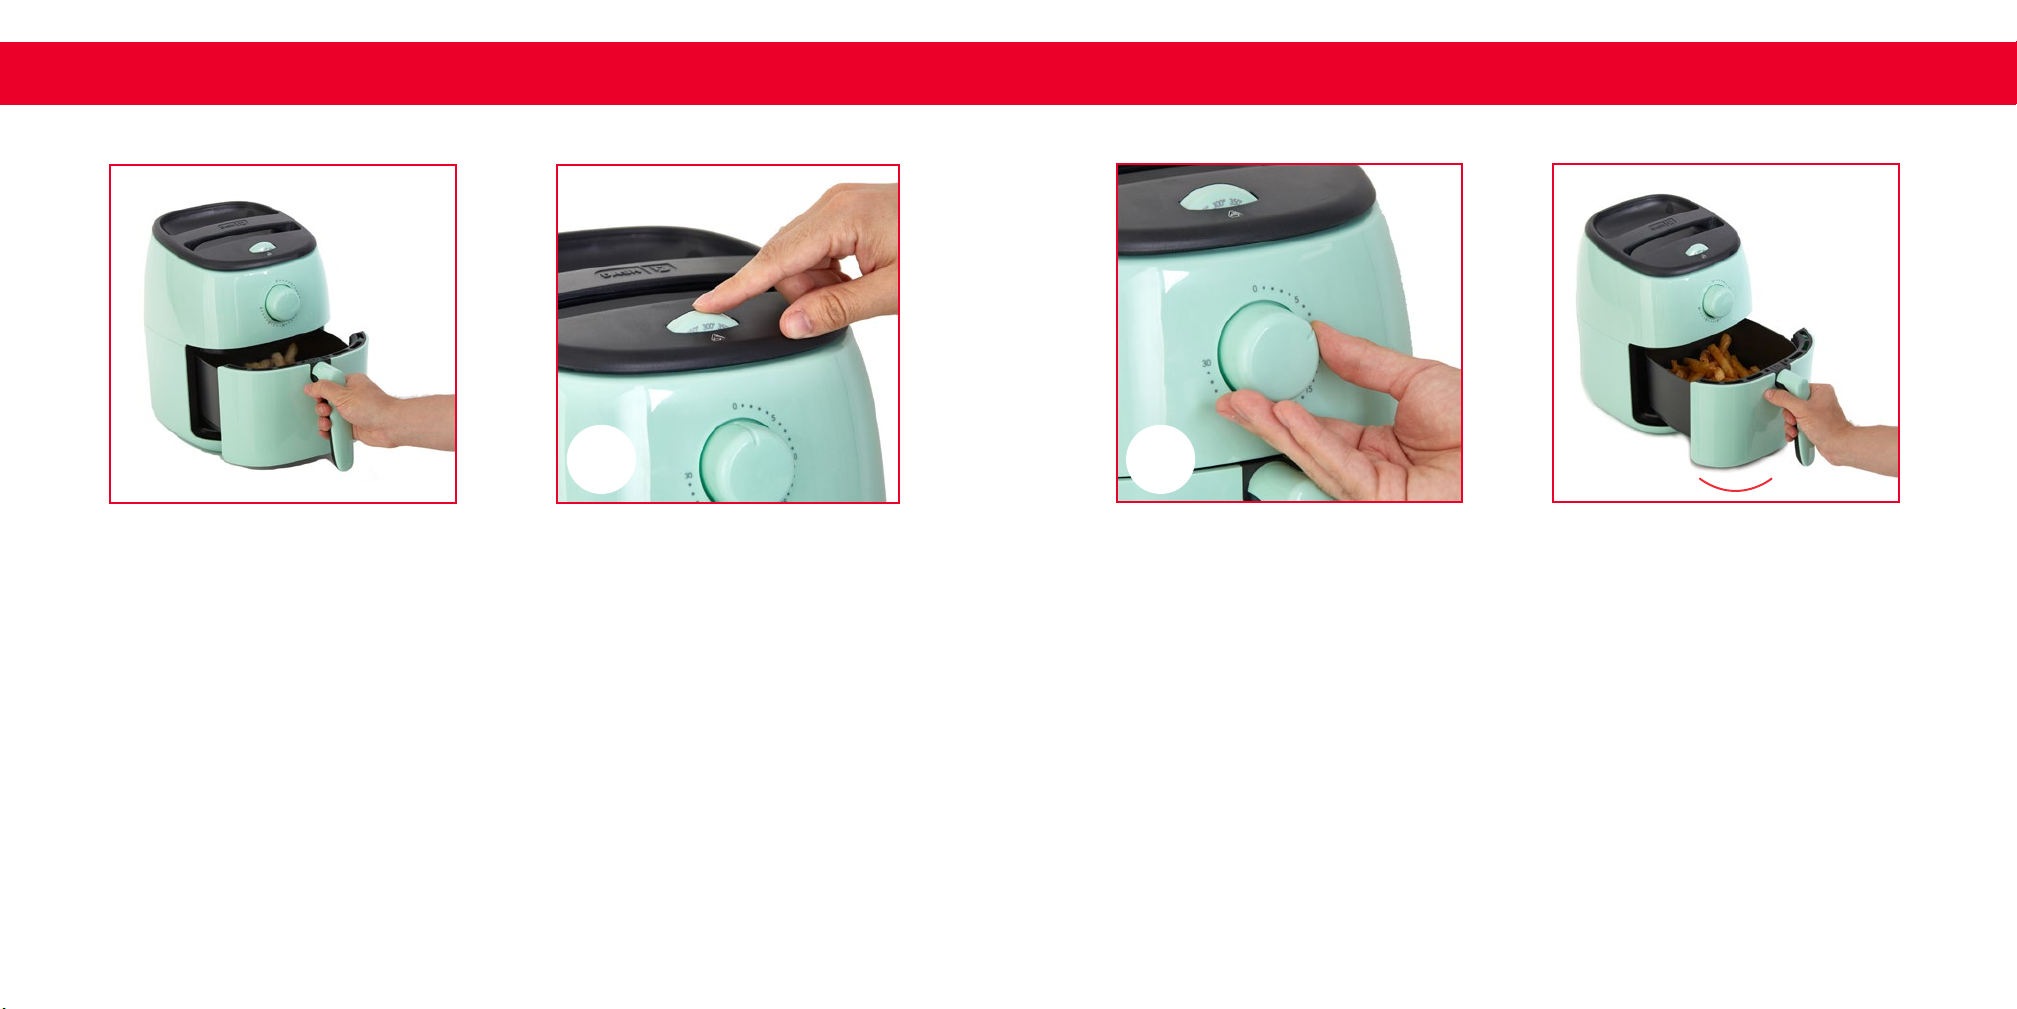
Place the appliance on a stable, at, heat-resistant surface. Plug the Air Fryer into a
1
wall socket.
10
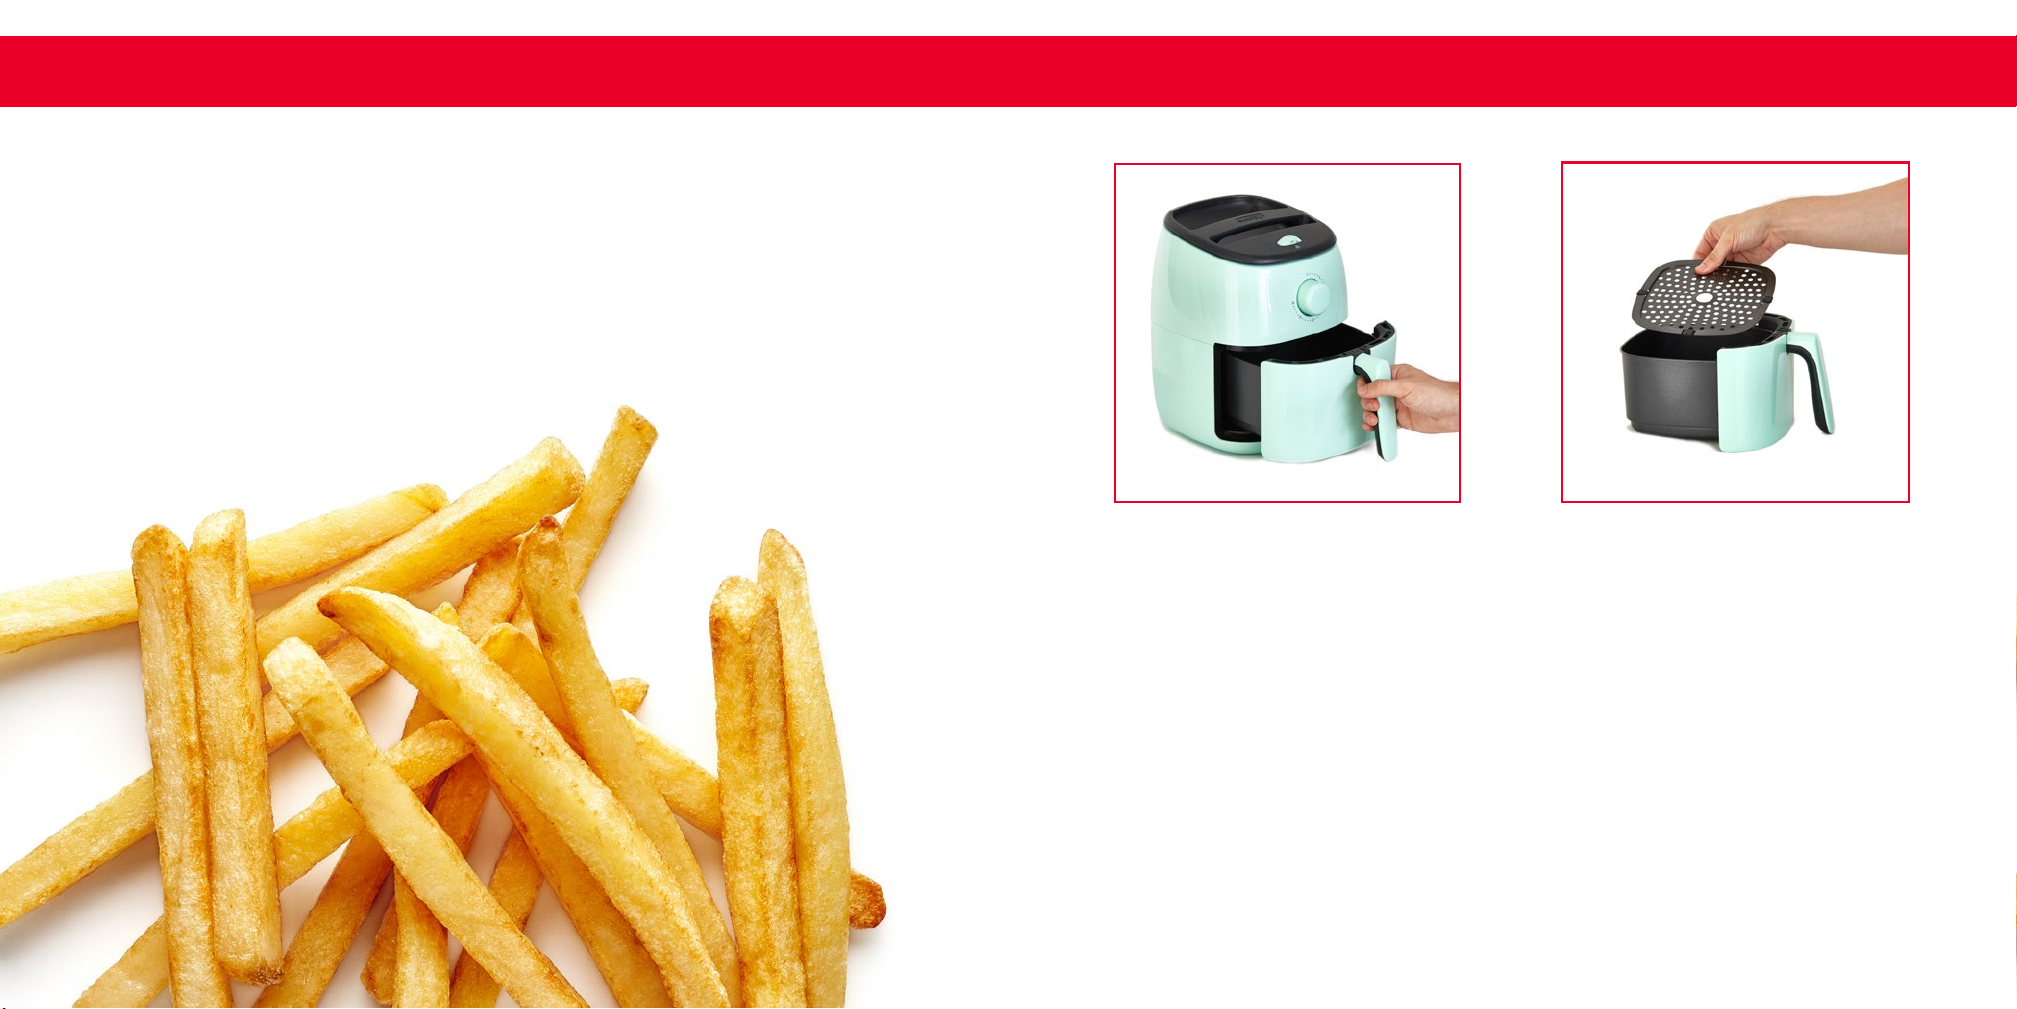
Remove the Crisper Drawer from the Air Fryer (photo A), and make sure that the Crisper Tray is
2
inserted in the Crisper Drawer (photo B). Place food in the Crisper Drawer on the Crisper Tray.
NOTE: There is no need to add any oil as the appliance works with hot air, although foods can
be tossed in a small amount of oil for crispier results.
11
Page 7
using YOUR Tasti-Crisp Air Fryer
using YOUR Tasti-Crisp Air Fryer
c
After adding food slide the Crisper Drawer back inside the Air Fryer (photo C).
3
Use the Temperature Dial to set the desired temperature. Refer to the Temperature & Time
4
Charts on page (16-17) for suggested settings (photo D).
12
D
E
Set the Timer Dial to your desired time. The Air Fryer will automatically begin air frying
5
and the Timer Dial will start counting down (photo E).
For even results, some foods require shaking halfway through the preparation time. See the
6
Temperature & Time Chart for recommendations. To do this, simply, remove the Crisper
Drawer from the appliance and shake it gently side to side (photo F).
F
‹
›
13
Page 8
using YOUR Tasti-Crisp Air Fryer
G
When the Air Fryer is done cooking, a chime will sound.
7
Pull the Crisper Drawer out of the appliance and place it on a heat-resistant surface. Caution:
8
The Crisper Drawer and Crisper Tray will be hot. Only touch the Crisper Drawer by the Crisper
Drawer Handle. Check if the food is done. If the food is not ready, slide the Crisper Drawer back
into the appliance and set the Timer Dial for a few extra minutes.
TIPS & TRICKS
• Air frying smaller items or fewer items will require a shorter cooking time than larger items
or more items.
• Shaking items halfway during the cooking time optimizes the end result and can help prevent
unevenly fried foods.
• Avoid preparing extremely greasy items, such as sausages, in the Air Fryer.
• Use a baking pan in the Crisper Drawer to bake a cake or quiche, or to fry fragile or lled items.
H
a
g
n
i
y
F
r
i
A
• Soak fresh potatoes in water for 30 minutes prior to frying, then add a small amount of oil for
a crispy result. Fry potatoes in the Air Fryer within a few minutes of adding the oil.
• Snacks like chicken nuggets and mozzarella sticks usually prepared in an oven can also be
prepared in the Air Fryer.
• Use store-bought dough to prepare lled snacks such as calzones quickly and easily. Items
made with store-bought dough require less preparation than homemade dough.
c
k
s
!
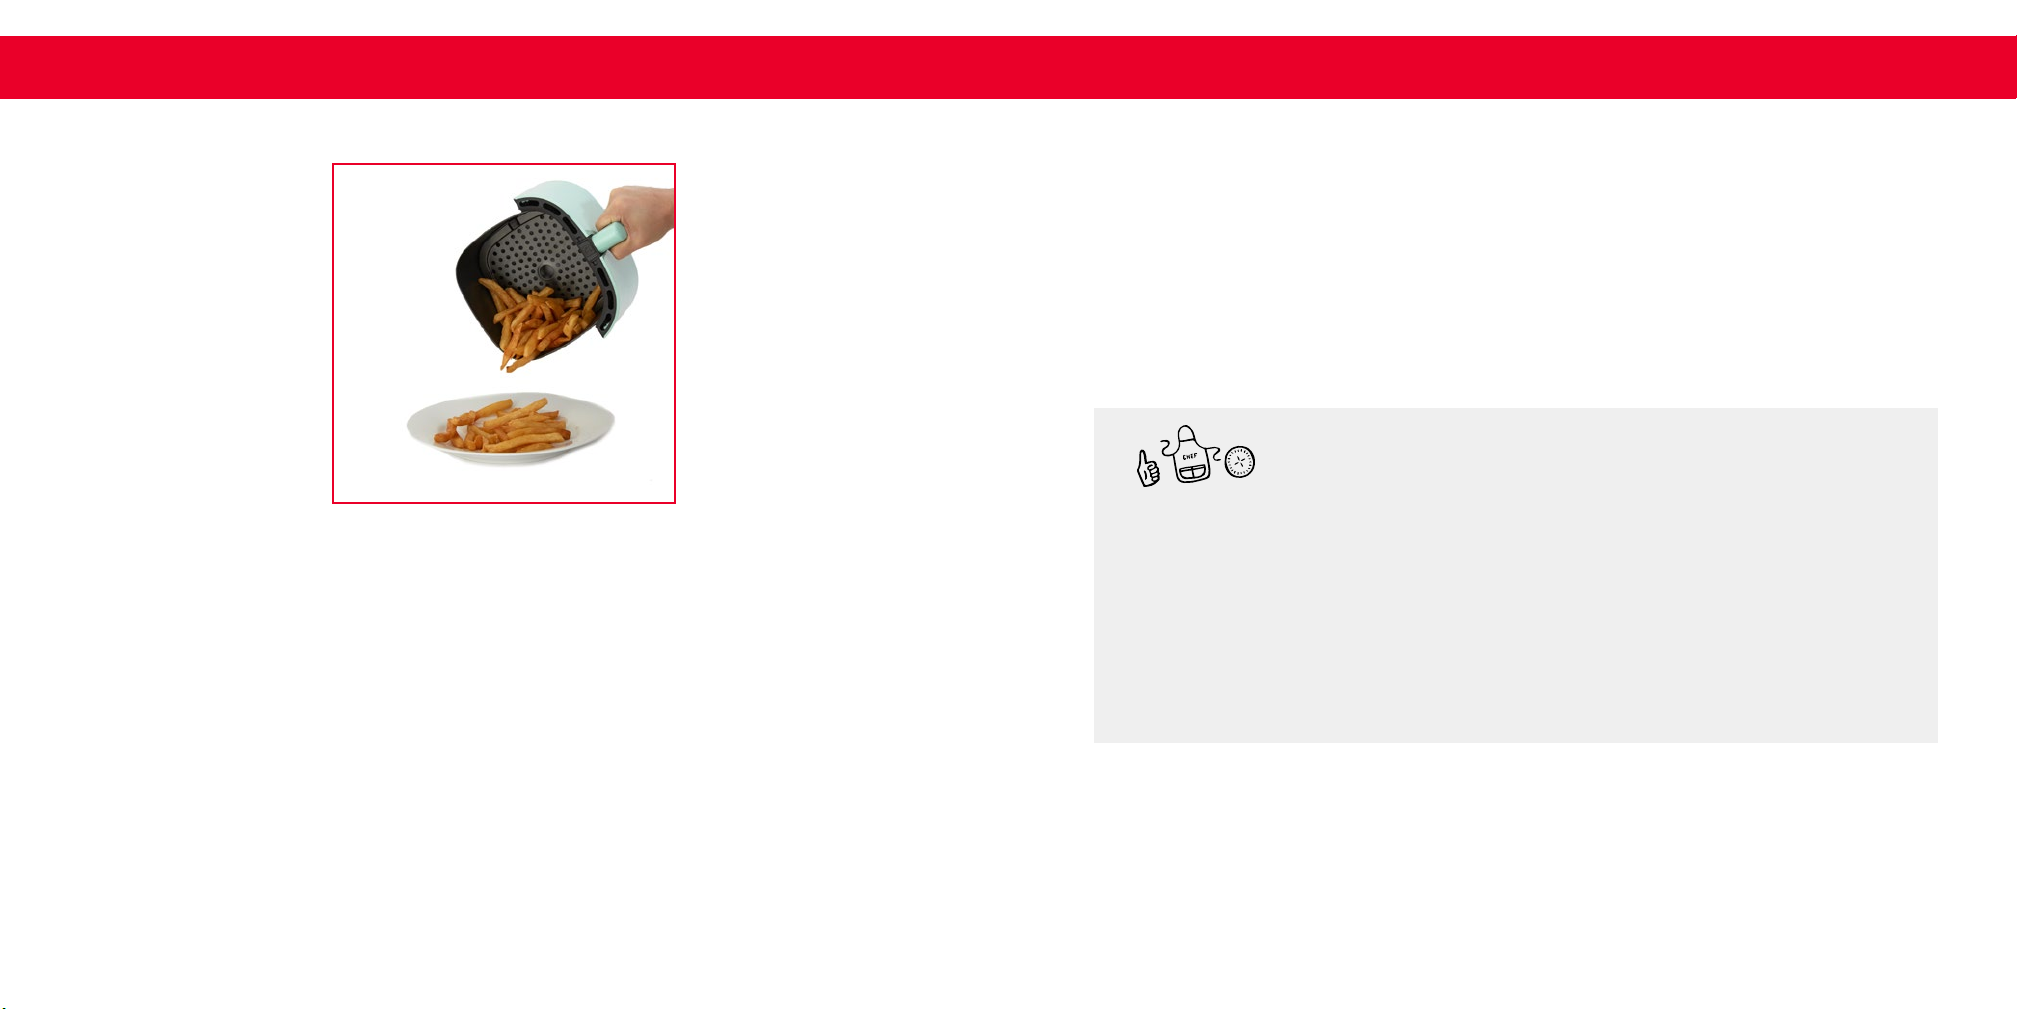
Empty the Crisper Drawer into a bowl or onto a plate. To remove large or greasy items,
9
lift them out of the Crisper Drawer with a pair of tongs. Excess oil from any foods will be
collected at the bottom of the Crisper Drawer. Allow the appliance to cool before disposing
of any excess oil (photo G).
14
15
Page 9
Temperature & Time Charts
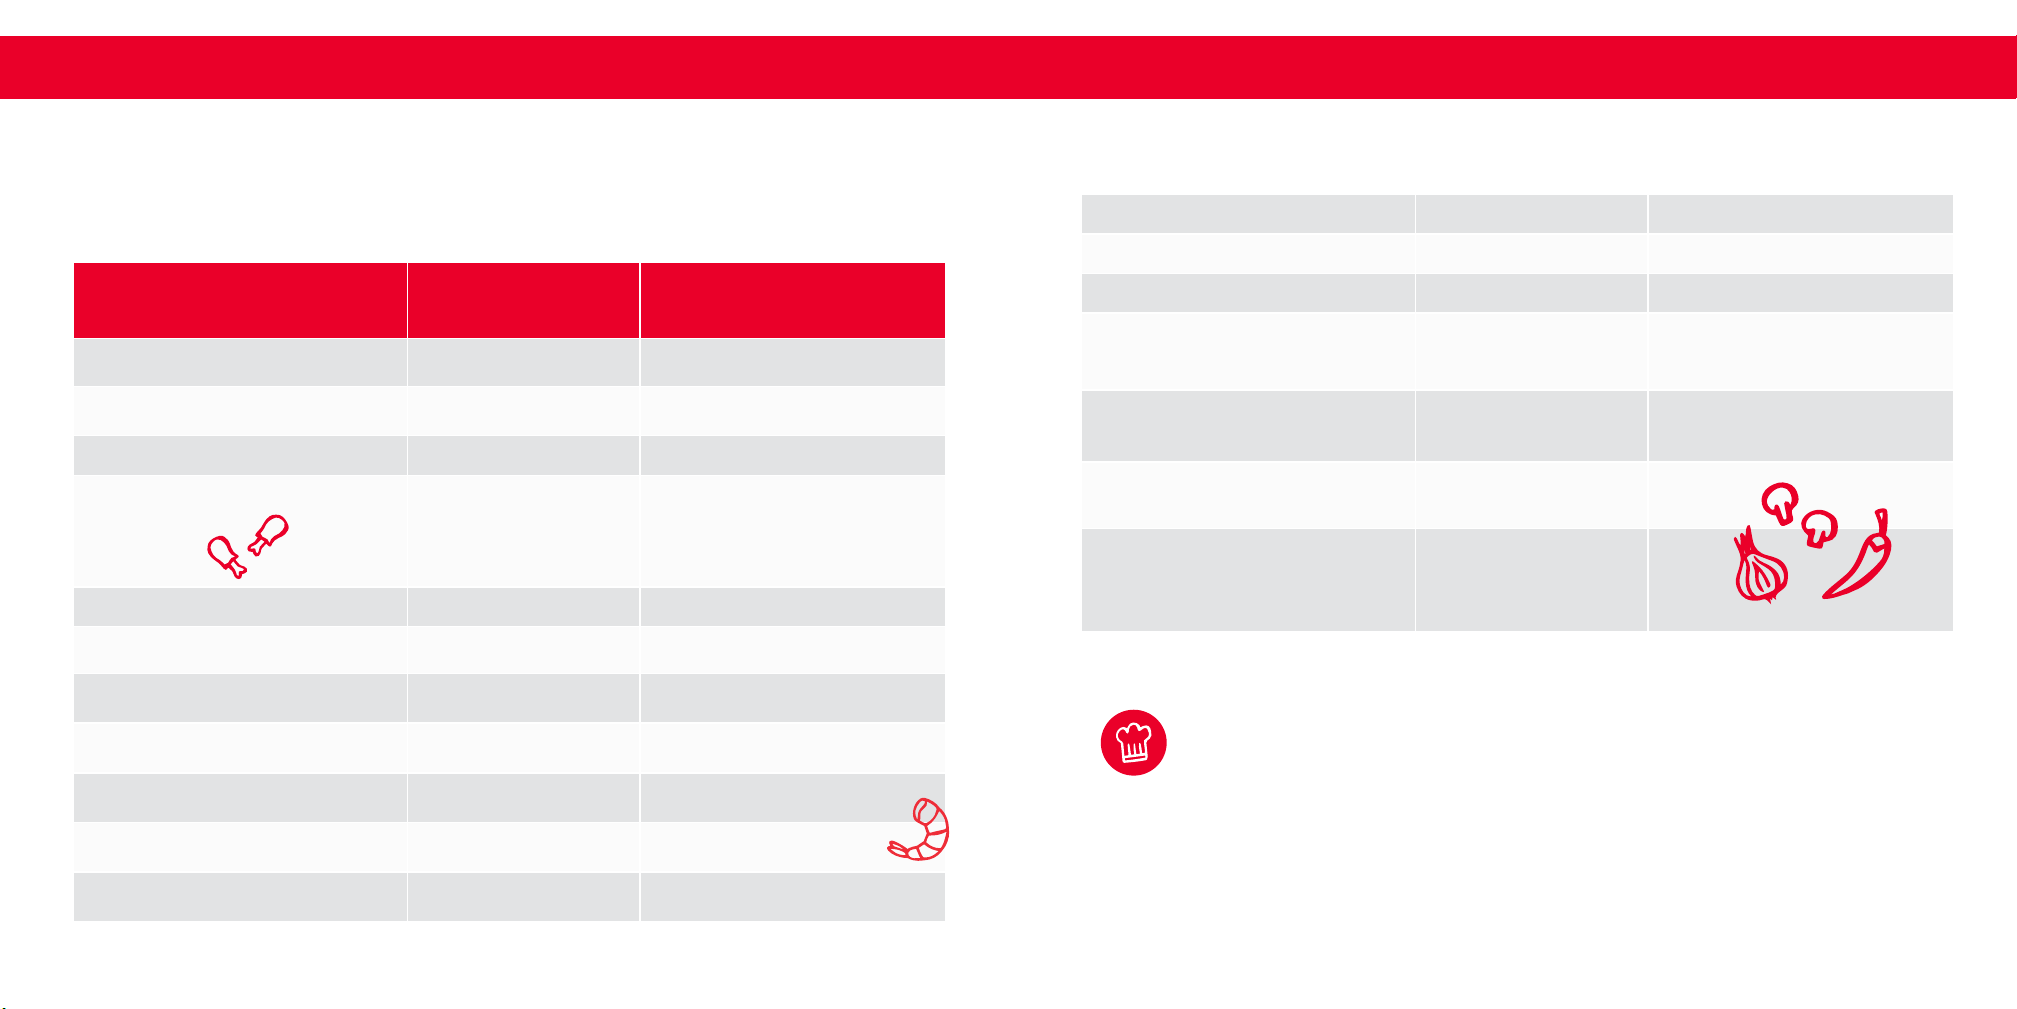
Please keep in mind that these temperatures and times are guidelines, not exact specications. Actual
cooking times vary depending on the size, shape, and amount of food. When air frying a new item,
always make sure food is cooked properly before consumption. According to the USDA, the safe
internal temperature is 165°F for poultry and 160°F for beef. If food is not cooked properly using these
guidelines, add a few minutes to the Air Fryer and cook food longer.
Temperature & Time Charts
Frozen sh sticks 390℉ 10
Mozzarella sticks 350℉ 10
Spring rolls 390℉ 10-15
INGREDIENT TEMPERATURE (ºF) TIME (MIN)
Thin frozen fries 400℉ 16-20
Thick frozen fries 400℉ 17-20
Frozen chicken nuggets 370℉ 10
Cook for 8-10 minutes at 400°F,
Drumsticks 400℉
Hamburger 360℉ 6-10
Meatballs - 1” 400℉ 6-10
Chicken breast (boneless, skinless) 360℉ 15-20
Chicken wings 400℉ 13-18
Bacon - regular 400℉ 10
Shrimp (frozen) 390℉ 8-20
then lower the temp to 320ºF for
10 minutes
Potstickers 400℉ 7-10
Brussel sprouts (trimmed, halved if
large sizes)
Sweet potato fries - frozen 360℉ 10-12
Sweet potato fries - fresh 400℉ 10
Air fried mixed veggies (red bell
pepper, summer squash, zucchini,
mushrooms and onion)
!
p
i
T
f
e
h
C
The Air Fryer can also be used to reheat foods. To reheat food, set the temperature to
300℉ for up to 10 minutes.
375℉ 20
375℉ 15-20
Onion rings 400℉ 12-15
16
17
Page 10
Cleaning & Maintenance
• Remove the plug from the wall socket and let the appliance cool down completely. Removing the
Crisper Drawer allows the Air Fryer to cool down quicker.
• Thoroughly clean the appliance after every use.
• Do not clean the Crisper Tray, Crisper Drawer, or the inside of the appliance with metal kitchen
utensils or abrasive cleaning materials, as they may damage the non-stick coating.
• Wipe the outside of the appliance with a moist, soft cloth.
• The Crisper Tray and Crisper Drawer are dishwasher-safe.
• Alternatively, the Crisper Tray and Crisper Drawer can be cleaned with hot water, dish soap, and a
non-abrasive sponge.
• Clean the heating element with a soft cleaning brush to remove any food residue.
• Make sure the appliance has cooled down completely before cleaning the heating element.
• Make sure that the appliance is unplugged and all parts are clean and dry before storing.
T
f
i
C
h
e
p
!
C
o
m
n
a
n
n
i
n
o
R
o
l
l
3
5
s
!
a
g
p
e
If the Crisper Drawer or the Crisper Tray
is dirty, remove it from the Air Fryer and
ll the Crisper Drawer with hot water and
dish soap. Then, put the Crisper Tray in
the Crisper Drawer and let them soak for
about 10 minutes to release any food that
has become stuck.
18
Page 11

Page Title
Troubleshooting
Troubleshooting
Page Title
PROBLEM POSSIBLE CAUSE SOLUTION
The Air Fryer does not turn on. The appliance is not plugged in. Plug the Air Fryer into a
grounded wall socket.
The food is not done after the
recommended time.
The food is not done after the
recommended time.
Food is fried unevenly in the Air
Fr yer.
Snacks are not crispy when they
come out of the Air Fryer.
Too much food has been added
to the Crisper Drawer.
The temperature was set too
low.
Certain types of food need to
be shaken halfway through the
preparation time.
The food was not dry enough or
needs more oil.
Chart
Use less food and cook in
batches if necessary. Your food
will also cook more evenly.
Adjust the temperature to the
required temperature setting
(see “Temperature & Time”
chart, pages 16-17).
Items that lie on top of or across
each other (fries, onion rings,
etc.) need to be shaken halfway
through the preparation time
(see “Temperature & Time”
chart, pages 16-17).
Make sure to properly dry the
food or lightly brush some oil
onto the snacks for a crispier
result
PROBLEM POSSIBLE CAUSE SOLUTION
White smoke is coming out of
the appliance.
Fresh fries are fried unevenly in
the Air Fryer.
Fresh fries are not crispy when
they come out of the Air Fryer.
Your food is too greasy.
The Crisper Drawer still
contains residue from previous
use.
Food is touching the heating
element
Certain types of food need to
be shaken halfway through. the
preparation time.
The crispiness of the fries
depends on the amount of oil
and water in the fries
When you fry greasy items in the
Air Fryer, a large amount of fat will
leak into the Crisper Drawer. The
fat produces white smoke and the
Crisper Drawer may heat more
than usual. This does not affect
the appliance or the end result.
White smoke is caused by
grease heating in the Crisper
Drawer. Make sure it is cleaned
properly after each use.
Remove some food from the Air
Fryer
Items that lie on top of or across
each other (fries, onion rings,
etc.) need to be shaken halfway
through the preparation time
(see “Temperature & Time”
chart, pages 16-17).
Make sure you dry the potato
sticks properly before you add
the oil.
I cannot slide the Crisper
Drawer into the appliance
properly.
There is too much food in the
Crisper Drawer.
Do not overll the Crisper
Drawer.
Cut the potato sticks smaller for
a crispier result.
Add slightly more oil for a
crispier result.
21 20
Page 12
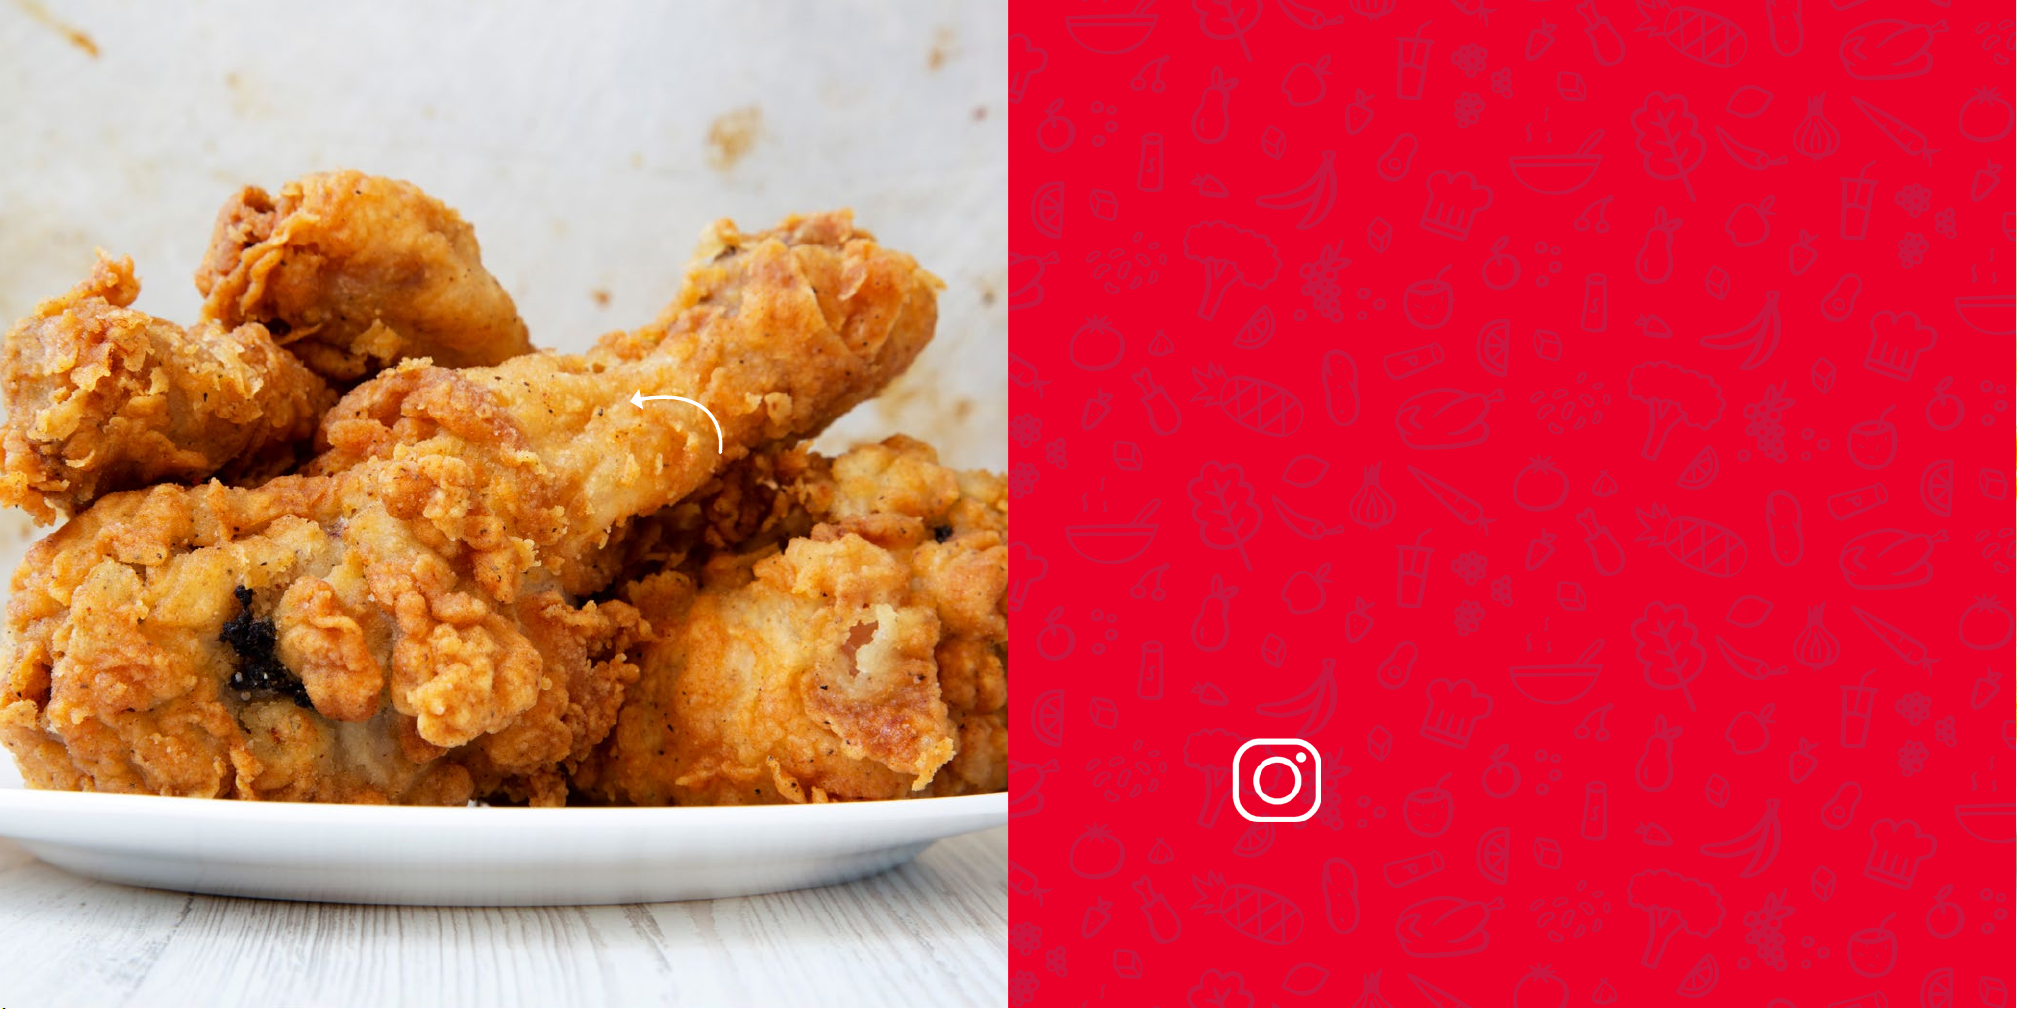
digital family AIR FRYER
RECIPE
TastiCrisp Air Fryer
d
e
i
C
B
F
k
l
i
m
r
e
n
u
o
e
g
a
p
3
0
h
i
c
k
e
!
BOOK
Follow us @unprocessyourfood
for recipes, videos, & daily inspiration
RECIPE
n
Guide
Follow us @unprocessyourfood
for recipes, videos, & daily inspiration
Page 13
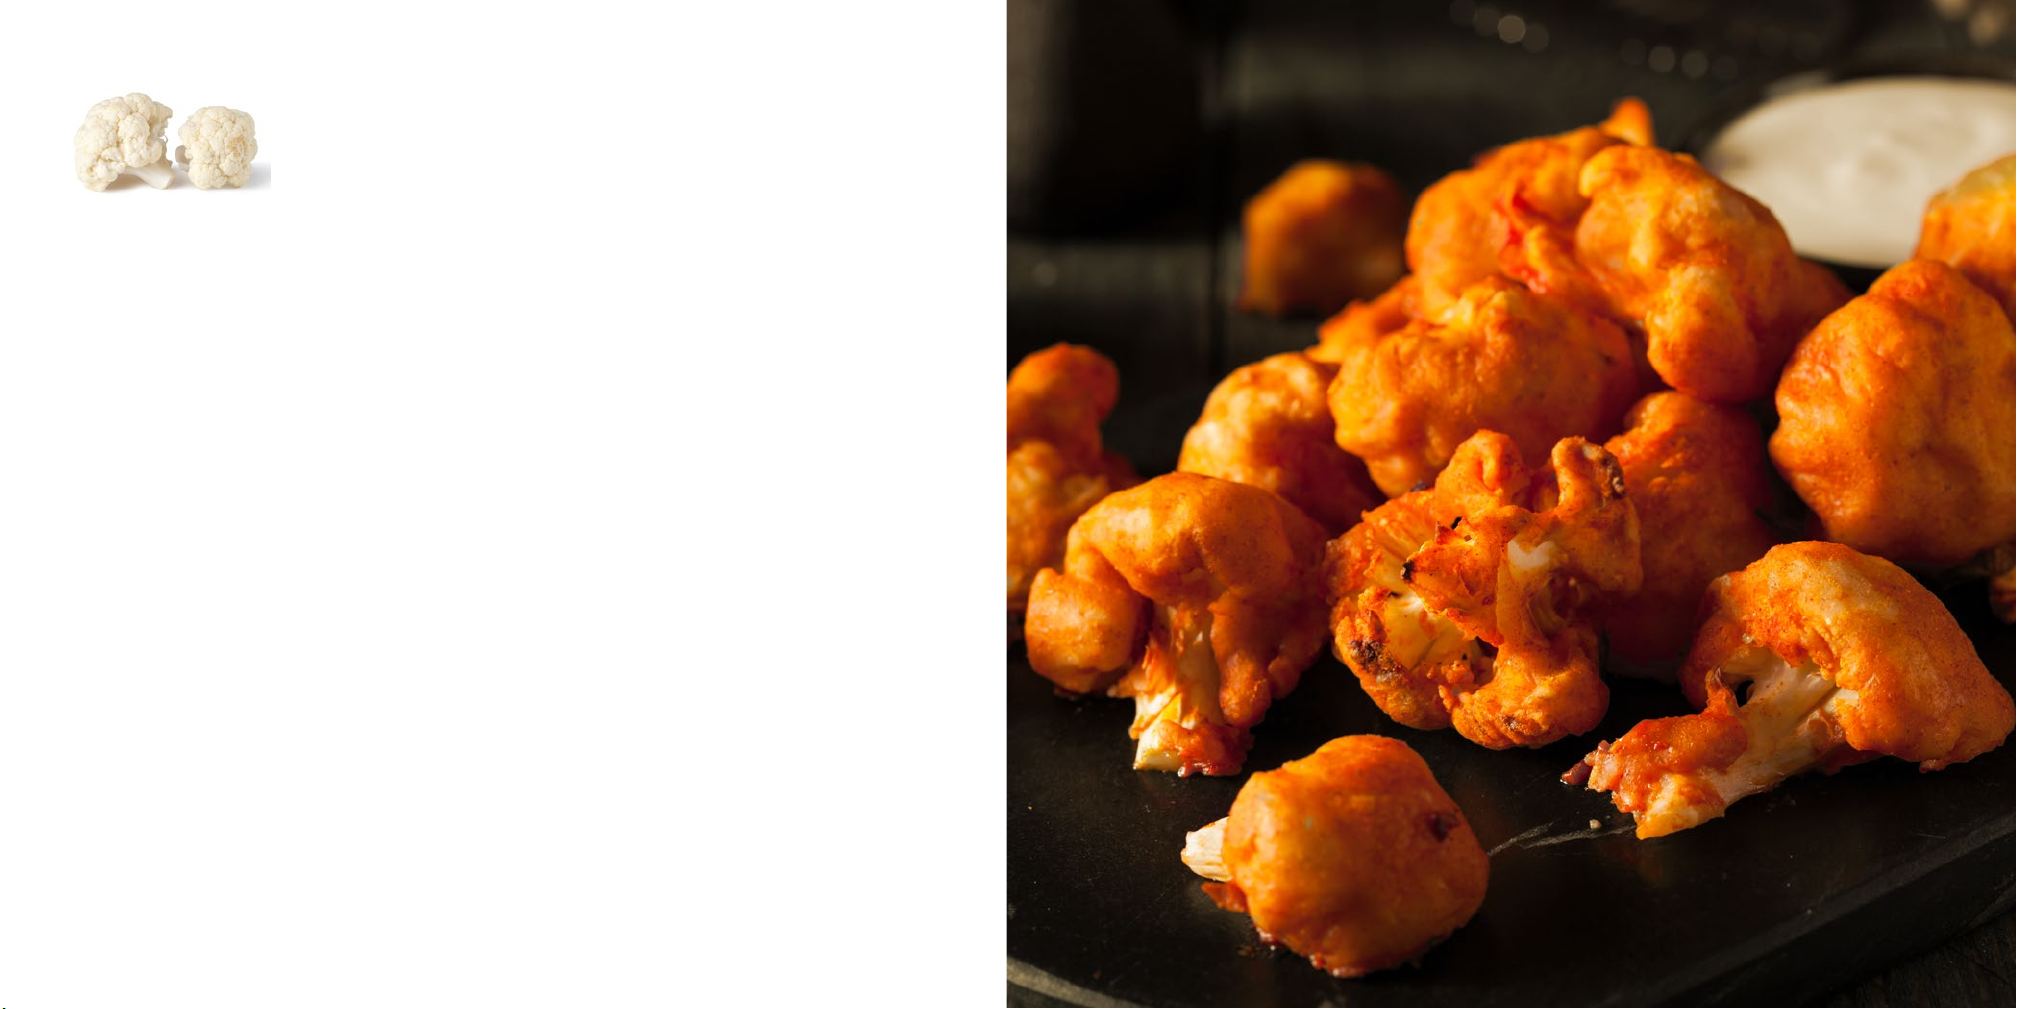
B U FFALO
CAULIFLOWER
Ingredients:
3 cups cauliower orets, cut into ½ pieces
½ tbsp cornstarch
1 tbsp grapeseed or vegetable oil
Pinch of salt
For Buffalo Sauce:
1 tbsp unsalted butter
¼ hot sauce
½ tbsp honey
½ clove garlic, minced
Serve with blue cheese dressing or another dip
Directions: Temperature: 360°F Time: 15 minutes
Preheat the Air Fryer to 360°F. Toss the orets with the oil and ½ tbsp of cornstarch.
Air fry at 360°F for 15 minutes.
While the cauliower is cooking, add all the hot sauce ingredients into a small pot over medium heat.
Whisk to mix in the butter and reduce to heat to low.
Toss the orets with hot sauce mixture and sprinkle with salt.
24
Page 14

French
Mac ‘n Cheese
Fries
Ingredients:
½ large Russet potato, washed and dried
½ tbsp grape seed or vegetable oil
Pinch of salt
Directions: Temperature: 320°F Time: 15 minutes
Preheat Air Fryer to 320°F.
Cut the potato lengthwise into ¼ inch slices. Lay the slices at and cut lengthwise again into ¼ inch pieces
(think fast food style French fry size). Lay potato pieces on paper towel and roll them around to dry off any
excess moisture.
Toss the potato pieces in a bowl with the oil. Lay oiled pieces in the basket. Make sure they do not stick
together. They can be layered as long as air can get through.
Air fry potatoes for 15 minutes. Salt immediately when done.
Balls
Ingredients:
4 cups cooked elbow macaroni
1 tbsp butter
3 tsp all-purpose our
1
1
/3 cups heavy cream
2 cups sharp cheddar, shredded
2 cups Monterey jack, shredded
2 tsp sea or kosher salt
¼ tsp smoked paprika
½ tsp granulated garlic
¼ black pepper, ground
4 dashes hot sauce
2 tbsp fresh parsley, chopped
Directions: Temperature: 360°F Time: 12 minutes
Add butter to a medium sized pot over medium heat. When melted, whisk in the our. Whisk for one
minute. Pour in the heavy cream and whisk to mix.
When cream is hot, whisk in 1 ½ cups of the cheddar and 1 ½ cups Monterey Jack in increments until the
cheese is melted. Whisk in the salt, smoked paprika, granulated garlic, black pepper and hot sauce to
combine.
Pour in the pasta and, with a rubber spatula, mix to combine. Remove from the heat and fold in the
remaining shredded cheese and chopped parsley. Transfer pasta mix onto a sheet tray lined with
parchment paper and cool in the fridge for a half hour. Mix the panko with oil and coat the crumbs well
with the oil.
Preheat Air Fryer to 360°F. Form roughly a 2-inch ball with a scoop or by hand. Dredge balls in our and
shake off excess. Dip the mac & cheese balls in beaten eggs and then in the panko. Arrange 8 balls into
the basket, 7 in a circle and one in the middle. Air fry for 12 minutes. Air fry in batches.
3 large eggs, beaten
1 cups all-purpose our
3 cups panko breadcrumbs
4 tbsp grape seed or
vegetable oil
27 26
Page 15
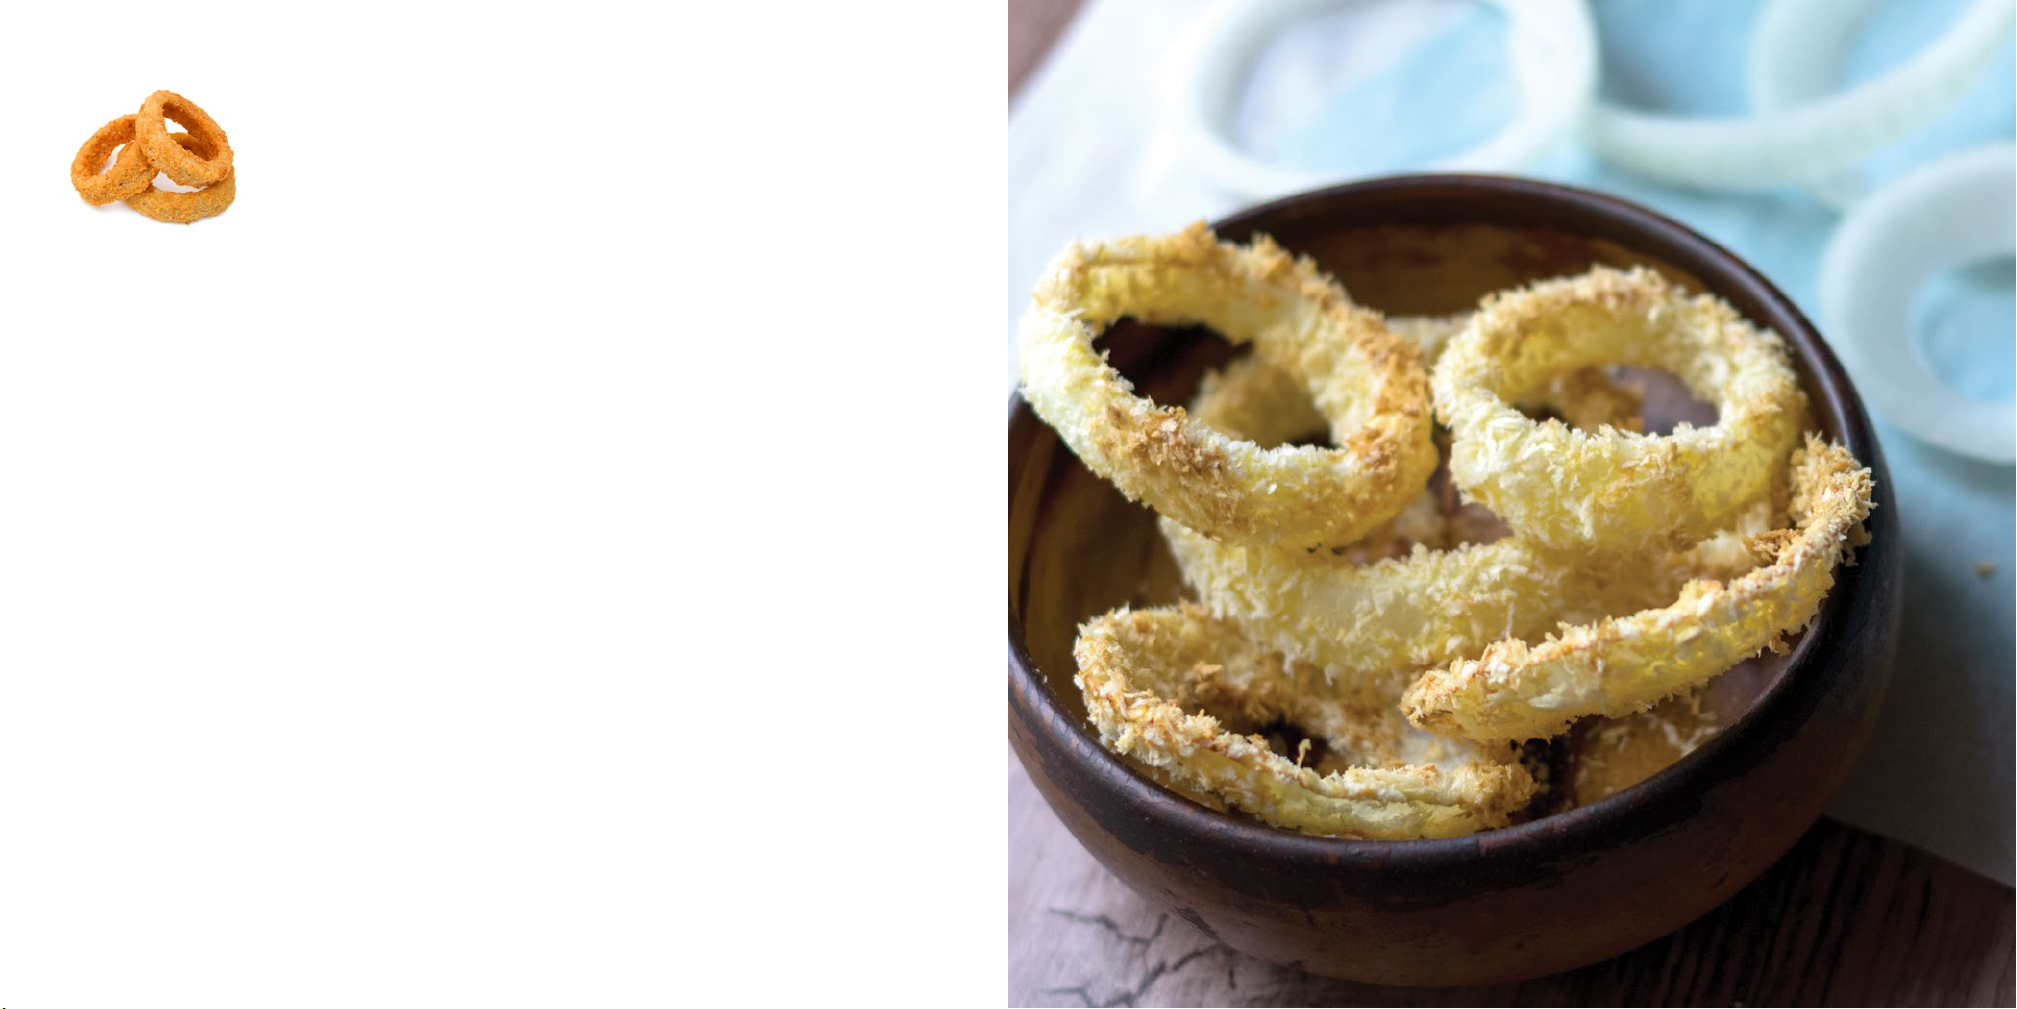
Onion
Rings
Ingredients:
½ large Vidalia onion, peeled, ends cut off and sliced into roughly ½ inch rings
1 cup all purpose our
2 large eggs, beaten
1 cups panko breadcrumbs
1 ½ tbsp grapeseed or vegetable oil
½ tsp sea or kosher salt
Directions: Temperature: 285°F Time: 10 minutes
Preheat Air Fryer to 285°F.
Mix the panko with the oil and salt to coat the crumbs well with the oil. Dredge onion rings in our and
shake off excess.
Dip the rings into the egg and then into the panko mixture. Manually press and squeeze the crumbs onto
the onion rings to get them to stick.
Place rings into the basket in two layers, about 2 on the bottom and 2 on top, depending on ring size and
fry for 10 minutes.
Serve with sauces and condiments, if desired.
28
Page 16

Buttermilk
Crab
Fried Chicken
Ingredients:
2 each bone-in chicken drumsticks and thighs
For Crumb Mix:
2 cups plain, unsalted bread crumbs
4 tbsp grape seed oil
2 tsp onion powder
2 tsp garlic powder
2 tsp paprika
2 tsp dried thyme
2 tsp sea or kosher salt
1 tsp black pepper, freshly ground
Directions: Temperature: 285°F Time: 4 hours and 30 minutes
Mix together the ingredients for the buttermilk marinade, add chicken and let marinate in the fridge for at
least 4 hours.
Mix together all ingredients for the crumb mixture, manually rubbing the crumbs to coat them with the oil.
Preheat Air Fryer to 285°F. Remove chicken from the buttermilk and coat with the seasoned bread
crumbs. Place chicken in the basket and fry for 30 minutes.
Remove the chicken and season with salt. Place on a wire rack to rest for a few minutes before eating. Air
fry chicken in batches.
For Buttermilk Marinade:
1 quart buttermilk
1 tbsp sea or kosher salt
2 tbsp hot sauce
Cakes
Ingredients:
16 oz crab meat, picked through for pieces of shell
2 tbsp parsley, chopped
2 tbsp scallion greens, chopped
1 tbsp lemon zest
½ cups mayonnaise
1 egg, beaten
few dashes of hot sauce
¼ cups panko crumbs, half crushed up
1 tsp Dijon mustard
Pinch of salt
Pinch of black pepper
1 tsp oil
Directions: Temperature: 400°F Time: 8 minutes
Combine crab meat with the parsley, scallion, lemon zest, mayo, egg, hot sauce, crushed panko, and
Dijon. Mix thoroughly and season with salt and pepper.
Form into 2-inch balls with a scoop or by hand and atten into a disc. The mixture will be loose.
Preheat the Air Fryer to 400°F. Mix the remaining panko with the oil and combine, season with salt.
With a spatula, place 3 crab cakes into the basket and top each one with panko crumbs. Air fry for 8
minutes. Repeat with remaining crab cakes. Serve with lemon wedges.
31 30
Page 17
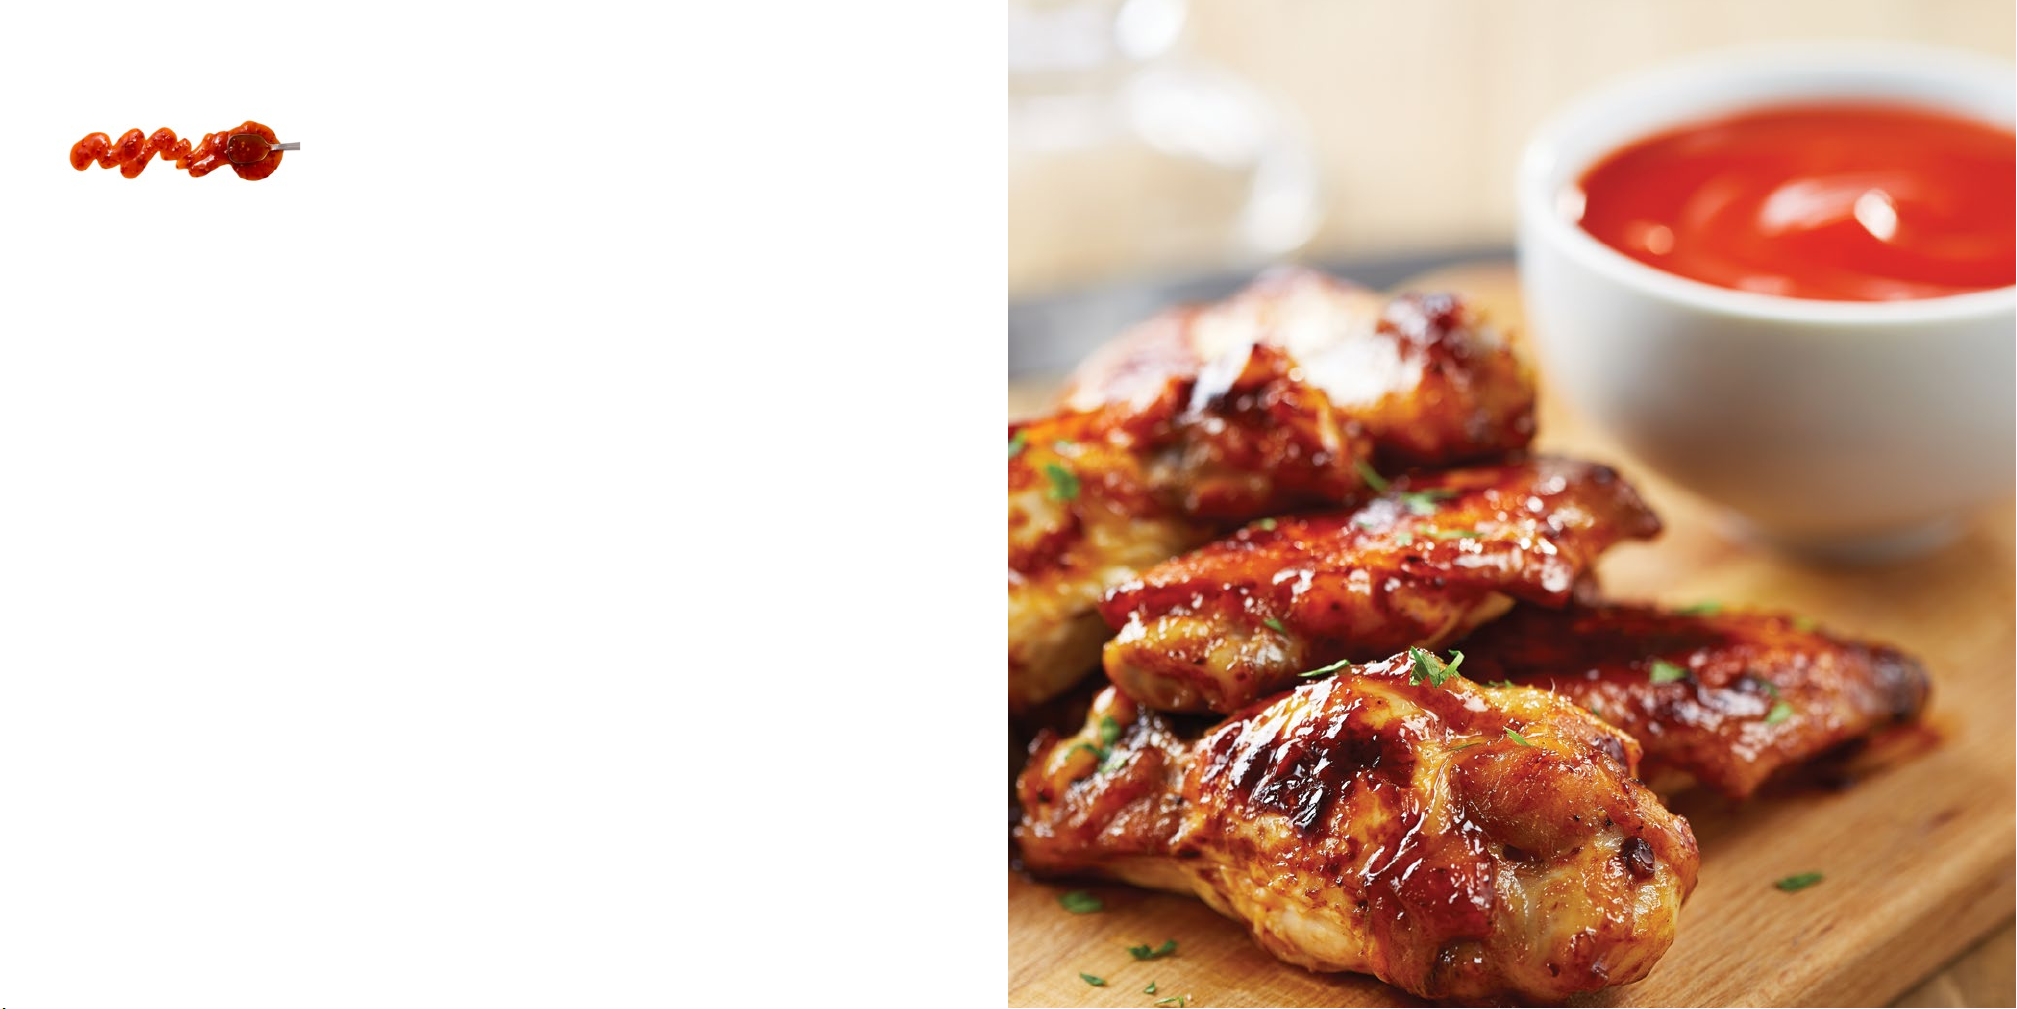
Sriracha
Chicken WIngs
Ingredients:
5 chicken wing pieces, mixture of ats and drumettes
½ tbsp grape seed or vegetable oil
½ tsp sea or kosher salt
⅛ cup sriracha
½ tbsp soy sauce
1 tbsp unsalted butter
¾ tbsp honey
1 tbsp scallion greens, thin sliced
Directions: Temperature: 360°F Time: 25 minutes
Preheat Air Fryer to 360°F. Pat dry excess moisture on the wings with paper towel, toss the dried wings
with the oil and salt.
Place just the drumettes in the basket of the Air Fryer and set the timer for 25 minutes. Cook for 5 minutes
and then add the wing ats in a single layer in the basket. Cook for the remaining 20 minutes.
While the chicken is cooking, add the sriracha, soy, butter and honey in a small pot over low heat. Whisk
ingredients together until the honey has dissolved and the butter has melted, and reduce heat to low to
keep warm.
Toss the wings in a bowl with the glaze, garnish with sliced scallions and serve immediately.
32
Page 18

Easy
Cinnamon
Donut
Ingredients:
1 can of biscuit dough
4 tbsp butter, melted
1
/3 cup granulated sugar
½ tsp cinnamon
4 tbsp dark brown sugar
½ tsp sea or kosher salt
Directions: Temperature: 320°F Time: 5 minutes
Combine sugar, cinnamon, brown sugar and salt in a bowl and set aside.
Preheat Air Fryer to 320°F.
Remove the dough from the can (do not atten) and use a 1 inch ring cutter to cut a hole in the center of
each biscuit.
Arrange 3 pieces of dough in the basket at a time, and air fry for 5 minutes.
As each round of donuts comes out, use a pastry brush to paint butter on entire surface of each donut.
Coat each buttered donut in the sugar mix. Shake off excess and serve warm.
Rolls
Ingredients:
4 pieces biscuit dough (can be store-bought)
3 tbsp brown sugar
1 tsp ground cinnamon
For Cream Cheese Icing Glaze:
¼ cup cream cheese
2 tbsp milk, warm
¼ cup powdered sugar
Directions: Temperature: 350°F Time: 10 minutes
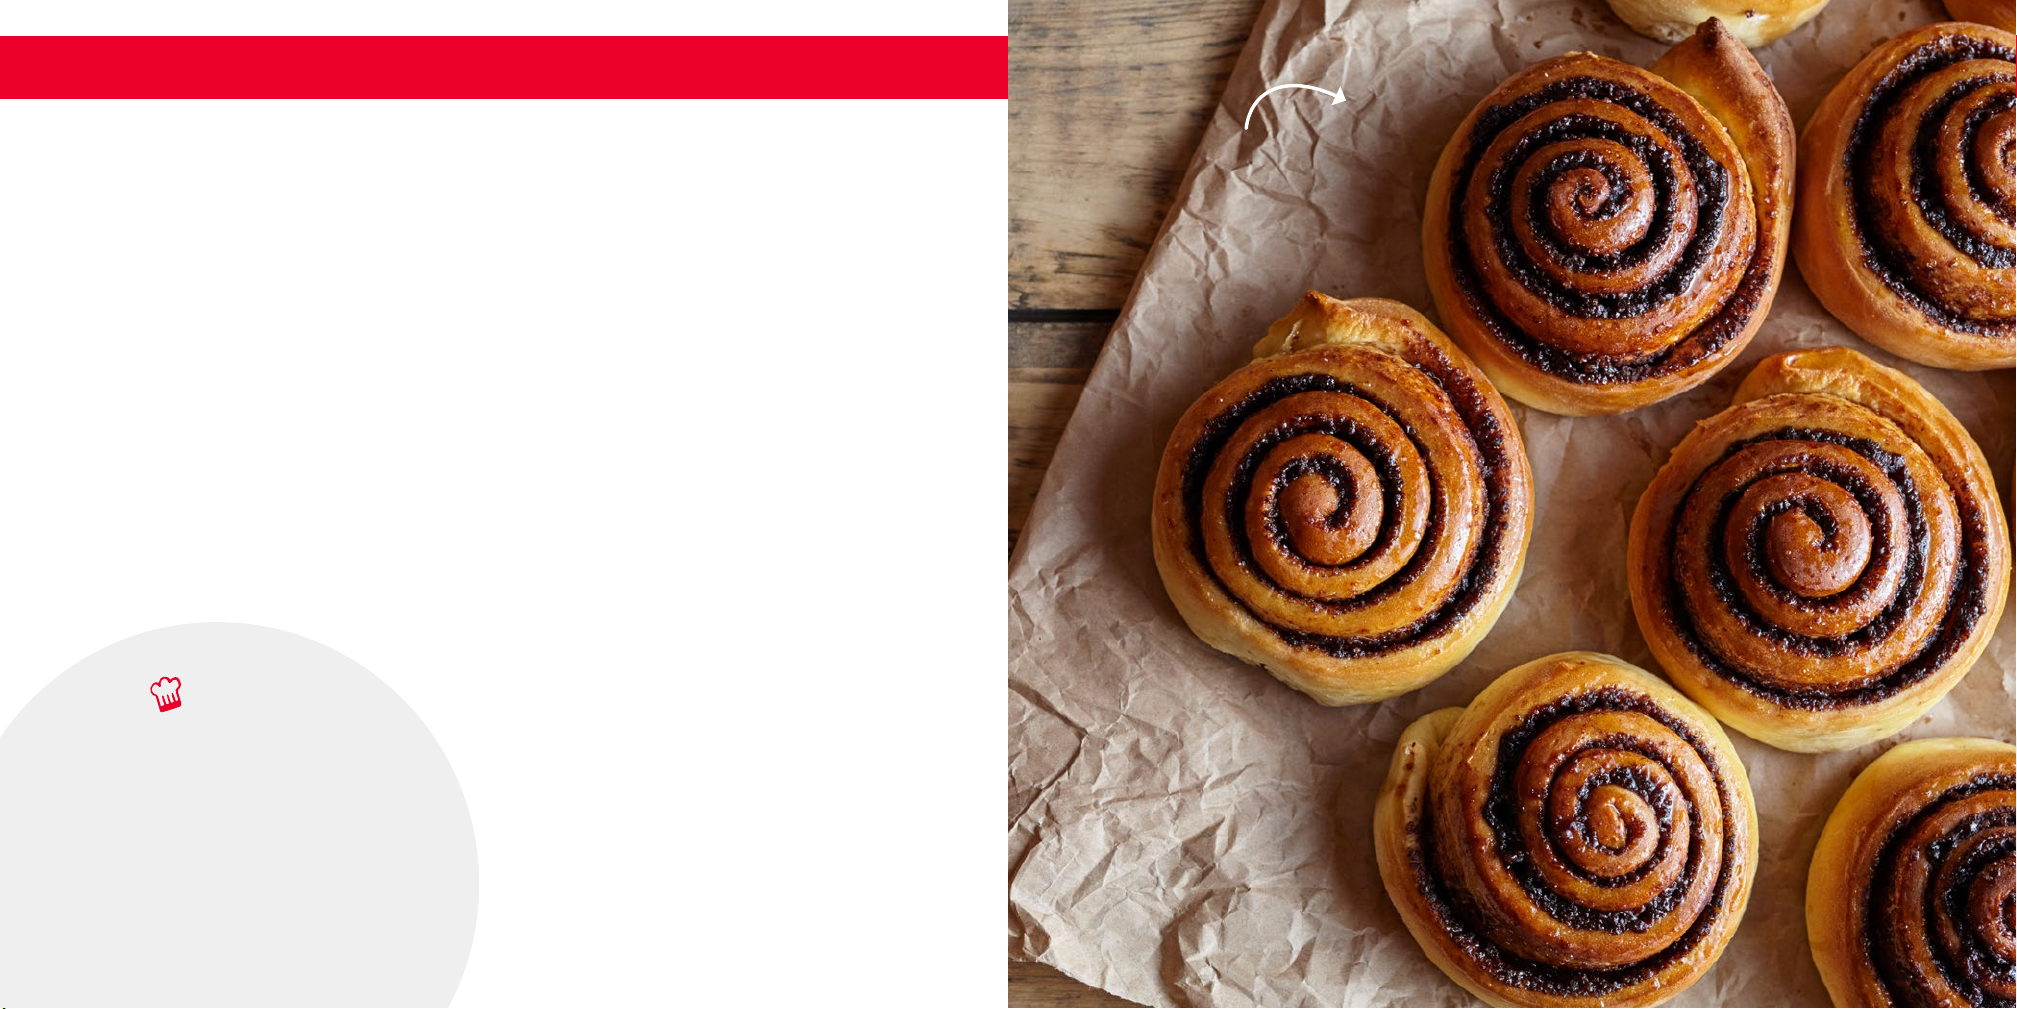
Roll the biscuit dough pieces out into long ovals with a rolling pin. Toss together the brown sugar and
ground cinnamon. Dust both sides of the dough ovals with the cinnamon sugar mix.
Roll the ovals up into long cylinders. Slice the cylinders into 1” thick rolls.
Place the rolls into the Air Fryer and air fry in batches at 350ºF for 10 minutes each until well-browned on
top and the centers are cooked through.
Soften the cream cheese in a microwave for 30 seconds. Combine the milk with powdered sugar and
whisk until smooth. Add the cream cheese and continue to whisk until combined. Top cinnamon rolls with
cream cheese glaze, if desired.
35 34
Page 19

Baja
Fish Tacos
Ingredients:
1 lb sh of your choice, sliced into long strips,
about 1 inch wide
2 cup panko bread crumbs
4 tbsp grape seed or vegetable oil
1 ½ tsp ground cumin
1 ½ tsp sea or kosher salt
Freshly-ground black pepper, to taste
1 cups all-purpose our
3 large eggs, beaten
6-8 (8”) corn tortillas
2 tsp vegetable oil
¼ cup red onion, sliced thin
1 red bell pepper, sliced thin
1 avocado, sliced thin
1 lime, cut into wedges
2 tbsp cilantro, chopped
1 jalapeño, sliced thin (optional)
Sour cream (optional)
Directions: Temperature: 400°F Time: 13-16
Mix the panko with oil. Rub by hand to coat the oil onto the panko. Add the salt, cumin and black pepper
and mix into the panko. Preheat the Air Fryer to 400°F.
Season the sh with salt and pepper, dredge in the our and shake off excess. Dip the sh into the egg
and then into the seasoned panko. Press the crumbs onto the sh to help them stick.
In a small sauté pan over medium heat, add oil and sauté the onions and peppers with a pinch of salt.
Saute for 2-3 minutes, until the onions are translucent.
Lay sh in the basket in one layer and air fry for 6-8 minutes, depending on the thickness of the sh. Air fry
in batches.
In a preheated 350°F oven, place the tortillas on the oven rack and bake for 5 minutes while the sh is
cooking. Assemble tacos with sh and accompaniments.
36
Page 20
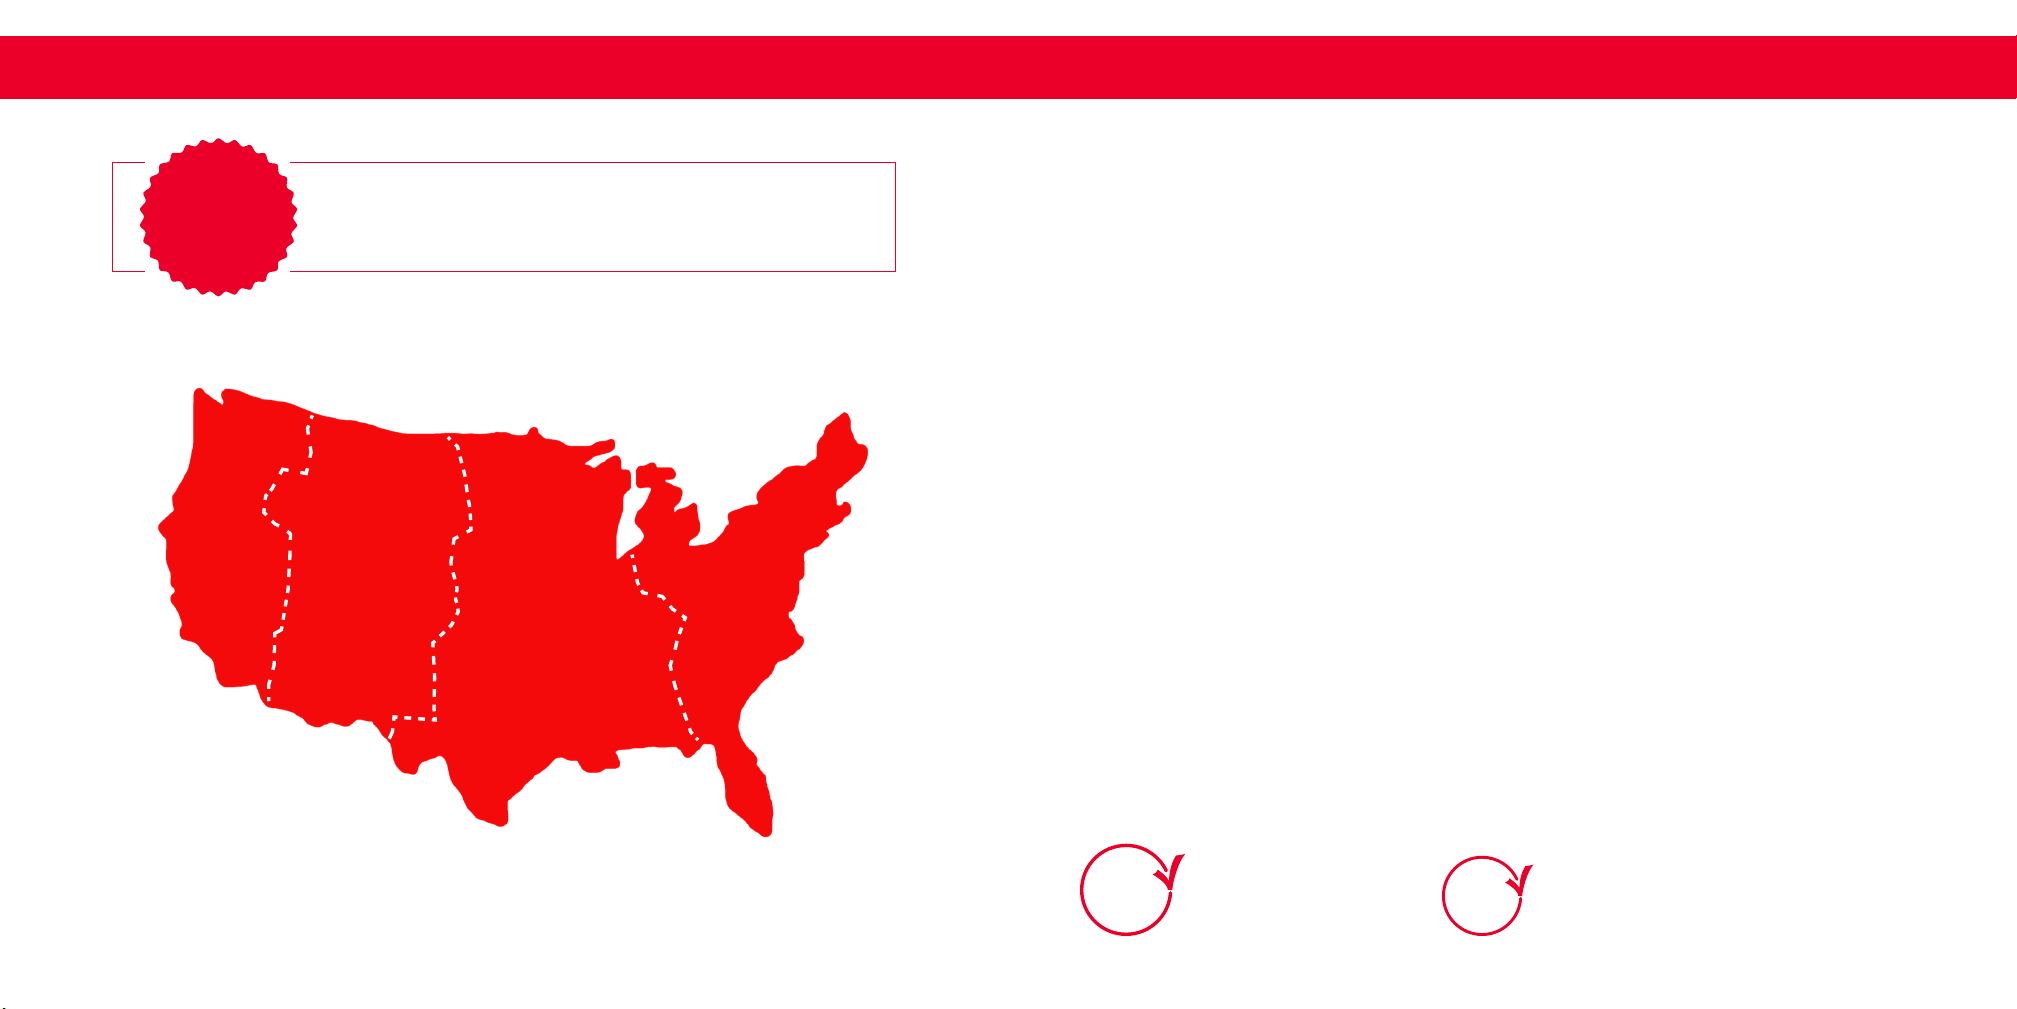
CUSTOMER SUPPORT
customer support
feel good
guarantee
Our US-based customer support team is at your service
Reach us at 1 (800) 898-6970 or [email protected]
Dash values quality and workmanship and stands behind this
product with our Feel Good Guarantee
™
our commitment to quality, visit bydash.com/feelgood.
Monday - Friday during the times below.
7am –
7pm
8am –
8pm
9am –
9pm
™
. To learn more about
10am –
10pm
warrant ywarrant ywarrant y
STOREBOUND, LLC – 1 YEAR LIMITED WARRANTY
Your StoreBound product is warranted to be free from defects in material and workmanship for a period of
one (1) year from the date of the original purchase when utilized for normal and intended household use.
Should any defect covered by the terms of the limited warranty be discovered within one (1) year, StoreBound,
LLC will repair or replace the defective part. To process a warranty claim, contact Customer Support at
1-800-898-6970 for further assistance and instruction. A Customer Support agent will assist you by troubleshooting
minor problems. If troubleshooting fails to x the problem, a return authorization will be issued. Proof of purchase
indicating the date and place of purchase is required and should accompany the return. You must also include
your full name, shipping address, and telephone number. We are unable to ship returns to a PO box. StoreBound
will not be responsible for delays or unprocessed claims resulting from a purchaser’s failure to provide any or all
of the necessary information. Freight costs must be prepaid by the purchaser.
Send all inquiries to [email protected].
There are no express warranties except as listed above.
REPAIR OR REPLACEMENT AS PROVIDED UNDER THIS WARRANTY IS THE EXCLUSIVE REMEDY OF THE
CUSTOMER. STOREBOUND SHALL NOT BE LIABLE FOR ANY INCIDENTAL OR CONSEQUENTIAL DAMAGES
OR FOR BREACH OF ANY EXPRESS OR IMPLIED WARRANTY ON THIS PRODUCT EXCEPT TO THE EXTENT
REQUIRED BY APPLICABLE LAW. ANY IMPLIED WARRANTY OF MERCHANTABILITY OR FITNESS FOR A
PARTICULAR PURPOSE ON THIS PRODUCT IS LIMITED IN DURATION TO THE DURATION OF THIS WARRANTY.
Some states do not allow the exclusion or limitation of incidental or consequential damages, or limitations
on how long an implied warranty lasts. Therefore, the above exclusions or limitations may not apply to you.
This warranty gives you specic legal rights and you may also have other rights, which vary from state to state.
REPAIRS
DANGER! Risk of electric shock! The Tasti-Crisp Air Fryer is an electrical appliance.
Do not attempt to repair the appliance yourself under any circumstances.
Contact Customer Support regarding repairs to the appliance.
TECHNICAL SPECIFICATIONS
Voltage 120V ~ 60Hz
Power Rating 1000W
Stock#: DCAF200_20190730_v4
PLEASE NOTE:
Your Tasti-Crisp Air Fryer
is not dishwasher-safe.
Hey Hawaii! You can reach our customer service team from 5AM to 5PM.
And also, Alaska, feel free to reach out from 6AM - 6PM.
FOOD
SAFE
This product has passed food
safety testing in accordance
with FDA guidelines.
PFOA
FREE
39 38
Page 21

1-800-898-6970 | @unprocessyourfood | bydash.com
 Loading...