

Page 1
# DBCM100
Mini Bundt ® MAKER
r
e
c
i
p
e
s
s
i
d
e
!
i
n
Instruction Manual | Recipe Guide
Page 2
®
Mini Bundt
Important Safeguards ................................................................... 4-9
Parts & Features ............................................................................... 10
Before Using Your Mini Bundt® Maker ......................................... 11
Using Your Mini Bundt® Maker ............................................... 12-17
Cleaning & Maintenance ............................................................... 18
Tips & Tricks ..................................................................................... 19
Recipes ....................................................................................... 20-41
Customer Support .......................................................................... 42
Warranty ........................................................................................... 43
a
e
t
m
h
s
a
d
e
h
t
!
maker
∙ 3 ∙
Page 3

IMPORTANT SAFEGUARDS IMPORTANT SAFEGUARDS
IMPORTANT SAFEGUARDS: PLEASE
READ AND SAVE THIS INSTRUCTION
AND CARE MANUAL.
When using electrical appliances, basic safety precautions should be
followed, including:
• Please read and save this instruction
manual.
• When using electrical appliances,
basic safety precautions should be
followed including:
• Read all instructions.
• Remove all bags and packaging
from appliance before use.
• Do not use appliance outdoors or
for commercial purposes.
• Never leave appliance unattended
when in use.
• Only use the appliance on a stable,
dry surface.
• Make sure the appliance is cleaned
thoroughly before using.
• Do not use appliance for other than
its intended use. For household use
only. Do not use outdoors.
• Close supervision is necessary
when any appliance is used by or
near children. Children should be
supervised to ensure that they do
not play with the appliance.
• Do not operate this appliance with
a damaged cord, damaged plug,
after the appliance malfunctions, is
dropped, or damaged in
any manner. Return appliance to
the nearest authorized service
facility for examination, repair, or
adjustment.
• For maintenance other than
cleaning, please contact
StoreBound directly at
1-800-898-6970 from 9AM-9PM
EST Monday-Friday or by email at
[email protected].
• Do not place appliance on or near a
hot gas burner, hot electric burner,
or in a heated oven. Extreme
caution must be used when moving
an appliance containing hot oil or
other hot liquids. Always attach
plug to appliance rst, then
plug cord into the wall outlet. To
disconnect, turn any control to
“off”, then remove plug from wall
outlet. Do not use appliance for
other than intended use.
• Refrain from using attachments
that are not recommended by the
appliance manufacturer, as this
may result in re, electric shock, or
personal injury.
• Do not let the cord touch hot
surfaces, or hang over the edges
of tables or counters.
• This appliance is not intended for
use by persons (including children)
with reduced physical, sensory,
or mental capabilities, or lack of
experience and knowledge unless
they are provided with supervision
and instruction concerning use
of the appliance by a person
responsible for their safety.
• Always be sure to unplug the
appliance from the outlet prior to
moving, cleaning, storage, and
when not in use.
• StoreBound shall not accept
liability for damages caused by
improper use of the appliance.
• Improper use of the appliance can
result in property damage or even
in personal injury.
• This appliance has a polarized
plug (one blade is wider than
the other). To reduce the risk of
electric shock, this plug will t in
a polarized outlet only one way. If
the plug does not completely t
in the outlet, reverse the plug. If it
still does not t, contact a qualied
electrician. Do not attempt to
modify the plug in any way.
• Turn the appliance OFF, then
unplug from the outlet when
not in use, before assembling or
disassembling parts and before
cleaning. To unplug, grasp the
plug and pull from the outlet.
Never pull from the power cord.
• A short power supply cord is
to be provided to reduce the
risk resulting from becoming
entangled in or tripping over a
longer cord. An extension cord
may be used if care is exercised in
its use. If an extension cord is used,
the marked electrical rating of the
extension cord should be at least
as great as the electrical rating of
the appliance. The extension cord
should be arranged so that it will
∙ 5 ∙∙ 4 ∙
Page 4

IMPORTANT SAFEGUARDS IMPORTANT SAFEGUARDS
not drape over the countertop or
tabletop where it can be pulled
on by children or tripped over
unintentionally. If the appliance
is of the grounded type, the cord
set or extension cord should be a
grounding-type 3-wire cord.
• Warning: Hot surfaces! Never
touch the Cooking Surface or
Cover while appliance is in use.
Always lift and lower the Cover by
the Cover Handle.
• DO NOT lift the Cover so that
your arm is over the Cooking
Surface as it is hot and may cause
injury. Lift from the side.
• To prevent the risk of re, electric
shock, or personal injury, do not
put cord, plug, or appliance in
or near water or other liquids.
The Mini Bundt® Maker is NOT
dishwasher safe.
• Never use abrasive cleaning
agents to clean your appliance as
this may damage the Mini Bundt®
Maker and its non-stick Cooking
Surface.
• DO NOT use the Mini Bundt®
Maker near water or other liquids,
with wet hands, or while standing
on a wet surface.
• Allow Mini Bundt® Maker to
cool completely before moving,
cleaning, or storing.
IMPORTANT SAFEGUARDS: PLEASE
READ AND SAVE THIS INSTRUCTION
AND CARE MANUAL.
GARANTIES IMPORTANTES:
VEUILLEZ LIRE ET CONSERVER CE
MODE D’EMPLOI ET D’ENTRETIEN
L’utilisation d’appareils électriques nécessite de prendre des mesures de
sécurité de base, y compris:
• Veuillez lire et conserver ce
manuel d’utilisation.
• Lors de l’utilisation d’appareils
électriques, les mesures de
sécurité de base doivent être
suivies, notamment:
• Lisez toutes les instructions.
• Retirez tous les sacs et emballages
de l’appareil avant utilisation.
• N’utilisez pas cet appareil
à l’extérieur ou à des ns
commerciales.
• Ne laissez jamais l’appareil sans
surveillance lorsqu’il est utilisé.
• Utilisez l’appareil uniquement sur
une surface stable et sèche.
• Assurez-vous que l’appareil est
nettoyé à fond avant de l’utiliser.
• Ne pas utiliser cet appareil pour un
usage autre que celui auquel il est
destiné. Pour usage domestique
seulement. Ne pas utiliser
à l’extérieur.
• Une surveillance étroite est
nécessaire lorsqu’un appareil est
utilisé par ou à proximité d’enfants.
Les enfants doivent être surveillés
pour s’assurer qu’ils ne jouent pas
avec l’appareil.
• Ne pas utiliser cet appareil avec un
cordon ou une che endommagé,
après un dysfonctionnement
de l’appareil, une chute ou un
dommage quelconque. Renvoyez
l’appareil à un centre de service
agréé le plus proche pour un
examen, une réparation ou
un réglage.
• Pour tout entretien autre que
le nettoyage, veuillez contacter
StoreBound directement au 1-800898-6970 de 9h à 21h HNE du
lundi au vendredi ou par courrier
∙ 7 ∙∙ 6 ∙
Page 5

garanties importantes garanties importantes
électronique à
[email protected].
• Ne placez pas l’appareil sur ou à
proximité d’un brûleur à gaz chaud,
d’un brûleur électrique chaud ou
dans un four chauffé. Une extrême
prudence doit être utilisée lors
du déplacement d’un appareil
contenant de l’huile chaude ou
d’autres liquides chauds. Attachez
toujours d’abord la che à l’appareil,
puis branchez le cordon dans la prise
murale. Pour déconnecter, éteignez
toutes les commandes, puis retirez
la che de la prise murale. N’utilisez
pas cet appareil pour un usage autre
que celui prévu.
• Évitez d’utiliser des accessoires
qui ne sont pas recommandés par
le fabricant de l’appareil car cela
pourrait provoquer un incendie, un
choc électrique ou des blessures.
• Ne laissez pas le cordon toucher
des surfaces chaudes ou pendre des
bords de tables ou de comptoirs.
• Cet appareil n’est pas destiné à être
utilisé par des personnes (y compris
des enfants) ayant des capacités
physiques, sensorielles ou mentales
réduites, ou manquant d’expérience
et de connaissances, à moins qu’une
personne responsable de leur
sécurité ne les supervise et ne les
instruise.
• Assurez-vous toujours de
débrancher l’appareil de la prise
avant de le déplacer, de le nettoyer,
de le ranger et lorsqu’il n’est
pas utilisé.
• StoreBound n’acceptera aucune
responsabilité pour les dommages
causés par une utilisation incorrecte
de l’appareil.
• Une utilisation inappropriée de
l’appareil peut entraîner des
dommages matériels, voire corporels.
• Cet appareil est doté d’une che
polarisée (une lame est plus
large que l’autre). Pour réduire les
risques d’électrocution, cette che
ne peut être insérée dans une
prise polarisée. Si la che n’entre
pas complètement dans la prise,
inversez-la. Si le problème persiste,
contactez un électricien qualié.
N’essayez pas de modier la che de
quelque manière que ce soit.
• Éteignez l’appareil, puis débranchez-
le de la prise lorsqu’il n’est pas
utilisé, avant d’assembler ou de
désassembler des pièces et avant
de le nettoyer. Pour débrancher,
saisissez la che et retirez-la de la
prise. Ne tirez jamais sur le
cordon d’alimentation.
• Un cordon d’alimentation court
doit être fourni an de réduire
les risques d’enchevêtrement ou
de trébuchement sur un cordon
plus long. Une rallonge peut être
utilisée si elle est utilisée avec
soin. Si une rallonge est utilisée,
le calibre électrique indiqué doit
être au moins égal à celui de
l’appareil. La rallonge doit être
disposée de manière à ne pas se
poser sur le comptoir ou la table,
où elle pourrait être tirée par des
enfants ou faire trébucher dessus
par inadvertance. Si l’appareil est du
type mis à la terre, le cordon ou la
rallonge doit être un cordon à 3 ls.
• AVERTISSEMENT: Surfaces chaudes
! Ne touchez jamais la surface de
cuisson ou le couvercle pendant
l’utilisation de l’appareil. Soulevez et
baissez toujours le couvercle à l’aide
de sa poignée.
• NE soulevez PAS le couvercle pour
que votre bras se trouve au-dessus
de la surface de cuisson brûlante,
car cela pourrait entraîner des
blessures. Soulevez par le côté.
• An d’éviter les risques de feux,
d’électrocution, ou de dommages
corporels, ne mettez pas le cordon,
la prise ou l’appareil dans ou à
proximité de l’eau ou d’autres
liquides. Le Mini Pâtissier n’est PAS
lavable en machine.
• N’utilisez jamais des produits
d’entretien abrasifs pour nettoyer
l’appareil, car cela pourrait
endommager Le Mini Pâtissier et sa
surface de cuisson anti-adhérente.
• N’utilisez PAS Le Mini Pâtissier
à proximité de l’eau ou d’autres
liquides, avec des mains mouillées,
ou si vous vous tenez sur une
surface mouillée.
• Laissez Le Mini Pâtissier refroidir
complètement avant tout
déplacement, nettoyage
ou entreposage.
GARANTIES IMPORTANTES:
VEUILLEZ LIRE ET CONSERVER CE
MODE D’EMPLOI ET D’ENTRETIEN
∙ 9 ∙∙ 8 ∙
Page 6
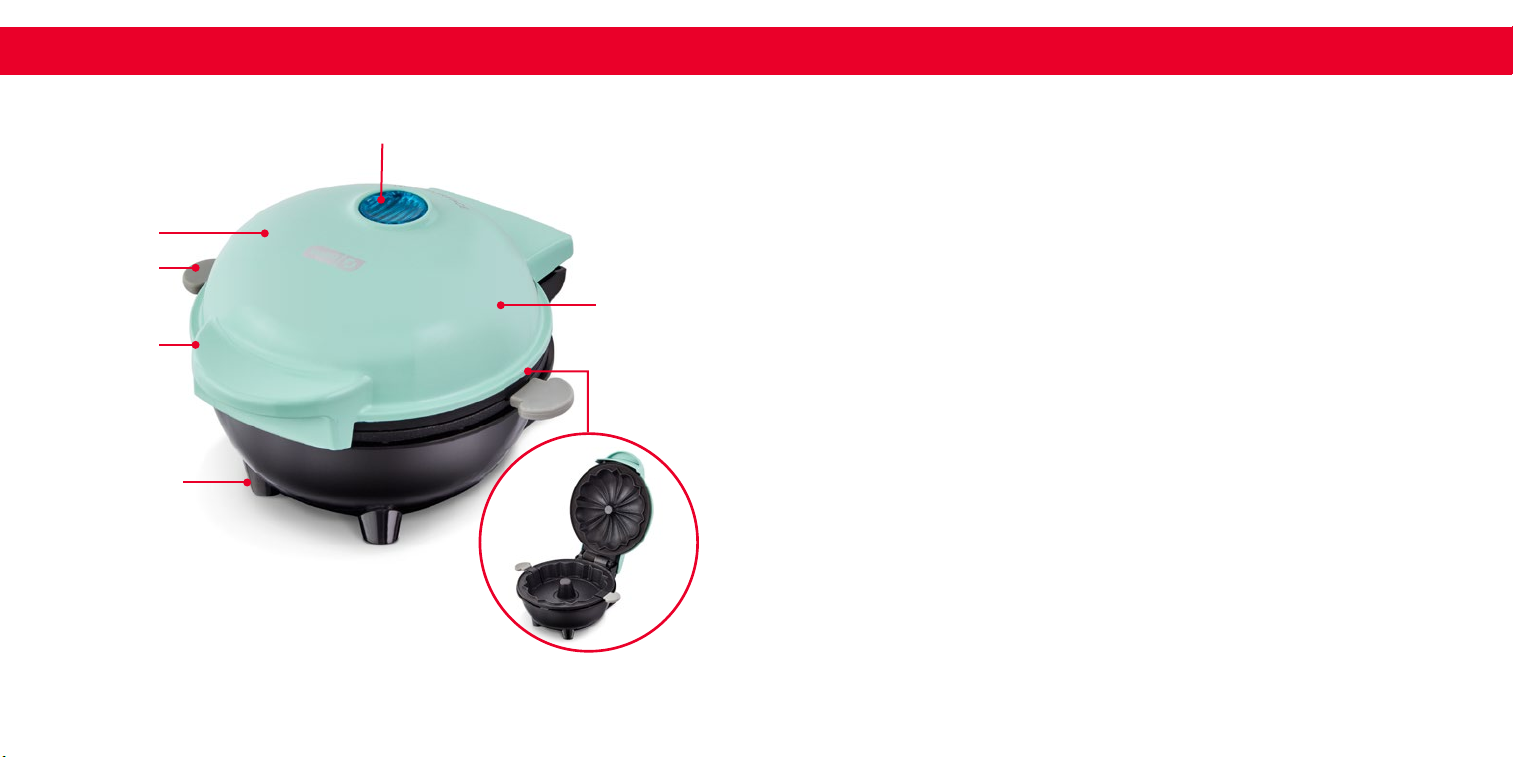
parts & Features
parts & Features
before using your Mini Bundt ® maker
Cover
Lifter
Cover
Handle
Non-slip Feet
Indicator Light (Blue)
Main
Body
Cooking Surfaces
Before rst use, remove all packaging material and thoroughly clean your
Mini Bundt® Maker.
Carefully unpack your Mini Bundt® Maker. Remove all
1
packaging materials.
Clean both Cooking Surfaces of the Mini Bundt® Maker with a damp
2
cloth or sponge.
Wipe dry with a soft cloth. NEVER IMMERSE THE Mini Bundt® MAKER
3
OR CORD IN WATER OR ANY OTHER LIQUID.
Position the Mini Bundt® Maker on a dry, level, heat-resistant surface.
4
It is recommended to operate this appliance on a separate outlet and
5
circuit from other appliances to avoid overloading the circuit.
∙ 10 ∙
∙ 11 ∙
Page 7
before using your mini pie maker using your Mini Bundt® maker
using your Mini Bundt ® Maker
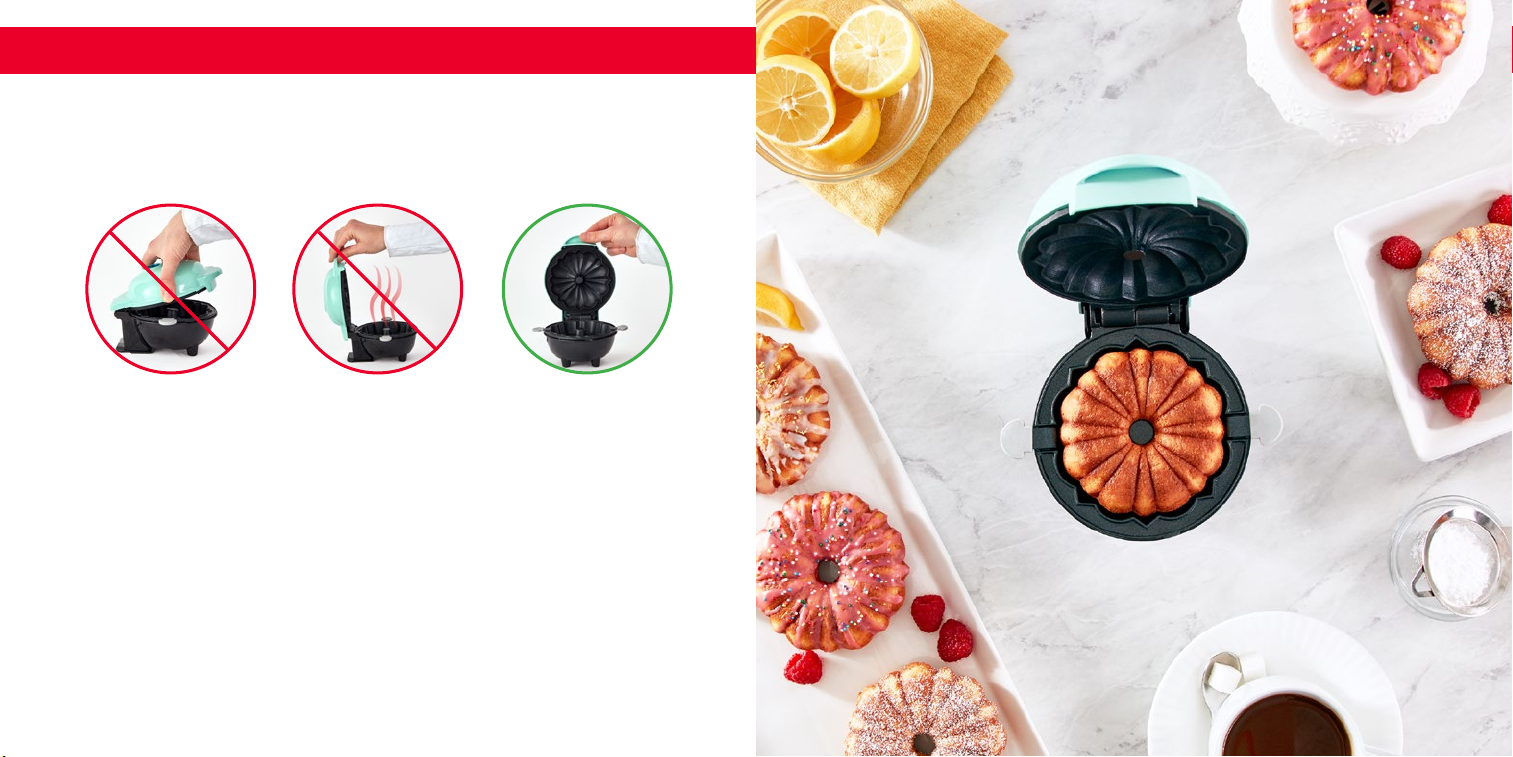
When using your Mini Bundt® Maker, the Cooking Surface and Cover will
become hot. To properly open the Mini Bundt® Maker, lift using the Cover
Handle from the side.
using your Mini Bundt® maker
Never touch the
Cooking Surface or
Cover while appliance
is in use.
DO NOT lift the Cover
so that your arm is
over the Cooking
Surface as it is hot and
may cause injury.
∙ 12 ∙ using your Mini Bundt® maker ∙ 13
Always lift and lower
the Cover by the
Cover Handle. Lift
from the side.
using your Mini Bundt® maker ∙ 13
Page 8
using your Mini Bundt ® maker
using your Mini Bundt® makerusing your Mini Bundt®
using your Mini Bundt ® maker
A C
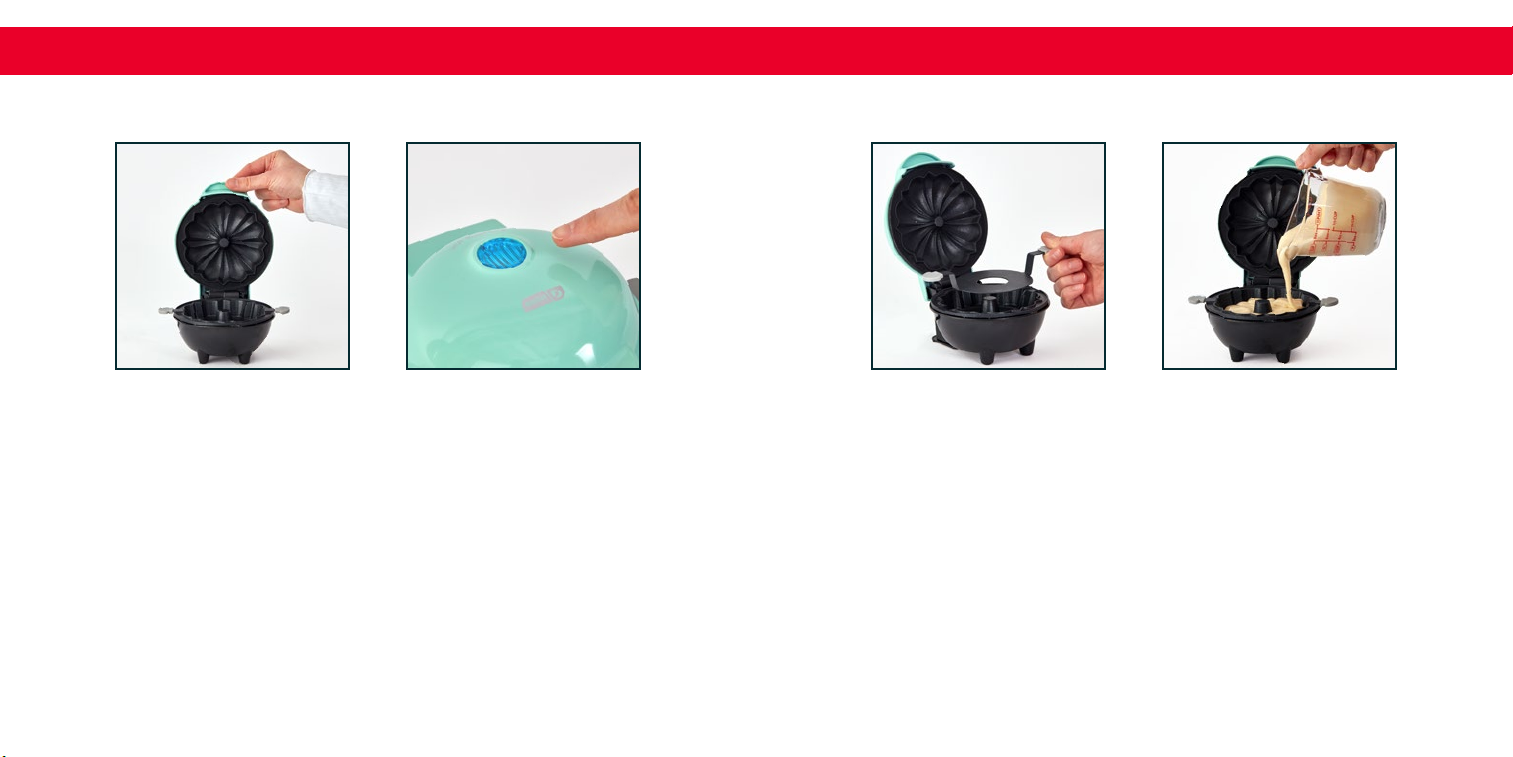
Place the appliance on a stable and dry surface and lift the Cover to
1
open the Mini Bundt® Maker (photo A). Spray both Cooking Surfaces
with a small amount of cooking spray.
Plug the cord into a power outlet. The Indicator Light will illuminate
2
blue, signaling that the Mini Bundt® Maker is heating up (photo B).
Once the Cooking Surfaces reach the optimal cooking temperature,
the Indicator Light will automatically shut off.
NOTE: Always preheat the Mini Bundt® Maker before adding batter
or the surface will not heat evenly.
Do not leave your Mini Bundt® Maker unattended when plugged in.
∙ 14 ∙ ∙ 15 ∙
B
Add the Removal Tool to the base of the Mini Bundt® Maker (photo C).
3
Carefully pour batter into the Mini Bundt® Maker, lling so the base
4
is approximately ¾ full (photo D). The Mini Bundt® will rise while
cooking, so do not overll the Mini Bundt® Maker.
Close the Cover. During the cooking process, the heating element will
5
automatically turn on and off to regulate the temperature and ensure
that the Cooking Surface does not get too hot or cold. When this
occurs, the Indicator Light turns on and off .
D
Page 9
using your Mini Bundt ® maker
FE
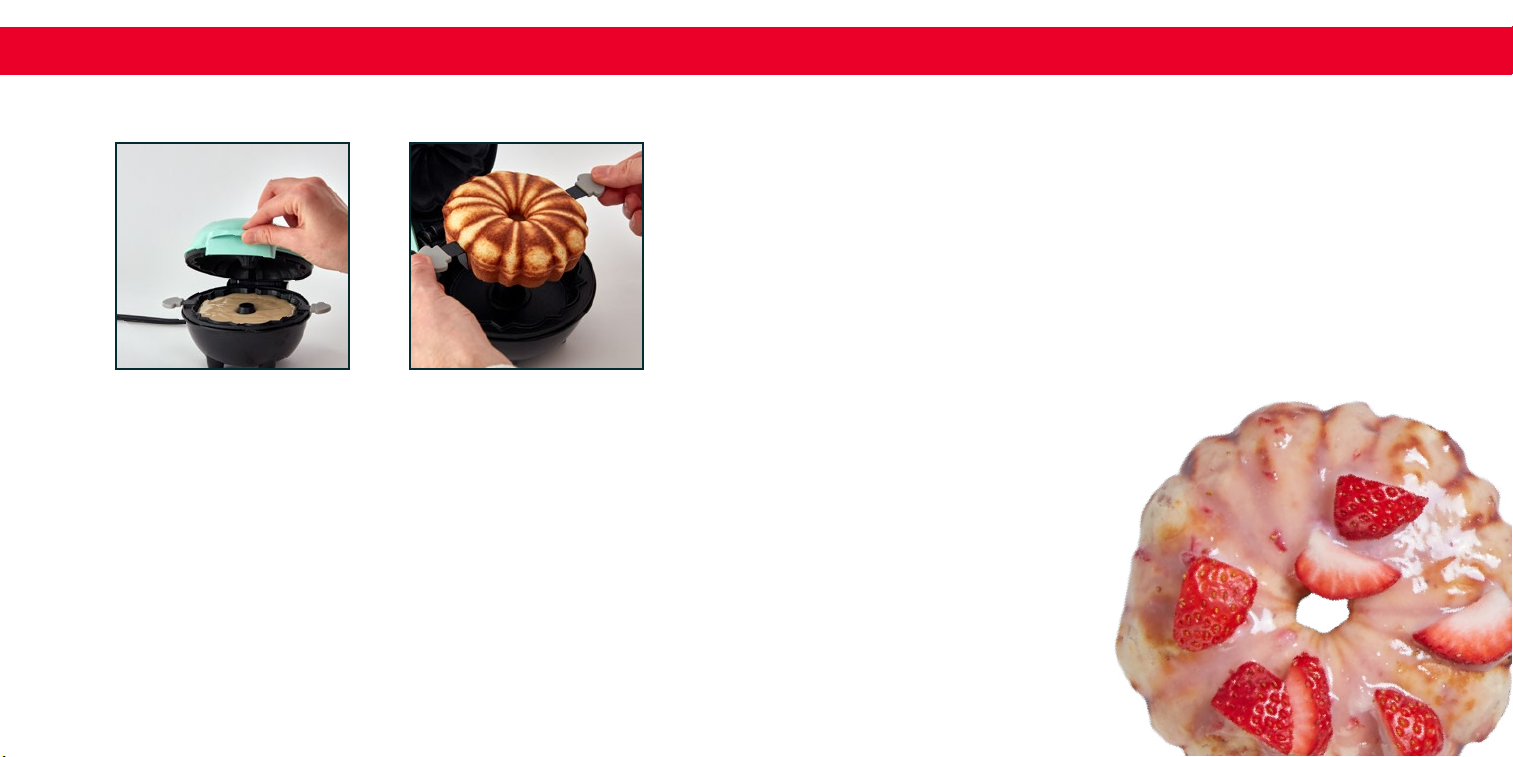
Actual cooking time will vary depending on ingredients and type of
6
Bundt® being prepared. As a general guideline, most recipes require
on average 9-11 minutes of cooking time. It is okay to open the Cover
to check for doneness (photo E). Always lift using the Cover Handle.
You can use a toothpick to check the cake for doneness: if the
7
toothpick comes out clean, your cake is cooked through!
using your Mini Bundt ® maker
Once the Bundt® is cooked, rst unplug your Mini Bundt® Maker.
8
Allow the appliance to cool for a few minutes, as the cake and Mini
Bundt® Maker will be very hot.
Carefully remove your cake by lifting the Removal Tool (photo F). Be
9
careful, as the sides of the Removal Tool may still be hot.
NOTE: Do not use metal utensils to separate cake from the Removal
Tool as this will damage the nonstick surface. Instead, use a wood or
silicone spatula if needed.
∙ 16 ∙ ∙ 17 ∙
Page 10

cleaning & maintenance tips & tricks
Before cleaning, unplug from outlet and allow to cool.
Clean the interior and exterior surfaces of the Mini Bundt® Maker with a
damp cloth or sponge. Wipe dry with a soft cloth. NEVER IMMERSE THE
MINI BUNDT® MAKER OR CORD IN WATER OR ANY OTHER LIQUID.
To remove llings or crust baked onto the Cooking Surfaces, pour a small
amount of cooking oil onto the hardened food. After 5 minutes, wipe with
a paper towel or dry cloth. A clean kitchen brush or even a toothbrush
works well to remove stubborn foods.
NEVER USE ABRASIVE CLEANERS OR SCOURING PADS TO CLEAN THE
MINI BUNDT® MAKER, AS THOSE MAY DAMAGE THE SURFACES.
To store, be sure all parts are clean and dry. Store appliance in its box or in
a clean, dry place.
Never store it while it is hot or wet. Never wrap cord tightly around the
appliance; keep it loosely coiled.
Always pre-heat the Mini Bundt® Maker before adding
the batter, or the cake will not cook evenly. Be careful
when adding batter as the Cooking Surface will be hot.
Cakes are very hot when you take them out of the Mini
Bundt® Maker. Use caution and allow to cool before
serving or enjoying them.
Always ll the Mini Bundt® Maker ¾ full to ensure the
best shape.
In a pinch, pre-made cake mixes work in the Mini Bundt®
Maker! Simply create batter according to the given
recipe and add to the Mini Bundt® Maker.
Mix and match recipes (page 21) and glazes (page 38)
using the included Recipe Guide.
∙ 19 ∙∙ 18 ∙
Page 11
RECIPE
GUIDE
Follow us!
@bydash | recipes, videos, & inspiration
@unprocessyourfood | veg & vegan-friendly meals
Page 12
Vanilla
®
Mini Bundt
Makes 5 cakes
Ingredients:
1½ cups unbleached all-
purpose our
1½ tsp baking powder
¼ tsp baking soda
Directions:
1. Plug in your Mini Bundt® Maker and preheat for 10 minutes.
2. In a medium bowl, combine our, baking powder, baking soda, and salt.
3. In a larger bowl, beat butter and sugar with handheld mixer on medium until they
are uffy and light. Add egg, milk, vanilla, and blend until mixed. Using slow speed,
mix dry ingredients into the wet until just combined. Small lumps are okay.
4. Brush Mini Bundt® Maker and Removal Tool lightly with butter or baking spray.
Add batter until Mini Bundt Maker is ¾ full (
5. Bake for 9 minutes, until a toothpick comes out clean when inserted into the cake.
6. Lift out the cake using the Removal Tool. Cool cake completely before
glazing. Serve.
¼ tsp salt
4 tbsp unsalted butter,
softened
½ cup sugar
Cake
1
/
cup batter).
3
1 large egg
½ cup whole milk
1 tsp vanilla extract
∙ 23 ∙∙ 22 ∙
Page 13

Orange Olive Oil
®
Mini Bundt
Makes 6 cakes
Ingredients:
¾ cup sugar
1 navel orange
3 tbsp buttermilk or plain yogurt
3 large eggs
1½ cups unbleached all-purpose our
Directions:
1. Plug in your Mini Bundt® Maker and preheat for 10 minutes.
2. Place sugar in medium mixing bowl. Grate 2 tsp of orange zest. Add zest to sugar,
rubbing them together until sugar is golden. Halve the orange and squeeze 2 tbsp
juice into measuring cup. Add buttermilk, then pour mixture into sugar and whisk well.
Whisk in eggs.
3. In a small bowl, whisk our, baking powder, baking soda, and salt together. Add dry
ingredients to wet and whisk to combine. Change to a spatula and fold in olive oil in
about 6 additions, mixing very well after each addition.
4. Coat Mini Bundt® Maker and Removal Tool lightly with baking spray. Fill the Mini
Bundt® Maker ¾ full (
5. Bake for 12 minutes, until a toothpick comes out clean when inserted into the cake.
6. Lift out cake using the Removal Tool. Cool cake completely before glazing. Serve.
1
/
cup batter).
3
Cake
1 tsp baking powder
¼ tsp baking soda
¹
8
/
tsp salt
½ cup fruity olive oil
Ket0 Zucchini Spice
Mini Bundt
Makes 6 cakes
Ingredients:
2 medium zucchini
squash, 12 ounces,
coarsely shredded, about
2½ cups
1
cup coconut our
/
3
1 tsp baking powder
Directions:
1. Place shredded zucchini in a clean dish towel and squeeze out as much liquid
as you can. The drier the squash the better, so really work at this. Loosening the
compacted squash, there should be about 1½ cups.
2. In a small bowl, combine the coconut our, baking soda, salt, cinnamon, ginger,
and clove.
3. In a medium mixing bowl, beat the cream cheese and Swerve Brown with a hand
mixer on medium until smoothly combined. Add the eggs and zucchini, mixing until
blended. Add the dry ingredients, and mix well.
4. Fill the Mini Bundt® Maker ¾ full (
over top of batter. Bake for 12 to 13 minutes, until a toothpick comes out clean when
inserted into the cake.
5. Lift out cake using the removal tool and transfer cake to wire rack. Serve warm,
dusted with Swerve Confectioners’, if desired.
¼ tsp baking soda
¼ tsp salt
½ tsp ground cinnamon
¼ tsp ground ginger
¹
®
Cake
4 tbsp cream cheese
¼ cup Swerve Brown
3 eggs
4 tbsp chopped walnuts,
/
8
tsp ground clove
1
/
cup batter). If using, sprinkle 1 tbsp walnuts
3
or Swerve Confectioners’,
for garnish, optional
∙ 24 ∙ ∙ 25 ∙
Page 14
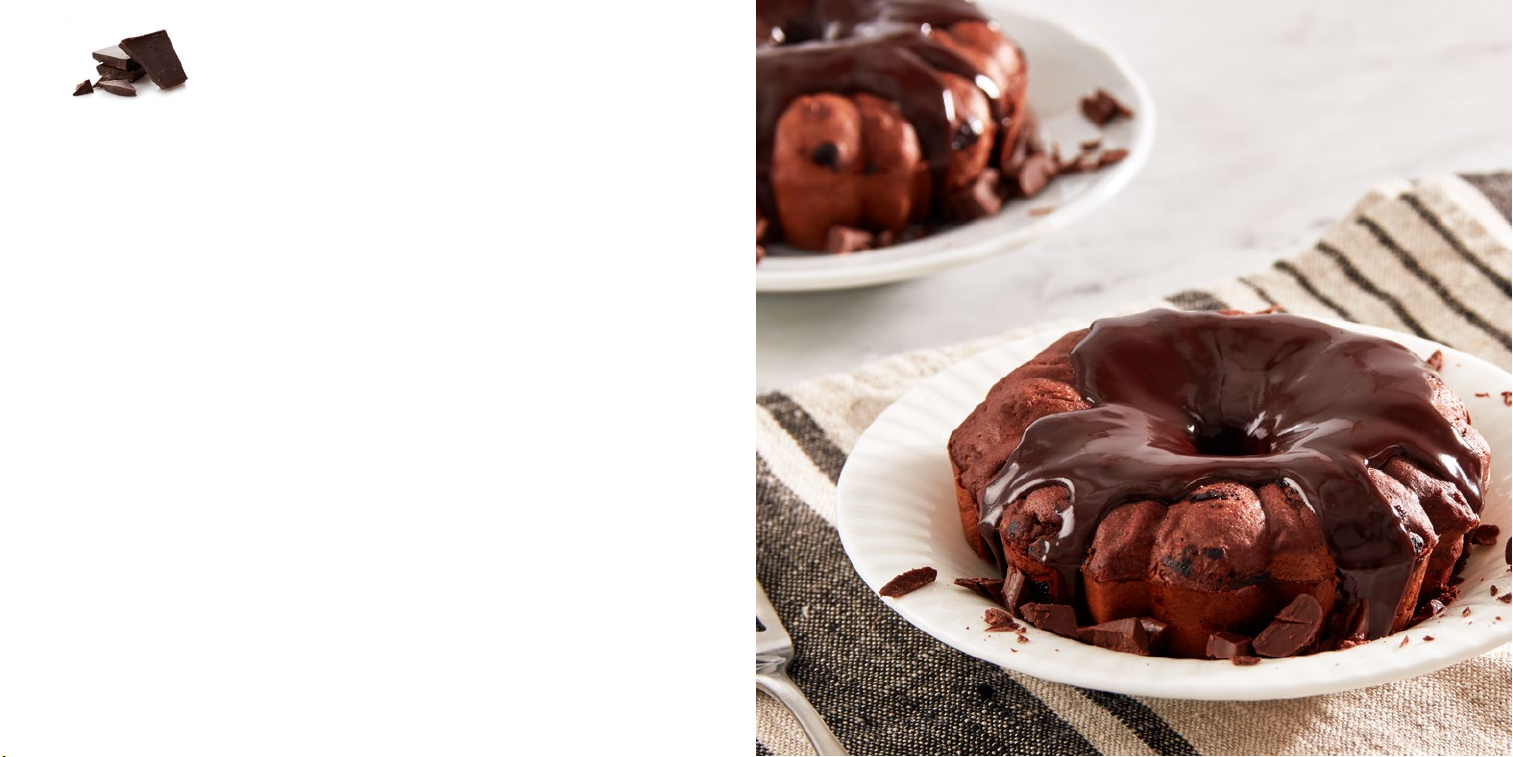
Sour Cream Chocolate
®
Mini Bundt
Makes 5 cakes
Ingredients:
1½ cups unbleached all-
purpose our
¼ cup unsweetened Dutch
process cocoa powder
1 ½ tsps baking powder
Directions:
1. Plug in your Mini Bundt® Maker to preheat for 10 minutes.
2. In medium bowl, sift together our, cocoa powder, baking powder, baking soda,
and salt.
3. In second bowl, whisk together egg, sour cream, milk, and vanilla.
4. In larger bowl, beat butter and sugar with a handheld mixer on medium until they
are uffy and light. Add wet ingredients, blending until mixed. Using slow speed, mix
in dry ingredients just until combined. Small lumps are okay.
5. Brush Mini Bundt® Maker and Removal Tool lightly with butter or baking spray. Fill
the Mini Bundt® Maker ¾ full (
6. Bake for 12 minutes, until a toothpick comes out clean when inserted into the cake.
7. Lift out cake using the Removal Tool. Cool cake completely before glazing.
¼ tsp baking soda
¼ tsp salt
1 large egg
¼ cup sour cream
2
/
1
/
3
Cake
cup whole milk
3
cup batter).
1 tsp vanilla extract
4 tbsp unsalted butter,
softened
½ cup sugar
∙ 26 ∙ ∙ 27 ∙
Page 15

Red Velvet
®
Mini Bundt
Makes 6 cakes
Ingredients:
1 cup plus 2 tbsp,
unbleached
all-purpose our
2 tbsp unsweetened
natural cocoa powder
1 tsp baking powder
Directions:
1. Plug in your Mini Bundt® Maker to preheat for 10 minutes.
2. In a small mixing bowl, combine our, cocoa powder, baking powder, baking soda,
and salt.
3. In a measuring cup, whisk buttermilk, egg, vinegar, vanilla, and red food
color together.
4. In a medium mixing bowl, beat butter and sugar with handheld mixer on medium
until uffy and light. Add
until combined.
5. Brush the Mini Bundt® Maker and Removal Tool lightly with butter or baking spray.
Fill the Mini Bundt® Maker ¾ full (
6. Bake for 12 minutes, until a toothpick comes out clean when inserted into the cake.
7. Lift out cake using the Removal Tool. Cool cake completely before glazing. Serve.
¾ tsp baking soda
¼ tsp salt
½ cup buttermilk, full or
reduced fat
1 large egg
1½ tsp white vinegar
1
/
of dry ingredients, blend, then ½ wet ingredients. Repeat
3
Cake
1
cup batter).
/
3
½ tsp vanilla extract
2 tsp red food color
6 tbsp unsalted butter,
softened
¾ cup sugar
Gingerbread
Mini Bundt
Makes 4 cakes
Ingredients:
¾ cup unbleached all-purpose our
½ tsp baking powder
½ tsp baking soda
1 tsp ground ginger
½ tsp ground cinnamon
¹
8
tsp ground clove
/
Directions:
1. Plug in your Mini Bundt Maker to preheat for 10 minutes.
2. In a small mixing bowl, combine our, baking powder, baking soda, ginger,
cinnamon, clove, and salt.
3. In a larger mixing bowl, beat butter and sugar with handheld mixer on medium
until uffy and light. Beat in egg and molasses. Add ½ dry ingredients and mix, using
slow speed. Add buttermilk, then remaining dry ingredients, blending until just
combined.
4. Brush Mini Bundt Maker lightly with butter or baking spray. Lower the top. Fill the
Mini Bundt Maker ¾ full (
comes out clean when inserted into the cake.
5. Lift out the cake using the removal tool and transfer cake to wire rack. Cool cake
completely before glazing. Serve.
1
/
3
cup batter). Bake for 10 to12 minutes, until a toothpick
®
Cake
¼ tsp salt
4 tbsp unsalted butter, softened
½ cup brown sugar
1 large egg
¼ cup unsulfured molasses
¼ cup buttermilk, full or reduced fat
∙ 28 ∙ ∙ 29 ∙
Page 16
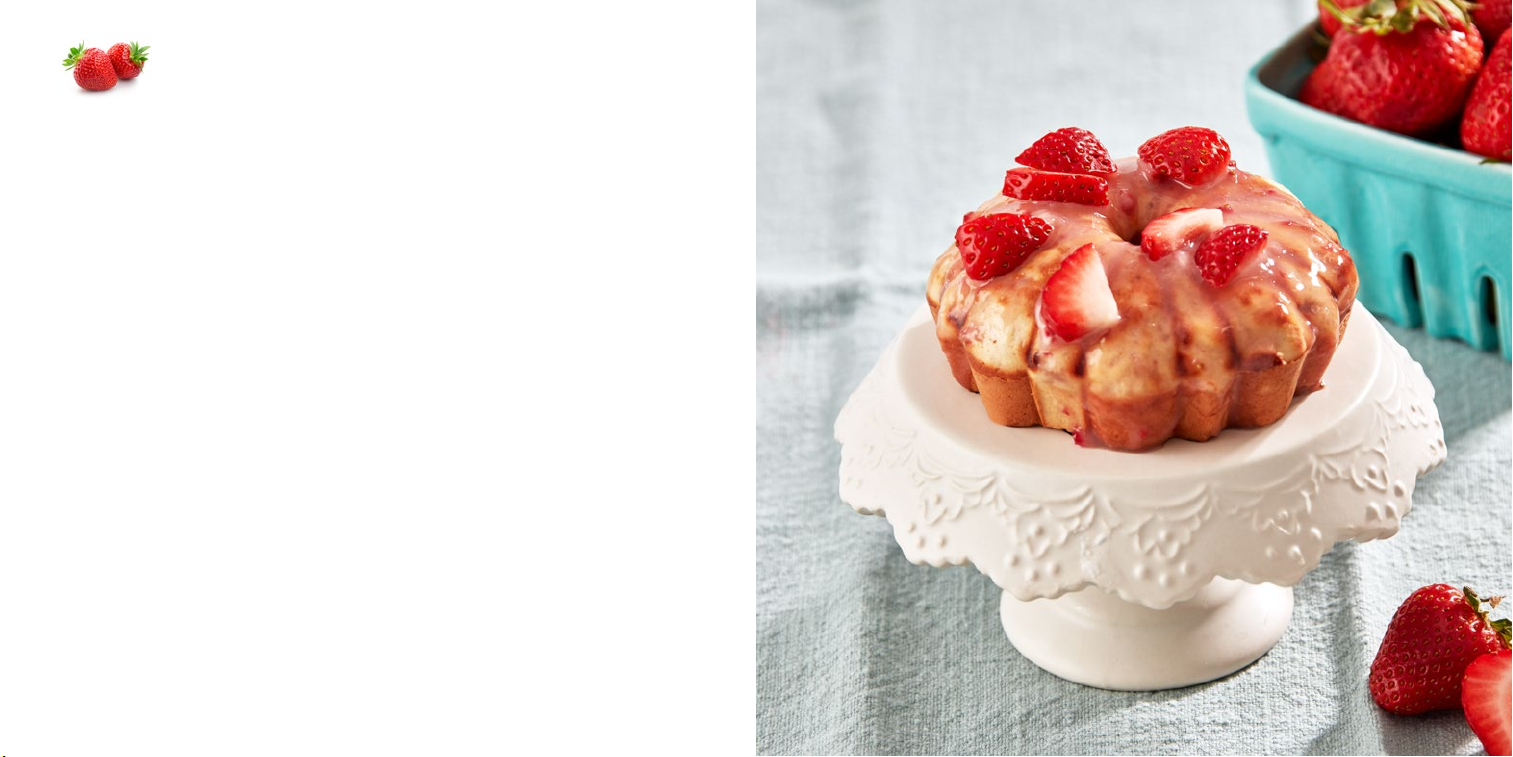
Strawberry
®
Mini Bundt
Makes 3-4 cakes
Ingredients:
1½ cups unbleached all-
purpose our
1½ tsp baking powder
¼ tsp baking soda
¼ tsp salt
4 tbsp unsalted butter,
softened
Directions:
1. Plug in your Mini Bundt® Maker to preheat for 10 minutes.
2. Create Strawberry Purée by combining fresh strawberries, sugar, and lemon juice in
a blender until smooth.
3. In medium bowl, combine our, baking powder, baking soda, and salt.
4. In larger bowl, beat butter and sugar with handheld mixer on medium until they are
uffy and light. Add egg, yogurt, strawberry puree, milk, vanilla, red food coloring (if
using) and blend until mixed. Using slow speed, mix dry ingredients into the wet until
just combined.
5. Brush Mini Bundt® Maker and Removal Tool with butter or baking spray. Fill the
Mini Bundt Maker ¾ full (
comes out clean when inserted into the cake.
6. Lift out cake on the Removal Tool and transfer it to a wire rack. Cool completely
before glazing. Serve.
∙ 30 ∙ ∙ 31 ∙
½ cup sugar
1 large egg
¼ cup full fat plain Greek
yogurt
6 tbsp whole milk
1 tsp vanilla extract
1
/
3
cup batter). Bake for 10-12 minutes, until a toothpick
Cake
3-4 drops red food
coloring, (optional)
Strawberry Purée
½ pound fresh
strawberries, halved
1 tbsp sugar
1 tsp fresh lemon juice
Page 17

Corn Bread
Mini Bundt
®
Cake with
Jalapeño Lime Glaze
Makes 6 cakes
Ingredients:
1 cup medium stoneground yellow
cornmeal, such as Indian Head
1 cup unbleached all-purpose our
2 tbsp sugar
1 tbsp baking powder
½ tsp salt
1 cup buttermilk, whole or reduced-fat
2 large eggs
1
cup unsalted butter, melted
/
3
Directions:
1. Plug in your Mini Bundt® Maker to preheat for 10 minutes.
2. In medium bowl, combine cornmeal, our, baking powder, and salt. In large
measuring cup, whisk buttermilk, eggs, and melted butter until well combined. Add
wet ingredients to dry and stir until just combined.
3. Brush Mini Bundt® Maker lightly with softened butter or coat lightly with baking
spray. Lower the top. Fill the Mini Bundt® Maker ¾ full (
minutes, until a toothpick comes out clean when inserted into the cake.
Jalapeño Glaze
¾ cup sugar
¾ cup water
2 tbsp nely chopped jalapeño pepper
1 cup confectioners’ sugar
1 tbsp whole milk
lime juice (optional)
1
/
cup batter). Bake for 10
3
4. Lift out cake using the Removal Tool and transfer the cake to wire rack. If using
Jalapeño Syrup, soak cake while warm. If using Jalapeño Glaze, let cool.
5. For Jalapeño Syrup, in small saucepan over medium heat, combine sugar, water,
jalapeños, and bring to simmer. Cook until syrup is clear. Set syrup aside for
5 minutes.
6. Soak cornbread cakes in the hot syrup for 20 seconds, turning it over after 10
seconds. With slotted pancake turner, transfer cake to wire rack and cool completely.
Repeat with remaining cakes.
7. For Jalapeño Glaze, in small bowl, whisk confectioners’ sugar with 2 tablespoons of
Jalapeño Syrup and the milk. Thin the glaze with lime juice as desired, starting with 1
teaspoon juice. Strain the syrup and add the jalapeño bits to the glaze. Dip the tops of
the cooled cornbread cakes in the glaze. Place on a wire rack until the glaze sets.
∙ 32 ∙
∙ 33 ∙
Page 18

Blueberry Lemon Keto
®
Mini Bundt
Makes 6 cakes
Ingredients:
4 large eggs, cold
4 ounces cream cheese, at room
temperature
¼ cup coconut our
¼ cup erythritol, preferably Swerve
1
½ tsp baking powder
Directions:
1. Plug in your Mini Bundt® Maker to preheat for 10 minutes.
2. In blender, combine eggs, cream cheese, coconut our, erythritol, baking powder,
lemon zest, vanilla and lemon extracts. Whirl to combine well. Let batter sit for 15
minutes to thicken. Pour batter into measuring cup.
3. Brush Mini Bundt® Maker lightly with butter. Pour in
tablespoon frozen blueberries.
4. Bake for 8 to 9 minutes, until, until a toothpick comes out clean when inserted into
the cake. Serve warm, sprinkled with Swerve confectioners’ sugar just before serving.
Cake
1 tsp grated lemon zest
1 tsp vanilla extract
½ tsp lemon extract
2 tbsp butter, softened
5 tbsp wild blueberries, frozen
1
/
cup batter. Sprinkle on 1
3
∙ 34 ∙
Page 19

Gluten-Free
Banana Bread
®
Dark Chocolate
®
Mini Bundt
Makes 6 cakes
Ingredients:
1 cup gluten-free our,
such as King Arthur
½ tsp. xanthan gum
1
/
3
cup unsweetened Dutch
process cocoa powder
Directions:
1. Plug in your Mini Bundt® Maker to preheat for 10 minutes.
2. In a large measuring cup, whisk buttermilk, vanilla, and egg together until well
mixed.
3. In a medium mixing bowl, beat butter and sugar with handheld mixer on medium
until uffy and light, 1 minute. Add
ingredients. Continue, alternating until fully combined.
4. Brush Mini Bundt® Maker lightly with butter or baking spray. Fill Mini Bundt Maker
1
¾ full (
inserted into the cake.
5. Lift out cake using the removal tool and transfer cake to wire rack. Cool cake
completely before glazing. Serve.
cup batter). Bake for 12 minutes, until a toothpick comes out clean when
/
3
1 tsp. baking soda
¼ tsp. salt
1 large egg
½ cup buttermilk, full or
reduced-fat
Cake
½ tsp vanilla extract
6 tbsp unsalted butter, at
room temperature
2
cup sugar
/
3
1
of dry ingredients, blend, then mix in ½ wet
/
3
Mini Bundt
Makes 6 cakes
Ingredients:
¾ cup unbleached all-purpose our
1 tsp baking powder
¼ tsp baking soda
½ tsp cinnamon
¼ tsp salt
4 tbsp unsalted butter, softened
Directions:
1. Plug in your Mini Bundt® Maker to preheat for 10 minutes.
2. In a small bowl, combine our, baking powder, baking soda, cinnamon, and salt.]
3. In a medium bowl, beat butter and sugar with a handheld mixer on medium until
they are uffy and light. Thoroughly mix in the egg, banana, and vanilla. Add the dry
ingredients, mixing until well blended.
4. Lightly spray Mini Bundt® Maker with baking spray. Fill the Mini Bundt® Maker ¾ full
1
/
(
cup batter).
3
5. Bake for 12 minutes, until a toothpick comes out clean when inserted into the cake.
6. Lift out cake using the removal tool and transfer cake to wire rack. Cool cake
completely before glazing. Serve.
∙ 36 ∙ ∙ 37 ∙
Cake
½ cup brown sugar, lightly packed
1 large egg
½ cup mashed ripe banana, about 1
medium
½ tsp vanilla extract
Page 20
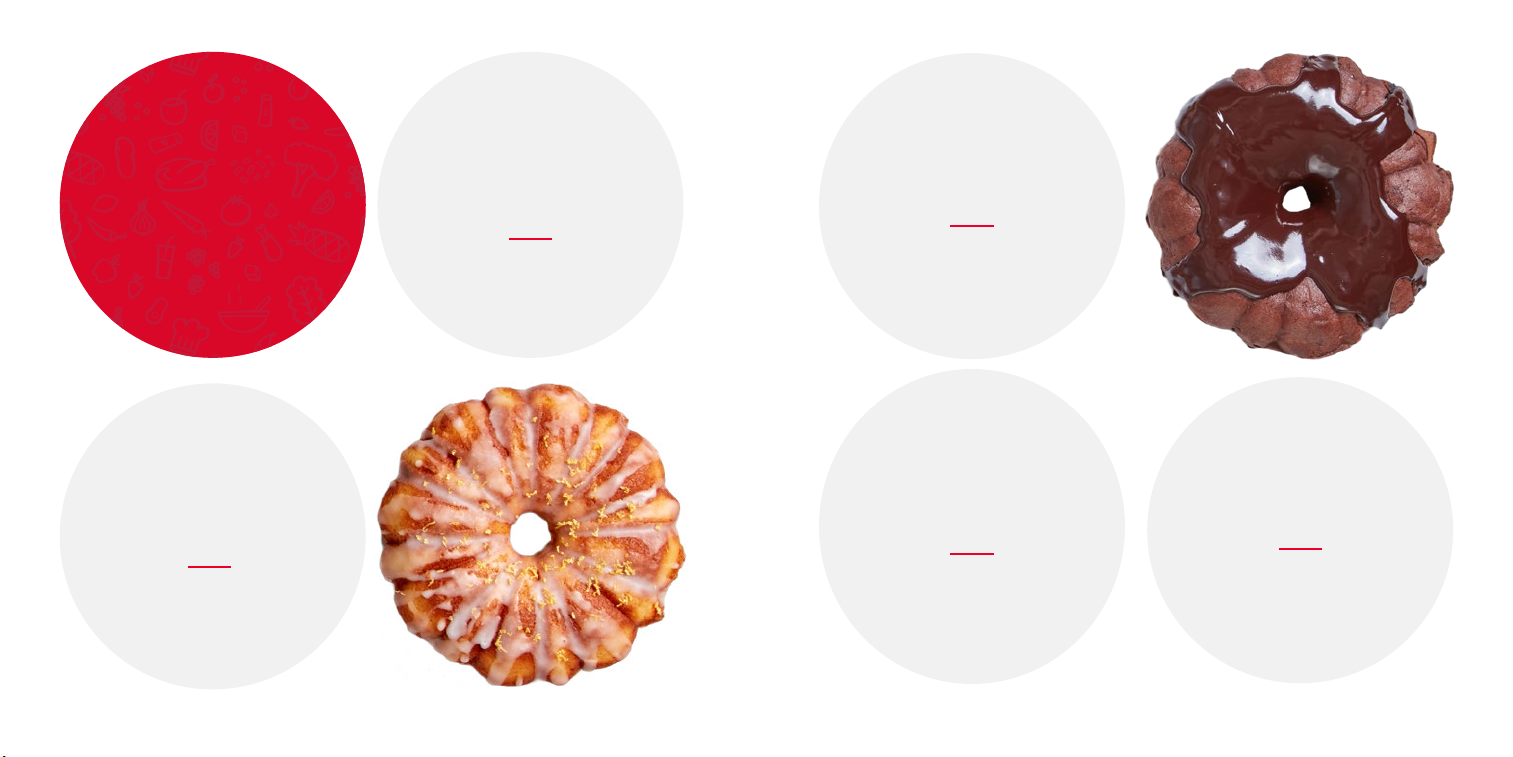
Get
Glazy!
Vanilla Glaze
1 cup confectioners’ sugar
1 tsp vanilla
2 tbsp whole milk,
room temperature
In small bowl, mix all
ingredients together until
well combined.
Cream
Cheese Glaze
½ cup cream cheese, room
temperature
1cup confectioners sugar
3 tbsp whole milk, room temperature
Place cream cheese in mixing bowl.
Sift in the sugar. Add the milk and
stir vigorously until the glaze is
smooth and creamy.
Peanut
Buer Glaze
½ cup confectioners’ sugar
2 tbsp peanut powder
4 tsp whole milk
In a mixing bowl, combine the
sugar, peanut powder and milk,
stirring vigorously until the glaze is
smooth and creamy.
Chocolate Glaze
½ cup confectioners’ sugar
3 tbsp unsweetened Dutch process
cocoa powder
½ tsp vanilla
5 tsp whole milk, room temperature
Sift sugar and cocoa powder into a
mixing bowl. Mix in the vanilla and
milk. Stir vigorously until the
glaze is smooth
and creamy.
Nutella Glaze
½ cup confectioners’ sugar
¼ cup Nutella
2 tbsp whole milk
Sift the sugar into a mixing bowl. Add
the Nutella, milk, and stir
until the glaze is smooth
and creamy.
∙ 39 ∙∙ 38 ∙
Page 21
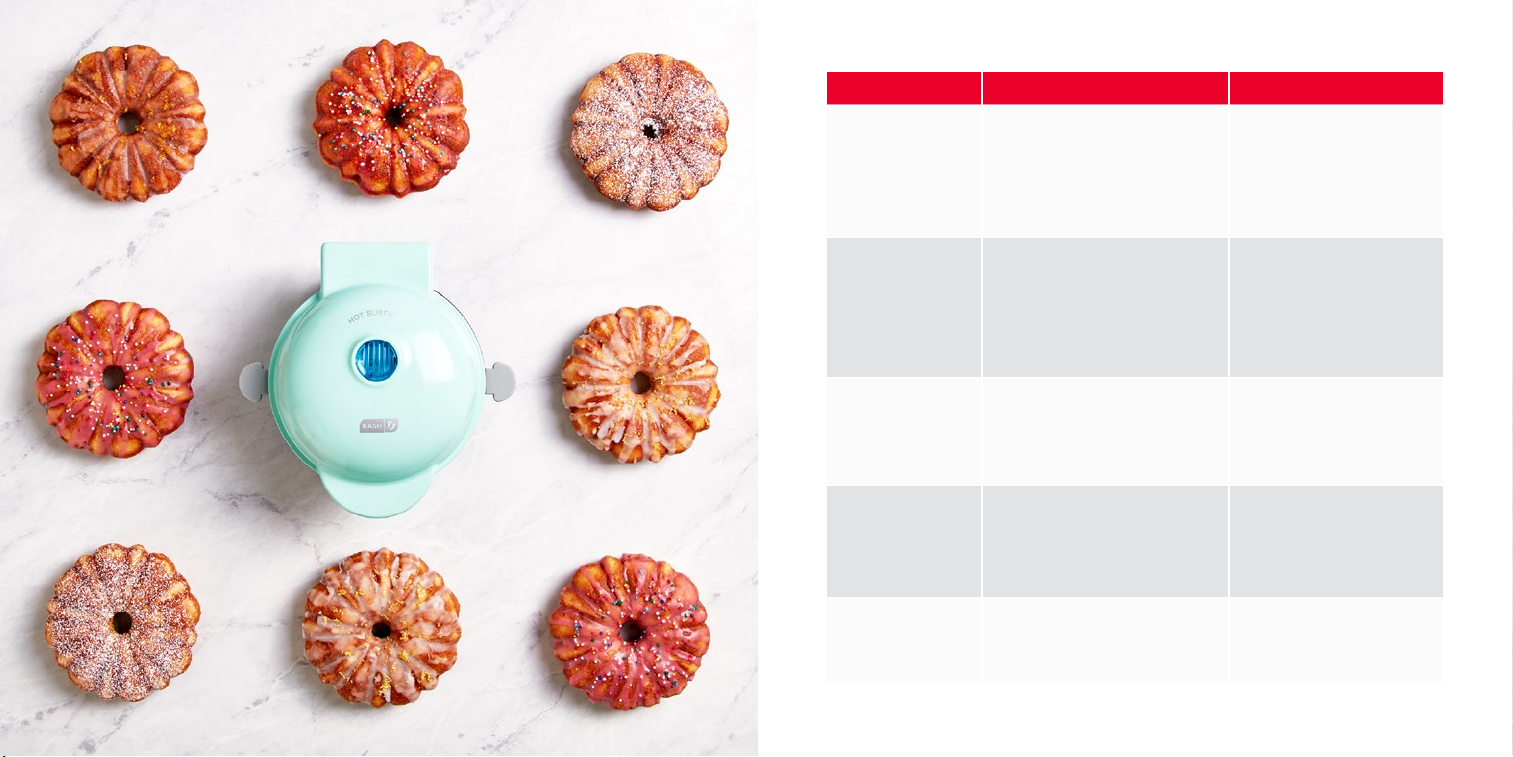
RECOMMENDED COMBINATIONS
BUNDT® GLAZE TOPPING
Vanilla Vanilla
Half Vanilla, Half Chocolate
Lemon
Chocolate Nutella
Peanut Butter
Red Velvet
Banana Bread Peanut Butter
Strawberry Nutella
Cream Cheese
Vanilla
Vanilla
Vanilla
Sprinkles
Fresh Berries
Raspberry Jam
Lemon Zest
Sprinkles
Shredded Coconut
Fresh Berries
Chopped Peanuts
Sprinkles
Mini Chocolate Chips
Confectioner's Sugar
Mini Chocolate Chips
Confectioner's Sugar
Chopped Walnuts
Fresh Berries
Confectioner's Sugar
∙ 41 ∙
Page 22
customer support
feel good
guarantee
Dash values quality and workmanship and stands behind this
product with our Feel Good Guarantee
™
our commitment to quality, visit bydash.com/feelgood.
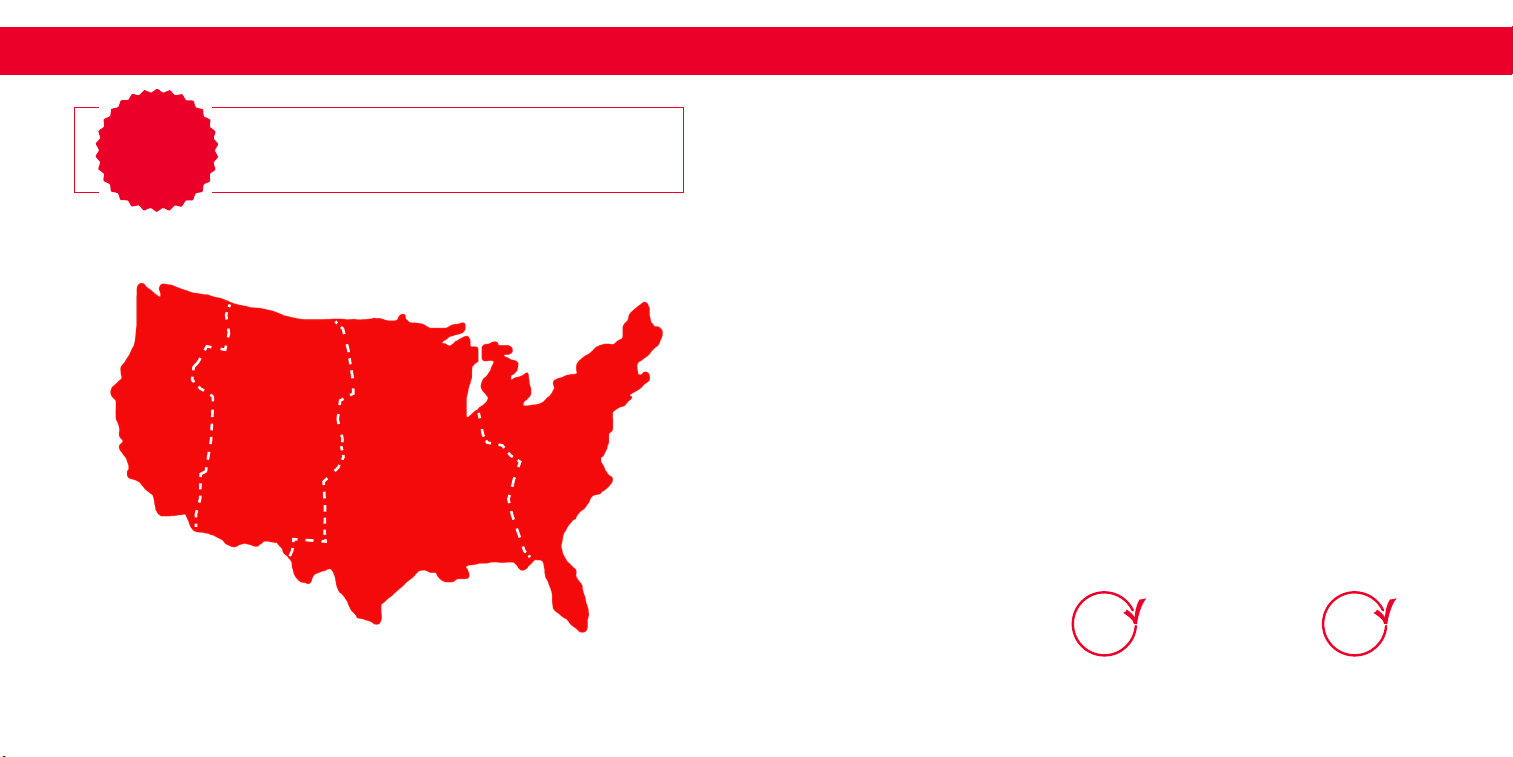
Our customer support teams in the US and Canada are at
your service Monday - Friday during the times below.
Contact us at 1 (800) 898-6970 or [email protected]
6am –
6pm
7am –
7pm
Hey Hawaii! You can reach our customer service team from 3AM to 3PM.
And also, Alaska, feel free to reach out from 5AM - 5PM.
8am –
8pm
™
. To learn more about
9am –
9pm
warranty
STOREBOUND, LLC – 1 YEAR LIMITED WARRANTY
Your StoreBound product is warranted to be free from defects in material and workmanship for a period of
one (1) year from the date of the original purchase when utilized for normal and intended household use.
Should any defect covered by the terms of the limited warranty be discovered within one (1) year, StoreBound,
LLC will repair or replace the defective part. To process a warranty claim, contact Customer Support at
1-800-898-6970 for further assistance and instruction. A Customer Support agent will assist you by troubleshooting
minor problems. If troubleshooting fails to x the problem, a return authorization will be issued. Proof of purchase
indicating the date and place of purchase is required and should accompany the return. You must also include
your full name, shipping address, and telephone number. We are unable to ship returns to a PO box. StoreBound
will not be responsible for delays or unprocessed claims resulting from a purchaser’s failure to provide any or all
of the necessary information. Freight costs must be prepaid by the purchaser.
Send all inquiries to [email protected].
There are no express warranties except as listed above.
REPAIR OR REPLACEMENT AS PROVIDED UNDER THIS WARRANTY IS THE EXCLUSIVE REMEDY OF THE
CUSTOMER. STOREBOUND SHALL NOT BE LIABLE FOR ANY INCIDENTAL OR CONSEQUENTIAL DAMAGES
OR FOR BREACH OF ANY EXPRESS OR IMPLIED WARRANTY ON THIS PRODUCT EXCEPT TO THE EXTENT
REQUIRED BY APPLICABLE LAW. ANY IMPLIED WARRANTY OF MERCHANTABILITY OR FITNESS FOR A
PARTICULAR PURPOSE ON THIS PRODUCT IS LIMITED IN DURATION TO THE DURATION OF THIS WARRANTY.
Some states do not allow the exclusion or limitation of incidental or consequential damages, or limitations
on how long an implied warranty lasts. Therefore, the above exclusions or limitations may not apply to you.
This warranty gives you specic legal rights and you may also have other rights, which vary from state to state.
Refurbished items or items not purchased through an authorized retailer are not eligible for warranty claims.
TRADEMARK INFORMATION
Bundt is a registered trademark of Northland Aluminum Products, Inc., Minneapolis, MN.
Bundt® is used with permission by StoreBound LLC.
REPAIRS
DANGER! Risk of electric shock! The Dash Mini Bundt® Maker is an electrical appliance.
Do not attempt to repair the appliance yourself under any circumstances.
Contact Customer Support regarding repairs to the appliance.
TECHNICAL SPECIFICATIONS
Voltage 120V~60Hz
Power Rating 350W
Stock#: DBCM100_20200218_V8
FOOD
SAFE
This product has passed food
safety testing in accordance
with FDA guidelines.
PFOA
FREE
∙ 42 ∙ ∙ 43 ∙
Page 23

1-800-898-6970 | @bydash | bydash.com
 Loading...