

Page 1
AXC-OVI12-60 / AXC-OVI12-120 / AXC-OVI12-2FT / AXC-OVI12-4FT
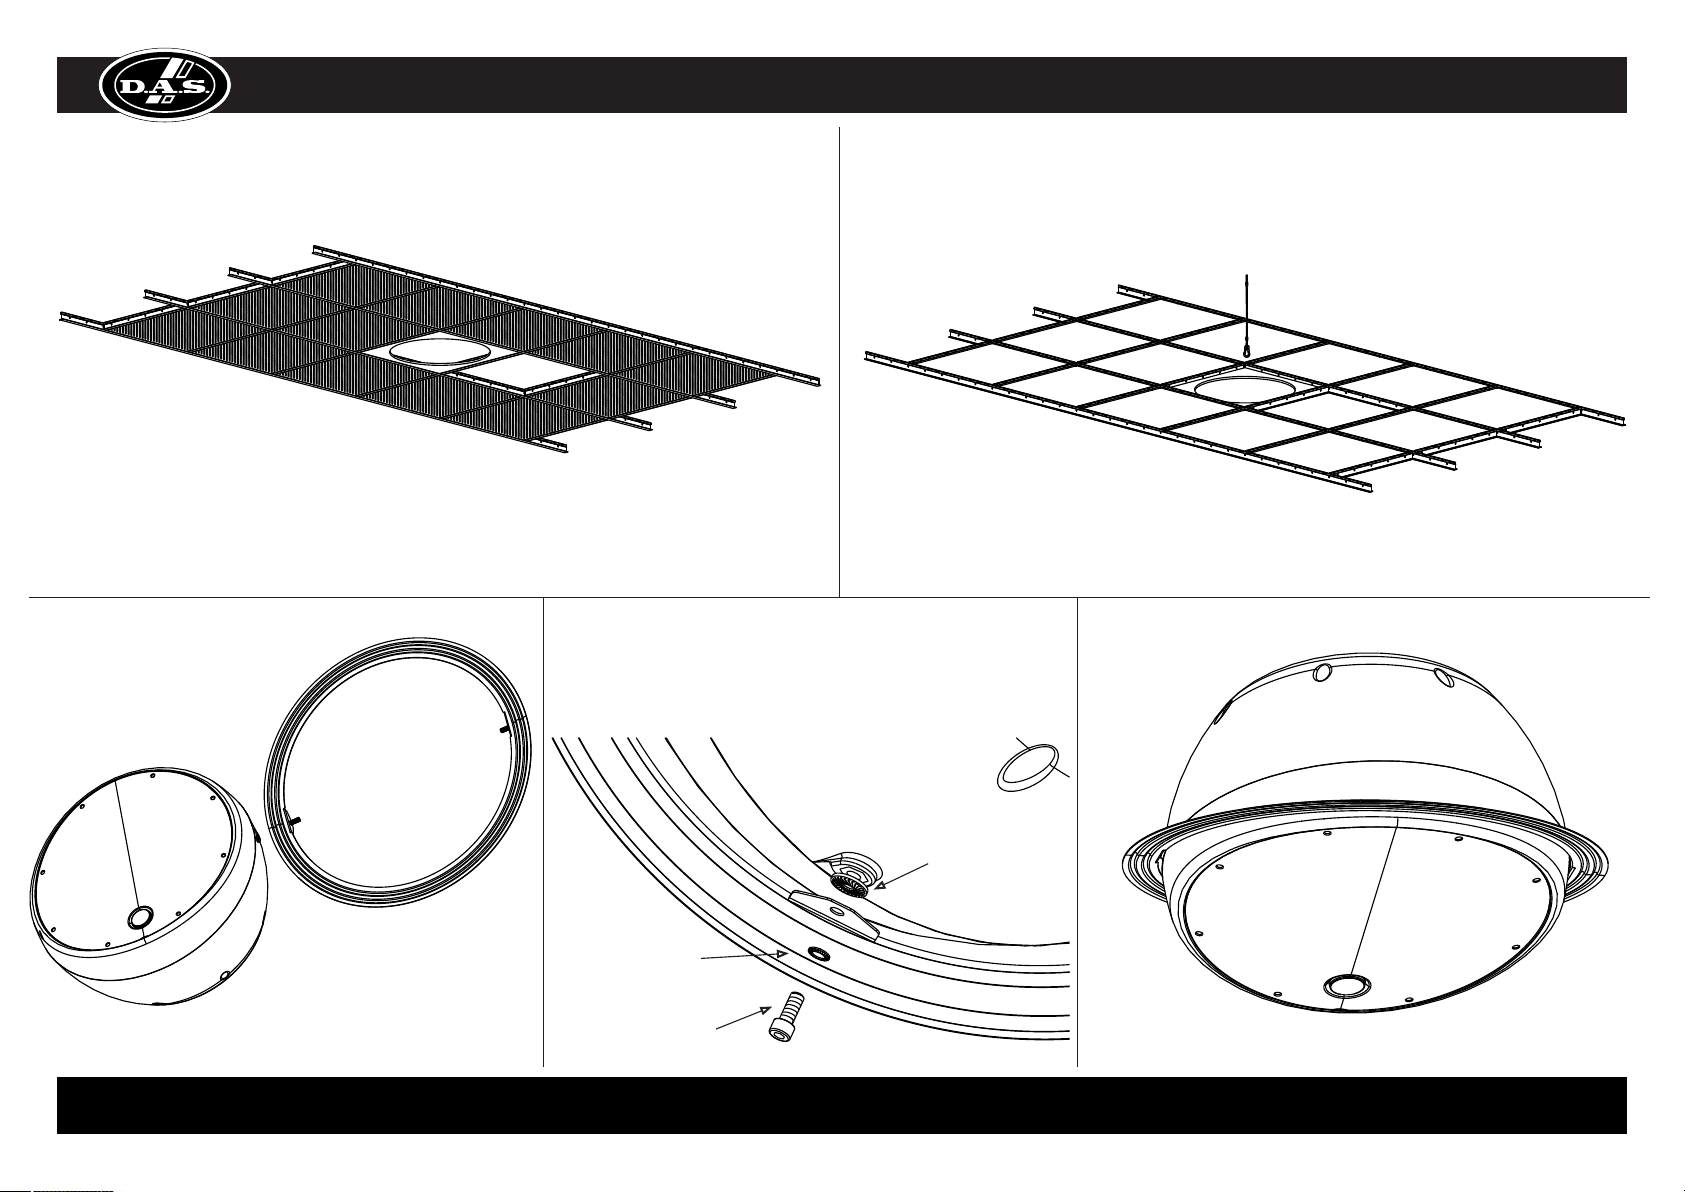
1. Desmontar la placa del techo
donde vaya a instalarse el Altavoz
más la contigua.
1. Dismantle and remove the ceiling tile
and the adjacent one to where the speaker
is to be installed.
2. Colocar la placa soporte
donde vaya a ir instalado el Altavoz.
2. Insert the supporting tile where the
speaker is to be installed.
4. Atornillar el anillo al Altavoz con el angulo de inclinación
estimado (podremos rectificar mas tarde)
MANUAL DEL USUARIO / USER’S MANUAL
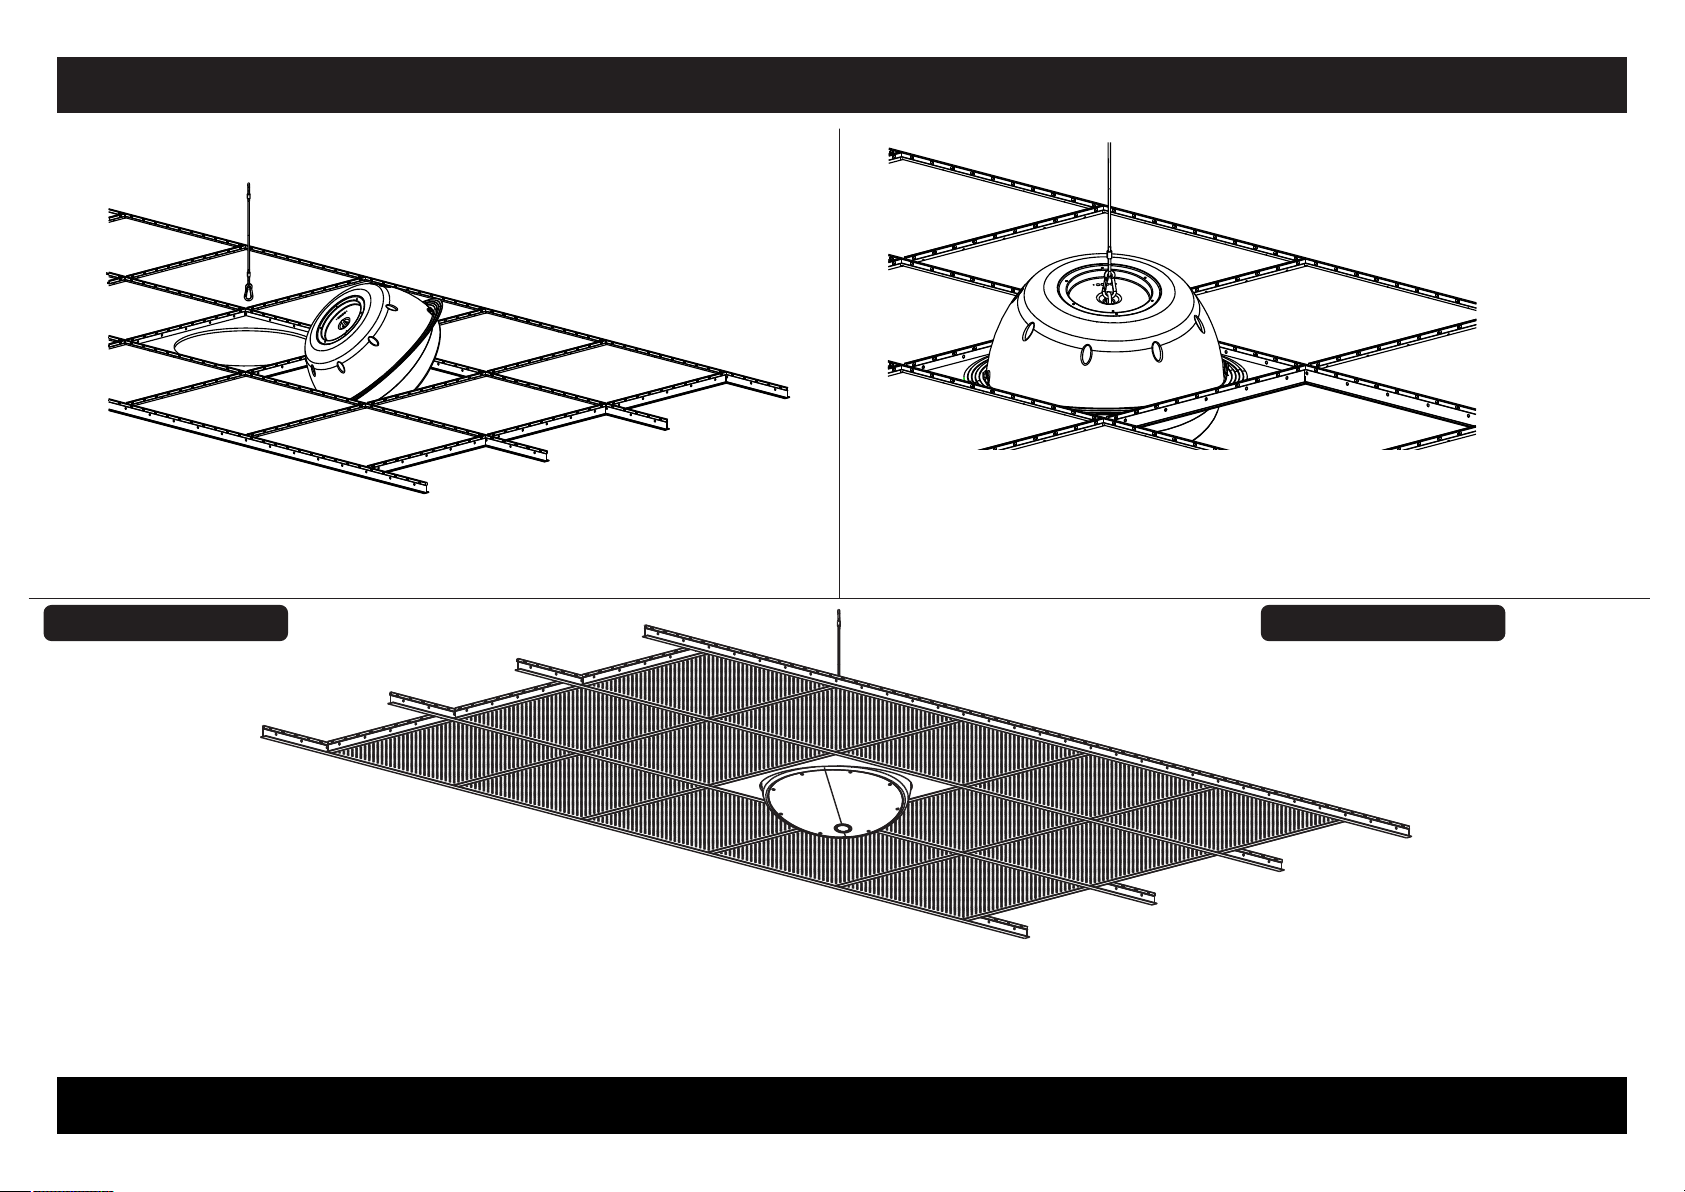
3. Colocar el cable de seguridad
en el techo de obra.
3. Fix the safety cable to a solid,
secure spot in the ceiling above.
4. Screw the ring to the speaker with the approximate
desired angle (angle can be readjusted later).
Arandela dentada
Serrated washer
Arandela de seguridad
Security washer
Tornillo M8
M8 screw
DAS Audio Group, S.L.
C/ Islas Baleares, 24 - 46988 - Fuente del Jarro. Valencia - SPAIN - Tel. 96 134 05 25 - Tel. Intl. +34 96 134 08 60 - Fax +34 96 134 06 07
www.dasaudio.com
Page 2
AXC-OVI12-60 / AXC-OVI12-120 / AXC-OVI12-2FT / AXC-OVI12-4FT
MANUAL DEL USUARIO / USER’S MANUAL
6. Posicionar en su lugar apoyando
sobre el soporte el anillo del Altavoz.
6. Position the speaker in its place,
5. Introducir el Altavoz por el hueco contiguo.
5. Insert the speaker through the adjacent tile’s gap.
8. Graduar el giro sobre el eje vertical del Altavoz rotando el aro sobre el soporte
8. Turn and regulate the speaker on its vertical axis by rotating the ring on the supporting tile.
Precauciones de Seguridad Safety Precautions
DAS Audio Group facilitará las especificaciones de las
cajas acústicas y las instrucciones de
instalación a la propiedad y a
cualquier personal implicado
e n l a i ns t a l a c i ó n d el
equ i p am i e n to ( téc n i cos
instaladores, arquitectos técnicos,
ingenieros, arquitectos, etc.)
En ningún caso, DAS Audio Group asumirá ninguna
responsabilidad sobre la instalación del equipamiento, a menos que
DAS Audio Group estuviera a cargo de la instalación de forma directa o
indirecta. La responsabilidad de DAS Audio Group se limitará única y exclusivamente a
la garantía del equipamiento.
Sin perjuicio de que DAS Audio Group provea de las pertinentes instrucciones y guías para la instalación,
DAS Audio Group recomienda encarecidamente que previamente a la instalación del altavoz para techo
AXC-OVI12-XX, que tanto la propiedad, arquitecto e instalador del falso techo comprueben que el falso
techo podrá soportar tanto el peso del altavoz como las posibles vibraciones tangenciales que pueda
transmitir el altavoz sobre la estructura cuanto este entre en funcionamiento.
Es responsabilidad del propietario en coordinación con el instalador, arquitecto e instalador del falso techo
reforzar las áreas donde el AXC-OVI12-XX vaya a ser instalado. Cada altavoz de techo AXC-OVI12-XX
debe llevar adicionalmente instalado un cable de seguridad que debe ir fijado a un elemento estructural
como son forjado, viga, etc. como medida preventiva de que pudiera caer sobre la audiencia.
DAS Audio Group, S.L.
C/ Islas Baleares, 24 - 46988 - Fuente del Jarro. Valencia - SPAIN - Tel. 96 134 05 25 - Tel. Intl. +34 96 134 08 60 - Fax +34 96 134 06 07
10. Colocar la placa de techo contigua.
10. Reposition the adjacent ceiling tile into its gap.
are provided, DAS Audio Group highly recommends that before the installation
of the AXC-OVI12-XX ceiling speakers, the property, the architect and the false ceiling constructor must
first ensure that the false ceiling will be able to support the weight, as well as the possible tangential
vibrations that can be transmitted by the speakers to this structure when playing.
This is the property responsibility to proceed with strengthening the same in coordination with the installer,
the architect and the false ceiling constructor, in areas where the AXC-OVI12-XX will be located.
Each AXC-OVI12-XX ceiling speaker must also carry additional support slings securely attached to the
structural elements either forged, beams, etc. preventing it from falling down to the audience.
supported by the ring.
9. Cablear el Altavoz
9. Connect signal cables to the speaker.
DAS Audio Group will provide all installation
instructions and speakers’ specification to the
property and any staff (installation technicians,
builders, technical architects / building engineers,
architects, etc.) involved in the installation of the
equipment.
In any case, DAS Audio Group shall have no
liability arising from the installation of
their own means (directly or indirectly).
DAS Audio Group shall only and exclusively be
responsible for the equipment warranty.
Without prejudice from the installation instructions and directions that
7.- Sujetar el Altavoz al cable de
seguridad.
7. Fix the speaker to the safety
cable.
the equipment, unless DAS
Audio Group would take
charge of the installation by
www.dasaudio.com
HI_AXCOVI _02
 Loading...