Danfoss RX1-S Installation guide [da]

Danfoss RX1-S Installation guide

Installation Guide

RX1-S

RF Receiver & Boiler Relay

Installation Guide

RX1-S


VISUR14F

Danfoss Heating Solutions

Installation Guide

RX1-S

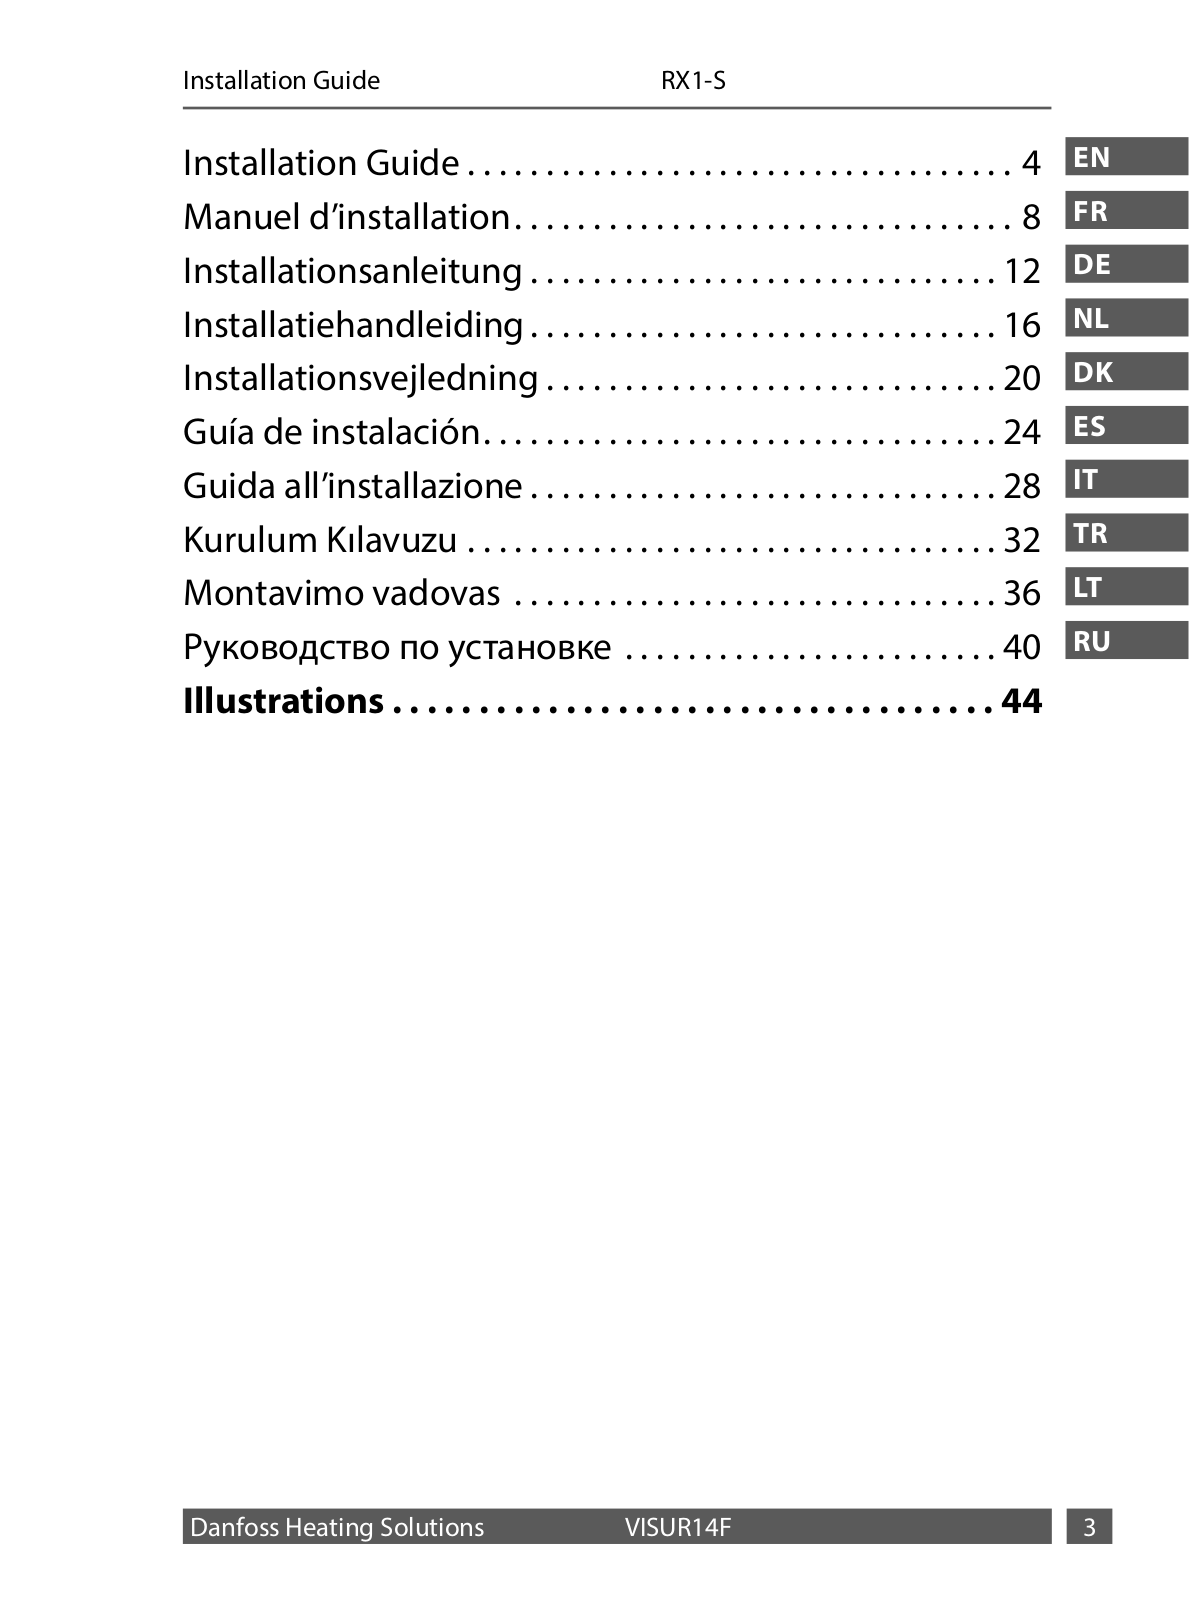
Installation Guide.. . . . . . . . . . . .

. . . . . . . . . . . . . . . . . . . . . . . 4

Manuel d’installation. . . . . . . . . . . . .

. . . . . . . . . . . . . . . . . . . 8

Installationsanleitung.. . . . . . . . .

. . . . . . . . . . . . . . . . . . . . . 12

Installatiehandleiding.. . . . . . . . . . .

. . . . . . . . . . . . . . . . . . . 16

Installationsvejledning.. . . . . . . . .

. . . . . . . . . . . . . . . . . . . . 20

Guía de instalación. . . . . . . . . . . . . . . . . . . .

. . . . . . . . . . . . . 24

Guida all’installazione.. . . . . . . . . .

. . . . . . . . . . . . . . . . . . . . 28

Kurulum Kılavuzu.. . . . . . . . . . . . .

. . . . . . . . . . . . . . . . . . . . . 32

Montavimo vadovas .. . . . . . . . . .

. . . . . . . . . . . . . . . . . . . . . 36

Руководство по установке .. . .

. . . . . . . . . . . . . . . . . . . . . 40

Illustrations. . . . . . . . . . . . . . . . .

. . . . . . . . . . . . . . . . . . . 44

EN

FR

DE

NL

DK

ES

IT

TR

LT

RU

Danfoss Heating Solutions

VISUR14F


Installation Guide

RX1-S


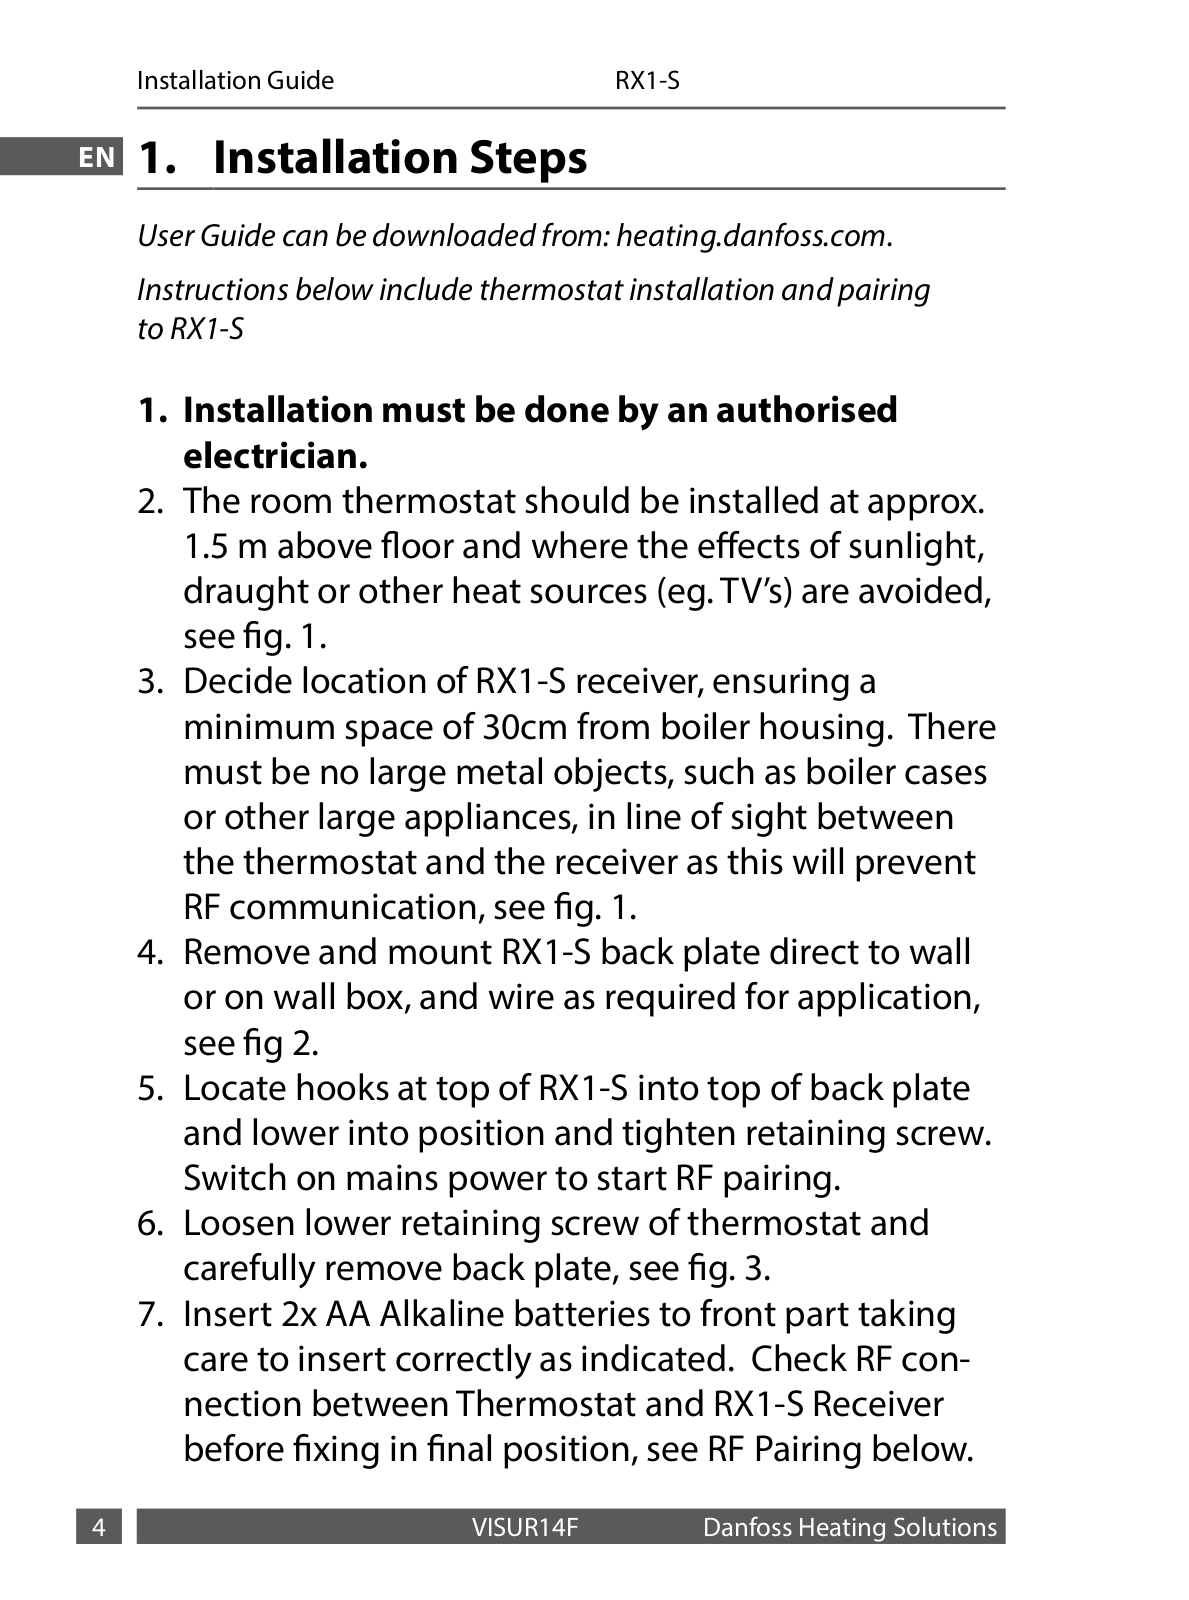
EN 1.. Installation Steps

User Guide can be downloaded from: heating.danfoss.com.

Instructions below include thermostat installation and pairing to RX1-S

1.Installation must be done by an authorised electrician..

2.The room thermostat should be installed at approx.. 1..5 m above floor and where the effects of sunlight, draught or other heat sources (eg.. TV’s) are avoided, see fig.. 1..

3.Decide location of RX1-S receiver, ensuring a minimum space of 30cm from boiler housing.. There must be no large metal objects, such as boiler cases or other large appliances, in line of sight between the thermostat and the receiver as this will prevent RF communication, see fig.. 1..

4.Remove and mount RX1-S back plate direct to wall or on wall box, and wire as required for application, see fig 2..

5.Locate hooks at top of RX1-S into top of back plate and lower into position and tighten retaining screw.. Switch on mains power to start RF pairing..

6.Loosen lower retaining screw of thermostat and carefully remove back plate, see fig.. 3..

7.Insert 2x AA Alkaline batteries to front part taking care to insert correctly as indicated.. Check RF connection between Thermostat and RX1-S Receiver before fixing in final position, see RF Pairing below..


VISUR14F

Danfoss Heating Solutions

Installation Guide

RX1-S


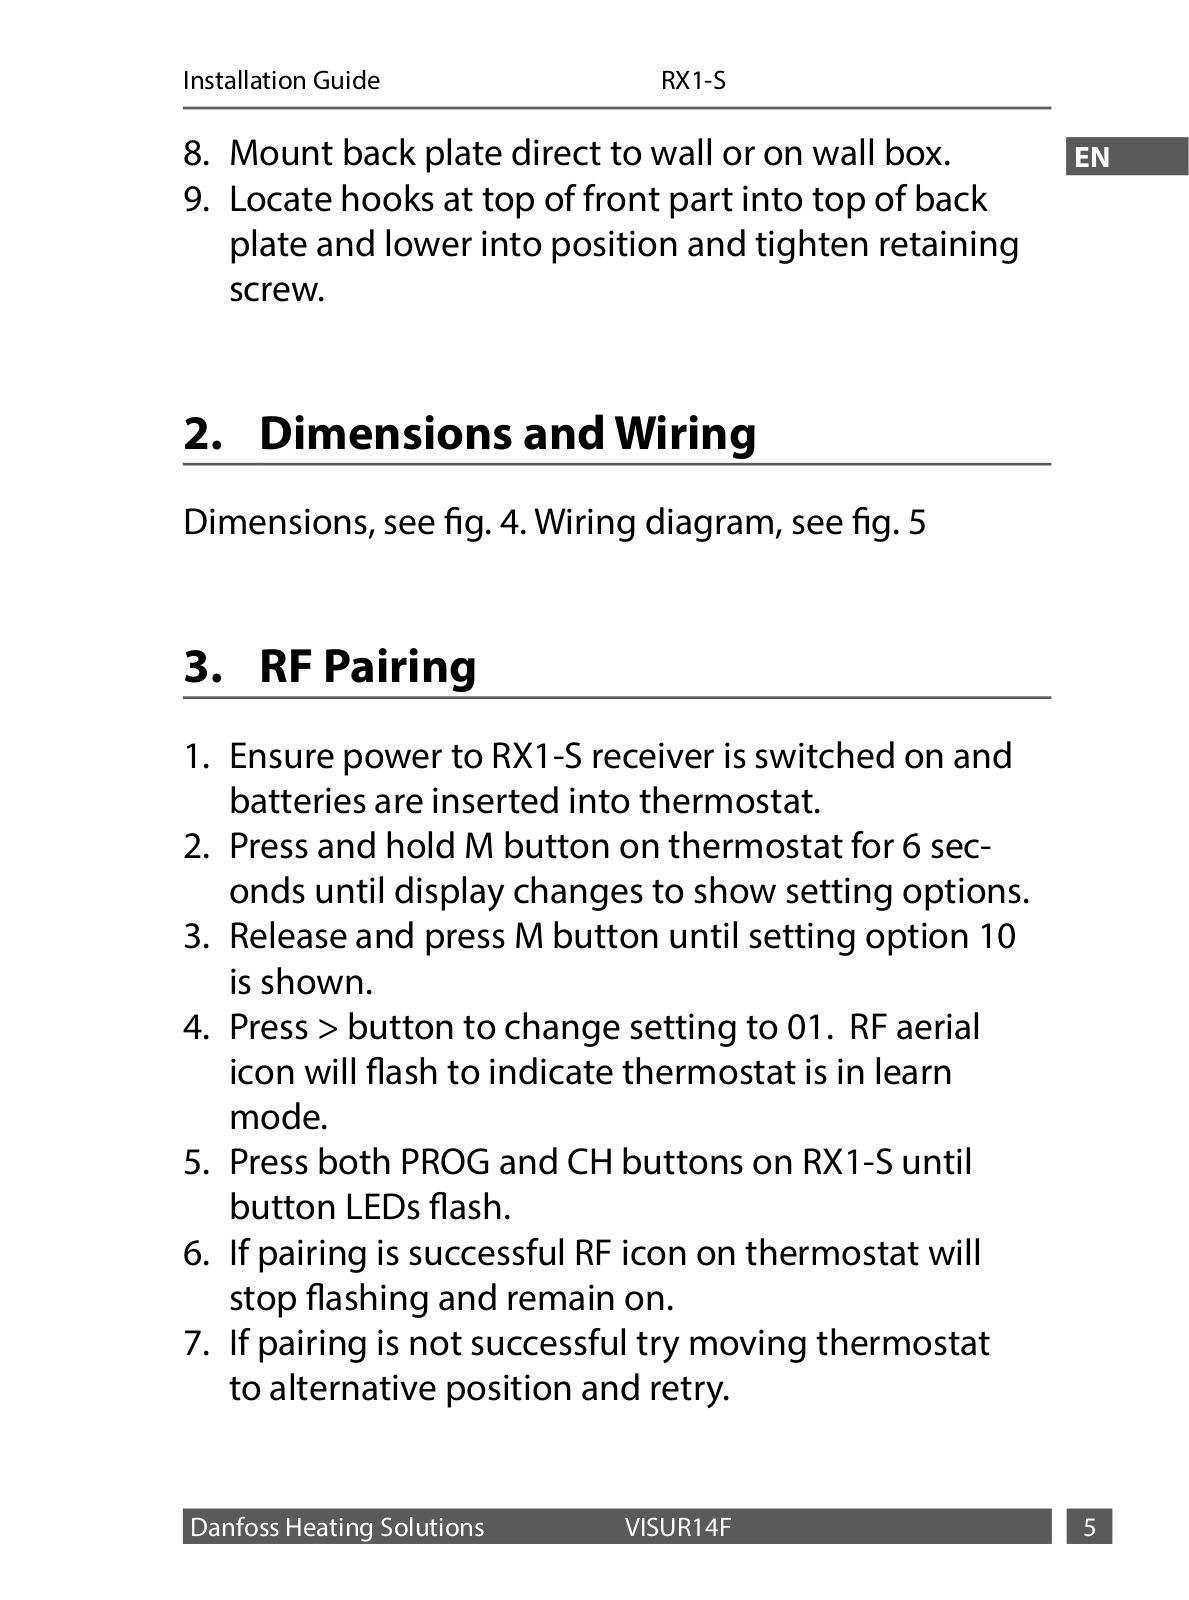
8. Mount back plate direct to wall or on wall box..

EN

9.Locate hooks at top of front part into top of back plate and lower into position and tighten retaining screw..

2.. Dimensions and Wiring

Dimensions, see fig.. 4.. Wiring diagram, see fig.. 5

3.. RF Pairing

1.Ensure power to RX1-S receiver is switched on and batteries are inserted into thermostat..

2.Press and hold M button on thermostat for 6 seconds until display changes to show setting options..

3.Release and press M button until setting option 10 is shown..

4.Press > button to change setting to 01.. RF aerial icon will flash to indicate thermostat is in learn mode..

5.Press both PROG and CH buttons on RX1-S until button LEDs flash..

6.If pairing is successful RF icon on thermostat will stop flashing and remain on..

7.If pairing is not successful try moving thermostat to alternative position and retry..

Danfoss Heating Solutions

VISUR14F


Installation Guide

RX1-S


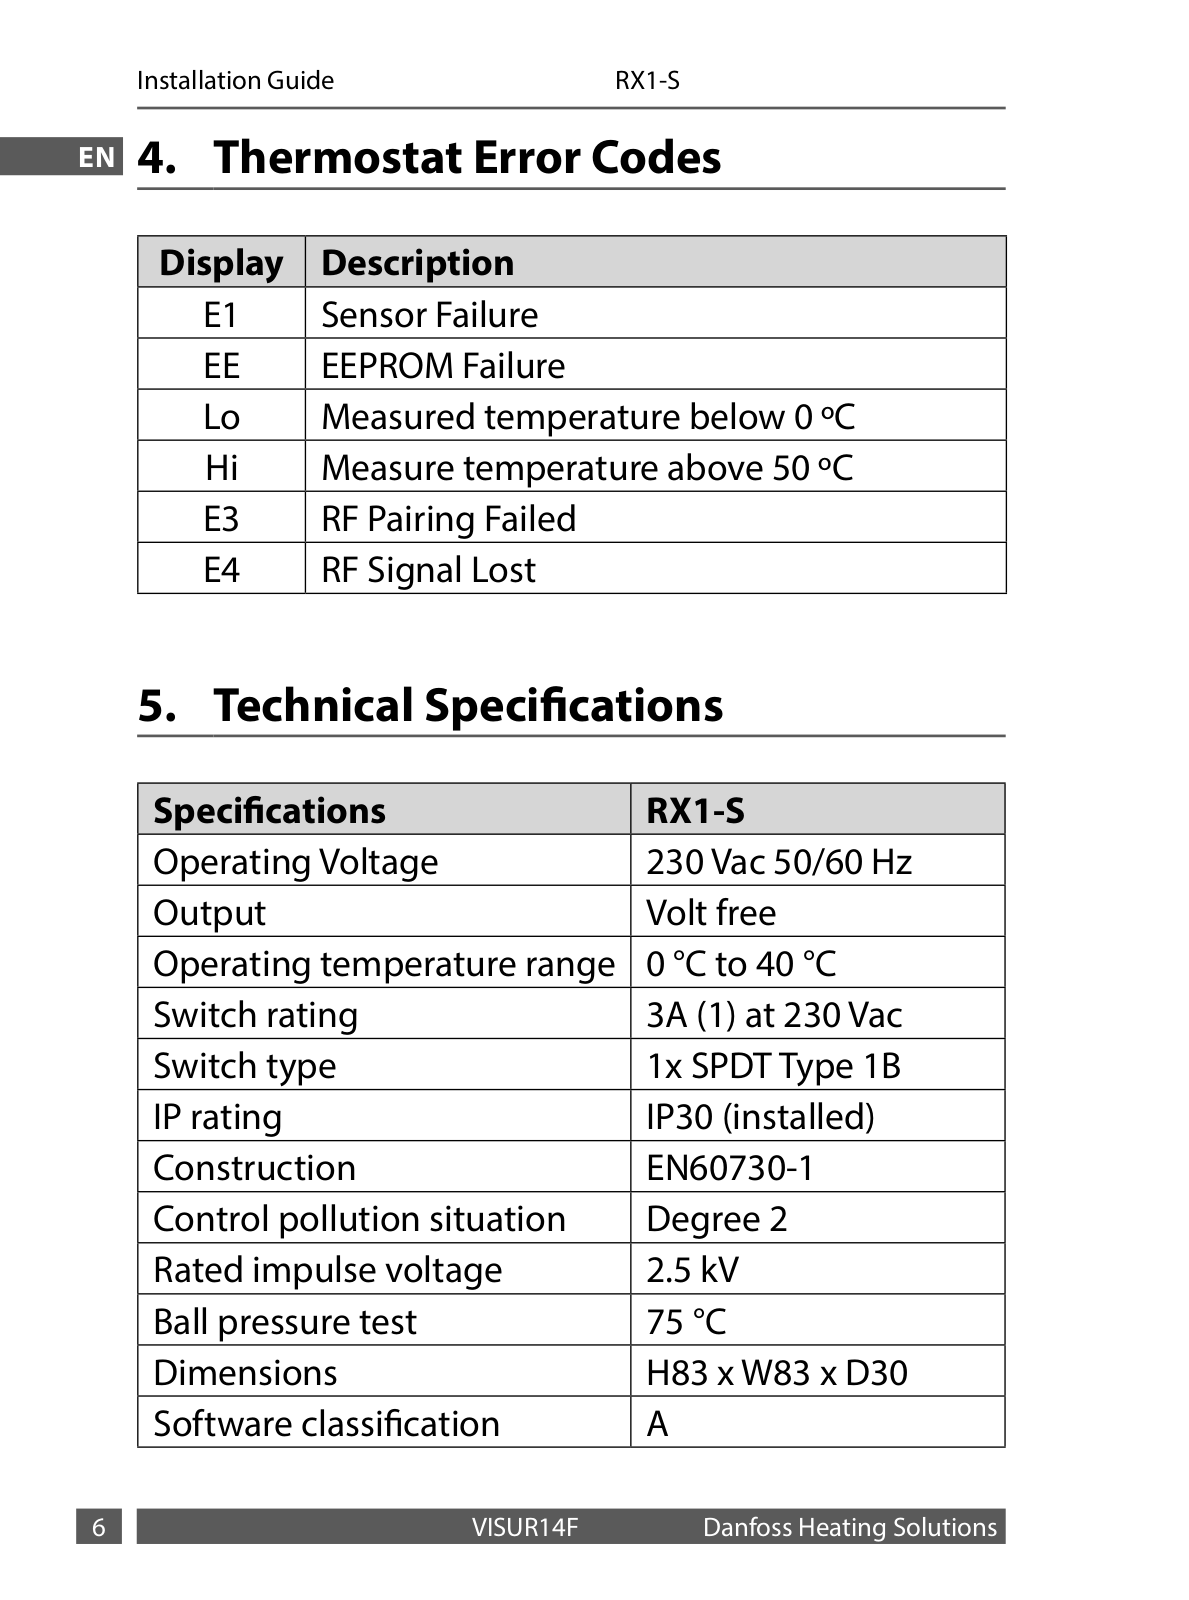
4.. Thermostat Error Codes

EN


Display

Description


E1

Sensor Failure


EE

EEPROM Failure


Lo

Measured temperature below 0 ºC


Hi

Measure temperature above 50 ºC


E3

RF Pairing Failed


E4

RF Signal Lost


5.. Technical Specifications


Specifications

RX1-S


Operating Voltage

230 Vac 50/60 Hz


Output

Volt free


Operating temperature range

0 °C to 40 °C


Switch rating

3A (1) at 230 Vac


Switch type

1x SPDT Type 1B


IP rating

IP30 (installed)


Construction

EN60730-1


Control pollution situation

Degree 2


Rated impulse voltage

2..5 kV


Ball pressure test

75 °C


Dimensions

H83 x W83 x D30


Software classification

A


VISUR14F

Danfoss Heating Solutions

Installation Guide

RX1-S


EN

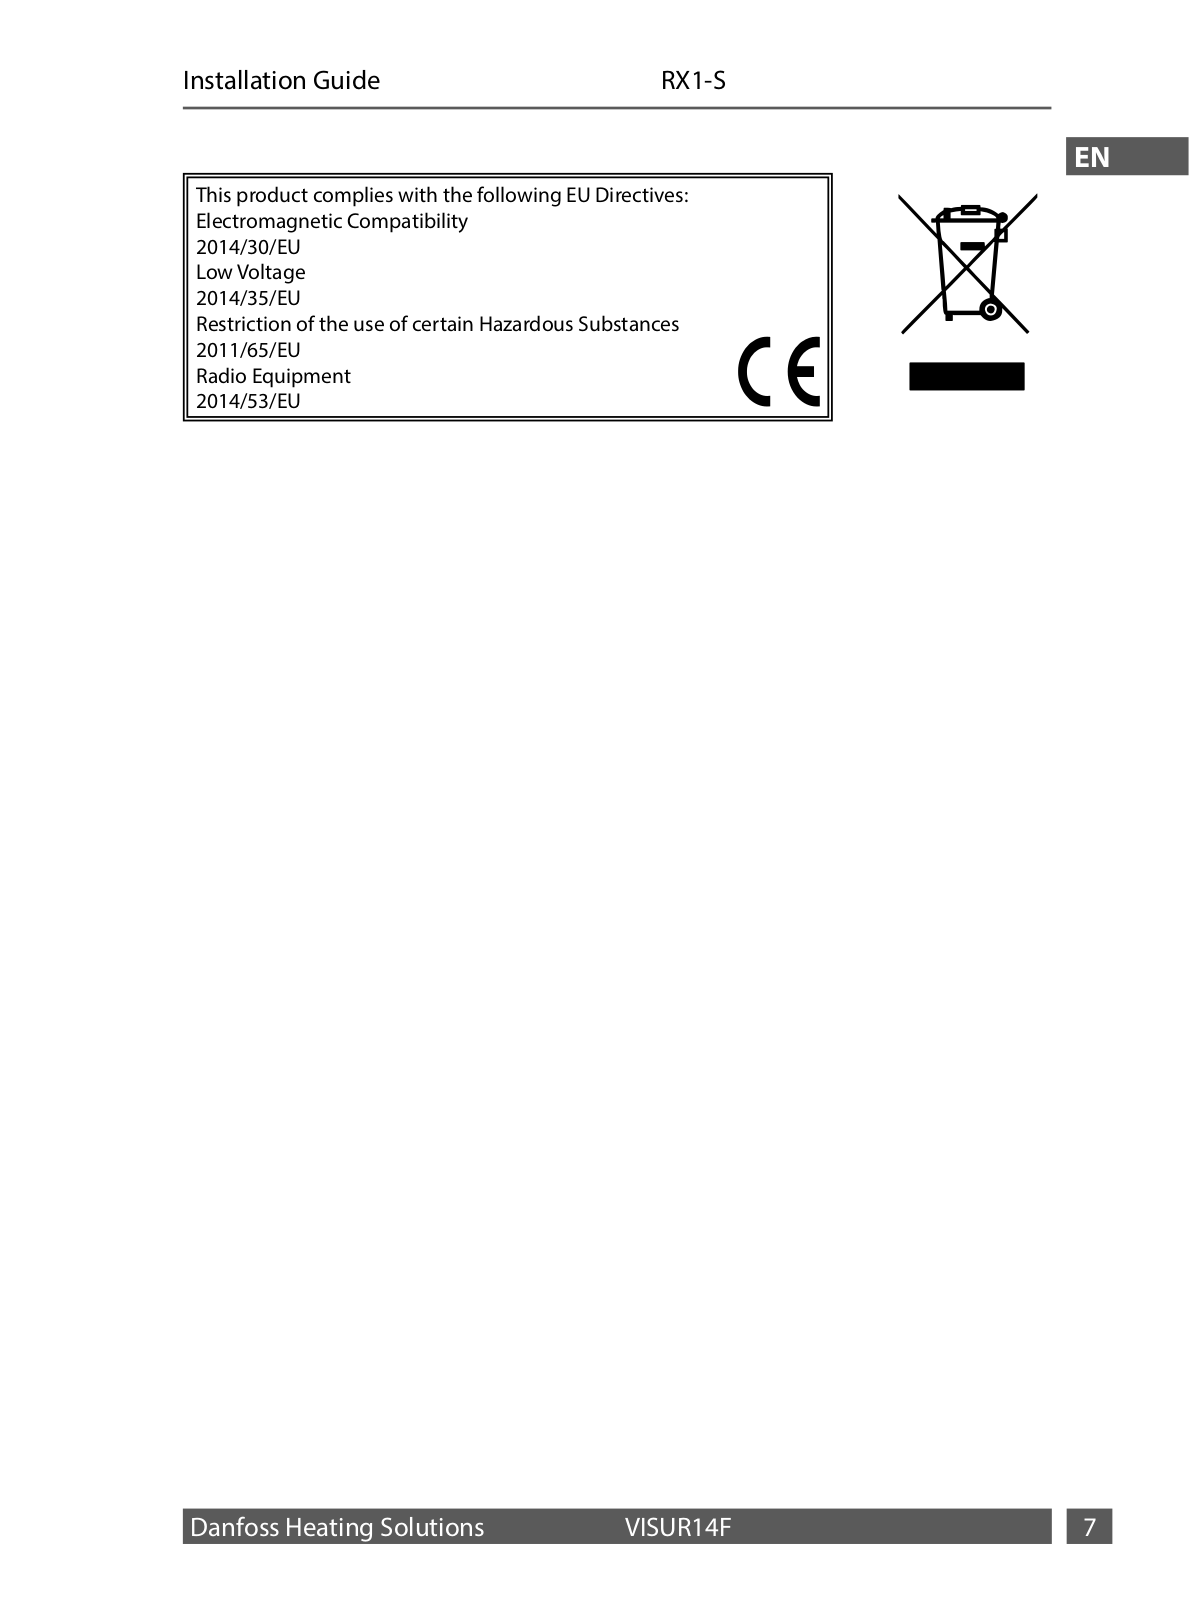
This product complies with the following EU Directives: Electromagnetic Compatibility

2014/30/EU Low Voltage 2014/35/EU

Restriction of the use of certain Hazardous Substances 2011/65/EU

Radio Equipment 2014/53/EU

Danfoss Heating Solutions

VISUR14F


Manuel d’installation

RX1-S


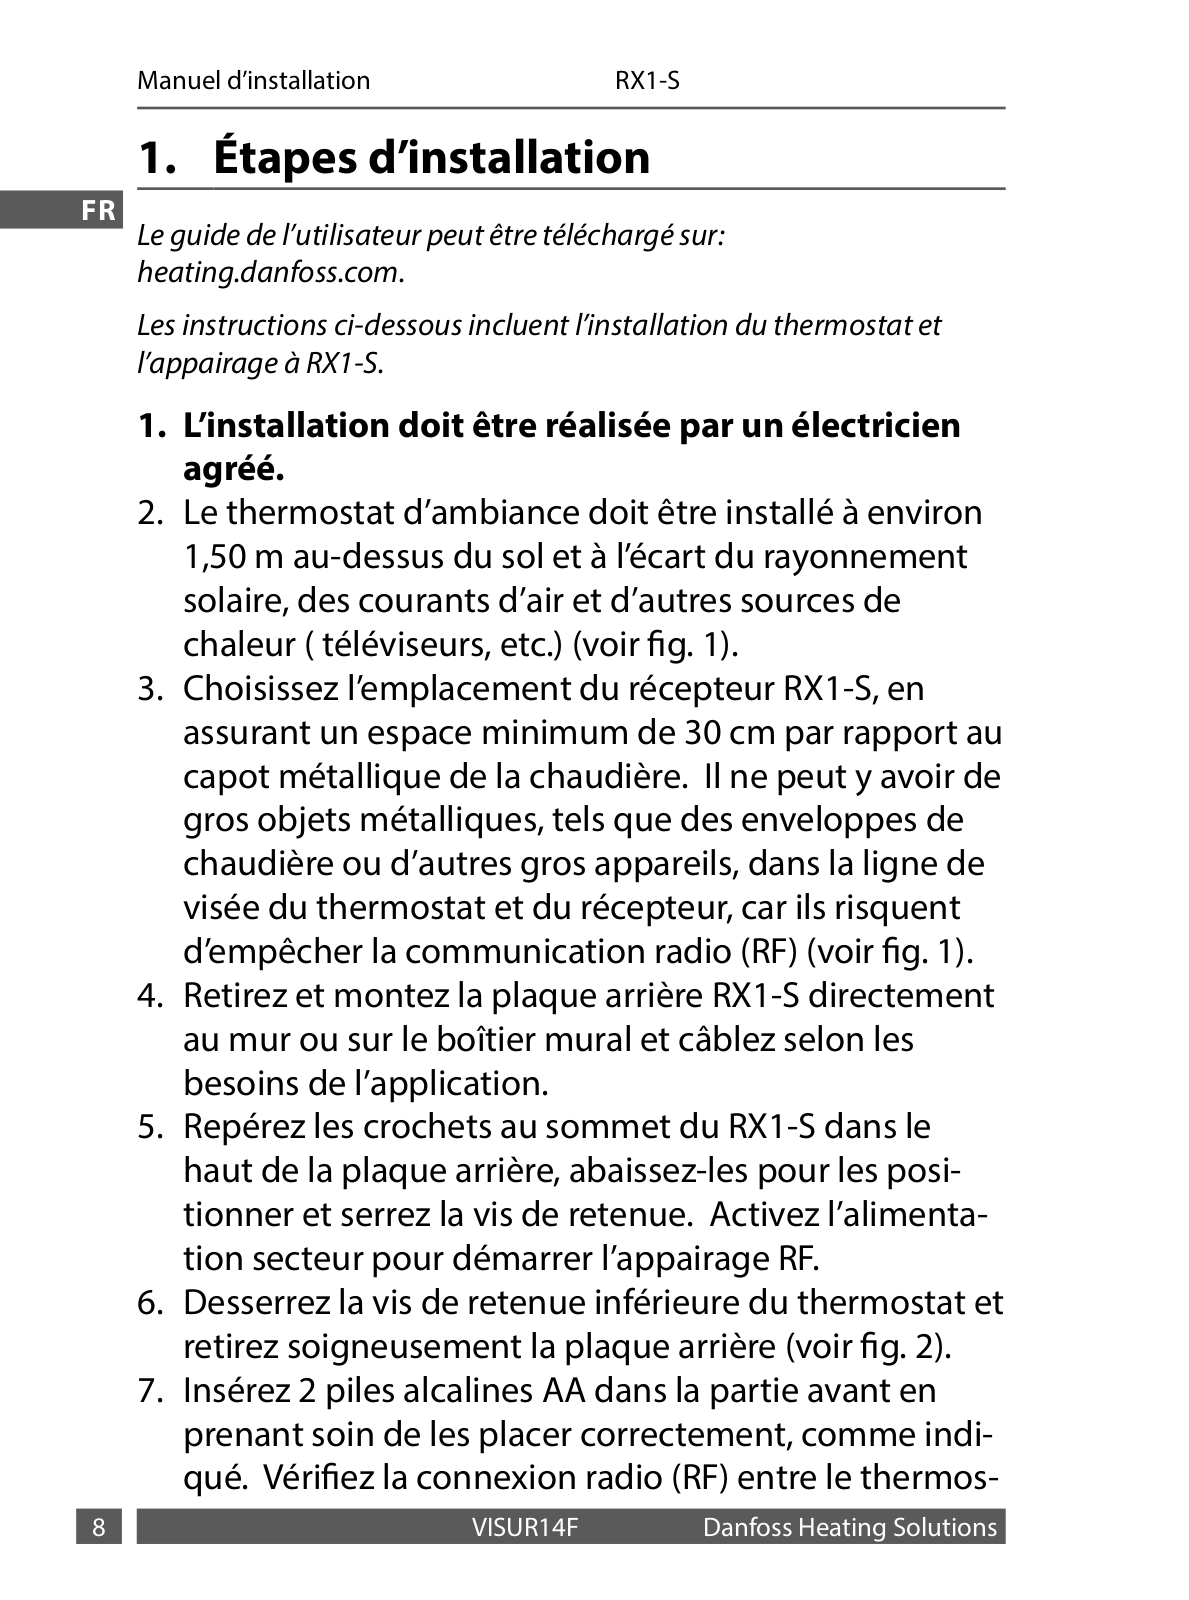
1.. Étapes d’installation

FR Le guide de l’utilisateur peut être téléchargé sur: heating.danfoss.com.

Les instructions ci-dessous incluent l’installation du thermostat et l’appairage à RX1-S.

1.L’installation doit être réalisée par un électricien agréé..

2.Le thermostat d’ambiance doit être installé à environ

1,50 m au-dessus du sol et à l’écart du rayonnement solaire, des courants d’air et d’autres sources de chaleur ( téléviseurs, etc..) (voir fig.. 1)..

3.Choisissez l’emplacement du récepteur RX1-S, en assurant un espace minimum de 30 cm par rapport au capot métallique de la chaudière.. Il ne peut y avoir de gros objets métalliques, tels que des enveloppes de chaudière ou d’autres gros appareils, dans la ligne de visée du thermostat et du récepteur, car ils risquent d’empêcher la communication radio (RF) (voir fig.. 1)..

4.Retirez et montez la plaque arrière RX1-S directement au mur ou sur le boîtier mural et câblez selon les besoins de l’application..

5.Repérez les crochets au sommet du RX1-S dans le haut de la plaque arrière, abaissez-les pour les positionner et serrez la vis de retenue.. Activez l’alimentation secteur pour démarrer l’appairage RF..

6.Desserrez la vis de retenue inférieure du thermostat et retirez soigneusement la plaque arrière (voir fig.. 2)..

7.Insérez 2 piles alcalines AA dans la partie avant en prenant soin de les placer correctement, comme indiqué.. Vérifiez la connexion radio (RF) entre le thermos-


VISUR14F

Danfoss Heating Solutions

Manuel d’installation RX1-S


tat et le récepteur RX1-S avant la fixation en position


finale (voir la section Appairage RF ci-dessous)..


FR

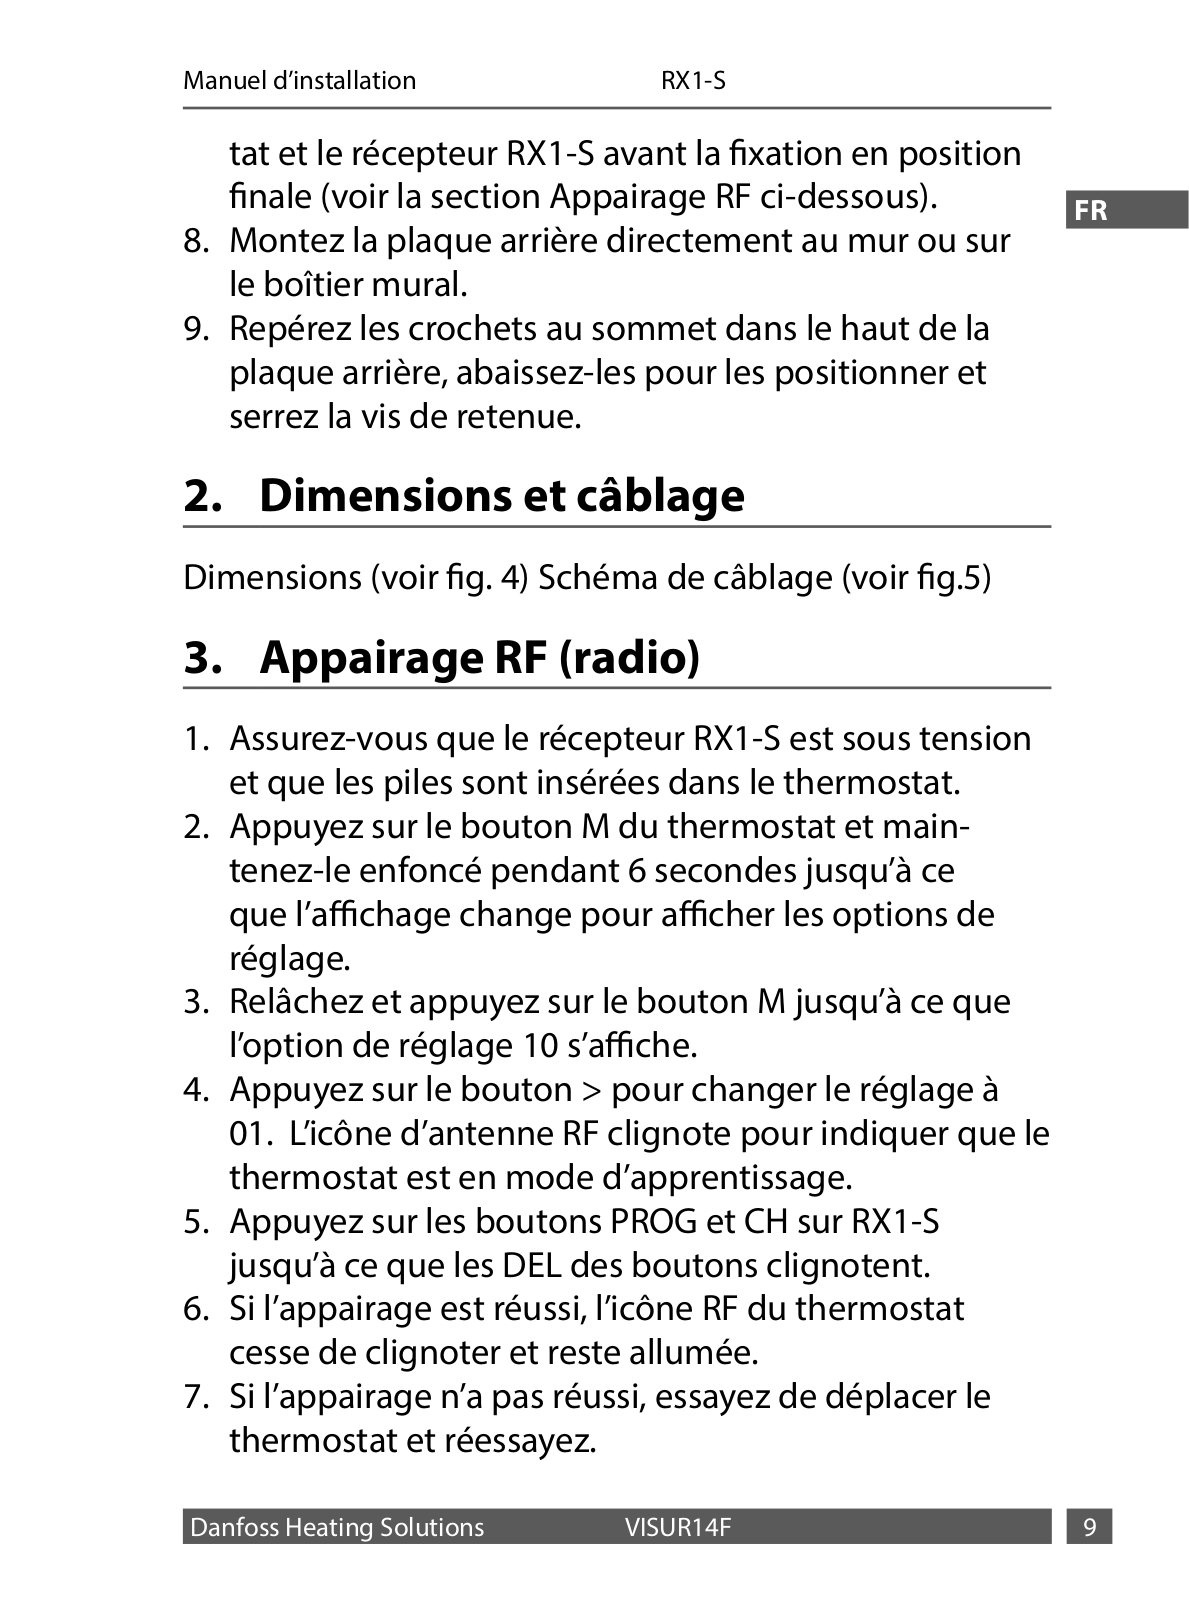
8.

Montez la plaque arrière directement au mur ou sur


le boîtier mural..


9.

Repérez les crochets au sommet dans le haut de la


plaque arrière, abaissez-les pour les positionner et


serrez la vis de retenue..


2.. Dimensions et câblage

Dimensions (voir fig.. 4) Schéma de câblage (voir fig..5)

3.. Appairage RF (radio)

1.Assurez-vous que le récepteur RX1-S est sous tension et que les piles sont insérées dans le thermostat..

2.Appuyez sur le bouton M du thermostat et main- tenez-le enfoncé pendant 6 secondes jusqu’à ce que l’affichage change pour afficher les options de réglage..

3.Relâchez et appuyez sur le bouton M jusqu’à ce que l’option de réglage 10 s’affiche..

4.Appuyez sur le bouton > pour changer le réglage à

01.. L’icône d’antenne RF clignote pour indiquer que le thermostat est en mode d’apprentissage..

5.Appuyez sur les boutons PROG et CH sur RX1-S jusqu’à ce que les DEL des boutons clignotent..

6.Si l’appairage est réussi, l’icône RF du thermostat cesse de clignoter et reste allumée..

7.Si l’appairage n’a pas réussi, essayez de déplacer le thermostat et réessayez..

Danfoss Heating Solutions

VISUR14F


Manuel d’installation RX1-S

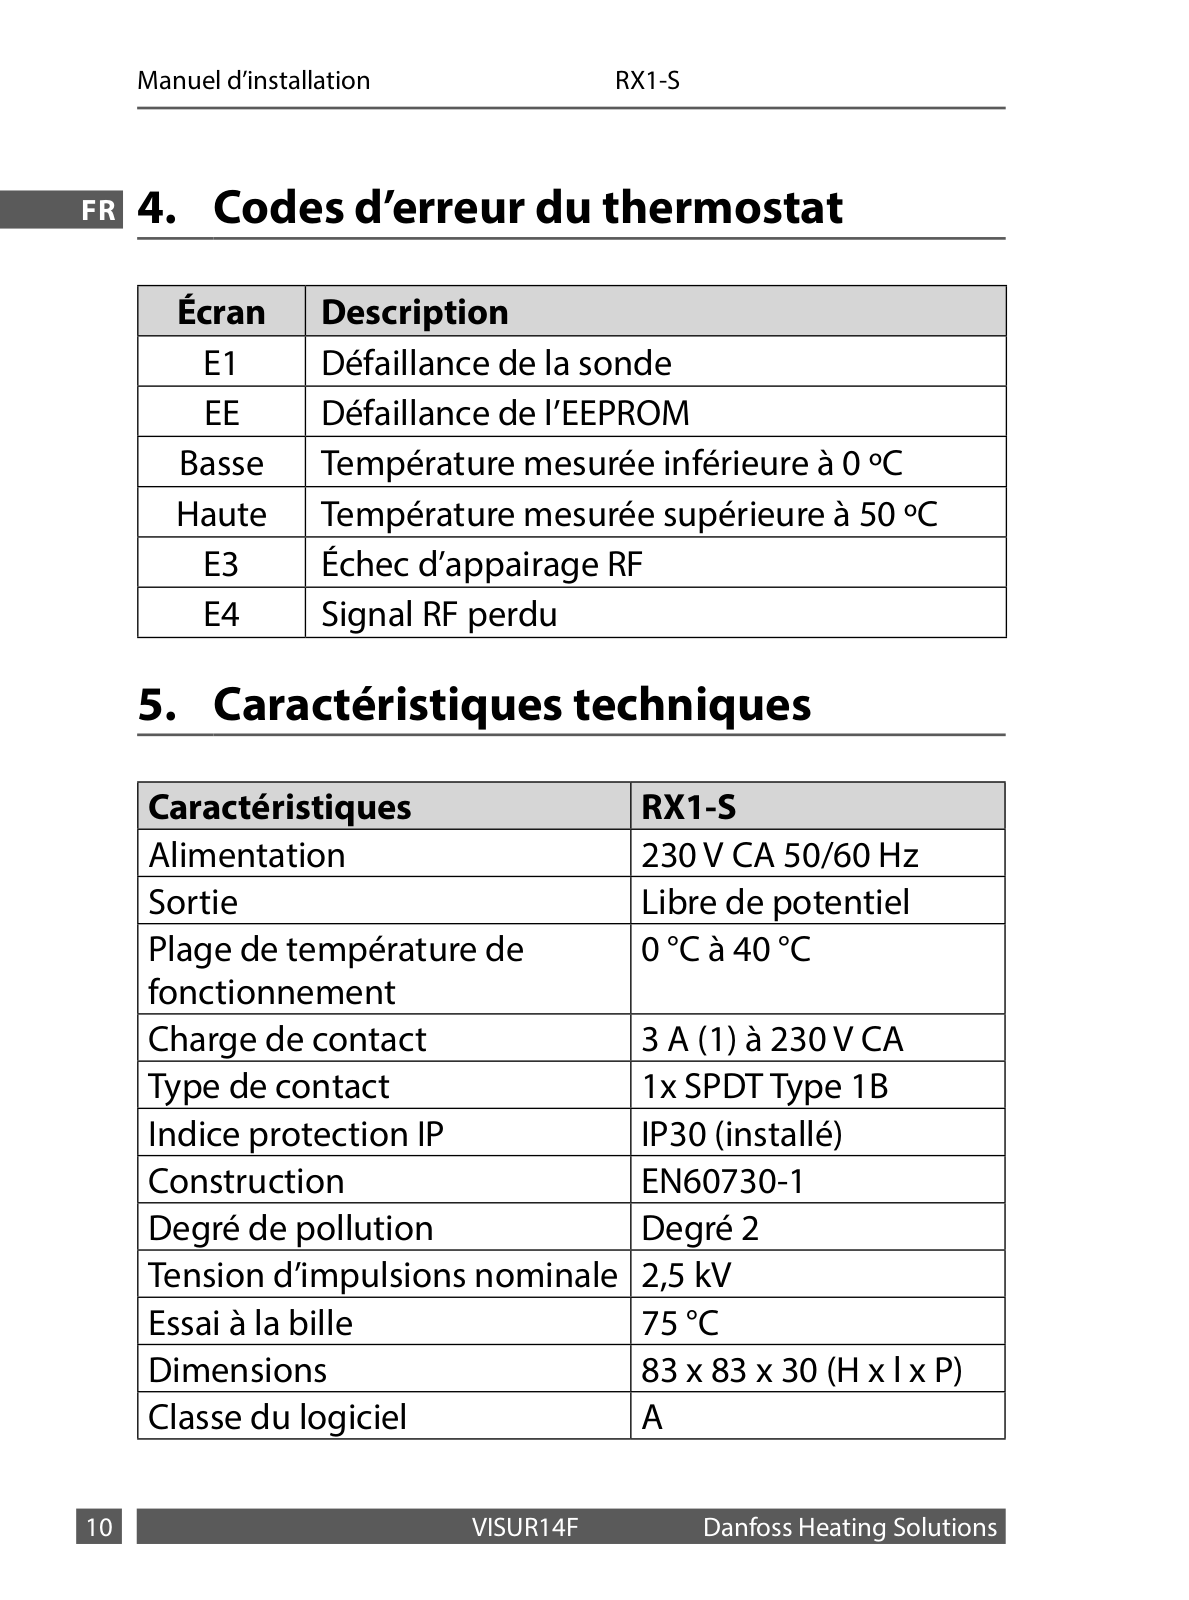
FR 4.. Codes d’erreur du thermostat

Écran

Description

E1

Défaillance de la sonde

EE

Défaillance de l’EEPROM

Basse

Température mesurée inférieure à 0 ºC

Haute

Température mesurée supérieure à 50 ºC

E3

Échec d’appairage RF

E4

Signal RF perdu

5.. Caractéristiques techniques


Caractéristiques

RX1-S


Alimentation

230 V CA 50/60 Hz


Sortie

Libre de potentiel


Plage de température de

0 °C à 40 °C


fonctionnement


Charge de contact

3 A (1) à 230 V CA


Type de contact

1x SPDT Type 1B


Indice protection IP

IP30 (installé)


Construction

EN60730-1


Degré de pollution

Degré 2


Tension d’impulsions nominale

2,5 kV


Essai à la bille

75 °C


Dimensions

83 x 83 x 30 (H x l x P)


Classe du logiciel

A


VISUR14F

Danfoss Heating Solutions

Manuel d’installation

RX1-S


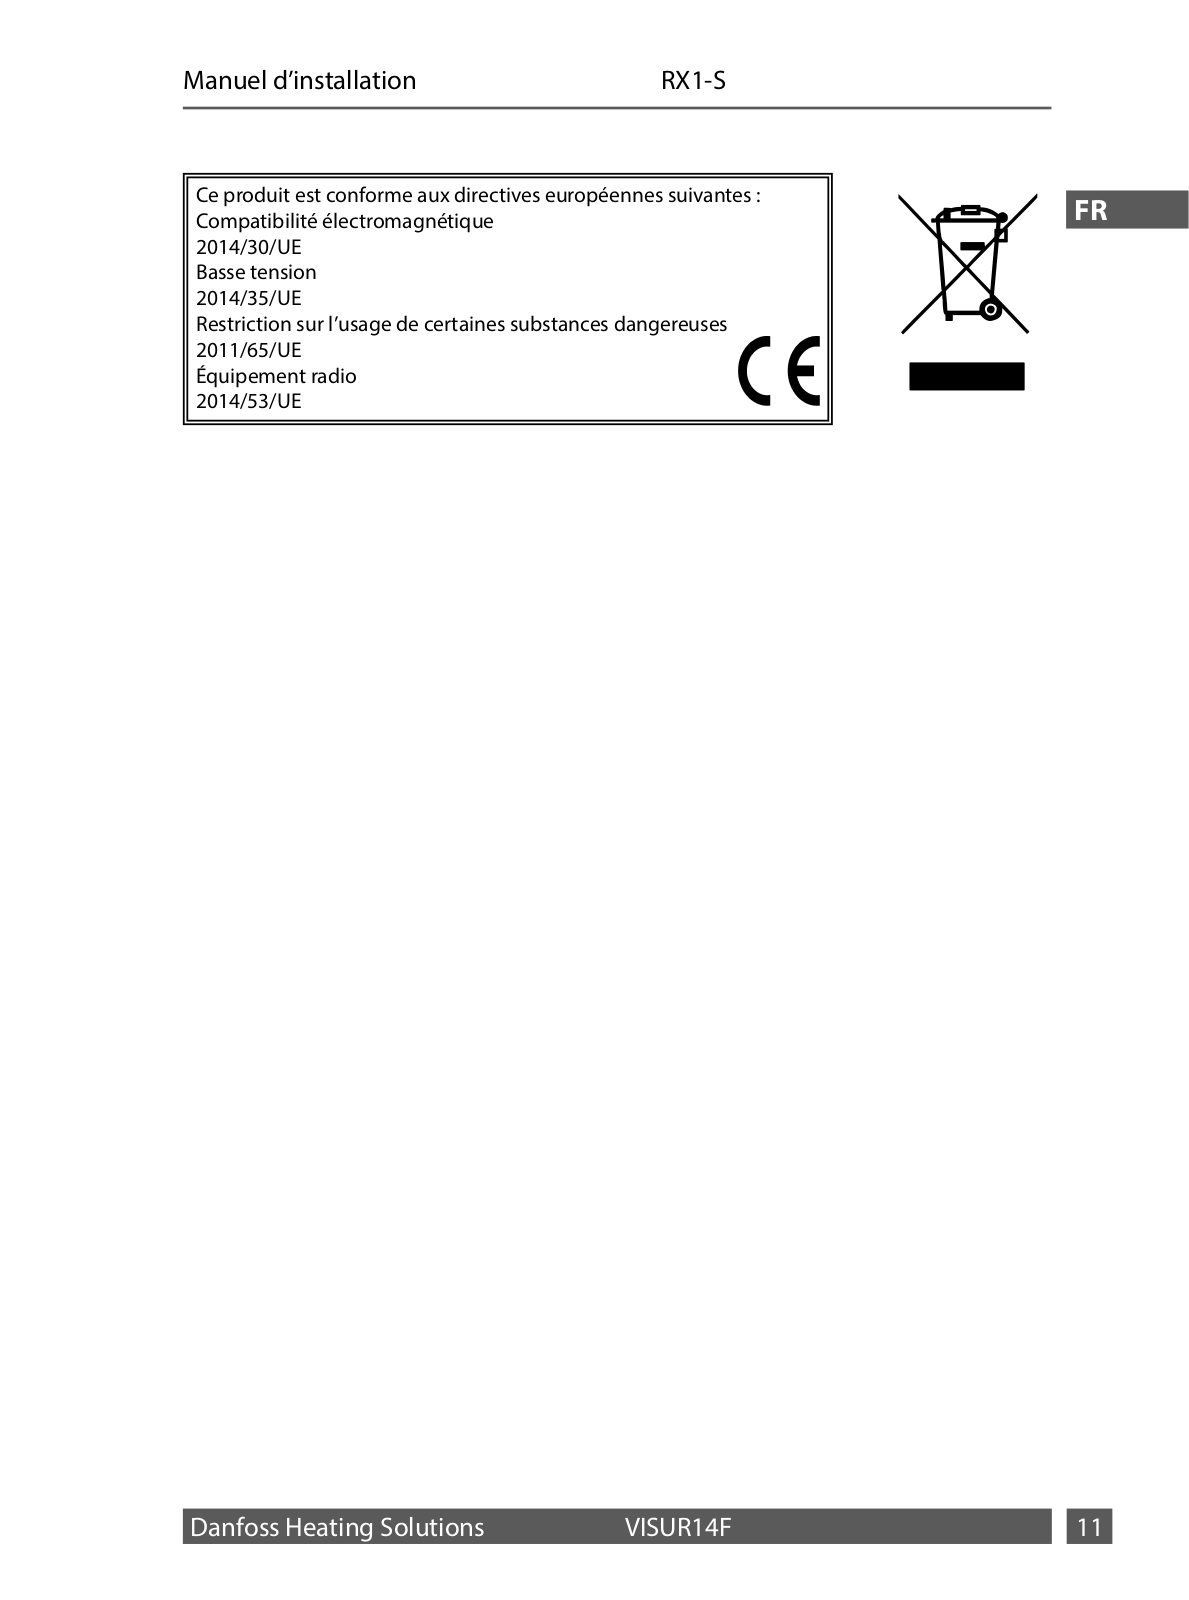
Ce produit est conforme aux directives européennes suivantes :


FR

Compatibilité électromagnétique


2014/30/UE


Basse tension


2014/35/UE


Restriction sur l’usage de certaines substances dangereuses


2011/65/UE


Équipement radio


2014/53/UE


Danfoss Heating Solutions

VISUR14F


Installationsanleitung RX1-S

1.. Einbauschritte

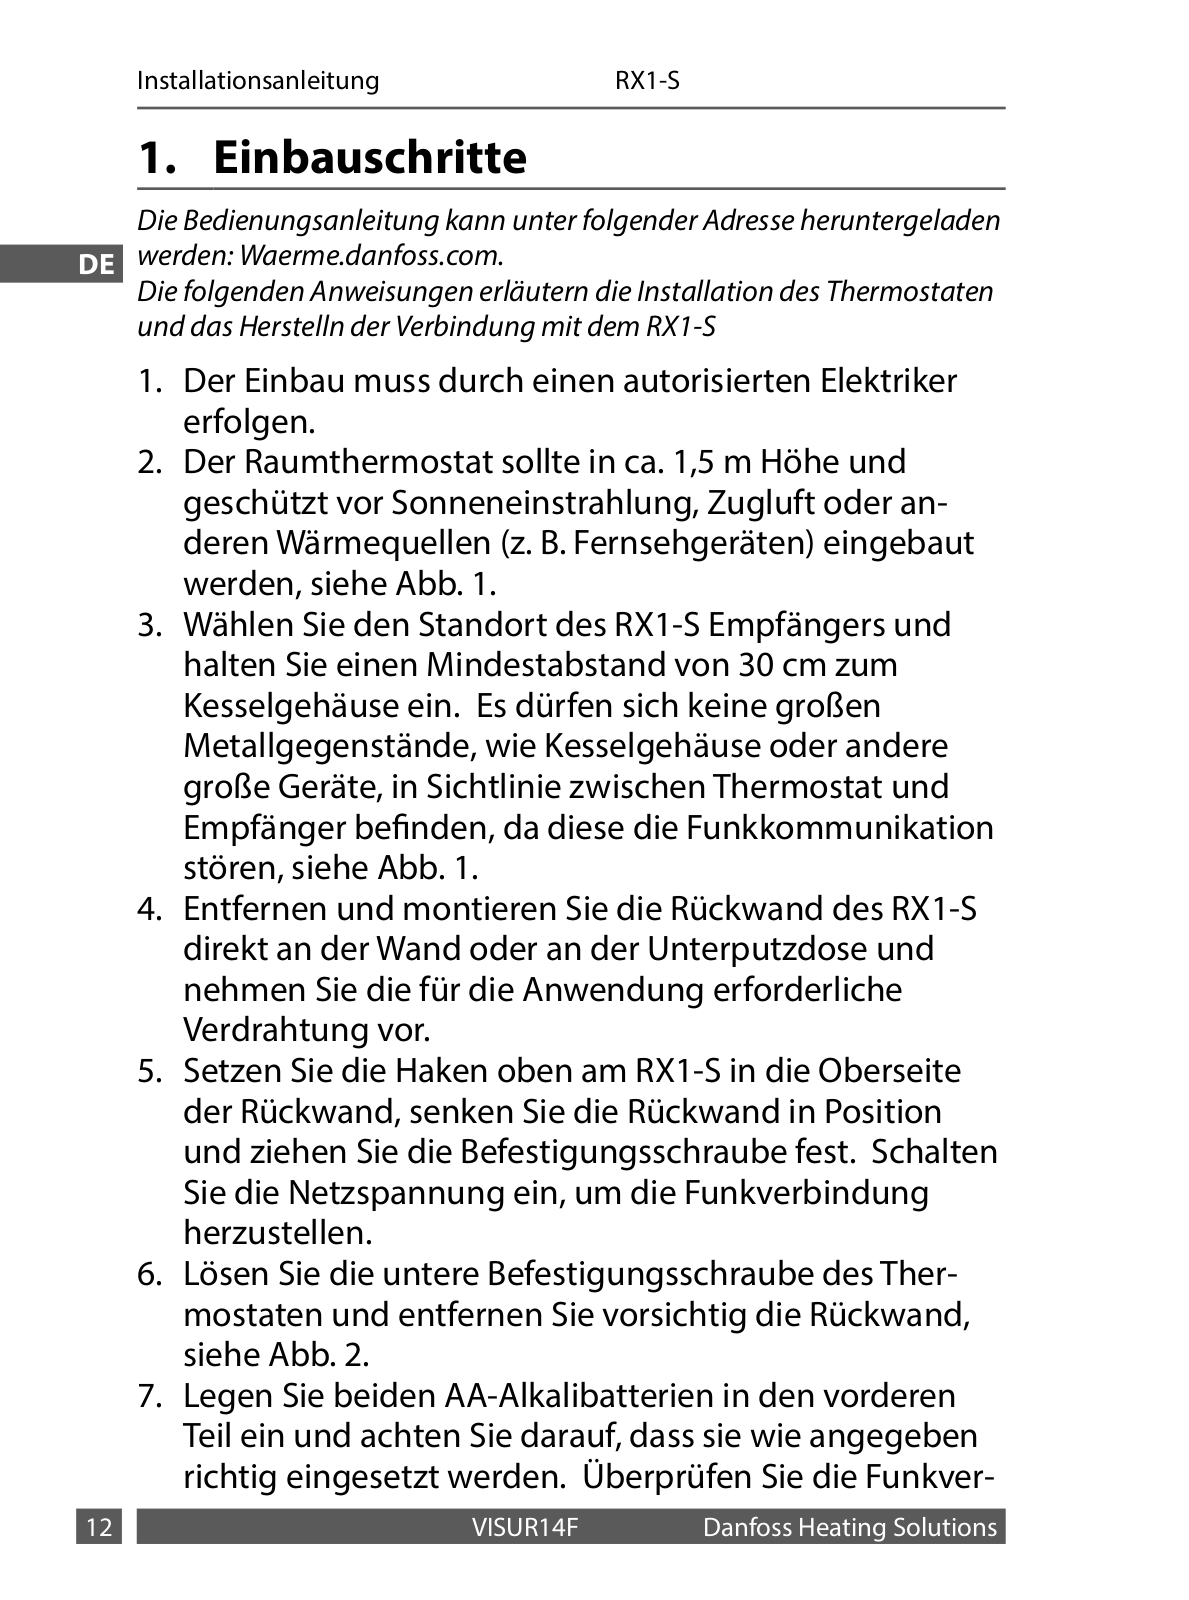
Die Bedienungsanleitung kann unter folgender Adresse heruntergeladen

DE werden: Waerme.danfoss.com.

Die folgenden Anweisungen erläutern die Installation des Thermostaten und das Herstelln der Verbindung mit dem RX1-S

1.Der Einbau muss durch einen autorisierten Elektriker erfolgen..

2.Der Raumthermostat sollte in ca.. 1,5 m Höhe und geschützt vor Sonneneinstrahlung, Zugluft oder anderen Wärmequellen (z.. B.. Fernsehgeräten) eingebaut werden, siehe Abb.. 1..

3.Wählen Sie den Standort des RX1-S Empfängers und halten Sie einen Mindestabstand von 30 cm zum Kesselgehäuse ein.. Es dürfen sich keine großen Metallgegenstände, wie Kesselgehäuse oder andere große Geräte, in Sichtlinie zwischen Thermostat und Empfänger befinden, da diese die Funkkommunikation stören, siehe Abb.. 1..

4.Entfernen und montieren Sie die Rückwand des RX1-S direkt an der Wand oder an der Unterputzdose und nehmen Sie die für die Anwendung erforderliche Verdrahtung vor..

5.Setzen Sie die Haken oben am RX1-S in die Oberseite der Rückwand, senken Sie die Rückwand in Position und ziehen Sie die Befestigungsschraube fest.. Schalten Sie die Netzspannung ein, um die Funkverbindung herzustellen..

6.Lösen Sie die untere Befestigungsschraube des Thermostaten und entfernen Sie vorsichtig die Rückwand, siehe Abb.. 2..

7.Legen Sie beiden AA-Alkalibatterien in den vorderen Teil ein und achten Sie darauf, dass sie wie angegeben richtig eingesetzt werden.. Überprüfen Sie die Funkver-


VISUR14F

Danfoss Heating Solutions

Installationsanleitung

RX1-S


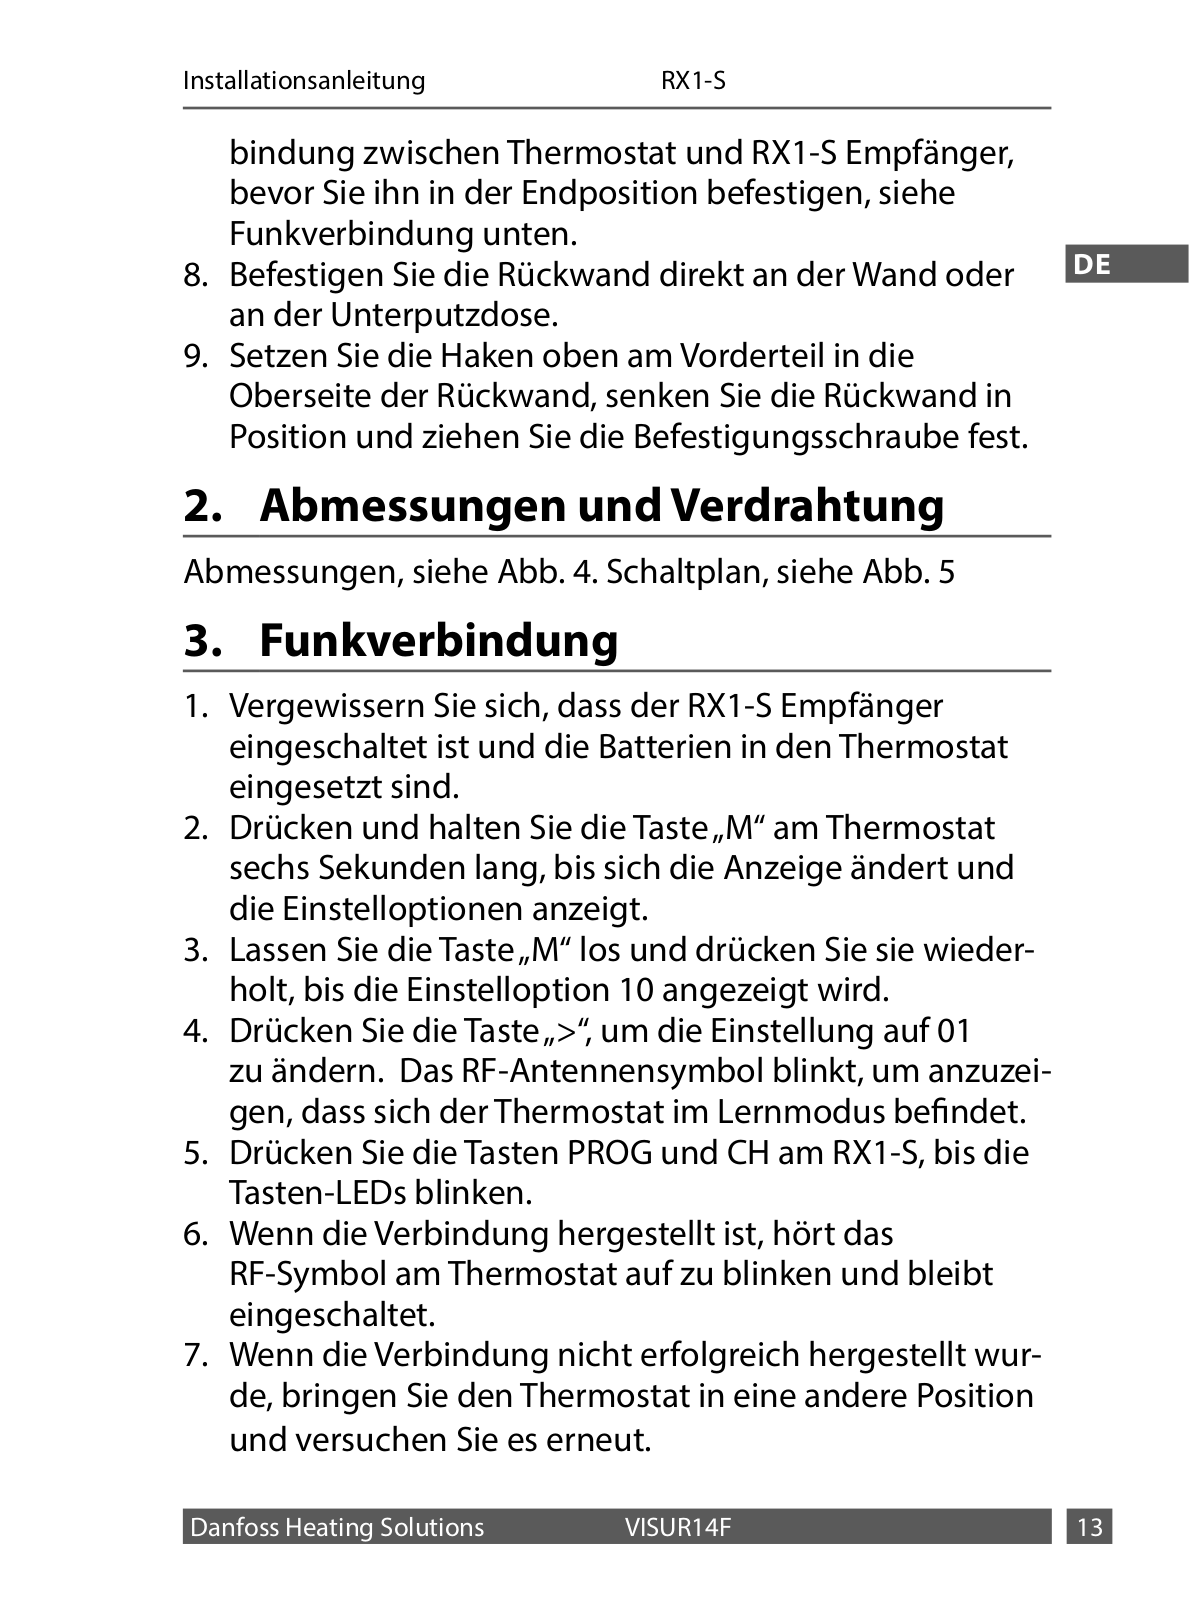
bindung zwischen Thermostat und RX1-S Empfänger, bevor Sie ihn in der Endposition befestigen, siehe Funkverbindung unten..

8. Befestigen Sie die Rückwand direkt an der Wand oder DE an der Unterputzdose..

9.Setzen Sie die Haken oben am Vorderteil in die Oberseite der Rückwand, senken Sie die Rückwand in Position und ziehen Sie die Befestigungsschraube fest..

2.. Abmessungen und Verdrahtung

Abmessungen, siehe Abb.. 4.. Schaltplan, siehe Abb.. 5

3.. Funkverbindung

1.Vergewissern Sie sich, dass der RX1-S Empfänger eingeschaltet ist und die Batterien in den Thermostat eingesetzt sind..

2.Drücken und halten Sie die Taste„M“ am Thermostat sechs Sekunden lang, bis sich die Anzeige ändert und die Einstelloptionen anzeigt..

3.Lassen Sie die Taste„M“ los und drücken Sie sie wiederholt, bis die Einstelloption 10 angezeigt wird..

4.Drücken Sie die Taste„>“, um die Einstellung auf 01

zu ändern.. Das RF-Antennensymbol blinkt, um anzuzeigen, dass sich der Thermostat im Lernmodus befindet..

5.Drücken Sie die Tasten PROG und CH am RX1-S, bis die Tasten-LEDs blinken..

6.Wenn die Verbindung hergestellt ist, hört das RF-Symbol am Thermostat auf zu blinken und bleibt eingeschaltet..

7.Wenn die Verbindung nicht erfolgreich hergestellt wurde, bringen Sie den Thermostat in eine andere Position und versuchen Sie es erneut..

Danfoss Heating Solutions

VISUR14F


Installationsanleitung

RX1-S


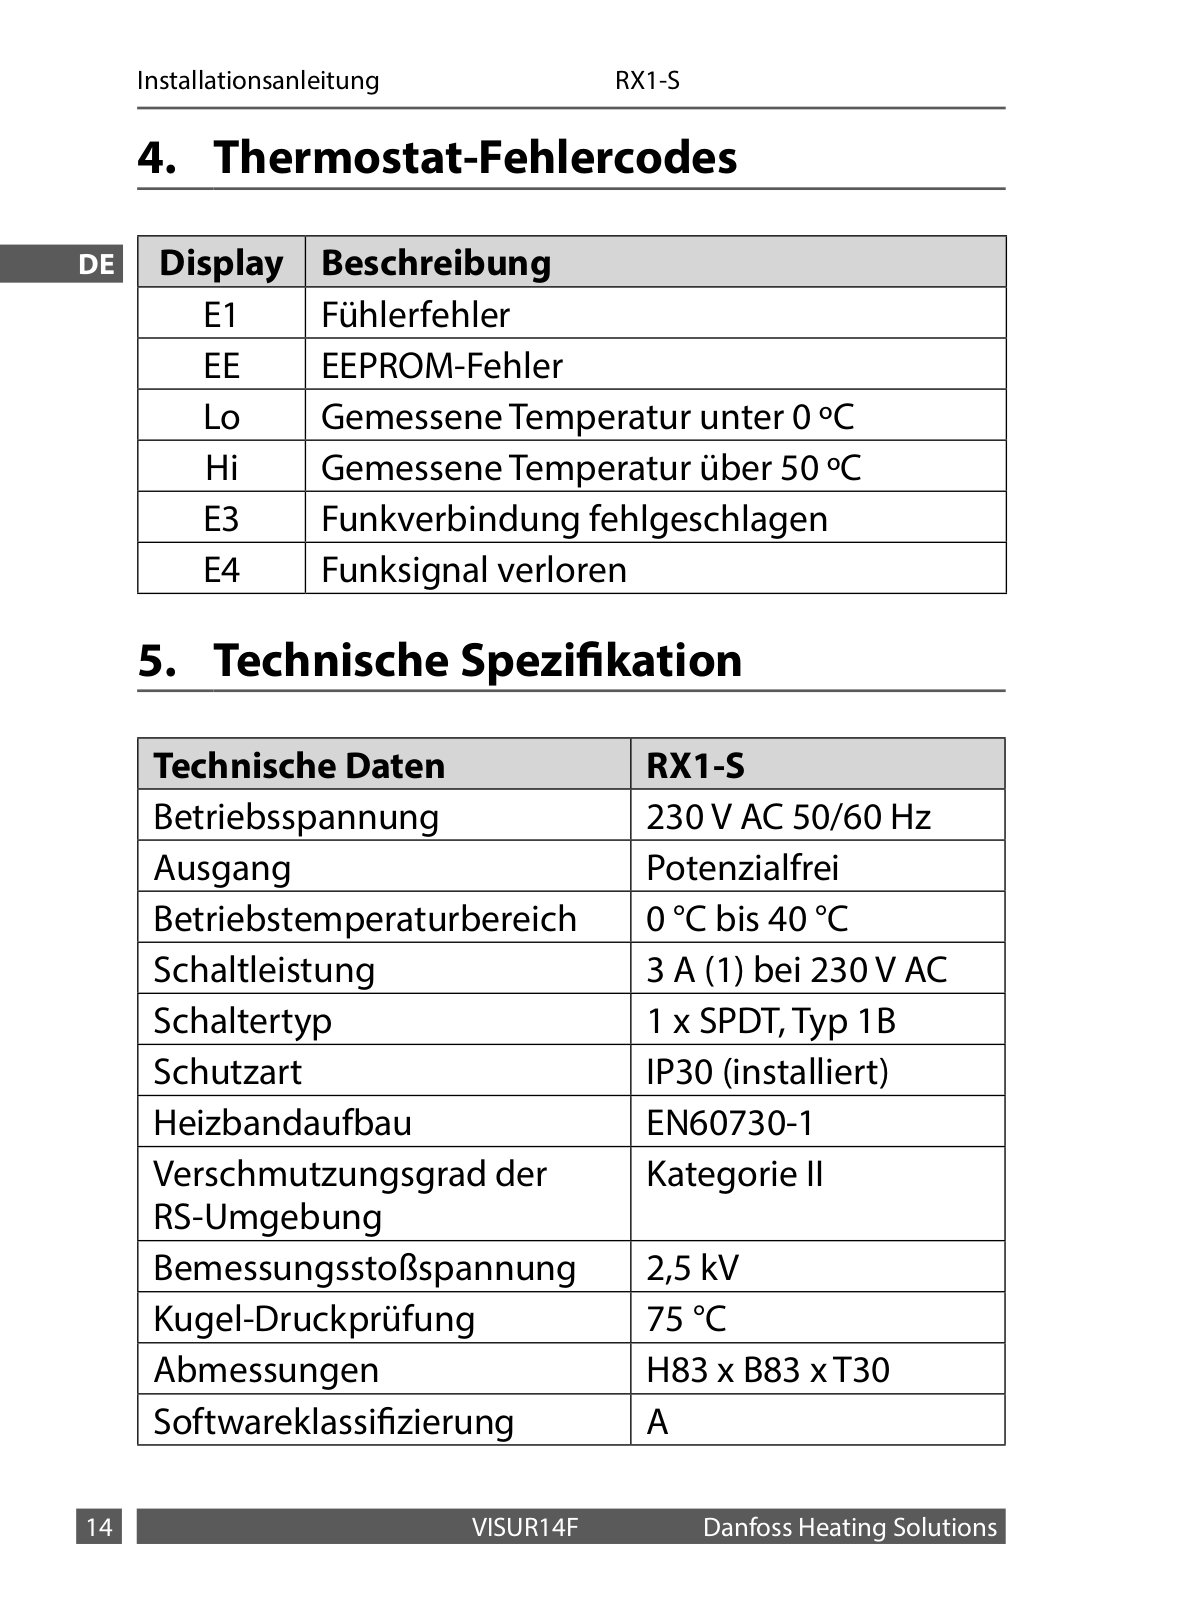
4.. Thermostat-Fehlercodes


DE


Display

Beschreibung


E1

Fühlerfehler


EE

EEPROM-Fehler


Lo

Gemessene Temperatur unter 0 ºC


Hi

Gemessene Temperatur über 50 ºC


E3

Funkverbindung fehlgeschlagen


E4

Funksignal verloren

5.. Technische Spezifikation


Technische Daten

RX1-S


Betriebsspannung

230 V AC 50/60 Hz


Ausgang

Potenzialfrei


Betriebstemperaturbereich

0 °C bis 40 °C


Schaltleistung

3 A (1) bei 230 V AC


Schaltertyp

1 x SPDT, Typ 1B


Schutzart

IP30 (installiert)


Heizbandaufbau

EN60730-1


Verschmutzungsgrad der

Kategorie II


RS-Umgebung


Bemessungsstoßspannung

2,5 kV


Kugel-Druckprüfung

75 °C


Abmessungen

H83 x B83 x T30


Softwareklassifizierung

A


VISUR14F

Danfoss Heating Solutions

Loading...
+ 32 hidden pages