

Electronic intelligent dial setting
RET-MD
thermostat with delay start
User & Installation Instructions
®
Certification Mark

INDEX
Installation 3-12
Speci cation 3
Mounting 4-5
Wiring 6-7
DIL switch settings 8-9
Mounting (continued) 10
Locking & Limiting 11
Resetting the unit 12
2
User Instructions 14-18
What is a room thermostat 14-15
Index
Display 16
Setting the temperature 16
Understanding your thermostat 17-18
Installation Instructions
Features RET-MD
Power supply 230 Vac ± 15%, 50/60 Hz
Switching action 1 SPDT volt free Type 1B
Switch rating 10-264 Vac, 3 (1) A
Temperature range 5-30°C
Maximum ambient temp 45°C
Control pollution Degree 2
Design standard EN 60730-2-9
Rated impulse voltage 2.5kV
Ball hardness test 75°C
Dimensions (mm) 85 wide x 86 high x 42 deep
Speci cation
3
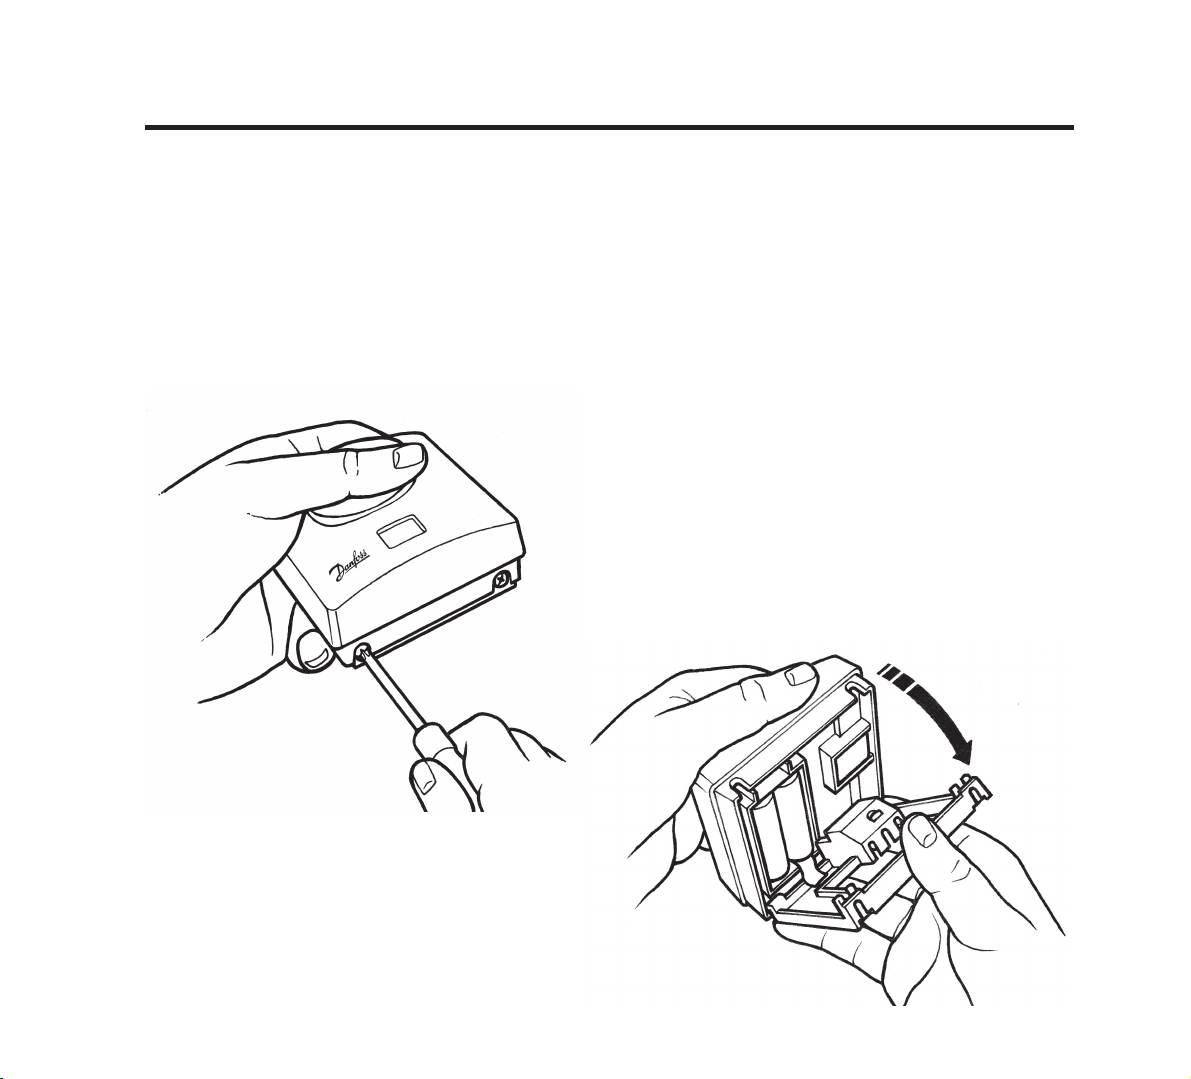
Mounting
Please Note:
This product should only be installed by a quali ed electrician or
competent heating installer and should be in accordance with the
current edition of the IEEE wiring regulations.
Mounting
4
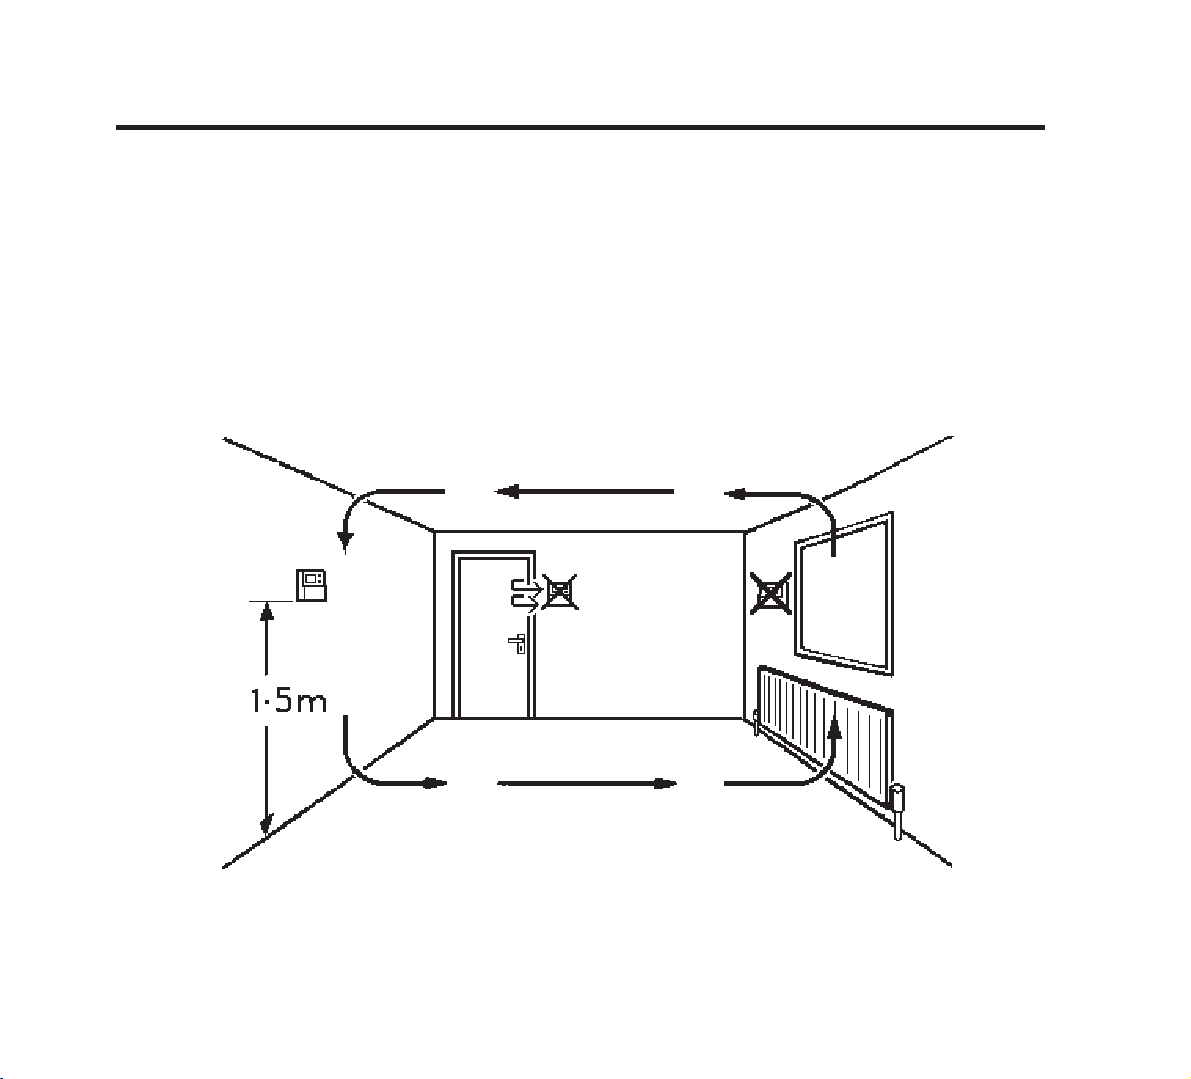
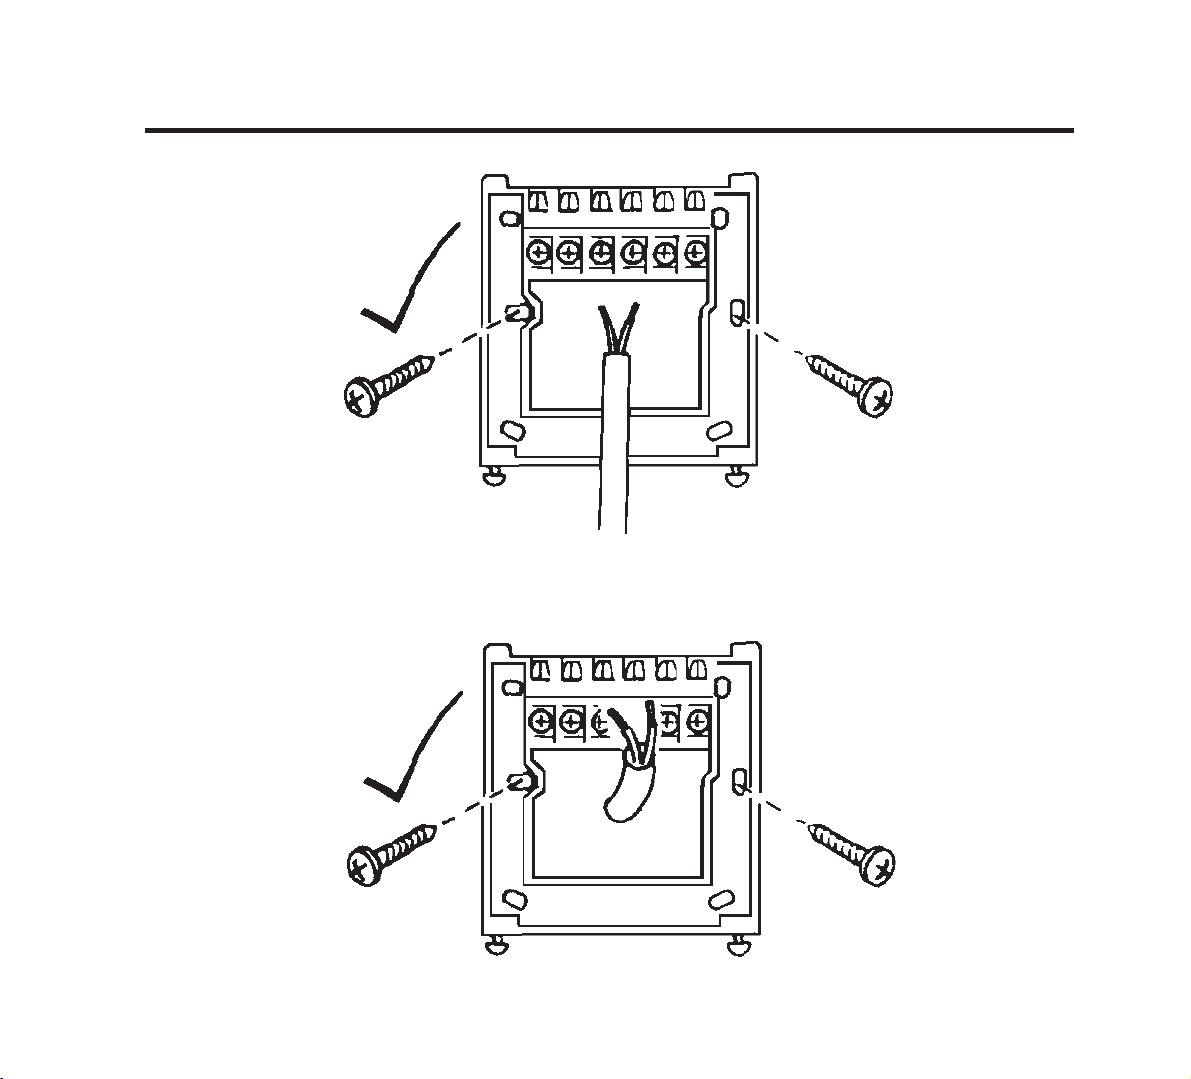
Mounting
Fix at a height of 1.5m approx from the oor, away from
draughts or heat sources such as radiators, open res or direct
sunlight.
Mounting
5
Wiring
Wiring
6

Wiring
Note: For RET-MD live supply is from the Time Control output.
Wiring
7

DIL switch settings
Slide the DIL switches to the settings required.
Delay Start
disabled
ON/OFF
6 CYCLES
°F
ON/OFF - boiler switches ON when below set temperature and
OFF when above.
CHRONO -
DIL switch settings
regular intervals to maintain a set temperature, achieving a
energy saving feature which res the boiler at
constant ambient environment for the user.
•
use 6 Cycles for radiator systems.
Delay Start
enabled
CHRONO
3 CYCLES
°C
8
•
use 3 Cycles for under oor heating.

DELAY START -
energy saving feature which automatically delays
the heating start time, depending on how close to set-point
the ambient room temperature already is (see chart below).
For example, during milder weather the heating start time
can be delayed to avoid wasting fuel by bringing rooms up to
temperature earlier than necessary.
45.0
40.0
35.0
30.0
25.0
20.0
Time delay after time control
switch on, minutes
15.0
10.0
5.0
Time delay after time control switch-on, minutes
0.0
0.0 1.0 2.0 3.0 4.0 5.0 6.0 7.0
Temperature below thermostat setting, ˚K
Temperature below thermostat setting, °K
DIL switch settings
9

Mounting (continued)
Mounting
10

Locking & Limiting
Locking - setting the thermostat at a temperature which
cannot be altered by the user.
Limiting - allowing the user to alter the temperature within
a prede ned range, which is less than the full range of the
product (i.e. between 18-22°).
Locking & Limiting
11

Resetting the unit
When power is rst applied, remove the dial and press the
RESET button for 2 seconds.
RESET
button
Resetting the unit
12

13

What is a room thermostat?
... an explanation for householders
A room thermostat simply switches the heating system on and o
as necessary. It works by sensing the air temperature, switching on
the heating when the air temperature falls below the thermostat
setting, and switching it o once this set temperature has been
reached.
Turning a room thermostat to a higher setting will not make the
room heat up any faster. How quickly the room heats up depends
on the design of the heating system, for example, the size of boiler
and radiators.
Neither does the setting a ect how quickly the room cools down.
14
Turning a room thermostat to a lower setting will result in the room

being controlled at a lower temperature, and saves energy.
The heating system will not work if a timeswitch or programmer has
switched it o .
The way to set and use your room thermostat is to nd the lowest
temperature setting that you are comfortable with, and then leave it
alone to do its job. The best way to do this is to set the room thermostat to a low temperature – say 18°C – and then turn it up by one degree each day until you are comfortable with the temperature. You
won’t have to adjust the thermostat further. Any adjustment above
this setting will waste energy and cost you more money.
If your heating system is a boiler with radiators, there will usually be
only one room thermostat to control the whole house. But you can
have di erent temperatures in individual rooms by installing thermostatic radiator valves (TRVs) on individual radiators. If you don’t
have TRVs, you should choose a temperature that is reasonable for
the whole house. If you do have TRVs, you can choose a slightly
higher setting to make sure that even the coldest room is comfortable, then prevent any overheating in other rooms by adjusting the
TRVs.
Room thermostats need a free ow of air to sense the temperature,
so they must not be covered by curtains or blocked by furniture.
Nearby electric res, televisions, wall or table lamps may prevent the
thermostat from working properly.
15

User Instructions
Display
The LCD displays actual room temperature until the setting dial
is moved.
Setting the temperature
Turn setting dial to required temperature. The selected
temperature will ash in the LCD to signify it is showing set
temperature.
16
After a short period the display stops ashing and shows
actual room temperature.
Display / Setting the temperature

Understanding your thermostat
RESET button
(behind dial)
Green LED thermostat
power on
Red LED heating in
operation
(LED ashes
in delay and
save modes)
Understanding your thermostat
SAVE
button
Temperature display LCD
17

• If the green LED is lit the Time Control is activated.
• If the red LED is lit constantly, the heating is switched on.
• If the red LED is ashing, the Delay Start function is in
operation.
• If the Save button is pressed while the heating is on,
the Delay Start function will start. This can save energy
by switching the heating o once the room is up to
temperature for the duration of the delay period (refer to
Delay Chart on page 9). Pressing the Save button a second
time will return the thermostat to normal operation and
the heating will start.
18
• If the green LED is on, but the red LED is o , the room
Understanding your thermostat
temperature has been reached and the thermostat is
satis ed. If more heat is required turn the setting dial to
increase the set temperature.

19

For problems relating to your heating controls ...
Visit our website:
www.danfoss-randall.co.uk
Email our technical department:
drl_technical@danfoss.com
Call our technical department
0845 121 7505
(8.45-5.15 Mon-Thurs, 8.45-4.45 Fri)
20
Danfoss Randall Ltd
Ampthill Road
Bedford
MK42 9ER
Tel: 01234 364621
Fax: 01234 219705
Part No 25695v06 10/07
 Loading...