

Page 1

Instrument for the Balancing of Heating Systems
PFM 3000
User Guide
VUE1V102
Page 2

PFM 3000
Page 3

PFM 3000
Content
Content
Introduction
Invaluable Advantages of PFM 3000
Important User Notice
Putting the Instrument into Operation
Battery Charging
Deaeration of Connecting Tubes
PFM 3000 Zero Measuring Correction
Functions of Keys on the Instrument's
Keyboard
Measuring with PFM 3000
Measuring Flow in the Fittings Not Saved in the
PFM 3000 Memory ..................................
Heating Calculations
............................................
........................................
.................
...............................
...............
....................................
....................
................
...........................................
..........................
...............................
Calculation of the Fitting Presetting for Requested
Flow ...............................................
Calculation of the Pressure Drop for Requested
3
flow ................................................
5
Data Record
6
6
6
6
7
Processing Projects
7
7
Measurements Necessary for the Calculation of
8Language Changing ..................................
Project Balancing ...................................
8Real Time Clock Setting ..............................
9Automatic Shut OFF ..................................
9Display Backlight Time ...............................
10Pressure Units ......................................
Balance Calculation of the Project with a Pressure
10Flow Units ..........................................
Input in the Middle ...................................
10Measuring Filter .....................................
Communication with a Computer
10Valve Selection .....................................
Data Processing and Displaying Program - User
11Valve Presetting Change .............................
software PFM 3000 ..................................
11Measured Medium ..................................
11
11Measuring Without Project ...........................
11System Overpressure Measuring .....................
12Differential Pressure and Flow Measuring .............
Maintenance Instructions
Parts of the Delivery
12
Technical Specifications
13Temperature Measuring .............................
PFM 3000 Menu
13
.......................................
...............................
..................
..........................
...............................
...........................
....................................
13
13
13
13Record Preparing ...................................
14Start of Recording ...................................
15Full Data Memory and Low Battery ....................
15End of Recording ...................................
15
16Creating a New Project ..............................
17Project without a Common Valve .....................
17
18Balance Calculation of the Project ....................
18Results of Project Balancing ..........................
18Project Balancing Check .............................
20
21
21
21Minimum PC Requirements ..........................
21Software Installation .................................
21Operating the Program ..............................
21Measured Data Processing ..........................
23
23
25
27
3
Page 4

PFM 3000
4
Page 5

PFM 3000
Introduction
PFM 3000 has been designed for the servicing and hydraulic
balancing of heating and cooling systems. It is equipped with
a number of added built-in functions that make your work
enjoyable.
The instrument is small. Its hard metal case lets you use it
even under severe outdoor conditions. Even if you spill
water on the case, PFM 3000 stays intact. A delivery
includes standard RS232 interface and user software for the
processing of gathered data.
A basic modulus of the instrument is a differential
manometer with digital pressure processing. It is equipped
with a built-in pressure sensor. The manometer combines
the advantages of digital technology and compensates
temperature dependence and the non-linear character of
measuring. It makes possible the measuring of overpressure
or underpressure in a system and the measuring of
differential pressure. Using pressure difference at a
balancing or measuring component you can measure flow at
particular branches of a system and balance the heating
system. Excellent features of the manometer enable further
accurate measuring.
An external thermometer modulus is a part of the basic
measuring equipment of the instrument. It enables to
measure the temperature of a medium. The thermometer
connects to the RS232 interface connector. One finds it easy
to work with, as its dimensions are compatible with the
dimensions of the measuring needles of balancing valves.
The measuring spike of the thermometer should be plugged
into an output for the measuring of differential flow. Along
with other data temperature is being recorded in the
instrument’s memory.
A built-in flow meter modulus is an indispensable instrument
for the balancing of hydraulic systems. It calculates flow at a
particular branch of a heating system out of pressure
difference at a measuring element. The memory of the
instrument keeps the characteristics of balancing and
measuring elements of established producers. You can
choose a particular type in the instrument’s menu.
There is an automatic flow correction function for flow
measuring in systems with non-freezing additives or cooling
systems.
A valve presetting calculation modulus is an revelsal part of
the flow meter modulus. The output of the valve presetting
calculation function is valve presetting for required flow. The
function calculates valve presetting using valve
characteristics stored in the memory. Therefore you always
receive the right value of presetting.
An integrated recording modulus including a real time circuit
is another positive feature of the instrument. The time circuit
is all time powered from apparatus lithium battery.
The modulus helps keep records from project realisation or
diagnose time actions in a heating system. The memory
stores pressure, flow, temperature, chosen valve, valve
presetting and measurement identification data, which helps
you process and evaluate results on your PC. While
recording measured data with a longer recording period, the
instrument switches automatically to the sleep mode. This is
enabled by a long-term recording function with energy
coming from an internal source.
You can record data at different points of the heating system
and have the current state of the system processed in your
office. You can also choose a periodical recording. The
5
Page 6
PFM 3000
analysis of time actions will help you choose an optimum
system solution.
To download recorded data into your PC you can use
software included in the delivery. The software makes it
possible to display data in a chart or graph. They can also
be printed. Data can be exported in standard PC formats
and processed by a text editor, chart processor or database
programs.
A heating system balancing modulus seems to be the most
important component for the user. The modulus calculates
the balancing of the system with many branches. It makes it
possible to regulate even a complicated heating system
including a common valve. A sophisticated calculation
method optimises hydraulic ratios in the system and
produces a project aiming at minimum energy loss in the
system. The method reduces substantially the time needed
for balancing. The function calculates valve presetting
directly using the characteristics stored in the memory.
Therefore you always receive the right presetting value.
Invaluable Advantages of PFM 3000
y Mechanical design
y Integrated pressure sensor
y Robust metal case
y Water resistant
y Big 4-line display
y Illuminated display
y Well-arranged 16-key foil keyboard
y Chargeable lithium battery
Important User Notice
If you have previously used the instrument to measure liquid
medium, do not expose it to temperature lower than the
point of congelation of measured liquid. The pressure sensor
may be damaged.
Inputs for measuring tubing are equipped with sintered filters
- filtering capacity 50 µm. When measuring in systems with a
lot of dirt, filters get fouled. If the instrument's display
indicates high pressure or one of pressure inputs does not
work after measuring tubing have been disconnected,
replace the filters.
Putting the Instrument into Operation
PFM 3000 is delivered with precharged lithiun battery and is
ready to run immediately. Please check apparatus clock
after first switch on.
Battery Charging
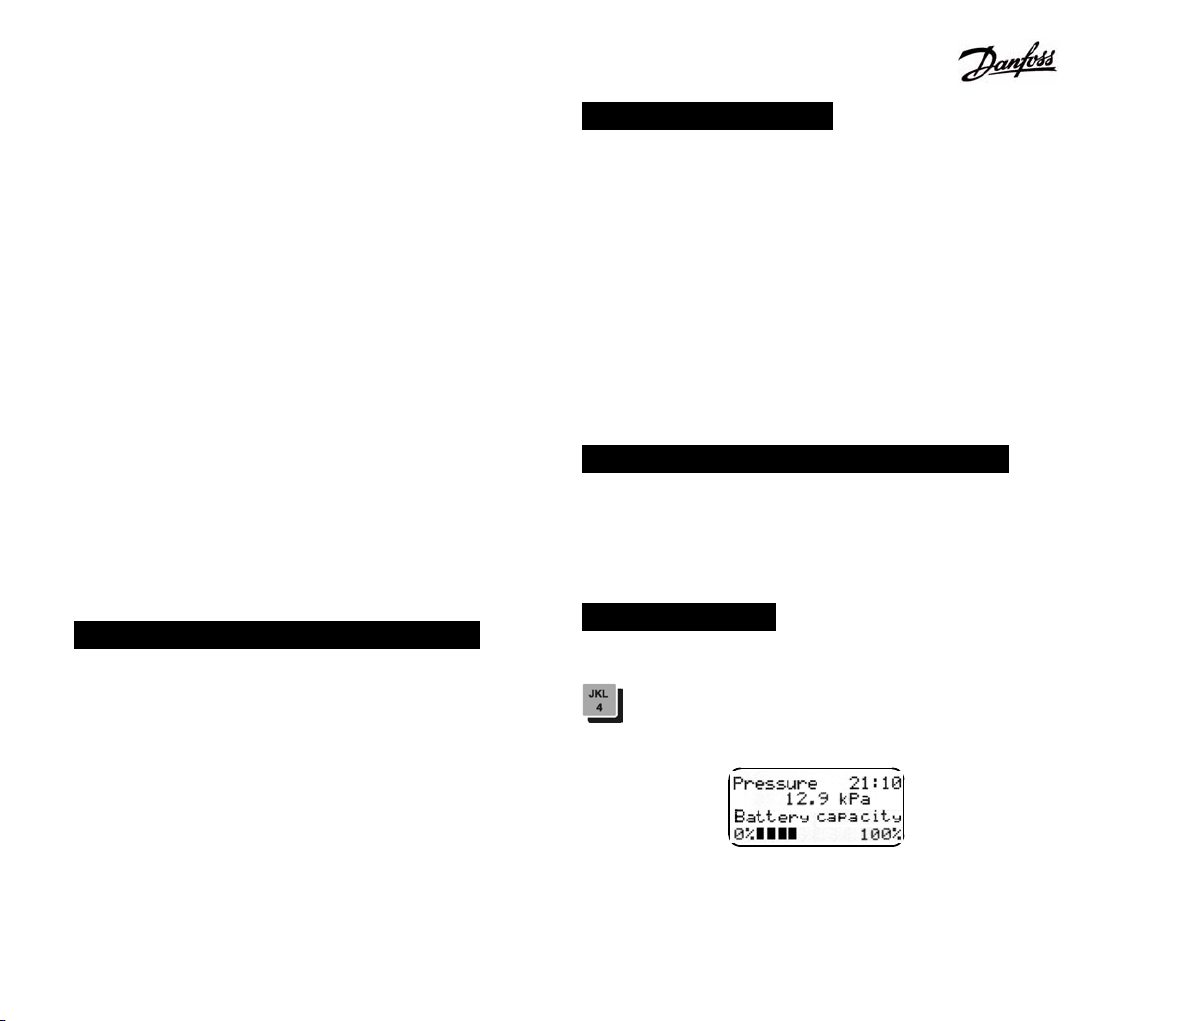
During measuring you can see battery state after hot key
pushing. The battery capacity baragraph appears on
display
6
Page 7
PFM 3000
Message Low Battery! flashes on the display every 15 sec
bellow battery capacity 5%. You can work in this state about
6 hours, after it PFM 3000 automatically switches off.
Connect battery charger into conector under the cover at
PFM 3000 bottom. Charging time is about 7 hours.
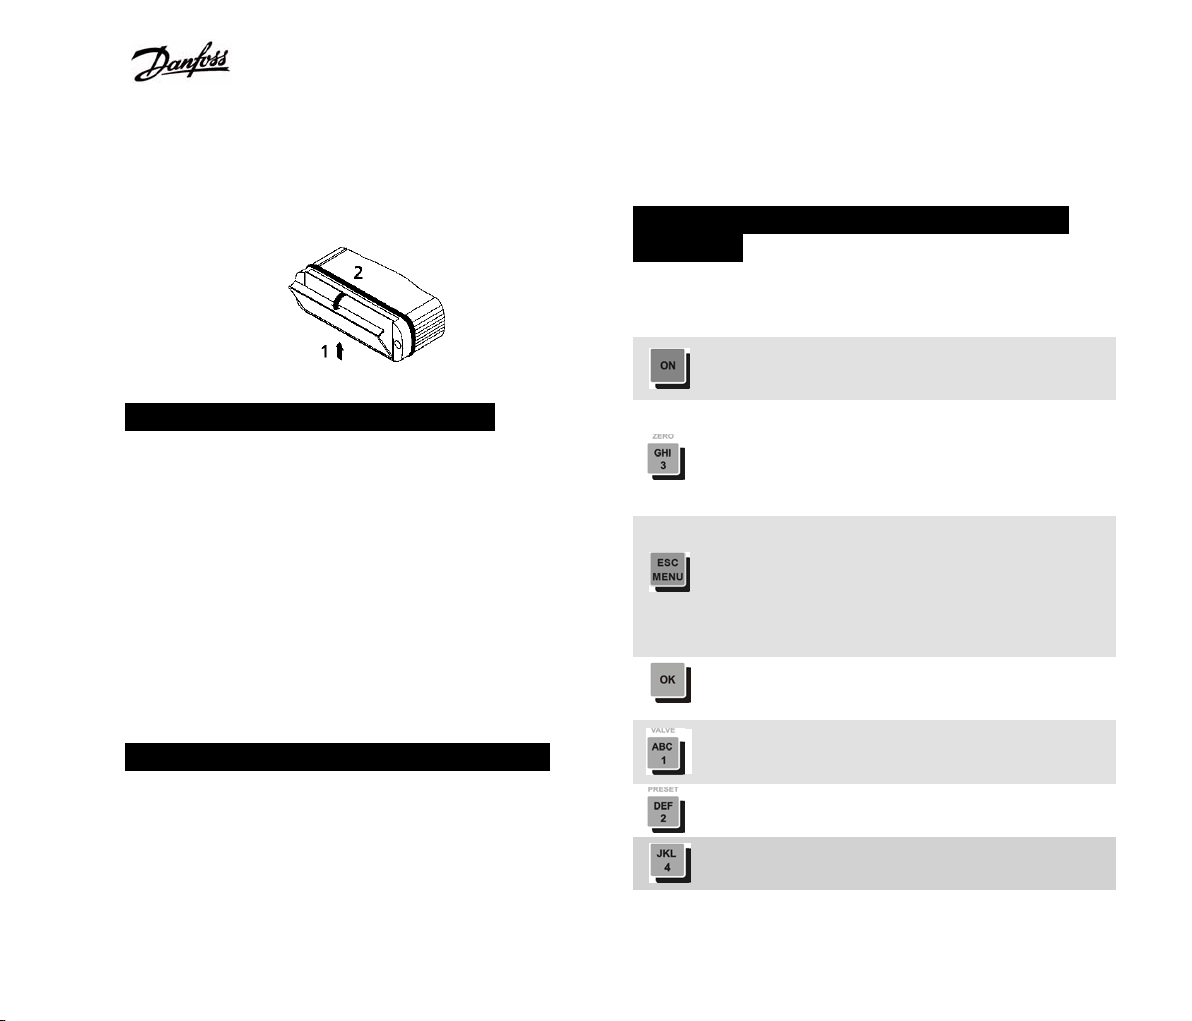
Deaeration of Connecting Tubes
To minimize measurement errors, deaerate the connecting
tubing of the instrument. Take a quick coupler R20 off the
tubing by pressing a safety ring (black collar) towards the
quick coupler. Do not disconnect the quick coupler merely by
pulling or force. The surface of the tubing or screw joint
might be damaged. Connect the tubing to the measuring
valve by a quick coupler R21 or to a discharge cock by
means of a measuring adaptor. Flush out the tubing with
water until air bubbles disappear. Put back the quick coupler
R20.
hoses. While it has not requested effect, special
maintenance is needed.
Zero is not stored in PFM 3000 configuration and not
corrected value is measured after new switch on.
Functions of Keys on the Instrument's
Keyboard
Keys with standard numbers or letters are used to enter data
into computer. Following keys have special functions:
Switches the instrument on and off. To switch on
the instrument, hold the key for one second.
Resets a reading about pressure on the display.
The key also corrects possible zero instability
and the dependence of the differential pressure
on static pressure.
If in the measuring function, it opens the menu.
It is used for the upward movement within the
menu. If you press the key while entering data,
the new value will not be saved. The previous
data will be kept.
Serves to accept a value or a selected
command in menu.
PFM 3000 Zero Measuring Correction
When measuring zero pressure will take an error after a time
of PFM 3000 using, you can correct this effect by ZERO
function. In the instant that zero error is grater some kPa, we
recommend clean or change sintered filters in apparatus
Hot key Valve. While in the measuring mode, it
opens a selection of valves.
Hot key Preset. While in the measuring mode, it
opens a valve presetting.
Hot key Battery. While in the measuring mode,
it opens battery capacity display.
7
Page 8
PFM 3000
Hot key Project Change. While in the Project
making mode, it changes displayed projects.
Deletes a sign from the actual position and
deletes a whole line if held.
Use the keys to move within the menu or the
value entry. While in the measuring mode, it
switches displaying modes. In the Project
making mode, it changes displayed branches.
PFM 3000 Configuration
Before measuring, configure the instrument according to a
particular system. The configuration will be saved in the
memory until a next change regardless of shutting down the
instrument.
Press MENU key to open menu. The first line
shows an entry name. The other lines show the
list of sub entries. A selected entry is marked
at the beginning of the line. If the entry has sub
entries, it is marked by at the very end of the
line.
Move in menu and confirm
requested item.
Return one level up, by holding 1 sec you will
return into the measuring from arbitrary menu
level.
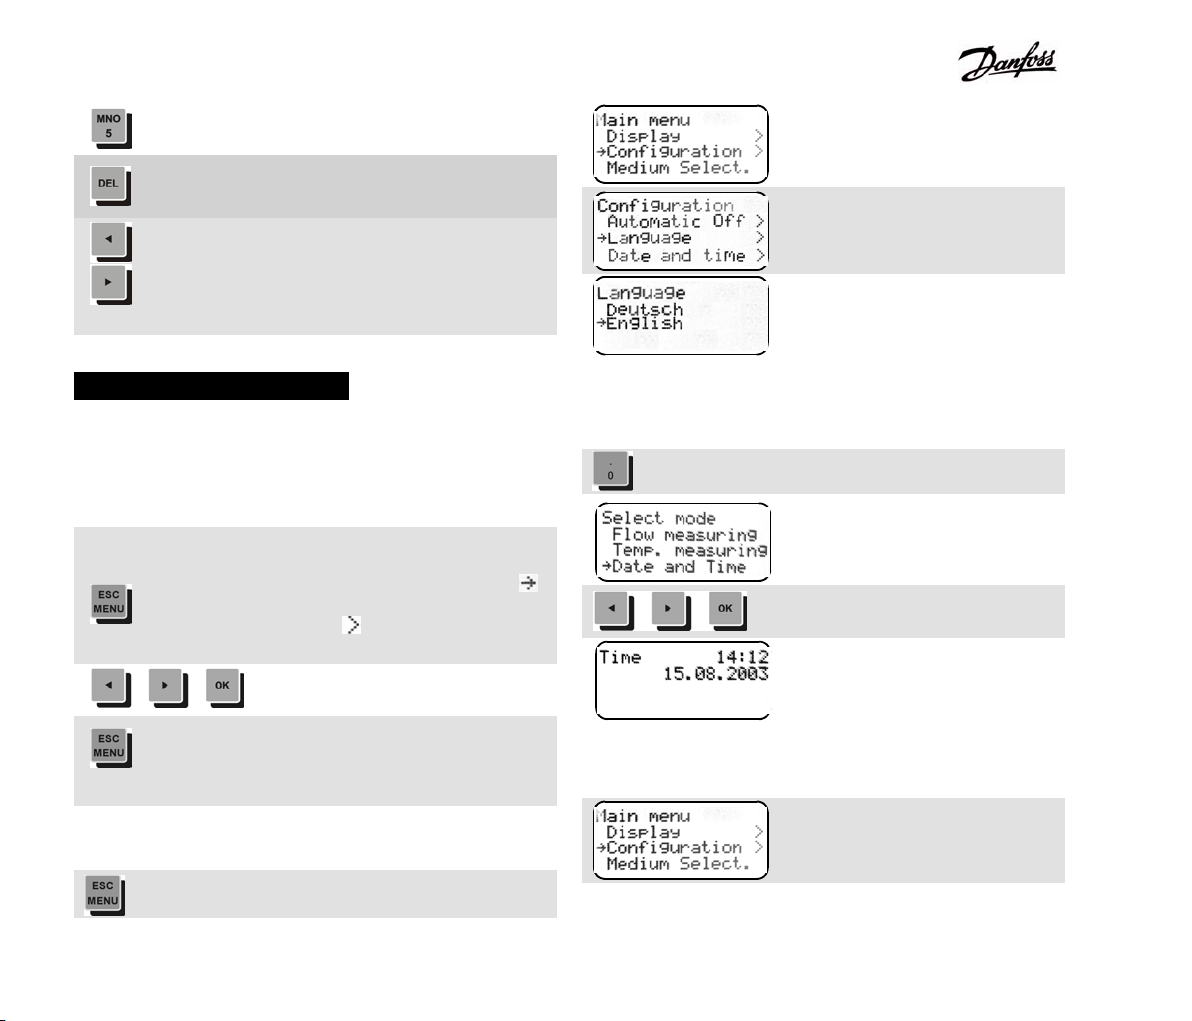
Language Changing
Main Menu
Select item Configuration
and confirm it.
Menu Configuration. Select
Language item and confirm it.
Menu Language. Select
requested Language and confirm
it.
Real Time Clock Setting
You can check Date and Time in the Time mode
Mode hot key
Mode offer
Select Date and Time and press
OK.
If PFM 3000 clock setting is incorrect set the appropriate
parameter
Main menu. Select
Configuration item and confirm.
Open menu
8
Page 9
PFM 3000
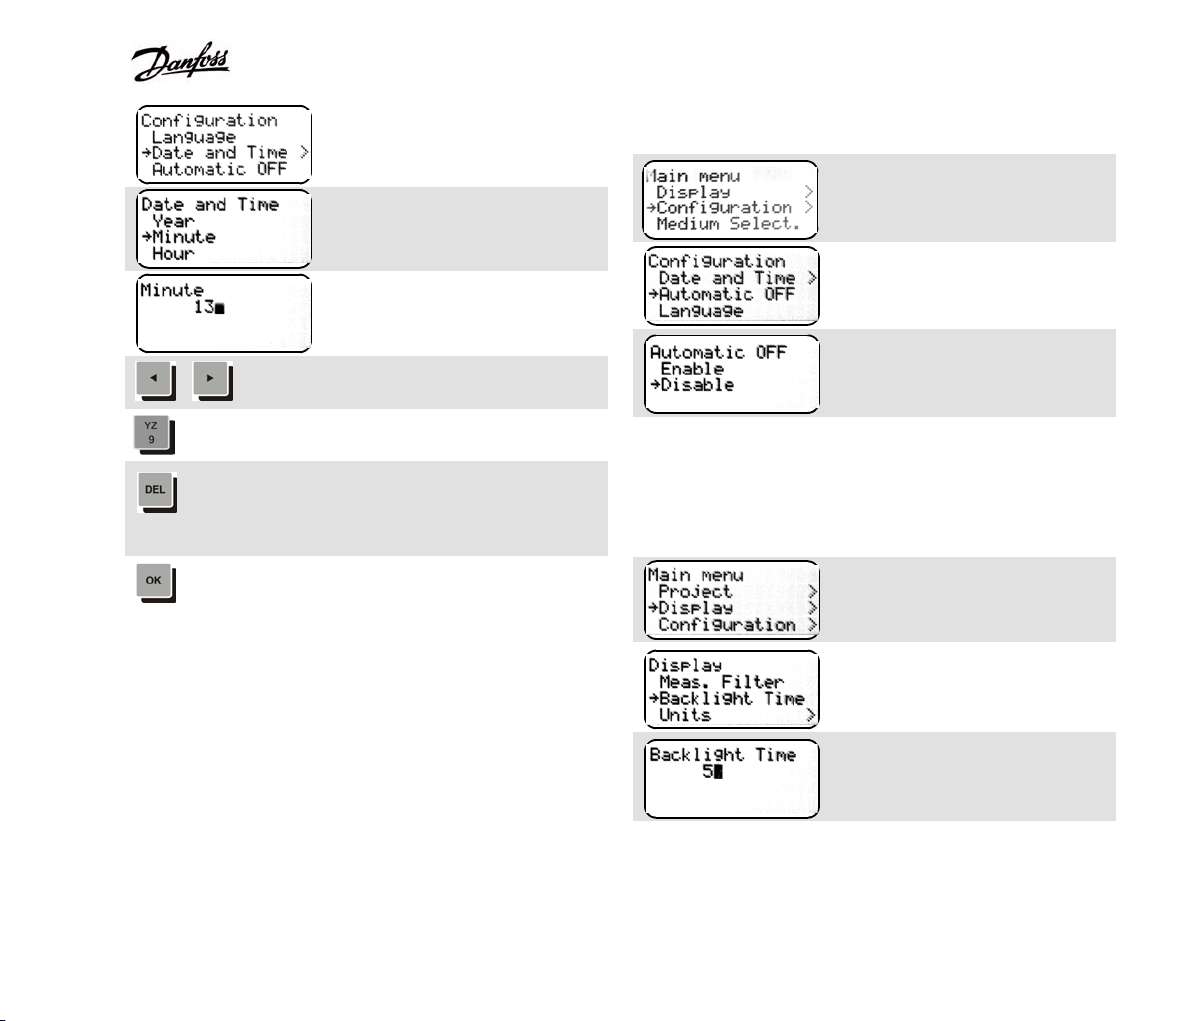
Configuration menu. Select
Date and Time item and
confirm.
Menu Date and Time. Select
Minute item and confirm.
Enter minutes.
Move cursor to requested
position.
...
There is no need to enter every decade and/or decimal point
of the number in question, only the desired changes
Rewrite digit at cursor position.
If needed, erase digit at cursor
position by DEL key. Holding
DEL by 1s you will erase whole
number.
Confirm correct number.
Automatic Shut OFF
PFM 3000 shuts down automatically 10 min after pressing
the keyboard for the last time. In case of measuring for a
longer period of time without using the keyboard switch this
function off in the Configuration/Automatic OFF menu.
While in the recording mode, this function is switched off
automatically. It is reactivated after the end of recording. The
automatic shut down command is not saved in the
instrument's configuration. Next time when you switch the
instrument on the function is active again.
Main menu
Select Display item and confirm.
Menu Configuration.
Select Automatic OFF item and
confirm.
Menu Automatic OFF.
Select requested function and
confirm.
Display Backlight Time
This is a function to be appreciated when you measure in
dark. When you set the backlight time to 0, the function is
not active.
Main menu. Select Display item
and confirm.
Display menu. Select Backlight
Time item and confirm.
Enter Backlight Time value and
confirm.
9
Page 10

PFM 3000
Pressure Units
Flow Units
Main menu. Select Display item
and confirm.
Display menu. Select Units item
and confirm.
Units menu. Select Pressure
Units item and confirm.
Pressure units choice. Select
requested unit and confirm.
Back one menu level.
Units menu. Select Flow Units
item and confirm.
Flow units choice. Select
requested unit and confirm.
a change of damping (time constant) of the measured value.
Display reading achieve 99,9% input pressure value after
0,75 s for the Fast filter, 5 s for the Medium Filter and 20 s
for the Slow Filter. There is additional filter for the flow
measuring, which adds 16 s more at arbitrary filtering
choice.
Main menu. Select Display item
and confirm.
Menu Display. Select
Measuring Filter item and
confirm.
Choose requested filter and
confirm.
Valve Selection
Valve choice hot key
Valve manufacturer selection.
Choose requested manufacturer
and confirm.
Valve type selection. Choose
requested valve and confirm.
Measuring Filter
The filtration of measured values makes it possible to
achieve a stabilised display of the value despite the
fluctuation in the measured value. Filtration is manifested as
Valve presetting input.
10
Page 11

PFM 3000
Enter valve presetting.
... ...
..
Decimal point you will enter by 1
s holding. There is only one
decimal point allowed in
PFM 3000.
Confirm. PFM 3000 returns back
into measuring.
Valve Presetting Change
Presetting hot key.
Enter new presetting.
Confirm. PFM 3000 returns back
into measuring.
Measured Medium
PFM 3000 uses a built-in measuring correction function for
heat-carrying mediums. To use measuring correction, we
need to know the temperature of the medium.
Enter Main Menu.
Select Medium Select. item.
Medium Select. menu. Choose
medium and confirm.
Enter medium concentration in
% and confirm.
When the temperature probe is
connected, measured
temperature appears on the
display. You have to connect
temperature probe to the
measured medium in this case.
In other case do not connect the
thermometer to PFM 3000 and
enter temperature manually.
Confirm.
Measuring with PFM 3000
Measuring Without Project
System Overpressure Measuring
Measuring Mode hot key
Measuring Mode choice.
11
Page 12

PFM 3000
Select Pressure Meas. and
confirm.
Connect static pressure to the higher pressure input (red).
Do not connect the lower pressure input (blue). The
instrument measures overpressure in the system compared
with atmospheric pressure.
Differential Pressure and Flow Measuring
PFM 3000 can measure pressure difference at any point in
the system. Flow can be measured only in specified
regulation fittings saved in the memory. Use connection
tubing to connect the measuring outputs of the balancing
valve to pressure inputs. Higher pressure to the positive
(red) input, lower pressure to the negative (blue) input.
To suppress the effect of static pressure in the system, set
PFM 3000 zero.
Completely open the regulation
valve and stop flow of the
medium.
Press ZERO key.
If the zero error exceeds a few
kPa, clean the sintered filters at
the pressure input. Call a
professional if the error persists.
Neither zero-setting is saved in the instrument's
configuration. Next time you switch the instrument on the
zero is not being corrected.
After you turn on the flow, PFM
3000 measures pressure
difference at the regulation
valve.
Measuring mode hot key.
Measuring mode choice
Select Flow Measuring and
confirm.
PFM 3000 computes flow at the
selected valve.
Measuring Flow in the Fittings Not Saved in
the PFM 3000 Memory
To measure flow, enter the respective fitting and its
presetting. You may want to measure flow in the fitting that
is not saved in the PFM 3000 memory.
Main menu. Select Direct Kv
Input and confirm.
Enter Kv value and confirm.
12
Page 13

PFM 3000
PFM 3000 will calculate flow using the given Kv value. Press
the VALVE or the PRESET key and the instrument returns
to standard flow measuring.
Temperature Measuring
Switch Off PFM 3000 and connect the temperature probe.
Switch ON PFM 3000.
Measuring Mode choice.
Select Temp. Measuring and
confirm.
Heating Calculations
Calculation of the Fitting Presetting for
Requested Flow
This function makes it possible to calculate the fitting
presetting for requested flow. Select the type of fitting and
connect PFM 3000 to the measured fitting.
Main menu. Select Heating
Calcul. item and confirm.
Select Valve Preset item and
confirm.
You will be asked to enter requested flow. Measure actual
flow and confirm with key OK. Then close the fitting and
confirm the pressure value under the closed state.
PFM 3000 will calculate presetting for requested flow.
Calculation of the Pressure Drop for
Requested flow
This function will show you, if it is possible to adjust the
branch, when you know available branch pressure. Choose
actual valve type and presetting.
Select Pressure Drop item from
Heating Calcul. menu.
Enter requested flow. PFM 3000 will compute pressure drop
across actual valve with actual presetting. When the
computed result is greater then the available pressure, you
simply know, that this requested flow is not genuine.
Leave off the pressure drop computing by ESC key.
Data Record
Record Preparing
You have to check respectively set up record parameters
from the Record menu.
13
Page 14

PFM 3000
Period/Hours = 0
Period/Minutes = 0
Period/Hours = X
Period/Minutes = Y
Check free record capacity from
Record/Capacity menu.
The display indicates filled
memory space in the form of a
baragraph. One baragraph unit
equals appr. 100 records. If
there is not enough vacant
memory space, delete the
memory in Record/Erase menu.
Record period may be from 1 s
up to 24 hours.
PFM 3000 records data with
period from Period/Seconds
input.
Seconds of period are ignored
and PFM 3000 records data with
period X:Y. While waiting for the
record the instrument switches
into the energy-saving sleep
mode. The display is not active
at that time. After
pre-programmed period elapses,
PFM 3000 wakes up and
measures time necessary for
parameters fixation. After that
record shoots and apparatus go
to the sleep mode again.
Select menu item Record/Place
or Record/Description.
Enter the identification chains of the record made of
letters from A to Z, numbers from 0 to 9, space, dash and
point (max. 16 characters). Thus each record includes a
32-character identification.
The characters are written in blink cursor
position. You can move cursor by arrow keys.
Alphanumeric key pressing overwrite the
character at cursor position. Every alphanumeric
key has some values. The key in left, for
instance, writes characters A, B, C, 1 by sequel
at the same position. After you press another
key, the cursor moves right one position. When
you need the same character twice, move the
cursor by arrow after entering the first character
and enter the character again.
This key deletes character in cursor position and
whole text right from the cursor moves one
character left. Holding the key by 1 sec erases
complete line.
You will confirm the input by the OK key. If you want
leave input without writing, press ESC key.
Start of Recording
Start the record from
Record/Start menu.
At the beginning of each recording the memory saves a
location and description (entered in the previous
paragraph), selected valve and presetting, time, pressure,
14
Page 15

PFM 3000
flow and temperature. During the data record flashes
before the time reading.
*
Full Data Memory and Low Battery
When the data memory fills up
during record, following display
will appear.
The record will stop and PFM 3000 switches off after 10
minutes.
Low battery state during data record works the same as in
normal measuring. With the battery capacity less then 5 %
message Low Battery! blinks on the display every 15 s.
When zero battery capacity PFM 3000 switches off.
End of Recording
Record continues.
Processing Projects
PFM 3000 has a built-in modulus for the calculation of
project balancing with one horizontal distribution and a
maximum of 32 vertical branches. The calculation method
presumes there is constant pressure at the input of the
project and the project includes no hydraulic elements with a
feedback (regulators of differential pressure at branches,
thermostatic valves).
You can store two this projects into the instrument memory.
Also it is able calculation of project balancing powered in the
middle by binding two simple projects.
Project schematic
End of record.
During record with Sleep apparatus wakes up by any key
pressing and apparatus ask you for the end of record as
the previous case.
Note: The Zero function (the correction of the zero shift of
measuring) is not active in the sleep mode.
15
Page 16
PFM 3000
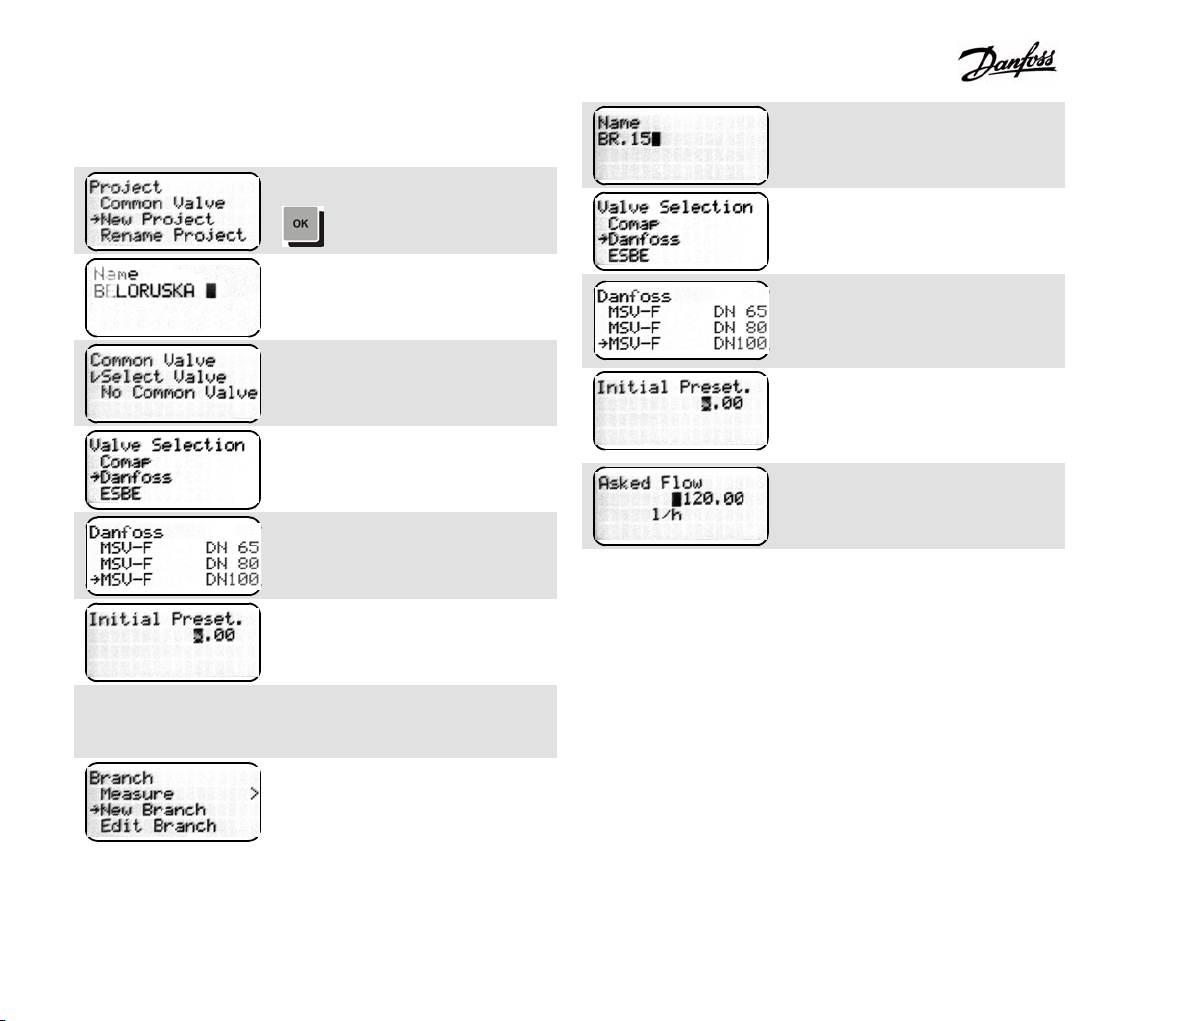
Creating a New Project
For new heating system may be projected value. For old
systems this presetting value, which will allow measurable
pressure drop at all branch balancing valves.
Menu Project/New project
Enter Project Name, max. 12
characters.
Common valve choice. For the
project without Common Valve
select No Common Valve.
Select Common Valve producer.
Select Common Valve type.
Enter Common Valve initial
presetting from Project/Initial
Preset menu.
Menu Branch/New branch.
Enter name of the branch, max.
12 characters.
Choose balancing valve in
branch.
Enter initial presetting of the
branch balancing valve. Use the
same rules as in the common
valve.
Enter requested flow.
Repeat New branch steps for all
branches in the project.
The branches has to be added in the order of distance from
heating medium input, so they are in the real project
topology. When you create new project in PFM 3000 at one
blow, each additional branch adds behind previous branch.
When you need add a branch somewhere in the middle of
the system, you need to select branch before the new
branch from menu Branch/Selection.
16
Page 17

PFM 3000
Project without a Common Valve
System without a common valve schematic
Occasionally we come across systems without a common
valve on input. PFM 3000 makes it possible to balance this
kind of system by selecting Project/Common valve/
Without common valve. If you create the project on
personal computer then cancel marking Common valve.
Connect PFM 3000 to the input
(into the measured system) of
the heat-carrying medium.
Menu Project/Input Pressure
Go to the first project branch and
connect PFM 3000 to the
balancing valve. Select a
respective branch.
Choose Branch/Measure item.
Menu Measure/Initial Preset
Measurements Necessary for the Calculation
of Project Balancing
Set all fittings in the project including common valve to
initial presetting.
Select a respective project from menu
Project/Selection.
Menu Measure/Valve Closed.
Close the balancing valve.
Set back initial presetting.
Repeat branch measuring at all project branches.
You can also create project in PC and download it into the
17
Page 18

PFM 3000
PFM 3000. Make use the User software PFM 3000.
Balance Calculation of the Project
Select Project/Balance calculation/Start to start
calculation. PFM 3000 checks whether all values needed for
calculation have been measured. In case some values are
missing, the instrument will indicate branches that still have
to be measured. The result of calculation is the presetting all
valves including the common valve for requested flow.
During the balance calculation the display indicates progress
the procedure in the baragraph.
Results of Project Balancing
When calculation is over, display the results under
Project/Balance calculation/Results menu.
Pressure behind common valve
computed from project
compensatory scheme.
Particular branch presetting
including common valve.
It is not possible to balance the
branch. It must be higher
requested flow value for
particular valve or smaller
dimension of the valve.
It is not possible to balance the
branch. It must be smaller
requested flow value for
particular valve or bigger
dimension of the valve.
Project Balancing Check
y Set the calculated presetting at all project branches
including the common valve. Actual flow should
correspond to requested flow.
y If necessary, correct small flow deflections from
requested values by changing fitting presetting.
y Store actual flow into the project in the
Branch/Measure Branch/Actual flow menu. Do not
forget to select a respective branch under
Branch/Select branch.
For balancing check is very expedient Projects Mode, so
that you can easily change branches with branch parameters
for displaying.
PFM 3000 mode selection hot
key.
Mode selection proposal.
18
Page 19

Select Project and confirm.
There are all significant project
data on this display.
Project name at the line 1.
Selected branch at the line 2.
Requested flow at the line 3.
Real flow at the line 4.
Hot key switches two PFM 3000 projects, you can list
between branches by arrow keys. When you change the
branch, PFM 3000 automatically chooses appropriate valve
and presetting for real flow calculation. When the project is
balanced in PFM 3000, apparatus chooses balanced
presetting, in other case initial presetting.
PFM 3000
19
Page 20

PFM 3000
Balance Calculation of the Project with a Pressure Input in the Middle
We often come across systems with one pressure input and distribution into both sides of the input. PFM 3000 makes it
possible to measure this kind of system by dividing it into two projects with simple distribution. You measure and balance the
projects separately. Then using the command Bind projects you balance the whole system with the input in the middle.
Scheme of the System with a Pressure Input in the Middle
Balance calculation of the project with a pressure input in the middle - Procedure
y Measure project Right Side.y Create two projects - marked as the Left Side and
Right Side in the picture.
y Start the balance calculation of the Left Side project.y Close the Right Side by the right stop valve.
y Pre-adjust all valves in the left side to initial presetting.
y Close the Left Side. Open the Right Side.
y Start the balance calculation of the Right Side project.
y Start the balance calculation of the Left Side project.y Measure project Left Side.
y Select Project/Balance calculation/Bind projects to
calculate the balance of the whole system.
20
Page 21

PFM 3000
Communication with a Computer
PFM 3000 can be easily connected to the computer by a
serial RS232 line.
Data Processing and Displaying Program User software PFM 3000
User software provide easily work with data recorded in
instrument and easily prepare projects in PC.
Recorded data can be processed by the PC program that is
a part of the apparatus delivery. Data can be displayed in a
chart and graph. They can be printed and also exported for
further processing by chart editors e.g. Data may be saved
in PC in the internal format of PFM 3000 (*.txt) for further
processing.
For the balancing of hydraulic systems the program makes it
possible to prepare two projects with a maximum of 32
branches of each.
During measuring data can viewed directly on the computer
monitor.
Minimum PC Requirements
PC 486, 16 MB RAM, min. 2 MB space left on HDD,
Windows 95 or higher
y Insert the installation disc into the disc drive.
y In Windows click setup.exe under Start/Run. The
program installs the software automatically.
Operating the Program
Main toolbar
The toolbar includes the icons of the most frequent
operations.
From the left: open file, save file, download data from the
instrument, print and work with projects.
Selecting units
The program allows various units of pressure and flow to be
entered and displayed. Choose Options/Units Selection to
select the units of pressure and flow.
You can select from the following units:
Pressure
y Pa, hPa, kPa, Mpa
y mbar, bar, psi, at
y mWs, mmWs, mmHg
Flow
y m3/hod, m3/min, m3/s
y l/hod, l/min, l/s
Software Installation
An installation CD-ROM is a part of the instrument
accessory. It contents software needed for communication
with PC.
Installation procedure:
Measured Data Processing
Downloading data from the instrument
Use a communication cable to connect the instrument.
Switch PFM 3000 on. Click Read to download data from
21
Page 22

PFM 3000
apparatus. Unless PFM 3000 is connected or switched on,
the message PFM 3000 not connected will be displayed. If
there are no recorded data, the message No recorded data
will be displayed.
If data have been recorded, they will be displayed in the user
software.
Data classification
Data are classified into records from particular places. Select
a requested place to receive measured pressure, flow and
temperature.
Measured data can be viewed also in graphs.
Graph view toolbar
The toolbar includes buttons for the scale adjustment and
the graph heading adjustment.
The functions of the icons (from the
left): original scale, scale up, scale
down, heading adjustment.
To move along the graph, use the right mouse-button. To
blow up an area, create a rectangle by clicking the left
mouse-button in the left top corner of the area and move to
the right bottom corner.
Using data
You can save data to the disc in the PFM 3000 format from
menu File/Save as choose export from File/Export menu to
export them in the database format. Exported data you can
again open in a spreadsheet programs, for instance Excel.
To browse previously saved data, click File/Open.
Printing
You can print recorded data and graphs indicating pressure,
flow and temperature change within a time period with an
adjustable recording period. Select a printer type under
Print/Printer set-up…. You can print either table and
graphs of stored values. To print a graph, use a landscape
page orientation. Select requested data from measured
points.
Project preparation and project saving
For the balancing of hydraulic systems the program makes it
possible to prepare two projects with a maximum of 32
branches of each.
Project tool bar
Creating a project
Each project includes information about the common valve,
input pressure and the common valve set-up. In the Project
section fill in the name, the common valve type from the
valve list and input pressure. For project without common
valve deselect Shared Valve box. Hit Add button to attach
the project to the tree of projects and branches in the left
part of the window. To enter branches, select a respective
project (click the mouse button at the respective project). In
the Branch section fill in the name, requested flow and the
valve from the valve list. To attach a branch to the tree of
project and branches, select Add in the Branch section.
After entering all branches, save the projects to the disc.
22
Page 23

PFM 3000
Working with projects
Click Open and Save at the tool bar to download project
files from/to the disc. The file can consist of max. of two
projects.
Click Read from the instrument and Write to download
projects. Projects and their branches may get modified also
in the PFM 3000. Save data in the instrument carefully to
avoid overwriting previously saved projects or measured
data. Therefore before downloading a project from PFM
3000 you have to confirm a requested operation in a
displayed dialogue box.
Click Print to print the project on a selected printer.
Maintenance Instructions
Calibrate the instrument every 12 months.
Replace sintered filters at pressure inputs every 12 months.
Sintered filter is located in the R20 quick coupling (smaller
one). You can replace sintered filter by the following
drawing:
Parts of the Delivery
PFM 3000 measuring computer 1 pcs
battery charger 1 pcs
thermometer PT100 digital 1 pcs
connecting tubing 1 pair
quick coupling R21 1 pair
quick coupling R20 1 pair
hoses Din 7 mm connection 1 pair
measuring adapter G3/4" 1 pair
reducer G3/4-G1/2 1 pair
measuring nozzle 1 pair
CD with the user software 1 pcs
RS232 communication cable 1 pcs
detailed manual, warranty certificate 1 pcs
plastic case 1 PCs
23
Page 24

PFM 3000
24
Page 25

Technical Specifications
PFM 3000
CommentUnitValueItem
kPa1 000Pressure range
kPa1 500Maximum overpressure
% of range0,15Linearity, repeability and hysteresis error
% of range0,25Temperature error
% of range0,06Static pressure effect
°C-5 až 90Medium temperature
°C-5 až 50Ambient temperature
°C-10 až 70Storage temperature
PT 100 digitalTemperature probe
°C-20 up to 120Range of Temperature probe
°C+/- 1Temperature error
Li-Ion batteryPower
1 sec up to 24 hoursPeriod of record
RS 232Interface
7,2 V
1250 mAh
hours7Charging time
mm77x192x25Dimensions w x h x d
g390Weight
IP65Cover
months12Calibration validity
at the end of a
connecting tubes 1.5 m
max.hours120Operating time
max.1 800No of records
max.valves400No of pre-programmed valves
max.2No of projects
max.32No of branches in each project
25
Page 26

PFM 3000
26
Page 27

PFM 3000 MenuPFM 3000 Menu
PFM 3000
Project
Selection
Balanc. Solve
Start
Bind Projects
Results
Source Pressure
Common Valve
New Project
Branch
Selection
Measure
New Branch
Valve Closed
Initial Preset.
Real Flow
Display
Units
Pressure Units
Flow Units
Meas. Filter
Backlight Time
Pa
hPa
kPa
MPa
mbar
bar
psi
at
mWs
mmWs
mmHg
m3/s
m3/min
m3/hod
l/s
l/min
l/hod
Configuration
Date and Time
Automatic OFF
Language
Minute
Hour
Day
Month
Year
Medium Select. Record
Watter
Ethylenglykol
Propylenglykol
Capacity used
Start
Erase
Period
Place
Hours
Minutes
Seconds
Direct KV Input
Heating Calcul.
Valve Preset
Pressure Drop
Rename Project
Delete Project
Initial Preset.
Edit Branch
Delete Branch
Description
27
Page 28

29
www.danfoss.com
 Loading...