

Page 1

GB DAS
Installation Guide to Devicom
TM
PC•PRO LAN
Page 2

Table of contents:
Introduction ............................................................................................................................................................................. 3
System overview .................................................................................................................................................................... 4
Connecting your system units .......................................................................................................................................... 5
Installing software ................................................................................................................................................................ 6
Finding NPorts on network ................................................................................................................................................ 7
Conguring ..............................................................................................................................................................................10
Assigning IP addresses ........................................................................................................................................................12
Change Operating mode ....................................................................................................................................................13
Mapping COM ports ............................................................................................................................................................. 15
Re-assigning COM Ports .....................................................................................................................................................18
Exporting COM Settings ......................................................................................................................................................21
Conguring PC•PRO ..............................................................................................................................................................23
Page 3

3
Introduction
1. Devicom™ PC•PRO LAN
The Devicom™ PC•PRO LAN is an Ethernet enabled soft- and hardware tool which gives you the
possibility to connect to your devireg 550 thermostat network from any PC on your Ethernet network.
Today only the Devireg™ 550 can be installed in network, but with the setup of Devicom™ PC•PRO all
settings and adjustments can be controlled from the computer, and from any PC on your local area
network.
The software is multilingual and includes both an advanced and a simple user front end (targeted at
the installer/end user)
A Windows ActiveX automation based API exist, making it possible to control Devireg™ 550 from 3rd
party Building Automation Systems. You can download it from www.devi.com
Page 4
4
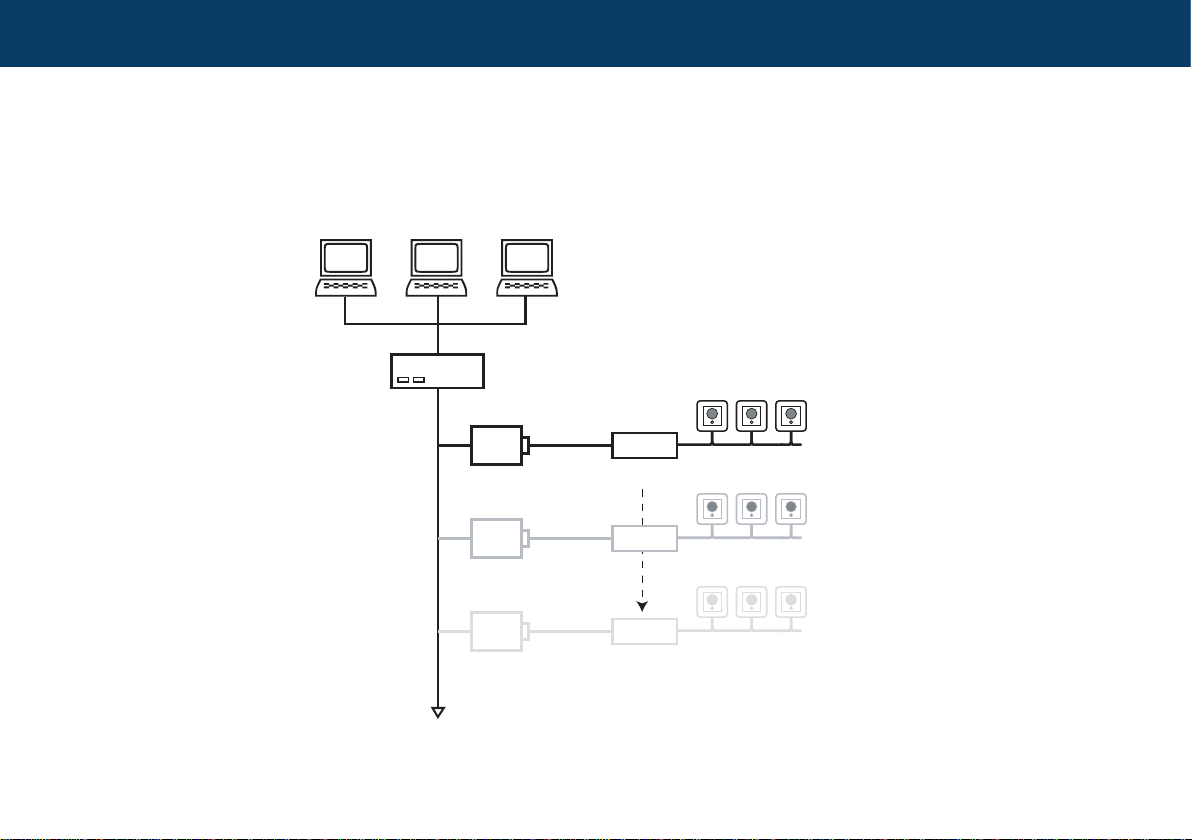
2. System setup
&UIFSOFU
/1PSU
*OUFSGBDF"
*'"|T
QDT
23 DEVINET
/1PSU
*OUFSGBDF"
23 DEVINET
/1PSU
*OUFSGBDF"
23 DEVINET
Wire the complete system according to this diagram.
System overview
Page 5

5
Connecting your system units
Step 1
Connect the 550s with two wires in parallel, use 1.5mm2 wires. You can use the same cables, or pipes,
to Devinet as for 230V mains.
Connect the devinet to the Devicom Interface A.
Connect the Devicom Interface A to the NPort with the RS232 cable/plug
Each Devicom Interface A can control up to 31 devireg™ 550. The Devicom PC•PRO software can
handle 30 Interface A’s, giving a total of 930 pieces of Devireg 550s in one single installation.
Connect the NPorts to the Ethernet e.g. via a switch.
(For initial setup test purposes you can also connect the NPort directly to your PC via a crossed network cable)
Page 6
6
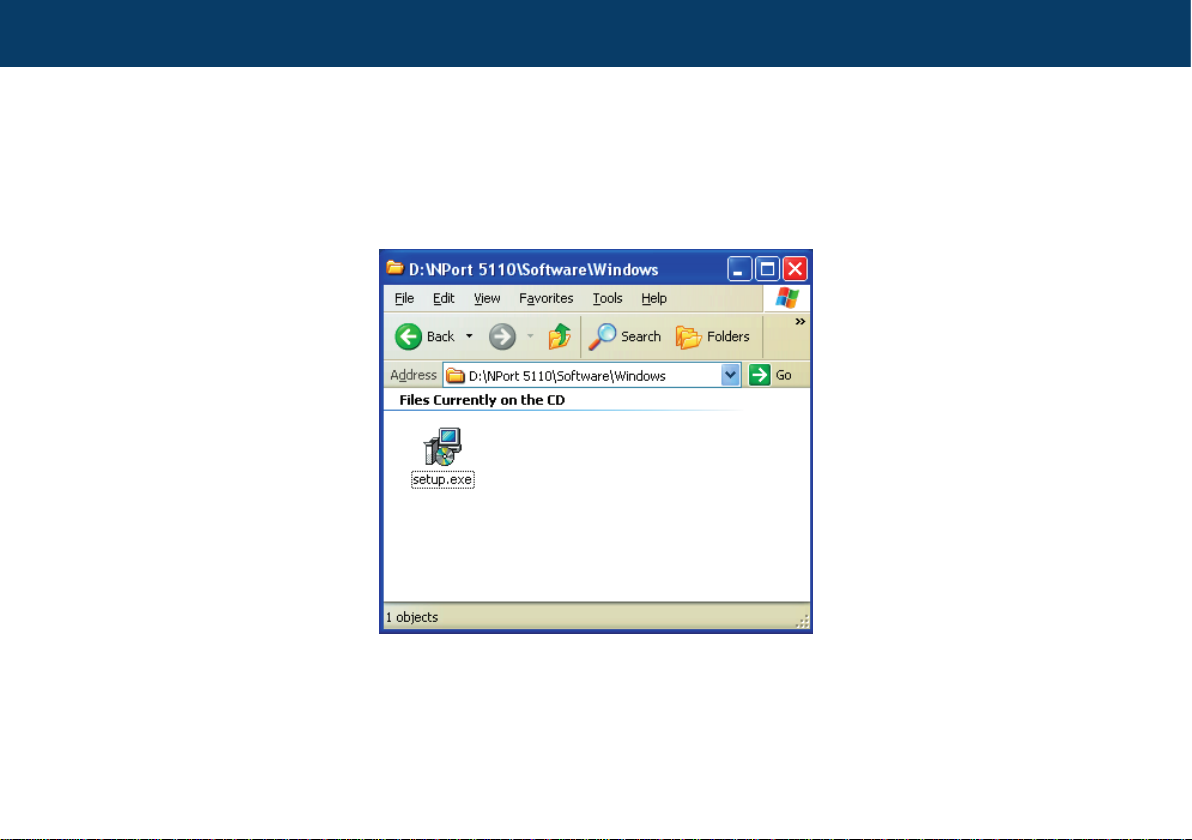
Installing software
Step 2
Install NPort Administration Suite on the PC and start Administrator:
Insert the CD and run \NPort5110\Software\Windows\setup.exe
Now launch the program.
Page 7
7
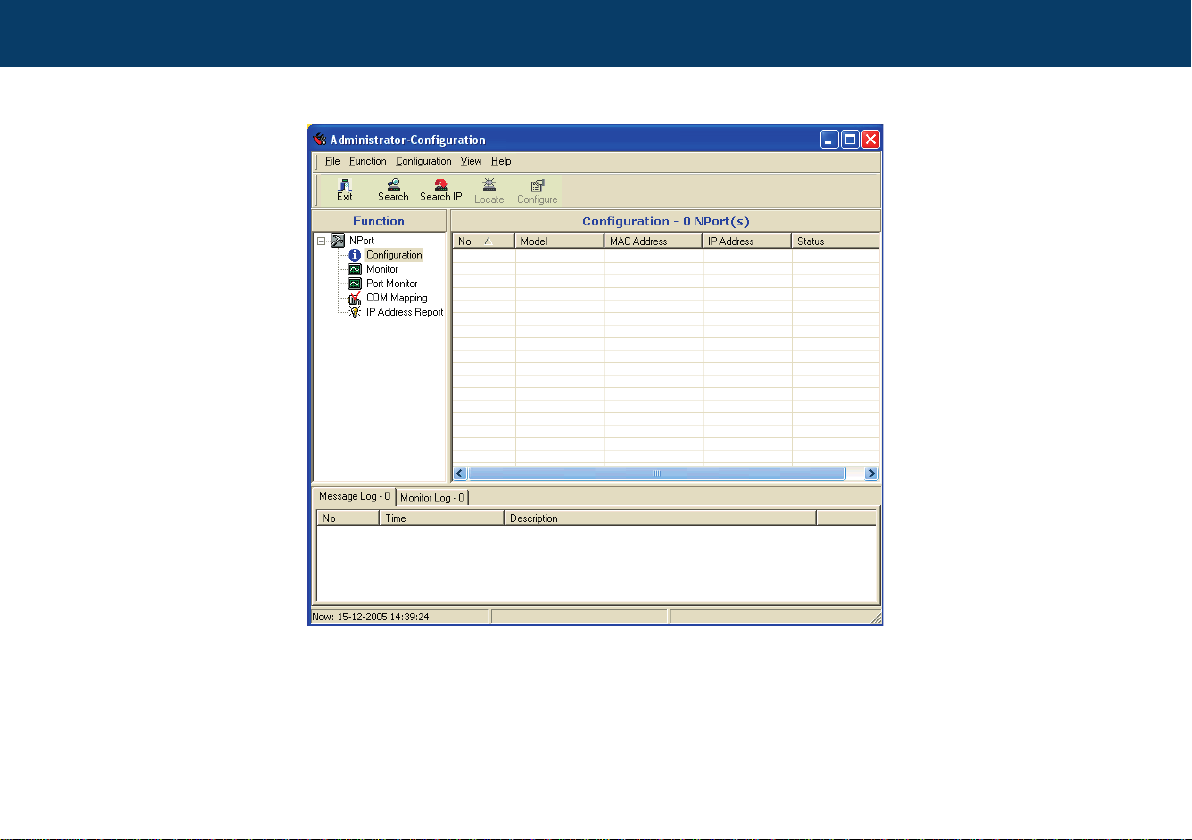
Step 3
Finding NPorts on network
Press Sea rch
This will have the system search for any connected NPorts
Page 8
8
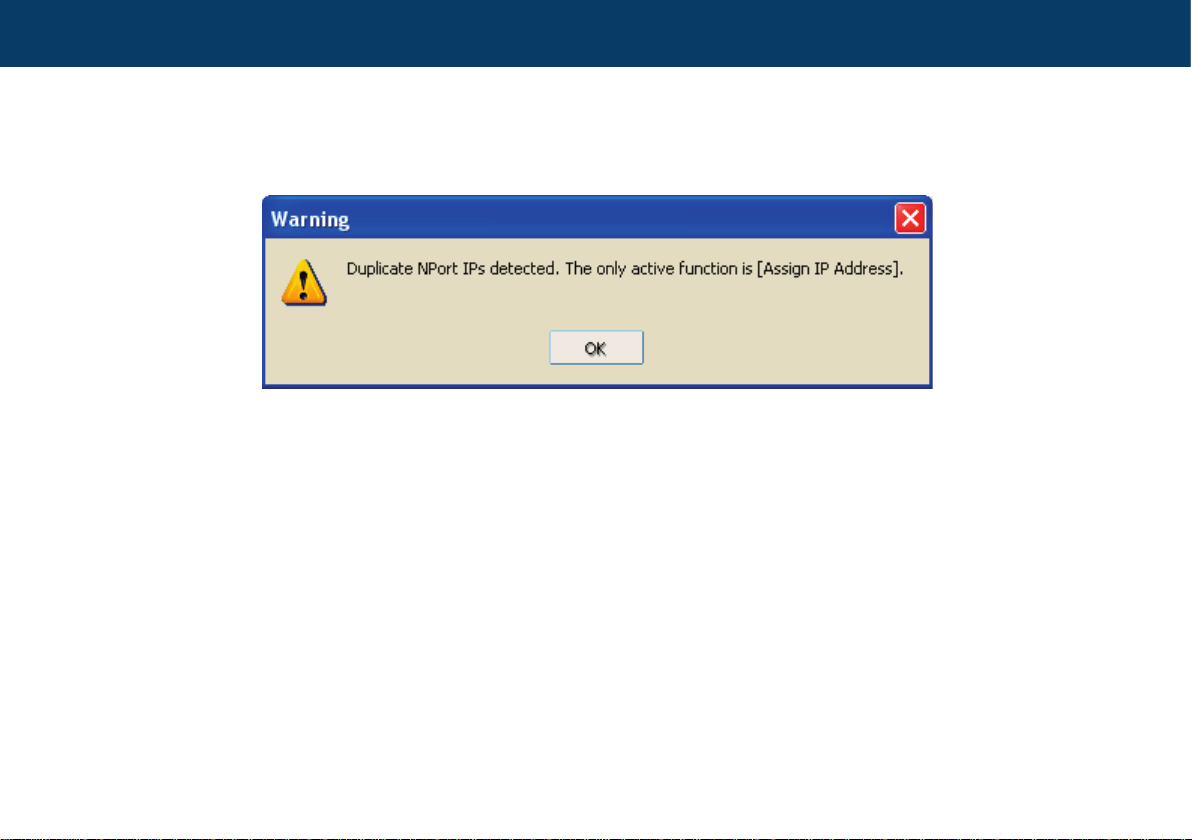
If you have more than one connected to your system, you will get the following warning message:
Because the NPort default have the exact same IP address 192.168.127.154
Press OK
Page 9

9
Now you can see that 2 NPort 5110s were found. Notice they have the same IP addresses. These must
be changed, as they must be unique.
Page 10

10
Step 4
Mark/select ‘all’ found units:
Configuring
Page 11

11
In the menu choose
Conguration ‡ Assign IP Address
which will bring up this window
Page 12

12
Assigning IP addresses
Step 5
Now either ‘Assign IP Sequentially’ or set IP manually (contact your IT administrator to get IP addresses,
it is recommended to use static IP addresses).
Page 13

13
Step 6
In the menu choose
Conguration ‡ Congure
which will bring up this window
Change Operating mode
Click the “Modify” check box and then click the button “Settings”
Page 14

14
Now change “Force Tx Timeout” from 0 to 30 and then click “OK”
Page 15

15
Mapping COM ports
Step 7
Now each NPort should be mapped to a COM port, in order for PC•PRO to nd the thermostats.
Click COM Mapping in the Function window
and then click the button Add
Page 16

16
Your NPorts have now been added to above window.
Press OK
Page 17

17
The NPorts have now been assigned COM2 and COM4
If you are not satised with the allocation of COM numbers, you can choose them yourself.
Page 18

18
Re-assigning COM Ports
Step 8
Right click the NPort you wish to re-assign a COM Port, and choose COM Settings:
Page 19

19
which brings up this window:
Page 20

20
Then we have:
Page 21

21
Exporting COM settings
Step 9
You can export the COM Settings to a le if you need to access the system from more PCs in the same
Ethernet network. From the menu choose:
COM Mapping ‡ Export COM Mapping
Now press
Page 22

22
and click yes to save the COM Port conguration
Then the following message will ‘pop up’
This is the default so ‘OK’
This concludes the NPort setup.
Page 23

23
Step 10
Now start PC•PRO
Under
Tools ‡ Options ‡ Communication
select the used COM ports:
Configuring PC•PRO
Page 24

24
This is what a congured system could look like:
Page 25

252627
Page 26

Page 27

Page 28

Article: 08095350
Version: 01.01
www.devi.com
 Loading...