

Installation and User Guide
living connect®
Electronic Radiator Thermostat
Danfoss Heating Solutions VIIDH102 11/2013
1
Installation Guide living connect®
Installation Guide
1. Installation
1.1 Identify your living connect® thermostat............................................. 4
1.2 In the package ..................................................................... 4
1.3 Overview of valve adapters ......................................................... 5
1.4 Installing the right adapter ......................................................... 6
1.5 Inserting the batteries .............................................................. 7
1.6 Using the buttons .................................................................. 7
1.7 Installing living connect® ............................................................ 8
1.8 Automatic adjustments............................................................. 8
1.9 Removing living connect® ........................................................... 9
1.10 Resetting living connect® to default settings . . . . . . . . . . . . . . . . . . . . . . . . . . . . . . . . . . . . . . . . . 9
1.11 Removing an adapter from living connect® ......................................... 10
2.
................................................................. 11
Pay a visit to the living
animations and videos, a FAQ section, literature and much, much more
living.danfoss.eu
Scan this QR code with your smartphone and go directly
to the living connect® Installation video on YouTube.
2
11/2013 VIIDH102 Danfoss Heating Solutions
User Guide living connect®
User Guide
3. Overview of display and control buttons ............................................... 12
4. Connecting living connect® to a Danfoss Link™ system
4.1
4.2 Connecting living connect® to Danfoss Link™ CC .................................... 12
4.3 Testing the connection ............................................................ 14
5. Additional settings
5.1 Adjustments for over/undersized radiators......................................... 14
5.2 Open-window function............................................................ 15
5.3 Automatic valve exercising ........................................................ 15
6. Safety precautions...................................................................... 15
7. Disposal ................................................................................ 15
............................................ 12
Danfoss Heating Solutions VIIDH102 11/2013
3
living eco®
Quick Start Guide
MAKING MODERN LIVING POSSIBLE
Danfoss Heating Solutions
living eco®
Quick Start Guide
MAKING MODERN LIVING POSSIBLE
Danfoss Heating Solutions
Installation Guide living connect®
1. Installation
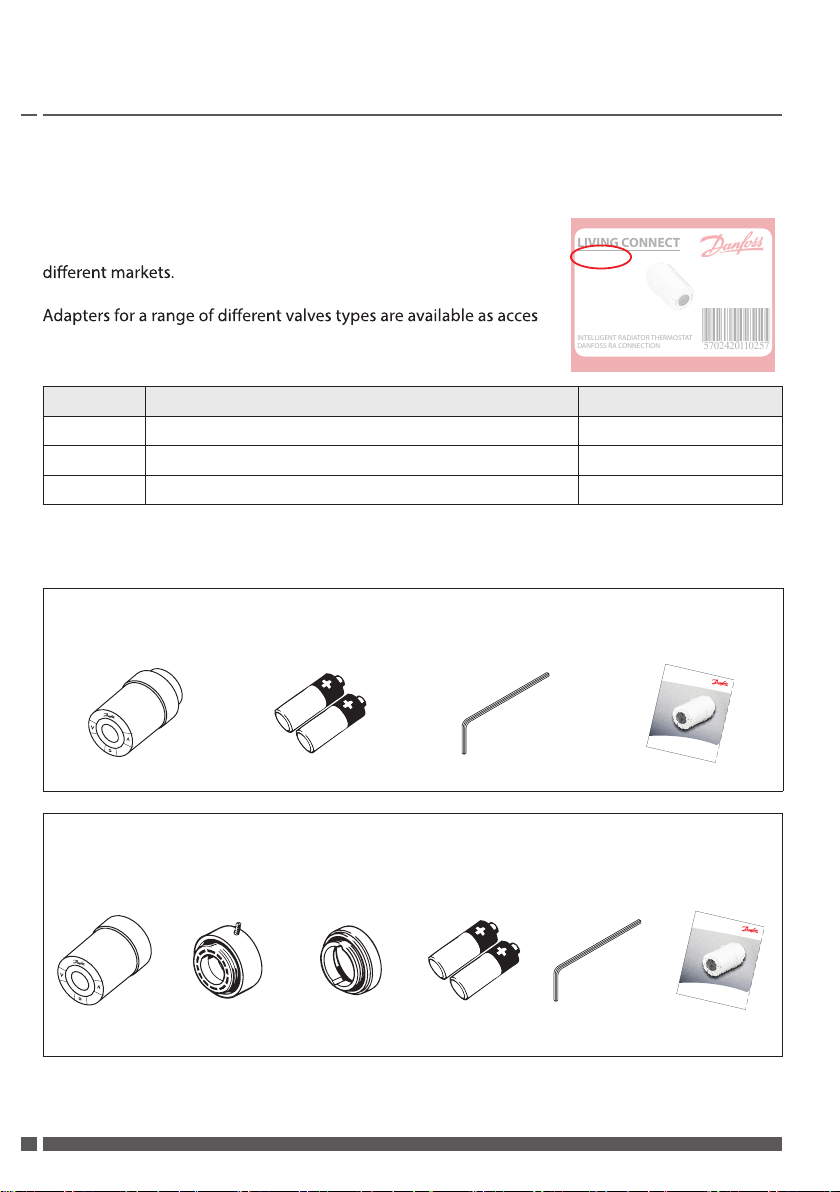
1.1 Identify your living connect® thermostat
living connect® comes in several versions to meet the demands of
LIVING CONNECT
014G0001
You identify your version by the code number on the box label.
-
sories, see chapter 1.3.
INTELLIGENT RADIATOR THERMOSTAT
DANFOSS RA CONNECTION
5702420110257
Code no. Version characteristics Quick guide languages
014G0001
014G0002
014G0003
Incl. pre-mounted RA adapter UK, DE, DK, NL, FR, PL, SE, FI
Incl. RA + M30 x 1.5 adapters UK, DE, DK, NL, FR, PL, SE, FI
Incl. RA + M30 x 1.5 adapters UK, CZ, SK, RU, TR, HU, HR, SI
1.2 In the package
living connect® 014G0001 is supplied with a pre-mounted adapter for Danfoss RA valves, two
alkaline AA batteries, a 2 mm Allen key and a Quick Guide in languages English, German, Danish,
Dutch, French, Polish, Swedish and Finnish.
living connect® sensor Alkaline AA batteries Allen key, 2 mm Quick Guide and “Hanger”
living connect® 014G0002 and 014G0003 are supplied with adapters for Danfoss RA valves and
valves with M30 x 1.5 (K) connections, two alkaline AA batteries, a 2 mm Allen key and a Quick
Guide in English, German, Danish, Dutch, French, Polish, Swedish and Finnish (014G0002) or in
English, Czech, Slovak, Russian, Turkish, Hungarian Croatian and Slovenian (014G0003).
living connect®
sensor
4
11/2013 VIIDH102 Danfoss Heating Solutions
Adapter for
RA valves
Adapter for
M30 x 1.5 (K) valves
Alkaline
AA batteries
Allen key, 2 mm
Quick Guide and
“Hanger”

34
26
Installation Guide living connect®
1.3 Overview of valve adapters
Adapter type Code no. Adapter Valve
For Danfoss
RA valves
For M30 x 1.5 (K)
valves
For Danfoss
RAV valves
For Danfoss
RAVL valves
For Danfoss
RTD valves
014G0251
014G0252
014G0250
014G0253
For M28 valves:
- MMA 014G0255
- Herz 014G0256
- Orkli 014G0257
- COMAP 014G0258
Danfoss Heating Solutions VIIDH102 11/2013
5

Installation Guide living connect®
1.4 Installing the right adapter
Adapter for RA valves (pre-mounted on 014G0001)
1.
Place the RA adapter on the valve as shown. Tighten the adapter with the 2 mm Allen key.
Adapter for M30 x 1.5 (K) valves
1.
Place the K adapter on the valve as shown. Hand-tighten the K adapter (max. 5 Nm).
Adapter for RAV valves (accessory)
1.
2.
2.
2.
Click the inner adapter on the valve. Hand-tighten the outer adapter (max. 5 Nm).
Adapter for RAVL valves (accessory)
1.
2.
Click the inner adapter on the valve. Hand-tighten the outer adapter (max. 5 Nm).
6
11/2013 VIIDH102 Danfoss Heating Solutions

Installation Guide living connect®
Adapter for RTD valves (accessory)
1.
Place the RTD adapter on the valve as shown. Hand-tighten the RTD adapter (max. 5 Nm).
Adapters for M28 valves (accessories)
Please follow the instructions supplied with the valve adapter for the specific M28 valve.
2.
1.5 Inserting the batteries
Remove the battery cover and insert two AA batteries. Make sure the
batteries are correctly oriented.
Rechargeable batteries must not be used.
When replacing batteries the programme settings will be preserved,
but after two minutes the settings for time and date are reset.
The low battery symbol
batteries run out.
After approx. two weeks the
to 21:00 hrs.
Before the batteries run out living connect® will leave the valve in a
slightly open position to protect the valve from damage.
is displayed approx. one month before the
1.6 Using the buttons
living connect® has two arrow buttons which allow you to navigate
the display and the menus and to set the temperature*.
The dot button
*The temperature is usually controlled via Danfoss Link™ CC, but may be
changed at any time using the thermostat’s buttons. If this is done, the
thermostat sends a message to Danfoss Link™ CC, instructing it to synchronise the other thermostats in the same room.
Danfoss Heating Solutions VIIDH102 11/2013
7

Installation Guide living connect®
1.7 Installing living connect®
1. 2.
living connect® must be in Installation Mode
M in the display.
Installation Mode can be selected by pressing
for 3 seconds until M is displayed, then
release and press
3.
Press to fix living connect®. Icons for Network Connection and Alarm are
again.
Screw living connect® onto the adapter and
tighten by hand (max. 5 Nm).
While slightly pressing forward, turn living
connect® clockwise untill it locks, then tighten.
4.
flashing, indicating living connect® is ready for
connection with Danfoss Link™ CC.
1.8 Automatic adjustments
living connect®
again to detect the exact opening point of the valve. This will allow living connect® to control the
dure is repeated once a night for up to a week.
You might experience the valve being warm dur ing the adjustment procedure, regardless of the
room temperature.
Intelligent Control (Forecast)
During the first week of operation living connect® learns when it is necessary to start heating the
room in order to reach the correct temperature at the correct time.
The intelligent control will continuously adjust the heating time compared to seasonal temperature changes.
Using Saving Program requires that your heating system has enough heat for a short period during
heat up. If your experience problems you should contact your installer.
8
11/2013 VIIDH102 Danfoss Heating Solutions

Installation Guide living connect®
1.9 Removing living connect®
1. 2.
Activate Installation Mode: Press for 3
seconds to select the Function Menu.
Select M with
3.
Remove the battery cover and the batteries. Insert the Allen key or similar into the hole to
. When M flashes, press .
A large M is flashing in the display to indicate
that Installation Mode is activated.
4.
lock the adapter ring. Turn counterclockwise
to unscrew living connect® from the adapter.
1.10 Resetting living connect® to default settings
1. 2.
Remove the battery cover and take out one
battery.
Danfoss Heating Solutions VIIDH102 11/2013
Press and hold for approx. 5 seconds, while
reinserting the battery.
9

Installation Guide living connect®
1.11 Removing an adapter from living connect®
1. 2.
Remove the battery cover. Insert a small hex key or similar into the locking
hole to lock the adapter ring.
3.
With the hex key locking the adapter ring,
turn the adapter in the shown direction.
4.
Put back the battery cover. Mount living connect® on another valve adapter according to
the instructions supplied with the adapter.
10
11/2013 VIIDH102 Danfoss Heating Solutions

Installation Guide living connect®
Thermostat type Programmable electronic radiator valve controller
Recommended use Residential (pollution degree 2)
Actuator Electromechanical
Display Grey digital with backlight
A
Control PID
Transmission frequency / range 868.42 MHz / up to 30 m
Power supply 2 x 1.5 V alkaline AA batteries
Power consumption 3 μW in standby, 1.2 W when active
Battery life 2 years
Low batteri signal
Ambient temperature range 0 to 40 °C
Transportation temperature
range
Maximum water temperature 90 °C
Temperature setting range 4 to 28 °C
Measurement interval Measures temperature every minute
Clock accuracy +/- 10 min/year
Spindle movement Linear, up to 4.5 mm, max. 2 mm on valve (1 mm/s)
Noise level <30 dBA
Open-window function Activated at temperature decrease of approx. 0.5 °C over 3 min.
Weight (incl. batteries) 177 g (with RA adapter)
IP class
-20 to 65 °C
Type 1
20 (not to be used in hazardous installations or in places
where it will be exposed to water)
Approvals, markings etc.
Danfoss Heating Solutions VIIDH102 11/2013
11

^
User Guide living connect®
3. Overview of display and control buttons
Low battery symbol Temperature set point*
Network connection Alarm
Lock Frost protection
Use these buttons to navigate within the menu and to adjust the temperature.
* living connect is displaying the set temperature, not the measured room temperature.
4. Connecting living connect® to a Danfoss Link™ system
4.1
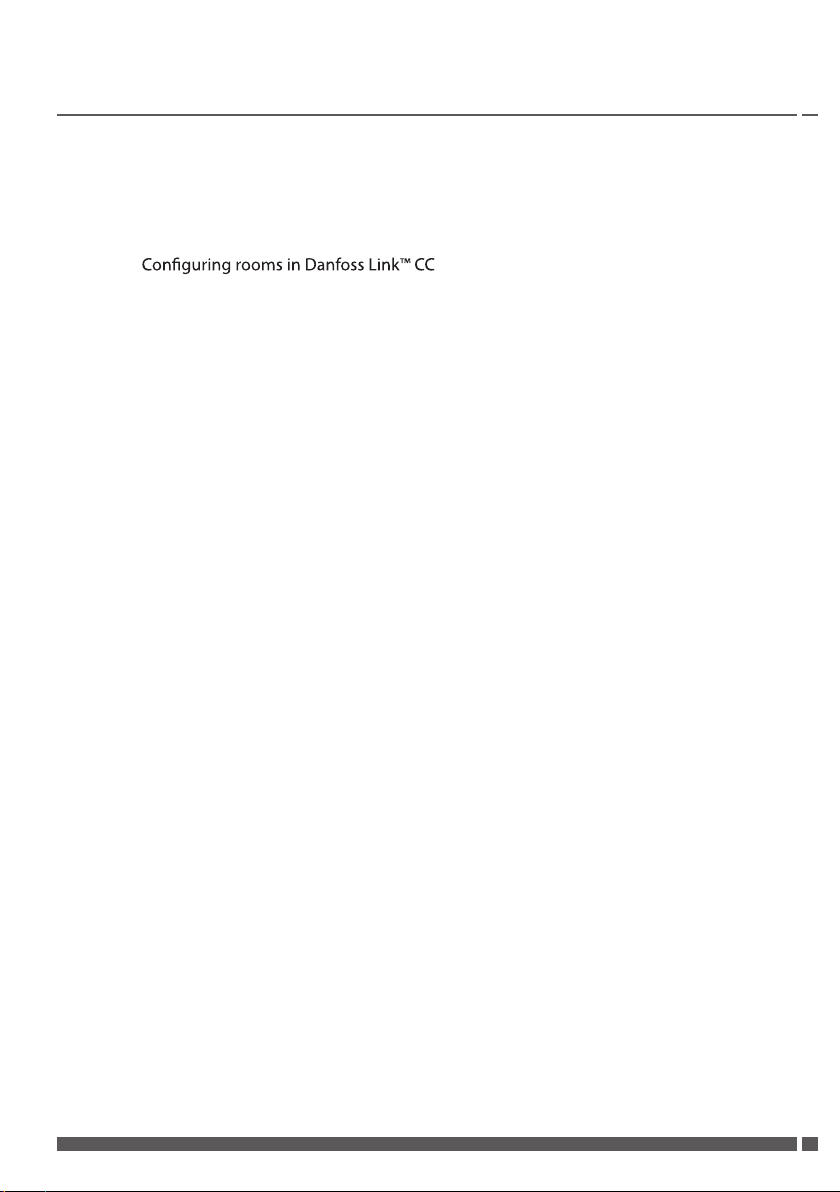
Make sure that the room in which living connect® has been installed, has been configured in
Danfoss Link™ CC - see installation guide for Danfoss Link™ CC.
4.2 Connecting living connect® to Danfoss LinkTM CC
1.
max.
150 cm
^
Move the Danfoss Link™ CC within a distance
of 1.5 m from the thermostat (the battery pack
014G0262 is recommended).
12
11/2013 VIIDH102 Danfoss Heating Solutions
2.
C
Bedroom, North
Adjust the room’s settings here.
Devices in room: 0
Regulation type: Unregulated.
Room devices
Heating regulation
Select “Room devices”.
Room name
?

User Guide living connect®
3.
Room Devices
Bedroom, North
The room contains:
Room has no devices at all.
Add a device
Remove a device
0 x
^
^
valid:
?
4.
Add Room Devices
Keep the device within 1 meter
1
of the controller and get ready
to begin installation. Press here
when ready:
Begin registration
2
Press the installation-button on
the device now.
?
Select “Add a device”. Press “Begin Registration”, and then press and
release
5.
Device was added:
FTS-117
Add another?
Yes
No
6.
on the thermostat.
Heating System Mode
Decide what the heating system
prioritizes.
Moderate response
Heating with low return
temperature (recommended for
district heating).
Quick response
Fast heating with warm radiators
(recommended for boilers).
?
Choose “Yes” to add another device to the
room, choose “No” to continue.
7.
Radiator C
Here y
radiators are placed:
Visible Radiators
Used when radiators are visible.
Covered Radiators
Used when radiators are
covered.
Choose Heating System and press .
8. Once a device has been registered and the
Danfoss Link™ CC is placed in final position, you must perform a network test see installation guide for Danfoss Link™ CC
?
Choose Radiator Type and press
Danfoss Link™ RS room sensor).
Danfoss Heating Solutions VIIDH102 11/2013
(only with
13

User Guide living connect®
4.3 Testing the connection
1. 2. 3.
Press for at least 3 seconds
until M is displayed.
Press
until LI is displayed.
Press
tion. LI disappears when the
connection is made.
to make the connec-
5. Additional settings
5.1 Adjusting to radiator/room conditions
Press for at least 3 seconds until M is displayed.
Press
The default setting is P2.
Use P1 if the radiator appears oversized for the room.
Use P3 if it is undersized.*
Select P1, P2 or P3 using
* The frequency of P1, P2 and P3 regulation varies to com-
until Pb is displayed, then press .
and exit using .
pensate for radiator over/under sizing.
If no connection can be
made, the alarm and antenna
Refer to “Technical questions”
at www.living.danfoss.eu
14
11/2013 VIIDH102 Danfoss Heating Solutions

User Guide living connect®
5.2 Open-window function
living connect® features an Open-window function, which
closes the valve if the room temperature is falling
dramatically, thus reducing the heat loss.
minutes, before living connect® returns to its original
settings.
When Open-window has been activated, the function is
quarantined for 45 minutes.
Note! Be aware that the Open-window function will be
living connect®,
thus preventing it from detecting the decreasing temperature.
5.3 Automatic valve exercising
To keep the radiator valve functional and at its best, living connect® automatically exercises the
valve every Thursday at approx. 11:00 hrs by opening it fully and then return to normal setting.
6. Safety precautions
The thermostat is not intended for children and must not be used as a toy.
Do not leave packaging materials where children may be tempted to play with them, as this is
extremely dangerous.
Do not attempt to dismantle the thermostat as it contains no user-serviceable parts. If error code
E1, E2 etc. is shown in the display or other defects appear, please return the thermostat to the
distributor.
7. Disposal
The thermostat must be disposed of as electronic waste.
Danfoss Heating Solutions VIIDH102 11/2013
15

Installation and User Guide living connect®
Installer
Danfoss A/S
Haarupvaenget 11
DK-8600 Silkeborg
Denmark
Phone: +45 7488 8000
Fax: +45 7488 8100
www.danfoss.com
www.living.danfoss.eu
VIIDH102
Produced by Danfoss A/S © 11/2013
 Loading...