

User Guide
DEVIreg™ Touch
Electronic Intelligent Thermostat
www.DEVI.com


DEVIreg™ Touch
Table of Contents
1 Introduction ............... 4
2 Settings ................. 6
3 Error Messages ............. 33
4 Removing Front Part of Thermostat 34
5 Warranty ................. 34
6 Disposal Instruction .......... 35
1.1 Safety Instructions ........ 5
2.1 Setting Temperature ....... 7
2.2 Time and Date .......... 8
2.3 Periods with Lowering of Temper-
ature ................ 10
2.4 Away ............... 18
2.5 Minimum Floor Temperature .. 21
2.6 Restore Default Temperature Set-
tings ................ 23
2.7 Safety Lock ............ 24
2.8 Frost Protection ......... 26
2.9 Energy Consumption ...... 29
2.10 Backlight Level .......... 30
2.11 Language ............. 31
2.12 Turning the Thermostat On/Off 32
User Guide 3

DEVIreg™ Touch
1 Introduction
DEVIreg™ Touch is an electronic thermostat specially designed for floor heating systems. Among others, the thermostat has the following features:
A touchscreen display with backlight.
▪
An easy-to-follow menu-driven operation.
▪
Energy-saving schedule: A standard or customized
▪
timer program including fully flexible day and time
pattern that lets you preset the temperature to energy-saving levels, e.g. while you are at work or asleep and with optimum heating start/stop to reach the desired temperature at the right time.
Open window detection that prevents excessive heat-
▪
ing at sudden drop of temperature.
Vacation setting: Suspension of normal program
▪
schedule for specified periods of time.
Consumption meter.
▪
Quick-access button to features such as frost protec-
▪
tion and away function.
4 User Guide

DEVIreg™ Touch
1.1 Safety Instructions
Please observe the following guidelines:
Do not cover the thermostat, e.g. by hanging towels or
▪
similar items in front of it! This will impair the ability of
the thermostat to sense and adjust the room temperature correctly.
Do not spill liquids of any kind into the thermostat.
▪
Do not open, disassemble, or tamper with the thermo-
▪
stat in any way.
If the thermostat is installed in a place frequented by
▪
small children, use the safety lock.
Do not interrupt the power supply to the thermostat.
▪
The installation of the thermostat must be done by an
▪
authorized and qualified installer according to local
regulations.
User Guide 5
DEVIreg™ Touch
2 Settings
Basic rules for changing thermostat settings
Accessing different
settings
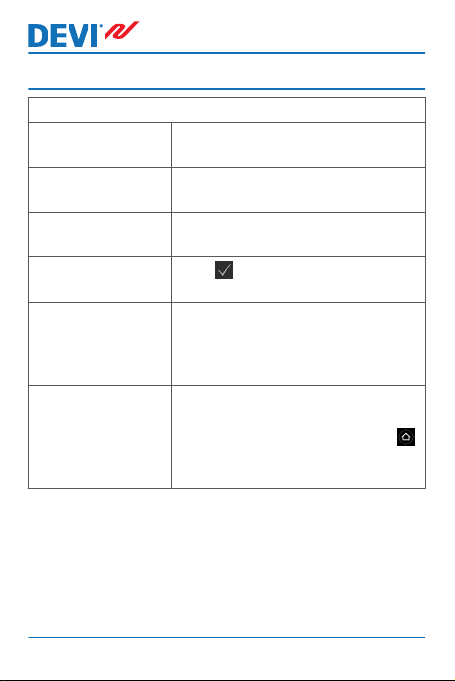
To increase a value Press the > arrow (press and hold to
To decrease a value Press the < arrow (press and hold to
To confirm a value
To cancel your
changes
To return to normal
temperature display
Directly press the item on the
screen you want to access.
step quickly through the values)
step quickly through the values)
in the top right corner of
Press
the screen.
Press the back arrow in the top left
corner of the screen to go to the
previous screen without saving
your changes.
Use the back arrow in the upper left
corner of the screen until you reach
the main menu screen, the press
in the centre of the main menu
screen.
6 User Guide
DEVIreg™ Touch
2.1 Setting Temperature
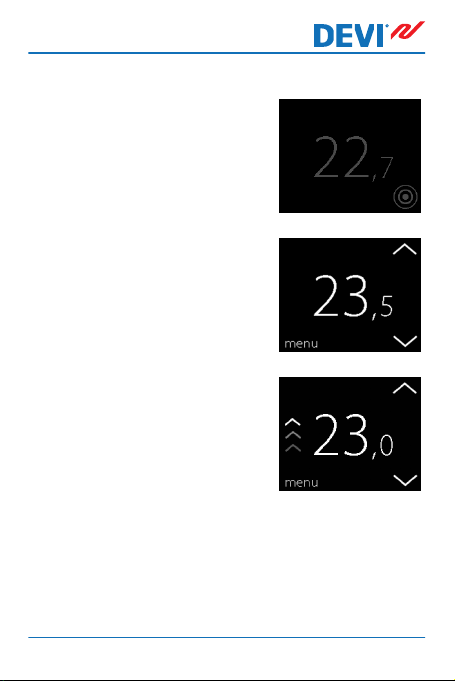
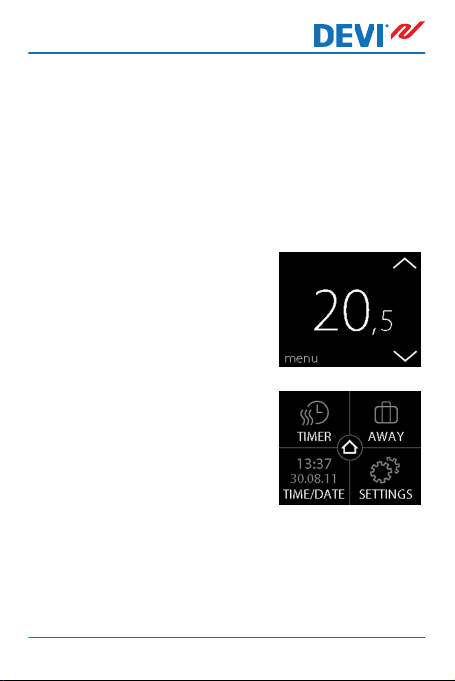
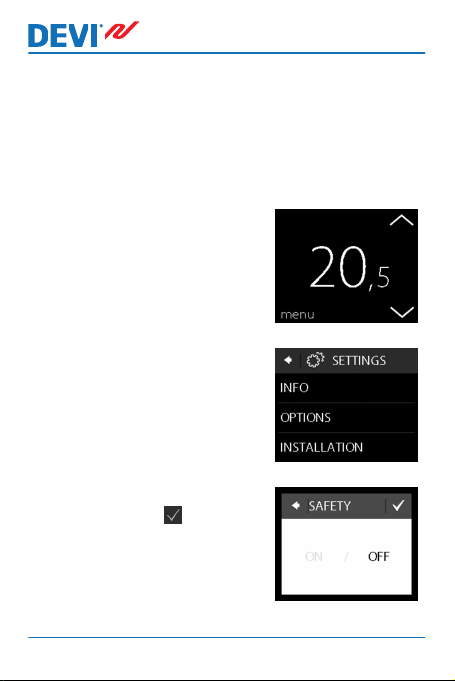
When the display is inactive, it
shows the actual temperature
measured in the room:
When you activate the display, it
shows the temperature that you
want (the one you have set):
If the system is heating, up arrows
will flash to the left of the temperature:
User Guide 7
DEVIreg™ Touch
How to lower or raise the temperature
1. Touch the thermostat display
to activate it. Then press the
up or down arrow in the right
side of the screen.
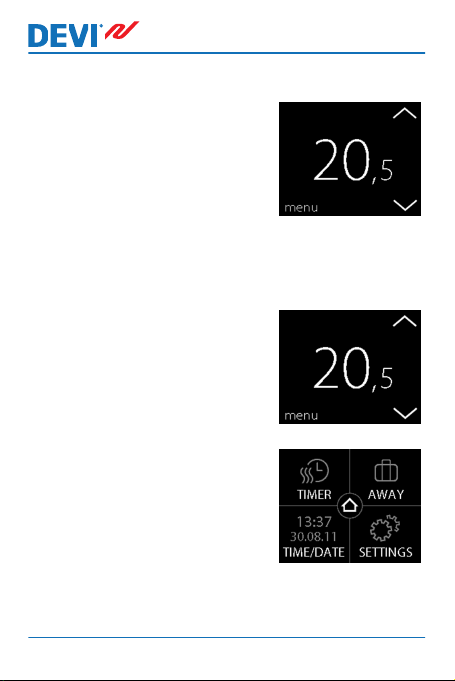
2.2 Time and Date
How to set the time and date
1. Touch the thermostat display
to activate it, then press
menu.
2. Press TIME/DATE in the bottom left corner of the menu.
Then press TIME.
8 User Guide

DEVIreg™ Touch
3. Press the hour numbers.
4. Use the arrows < and > to set
the hour. Press to confirm.
5. Press the minutes numbers
and use the arrows < and > to
set the minutes. Press to
confirm and press again to
return to the TIME/DATE
screen.
6. Press DATE.
User Guide 9

DEVIreg™ Touch
7. Press the day, month and year
respectively and set the date
using the arrows < and > and
pressing to confirm. Press
in the SET DATE screen.
To return to the normal temperature display, press the
back arrow in the upper left corner of the screen until you
get to the main menu, then press .
2.3 Periods with Lowering of Temperature
You can set the thermostat to keep a constant temperature,
or let the thermostat automatically switch between periods
with a lower temperature (also called economy temperature) and periods with comfort temperature.
By default, the thermostat is set to the following comfort
periods:
Monday - Friday: 6:00 - 8:00 and 16:00 - 22:30.
▪
Saturday - Sunday: 7:00 - 22:45.
▪
You use the thermostat timer to change the predefined
comfort periods and set the comfort and economy temperatures you want. Note: In order to switch between comfort
and economy temperatures, the timer function must be activated (ON).
10 User Guide
DEVIreg™ Touch
The thermostat has a forecast function. When this function
is active (i.e. FORECAST is set to ON when you press SETTINGS menu and then OPTIONS), you only need to select
the time at which you require comfort and economy temperatures. The thermostat will then calculate when the
heating should start in order to reach the desired temperature at the specified time.
How to define comfort and economy periods
1. Touch the thermostat display
to activate it, then press
menu.
2. Press TIMER in the upper left
corner of the menu. Then
press ADJUST SCHEDULE
User Guide 11
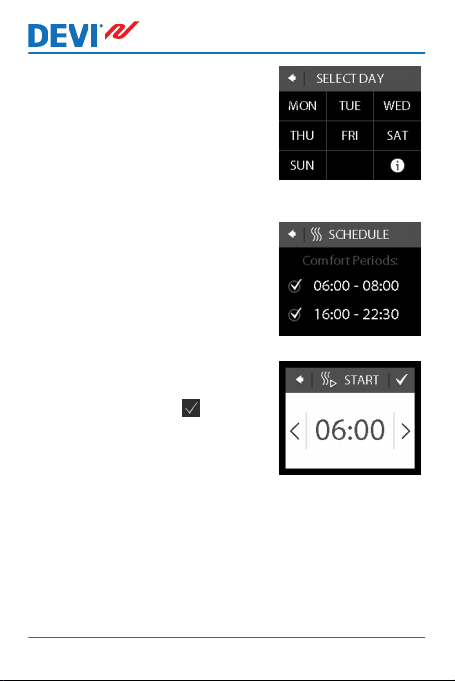
3. Press a day of the week on
which you want to switch between comport and economy
periods. You can define up to
2 comfort periods a day (and
thereby also 2 economy periods).
4. Press the first time indication
(i.e. 06:00 in the displayed example) to define start time for
the first comfort period.
5. Press the < and > arrows to
set the start time of the comfort period. Press to confirm.
DEVIreg™ Touch
12 User Guide

DEVIreg™ Touch
6. Press the end time of the first
comfort period to define it
(i.e. 08:00 in the displayed example).
7. Press the < and > arrows to set the end time of the
comfort period. Press to confirm.
8. Repeat Steps 4 to 7 to define the start time and the
end time of the second comfort period if you need it.
If not, press the check mark next to the second comfort period in order to deactivate it.
Note: All time intervals outside the defined comfort periods are automatically regarded as economy periods.
9.
User Guide 13
to confirm your com-
Press
fort periods.
A screen will now appear that
lets you copy the specified
comfort periods to other days
of the week.
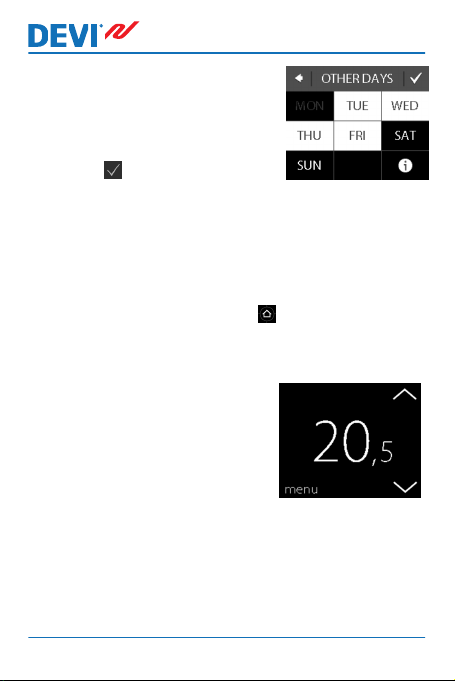
DEVIreg™ Touch
10. Click NO if the comfort periods
only apply to the selected day
of the week, or click YES to go
to a screen where you can select the relevant days. Then
press to copy the comfort
periods to these days.
11. Repeat Steps 3 to 7 to define comfort periods for
other days of the week.
To return to the normal temperature display, press the
back arrow in the upper left corner of the screen until you
get to the main menu, then press .
How to define comfort and economy temperatures
1. Touch the thermostat display
to activate it, then press
menu.
14 User Guide

DEVIreg™ Touch
2. Press TIMER in the upper left
corner of the menu. Then
press TEMPERATURES
3. Press COMFORT and use the
arrows < and > to set the
comfort temperature. Press
to confirm.
4. Press ECONOMIC and use the
arrows < and > to set the
economy temperature. Press
to confirm.
To return to the normal temperature display, press the
back arrow in the upper left corner of the screen until you
get to the main menu, then press .
User Guide 15

DEVIreg™ Touch
How to get an overview of defined comfort periods
1. Touch the thermostat display
to activate it, then press
menu.
2. Press TIMER in the upper left
corner of the menu. Then
press ADJUST SCHEDULE
3. Press the information icon in
the bottom right corner of the
SELECT DAY screen.
16 User Guide

DEVIreg™ Touch
A graphical overview of the defined comfort periods in a week
will now appear.
To return to the normal temperature display, press the
back arrow in the upper left corner of the screen until you
get to the main menu, then press .
How to turn the timer function on and off
You may for instance want to turn the timer function off
temporarily if a short extension of the comfort period is
needed.
When the timer is switched off, a hand icon
the upper part of the thermostat display (to illustrate that
temperature regulation is done manually).
User Guide 17
is shown in

DEVIreg™ Touch
1. Press the button on the side
of the thermostat.
2. Press ENABLE TIMER to turn
the timer function on, or DIS-
ABLE TIMER to turn it off.
2.4 Away
How to suspend normal temperature settings for one or
more days
Whatever temperature you set will be maintained 24 hours
a day for the number of days you select. After this number
of days have elapsed, the normal temperature settings will
resume.
18 User Guide

DEVIreg™ Touch
1. Touch the thermostat display
to activate it, then press
menu.
2. Press AWAY in the upper
right corner of the menu.
Then press PERIOD.
3. Press the start date and use
the < and > arrows to set the
date. Press to confirm.
To go quickly through the
dates, press and hold the arrow < or >.
4. Press the end date and use the arrows < and > to set
the date. Press twice to confirm.
User Guide 19

5. Press AWAY TEMP. and use
the arrows < and > to set the
temperature while you are
away. Press to confirm.
6. Make sure away mode is activated. If not, press AWAY and
then press ON. Press to
confirm.
On the specified start date, a suitcase symbol will appear on the
display.
DEVIreg™ Touch
20 User Guide

DEVIreg™ Touch
How to deactivate the away function
If you return earlier than expected, you can deactivate the
away mode.
1. Touch the thermostat display
to activate it. Then press off in
the bottom left corner.
2.5 Minimum Floor Temperature
How to set the minimum floor temperature
Note: This feature can only be activated if both a room sen-
sor and a floor sensor are available.
1. Touch the thermostat display
to activate it, then press
menu.
User Guide 21

DEVIreg™ Touch
2. Press Settings in the bottom
right corner of the menu.
Then press OPTIONS.
3. Use the arrows in the right
side of the screen to go to
MIN. FLOOR TEMP., and
press to select it. Then press
MIN. FLOOR and ON. Press
to confirm.
4. Press TEMPERATURE. Then
use the < and > arrows to set
the minimum floor temperature. Press to confirm.
To return to the normal temperature display, press the
back arrow in the upper left corner of the screen until you
get to the main menu, then press .
The floor temperature is now kept above the specified lower limit.
22 User Guide
DEVIreg™ Touch
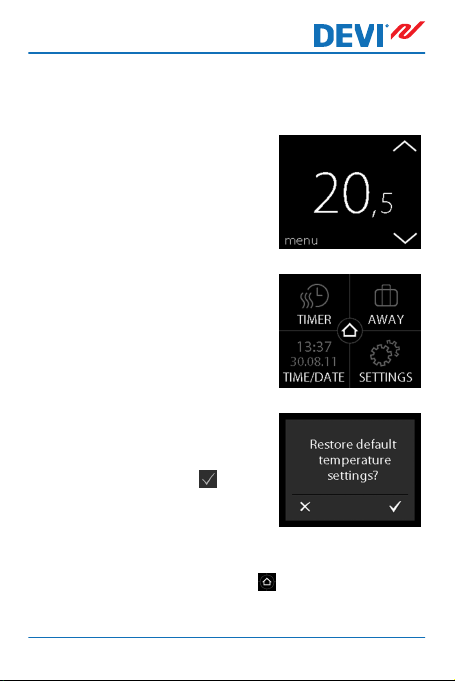
2.6 Restore Default Temperature Settings
How to restore the default temperature settings
1. Touch the thermostat display
to activate it, then press
menu.
2. Press Settings in the bottom
right corner of the menu.
Then press OPTIONS.
3. Use the arrows in the right
side of the screen to go to RE-
STORE TEMP., and press to
select it. Then press to confirm.
To return to the normal temperature display, press the
back arrow in the upper left corner of the screen until you
get to the main menu, then press .
User Guide 23
DEVIreg™ Touch
2.7 Safety Lock
The safety lock is used for locking the screen display in order to prevent undesirable changes of the thermostat settings.
How to lock the screen display
1. Touch the thermostat display
to activate it, then press
menu.
2. Press Settings in the bottom
right corner of the menu. Then
press OPTIONS.
3. Press SAFETY LOCK. Then
press ON. Press to confirm.
24 User Guide

DEVIreg™ Touch
A lock symbol will now appear
when you press the display.
How to unlock the screen display
1. Press the button on the side of
the thermostat.
2.
Press to unlock the screen
display.
User Guide 25

DEVIreg™ Touch
2.8 Frost Protection
Frost protection is used for maintaining a certain minimum
temperature to ensure frost control (5°C by default).
How to activate frost protection
1. Press the button on the side
of the thermostat.
2. Press FROST PROTECTION.
26 User Guide

DEVIreg™ Touch
A frost symbol will now appear on
the display.
How to turn frost protection off
1. Touch the thermostat display
to activate it. Then press off in
the bottom left corner.
How to set the frost protection temperature
1. Touch the thermostat display
to activate it, then press
menu.
User Guide 27
DEVIreg™ Touch
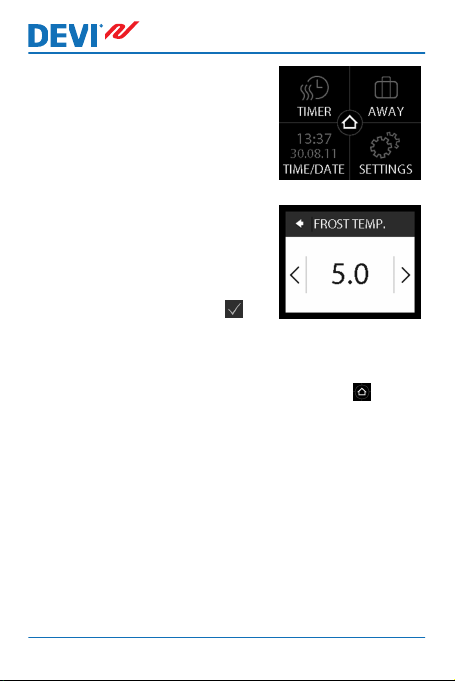
2. Press SETTINGS in the bottom right corner of the menu.
Then press INSTALLATION
and MANUAL SETUP.
3. Use the arrows in the right
side of the screen to go to
FROST TEMP., and press to
select it. Then use the < and >
arrows to set the frost protection temperature. Press to
confirm.
To return to the normal temperature display, press
the back arrow in the upper left corner of the screen
until you get to the main menu, then press .
28 User Guide

DEVIreg™ Touch
2.9 Energy Consumption
How to check your energy consumption
1. Touch the thermostat display
to activate it, then press
menu.
2. Press Settings in the bottom
right corner of the menu.
Then press Info.
3. Press Consumption. Then
press the period for which
you want to see the energy
consumption: last 7 days, last
30 days or total consumption
since installation of thermostat.
To return to the normal temperature display, press the
back arrow in the upper left corner of the screen until you
get to the main menu, then press .
User Guide 29
DEVIreg™ Touch
2.10 Backlight Level
How to change the backlight
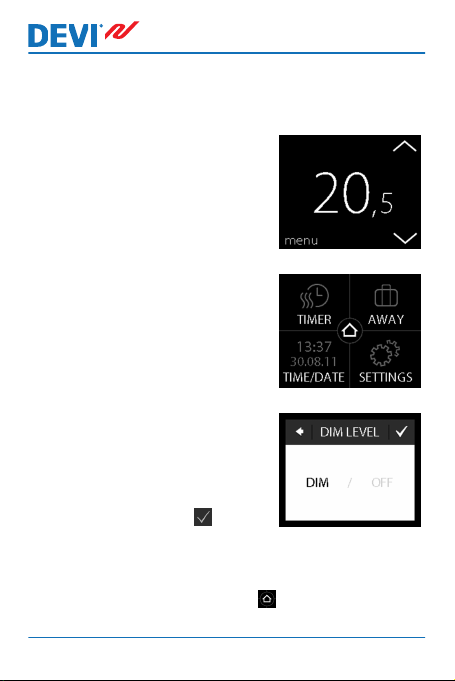
1. Touch the thermostat display
to activate it, then press
menu.
2. Press SETTINGS in the bottom right corner of the menu.
Then press OPTIONS.
3. Use the arrows in the right
side of the screen to go to
DIM LEVEL, and press to select it. Then press DIM to reduce backlight or OFF to turn
backlight off. Press to confirm.
To return to the normal temperature display, press the
back arrow in the upper left corner of the screen until you
get to the main menu, then press .
30 User Guide

DEVIreg™ Touch
2.11 Language
How to select language
1. Touch the thermostat display
to activate it, then press
menu.
2. Press Settings in the bottom
right corner of the menu.
Then press OPTIONS.
3. Use the arrows in the right
side of the screen to go to
your language, and press to
select it. Then press in the
upper right corner to confirm.
To return to the normal temperature display, press the
back arrow in the upper left corner of the screen until you
get to the main menu, then press .
User Guide 31

DEVIreg™ Touch
2.12 Turning the Thermostat On/Off
How to turn off the thermostat
1. Press the button on the side
of the thermostat.
2. Press POWER OFF.
A power symbol will now appear
on the display.
32 User Guide

DEVIreg™ Touch
How to turn on the thermostat
1. Touch the thermostat display
to activate it. Then press on in
the bottom left corner.
3 Error Messages
Error mes-
sage
User Guide 33
Problem Solution
The thermostat has overheated and
has switched
off.
The floor sensor short
circuited.
The floor sensor is disconnected.
Let the thermostat cool
for period. Then switch
the thermostat off and
on. If the error persists
contact your authorized
installer.
If the error persists contact your authorized installer.
If the error persists contact your authorized installer.

5
Y E A R
DEVIreg™ Touch
4 Removing Front Part of Thermostat
When painting, wallpapering or other projects are planned,
you can remove the front part of the thermostat from the
mounting base.
Important: Do NOT press on the display screen when removing the front part nor when clicking it back in place.
Press your fingers under the side of the front part and pull
toward you:
To reinstall the thermostat, click it back in place.
5 Warranty
34 User Guide

DEVIreg™ Touch
6 Disposal Instruction
User Guide 35

DEVIreg™ Touch
Danfoss A/S
Electric Heating Systems
Ulvehavevej 61
7100 Vejle
Denmark
Phone: +45 7488 8500
Fax: +45 7488 8501
E-mail: EH@DEVI.com
www.DEVI.com
Danfoss can accept no responsibility for possible errors in catalogues, brochures and other printed material. Danfoss reserves the right to alter its
products without notice. This also applies to products already on order provided that such alterations can be made without subsequential changes
being necessary in specifications already agreed. All trademarks in this material are property of the respective companies. DEVI and the DEVI logotype are trademarks of Danfoss A/S. All rights reserved.
VUGDB202 Produced by Danfoss © 07
/2012
 Loading...