

Page 1
USER MANUAL
Part No. 088L5130/5132
English .................. 1
Français ................ 7
Español ............... 14
57144A 10/09 (DJU)
© 2009 Danfoss Inc.
Programmable Thermostats 088L5130/5132 English
Contents
Introduction ................................................................................ 1
First Time Settings ..................................................................... 1
Ground Fault Circuit Interrupter (GFCI) ..................................... 1
Checking the GFCI ..................................................................... 2
4-Event Program ........................................................................ 2
Quick Set Temperature .............................................................. 3
Adaptive Preheat Feature .......................................................... 3
Manual Mode .............................................................................. 3
Temporary Override .................................................................... 3
Child Lock ................................................................................... 4
Introduction
The Danfoss LX thermostat can switch on your heating system at
predetermined times on different days of the week. For each day
of the week, you can set individual temperatures for 4 periods, called events. The thermostat comes with a default schedule suitable
for most installations. Unless you change the settings, the thermostat will operate in compliance with the default schedule. Lowering
the temperature when the home is unoccupied will reduce your
energy costs without reducing comfort.
Furthermore, the thermostat contains an adaptive preheat feature
that automatically changes heating period start times so as to
ensure that the required temperature is reached at the required
time. After three days the adaptive preheat feature learns when the
heating must be switched on.
Temperature Unit ........................................................................ 4
Setting Time ................................................................................ 4
Setting Day ................................................................................. 4
Read Out ..................................................................................... 5
Offset Temperature ..................................................................... 5
Application .................................................................................. 5
Display ........................................................................................ 6
Factory Reset ............................................................................. 6
Exit Menu .................................................................................... 6
Error Messages .......................................................................... 6
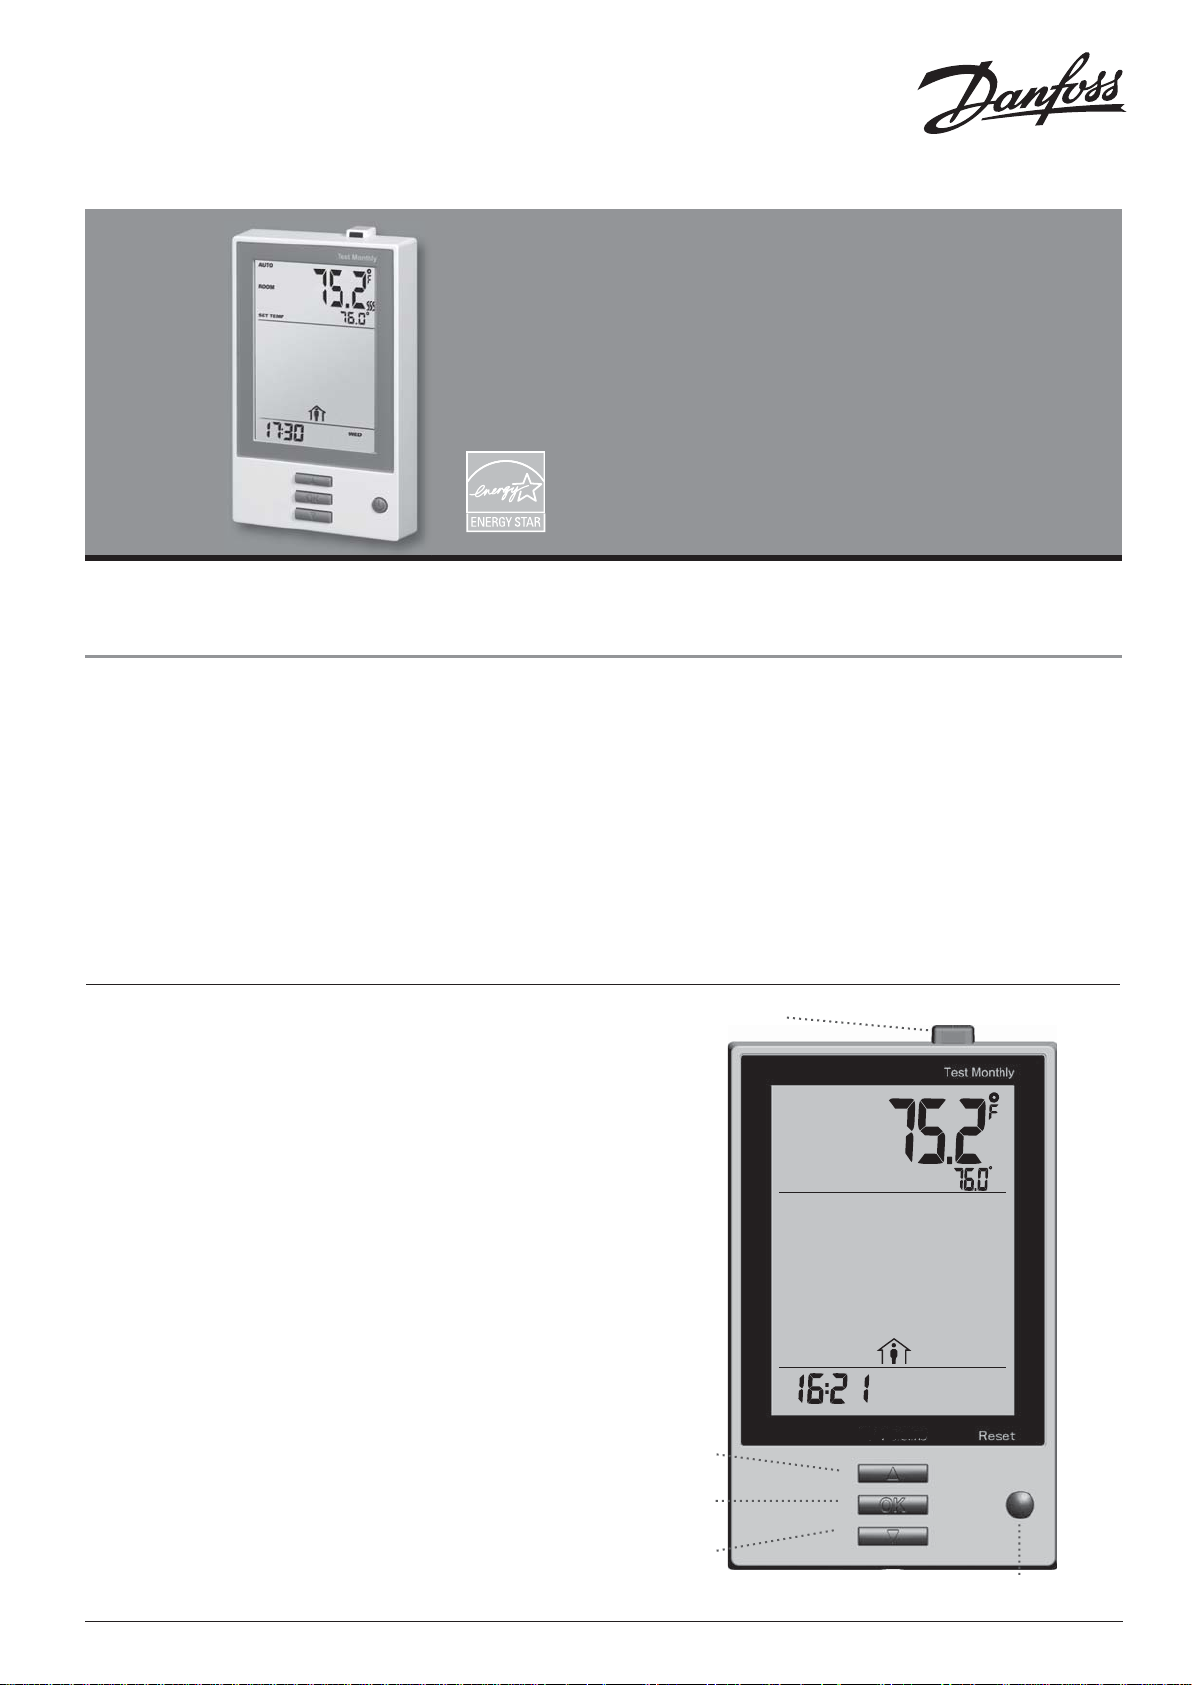
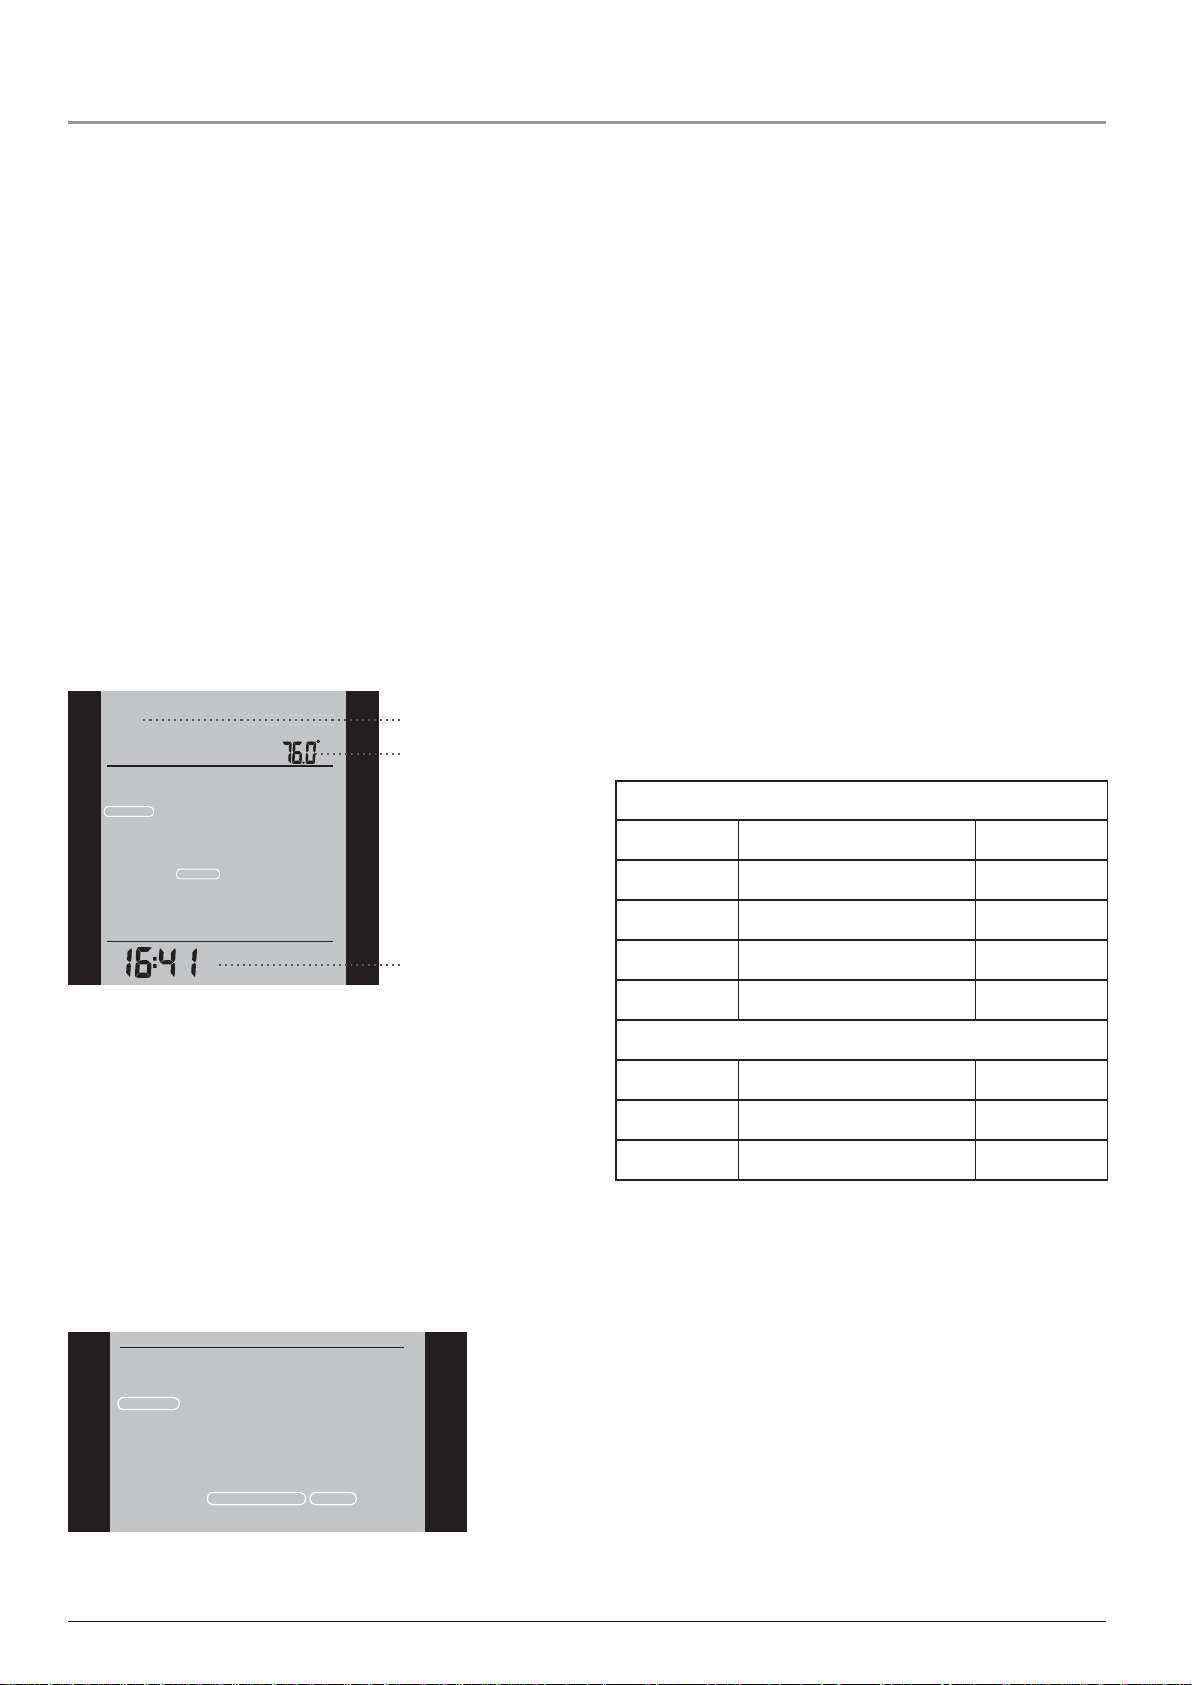
GFCI test button
AUTO
ROOM
SET TEMP
First Time Settings
The fi rst time you turn on the thermostat, time and day must be
set. The time fl ashes. Set the current time using the Up or Down
buttons. Then press the OK button to confi rm the time. The day
of the week will then fl ash. Select the current day using the Up
and Down buttons. Press the OK button. The thermostat is now
ready for use and will control your heating according to the preprogrammed 4-event schedule (see Factory Settings for Automatic
5:2 Program).
Ground Fault Circuit Interrupter (GFCI)
The thermostat is GFCI protected which ensures personal safety in
case of ground faults.
It is important that the GFCI is checked monthly.
© 2009 Danfoss Inc.
MON
Up button
OK button
Down button
Standby button
Reset GFCI
1
Page 2

Programmable Thermostats 088L5130/5132 English
Checking the GFCI
Testing can only be performed while the thermostat is calling for
heat.
Adjust the setpoint until the heating symbol ( ) appears. Use the
Up button to increase the heating demand and then press the OK
button Wait 10 seconds to allow the thermostat to adjust to the
new setpoint.
Then press the TEST button on the top of the thermostat.
The test is successful if the red light in the TEST button lights up
and GROUND FAULT is shown on the display. If this does not oc-
cur, check the installation/contact your electrical installer.
Press the Standby/Reset button to reset the GFCI.
The red light should go out and the display returns to normal appearance.
Press the Down button to return to the original temperature setting.
If the test fails, check the heating cable and thermostat.
If during normal operation the GFCI trips without the TEST button
being pressed, there could be a ground fault! To check whether it
is a ground fault or nuisance tripping, press Standby/Reset.
If this causes the red light to go off and stay off, it was nuisance
tripping and the system is operating correctly. If this does not occur, there is a ground fault! Contact your electrical installer.
4-Event Program
I want the temperature to be controlled automatically in accordance with a program of individual
temperature settings for four separate events during
a day:
• when I wake up in the morning,
6:1 will give you 6 days (Monday to Saturday) with the same
four events (Morning, Out, Home, Night) and 1 day (Sunday)
with the same two events (Day and Night).
7:0 will give you individual settings for each day from Monday
to Sunday.
1 Press the OK button to activate the menu.
2 Press the Up or Down buttons until the Schedule option fl ashes.
3 Press the OK button.
4 Press the Up or Down buttons until the required program (5:2,
6:1 or 7:0) fl ashes in the lower part of the display.
5 Press the OK button.
SCHEDULE
MON
TUE WED THU
FRI
Step 3: Select the time and temperature settings for
each event in the program of days selected in the
previous step.
• when I am away at work,
• when I come home,
• and at night.
To do so, you must perform the following 3 steps:
Step 1: Select automatic temperature control.
1 Press the OK button to activate the menu.
2 Press the Up or Down buttons until the Mode option fl ashes.
3 Press the OK button.
4 Press the Up or Down buttons until the Auto options fl ashes
in the upper part of the display.
5 Press the OK button.
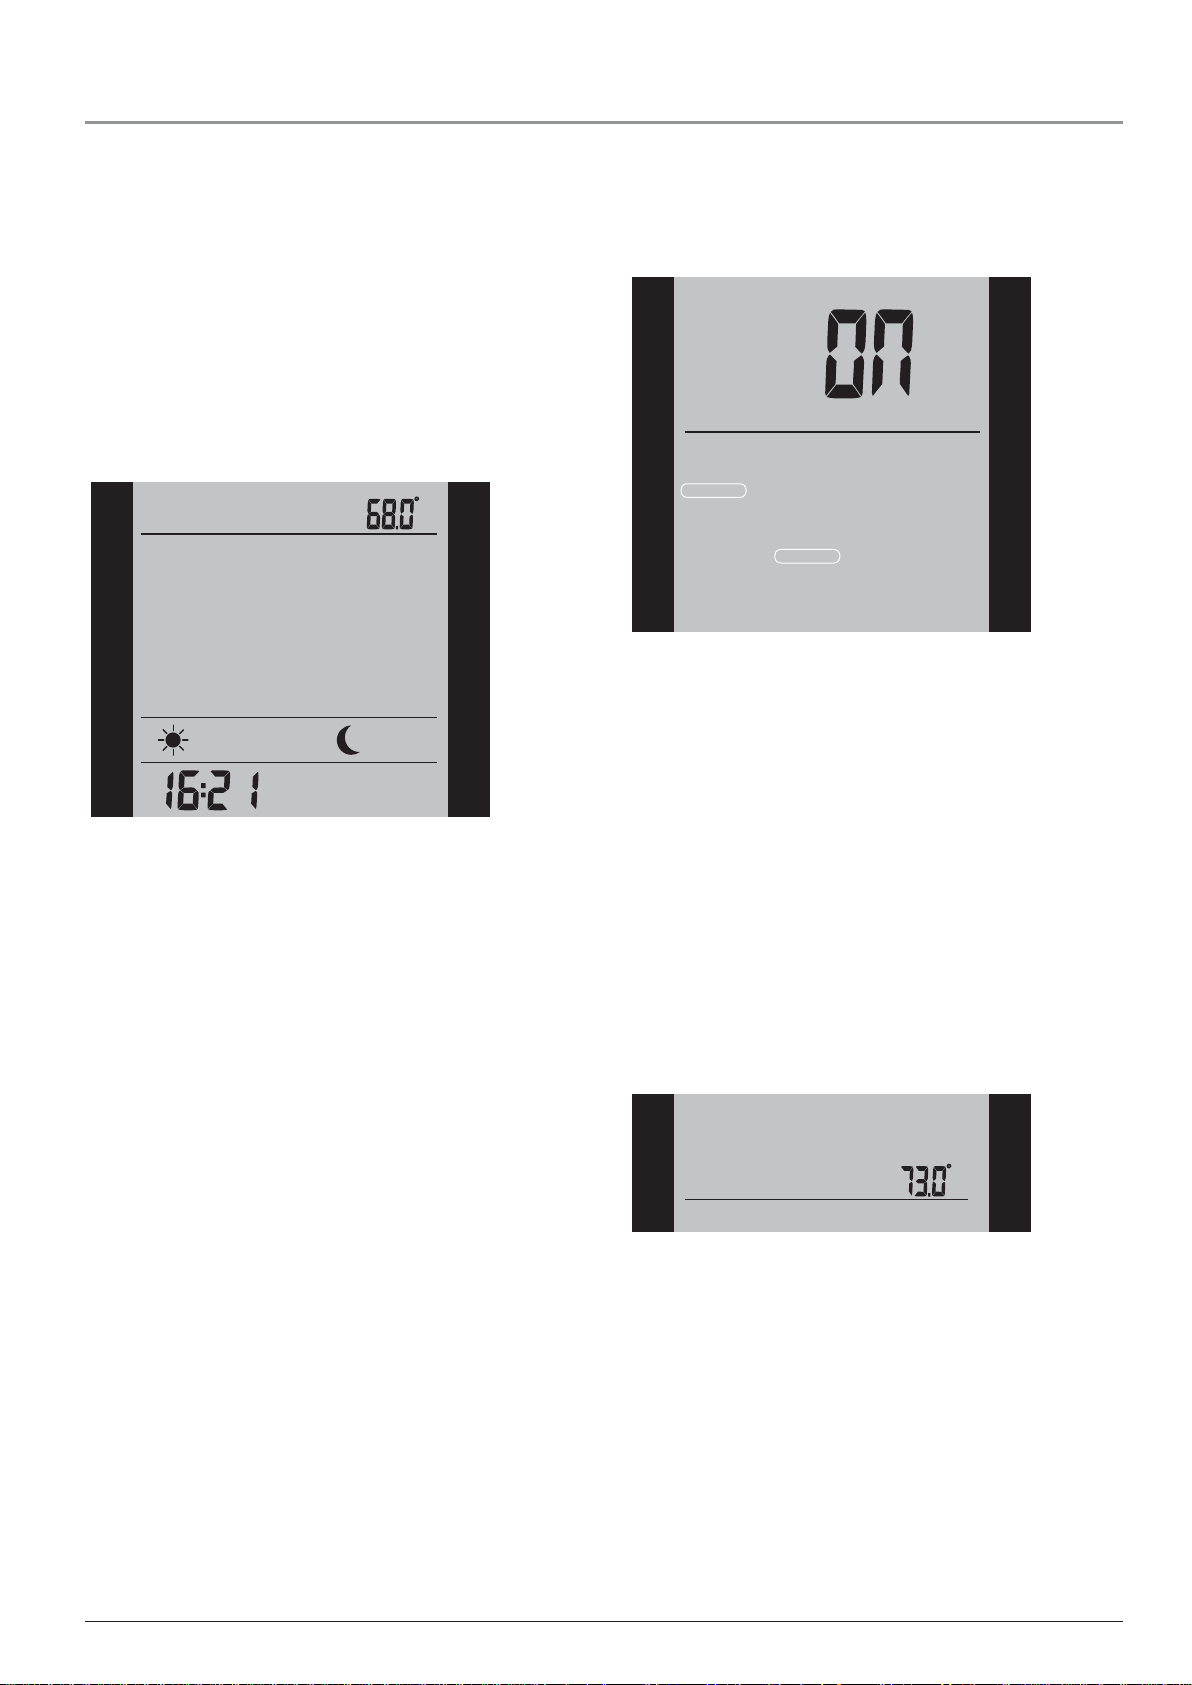
Factory setting: Auto mode
AUTO
OVERRIDE
MAN. MODE
MODE
SCHEDULE
PROGRAM
SETTINGS
EXIT
Step 2: Choosing the weekly schedule
for your program.
You have the following options:
5:2 will give you 5 days (Monday to Friday) with the same four
events (Morning, Out, Home, Night) and 2 days (Saturday and
Sunday) with the same two events (Morning and Night).
SET TEMP
PROGRAM
At work
EXIT
Morning
Hour
Minutes 5-day period
MON
TUE WED THU
FRI
Please note: The following description illustrates an example in
which settings are made for the daily events in a 5:2 program.
1 Press the Up or Down buttons until the Program option fl ashes.
2 Press the OK button.
3 Press the Up or Down buttons until the day(s) that you wish
to program fl ash in the lower part of the display, e.g. Mon Tue
Wed Thu Fri.
4 Press the OK button. The symbol for the fi rst event (e.g. morn-
ing) will now fl ash.
5 Press the OK button. The hour will fl ash, allowing you to set
the hour at which you want the morning period to begin.
6 Press the Up or Down buttons until the required hour is dis-
played.
7 Press the OK button. The minutes will fl ash.
8 Press the Up or Down buttons until the required minutes are
displayed.
At home
Night
2
© 2009 Danfoss Inc.
Page 3
Programmable Thermostats 088L5130/5132 English
9 Press the OK button. The temperature setting will now fl ash in
the upper part of the display.
10 Press the Up or Down buttons to set the required temperature.
11 Press the OK button. The symbol for the next event (e.g. at
work) will now fl ash, allowing you to set the time and temperature for this period of the day by repeating steps 6-12.
12 Once time and temperature have been set for the four events
applicable for the 5-day period Monday to Friday, Exit will fl ash.
13 Press the OK button. The next 2 days, Sat Sun, will then fl ash.
Please note that now only two events (Day and Night) are displayed.
14 Press the OK button. The symbol for the fi rst event will fl ash.
15 Set the time and temperature for this event, and for the following
event, by repeating steps 6-12.
16 Finally, select Exit to exit the Program for a 5:2 schedule.
SET TEMP
PROGRAM
EXIT
SAT SUN
Quick Set Temperature
I want to permanently change the temperature for
the event currently active in the automatic program.
To do so, you must:
1 Press the Up or Down buttons to set the required temperature
for the event currently active.
2 Press the OK button.
The adaptive preheat feature calculates when the thermostat must
start the heating system to ensure that the required temperature
is reached at the set time. Three days after the adaptive preheat
feature has been activated, it has learned when the heating must
be switched on to attain the required temperature.
Factory setting: ON
TIME
DAY
SETTINGS
CHILDLOCK
C°/F°
APPLICATION
OFFSET TEMP
READOUT
ADAPTIVE
DISPLAY
FACTORY RESET
EXIT
Manual Mode
I want to temporarily cancel the automatic 4-event
program and manually select temperature.
To do so, you must use manual mode:
1 Press the OK button to activate the menu.
2 Press the Up or Down buttons until the Mode option fl ashes.
3 Press the OK button.
4 Press the Up or Down buttons until Man. mode fl ashes in the
upper part of the display. The temperature will begin to fl ash.
5 Press the Up or Down buttons until the required temperature
fl ashes.
6 Press the OK button.
Please note: This feature can be useful for instance if you are going on holiday and want to maintain a frost protection temperature
(e.g. 41°F) while you are away.
The new temperature setting will then be saved and used for this
event in the future.
Example: If you change the temperature on a Tuesday morning
while the thermostat is running a 5:2 program, the new temperature will apply to all mornings from Monday to Friday.
Adaptive Preheat Feature
I want to ensure that the required temperature has
already been reached when I get up in the morning
or come home from work.
To do so, you must activate the adaptive function:
1 Press the OK button to activate the menu.
2 Press the Up or Down buttons until the Settings option fl ashes.
3 Press the OK button.
4 Press the Up or Down buttons until the Adaptive option
fl ashes.
5 Press the OK button. On or Off will now fl ash in the upper part
of the display.
6 Press the Up or Down buttons until On fl ashes.
7 Press the OK button.
8 Select Exit to exit the option.
Please note: The adaptive preheat function is only related to the
4-event program and only works in connection with going from one
event to another where the temperature is going to be raised.
To return to the automatic 4-event program, you must select Auto.
Please refer to page 2 for instructions.
MAN. MODE
MODE
Temporary Override
I want to temporarily set a comfort temperature for
a single event, e.g. because I am not at work one
day and want to maintain a higher temperature or
because I am having a party.
To do so, must use override mode:
1 Press the OK button twice to activate the menu.
2 Press the Up or Down buttons until the Mode option fl ashes.
3 Press the OK button.
4 Press the Up or Down buttons until Override fl ashes in the up-
per part of the display. The temperature will begin to fl ash.
5 Press the Up or Down buttons until the required temperature
fl ashes.
6 Press the OK button.
© 2009 Danfoss Inc.
3
Page 4
Programmable Thermostats 088L5130/5132 English
Please note: Override mode is a temporary temperature setting
that is cancelled automatically by the next event in the scheduled
4-event program.
OVERRIDE
MODE
Child Lock
I want to lock the thermostat menus to prevent the
settings from being changed.
To do so, you must activate the child lock:
1 Press the OK button twice to activate the menu.
2 Press the Up or Down buttons until the Settings option fl ashes.
3 Press the OK button.
4 Press the Up or Down buttons until the Childlock option
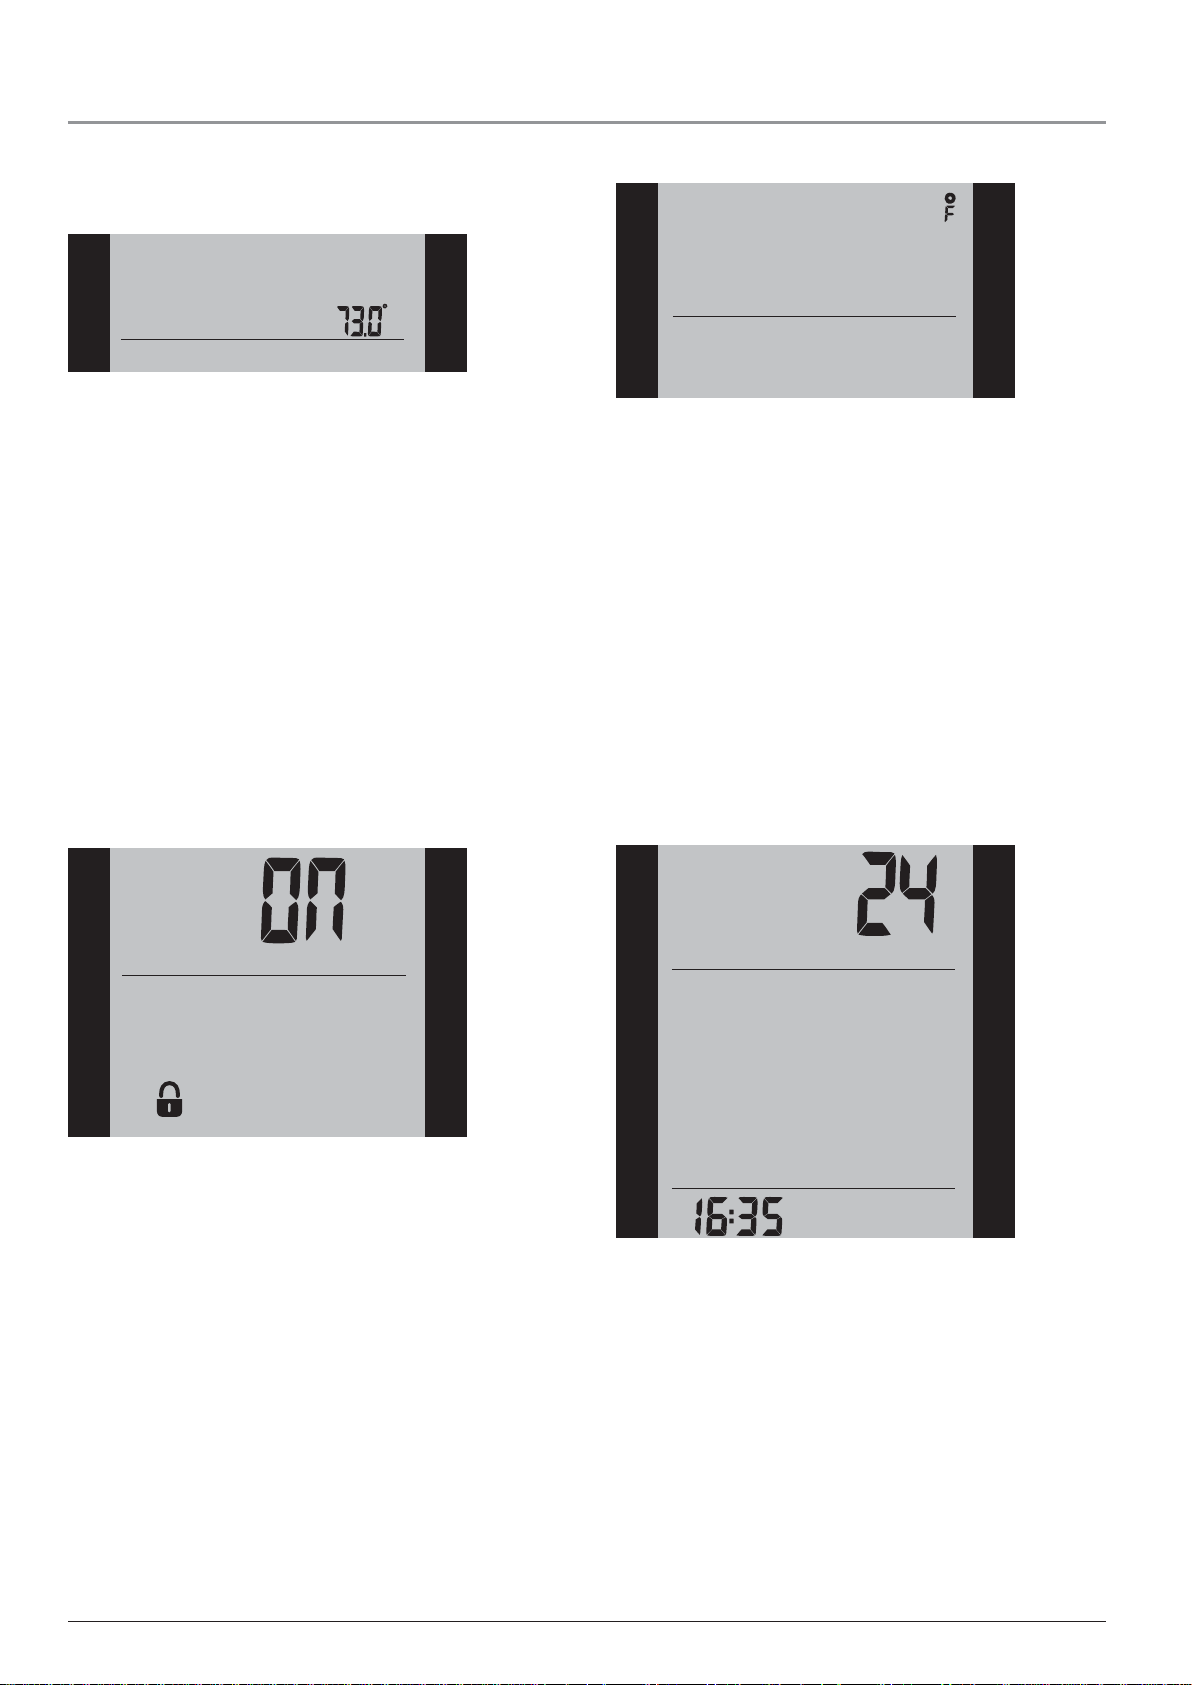
fl ashes. A padlock symbol will appear in the menu area and Off
will fl ash in the upper part of the display.
5 Press the Up or Down buttons until On fl ashes.
6 Press the OK button.
7 Select Exit to exit the option.
To unlock the child lock again, proceed as follows:
1 Press the OK button to activate the menu.
2 Then press and hold the Up and Down buttons simultaneously
for three seconds.
Factory setting: OFF
SETTINGS C°/F°
Setting Time
I want to change the time.
To do so, you must:
1 Press the OK button twice to activate the menu.
2 Press the Up or Down buttons until the Settings option fl ashes.
3 Press the OK button.
4 Press the Up or Down buttons until the Time option fl ashes.
The currently selected 12 or 24 hour clock will fl ash in the lower
part of the display.
5 Press the Up or Down buttons to select either 12 or 24 hour clock.
6 Press the OK button. The hour will begin fl ashing in the lower
part of the display.
7 Press the Up or Down buttons to set the hour.
8 Press the OK button. Now the minutes will fl ash.
9 Press the Up or Down buttons to set the minutes.
10 Press the OK button.
11 Select Exit to exit the option.
Factory setting: Celsius
SETTINGS
CHILDLOCK
Temperature Unit
I want to change the temperature unit (°C/°F) used in
the display.
To do so, you must:
1 Press the OK button twice to activate the menu.
2 Press the Up or Down buttons until the Settings option fl ashes.
3 Press the OK button.
4 Press the Up or Down buttons until °C/°F fl ashes in the menu
area. The unit currently selected will fl ash in the upper part of
the display.
5 Press the Up or Down buttons until the required unit °C/°F
fl ashes.
6 Press the OK button.
7 Select Exit to exit the option.
Please note: Temperatures are displayed in Celsius with a resolution
of 0.5 degree and in Fahrenheit with a resolution of 1 degree.
Factory setting: 24 hour clock
TIME
SETTINGS
Setting Day
I want to change the day of the week.
To do so, you must:
1 Press the OK button twice to activate the menu.
2 Press the Up or Down buttons until the Settings option fl ashes.
3 Press the OK button.
4 Press the Up or Down buttons until the Day option fl ashes.
The currently selected day of the week will fl ash in the lower
part of the display.
5 Press the Up or Down buttons until the required day of the
week fl ashes.
6 Press the OK button.
7 Select Exit to exit the option.
4
© 2009 Danfoss Inc.
Page 5
Programmable Thermostats 088L5130/5132 English
Please note: Usually, the electrician who installed the thermostat
will have set the correct time and day of the week.
Factory setting: Mon
SETTINGS
DAY
MON
FRI
TUE
SAT
WED
SUN
THU
Read Out
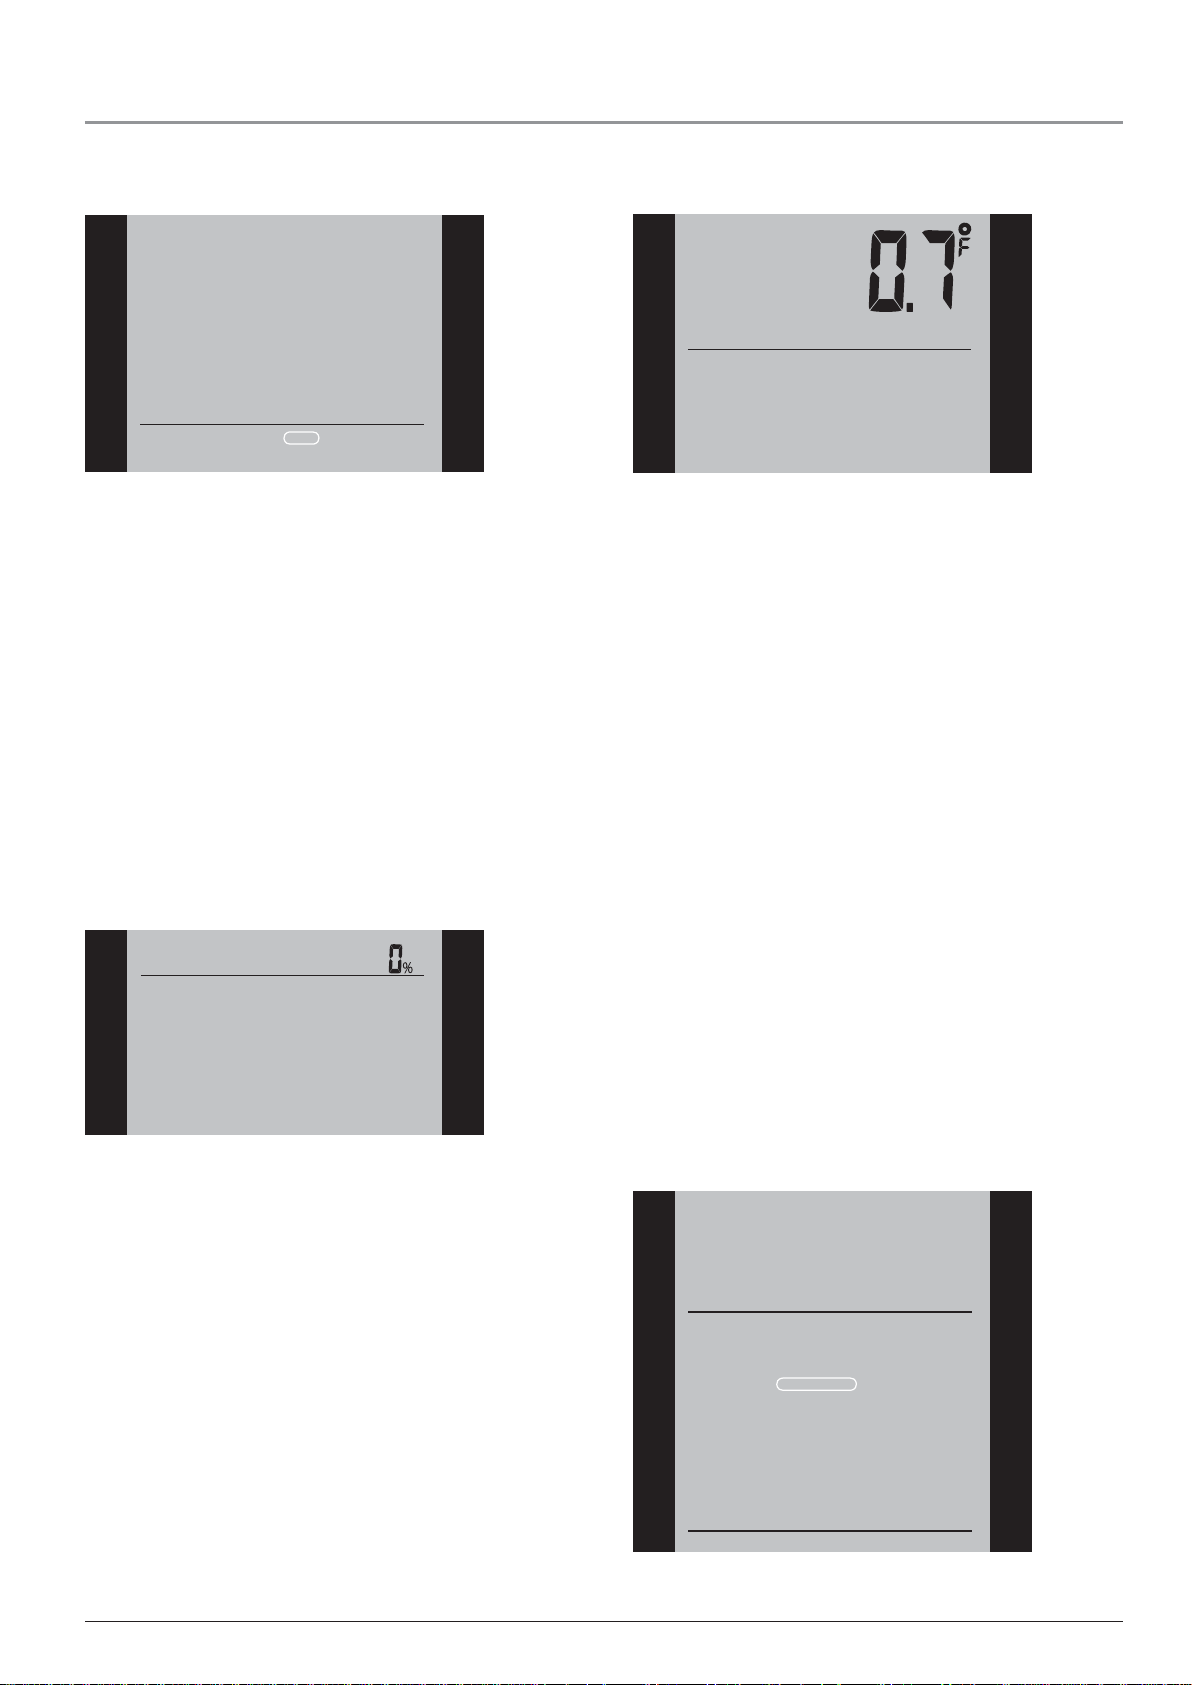
I want to know the amount of time (in percent) that
the heating has been turned on within a certain
period.
To do so, you must:
1 Press the OK button twice to activate the menu.
2 Press the Up or Down buttons until the Settings option fl ashes.
3 Press the OK button.
4 Press the Up or Down buttons until the Readout option fl ashes.
5 Press the Up or Down buttons to the select the period of inter-
est: 2 days, 30 days or 365 days. The percentage of time that
the heating has been turned on will then be indicated in the
upper part of the display.
The Readout submenu also contains information about the
Software version and the type of control (Room, Floor, Regulator or Room limit) selected for the Application.
(See Application for more information).
SETTINGS
READOUT
2 DAYS
30 DAYS
365 DAYS
SOFTWARE
APPLICATION
EXIT
Offset Temperature
I want to adjust the difference in temperature
between the thermostat and my room thermometer.
To do so, you must:
1 Press the OK button twice to activate the menu.
2 Press the Up or Down buttons until the Settings option fl ashes.
3 Press the OK button.
4 Press the Up or Down buttons until the Offset Temp option
fl ashes.
5 Press the Up or Down buttons to set the offset temperature (in
steps of 1°).
6 Press the OK button.
7 Select Exit to exit the option.
Offset is used to compensate for any difference between the
thermostat and a room thermometer. It is possible to adjust the
offset by up to +/- 10°C or +/- 18°F. Once the offset has been set
correctly, the thermostat will display the same temperature as the
thermometer.
If, for example, the thermostat shows 1° too much, the offset
should be set to 1°. The temperature will then be set 1° lower.
SETTINGS
OFFSET TEMP
Application
I want to select the type of temperature control.
To do so, you must:
1 Press the OK button twice to activate the menu.
2 Press the Up or Down buttons until the Settings option fl ashes.
3 Press the OK button.
4 Press the Up or Down buttons until the Application option
fl ashes.
5 Press the Up or Down buttons to select one of the four types
of control:
Room: The air sensor is used. Only room temperature is
controlled.
Floor: A fl oor sensor is used. Only fl oor temperature is controlled. (Factory default for 088L5132)
Regulator: The thermostat functions as a simple regulator and
no sensors are used.
Room limit: The thermostat controls room temperature while
using the fl oor sensor as a limit sensor. If you choose this option, you must set a maximum and minimum temperature for
the limit sensor, so that the thermostat will switch the heating
off or on if the temperature on the fl oor reaches the maximum
or minimum temperature respectively. This can, for instance,
be used to avoid excessively high temperatures on wooden
fl ooring (maximum limit) or excessively cold temperatures
on tiled/stone fl ooring (minimum limit). (Factory default for
088L5132)
6 Press the OK button.
7 Select Exit to exit the option.
Please note: Usually, the electrician who installed the thermostat
will have selected the correct type of temperature control for your
application.
ROOM
FLOOR
REGULATOR
ROOM LIMIT
TIME
DAY
SETTINGS
CHILDLOCK
C°/F°
APPLICATION
OFFSET TEMP
READOUT
ADAPTIVE
DISPLAY
FACTORY RESET
EXIT
© 2009 Danfoss Inc.
5
Page 6
Programmable Thermostats 088L5130/5132 English
Display
I want to choose the information to be shown on the
thermostat display.
To do so, you must:
1 Press the OK button twice to activate the menu.
2 Press the Up or Down buttons until the Settings option
fl ashes.
3 Press the OK button.
4 Press the Up or Down buttons until the Display option
fl ashes.
5 Press the Up or Down buttons to select whether or you wish to:
- display the Clock or not (On/Off),
- display the Set temperature or not (On/Off).
You can also decide whether the temperature displayed is:
- the Room temperature,
- the Floor temperature (if a fl oor sensor is used), or
- the Regulator temperature.
6 Press the OK button to confi rm the settings as you work your
way through the various options in the Display submenu.
7 Select Exit to exit the option.
Factory settings:
- TIME: ON
- Set temp.: ON
- Floor temperature is shown
FLOOR
SETTINGS
TIME
DAY
CHILDLOCK
C°/F°
APPLICATION
OFFSET TEMP
READOUT
ADAPTIVE
DISPLAY
FACTORY RESET
EXIT
Room/fl oor/regulator
On/Off
Exit Menu
I want to exit a menu.
To do so, you must use the Exit option:
The various menus and submenus contain an Exit option.
1 Press the Up or Down buttons until Exit fl ashes.
2 Press the OK button. You may have to repeat steps 1 and 2 to
return to the fi nal Exit option.
Please note: When you activate a menu, the menu item last selected will begin fl ashing. This allows you to view the latest setting.
If, for example, you activate the Mode menu, Man. mode will fl ash
if you used Man. mode the last time.
This principle also applies to current temperature/time settings.
When you enter the various menus, they always display the value
that was last selected. This allows you to check the current settings.
Should you enter a menu by mistake, you can exit it again without
changing the setting by simply confi rming the current setting, i.e.
by clicking the OK button.
Error Messages
E0 = Internal failure. Replace thermostat.
E1 = Air sensor defective or short-circuited. Replace thermostat.
E2 = Floor sensor defective or short-circuited. Check fl oor sensor.
Factory Settings for Automatic 5:2 Program
Days 1-5 (Monday - Friday)
Event Time Temperature
Morning 6:00 a.m. - 8:00 a.m. 77°F / 25°C
Out 8:00 a.m. - 4:00 p.m. 68°F / 20°C
On/Off
Factory Reset
I want to return to the factory settings.
To do so, you must:
1 Press the OK button twice to activate the menu.
2 Press the Up or Down buttons until the Settings option
fl ashes.
3 Press the OK button.
4 Press the Up or Down buttons until the Factory Reset option
fl ashes.
5 Press the OK button. A submenu will appears.
6 Press the Up or Down buttons until the Reset option fl ashes.
7 Press the OK button.
8 Select Exit to exit the option.
TIME
DAY
SETTINGS
CHILDLOCK
C°/F°
APPLICATION
OFFSET TEMP
READOUT
ADAPTIVE
DISPLAY
FACTORY RESET
EXIT
RESET
EXIT
Home 4:00 p.m. - 10:00 p.m. 77°F / 25°C
Night 10:00 p.m. - 6:00 a.m. 68°F / 20°C
Days 6-7 (Saturday - Sunday)
Event Time Temperature
Day 8:00 a.m. - 11:00 p.m. 77°F / 25°C
Night 23:00 p.m. - 08:00 a.m. 68°F / 20°C
6
© 2009 Danfoss Inc.
Page 7

MANUEL DE L’UTILISATEUR
No. de piece
088L5130/5132
Thermostat Programmable 088L5130/5132 Français
Contenu
Introduction ................................................................................ 7
Premiers réglages ....................................................................... 7
Disjoncteur de fuite à la terre intégré (GFCI) ............................. 7
Vérifi cation du disjoncteur de fuite à la terre intégré ................ 8
Programmation de 4 événements.............................................. 8
Réglage rapide de la température ............................................ 9
Fonction d’adaptation ................................................................ 9
Mode manuel .............................................................................. 9
Dérivation temporaire ............................................................... 10
Sécurité enfants (Séc. enfants) ................................................ 10
Introduction
Le thermostat peut démarrer votre système de chauffage à des
heures prédéterminées pour différents jours de la semaine. Pour
chaque jour de la semaine, vous pouvez régler des températures
individuelles pour 4 périodes nommées événements. Le thermostat
est fourni avec un programme par défaut qui est adéquat pour la
plupart des installations. Sauf si vous changez les réglages, le thermostat fonctionnera en suivant le programme par défaut. Abaisser
la température quand le domicile est inoccupé réduira vos coûts
d’énergie sans diminuer le confort.
De plus, le thermostat possède une fonction d’adaptation qui
change automatiquement l’heure de démarrage de la période de
chauffage afi n que la température souhaitée soit atteinte à l’heure
que vous avez réglée. Après trois jours, la fonction d’adaptation a
appris quand le chauffage doit être démarré.
Unité de température ............................................................... 10
Réglage de l’heure ................................................................... 10
Réglage du jour ........................................................................ 11
Lecture ...................................................................................... 11
Décalage de température ........................................................ 11
Application ................................................................................ 12
Affi chage ................................................................................... 12
Réinitialisation valeurs usine ................................................... 12
Sortie de menu ......................................................................... 13
Messages d’erreur .................................................................... 13
Bouton d’essai du disjoncteur de fuite à la terre intégré
AUTO
ROOM
SET TEMP
Premiers réglages
La première fois que vous mettez en marche le thermostat, l’heure
et le jour doivent être réglés. L’heure clignote. Réglez l’heure
actuelle en utilisant les boutons Up (hausse) ou Down (baisse).
Appuyez ensuite sur le bouton OK pour confi rmer l’heure. Le jour
de la semaine clignotera. Sélectionnez le jour actuel en utilisant les
boutons Up (hausse) ou Down (baisse). Appuyez sur le bouton
OK. Le thermostat est maintenant prêt et il contrôlera votre chauffage en suivant le programme 4-événements par défaut (voir les
réglages d’usine pour le programme automatique 5:2).
Disjoncteur de fuite à la terre intégré (GFCI)
Le thermostat possède un disjoncteur de fuite à la terre intégré pour
assurer votre sécurité au cas où une faute à la terre se produirait.
Il est important de vérifi er chaque mois le disjoncteur de fuite à la
terre intégré.
© 2009 Danfoss Inc.
MON
Bouton hausse
Bouton OK
Bouton baisse
Bouton de mise en attente
Réarmement du disjoncteur de fuite à la terre intégré
7
Page 8

Thermostat Programmable 088L5130/5132 Français
Vérifi cation du disjoncteur de fuite
à la terre intégré
La vérifi cation ne peut s’effectuer que si le thermostat active le
chauffage.
Réglez le point de consigne jusqu’à ce que le symbole du
chauffage ( ) apparaisse. Utilisez le bouton Up (hausse) pour
accroître le besoin de chauffage puis appuyez sur le bouton OK.
Attendez 10 secondes pour permettre au thermostat de s’ajuster
au nouveau point de consigne.
Appuyez sur le bouton TEST (essai) au haut du thermostat.
Le test aura réussi si la lumière rouge dans le bouton TEST (essai)
s’allume et que GROUND FAULT (faute à la terre) s’affi che à
l’écran. Si ce n’est pas le cas, vérifi ez l’installation/communiquez
avec votre électricien-installateur.
Appuyez sur le bouton Standby/Reset (attente/réarmement)
pour réarmer le disjoncteur de fuite à la terre intégré.
La lumière rouge s’éteindra et l’affi cheur reprendra son apparence
normale.
Appuyez sur le bouton Down (baisse) pour retourner au réglage
initial de température.
Si la vérifi cation échoue, vérifi ez le câble chauffant et le thermostat.
Si le disjoncteur de fuite à la terre intégré se déclenche pendant
l’opération normale sans que vous appuyiez sur le bouton TEST
(essai), il pourrait y avoir une faute à la terre ! Pour vérifi er si c’est
une faute à la terre ou un déclenchement intempestif, appuyez sur
Standby/Reset (attente/réarmement).
Si la lumière rouge s’éteint et demeure éteinte, c’était un déclenchement intempestif et le système fonctionne correctement. Si
ce n’est pas le cas, il y a une faute à la terre ! Communiquez avec
votre électricien-installateur.
Étape 2 : Sélection de la programmation hebdomadaire pour votre programme.
Vous avez les options suivantes :
5:2 vous donnera 5 jours (lundi au vendredi) avec les mêmes
quatre événements (matin, sorti, à la maison, nuit) et 2 jours
(samedi et dimanche) avec les mêmes deux événements (matin
et nuit).
6:1 vous donnera 6 jours (lundi au samedi) avec les mêmes
quatre événements (matin, sorti, à la maison, nuit) et 1 jour
(dimanche) avec les mêmes deux événements (jour et nuit).
7:0 vous donnera des réglages individuels pour chaque jour,
du lundi au dimanche.
1 Appuyez sur le bouton OK pour activer le menu.
2 Appuyez sur les boutons Up (hausse) ou Down (baisse)
jusqu’à ce que l’option Schedule (programme) clignote.
3 Appuyez sur le bouton OK.
4 Appuyez sur les boutons Up (hausse) ou Down (baisse)
jusqu’à ce que le programme requis (5:2, 6:1 ou 7:0) clignote
dans la partie inférieure de l’affi cheur.
5 Appuyez sur le bouton OK.
Réglage d’usine : 5:2
SCHEDULE
Programmation de 4 événements
Je veux que la température soit contrôlée automatiquement en fonction d’un programme de réglages
individuels de température pour quatre événements
distincts pendant une journée :
• quand je me lève le matin,
• quand je suis absent pour le travail,
• quand je reviens à la maison,
• et pendant la nuit.
Pour le faire, vous devez suivre les 3 étapes
suivantes :
Étape 1 : Sélectionnez le contrôle automatique de la
température.
1 Appuyez sur le bouton OK pour activer le menu.
2 Appuyez sur les boutons Up (hausse) ou Down (baisse)
jusqu’à ce que l’option Mode (mode) clignote.
3 Appuyez sur le bouton OK.
4 Appuyez sur les boutons Up (hausse) ou Down (baisse)
jusqu’à ce que l’option Auto clignote dans la partie supérieure
de l’affi cheur.
5 Appuyez sur le bouton OK.
Réglage d’usine : Mode Auto
AUTO
OVERRIDE
MAN. MODE
MODE
SCHEDULE
PROGRAM
SETTINGS
EXIT
MON
TUE WED THU
FRI
Étape 3 : Choisissez l’heure et la température pour
chaque événement du programme des jours que
vous avez choisi à l’étape précédente.
Veuillez noter : La description qui suit est un exemple dans lequel
les réglages sont faits pour les événements journaliers dans un
programme 5:2.
1 Appuyez sur les boutons Up (hausse) ou Down (baisse)
jusqu’à ce que l’option Program (programmation) clignote.
2 Appuyez sur le bouton OK.
3 Appuyez sur les boutons Up (hausse) ou Down (baisse)
jusqu’à ce que les jours que vous voulez programmer clignotent
dans la partie inférieure de l’affi cheur, par ex. lun mar mer jeu
ven.
4 Appuyez sur le bouton OK. Maintenant, le symbole pour le
premier événement (par ex. le matin) clignotera.
5 Appuyez sur le bouton OK. L’heure clignotera pour vous per-
mettre de régler l’heure à laquelle vous voulez que la période du
matin débute.
6 Appuyez sur les boutons Up (hausse) ou Down (baisse)
jusqu’à ce que l’heure souhaitée soit affi chée.
7 Appuyez sur le bouton OK. Les minutes clignoteront.
8 Appuyez sur les boutons Up (hausse) ou Down (baisse)
jusqu’à ce que les minutes souhaitées soient affi chées.
9 Appuyez sur le bouton OK. Maintenant, le réglage pour la tem-
pérature clignotera dans la partie supérieure de l’affi cheur.
10 Appuyez sur les boutons Up (hausse) ou Down (baisse) pour
régler la température souhaitée.
8
© 2009 Danfoss Inc.
Page 9

Thermostat Programmable 088L5130/5132 Français
Exemple : Si vous changez la température un mardi matin et que
SET TEMP
le thermostat exécute un programme 5:2, la nouvelle température
sera appliquée pour tous les matins du lundi au vendredi.
PROGRAM
Absent
(Exté rieur)
Matin
Heure
MON
TUE WED THU
FRI
Minutes Période 5-jours
EXIT
11 Appuyez sur le bouton OK. Maintenant, le symbole du prochain
événement (par ex. sorti) clignote pour vous permettre de régler
l’heure et la température pour cette période de la journée en
répétant les étapes 6-12.
12 Quand l’heure et la température ont été réglées pour les quatre
événements applicables à la période de 5 jours du lundi au
vendredi, Exit (sortie) clignotera.
13 Appuyez sur le bouton OK. Maintenant, les 2 prochains jours,
sam dim, clignoteront. Veuillez noter que seulement deux évé-
nements (jour et nuit) sont affi chés.
14 Appuyez sur le bouton OK. Le symbole du premier événement
clignotera.
15 Réglez l’heure et la température pour cet événement et pour le
suivant en répétant les étapes 6-12.
16 Finalement, sélectionnez Exit (sortie) pour sortir de la program-
mation du programme 5:2.
SET TEMP
PROGRAM
Maison
(Habitation)
Nuit
Fonction d’adaptation
Je veux être certain que la température souhaitée a
été atteinte quand je me lève le matin ou quand je
reviens du travail.
Vous devez alors activer la fonction d’adaptation :
1 Appuyez sur le bouton OK pour activer le menu.
2 Appuyez sur les boutons Up (hausse) ou Down (baisse)
jusqu’à ce que l’option Settings (réglages) clignote.
3 Appuyez sur le bouton OK.
4 Appuyez sur les boutons Up (hausse) ou Down (baisse)
jusqu’à ce que l’option Adaptive (adaptation) clignote.
5 Appuyez sur le bouton OK. On ou Off clignotera dans la partie
supérieure de l’affi cheur.
6 Appuyez sur les boutons Up (hausse) ou Down (baisse)
jusqu’à ce que On clignote.
7 Appuyez sur le bouton OK.
8 Sélectionnez Exit (sortie) pour sortir de l’option.
Veuillez noter : La fonction d’adaptation n’est associée qu’au
programme 4-événements et ne fonctionne que pour les cas où en
passant d’un événement à un autre la température sera haussée.
Réglage d’usine : ON (marche)
TIME
DAY
SETTINGS
CHILDLOCK
C°/F°
APPLICATION
OFFSET TEMP
READOUT
ADAPTIVE
DISPLAY
FACTORY RESET
EXIT
EXIT
SAT SUN
Réglage rapide de la température
Je veux changer de façon permanente la température de l’événement courant dans le programme
automatique.
Pour le faire, vous devez :
1 Appuyer sur les boutons Up (hausse) ou Down (baisse) pour
régler la température requise pour l’événement activé.
2 Appuyer sur le bouton OK.
Le nouveau réglage pour la température sera alors sauvegardé et
utilisé pour cet événement à l’avenir.
La fonction d’adaptation calcule le moment où le thermostat doit
démarrer le système de chauffage pour assurer que la température
requise est atteinte à l’heure réglée. Trois jours après l’activation
de la fonction d’adaptation, cette dernière a appris quand le chauffage doit être démarré pour obtenir la bonne température.
Mode manuel
Je veux temporairement annuler le programme automatique à 4-événements et régler manuellement la
température.
Pour le faire, vous devez utiliser le mode manuel :
© 2009 Danfoss Inc.
1 Appuyez sur le bouton OK pour activer le menu.
2 Appuyez sur les boutons Up (hausse) ou Down (baisse)
jusqu’à ce que l’option Mode (mode) clignote.
3 Appuyez sur le bouton OK.
4 Appuyez sur les boutons Up (hausse) ou Down (baisse)
jusqu’à ce que l’option Man. Mode (mode man.) clignote dans
la partie supérieure de l’affi cheur. La température commencera
à clignoter.
5 Appuyez sur les boutons Up (hausse) ou Down (baisse)
jusqu’à ce que la température souhaitée clignote.
6 Appuyer sur le bouton OK.
9
Page 10

Thermostat Programmable 088L5130/5132 Français
Veuillez noter : Cette fonction peut être utile par exemple si vous
vous absentez pour les vacances et que vous souhaitez maintenir
une température de protection contre le gel (par ex. 41 °F) pendant
votre absence.
Pour retourner au programme automatique à 4-événements, vous
devez sélectionner Auto. Voir la page 2 pour les instructions.
MAN. MODE
MODE
Dérivation temporaire
Je veux régler temporairement une température de
confort, pour un seul événement, par exemple si un
jour je ne suis pas au travail et que je veux augmenter la température ou si je donne une fête.
Pour le faire, vous devez utiliser le mode de dérivation :
1 Appuyez deux fois sur le bouton OK pour activer le menu.
2 Appuyez sur les boutons Up (hausse) ou Down (baisse)
jusqu’à ce que l’option Mode (mode) clignote.
3 Appuyez sur le bouton OK.
4 Appuyez sur les boutons Up (hausse) ou Down (baisse)
jusqu’à ce que Override (dérivation) clignote dans la partie su-
périeure de l’affi cheur. La température commencera à clignoter.
5 Appuyez sur les boutons Up (hausse) ou Down (baisse)
jusqu’à ce que la température souhaitée clignote.
6 Appuyez sur le bouton OK.
Réglage d’usine : OFF (arrêt)
SETTINGS
CHILDLOCK
Unité de température
Je veux changer l’unité de température (°C//°F)) qui
est utilisée sur l’afficheur.
Pour le faire, vous devez :
1 Appuyer deux fois sur le bouton OK pour activer le menu.
2 Appuyer sur les boutons Up (hausse) ou Down (baisse) jusqu’à
ce que l’option Settings (réglages) clignote.
3 Appuyer sur le bouton OK.
4 Appuyer sur les boutons Up (hausse) ou Down (baisse) jusqu’à
ce que °C/°F clignote dans le menu. L’unité couramment sélec-
tionnée clignotera dans la partie supérieure de l’affi cheur.
5 Appuyer sur les boutons Up (hausse) ou Down (baisse) jusqu’à
ce que l’unité requise °C/°F clignote.
6 Appuyer sur le bouton OK.
7 Sélectionner Exit (sortie) pour sortir de l’option.
Veuillez noter : Le mode de dérivation est un réglage temporaire
de température qui sera automatiquement annulé par le prochain
événement du programme à 4-événements.
OVERRIDE
MODE
Sécurité enfants (Séc. enfants)
Je veux bloquer les menus du thermostat afin d’interdire que les réglages soient changés.
Pour le faire, vous devez activer la sécurité enfants :
1 Appuyez deux fois sur le bouton OK pour activer le menu.
2 Appuyez sur les boutons Up (hausse) ou Down (baisse) jusqu’à
ce que l’option Settings (réglages) clignote.
3 Appuyez sur le bouton OK.
4 Appuyez sur les boutons Up (hausse) ou Down (baisse)
jusqu’à ce que l’option Childlock (sécurité enfants) clignote.
Le symbole d’un cadenas apparaitra dans le menu et Off cligno-
tera dans la partie supérieure de l’affi cheur.
5 Appuyez sur les boutons Up (hausse) ou Down (baisse)
jusqu’à ce que On clignote.
6 Appuyez sur le bouton OK.
7 Sélectionnez Exit (sortie) pour sortir de l’option.
Pour désengager la sécurité enfants, procédez comme suit :
1 Appuyez sur le bouton OK pour activer le menu.
2 Appuyez simultanément et maintenez enfoncé les boutons Up
(hausse) et Down (baisse) pendant trois secondes.
Veuillez noter : Les températures sont affi chées en Celsius avec
une résolution de 0,5 degré et en Fahrenheit avec une résolution de
1 degré.
Réglage d’usine : Celsius
SETTINGS C°/F°
Réglage de l’heure
Je veux changer l’heure.
Pour le faire, vous devez :
1 Appuyer deux fois sur le bouton OK pour activer le menu.
2 Appuyer sur les boutons Up (hausse) ou Down (baisse) jusqu’à
ce que l’option Settings (réglages) clignote.
3 Appuyer sur le bouton OK.
4 Appuyer sur les boutons Up (hausse) ou Down (baisse) jusqu’à
ce que l’option Time (heure) clignote. L’horloge courante sélec-
tionnée, de 12 ou 24 heures, clignotera dans la partie inférieure
de l’affi cheur.
5 Appuyer sur les boutons Up (hausse) ou Down (baisse) pour
sélectionner l’horloge 12 ou 24 heures.
6 Appuyer sur le bouton OK. L’heure commencera à clignoter
dans la partie inférieure de l’affi cheur.
7 Appuyer sur les boutons Up (hausse) ou Down (baisse) pour
régler l’heure.
10
© 2009 Danfoss Inc.
Page 11

Thermostat Programmable 088L5130/5132 Français
8 Appuyer sur le bouton OK. Maintenant, les minutes clignoteront.
9 Appuyez sur les boutons Up (hausse) ou Down (baisse) pour
régler les minutes.
10 Appuyez sur le bouton OK.
11 Sélectionnez Exit (sortie) pour sortir de l’option.
Réglage d’usine : Horloge 24 heures
TIME
SETTINGS
Pour le faire, vous devez :
1 Appuyer deux fois sur le bouton OK pour activer le menu.
2 Appuyer sur les boutons Up (hausse) ou Down (baisse)
jusqu’à ce que l’option Settings (réglages) clignote.
3 Appuyer sur le bouton OK.
4 Appuyer sur les boutons Up (hausse) ou Down (baisse)
jusqu’à ce que l’option Readout (lecture) clignote.
5 Appuyer sur les boutons Up (hausse) ou Down (baisse) pour
sélectionner la période voulue : 2 jours, 30 jours or 365 jours.
Le pourcentage de temps que le chauffage a été en fonction
sera indiqué dans la partie supérieure de l’affi cheur.
Le sous-menu de lecture contient également de l’information à propos de la version du logiciel et du type de contrôle
(pièce, sol, régulateur ou limite de pièce) qui sont sélectionnés
pour l'application.
(Voir Application pour plus d’information).
SETTINGS
READOUT
2 DAYS
30 DAYS
365 DAYS
SOFTWARE
APPLICATION
EXIT
Réglage du jour
Je veux changer le jour de la semaine.
Pour le faire, vous devez :
1 Appuyer deux fois sur le bouton OK pour activer le menu.
2 Appuyer sur les boutons Up (hausse) ou Down (baisse)
jusqu’à ce que l’option Settings (réglages) clignote.
3 Appuyer sur le bouton OK.
4 Appuyer sur les boutons Up (hausse) ou Down (baisse)
jusqu’à ce que l’option Day (jour) clignote. Le jour courant
sélectionné clignotera dans la partie inférieure de l’affi cheur.
5 Appuyez sur les boutons Up (hausse) ou Down (baisse)
jusqu’à ce que le jour souhaité clignote.
6 Appuyez sur le bouton OK.
7 Sélectionnez Exit (sortie) pour sortir de l’option.
Veuillez noter : Habituellement, l’électricien qui fait l’installation du
thermostat aura réglé la bonne heure et le bon jour de la semaine.
Réglage d’usine : Lun
DAY
SETTINGS
Décalage de température
Je veux ajuster la différence de température entre le
thermostat et mon thermomètre de pièce.
Pour le faire, vous devez :
1 Appuyer deux fois sur le bouton OK pour activer le menu.
2 Appuyer sur les boutons Up (hausse) ou Down (baisse) jusqu’à
ce que l’option Settings (réglages) clignote.
3 Appuyer sur le bouton OK.
4 Appuyer sur les boutons Up (hausse) ou Down (baisse)
jusqu’à ce que l’option Offset Temp (décalage temp) cli-
gnote.
5 Appuyer sur les boutons Up (hausse) ou Down (baisse) pour
régler le décalage de température (par incréments de 1°).
6 Appuyer sur le bouton OK.
7 Sélectionner Exit (sortie) pour sortir de l’option.
Le décalage est utilisé pour réduire toute différence entre le
thermostat et un thermomètre de pièce. Il est possible de régler le
décalage jusqu’à +/- 10 °C or +/- 18 °F. Une fois que le décalage a
été correctement réglé, le thermostat affi chera la même température que le thermomètre.
Si le thermostat, par exemple, montre 1° de trop, le décalage doit
être ajusté à 1°. La température sera alors ajustée 1° plus bas.
MON
TUE
WED
FRI
SAT
THU
SUN
Lecture
Je veux savoir combien de temps (en pour cent)
le chauffage a été énergisé pendant une certaine
période de temps.
© 2009 Danfoss Inc.
SETTINGS
OFFSET TEMP
11
Page 12

Thermostat Programmable 088L5130/5132 Français
Application
Je veux choisir le type de contrôle de la température.
Pour le faire, vous devez :
1 Appuyer deux fois sur le bouton OK pour activer le menu.
2 Appuyer sur les boutons Up (hausse) ou Down (baisse) jusqu’à
ce que l’option Settings (réglages) clignote.
3 Appuyer sur le bouton OK.
4 Appuyer sur les boutons Up (hausse) ou Down (baisse)
jusqu’à ce que l’option Application (application) clignote.
5 Appuyer sur les boutons Up (hausse) ou Down (baisse) pour
sélectionner un des quatre types de contrôles :
Pièce : La sonde de pièce intégrée est utilisée. Seulement la
température de la pièce est contrôlée.
Sol: Une sonde au sol est utilisée. Seulement la température
du sol est contrôlée. (Usine par défaut pour 088L5130)
Régulateur : Le thermostat fonctionne comme simple régula-
teur et aucune sonde n’est utilisée.
Limite de pièce : Le thermostat contrôle la température de
la pièce et utilise une sonde de température externe comme
sonde de limite. Si vous choisissez cette option, vous devez
régler une température maximum et minimum pour la sonde
de limite afi n que le thermostat arrête ou démarre le chauffage
si la température du sol atteint le maximum ou le minimum
respectivement. Ceci peut être utilisé, par exemple, pour éviter
des températures excessivement élevées sur un plancher de
bois (limite maximum) ou des températures excessivement
froides sur des planchers de tuiles/pierre (limite minimum).
(Usine par défaut pour 088L5132)
6 Appuyez sur le bouton OK.
7 Sélectionnez Exit (sortie) pour sortir de l’option.
5 Appuyer sur les boutons Up (hausse) ou Down (baisse) pour
sélectionner ce que vous voulez :
- Affi cher ou non l’horloge (On/Off),
- Affi cher ou non le réglage de la température (On/Off).
Vous pouvez également décider si la température affi chée
sera :
- la température de la pièce,
- la température du sol (si une sonde de sol est utilisée),
ou
- la température du régulateur.
6 Appuyez sur le bouton OK pour confi rmer les réglages au fur à
mesure que vous progressez parmi les diverses options dans le
sous-menu de Display (affi chage).
7 Sélectionnez Exit (sortie) pour sortir de l’option.
Réglages d’usine:
- HEURE: ON (marche)
- Réglage temp. : ON (marche)
- La température du sol est montrée.
FLOOR
SETTINGS
TIME
DAY
CHILDLOCK
C°/F°
APPLICATION
OFFSET TEMP
READOUT
ADAPTIVE
DISPLAY
FACTORY RESET
EXIT
Régulateur pièce/sol
(En/Hors – On/Off)
Veuillez noter : Habituellement, l’électricien qui installe le thermostat
aura sélectionné le bon type de contrôle de température pour votre
application.
ROOM
FLOOR
REGULATOR
ROOM LIMIT
TIME
DAY
SETTINGS
CHILDLOCK
C°/F°
APPLICATION
OFFSET TEMP
READOUT
ADAPTIVE
DISPLAY
FACTORY RESET
EXIT
Affi chage
Je veux choisir l’information qui sera affichée sur
l’afficheur du thermostat.
Pour le faire, vous devez :
1 Appuyer deux fois sur le bouton OK pour activer le menu.
2 Appuyer sur les boutons Up (hausse) ou Down (baisse)
jusqu’à ce que l’option Settings (réglages) clignote.
3 Appuyer sur le bouton OK.
4 Appuyer sur les boutons Up (hausse) ou Down (baisse)
jusqu’à ce que l’option Display (affi chage) clignote.
(En/Hors – On/Off)
Réinitialisation valeurs usine
Je veux revenir aux réglages d’usine.
Pour le faire, vous devez :
1 Appuyer deux fois sur le bouton OK pour activer le menu.
2 Appuyer sur les boutons Up (hausse) ou Down (baisse)
jusqu’à ce que l’option Settings (réglages) clignote.
3 Appuyer sur le bouton OK.
4 Appuyer sur les boutons Up (hausse) ou Down (baisse)
jusqu’à ce que l’option Factory Reset (réinitialisation valeurs
d’usine) clignote.
5 Appuyer sur le bouton OK. Un sous-menu apparaitra.
6 Appuyez sur les boutons Up (hausse) ou Down (baisse)
jusqu’à ce que l’option Reset (réinitialisation) clignote.
7 Appuyez sur le bouton OK.
8 Sélectionnez Exit (sortie) pour sortir de l’option.
TIME
DAY
SETTINGS
CHILDLOCK
C°/F°
APPLICATION
OFFSET TEMP
READOUT
ADAPTIVE
DISPLAY
FACTORY RESET
EXIT
RESET
EXIT
12
© 2009 Danfoss Inc.
Page 13

Thermostat Programmable 088L5130/5132 Français
Sortie de menu
Je veux sortir d’un menu.
Pour le faire, vous devez utiliser l’option Exit
(sortie) :
Les divers menus et sous-menus possèdent une option Exit
(sortie).
1 Appuyez sur les boutons Up (hausse) ou Down (baisse)
jusqu’à ce que Exit (sortie) clignote.
2 Appuyez sur le bouton OK. Vous devrez peut-être répéter les
étapes 1 et 2 pour retourner à l’option Exit (sortie) fi nale.
Veuillez noter: Quand vous activez un menu, le dernier item du
menu qui a été activé commencera à clignoter. Ceci vous permet
de voir le dernier réglage. Si, par exemple, vous activez le menu
Mode, Man. Mode (mode manuel) clignotera si vous avez utilisé
Man. Mode (mode manuel) la dernière fois.
Ce principe s’applique également aux réglages courants de
température/heure. Quand vous entrez dans les divers menus,
ils affi cheront toujours la dernière valeur sélectionnée. Ceci vous
permet de vérifi er les réglages courants.
Si vous ouvrez un menu par erreur, vous pouvez en sortir sans
changer le réglage en confi rmant simplement le réglage courant,
c.-à-d. en appuyant sur le bouton OK.
Messages d’erreur
E0 = Panne interne. Remplacer le thermostat.
E1 = Sonde interne défectueuse ou court-circuitée. Remplacer le
thermostat.
E2 = Sonde externe défectueuse ou court-circuitée. Vérifi ez la
sonde externe.
Réglage d’usine pour le programme automatique 5:2
Jours 1-5 (lundi – vendredi)
Événement Heure Température
Matin 6h00 - 8h00 77 °F/25 °C
Absent (Extérieur)
Maison 16h00 - 22h00 77 °F/25 °C
Nuit 22h00 - 6h00 68 °F/20 °C
Événement Heure Température
Jour 8h00 - 23h00 77 °F/25 °C
8h00 - 16h00 68 °F/20 °C
Jours 6-7 (samedi – dimanche)
Nuit 23h00 - 8h00 68°F / 20°C
© 2009 Danfoss Inc.
13
Page 14

MANUAL DEL USUARIO
Parte No
088L5130/5132
Thermostato Programable 088L5130/5132 Español
Contenido
Introducción .............................................................................. 14
Ajustes iniciales ........................................................................ 14
Interruptor de circuito de fallo a tierra (GFCI) ......................... 14
Verifi cación del GFCI ................................................................ 15
Programa de 4 eventos ............................................................ 15
Ajuste rápido de temperatura ................................................. 16
Función adaptativa ................................................................... 16
Modo manual ............................................................................ 16
Anulación temporal .................................................................. 17
Bloqueo para niños .................................................................. 17
Unidades de temperatura ........................................................ 17
Cómo ajustar la hora ................................................................ 17
Cómo ajustar el día .................................................................. 18
Valor de lectura ........................................................................ 18
Compensación de temperatura ............................................... 18
Aplicación ................................................................................. 18
Pantalla ..................................................................................... 19
Reajuste de fábrica .................................................................. 19
Cómo salir del menú ................................................................ 19
Mensajes de error ..................................................................... 20
Introducción
El termostato puede encender su sistema de calefacción a horas
predeterminadas en diferentes días de la semana. Para cada día
de la semana, puede ajustar temperaturas individuales para 4
períodos, llamados eventos. El termostato viene con un programa
predeterminado y adecuado para la mayoría de instalaciones. A
menos que usted cambie los ajustes, el termostato funcionará de
conformidad con el programa predeterminado. Bajar la temperatura cuando la vivienda no esté habitada, reducirá sus costos de
energía sin reducir el confort.
Además, el termostato incluye una función adaptativa que cambia
automáticamente las horas de inicio del período de calefacción
a fi n de asegurar que se logre la temperatura requerida a la hora
establecida. Después de tres días la función adaptativa habrá
registrado la hora en que deberá encenderse la calefacción.
Ajustes iniciales
La primera vez que encienda el termostato, será necesario ajustar
la hora y el día. Parpadea la hora. Ajuste la hora actual con los
botones Up (Arriba) o Down (Abajo). Después pulse el botón OK
(Aceptar) para confi rmar la hora. Entonces parpadeará el día de
la semana. Seleccione el día actual con los botones Up o Down.
Pulse el botón OK. El termostato ya está listo para el uso y controlará su calefacción de acuerdo con el programa de 4 eventos
establecido previamente (ver Ajustes de Fábrica para el Programa
Automático 5:2).
Interruptor de circuito de fallo a tierra (GFCI)
El termostato tiene un GFCI incorporado que garantiza la seguridad personal si ocurren fallos a tierra.
Es importante verifi car mensualmente el GFCI.
Botón Up
(Arriba)
Botón OK
(Aceptar)
Botón Down
(Abajo)
Botón de prueba GFCI
AUTO
ROOM
SET TEMP
MON
Botón Standby (En espera)
Reajuste del GFCI
14
© 2009 Danfoss Inc.
Page 15

Thermostato Programable 088L5130/5132 Español
Verifi cación del GFCI
La prueba se puede realizar únicamente cuando el termostato
activa la calefacción.
Establezca el punto de ajuste hasta que aparezca el símbolo de
calefacción ( ). Use el botón Up para aumentar la demanda de
calefacción y después pulse el botón OK. Espere 10 segundos para
permitir que el termostato se acomode al nuevo punto de ajuste.
Después pulse el botón TEST (Prueba) en la parte superior del
termostato.
La prueba tiene éxito si se ilumina la luz roja en el botón TEST y
en la pantalla aparece GROUND FAULT (Fallo a tierra). Si esto no
ocurre, verifi que la instalación o comuníquese con un electricista.
Pulse el botón Standby/Reset (En espera/reajuste) para reajustar
el GFCI.
La luz roja deberá apagarse y la pantalla retornará a su aspecto
normal.
Pulse el botón Down para regresar al ajuste original de temperatura.
Si falla la prueba, verifi que el cable calefactor y el termostato.
Si el GFCI se dispara durante el funcionamiento normal, sin pulsar
el botón TEST, podría haber un fallo a tierra. Para verifi car si se
trata de un fallo a tierra o de un disparo de interferencia, pulse
Standby/Reset.
Si se apaga la luz roja y permanece así, se trataba de un disparo
de interferencia y el sistema está funcionando correctamente. Si
esto no ocurre es porque hay un fallo a tierra! Comuníquese con
un electricista.
Paso 2: Elija el programa semanal para su
termostato
Usted dispone de las opciones siguientes:
5:2 le dará 5 días (de lunes a viernes) con los mismos cuatro
eventos (Mañana, Ausente, En casa, Noche) y 2 días (sábado y
domingo) con los mismos dos eventos (Mañana y Noche).
6:1 le dará 6 días (de lunes a sábado) con los mismos cuatro
eventos (Mañana, Ausente, En casa, Noche) y 1 día (domingo)
con los mismos dos eventos (Día y Noche).
7:0 le permitirá realizar ajustes individuales para cada día de
lunes a domingo.
1 Pulse el botón OK para activar el menú.
2 Pulse los botones Up o Down hasta que parpadee la opción
Schedule (Programa).
3 Pulse el botón OK.
4 Pulse los botones Up o Down hasta que parpadee el programa
a seleccionar (5:2, 6:1 o 7:0) en la parte inferior de la pantalla.
5 Pulse el botón OK.
Ajuste de fábrica: 5:2
SCHEDULE
Programa de 4 eventos
Deseo controlar automáticamente la temperatura de
acuerdo con un programa de ajustes de temperatura
individuales para cuatro eventos separados durante
un día:
• Cuando me levanto en la mañana,
• Cuando estoy en el trabajo,
• Cuando regreso a casa,
• y durante la noche.
Para hacerlo, será necesario realizar los 3 pasos
siguientes:
Paso 1: Seleccione el control de temperatura
automático.
1 Pulse el botón OK para activar el menú.
2 Pulse los botones Up o Down hasta que parpadee la opción
Mode (Modo).
3 Pulse el botón OK.
4 Pulse los botones Up o Down hasta que parpadee la opción
Auto (Automático) en la parte superior de la pantalla.
5 Pulse el botón OK.
Ajuste de fábrica: Modo automático
AUTO
OVERRIDE
MAN. MODE
MON
TUE WED THU
FRI
Paso 3: Seleccione los ajustes de hora y temperatura para cada evento en el programa de días seleccionado en el paso anterior.
SET TEMP
PROGRAM
En el
trabajo
EXIT
Mañana
MON
TUE WED THU
FRI
En casa
Noche
MODE
SCHEDULE
PROGRAM
SETTINGS
EXIT
Tome nota: La descripción a continuación ilustra un ejemplo en el
cual se realiza ajustes para los eventos diarios en un programa 5:2.
© 2009 Danfoss Inc.
Hora
Minutos Período de 5 días
15
Page 16

Thermostato Programable 088L5130/5132 Español
1 Pulse los botones Up o Down hasta que parpadee la opción
Program (Programa de 4 eventos).
2 Pulse el botón OK.
3 Pulse los botones Up o Down hasta que en la parte inferior de
la pantalla parpadeen el día o los días que desee programar, por
ejemplo Mon Tue Wed Thu Fri (Lun, Mar, Miérc, Jue, Vier).
4 Pulse el botón OK. Ahora parpadeará el símbolo para el primer
evento (por ejemplo, Mañana).
5 Pulse el botón OK. Parpadeará la hora, lo cual le permitirá es-
tablecer la hora en la que usted desea que comience el período
de la mañana.
6 Pulse los botones Up o Down hasta que parpadee la hora
requerida.
7 Pulse el botón OK. Ahora parpadearán los minutos.
8 Pulse los botones Up o Down hasta que aparezcan en la panta-
lla los minutos requeridos.
9 Pulse el botón OK. Entonces parpadeará el ajuste de tempera-
tura en la parte superior de la pantalla.
10 Pulse los botones Up o Down para ajustar la temperatura reque-
rida.
11 Pulse el botón OK. Entonces parpadeará el símbolo para el
próximo evento (por ejemplo, en el trabajo), lo cual le permitirá
ajustar la hora y temperatura para este período del día mediante
la repetición de los pasos 6 al 12.
12 Después de ajustar la hora y la temperatura para los cuatro
eventos aplicables al período de 5 días, de lunes a viernes,
parpadeará la opción Exit (Salir).
13 Pulse el botón OK. Entonces parpadearán los próximos 2 días
Sat Sun (Sáb Dom). Tenga presente que ahora solo aparecerán
dos eventos (Día y Noche).
14 Pulse el botón OK. Parpadeará el símbolo para el primer evento.
15 Ajuste la hora y la temperatura para este evento y para el si-
guiente, mediante la repetición de los pasos 6 al 12.
16 Finalmente, seleccione Exit para salir del programa de 4 eventos
para un programa 5:2.
Función adaptativa
Deseo garantizar que ya se haya llegado a la temperatura requerida al levantarme por la mañana o al
volver a casa después del trabajo.
Para hacerlo, deberá activar la función adaptativa:
1 Pulse el botón OK para activar el menú.
2 Pulse los botones Up o Down hasta que parpadee la opción
Settings (Ajustes).
3 Pulse el botón OK.
4 Pulse los botones Up o Down hasta que parpadee la opción
Adaptive (Adaptativa).
5 Pulse el botón OK. Entonces parpadearán On (Encendido) u Off
(Apagado) en la parte superior de la pantalla.
6 Pulse los botones Up o Down hasta que parpadee On.
7 Pulse el botón OK.
8 Seleccione Exit para salir de la opción.
Tome nota: La función adaptativa está relacionada solamente con
el programa de 4 eventos y funciona solamente en conexión con el
traslado de un evento a otro donde se elevará la temperatura.
La función adaptativa calcula cuándo el termostato deberá activar
el sistema de calefacción para asegurar que se alcance la temperatura requerida a la hora establecida. Tres días después de activar
la función adaptativa, ésta habrá registrado la hora en que debe
activarse la calefacción para alcanzar la temperatura requerida.
Ajuste de fábrica: ON (ENCENDIDO)
SET TEMP
PROGRAM
EXIT
SAT SUN
Ajuste rápido de temperatura
Deseo cambiar permanentemente la temperatura
para el evento activo actualmente en el programa
automático.
Para hacerlo, es necesario lo siguiente:
1 Pulse los botones Up o Down para ajustar la temperatura de-
seada para el evento actualmente activo.
2 Pulse el botón OK.
Entonces se guardará el nuevo ajuste de temperatura y se utilizará
en el futuro para este evento.
Ejemplo: Si usted cambia la temperatura para el martes en la
mañana mientras el termostato ejecuta un programa 5:2, la nueva
temperatura se aplicará a todas las mañanas de lunes a viernes.
TIME
DAY
SETTINGS
CHILDLOCK
C°/F°
APPLICATION
OFFSET TEMP
READOUT
ADAPTIVE
DISPLAY
FACTORY RESET
EXIT
Modo manual
Deseo cancelar temporalmente el programa automático de 4 eventos y seleccionar manualmente la
temperatura.
Para hacerlo, deberá usar el modo manual:
1 Pulse el botón OK para activar el menú.
2 Pulse los botones Up o Down hasta que parpadee la opción
Mode.
3 Pulse el botón OK.
4 Pulse los botones Up o Down hasta que parpadee la opción
Man. mode (Modo manual) en la parte superior de la pantalla.
La temperatura comenzará a parpadear.
5 Pulse los botones Up o Down hasta que parpadee la tempera-
tura requerida.
6 Pulse el botón OK.
Tome nota: Esta característica puede ser útil cuando usted salga
de vacaciones y desee mantener una temperatura de protección
contra el congelamiento (por ejemplo, 41 °F) mientras esté ausente.
16
© 2009 Danfoss Inc.
Page 17

Thermostato Programable 088L5130/5132 Español
Para regresar al programa automático de 4 eventos, deberá seleccionar Auto. La página 2 incluye instrucciones.
MAN. MODE
MODE
Anulación temporal
Deseo establecer temporalmente una temperatura
de confort para un solo evento, por ejemplo, no voy
al trabajo un día y deseo una temperatura más alta o
porque tendré una fiesta.
Para hacerlo, deberá usar la modalidad de anulación:
1 Pulse dos veces el botón OK para activar el menú.
2 Pulse los botones Up o Down hasta que parpadee la opción
Mode.
3 Pulse el botón OK.
4 Pulse los botones Up o Down hasta que parpadee la opción
Override (Anular) en la parte superior de la pantalla. La tempe-
ratura comenzará a parpadear.
5 Pulse los botones Up o Down hasta que parpadee la tempera-
tura requerida.
6 Pulse el botón OK.
Tome nota: La modalidad de anulación es un ajuste temporal de la
temperatura que se cancela automáticamente al ocurrir el próximo
evento en el programa defi nido de 4 eventos.
OVERRIDE
Ajuste de fábrica: OFF (APAGADO)
SETTINGS
CHILDLOCK
Unidades de temperatura
Deseo cambiar las unidades de temperatura (°C/°F)
utilizadas en la pantalla.
Para hacerlo, es necesario lo siguiente:
1 Pulse dos veces el botón OK para activar el menú.
2 Pulse los botones Up o Down hasta que parpadee la opción
Settings.
3 Pulse el botón OK.
4 Pulse los botones Up o Down hasta que parpadee °C/°F en el
área de menú. Las unidades seleccionadas actualmente parpa-
dearán en la parte superior de la pantalla.
5 Pulse los botones Up o Down hasta que parpadee la unidad
°C/°F requerida.
6 Pulse el botón OK.
7 Seleccione Exit para salir de la opción.
Tome nota: Las temperaturas aparecen en grados Celsius con una
exactitud de 0,5 grados y en grados Fahrenheit con una exactitud de
1 grado.
MODE
Bloqueo para niños
Deseo bloquear los menús del termostato para
impedir que se cambien los ajustes.
Para hacerlo, deberá activar el bloqueo para niños:
1 Pulse dos veces el botón OK para activar el menú.
2 Pulse los botones Up o Down hasta que parpadee la opción
Settings.
3 Pulse el botón OK.
4 Pulse los botones Up o Down hasta que parpadee la opción
Childlock (Bloqueo para niños). Aparecerá un símbolo de can-
dado en el área de menú y parpadeará Off en la parte superior
de la pantalla.
5 Pulse los botones Up o Down hasta que parpadee On.
6 Pulse el botón OK.
7 Seleccione Exit para salir de la opción.
Para volver a desactivar el bloqueo para niño, haga lo
siguiente:
1 Pulse el botón OK para activar el menú.
2 Después pulse sin soltar los botones Up y Down simultánea-
mente durante tres segundos.
Ajuste de fábrica: Celsius
SETTINGS C°/F°
Cómo ajustar la hora
Deseo cambiar la hora.
Para hacerlo, es necesario lo siguiente:
1 Pulse dos veces el botón OK para activar el menú.
2 Pulse los botones Up o Down hasta que parpadee la opción
Settings.
3 Pulse el botón OK.
4 Pulse los botones Up o Down hasta que parpadee la opción
Time (Hora). Aparecerá en la parte inferior de la pantalla la
opción de reloj de 12 ó 24 horas seleccionada.
5 Pulse los botones Up o Down para seleccionar el reloj de 12 ó
24 horas.
6 Pulse el botón OK. La hora comenzará a parpadear en la parte
inferior de la pantalla.
7 Pulse los botones Up o Down para ajustar la hora.
8 Pulse el botón OK. Ahora parpadearán los minutos.
9 Pulse los botones Up o Down para ajustar los minutos.
© 2009 Danfoss Inc.
17
Page 18

Thermostato Programable 088L5130/5132 Español
10 Pulse el botón OK.
11 Seleccione Exit para salir de la opción.
Ajuste de fábrica: Hora militar (24 horas)
TIME
SETTINGS
Cómo ajustar el día
Deseo cambiar el día de la semana.
Para hacerlo, es necesario lo siguiente:
1 Pulse dos veces el botón OK para activar el menú.
2 Pulse los botones Up o Down hasta que parpadee la opción
Settings.
3 Pulse el botón OK.
4 Pulse los botones Up o Down hasta que parpadee la opción
Day (Día). El día de la semana seleccionado actualmente par-
padeará en la parte inferior de la pantalla.
5 Pulse los botones Up o Down hasta que parpadee el día de la
semana requerido.
6 Pulse el botón OK.
7 Seleccione Exit para salir de la opción.
Tome nota: Usualmente, el electricista que instaló el termostato
habrá ajustado la hora y el día de la semana correctos.
Ajuste de fábrica: Mon (Lun)
DAY
SETTINGS
4 Pulse los botones Up o Down hasta que parpadee la opción
Readout (Valor de lectura).
5 Pulse los botones Up o Down para seleccionar el período de
interés: 2 días, 30 días o 365 días. El porcentaje de tiempo
que la calefacción ha estado encendida aparecerá en la parte
superior de la pantalla.
El submenú Readout contiene también información sobre la
versión del Software y sobre el tipo de control (Ambiente,
Piso, Regulador o Límite ambiente) para la Aplicación.
(Consulte la sección Aplicación para obtener más información).
SETTINGS
READOUT
2 DAYS
30 DAYS
365 DAYS
SOFTWARE
APPLICATION
EXIT
Compensación de temperatura
Deseo ajustar la diferencia en temperatura entre el
termostato y mi termómetro ambiental.
Para hacerlo, es necesario lo siguiente:
1 Pulse dos veces el botón OK para activar el menú.
2 Pulse los botones Up o Down hasta que parpadee la opción
Settings.
3 Pulse el botón OK.
4 Pulse los botones Up o Down hasta que parpadee la opción
Offset Temp (Compensación de temperatura).
5 Pulse los botones Up o Down para ajustar la compensación
de temperatura (en pasos de 1°)
6 Pulse el botón OK.
7 Seleccione Exit para salir de la opción.
Esta opción se utiliza para compensar cualquier diferencia entre
el termostato y un termómetro ambiental. Es posible ajustar la
compensación hasta un máximo de +/- 10 °C o +/- 18 °F. Después
de ajustar correctamente la compensación de temperatura, el
termostato mostrará la misma temperatura que el termómetro.
Por ejemplo, si el termostato muestra un excedente de 1°, la compensación deberá ajustarse a 1°. Entonces la temperatura será 1°
más baja.
MON
TUE
WED
FRI
SAT
THU
SUN
Valor de lectura
Deseo conocer el tiempo (en porcentaje) que la
calefacción ha estado funcionando dentro de un
cierto período.
Para hacerlo, es necesario lo siguiente:
1 Pulse dos veces el botón OK para activar el menú.
2 Pulse los botones Up o Down hasta que parpadee la opción
Settings.
3 Pulse el botón OK.
18
SETTINGS
OFFSET TEMP
Aplicación
Deseo seleccionar el tipo de control de temperatura.
Para hacerlo, es necesario lo siguiente:
1 Pulse dos veces el botón OK para activar el menú.
2 Pulse los botones Up o Down hasta que parpadee la opción
Settings.
3 Pulse el botón OK.
© 2009 Danfoss Inc.
Page 19

Thermostato Programable 088L5130/5132 Español
4 Pulse los botones Up o Down hasta que parpadee la opción
Application (Aplicación).
5 Pulse los botones Up o Down para seleccionar uno de los
cuatro tipos de control:
Room (Ambiente): Se usa el sensor ambiente incorporado.
Solamente se controla la temperatura ambiente.
Floor (Piso): Se utiliza un sensor de piso. Solamente se controla
la temperatura del piso. (Ajustes de fábrica para 088L5130)
Regulator (Regulador): El termostato funciona como un simple regulador y no se usan los sensores.
Room limit (Límite ambiente): El termostato controla la temperatura ambiente a la vez que usa el sensor de temperatura
externo como sensor limitador. Si elige esta opción deberá
establecer una temperatura máxima y mínima para el sensor
limitador, de manera que el termostato apague o encienda la
calefacción si la temperatura en el piso alcanza la temperatura
máxima o mínima respectivamente. Por ejemplo, esto se puede utilizar para evitar las temperaturas excesivamente altas en
pisos de madera (límite máximo) o las temperaturas excesivamente frías en pisos cerámicos o de piedra (límite mínimo).
(Ajustes de fábrica para 088L5132)
6 Pulse el botón OK.
7 Seleccione Exit para salir de la opción.
Tome nota: Usualmente, el electricista que instaló el termostato
habrá seleccionado el tipo correcto de control de temperatura para
su aplicación.
ROOM
FLOOR
REGULATOR
ROOM LIMIT
TIME
DAY
SETTINGS
CHILDLOCK
C°/F°
APPLICATION
OFFSET TEMP
READOUT
ADAPTIVE
DISPLAY
FACTORY RESET
EXIT
Pantalla
Deseo seleccionar la información que aparecerá en
la pantalla del termostato.
Para hacerlo, es necesario lo siguiente:
1 Pulse dos veces el botón OK para activar el menú.
2 Pulse los botones Up o Down hasta que parpadee la opción
Settings.
3 Pulse el botón OK.
4 Pulse los botones Up o Down hasta que parpadee la opción
Display (Pantalla).
5 Pulse los botones Up o Down para seleccionar la opción que
desee:
- Ver la hora o no (encendido/apagado),
- Ver la temperatura establecida o no (encendido/apagado),
Además, puede decidir si la temperatura mostrada es:
- la temperatura ambiente,
- la temperatura de piso (si se utiliza un sensor de piso),
o
- la temperatura del regulador.
6 Pulse el botón OK para confi rmar los ajustes mientras avanza a
través de las diferentes opciones en el submenú Display.
7 Seleccione Exit para salir de la opción.
Ajustes de fábrica:
- HORA: ENCENDIDO
- Temperatura establecida: ENCENDIDO
- Se muestra la temperatura de piso.
FLOOR
SETTINGS
TIME
DAY
CHILDLOCK
C°/F°
APPLICATION
OFFSET TEMP
READOUT
ADAPTIVE
DISPLAY
FACTORY RESET
EXIT
Ambiente/piso/regulador
Encendido/apagado
Encendido/apagado
Reajuste de fábrica
Deseo restablecer los ajustes de fábrica.
Para hacerlo, es necesario lo siguiente:
1 Pulse dos veces el botón OK para activar el menú.
2 Pulse los botones Up o Down hasta que parpadee la opción
Settings.
3 Pulse el botón OK.
4 Pulse los botones Up o Down hasta que parpadee la opción
Factory Reset (Reajuste de fábrica).
5 Pulse el botón OK. Aparecerá un submenú.
6 Pulse los botones Up o Down hasta que parpadee la opción
Reset (Reajuste).
7 Pulse el botón OK.
8 Seleccione Exit para salir de la opción.
TIME
DAY
SETTINGS
CHILDLOCK
C°/F°
APPLICATION
OFFSET TEMP
READOUT
ADAPTIVE
DISPLAY
FACTORY RESET
EXIT
RESET
EXIT
Cómo salir del menú
Deseo salir de un menú.
Para hacerlo, deberá usar la opción Exit:
Los diversos menús y submenús contienen una opción Exit.
1 Pulse los botones Up o Down hasta que parpadee Exit.
2 Pulse el botón OK. Quizá deba repetir los pasos 1 y 2 para
volver a la última opción Exit.
Tome nota: Al activar un menú parpadeará el último elemento de
menú seleccionado. Esto le permite ver el ajuste más reciente. Por
ejemplo, si activó el menú Mode, parpadeará Man. mode si la
última vez utilizó Man. mode.
Este principio también se aplica a los ajustes actuales de hora y
temperatura. Al ingresar a los diferentes menús, estos siempre
muestran el último valor seleccionado. Esto le permite ver los
ajustes actuales.
Si accidentalmente ingresa a un menú, puede salir sin cambiar los
ajustes si confi rma el ajuste actual, y para ello deberá hacer Clic
en el botón OK.
© 2009 Danfoss Inc.
19
Page 20

Thermostato Programable 088L5130/5132 Español
Mensajes de error
E0 = Error interno. Cambie el termostato.
E1 = El sensor interno está defectuoso o en cortocircuito. Cambie
el termostato.
E2 = El sensor externo está defectuoso o en cortocircuito. Inspec-
cione el sensor externo.
Ajustes de fábrica para el programa automático 5:2
Días 1-5 (lunes - viernes)
Evento Hora Temperatura
Mañana 6.00 - 8.00 h 77 °F / 25 °C
Ausente 8.00 - 16.00 h 68 °F / 20 °C
En casa 16.00 - 22.00 h 77 °F / 25 °C
Noche 22.00 - 6.00 h 68 °F / 20 °C
Días 6-7 (sábado - domingo)
Evento Hora Temperatura
Día 8.00 - 23.00 h 77 °F / 25 °C
Noche 23.00 - 8.00 h 68°F / 20°C
57144A
Danfoss can accept no responsibility for possible errors in catalogues, brochures, other printed materials, and website information. Danfoss reserves the right to alter its products without
notice. This also applies to products already on order provided that such alteration can be made without subsequent changes being necessary in specications already agreed upon. All
trademarks in this material are property of the respective companies. Danfoss and the Danfoss logotype are registered trademarks of Danfoss A/S. All rights reserved.
Danfoss Inc.
Tor on to
Toll Free: 866-676-8062
Phone: 905-285-2050
Fax: 905-285-2055
www.LX.Danfoss.com
© 2009 Danfoss Inc.
Danfoss
LX
BRINGING WARMTH TO LIFE
20
 Loading...