

Page 1
Optional USB to Ethernet Conguration 1 of 3
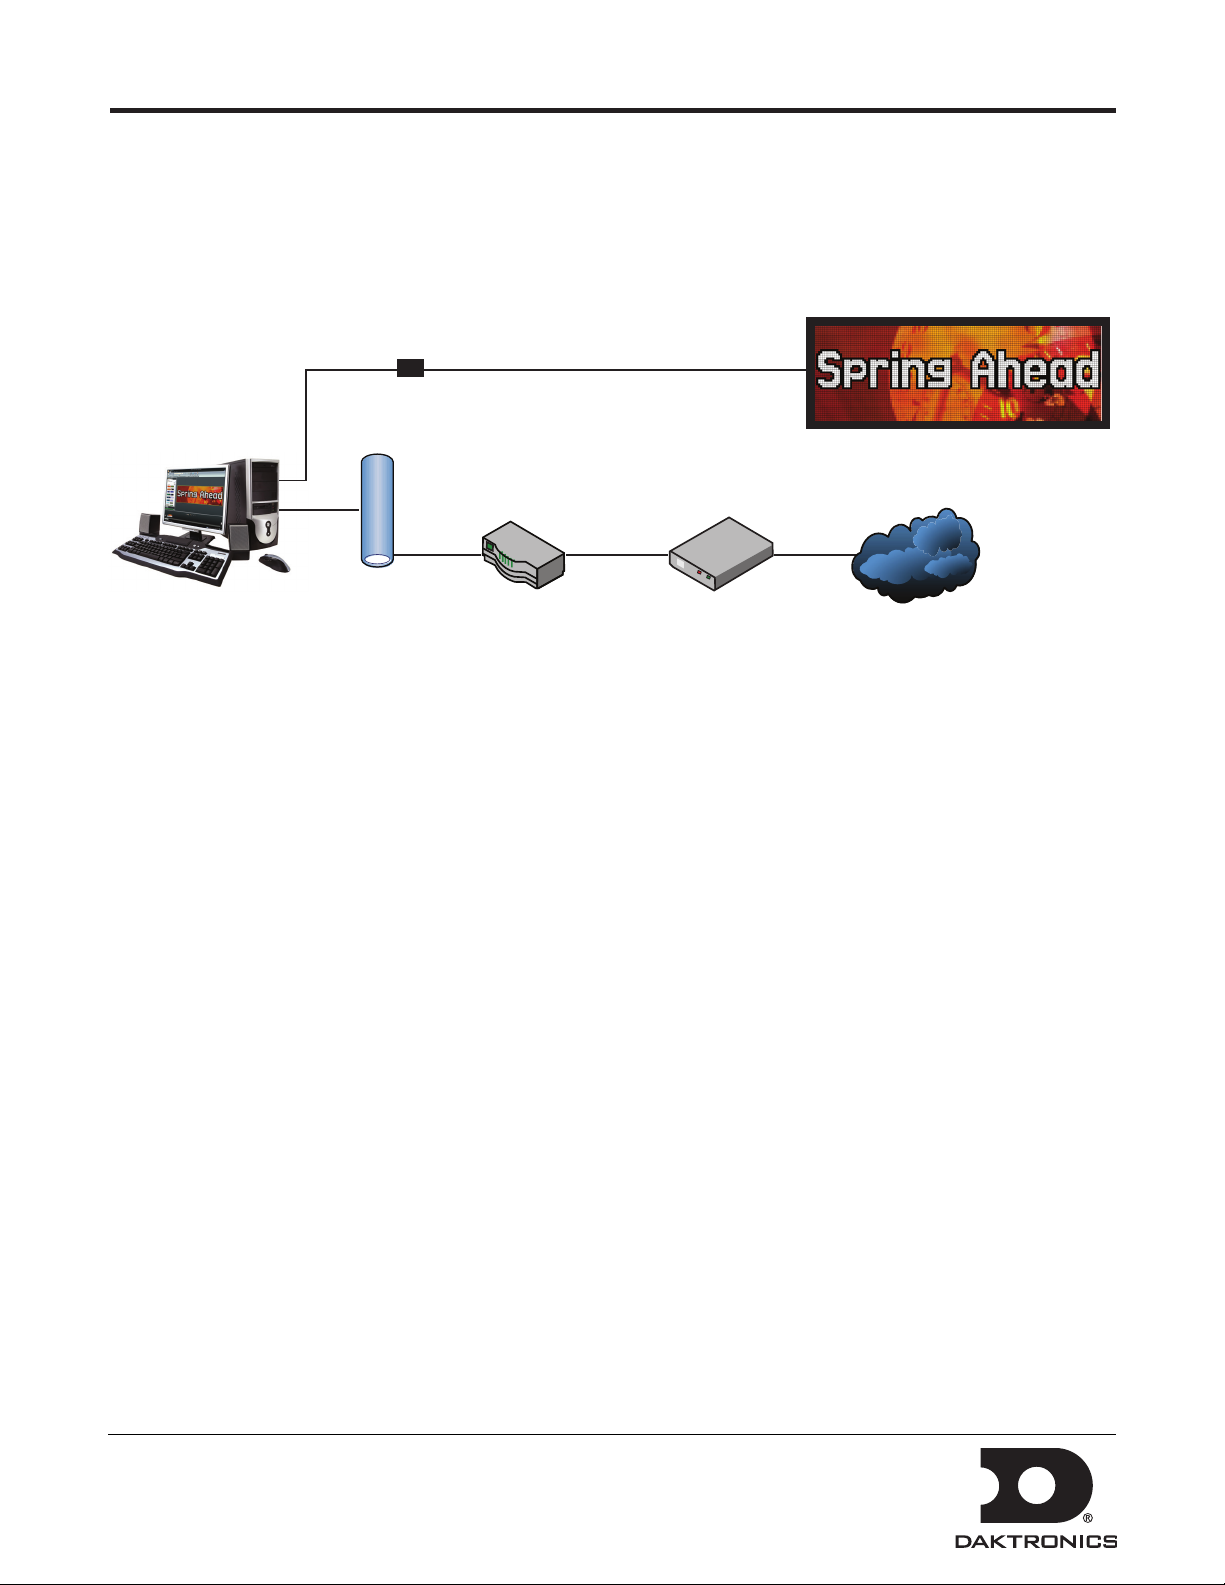
The USB to Ethernet adapter bypasses complex network configuration in situations where simple point-to-point
communication is required.
The adapter creates a secondary network, which is dedicated for communication with a Daktronics Galaxy®
display. Normal network operation is still enabled through the primary network.
USB to
Ethernet
Adapter
Network
Router
DSL/Cable
Internet
Modem
Caution:
• Multiple USB to Ethernet adapters cannot be utilized on the same computer.
• Installations with multiple displays or those that require control from multiple computers cannot use the USB
to Ethernet adapter.
System Requirements
• Windows® XP®, Vista®, or 7®
with current updates installed
• 1.6 GHz or higher processor
• 1.5 GB RAM or higher
• USB Specification Version 2.0/1.1/1.0
• CD-ROM or DVD Drive
Connecting Communications
The USB to Ethernet adapter can be used in conjunction with communication kits supplied with the display.
Install communication components according to manual and quick guide provided with device.
Installing the Driver
The driver configures the USB to Ethernet adapter to a static IP Address – 172.16.192.20 – that is compatible with
the default IP Address set on the display – 172.16.192.25.
DD1790707 Rev 2
12 September 2012
PO Box 5128 201 Daktronics Drive, Brookings, SD 57006-5128
tel: 800-325-8766 fax: 605-697-4700
www.daktronics.com
Page 2
Optional USB to Ethernet Conguration 2 of 3
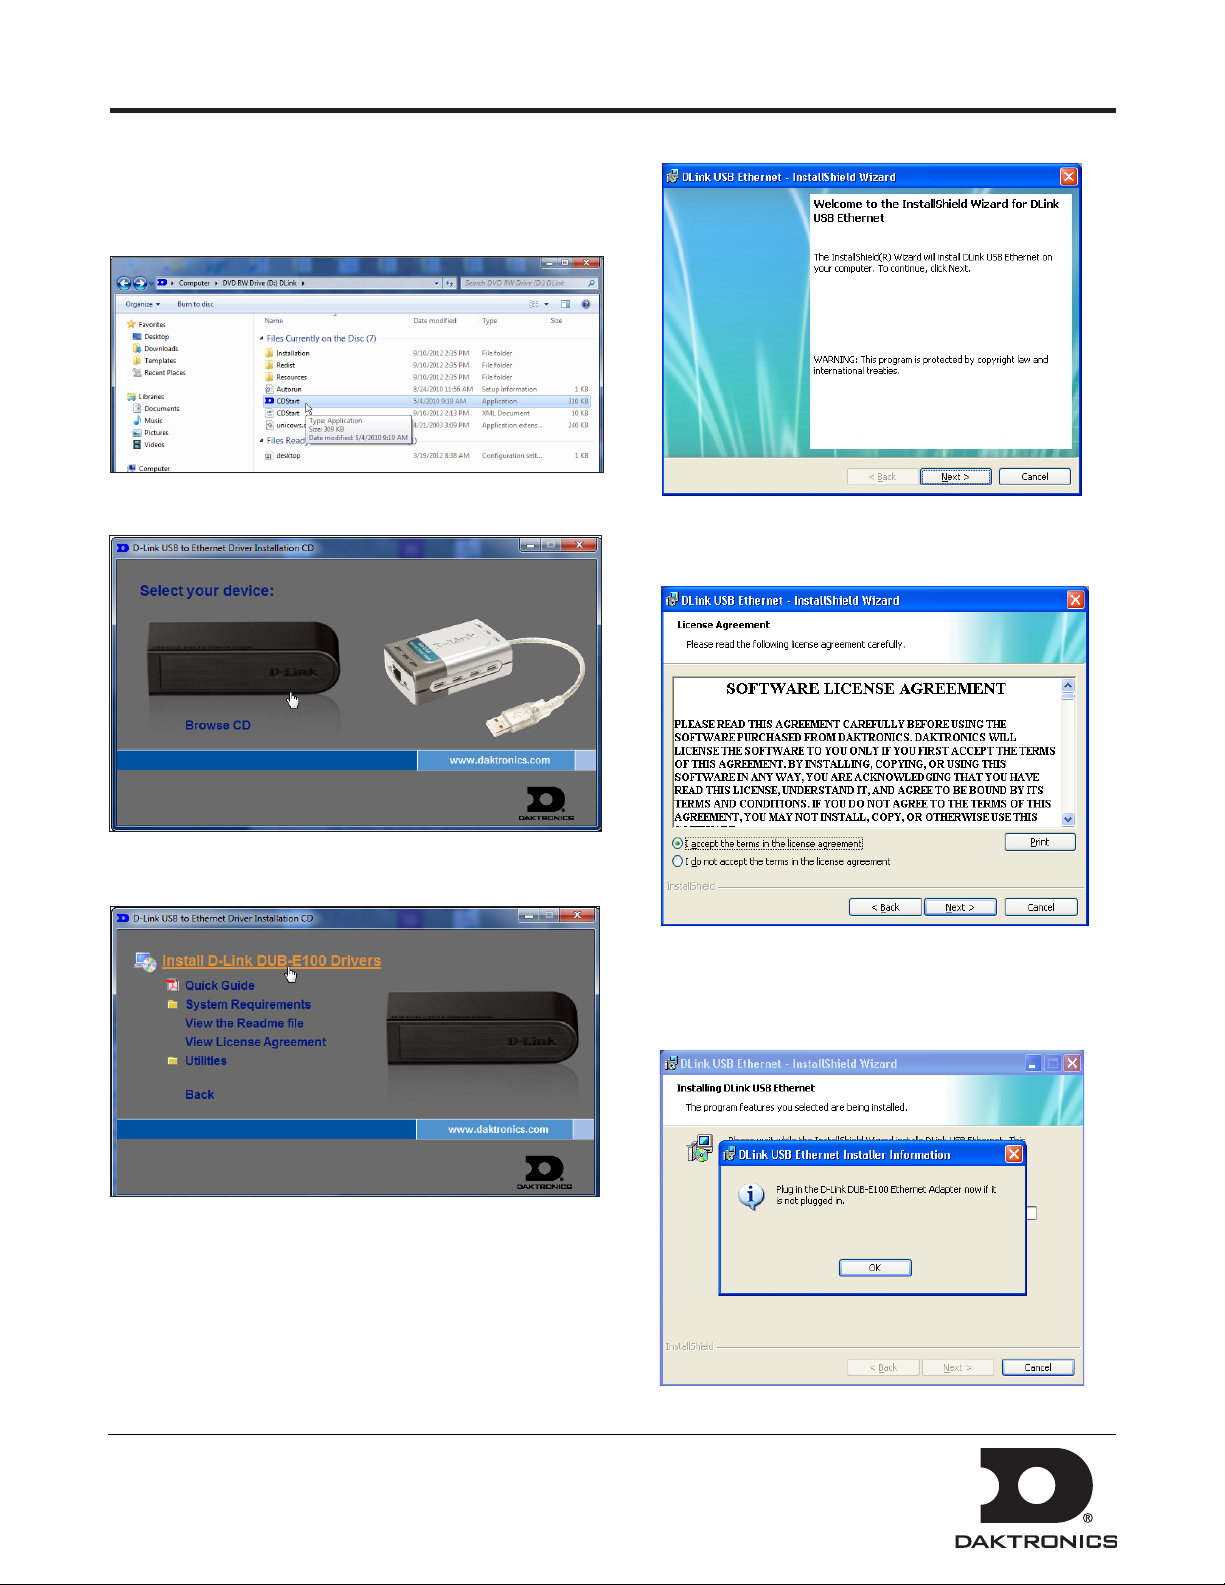
1. Insert disc into CD-ROM.
2. The CD should run automatically. If it does not,
navigate to the CD-ROM drive and double-click the
CDStart. exe file.
3. Click the Image of the device you are installing.
5. Click Next when the InstallShield Wizard opens.
6. Select I accept the terms in the license agreement
and click Next.
4. Click Install D-Link DUB-E100 Drivers.
7. Click Install.
8. Plug Ethernet Adapter in open USB port on the
control computer when prompted.
DD1790707 Rev 2
12 September 2012
PO Box 5128 201 Daktronics Drive, Brookings, SD 57006-5128
tel: 800-325-8766 fax: 605-697-4700
www.daktronics.com
Page 3

Optional USB to Ethernet Conguration 3 of 3
Windows XP
• Click Yes, this time only and Next when the
Found New Hardware Wizard window opens.
• Click Install the software automatically
(Recommended) and Next.
12. Click Finish when installation is complete.
Conguration Without CD
1. After plugging the Ethernet Adapter in an open
USB port on the control computer, go to:
http://dakles.daktronics.com/downloads.
2. Click venus1500 > utils > USBEthernet > Driver >
install.html.
3. Click the Image of the device you are installing.
4. Click Save as and Save the file to your computer’s
hard drive.
5. Browse to the file and double-click DlinkSetup to
start the Installation Wizard.
6. Click Next when the InstallShield Wizard opens.
7. Select I accept the terms in the license agreement
and click Next.
8. Click Install.
9. Connect an Ethernet cable (not provided by
Daktronics) to the USB to Ethernet adapter.
• Driver software installation starts automatically
9. Connect an Ethernet cable (not provided by
Daktronics) to the USB to Ethernet adapter.
10. Connect the other end of the Ethernet cable to the
communication device.
10. Connect the other end of the Ethernet cable to the
communication device.
11. Wait until you see that new hardware has been
installed in the notification area in the lower-right
corner of your monitor before you click OK.
12. Click Finish when installation is complete.
11. Wait until you see that new hardware has been
installed in the notification area in the lower-right
corner of your monitor before you click OK.
DD1790707 Rev 2
12 September 2012
PO Box 5128 201 Daktronics Drive, Brookings, SD 57006-5128
tel: 800-325-8766 fax: 605-697-4700
www.daktronics.com
 Loading...