

Daikin DTKM50QRV16, ATKM60QRV16, FTHP50RRV16, DTKM60QRV16, ATKM50RRV16 Service Manual
...
REMOVAL
PROCEDURE
SERVICE MANUAL
Indoor Unit
Inverter
Wall Mounted Type
5.0/6.0/7.1 kW Class
Si041403EB

Service Manual
Removal Procedure
Indoor Unit
zCooling Only
ATKM50QRV16 DTKM50QRV16 FTHP50RRV16
ATKM60QRV16 DTKM60QRV16
FTKM50PRV16
ATKM50RRV16 DTKM50RRV16 FTKM60PRV16
ATKM60RRV16 DTKM60RRV16 FTKM71PRV16
ATKP50QRV16 DTKP50QRV16 FTKM50QRV16
ATKP60QRV16 DTKP60QRV16 FTKM60QRV16
ATKP71QRV16 DTKP71QRV16 FTKM71QRV16
ATKP50RRV16 DTKP50RRV16 FTKM50RRV16
ATKP60RRV16 DTKP60RRV16 FTKM60RRV16
ATKP71RRV16 DTKP71RRV16
FTKP50PRV16
FTKP60PRV16
FTKP50QRV16
FTKP60QRV16
FTKP71QRV16
FTKP50RRV16
FTKP60RRV16
FTKP71RRV16

Si041403EB
Removal Procedure 1
Table of Contents
1. Air Filters / Front Panel ...........................................................................2
2. Horizontal Blade......................................................................................4
3. Front Grille ..............................................................................................5
4. Electrical Box ..........................................................................................6
5. PCBs .......................................................................................................8
6. Drain Pan / Swing Motors / Vertical Blade ASSYs................................11
7. Indoor Heat Exchanger .........................................................................14
8. Fan Rotor / Fan Motor...........................................................................16
Note:
The illustrations may be slightly different depending on the model.

Air Filters / Front Panel Si041403EB
2 Removal Procedure
1. Air Filters / Front Panel
Warning
Be sure to wait for 10 minutes or more after turning off all power supplies before
disassembling work.
Step Procedure Points
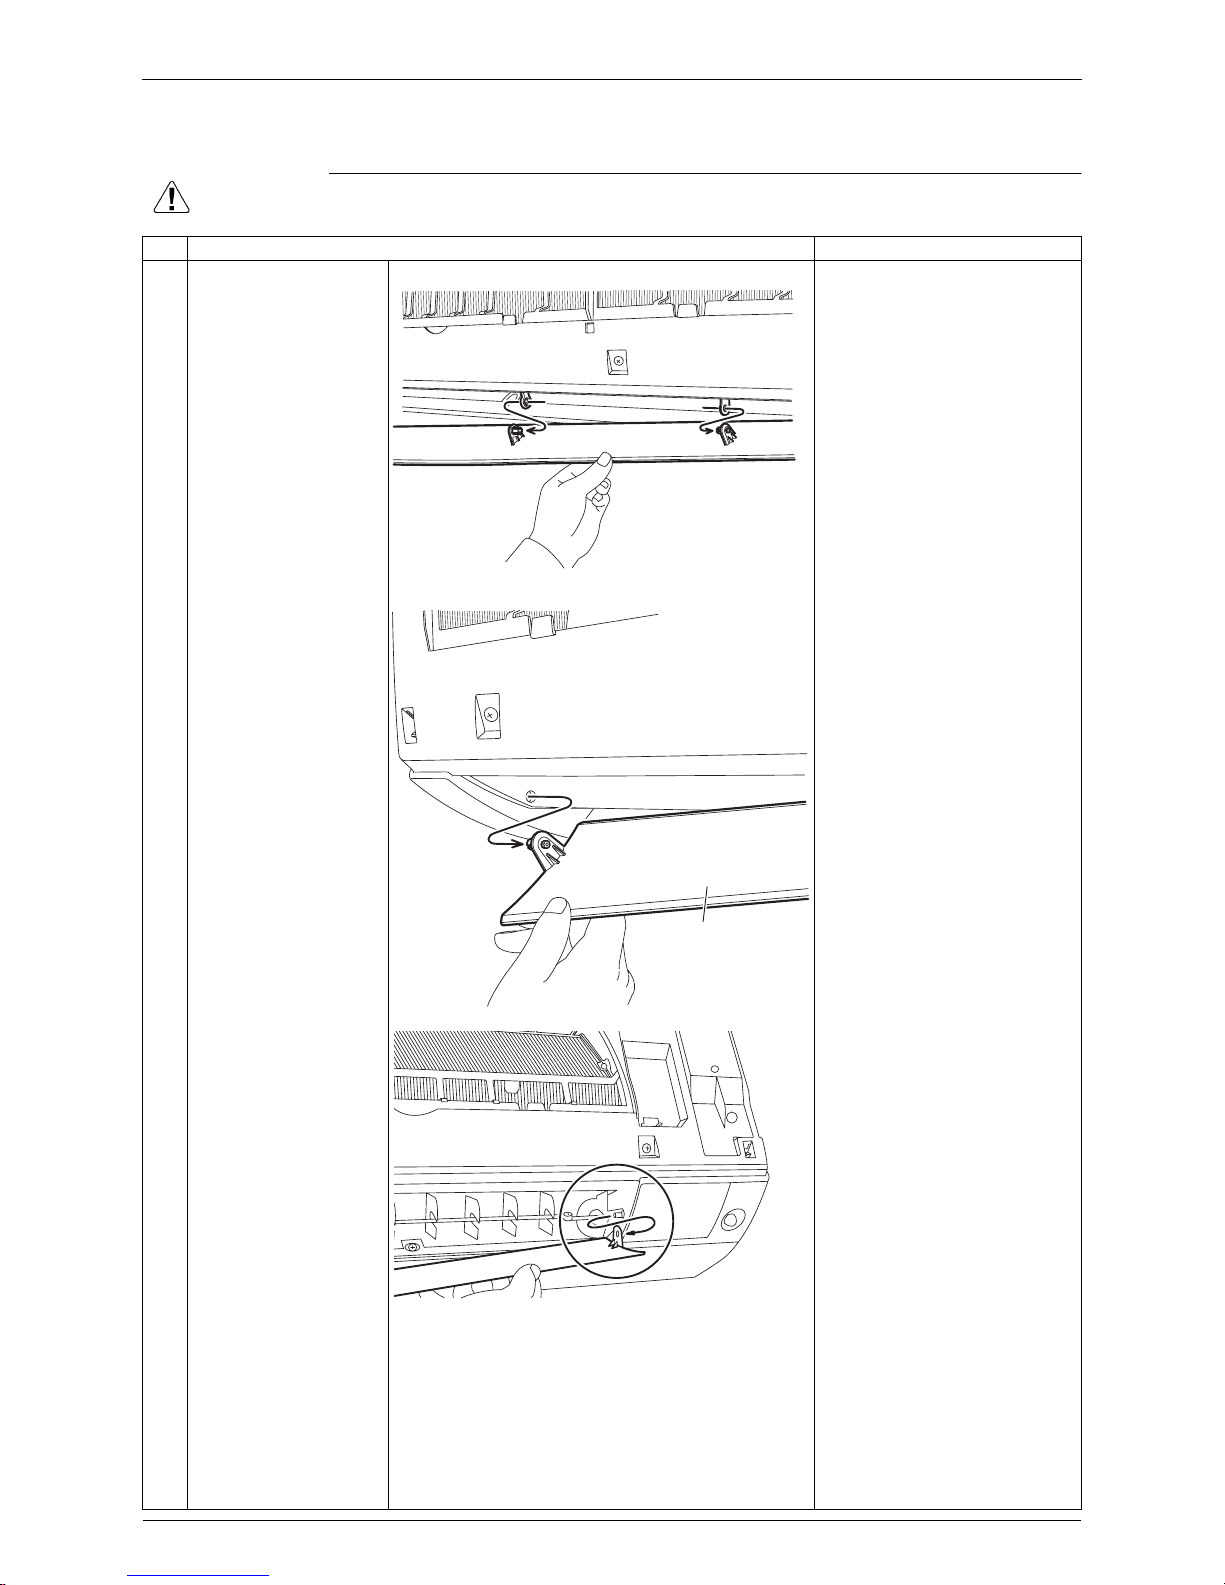
1. Remove the air filters.
The 2 filters are
interchangeable.
When reassembling, insert
the air filter with the
“FRONT” mark faced up.
When reassembling, insert
the air filter along the guides.
Be sure to insert the 2
bottom hooks when
reassembling the air filter.
1 Open the front panel to
the position where it
stops.
23Unfasten the 2 hooks,
pull out the air filter
downward and remove
it.
Remove the other air
filter in the same way.
4 Unfasten the 4 hooks
and remove the
optional filter ASSY.
5 Unfasten the 5 hooks
and remove the
optional filter.
Front panel
(R20135)
(R20136)
Air filter
Hook
(R20137)
Hook
Hook
Optional
filter ASSY
Optional filter
Hook
Hook
(R23478)

Si041403EB Air Filters / Front Panel
Removal Procedure 3
2. Remove the front panel.
1 Open the front panel
over the position where
it stops.
2 Slide the left shaft to the
right and release it.
When reassembling the front
panel, fit the right and left
shafts one by one into the
grooves and fully push them
into position.
34Release the right shaft
in the same way.
Remove the front panel.
Step Procedure Points
(R20139)
(R23479)
Left shaft
(R23480)
Right shaft
Horizontal Blade Si041403EB
4 Removal Procedure
2. Horizontal Blade
Warning
Be sure to wait for 10 minutes or more after turning off all power supplies before
disassembling work.
Step Procedure Points
1 Release the 2 center
shafts of the horizontal
blade.
2 Release the left shaft.
3 Release the right shaft
and remove the
horizontal blade.
(R19775)
Horizontal blade
(R19776)
(R20142)
 Loading...