

Page 1
North America, Inc.
375 Jaffrey Road
Peterborough, NH 03458
(800) 243-8145
www.dahleusa.com
Blade installation is the opposite of blade removal.
1. Insert the blade carrying device into the new blade with the
bevel side up. Remove the protective cover from the
blade.
2. Carry the blade with both hands being careful to keep
fingers clear.
3. Insert the blade into the cutter and slide up into place. If
you are having trouble lining up the hex screw holes, try
loosing the blade carrying device from the blade. You can
also pull down on the cutting arm until the screw holes line
up. Be careful to keep your fingers clear of the blade.
4. Tighten the hex screws located on each end of the blade.
Remove the blade carrying device and insert the last of the
three hex screw that holds the blade in place.
5. Raise the cutting arm to its highest position and install the
blue metal blade cover. Insert the two 4 mm hex screw
that holds the cover in place.
6. Place the clear plastic safety cover over the metal arms
and use four 3 mm hex screws to secure the cover in
place.
7. Replace the remaining clear plastic cover on the cutter and
secure with 3 mm hex screws.
8. Insert test paper and make a trial cut.
*After repeated cutting it may be necessary to rotate your
plastic cutting block 90 degrees.
**After repeated sharpening of your blade, it may be
necessary to install the metal spacer provided, to the cutting
arm.
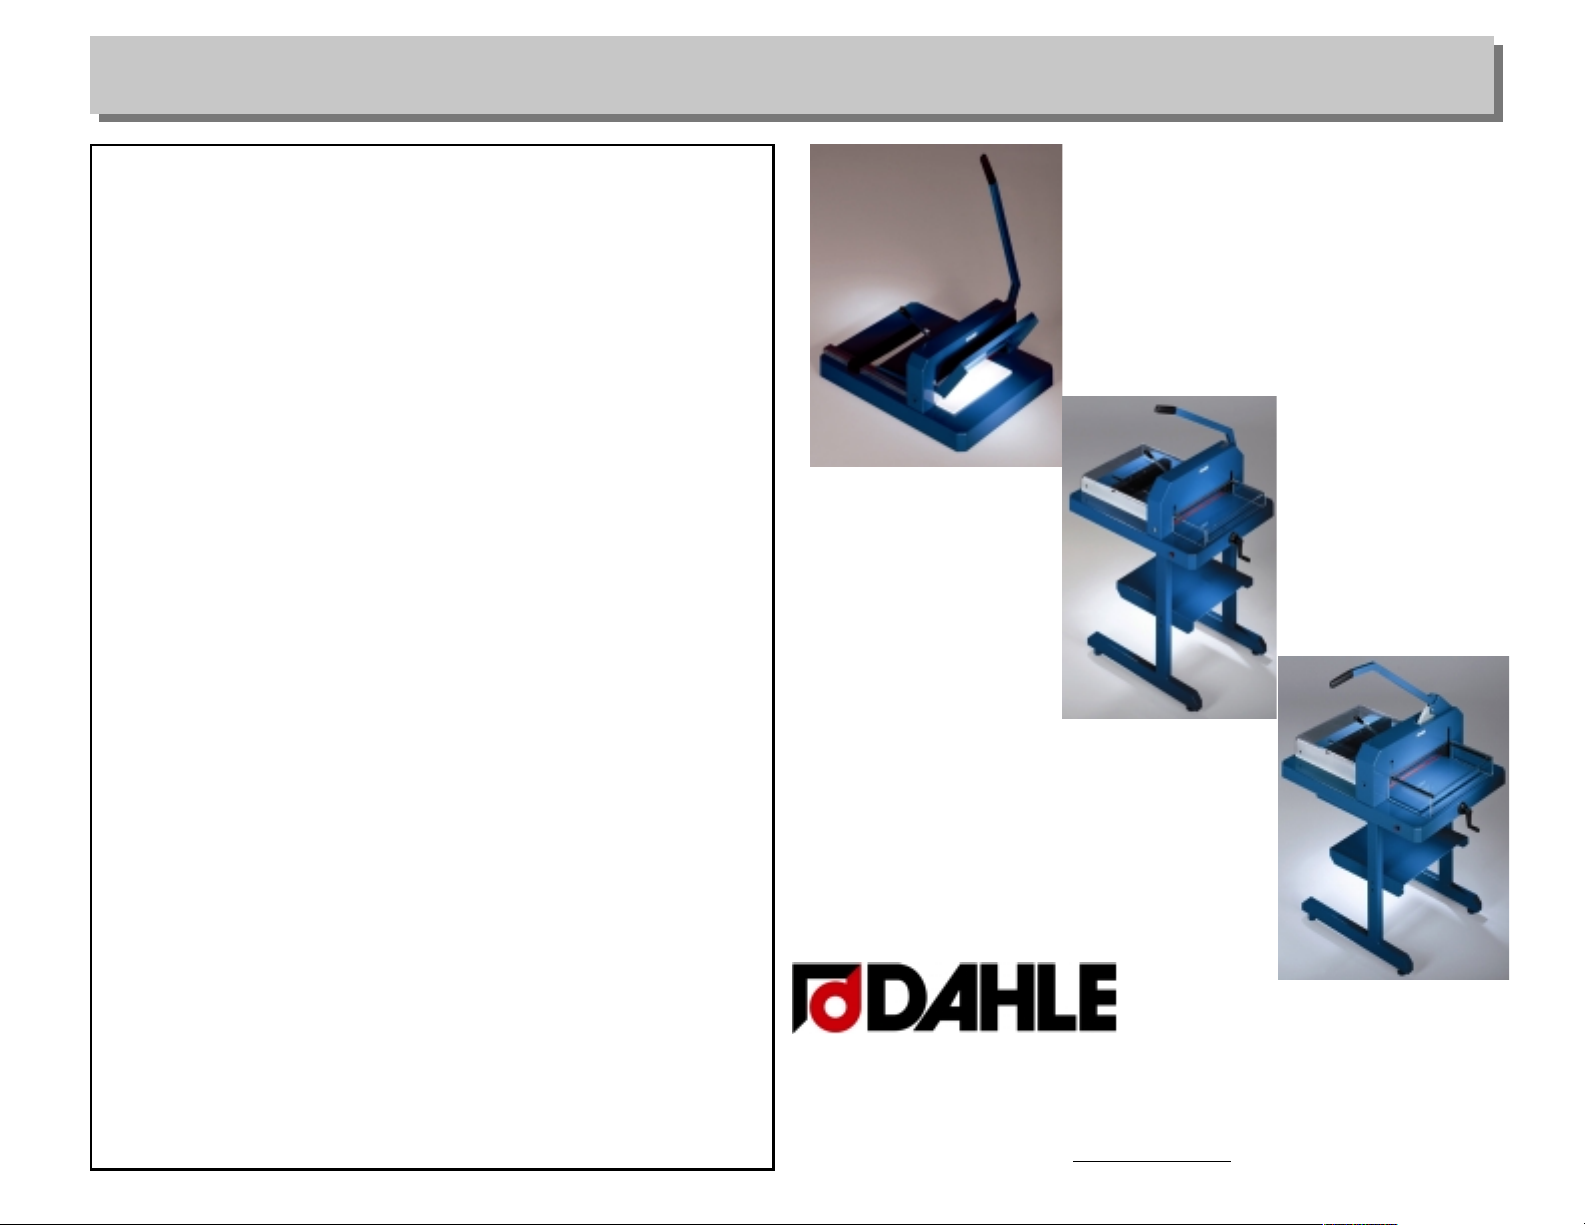
Blade Installation Instructions for the DAHLE 842, 846, and 848 Ream Cutter
842
848
846
Page 2
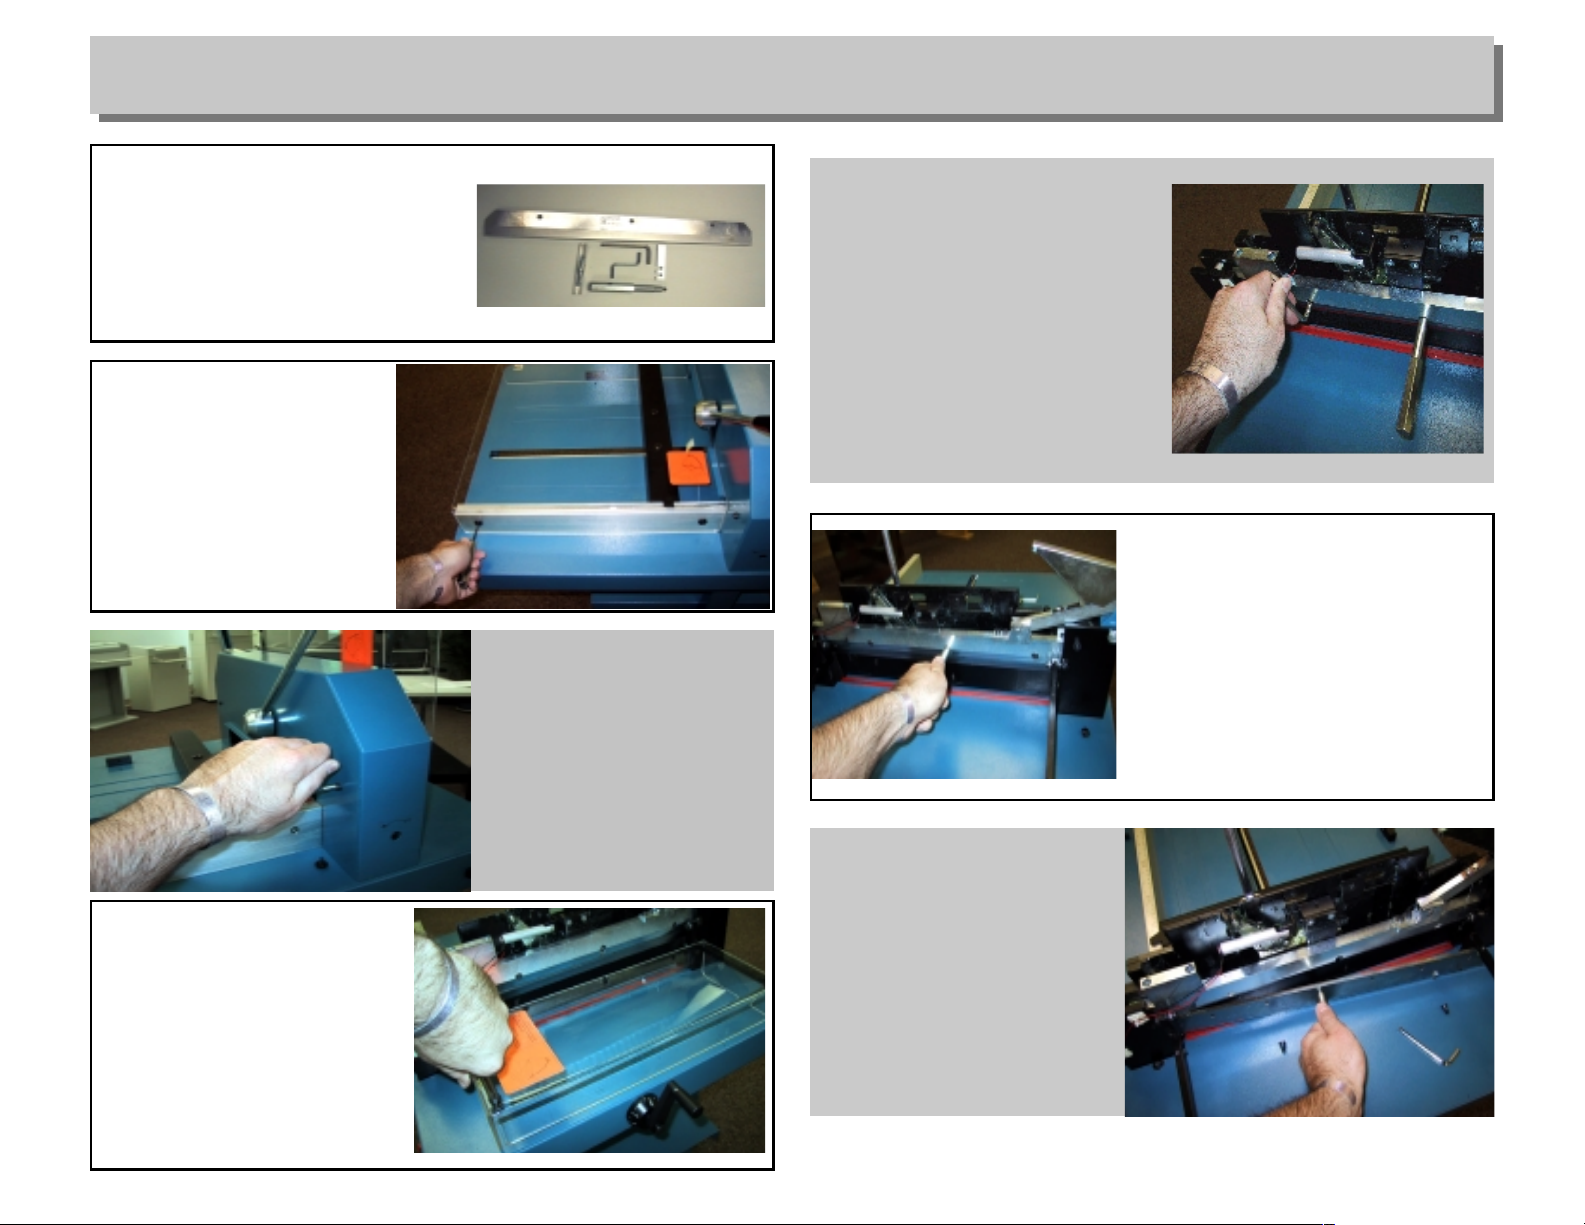
6. Once the blade is free,
remove it from the cutter
and place it in a safe
container.
5. Lift the blade arm to its highest
position. Loosen the blade
carrying device a few turns. With
both hands, gently push
downward being careful to keep
fingers clear of the blade. If the
blade does not move, loosen the
blade carrying device a little more,
lower the cutting arm, and again
gently push the blade downward.
Blade Removal Instructions for the DAHLE 842, 846, and 848 Ream Cutter
2. Lift the cutting arm to its
highest position. With a 4
mm hex key, remove the
two screw on the left side
of the blue metal blade
cover. Once the screws
are removed, lift the cover
and slide it over the top of
the handle.
3. Remove the four hex
screw on the top of the
clear plastic safety cover
located to the right of the
cutting blade (while facing
the machine). Remove
the cover.
4. Lower the cutting arm to its
lowest position. Locate the
blade and the three hex screws
that hold the blade in place.
Remove the center hex screw
and insert the blade carrying
device (looks like a screwdriver
with threads on the tip) and
tighten. Remove the remaining
two hex screws that hold the
blade in place.
1. With a 3 mm hex key,
remove the hex screws on
the clear plastic cover to
the left of the cutting blade
(while facing the machine).
Remove the cover.
Tools You Will Need
•
3 mm hex key
•
4 mm Hex Key*
•
5 mm Hex Key*
•
Blade Carrying Device*
*Included in blade replacement kit
 Loading...