

Page 1
■
Be sure that washer is grounded.
To avoid electrical shock, use a metal pipe for the ground
connection.
But, do not ground the washer with gas pipes or telephone
lines to avoid dangers of explosion or lightning strike.
■
Do not put your hands into the spin dryer
basket when it is spinning.
Your fingers can be caught by spinning laundry and
damaged.
■
Never allow children to operate or play
with the washer.
Children playing with the washer may accidentally fall into
the washing tub.
■
Disconnect the power cord from the power
supply when not in use.
■
Ventilationopenings must not be obstructed by
carpeting when the washing machine is installed on a
carpeted floor.
■
If the supply cordof this appliance is damaged, it
should be replaced by a repair shop appointed by
manufacturer, because special purpose tools are required.
■
Turn off the SPIN Timer immediatelywhen the
spin dryer makes noise and vibration excessively during
spinning.
■
Don’t use excessively hot water.
(Below 50°C)
Plastic parts may be deformed or damaged.
Also, clothing may be deformed or decolored.
■
Before washing, check all pockets.
If nails or pins remain in pockets, they may damage the
washer or clothes.
■
Close the water tap a little if the water
pressure is too high.
■
Be sure to cover with the safety cover on
laundry before spinning.
This prevents laundry from being tossed out and damaged.
■
To avoid water splashes, close the wash
tub lid.
■
Never splash water on the control panel.
PRECAUTIONS WHEN OPERATING
■
Make sure that electric connector is set for your
available voltage before operating the washing machine.
■
This unit is set for 220V. (240V)
■
If you want to change the voltage, remove the back cover
and reset the connector as figures.
ELECTRIC CONNECTION
CAUTIONS
(ONLY FOR DUAL VOL TAGE MODEL)
1
Page 2
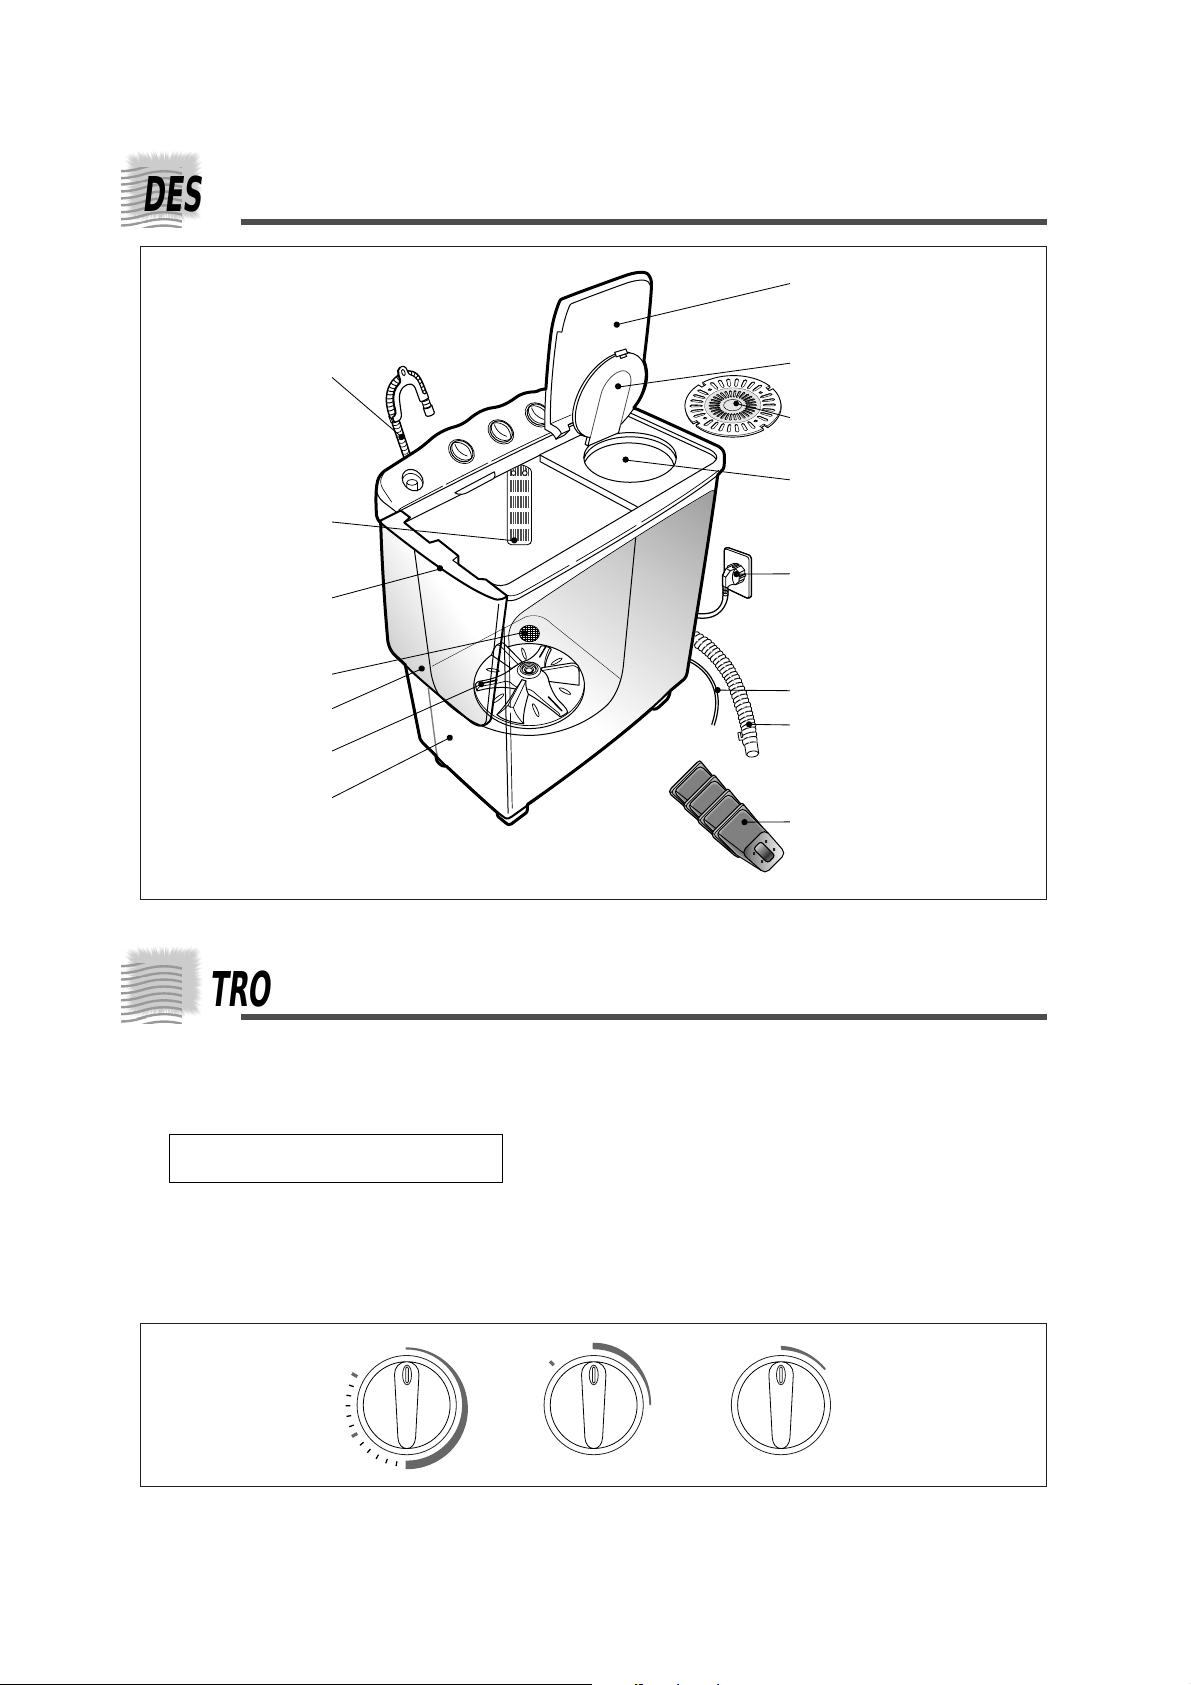
! TIMER
Use to select the desired time for washing, rinsing or
spinning.
Use to select the desired time for draining.
(In case of DRAIN PUMP model)
@ WASH SELECTOR
Select “WASH · RINSE” for washing and rinsing,
Select “DRAIN” to drain the water.
Select “OFF” to stop washing, rinsing and draining.
# SPIN SELECTOR
Select “SPIN” for spinning.
Select “OFF” to stop spinning.
DESCRIPTION OF P ARTS
TIMER
WASH SELECTOR
W
A
S
H
-
R
I
N
S
E
O
F
F
D
R
A
I
N
0
9
3
6
12
15
SPIN SELECTOR
O
F
F
S
P
I
N
CONTROL P ANEL
SPIN DRYER LID
When you open this lid while the spin
basket is spinning, the spinning
will be stopped by brake system.
WATER DRAIN HOSE
(PUMP MODEL)
OVERFLOW FILTER
WASH TUB LID
During operation, close the
wash tub lid.
DRAIN FILTER
WASH TUB
PULSATOR
BASE
POWER CORD
The plug’s shape may not correspond
with this drawing.
INNER LID
SPIN DRYER BASKET.
EARTH WIRE (OPTION)
WATER DRAIN HOSE
(NON-PUMP MODEL)
LEG
SAFETY COVER
2
! @ #
Page 3

WASHING PROCEDURE
¡Æ
TO WASH
! Before starting washing, check followings.
Lay the drain hose down toward a sink hole.
(In case of NO DRAIN PUMP model)
Place the drain hose in sink or bath.
(In case of DRAIN PUMP model)
Connect the power cord to the power supply outlet.
@ Set the WASH SELECTOR to “WASH · RINSE”.
# Fill water in the wash tub to the desired water
level and add detergent. (see page 5)
$ Put laundry in the wash tub.
% Set the WASH TIMER 1~15 minutes.
^ After washing, set the WASH SELECTOR to “DRAIN”
for drain and set the TIMER to the proper time.
¡Æ
TO SPIN DRY
! Transfer the clothes into the spin basket and arrange it
evenly.
@
Be sure to put the safety cover and close the inner lid.
# Close the spin dryer lid.
$ Set theSPIN SELECTOR to “SPIN”.
% Set theTIMER 1~5 minutes.
¡Æ
TO RINSE
! Set theWASH SELECTOR to“WASH · RINSE”.
@ Supply the proper amount of water as not to overflow
the top of the washing tub.
# Set the TIMER 2~3 minutes.
$ Todrain the water, set the WASH SELECTOR to
“DRAIN” and set the TIMER to the proper time.
% Repeat this cycle until drain water is clean.
(2~3 cycles)
¡Æ
OVER FLOW RINSE
! Set theWASH SELECTOR to“WASH · RINSE”.
@
Keep suppling water. (Adjust water pressure to ensure that
the amount of supplied does not exceed the amount of drain.)
# Set the TIMER 6~8 minutes.
$ As soon as the TIMER shuts off or the rinsing
water become clear, turn off the water tap.
% To drain the water, set the WASH SELECTOR to
“DRAIN” and set the TIMER to the proper time.
3
Page 4

INSTALLATION
■
LOCA TION & ENVIRONMENT
Leave some space.
Space at least 10cm between the washer and the wall.
Place washer on a sturdy and flat surface.
If the washer is placed on an uneven or weak surface,
noise or vibration may be occurred.
(Allowable inclination is max. 2°)
Never install the washer near water.
Do not place the washer in steamy rooms or where the
washer is directly exposed to rain.
Moisture may destroy the electrical insulation and cause
an electric shock hazard.
Avoid direct sunlight or heating devices.
As plastic and electrical components are affected by direct
heat, never place the washer near heater, boilers, etc..
Do not place it under direct sunlight.
Avoid cold place.
Do not place or store the washer below 0°C(32°F) to avoid
any damage from freezing.
■
LEG SETTING
Slide the leg into the
opening underneath the base,
and push.
■
INLET HOSE SETTING
Attach the water inlet hose to the water inlet pipe.
■
DRAIN HOSE SETTING
! Connect the drain hose to the drain outlet at the rear
side of your washer.
@ The other end of drain hose setting toward the bath
or sinkhole.
# Install the drain hose under 85cm from the ground.
(In case DRAIN PUMPmodel)
85Cm
(NO DRAIN PUMP)
(PUMP)
4
CLEANING & MAINTENANCE
■
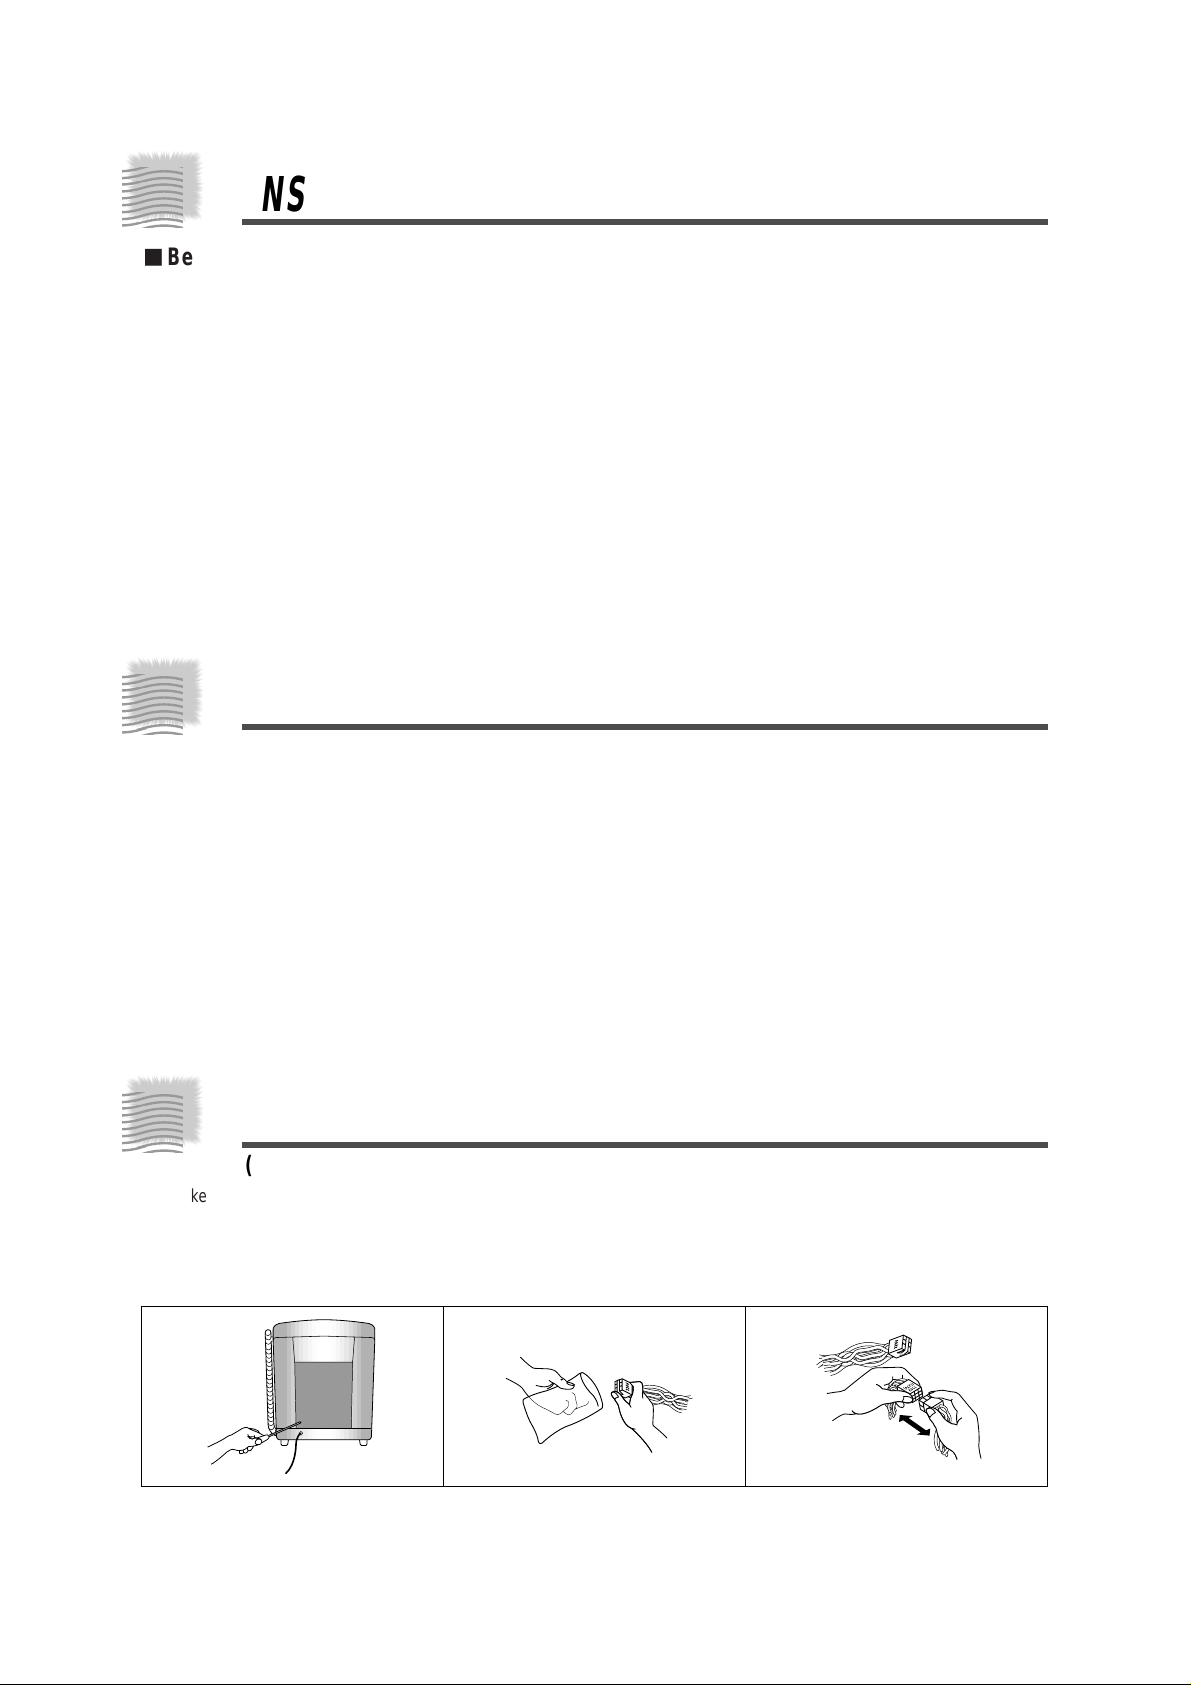
CLEANING THE DRAIN FIL TER
In case of incomplete drain, remove lints from the drain
filter with soft brush.
■
CLEANING THE WASHER BODY
Wipe of stains on the cabinet and control panel with soft
cloth.
Do not use benzene, thinner, cleanser or wax.
(Plastic parts will be damaged.)
■
CLEANING THE OVERFLOW FIL TER
Insert your finger into hole “A”
and then pull the overflow filter
in the direction of arrow as shown
in the figure.
■
CLEANING THE WASH TUB
Fill water in the wash tub to “L” level,
and operating wash cycle for
1~2 minutes.
After washing drain water from
the wash tub.
Close the wash tub lid.
Proper care of your washer can extend its life.
A
Less than 10cm
 Loading...