

Daewoo DWF-ELC55BGN, DWF-ELC55GPN Instruction Manual
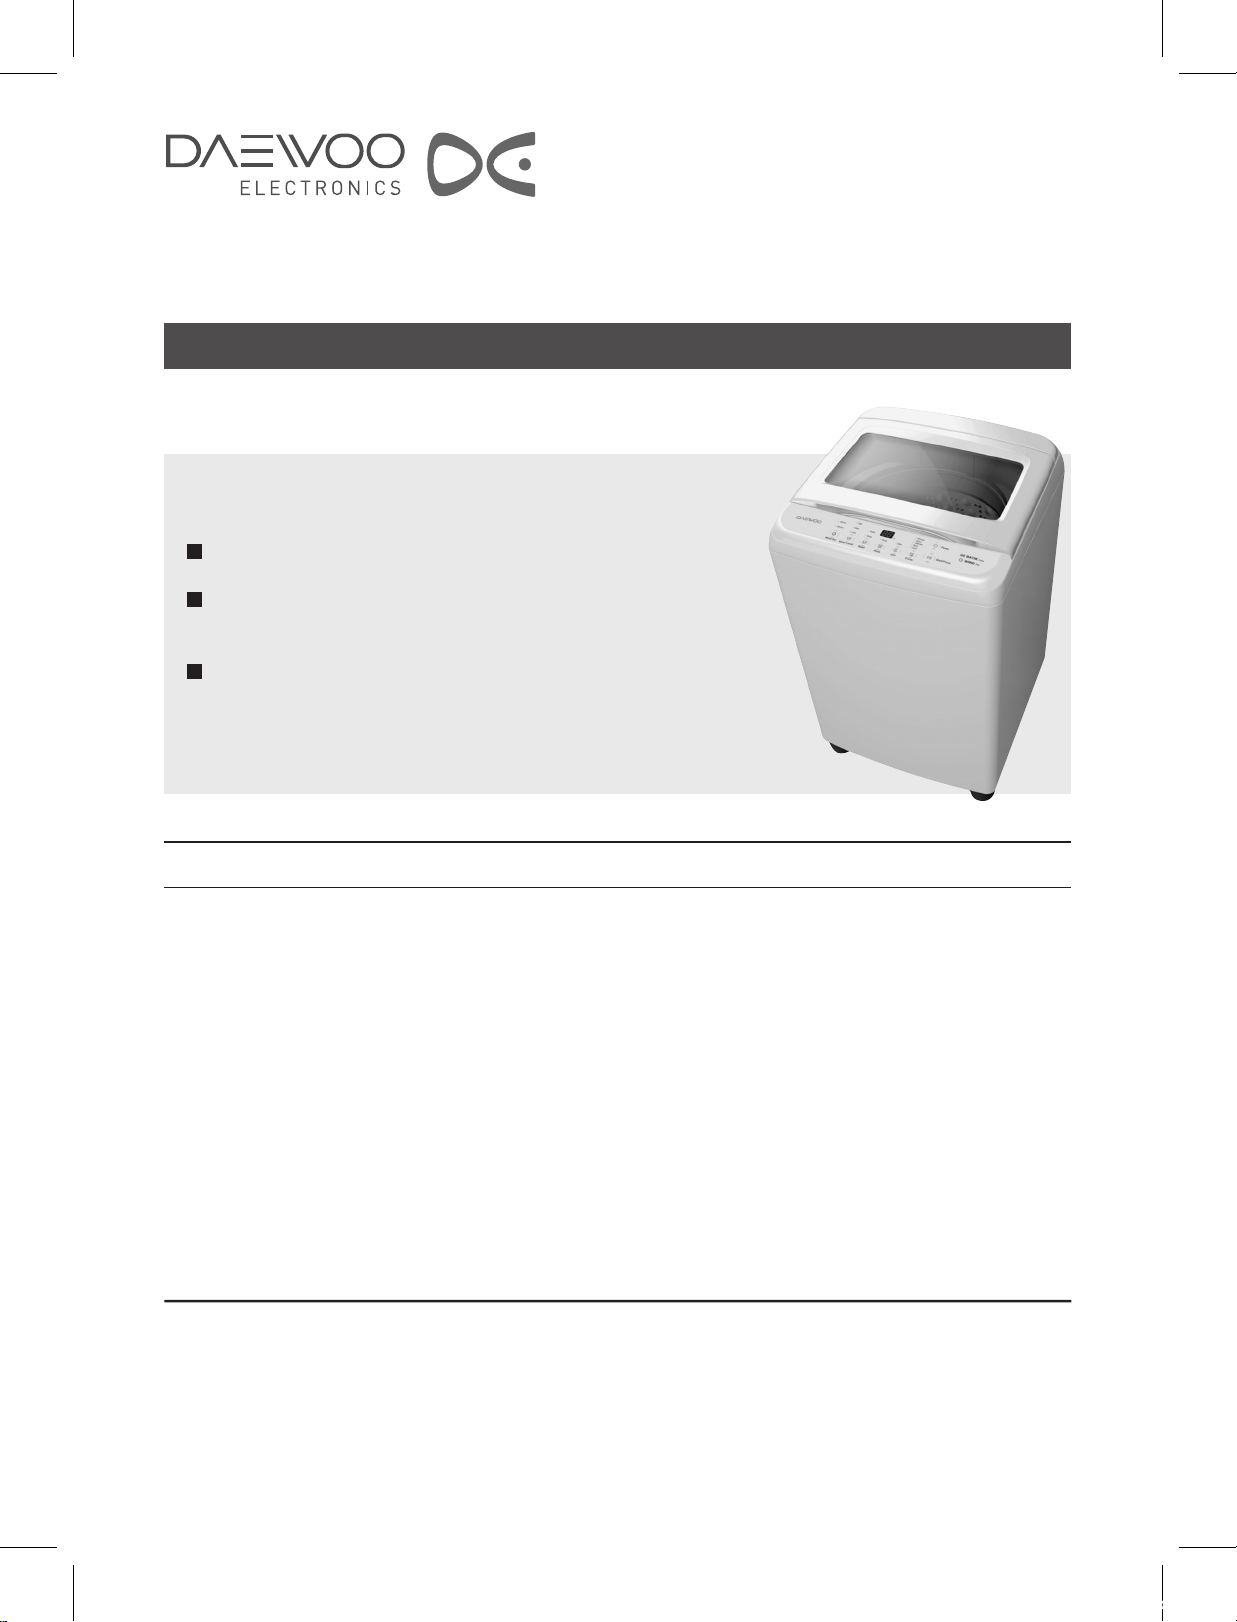
Full-Auto Electric Washing Machine
Model : DWF-ELC55BGN / DWF-ELC55GPN
INSTRUCTION MANUAL
Applying One-Touch Operation System.
Realizing calm washing through the innovational low-noise
design.
Before operating this washer, please read this instruction
completely. Thank you.
CONTENTS Page
PARTS AND FEATURES....................................................................................................................2
WASHER SAFETY .............................................................................................................................3
INSTALLATION INSTRUCTIONS ......................................................................................................4
ELECTRICAL REQUIREMENTS .......................................................................................................5
INLET HOSE CONNECTION .............................................................................................................6
OPERATING YOUR WASHER ...........................................................................................................7
THE FUNCTIONS OF THE CONTROL PANEL .................................................................................8
WASHING PROCEDURE AND COURSE SELECTION ....................................................................9
GENERAL PROCEDURE FOR OPERATION ..................................................................................13
CARING FOR YOUR WASHER .......................................................................................................14
HOW TO CLEAN THE FILTER .........................................................................................................15
REMOVING STAINS ........................................................................................................................16
TROUBLE SHOOTING ....................................................................................................................17
SPECIFICATION ..............................................................................................................................18
A NOTE TO YOU
Thank you for buying a DAEWOO appliance.
DAEWOO washers are easy to use, save time, and help you manage your home better.
This manual contains valuable information about how to operate and maintain your washer property and safely.
Please read it carefully.
DWF-ELC55BGN,DWF-ELC55GPN(영)_호주향.indd 1 16. 7. 8. 오후 12:08
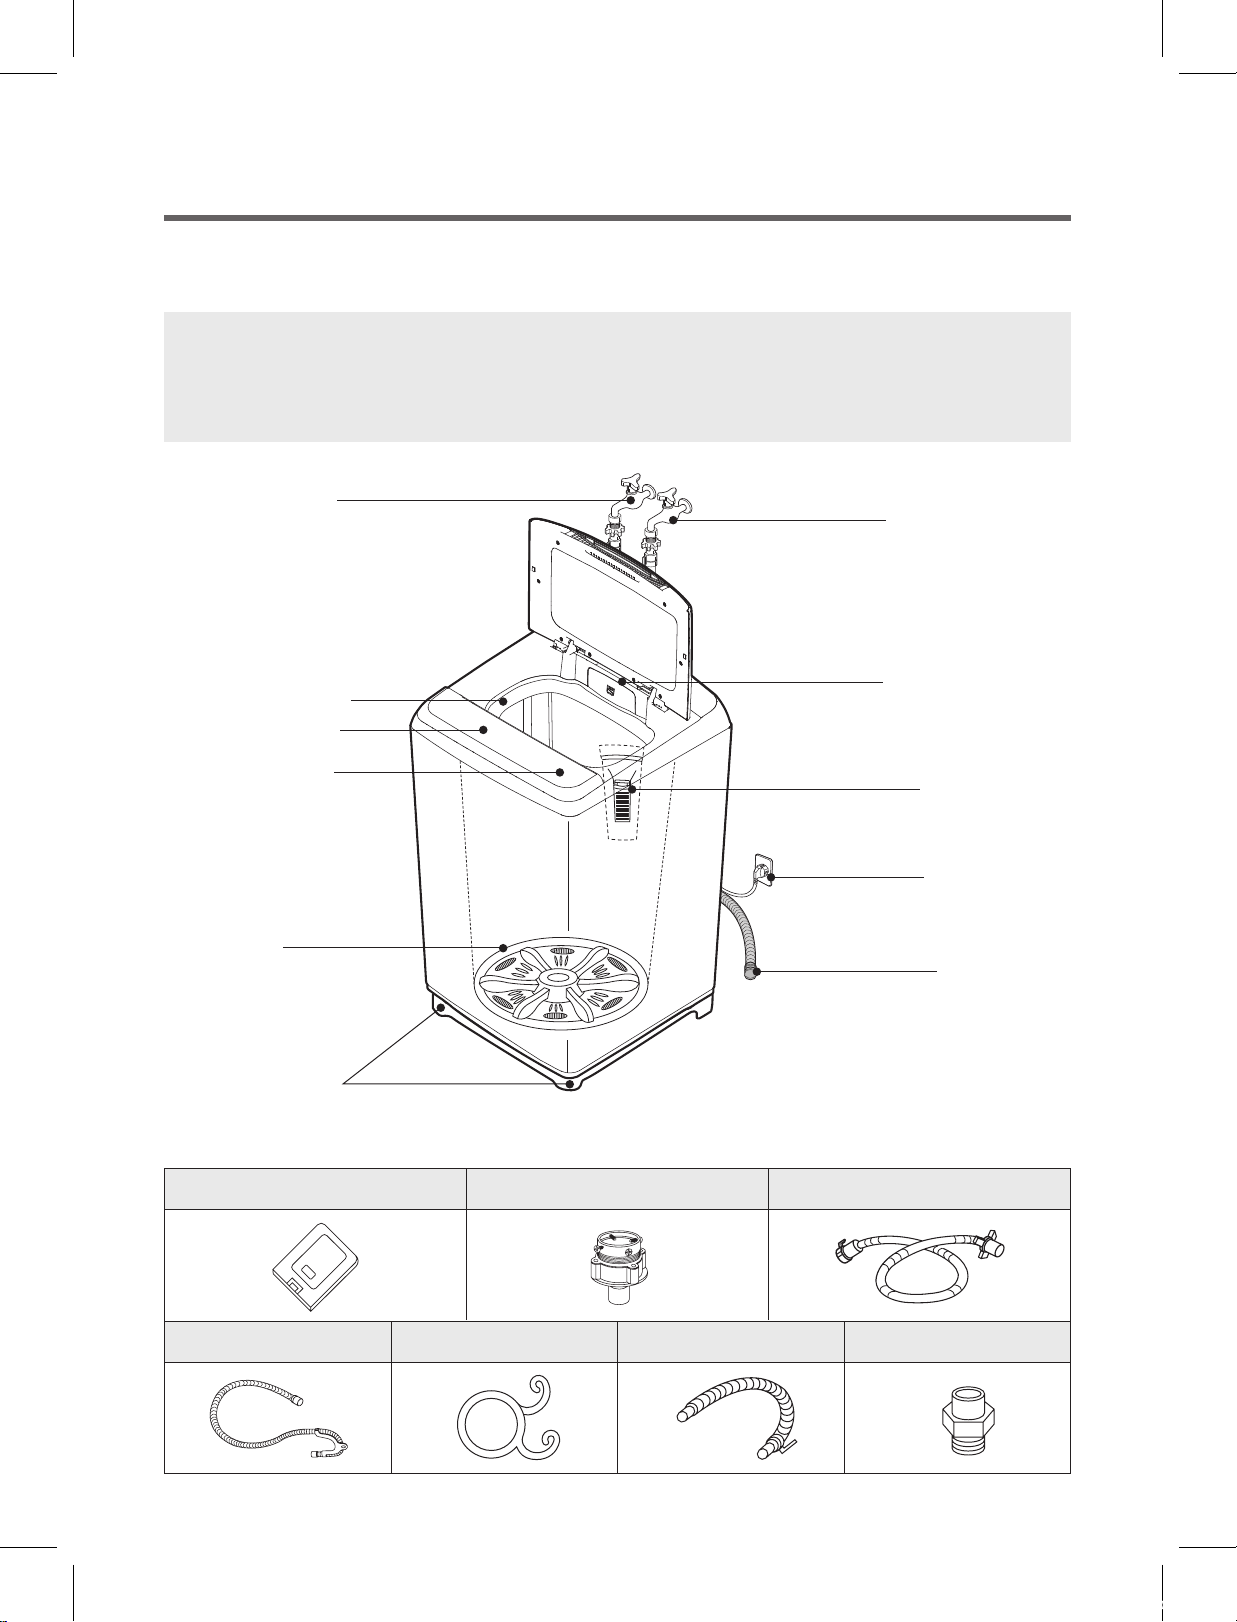
PARTS AND FEATURES
UP
DRYTEN
UP
UP
The parts and features of your washer are illustrated on the page.
Become familiar with all parts and features before using your washer.
NOTE
• The drawings in the book may vary from your washer model.
They are designed to show the different features of all models coverd by this book,Your
model may not include all features.
• HOT WATER TAP
After using the washer, close the water tap.
In case of the single valve model, there is no hot
water valve.
• Fabric Softener Inlet
• CONTROL PANEL
• POWER SWITCH
• PULSATOR
• COLD WATER TAP
After using the washer, close the
water tap.
• DETERGENT CASE
• MAGIC FILTER
(OPTION)
• POWER CORD
• DRAIN HOSE• DRAIN HOSE
• ADJUSTABLE LEG
ACCESSORIES
COVER UNDER (OPTION) WATER TAP ADAPTER INLET HOSE
HOSE DRAIN (FOR PUMP)
DWF-ELC55BGN,DWF-ELC55GPN(영)_호주향.indd 2 16. 7. 8. 오후 12:08
HOSE DRAIN CLAMP
HOSE DRAIN (FOR NON-PUMP)
CONNECTOR INLET
2

WASHER SAFETY
Save these instructions
Your safety is important to us.
To reduce the risk of fire, electrical shock, or injury when using your washer adhere to the
following basic precautions.
Read all instructions before using your washer
• Flammable fluids (dry-cleaning solvents,
kerosene, gasoline, etc.) should not be
used or stored in near your washer.
Do not add flammable fluids to your wash
water.These substances give off vapors
that can create a fire hazard or explosion.
• After starting a cycle, do not reach into the
spin basket unless all motion stops.
• Do not tamper with the controls.
• The appliance is not intended for use by
young children or infirm persons without
supervision.
• Young children should be supervised to
ensure that they do not play with the
appliance.
• If the supply cord is damaged, it must be
replaced by the manufacturer or its service
agent or a similarly qualified person in
order to avoid a hazard
• If the appliance is supplied from a cord
extension set or electrical portable outlet
device it should be positioned so it is not
subjected to splashing or ingress of
moisture.
Please ...
• Have only a qualified person install, repair,
or replace parts on washer.
• Maintain washer properly.
• Protect washer from the weather and keep
it where the temperature will not fall below
freezing.
• Do not install the washer at a place of
extremely high humidity. It could cause an
Electrical shock or a short circuit.
• Connect washer to the correct outlet,
electrical supply, water supply, and drain.
• Ground washer properly.
Understanding your responsibilities
• Do not wash fiberglass materials.
Small particles can stick to fabrics washed in following loads and cause skin irritation.
• Do not use chlorine bleach and ammonia or acid (such as vinegar or rust remover) in the same wash.
Hazardous fumes can form.
• Do not use hot water if standard temperature is over 50˚C (122˚F).
It could cause a deformation of plastic parts.
• Do not spray water on the control panel and back cover of the washer.
• It could cause fire or an electric shock.
• In case of the dual valve model, if you connect only cold water inlet valve, while water temperature is
selected as hot or warm, there can be water leakage from unconnected water inlet valve.
• Unplug power supply cord before attempting to service your washer.
(Understanding your responsibilities)
• This appliance is not to be used by persons (including children) with reduced physical, sensory or metal
capabilities or lack of experience and knowledge, unless they have been given supervision or instruction.
• Children shall not play with the appliance.
• Cleaning and user maintenance shall not be made by children without supervision.
• Children of less than 3 years should be kept away unless continuously supervised.
• No accessing of child to vinyl bags which may cause a suffocation.
3
DWF-ELC55BGN,DWF-ELC55GPN(영)_호주향.indd 3 16. 7. 8. 오후 12:08
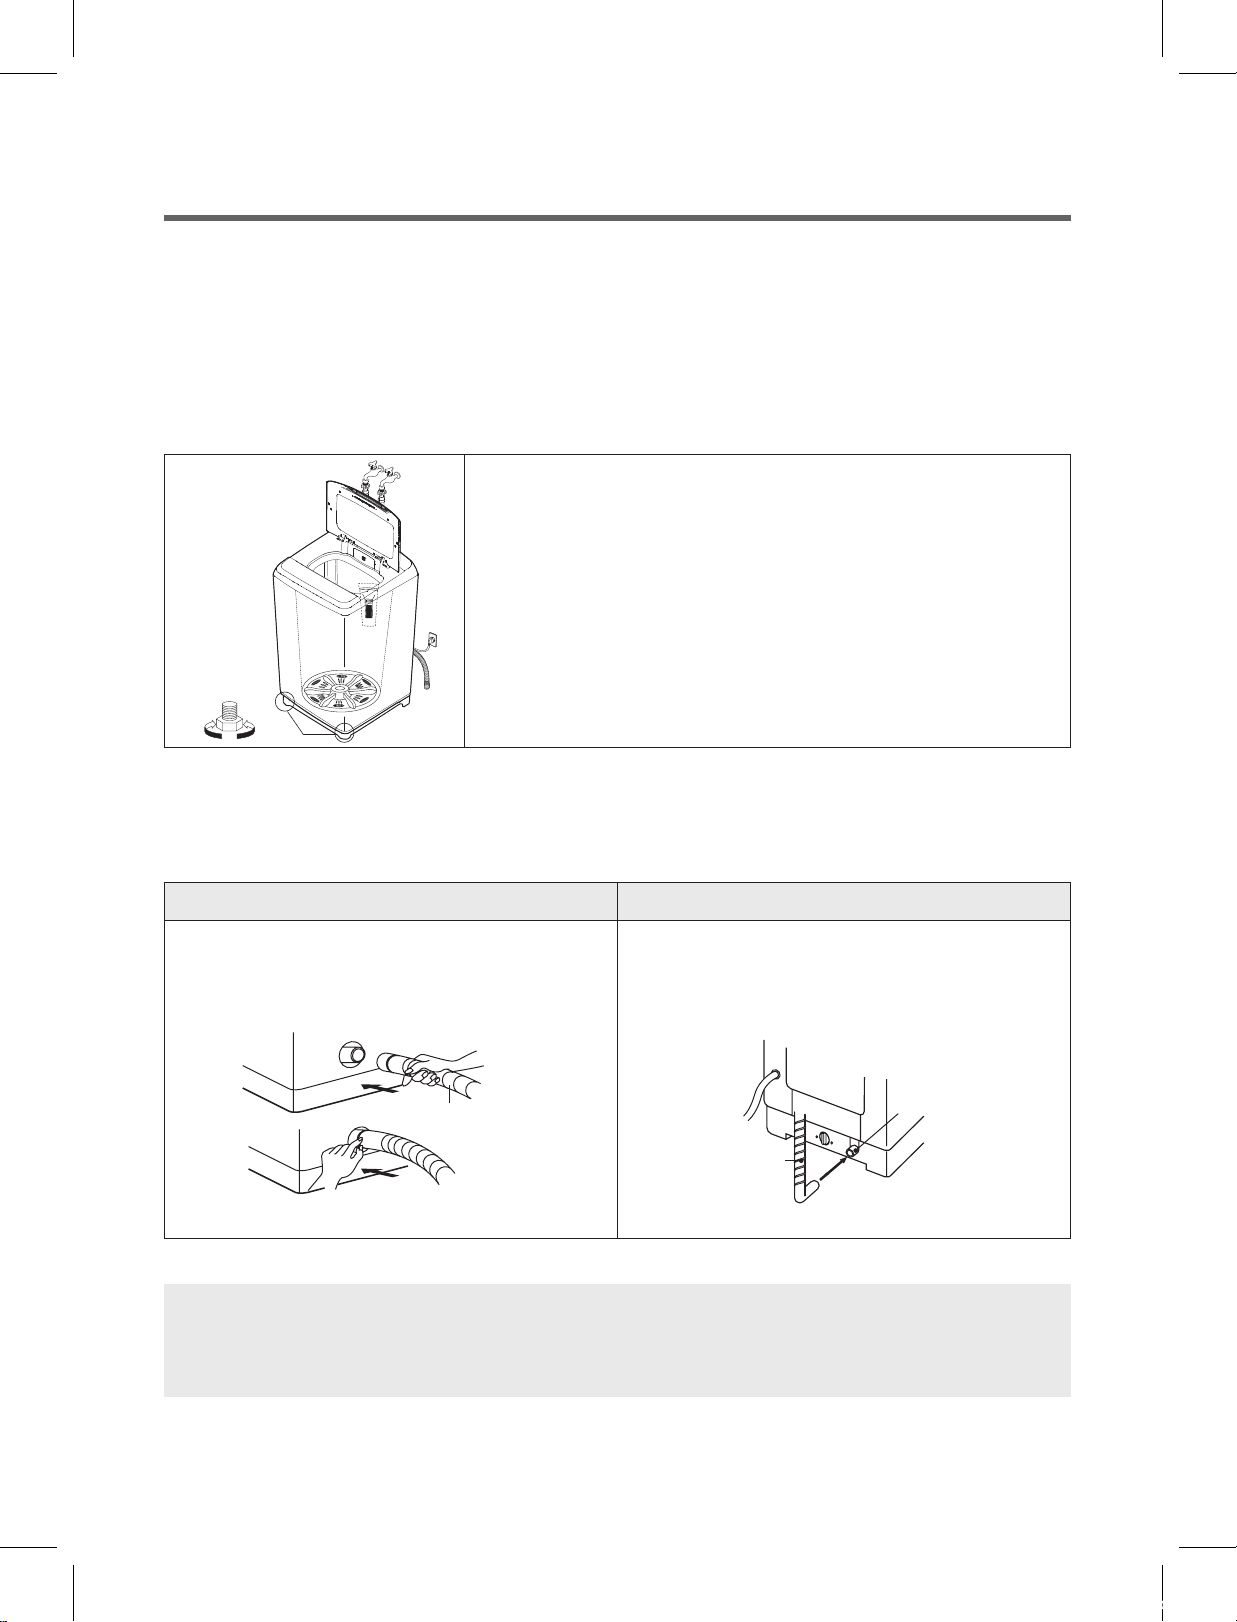
INSTALLATION IN STRUCTIONS
Location of washing machine
Check location where washing machine will be installed. Make sure you have everything
necessary for correct installation.
Proper installation is your responsibility.
• Do not place or store your washing machine below 0°C (32°F) to avoid any damage from
freezing.
• Install the washing machine on the horizontal solid floor.
C
If the washing machine is installed on an unsuitable floor, it
could make considerable noise, vibration and cause a
malfunction.
If washing machine is not level, adjust the front leg(A) up or
down for horizontal setting.
• Earthed electrical outlet(B) is required with 20cm ofbottom
B
back of washing machine cabinet(option).
• Hot and cold water faucets (C) must be within 1M of the
upper back of the washing machine cabinet and provide
water pressure 0.3kgf/cm² - 8kgf/cm² (2.94N/cm²-78.4cm²).
UP
A
DOWN
A
Drain system
Never forget to install drain hose before operating your washing machine.
The packing box is opened, there are a drain hose.
Non-Pump Model Pump Model
• Connect the drain hose to the drain outlet at
the back side of the washer.
• Connect the drain hose to the drain outlet at
the back side of the washing machine.
Drain Outlet
Drain hose
Drain hose
NOTES
• Carpet does not obstruct the openings for washing machines with ventilation openings in
the base.
4
DWF-ELC55BGN,DWF-ELC55GPN(영)_호주향.indd 4 16. 7. 8. 오후 12:08
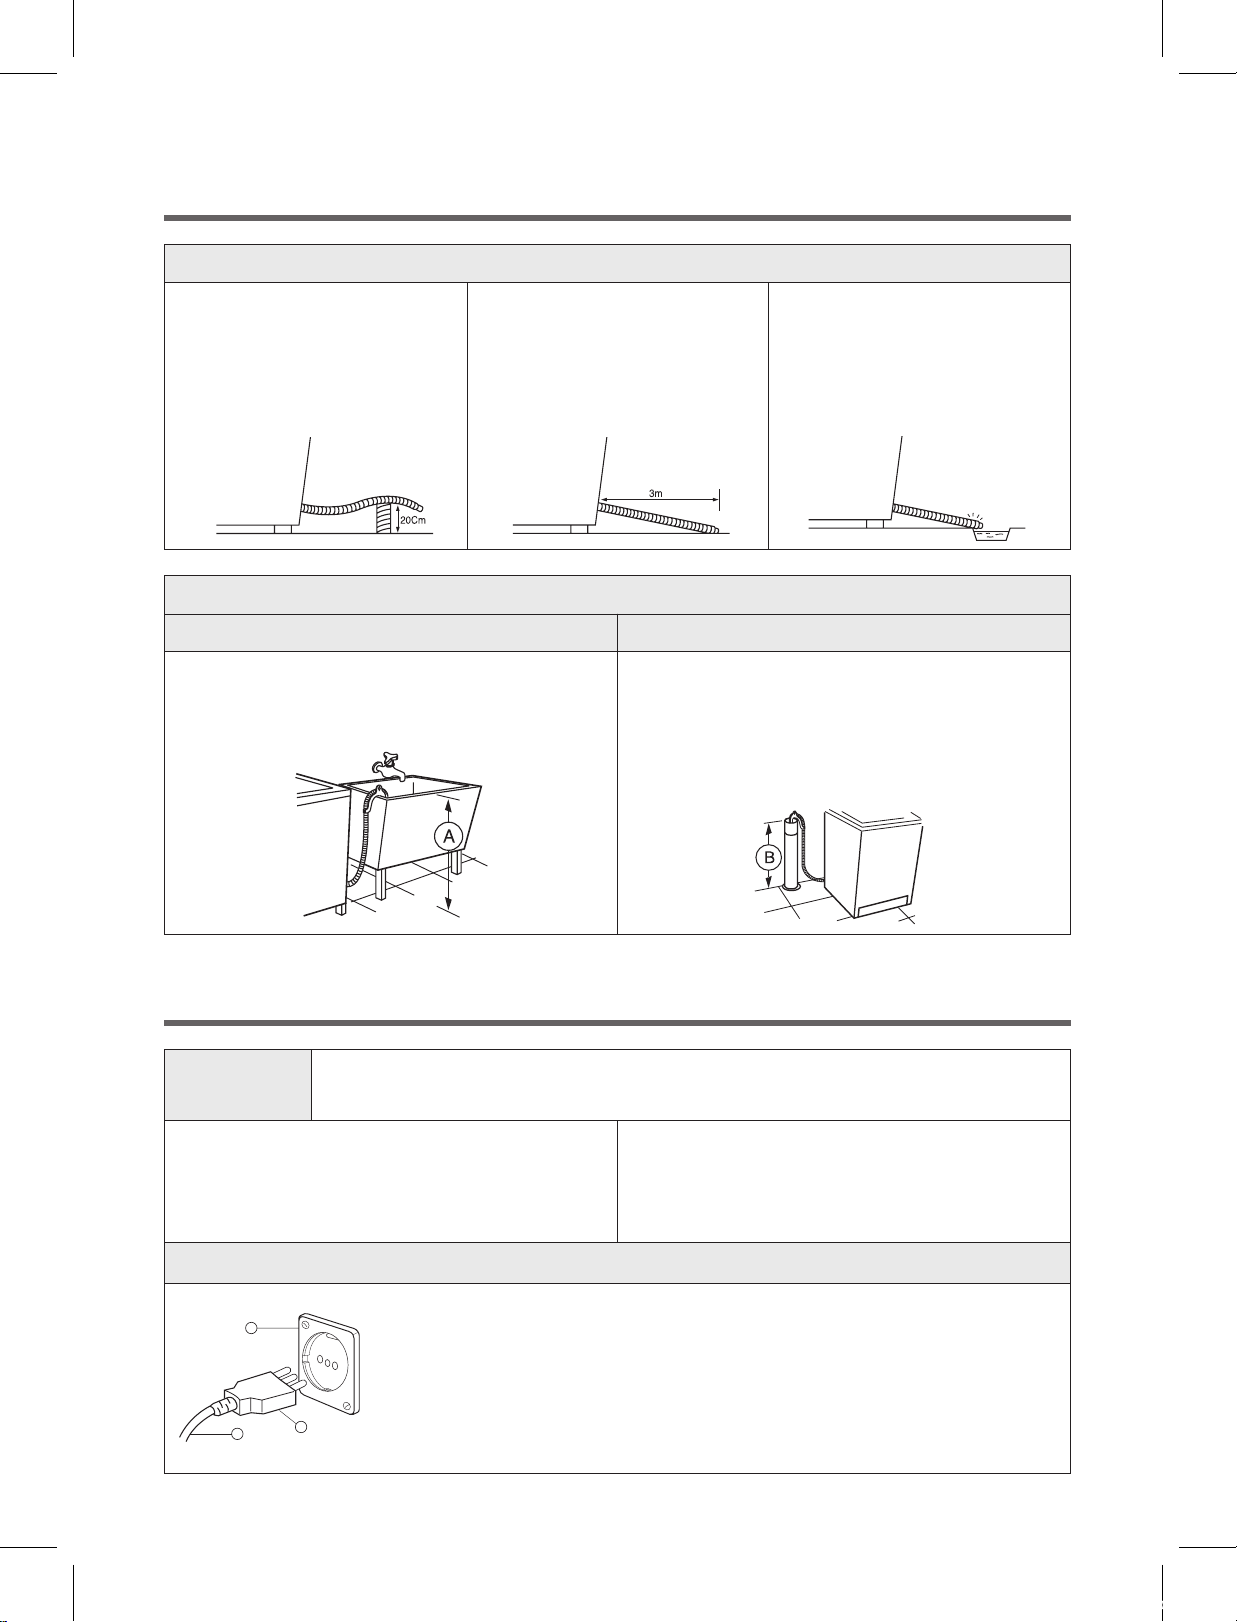
Non-Pump Model
1 In case that it goes over
a door sill.
Don’t let the height of the
drain hose exceed 20cm
2 In case of extending the
drain hose.
Don’t let the total length
exceed 3m.
from the bottom of
washer.
Pump Model
Laundry tub drain system Standpipe drain system
• Top of tub must be at least 86cm
(34inches) high and no higher than 130cm
from bottom of washer (A)
3 Be careful that the end
of the drain hose is not
immersed in water.
• Needs a 3cm minimum diameter
standpipe with minimum carry away
capacity of 30liters per minute.
• Top of tub must be at least 86cm
(34inches) high and no higher than 130cm
from bottom of washer (B)
ELECTRICAL REQUIREMENTS
WARNING
• Electrical earth is required on this washing
machine
• If it does not fit the outlet, have a proper outlet
installed by a qualified electrician.
C
A
B
electrical shock hazard: failure to follow these instructions could result in
death or serious injury.
• Don’t earth to a gas pipe.
• Don’t change the power supply cord plug.
• Check with a qualified electrician if you are not
sure the washing machine is properly earthed.
Recommended earthing method
For your personal safety, this washer must be earthed.
This washer is equipped with a power supply cord (A) having a earthing plug
(B). To minimize possible shock hazard, the cord must be plugged into a mating
earthing-type wall receptacle (C). If a mating wall receptacle is not available, it
is the personal responsibility and obligation of the customer to have the proper
earthed wall receptacle installed by a qualified electrician.
5
DWF-ELC55BGN,DWF-ELC55GPN(영)_호주향.indd 5 16. 7. 8. 오후 12:08
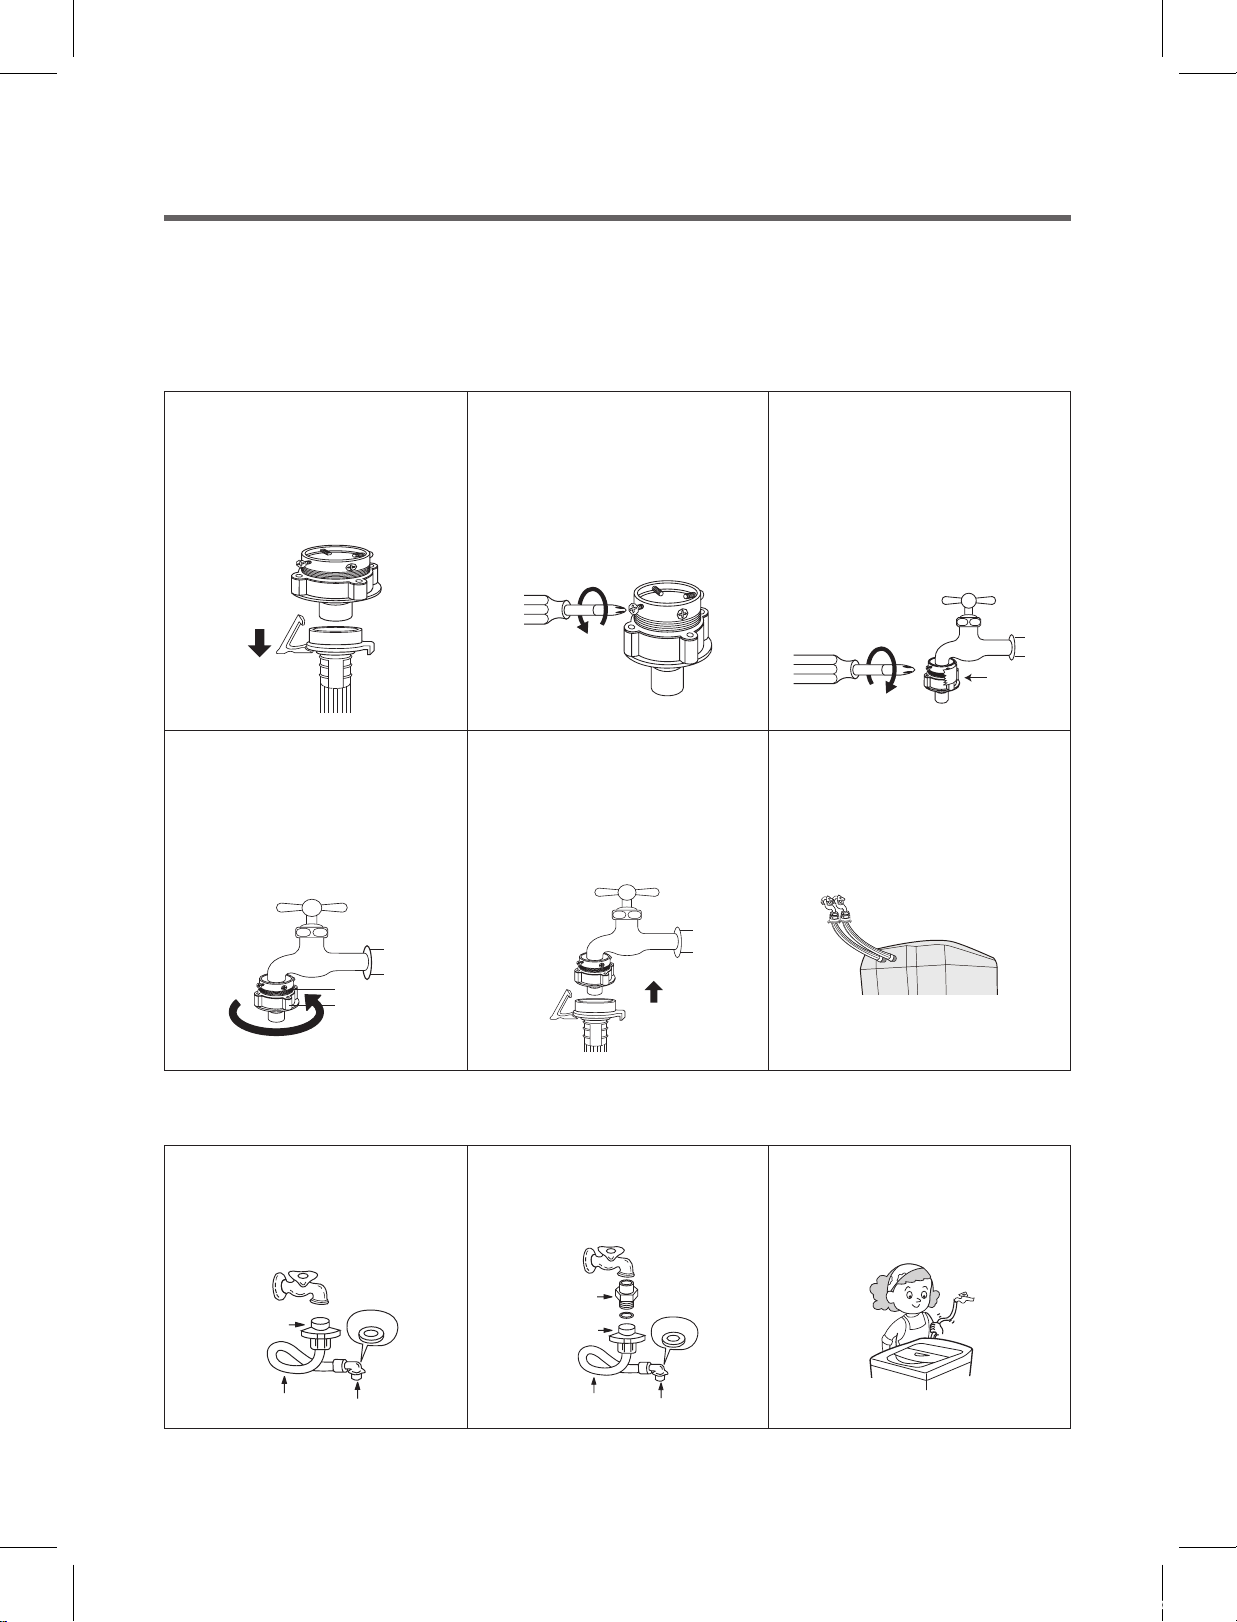
INLET HOSE CONNECTION
Be careful not to confuse hot water inlet and cold water inlet.
In using only one water tap or in case of attached one water inlet valve, connect the
inlet hose to the cold water inlet valve.
For Ordinary Tap
1 Pull down the collar of
the inlet hose to separate
it from the water tap
adapter.
4 Remove the tape, and
screw connector B into
connect A tightly.
Connector B
Connector A
2 Loosen the four screws
properly in fitting into
water tap.
5 Connect the inlet hose to
the water tap adapter by
pulling down the collar of
the hose end.
3 Fit the water tap adapter
into the water tap and
tighten the four screws
evenly while pushing up
the adapter so that the
rubber packing can
attach to the water tap
tightly.
TAPE
6 Connect the inlet hose
adapter of the hose to
the water inlet of the
washing machine by
turning it clockwise to be
fixed tightly.
• Please check the rubber
packing inside the inlet hose
adapter of the hose.
For Screw-Shaped Tap
1 Connect the inlet hose to
the water tap by
screwing the connector
tightly.
Rubber
Connector
Hose Connector
DWF-ELC55BGN,DWF-ELC55GPN(영)_호주향.indd 6 16. 7. 8. 오후 12:08
Packing
2 Connect the connector-
inlet supplied if
necessary.
Connector
inlet
Connector
Hose Connector
Rubber
Packing
6
3 Insert the inlet hose
adapter into the water
inlet of a washing
machine and turn it to be
fixed. .
* Cheek the packing in the inlet
 Loading...