

Daewoo DWD-VF80M1 Service Manual

Service Manual
Washing Machine
Model: DWD-VF80M1
S/M No. : WDVF80M001
Jul. 2007
✔Caution
: In this Manual, some parts can be changed for improving,
their performance without notice in the parts list. So, if you
need the latest parts information, please refer to PPL(Parts
Price List) in Service Information Center (http://svc.dwe.co.kr).

WASHING MACHINE
CCoonntteennttss
1. SPECIFICA TIONS....................................................................................................................2
2. INST ALLATION........................................................................................................................3
Removing transit bolts...................................................................................................3
Location of washer.........................................................................................................3
Inlet hose connection.....................................................................................................4
Electrical requirements..................................................................................................5
Drain system ...................................................................................................................5
Level adjustment.............................................................................................................5
3. OPERA TING YOUR WASHER................................................................................................7
4. DIRECTION FOR DISASSEMBLY ..........................................................................................9
5. THE FUNCTIONS OF THE CONTROL P ANEL....................................................................20
6. FAILURE CODES...................................................................................................................22

1. SPECIFICATIONS
2
SPECIFICATIONS
■
Accessories
Drain hose Inlet hose Manual Cap holder(4EA)
Dimension (mm)
Maximum mass of dry clothes (Kg)
Unit Weight (kg)
Power Source
Power Consumption
Operating Water Pressure
596 x 850 x 510 (WxHxD)
5.0
62(Net) / 67(Gross)
220~240V / 50Hz
2200W
0.1MPa ~ 1MPa
MODEL DWD-VF80M1
ADJUSTABLE LEG
CONTROL PANEL
DOOR
DETERGENT CASE
INLET HOSE
KICKPLATE
POWER CORD
HOSE DRAIN
2. INSTALLATION
3
INSTALLATION
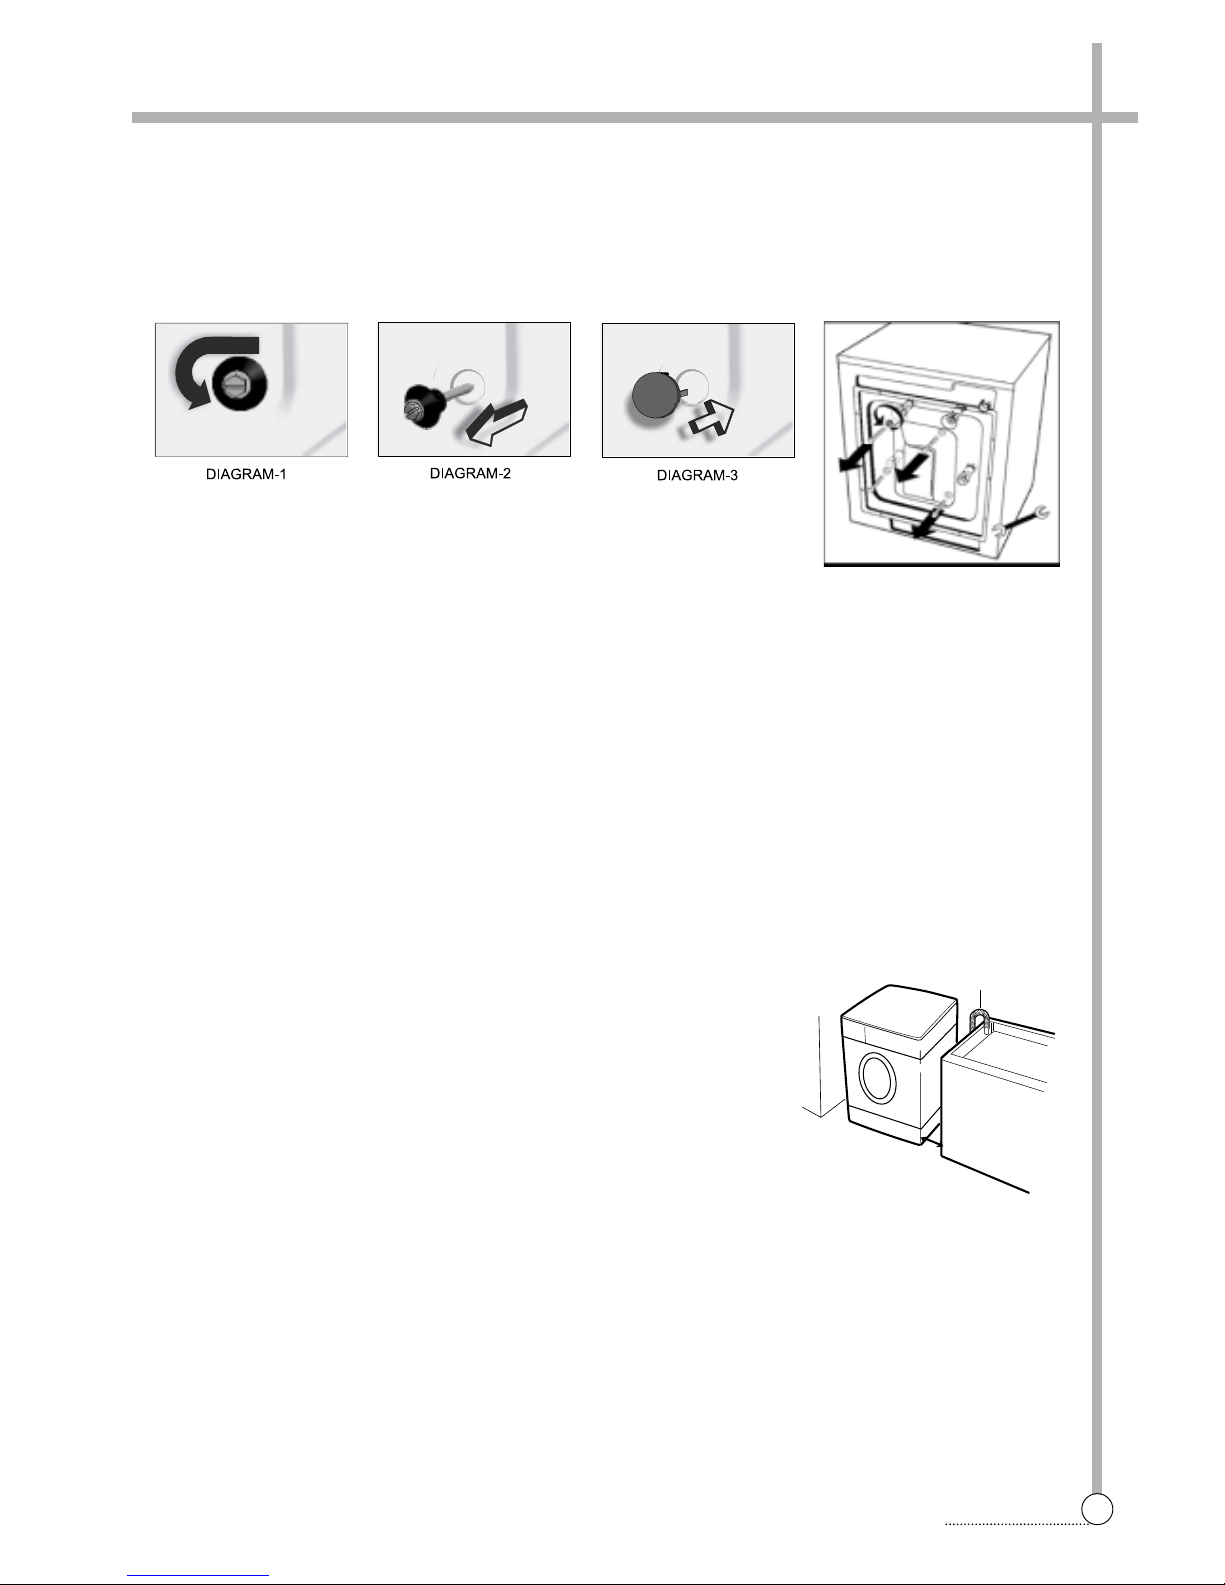
■ Removing transit bolts
1. Before operating the washer, remove the four transit bolts which are located at the rear of the washer.
• If the bolts are not removed, it may cause heavy vibration, noise and malfunction.
2. Unscrew the 4 bolts with the suitable spanner. Keep the 4 bolts and spanner for future use.
• Whenever the appliance is transported, the transit bolts must be refitted.
3. The plastic parts located inside the washer will fall down under the machine.
• If all of them have not fallen down, open the washer door and move the drum until all plastic parts fall
down.
• Lift the washer slightly and pick up the plastic parts.
• To the holes where the transit bolts have been removed, insert the plastic cap holders supplied.
■ Location of washer
• Check location where the washer will be installed. Make sure you have everything necessary for correct
installation.
• Do not place or store your washer below 0°C (32°F) to avoid any damage from freezing.
• Do not place or store laundry products on top of washer at any time.
• Install washer on an even, horizonal, non-slippery and tough floor. If the
washer is installed on an unsuitable floor, it could make considerable
noise, vibrate severely and cause a malfunction. If the washer is not
level, adjust leg up or down for horizontal installation.
• Ventilation openings must not be obstructed by carpeting when the
washer is installed on a carpeted floor.
• Leave space around the washer upon installation (right and left: 2cm,
rear: 10cm)
• In case of built-in installation, the distance between top of the washer
and bottom of upper plate should be at least 3mm.
Laundry
Tub
Washer
approx.
2cm
Drain Hose
4
INSTALLATION
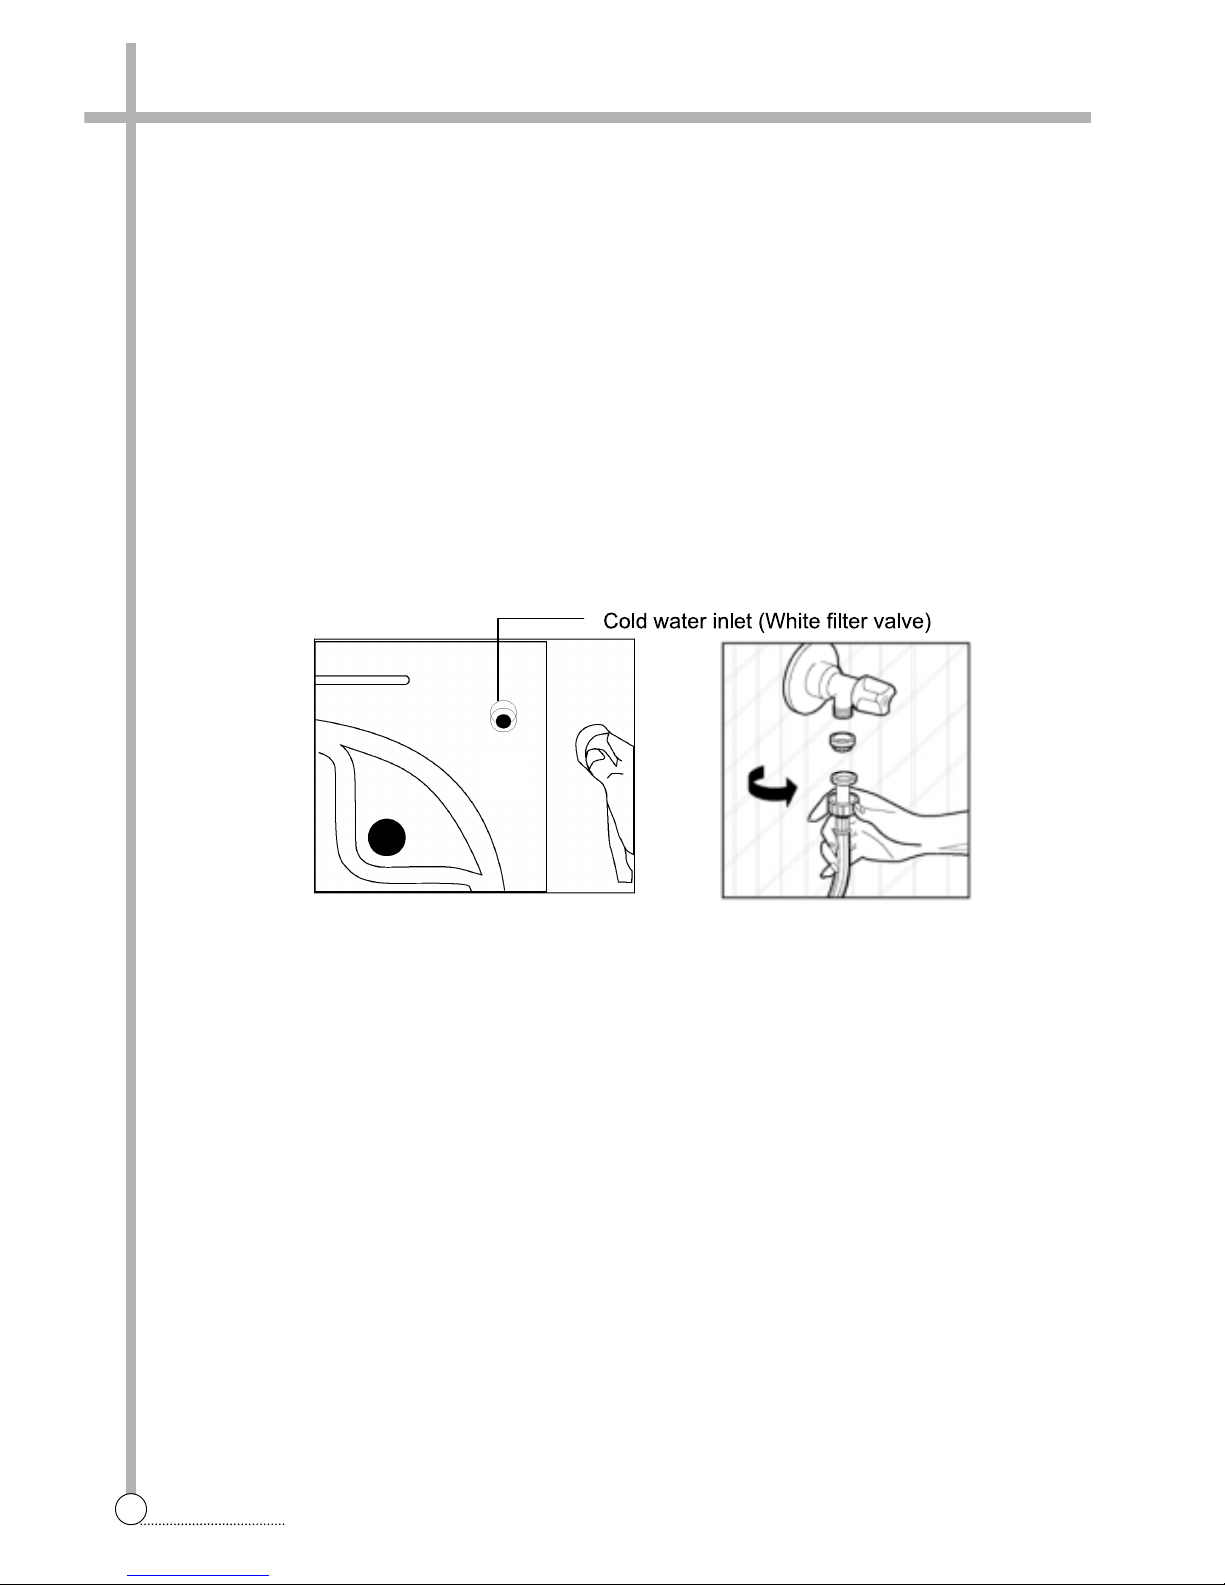
■ Inlet hose connection
The washer should be connected to the water mains using new hose sets, old hose sets should not be reused.
• Your machine has a single water (cold) inlet.
• To prevent from the leakages on the connection joints, 1 seal is included in the hose packing. (Fit this seal on
the end of the water inlet hose at the tap side.)
• Connect the end with bracket of the water inlet hose to the water inlet valve at the rear of the machine and the
other end to your tap. In situations where you are not assured, let a qualified plumber make the connection
works.
• Water pressure of 1-10 bars from your tap will enable your machine to work more efficiently. (1 bar pressure
means water flow of more than 8 liters in 1 minute from a fully opened tap).
• After connections are completed, check for the non-leakage of the connection joints by turning on your tap
completely .
• Be sure that water inlet hoses are not folded, broken or crushed.
• Mount the water inlet hoses to a 3”/4, geared water tap.

5
INSTALLATION
■ Electrical requirements
•
The washer should be connected to the water mains using new hose sets, old hose sets should not be reused.
■ Drain system
• Never forget to install drain hose before operating your washer.
• Open the packing box, and there is a drain hose inside the drum.
• Connect the drain hose to the drain outlet at the back side of the washer.
• Top of laundry tub must be at least 60cm high and no higher than 100cm from the floor.
• When installing the drain hose to tub (sink), secure it tightly with a string.
• Proper securing of the drain hose will protect the floor from damage due to water leakage.
• When the drain hose is too long, do not force it back into the washer. This will cause abnormal noise.
• Electrical earth is required on this washer
• If it does not fit the outlet, have a proper outlet
installed by a qualified electrician.
• Do not earth to a gas pipe.
• Do not change the power supply cord plug.
• Check with a qualified electrician if you are not
sure the washer is properly earthed.
WARNING
Recommended earthing method
Electrical shock hazard : Failure to follow these instructions could result in death or serious
injury.
For your personal safety , this washer must be earthed.
This washer is equipped with a power supply cord ‘A ’ having a earthing plug ‘B’.
To minimize possible shock hazard, the cord must be plugged into a mating earthing-type wall receptacle ‘C’. If a mating wall receptacle is not available, it is the
personal responsibility and obligation of the customer to have the proper earthed
wall receptacle installed by a qualified electrician.
C
B
A
■ Level adjustment
1 If the washer is installed on an unsuit-
able floor, it could make considerable
noise, vibrate and cause a malfunction.
6
INSTALLATION
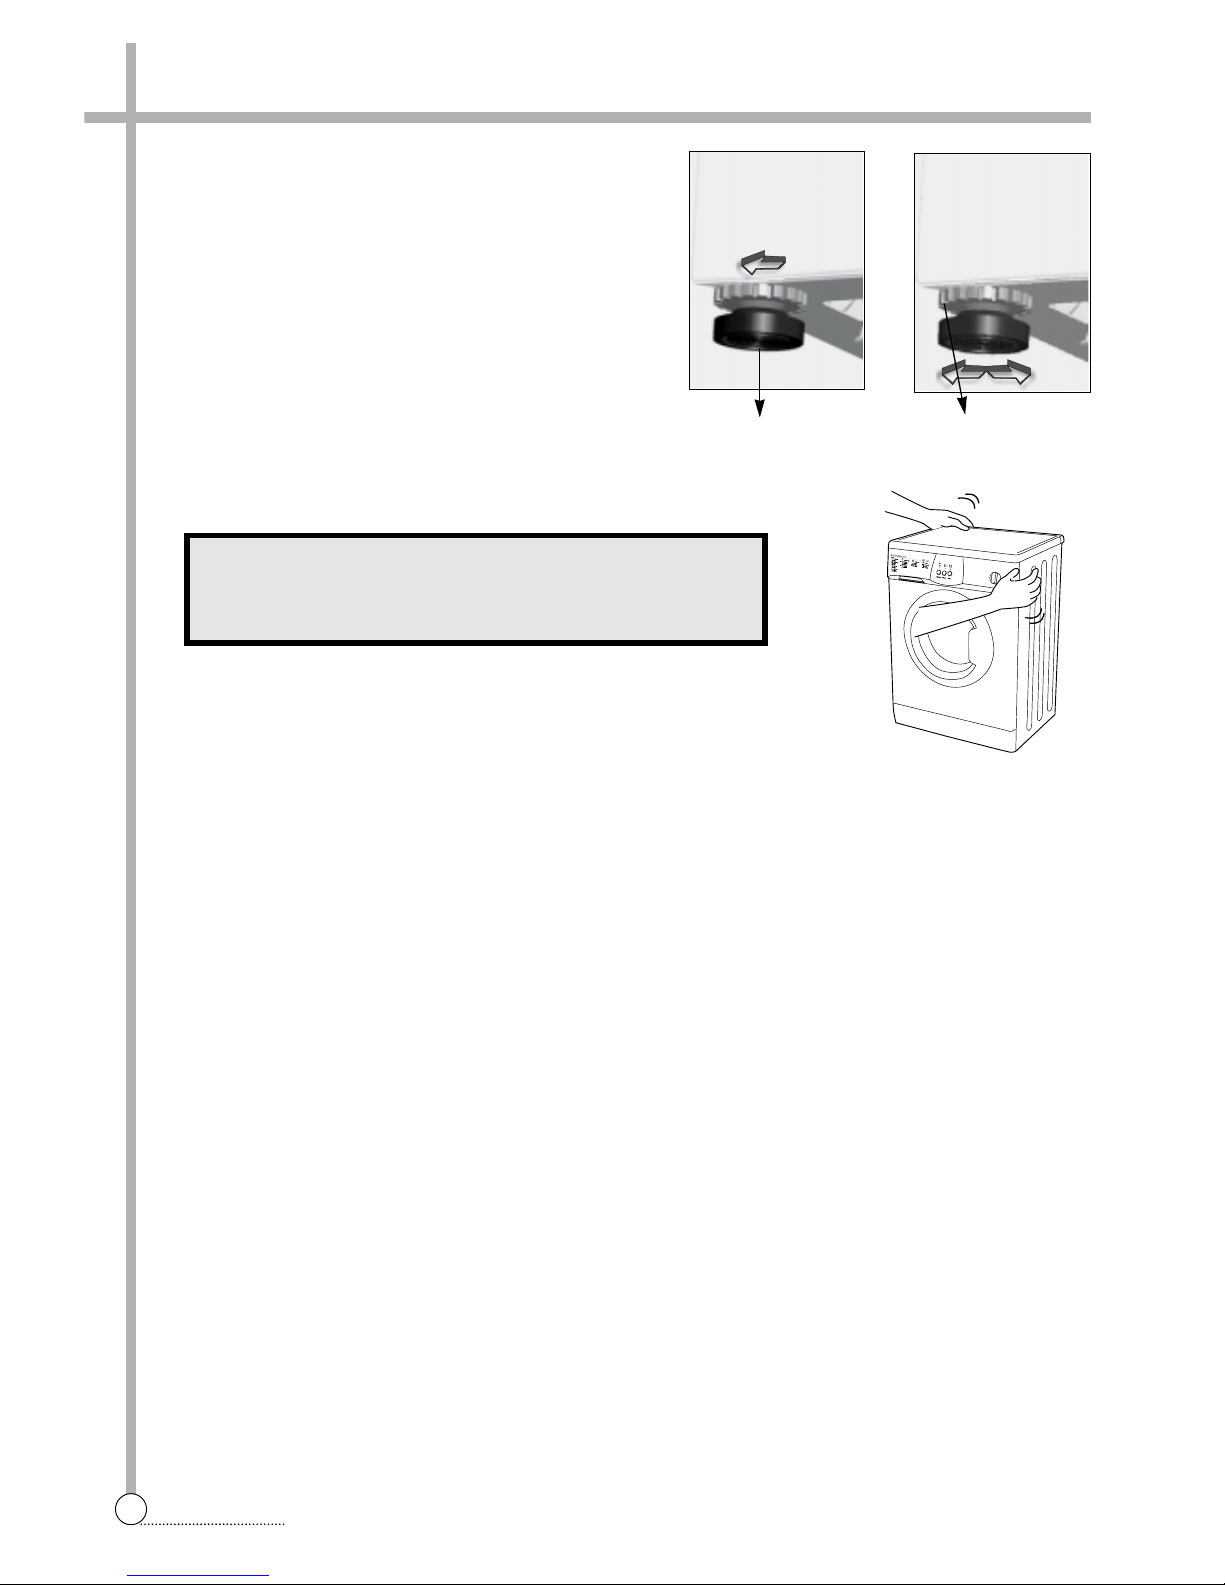
2 Adjust the level of washer using adjustable legs.
• Please check if there is any gap between the four
adjustable legs and the floor.
• Turning adjustable legs by the enclosed spanner,
adjust the level of washer and make it sure that
there is no swaying of washer.
• After the adjustment is finished, turn the fixing
nuts up tightly so that the washer maintains the
adjustment.
• Never put cartons, wooden block or similar
meterials
3 Make it sure that the washer does not sway when you press down the four corners of the washer's
top plate.
Fixing Nut
NOTE
There should be no swaying of washer and all the
adjustable legs should stick to the floor closely.
adjustable leg
7
INSTALLATION
3. OPERATING YOUR WASHER
To obtain the best washing results, you must operate your washer properly.
This section gives you this important information.
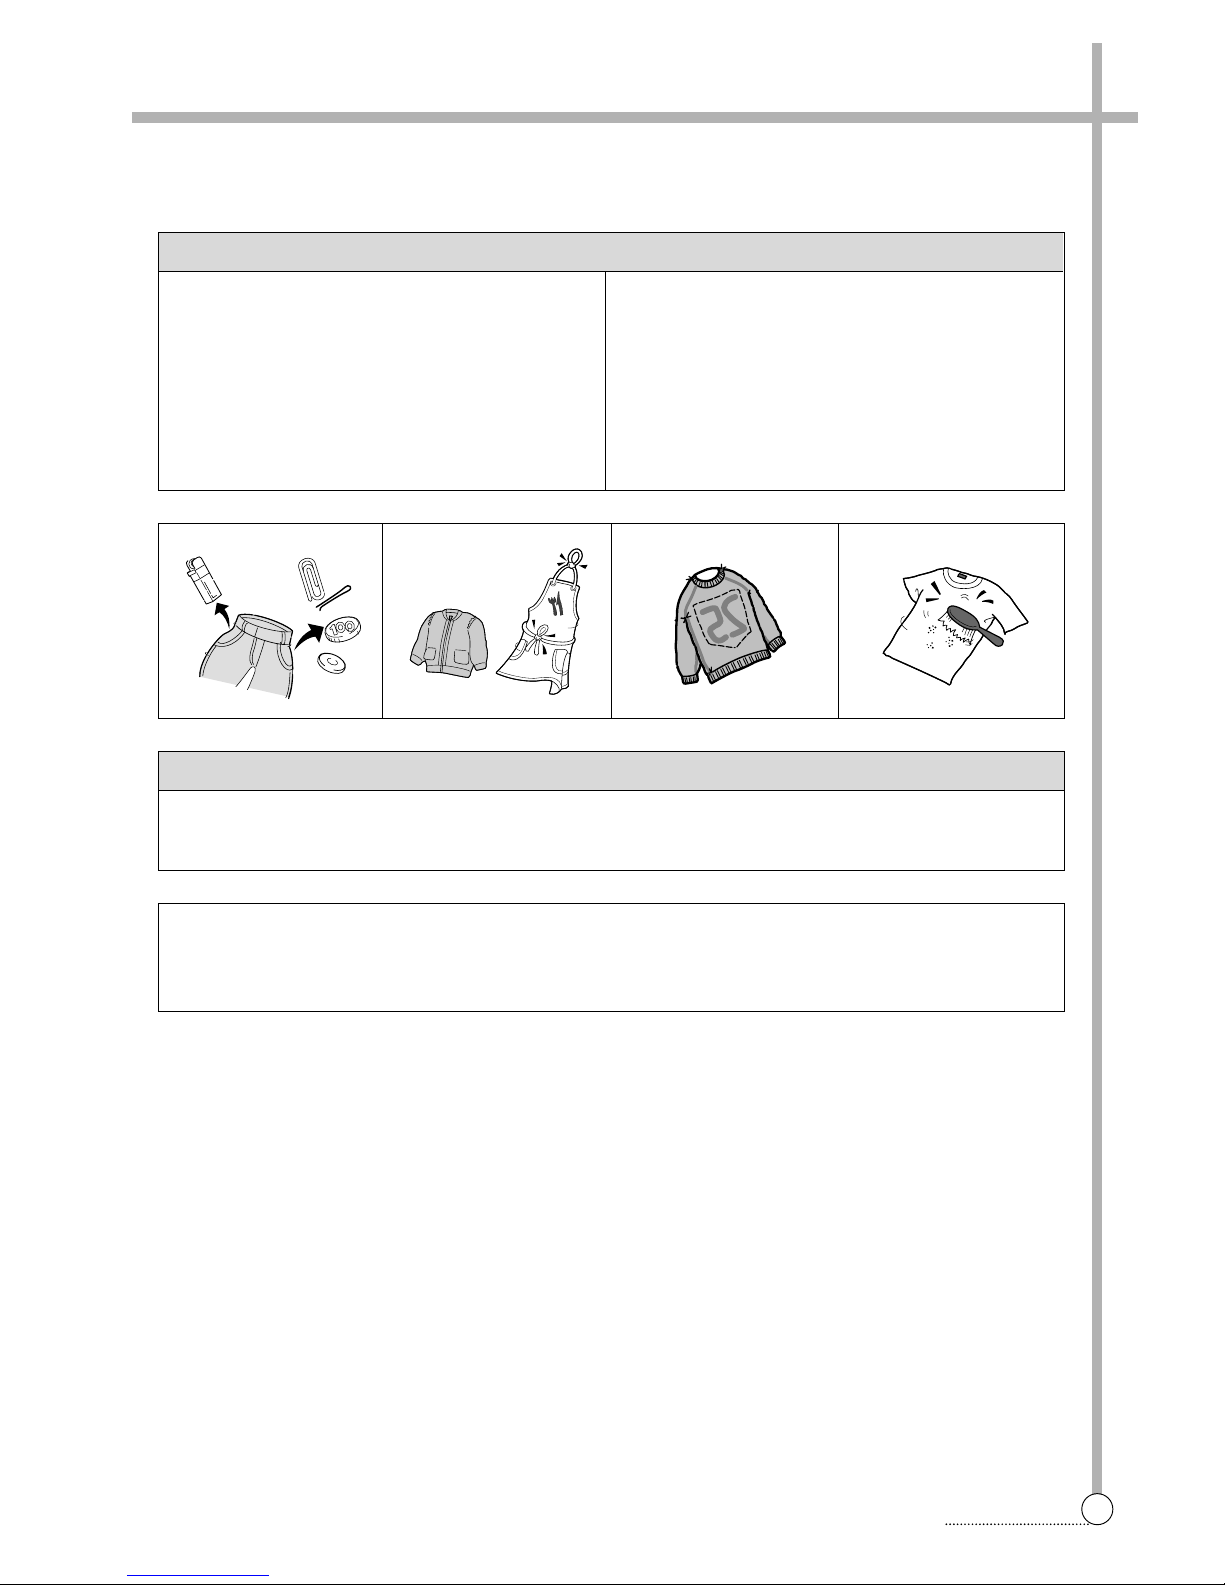
• Close zippers, snaps and hooks to avoid snagging
other items.
Remove pins, buckles and other hard objects to
avoid getting them caught inside the washer or
scratching the washer interior.
• Empty pockets and pull them inside out.
• Turn down cuffs and turn synthetic knits inside out
to avoid pilling.
• Tie strings and sashes to avoid tangling.
• Treat spots and stains.
(See “Removing stains” on page 21)
• Wash your small clothes like socks and handker-
chiefs in a washing bag.
Preparing clothes for washing
• Separate heavily soiled items from lightly soiled ones, even if they would normally be washed together.
• Separate dark colors from light colors, colorfast items from non-colorfast item.
Sorting
Soil (Heavy, Normal, Light) Separate clothes according to amount of soil.
Color (White, Lights, Darks) Separate white clothes from colored clothes.
Lint (Lint producers, Collectors) Wash lint producers and lint collectors separately.
 Loading...