

Daewoo DWD-NT1211SC Owner's Manual

Notes
3
19
20
23
24
25
26
Front Load
Product Speci fic ation
Front Load
Table o f was hing procedur es
Remove the trou ble s
Appendix
and wash care sym bol s
Doo r can’t b e a handl e durin g the tra nspor t. Plea se clos e the doo r and don ’t carr y it,
or it w ill be ou t of shap e . You can’t close the do or.
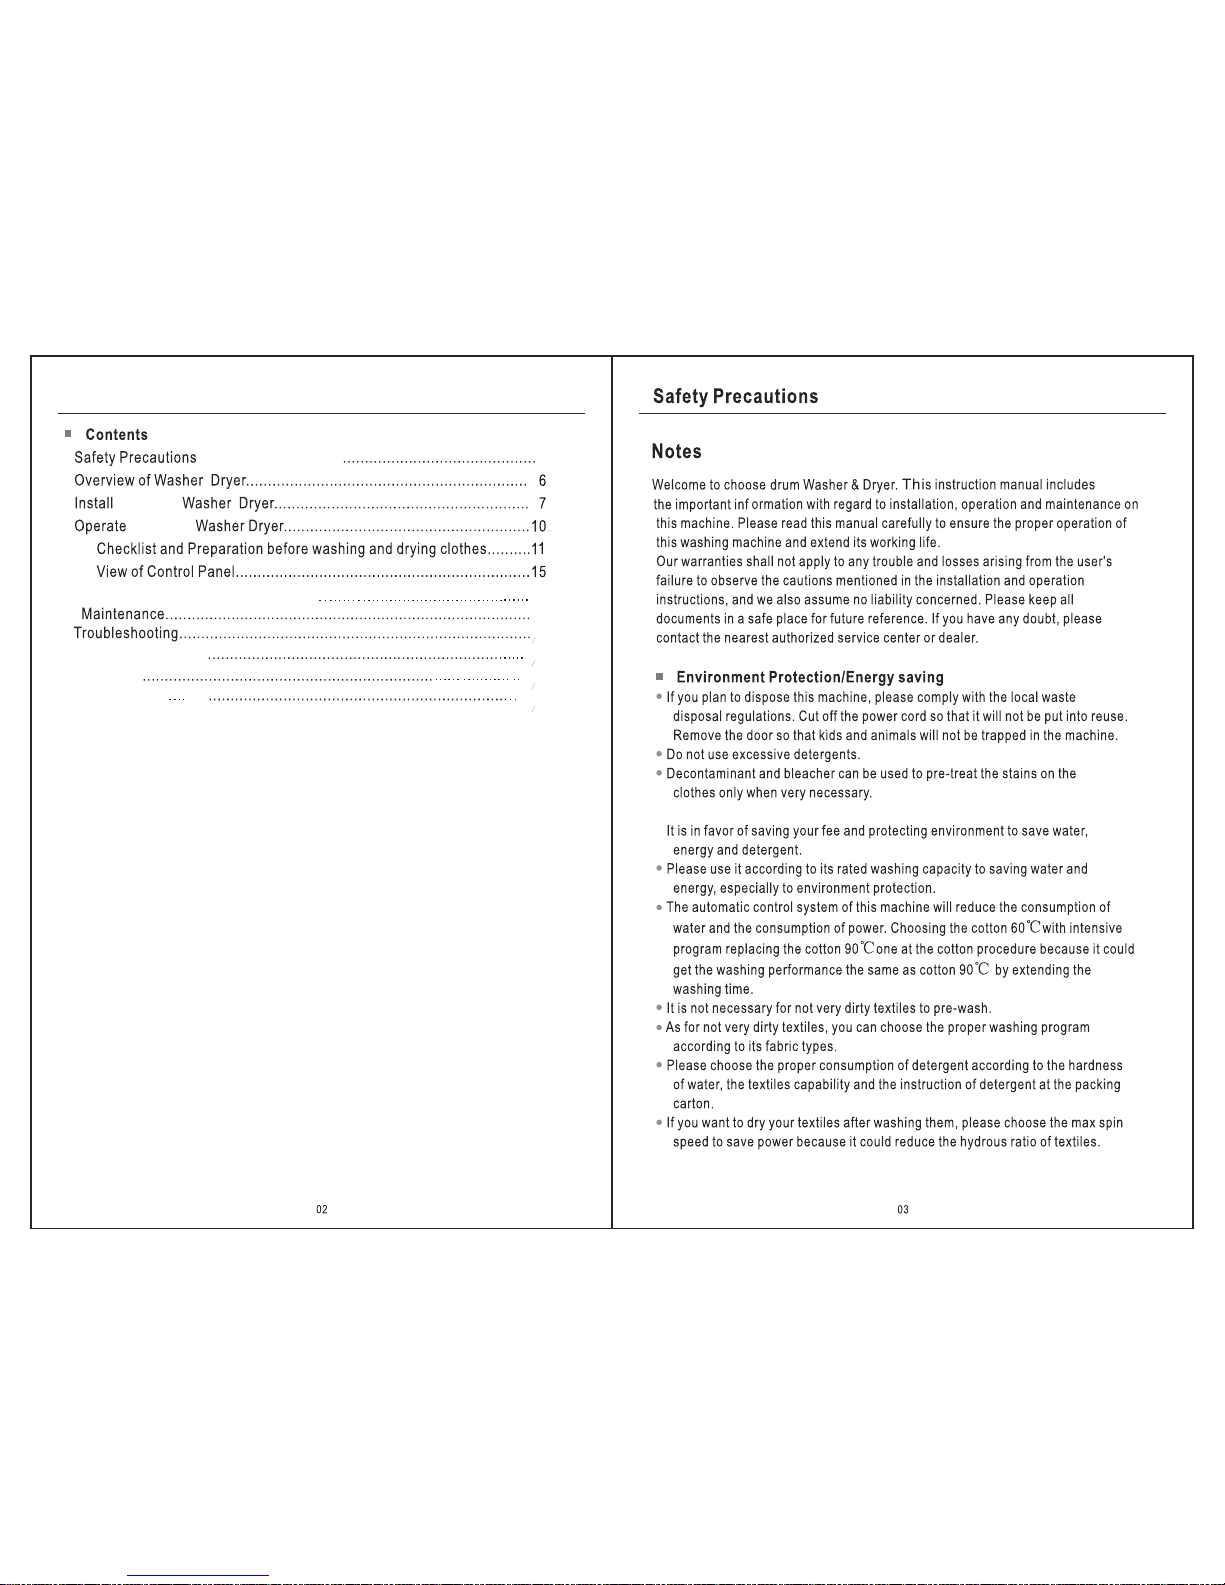
1 Con trol Pa ne
2 Det ergen t Drawe r
4 Out let Hos e
5 Pow er Plug
6 Leg
7 Bas e Cover
8 Doo r
3 Con trol Pa nel
2
1
8
7
6
3
4
5
Det ergen t Box
8
Install Washing Dryer
3.En sure th e posit ionin g statu s of Washing &Dryer. Loo sen the l ock nut w ith spa nner
and t urn the l eg with h and unt il it clo sely co ntact s with th e floor. P ress th e leg wit h one
han d and fas ten the n ut clos ely to th e cabin et with t he othe r hand.
4.Af ter bei ng lock ed prop erly, pr ess f our corners again to mak e sure th at they h as been
adj usted p roper ly. If it is s til l unstable, it has to repe at Step s 2 and 3.
5.Pu t a solid c ylind er (e.g . pop can s) oppo sitel y on the to p cover o f the Washer &Dryer alo ng
the f ront- and-a ft and tr ansve rse sep arate ly. And I f the cyl inder k eeps st able, t he Washer
&Dr yer has b een pla ced hor izont ally. It i ndi cates that the feat have b een adj usted p roper ly.
Not es: In pr incip le, the re is onl y one loo se leg at m ost. If t his leg i s locat ed at the b ack of wa shing
mac hine an d is inco nveni ent for a djust ment, t hen ano ther le g at its di agona l posit ion can b e
adj usted t o achie ve the sa me effe ct.
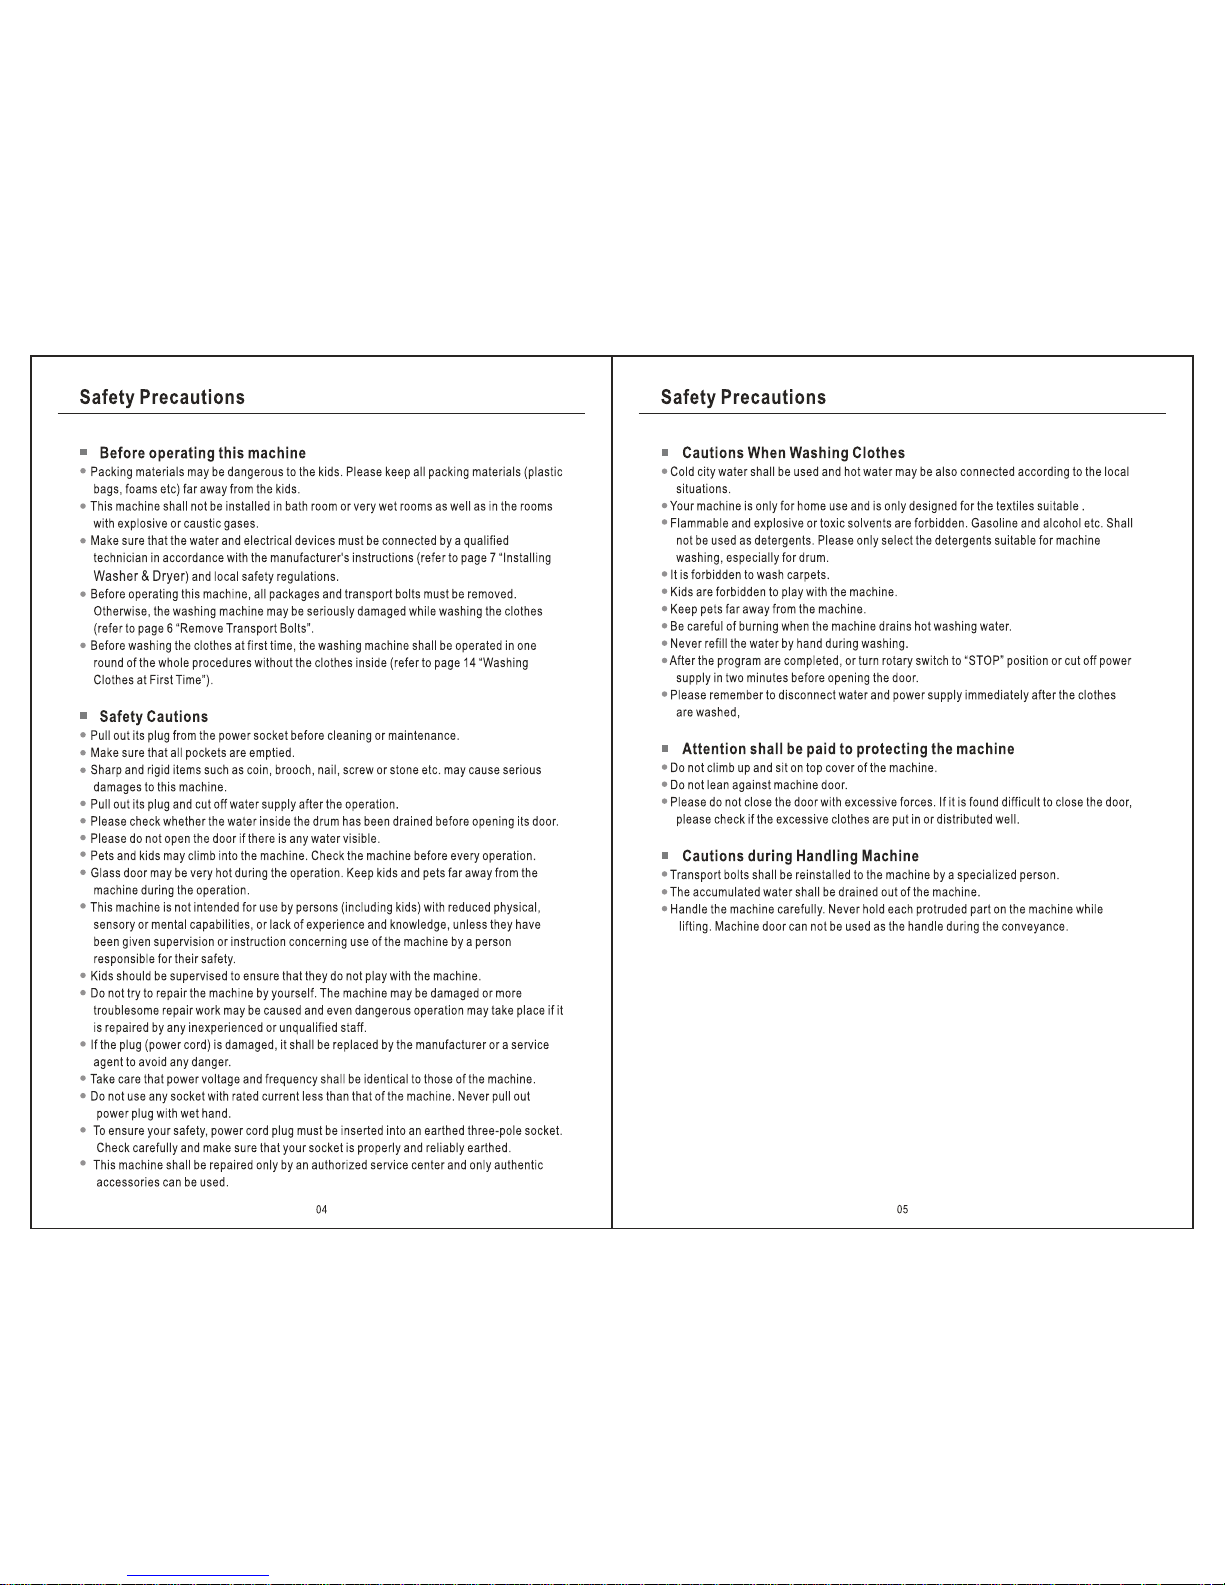
Connect inlet pipe
Con nect th e inlet p ipe as in dicat ed in the f igure .
Install inlet pipe
1.Co nnect t he elbo w to tap an d faste n it
clo ckwis e.
2.Co nnect t he othe r end of in let pip e to the in let
val ve at the b acksi de of was hing ma chine a nd
fas ten the p ipe tig htly cl ockwi se.
Not es: aft er conn ectio n, if the re is any l eakag e
wit h hose, t hen rep eat the s teps to c onnec t inlet
pip e. The mo st co mmon type of tap shall be
use d to supp ly wate r. If tap is s quare o r too big ,
the n stand ard tap s hall be c hange d.
Place outlet hose
The re are tw o ways to p lace th e end of ou tlet ho se:
1.Pu t it besi de the wa ter tro ugh.
9
Install Washing Dryer
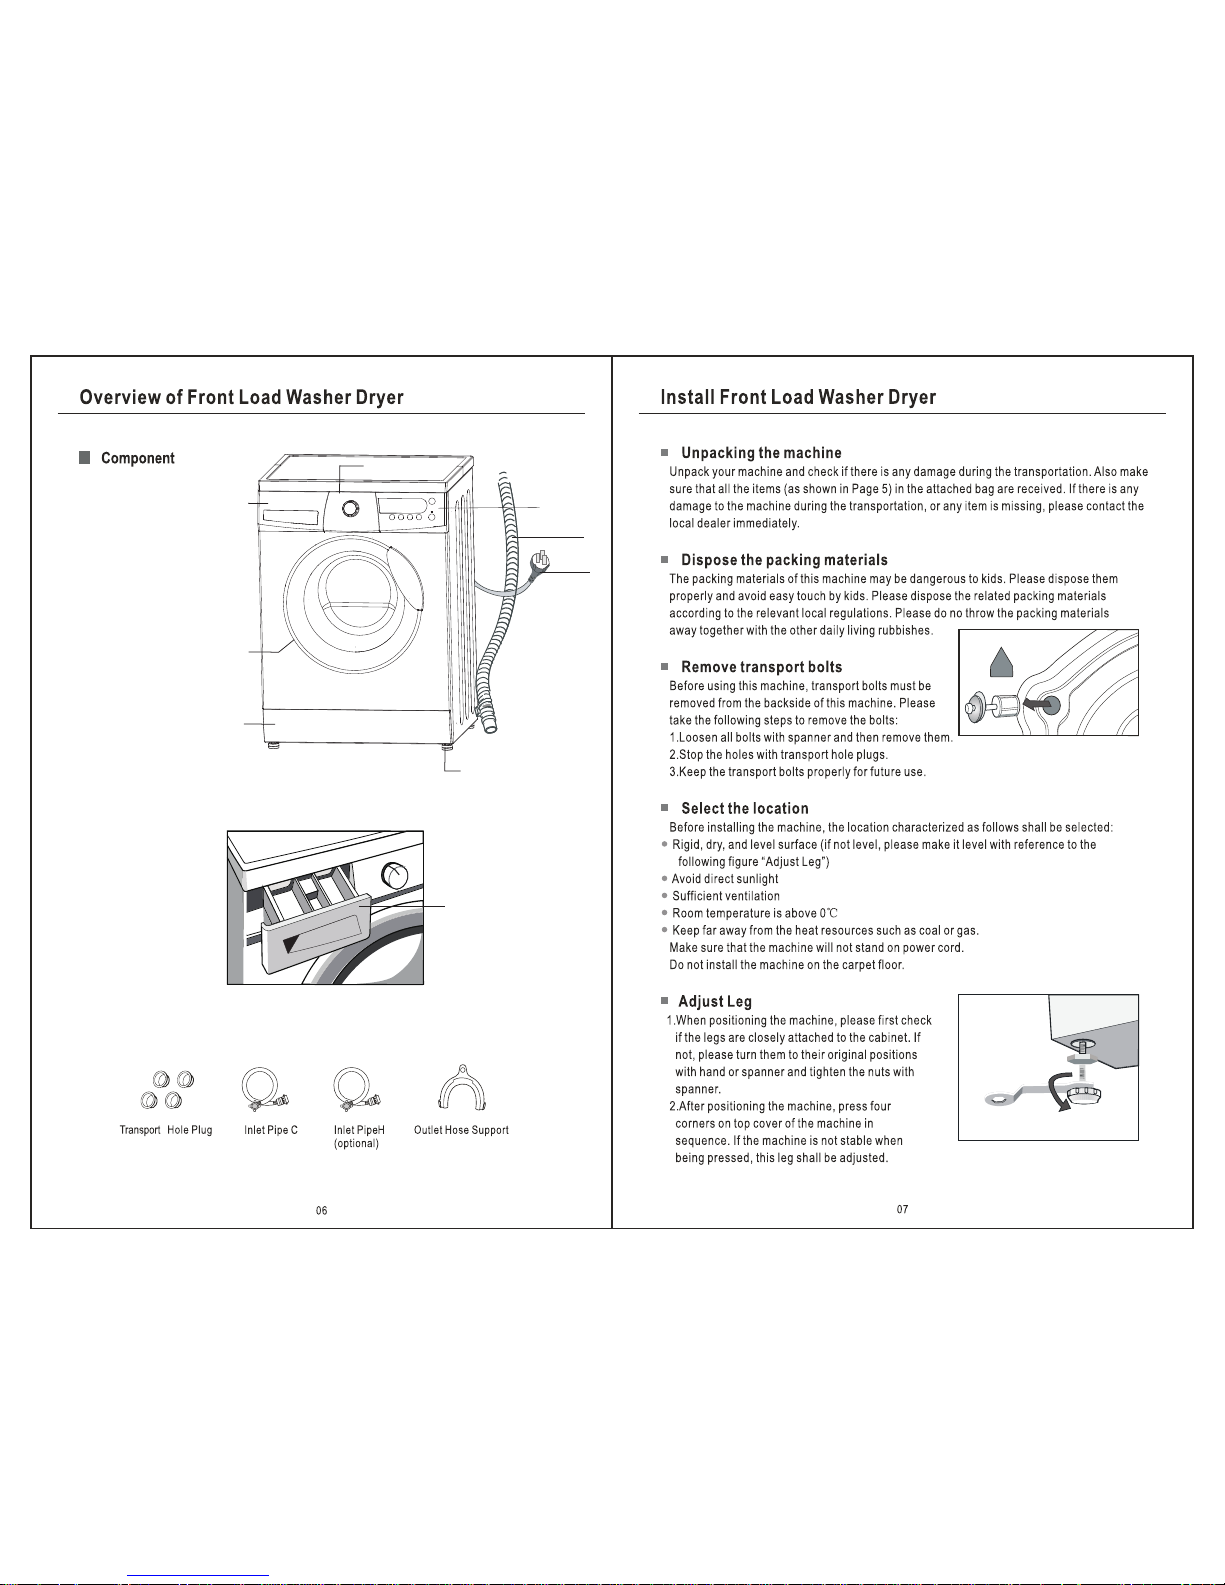
2.Co nnect i t to the br anch dr ain pip e of the tr ough.
Max. 100cm
- Whe n insta lling o utlet h ose, fi x it
pro perly w ith a rop e.
- Pos ition o utlet h ose pro perly s o that
the f loor wi ll not be d amage d by wate r
lea kage.
Max. 100cm
- To avoi d the occ urren ce of sip honin g,
out let hos e shall b e insta lled at a h eight
of 0. 6~1.6 m and its e nd shal l not be
imm ersed i n water.
Trou gh
Hose R etain er
Bin d
Max. 100cm
Max. 100cm
- If ou tlet ho se is too l ong, do n ot forc e
it in to Washe r and Dry eras it w ill cau se
abn ormal n oises .
Electrical Connectio n
- As the m aximu m curre nt thro ugh the u nit is 10 A when you are usi ng its heati ng func tion,
ple ase mak e sure th e power s upply s ystem ( curre nt, pow er volt age and w ire) at y our
hom e can mee t the nor mal loa ding re quire ments o f the ele ctric al appl iance s.
- Ple ase con nect th e power t o a socke t which i s corre ctly in stall ed and pr operl y earth ed.
- Mak e sure th e power v oltag e at your p lace is s ame to th at in the m achin e's rat ing lab el.
- Pow er plug m ust mat ch the so cket an d cabin et must b e prope rly and e ffect ive ly earthed.
- Do no t use mul ti-pu rpose p lug or so cket as e xtens ion cor d.
- Do no t conne ct and pu ll out pl ug with w et hand .
- Whe n conne cting a nd pull ing out t he plug , hold th e plug ti ghtly a nd then p ull it ou t. Do
not p ull pow er cord f orcib ly.
- If po wer cor d is dama ged or ha s any sig n of bein g broke n, spec ial pow er cord m ust be
sel ected o r purch ased fr om its ma nufac turer o r servi ce cent er for re place ment.
 Loading...