

Page 1

GE Electric Side-by-Side Refrigerator
Installation Manual
Installation Manual
GSG210IAPC
GSG210IHPC
GSQ210IAPC
GSQ210IHPC
GSV210IAPC
GSV210IHPC
GSW210IAPC
GSW210IHPC
GSG240IARC
GSG240IHRC
GSQ240IARC
GSQ240IHRC
GSV240IARC
GSV240IHRC
GSW240IARC
GSW240IHRC
GSG240MGRC
GSG240MHRC
GSQ240MGRC
GSQ240MHRC
GSV240MGRC
GSV240MHRC
GSW240MGRC
GSW240MHRC
Pub#APR1047E
Page 2
Installation Manual
Table of contents
PREPARATION............................................................................................................................
IN CASE THE REFRIGERATOR CANNOT PASS A DOOR
– Removing Freezer Door
– Removing Refrigerator Door
– Replacing Freezer Door
– Replacing Refrigerator Door
LEVELING AND DOOR ADJUSTMENT
– In case freezer door is lower than refrigerator door
– In case refrigerator door is lower than freezer door
– How to Install Water Line
– Installation Procedure
................................................................................................
..........................................................................
2
3
5
Appliances
Model:
GSG210IAPC
GSG210IHPC
GSQ210IAPC
GSQ210IHPC
GSV210IAPC
GSV210IHPC
GSW210IAPC
GSW210IHPC
GSG240IARC
GSG240IHRC
GSQ240IARC
GSQ240IHRC
GSV240IARC
GSV240IHRC
GSW240IARC
GSW240IHRC
GSG240MGRC
GSG240MHRC
GSQ240MGRC
GSQ240MHRC
GSV240MGRC
GSV240MHRC
GSW240MGRC
GSW240MHRC
1
Page 3
PREPARATION
1. Check if the refrigerator can pass a doorway or enter the door first.
Model Name Dimensions
GS*240IA
GS*240IH
GS*240MG
GS*240MH
GS*210IA
GS*210IH
GSV230IA
GSV230IH
928mm x 896mm x 1808mm
928mm x 816mm x 1808mm
* = G, Q, W, V
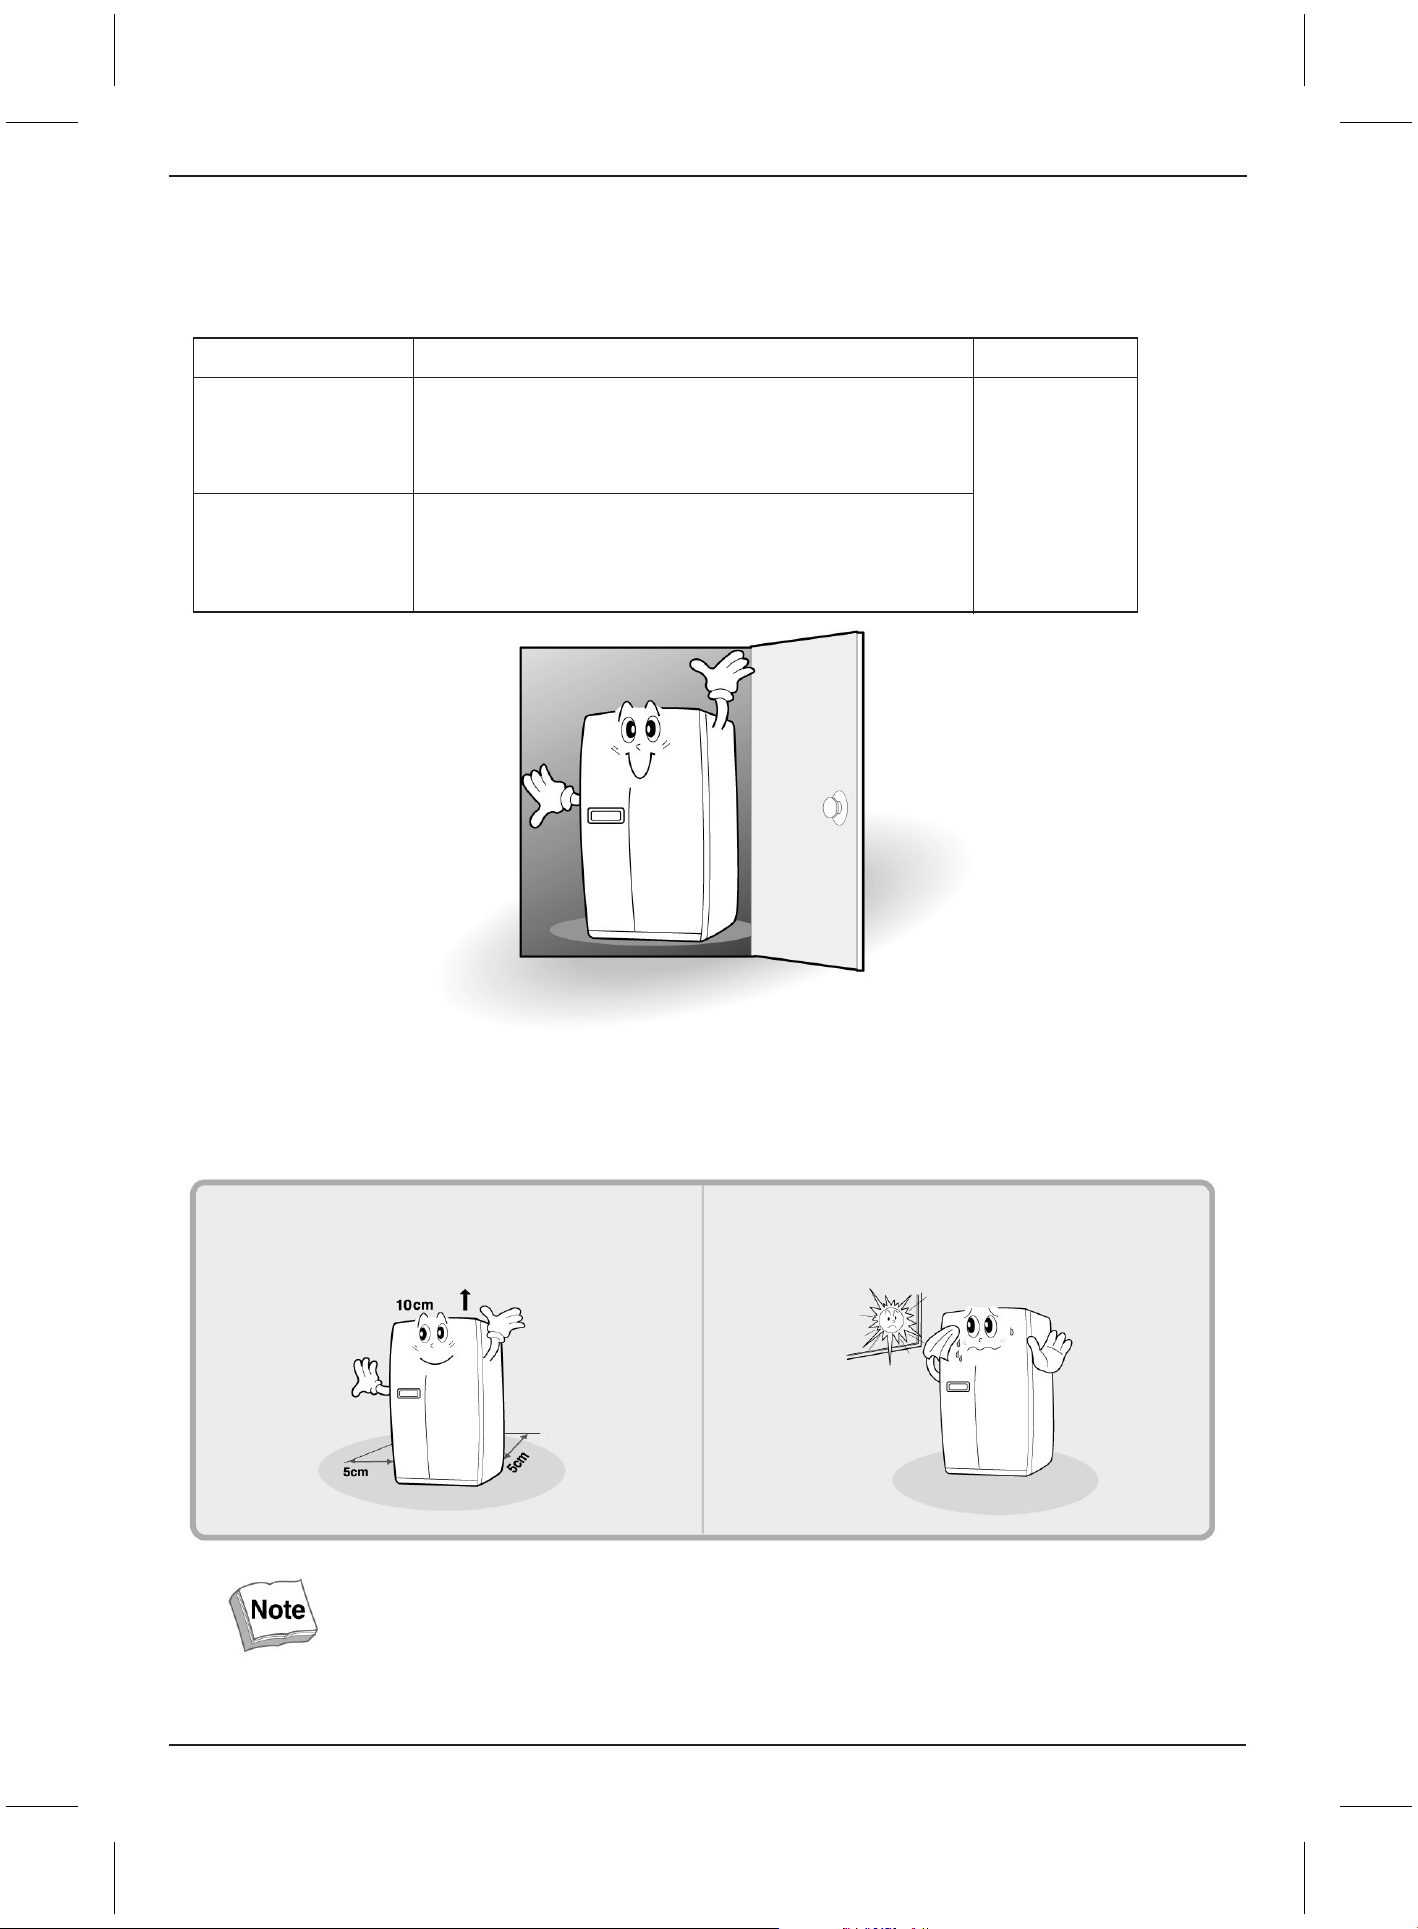
2. Find a suitable place to install.
• Make sure there is sufficient space between
refrigerator and the wall for free air ventilation.
• Once the installation location is decided follow the installation instructions.
If surrounding temperature of refrigerator is low (below 5°C), foods can be frozen or the refrigerator may
not work efficiently.
• Avoid direct sunlight.
2
Page 4

If refrigerator can not enter a door
follow these steps.
Removing Freezer Door
Remove the bottom cover first.
1
Pull out the left collar of the coupling
first, then hold the coupling and pull
out the left water tube.
(MG/MH models only)
Lift up the front of hinge to remove.
4
( After the hinge is removed the
door can fall down forward. Be
careful !)
Remove front bottom cover first, if it is attached.
Unscrew top hinge cover with a
screw driver.
2
Insert a thin screw driver into the
side groove of the cover to
remove.
Be careful not to damage the water
5
line when removing the door
Turn top hinge fastener
3
counterclockwise 3~4 times.
Disconnect the harness wires.
PREPARATION / If refrigerator can not enter a door follow these steps
.
Removing Refrigerator Door
Unscrew top hinge cover with a
screw driver.
1
Insert a thin screw driver into the
side groove of the cover to
remove.
Lift the door straight up to
remove.
4
Turn top hinge fastener
2
counterclockwise 3~4 times.
Disconnect harness wires.
Lift up the front of hinge to remove.
3
(After the hinge is removed the
door can fall down forward.
Be careful !)
3
Page 5

If refrigerator can not enter a door
Replacing Freezer Door
2
Insert the bottom hole of freezer
door straight to the bottom hinge
pin.
1
Insert the water tube into the hole of
the bottom hinge pin first, then
Insert the bottom of freezer door into
the bottom hinge pin.
3
Let the top of door close to the
cabinet and insert the top hinge
pin to the top hole of freezer door
.
( Insert the back of hinge to the
groove of protrusion first, then
front to the top hole of door.)
4
Turn the hinge fastener tightly to
the end.
Connect harness wirings and
screw ground wire.
follow these steps.
Insert the water tube far into the
5
coupling.
(MG/MH models only)
Replacing Refrigerator Door
Insert the bottom hole of
1
refrigerator door straight to the
bottom hinge pin
Let the top of door close to the
2
cabinet and insert the top hinge
pin to the top hole of freezer door
( Insert the back of hinge to the
groove of protrusion first, then
front to the top hole of door.)
Turn the hinge fastener tightly
3
.
to the end.
Connect harness wirings and
screw ground wire.
Click and screw the top hinge
cover.
4
Page 6

Leveling & Door
In case freezer door is lower than refrigerator door...
The front of refrigerator needs to be higher just a little than the back for easy
door closing, but if the wheel is raised too much for door balance, i.e. front of
refrigerator is too higher than the back, it can be difficult to open the door.
2
Open the doors, unscrew the
front cover and remove, if it is
attached.
1
Insert a screw driver (flat tip) into a
groove of the left wheel (bottom of
freezer) and turn it clockwise until
the door is balanced. (clockwise to
raise freezer door ; counterclockwise
to lower)
Unless the freezer door is
balanced by step 1, then follow
the next steps.
3
4
2
Loosen 3 hinge bolts (2 on the left
+ 1 on the right) a little. (Do not
unfasten them completely.)
Insert a hexagonal wrench into the
groove of adjusting nut and turn
clockwise until the door is level.
1
Insert a screw driver (flat tip) into a
groove of the right wheel (bottom of
refrigerator) and turn it clockwise
until the door is balanced. (clockwise
to raise refrigerator door ;
counterclockwise to lower)
Unless the refrigerator door is
balanced by step 1, then follow the
next steps.
Hinge Bolt
3
Once the door is balanced,
fasten the hinge bolts tightly.
In case refrigerator door is lower than freezer door...
Remove the back paper of the tape on the
filter holder and attach the filter holder on a
suitable place.
After installation and/or door leveling, fasten front
cover with screws.(Remove the screws on the
front bottom panel first. Click and screw the cover)
Attaching of Water Filter Holder
Front Cover
Door Adjustment
Refrigerator must be level in order to maintain optimal performance and desirable front appearance.
(If the floor beneath the refrigerator is uneven, freezer and refrigerator doors look unbalanced.)
Loosen 3 hinge bolts(1 on the
left + 2 on the right) a little. (Do
not unfasten them completely.)
Insert a hexagonal wrench into
the groove of adjusting nut
and turn clockwise until the
door is level.
Once the door is balanced,
fasten the hinge bolts tightly and
screw the front cover.
If refrigerator can not enter a door follow these steps / Leveling & Door
5
Page 7

How to install Water Line
WATER SUPPY KIT
Water V
Nut
Screw°ø4ea
Connec
Rubber
Filter
Water
Fastene
Holde
A/B
1. The water pressure should be 3 kgf/cm
2
or more to run
the automatic icemaker
.
Checkup your tap water pressure ; if a cup of 180cc is
full within 10 seconds, the pressure is OK.
2. When installing the water tubes, ensure they are not colse
to any hot surfaces.
3. The water filter only "filters" water ; it does not eliminate
any bacteria or microbes.
4.If the water pressure is not so high to run the icemaker, call
the local plumber to get an additional water pressure pump.
5. The filter life depends on the amount of use. We recommend
you replace the filter at least once every 6months.
When attaching the filter, place it for easy access
(removing & replacing)
6. After installation of refrigerator and water line system, select
[WATER] on your control panel and press it for 2~3 minutes
to supply water into the water tank and dispense water
.
7. Use sealing tape to every connection of pipes/tubes to
ensure there is no water leak.
8. The water tube should be connected to the cold water line.
Check the parts below for installing water supply.
Some other necessary parts are available at your
local service agents.
Installation Procedure
1. Join [Connector A], [Connector B] and [Water Valve] to the tap water lines.
Sealing
Warm Water
Cold Water
Tap
Rubber Packing
Connector B
Connector A
Nut
Water Valve
The water valve should be connected to
the cold water line, otherwise there can be
a problem of cold water supply."
Caution
Caution
1) Switch off the main water line(valve).
2) Connect [Water Valve] and [Connector A].
3) Join [Connector A], [Connector B] to the tap water lines
Use only [Connector A + Water Valve] in case there's only
one tap water line.
Apply the sealing tape to all the joints as the figure shows.
If the connectors(valves) do not fit the existing water line,
call your service agent for additional guideance and action.
2. Connect the Water Tube to the Water Valve.
1) Insert the Nut to the Water tube.
2) Insert the Tube to the Valve as the figure shows.
3) Fasten the nut to join firmly.
TIP
Warm Water
Cold Water
Water Valve
Water Tube
(30154202400)
3011202000
(3010541600)
(A:3019503200
B:3019503300)
(3012020700)
(3014454500)
(7112401211)
(MG/MH models only)
(MG/MH models only)
6
Page 8

7. Fasten the Water Tube.
5. Attach the Filter Box
6. Connect the Water Tube to the refrigerator.
1) Remove the rear cover at the bottom back of the refrigerator.
2) Insert the fastening ring into the Water tube.
(Be careful to follow the direction of the nut.)
3) Insert the Water Tube into the top of Water Valve, turn the nut clockwise
to fasten it. (The Water valve is to the right of the motors.)
4) Check for any bent tubes or water leaks; if so, re-ckeck instalation procedure.
5) Replace the rear cover. (The Water Tube should be placed between the
groove of the refrigerator back and motor cover.)
Water Tube
Water Tube
Nut
1)
Screw and fasten the filter holder to the left/right side of the
back of refrigerator.
In case the holder is not fastened well, remove the back
paper of the tape on the filter holder and attach it."
2) Insert the filter box into the holder.
1) Fasten the Water Tube with the [Fastener A] .
2)
Check if the tube is bent or sqeezed. If so, set it right to prevent any
water leak.
Fastener A
Water Tube
4. Remove any substances in the filter.
1)
Open the main tap water valve and check if water comes out of
the Water Tube.
2) Check if the Water Valve is open in case water does not come out.
3) Leave the valve open until clean water is coming out.
Initial water may contain some substances out of filter
(manufacturing process).
Warm Water
Ref Side
Water Tube
Water Tube
Cold Water
Water
Water Valve
Set the tube upright as the figure shows.
Caution
Caution
8. After installation of Water Supply System
1) Plug the refrigerator, press the [WATER] button on the control
panel for 2~3 minutes to remove any air (bubble) in the pipes
and drain out the initial water.
2) Check the water leak again through the water supply system
(tubes, connectors and pipes) Rearrange the tubes again and
do not move the refrigerator.
Water Tube
Leave a sufficient distance when cutting the tubes.
Caution
Caution
3. Get ready to install the Water Filter
1) Measure an approximate distance between the filter and the
Water Tube and cut the tube off filter vertically.
2) Connect the tubes to the filter as the figure shows.
Tap Side
A right angle
Ref Side
Filter Box
Water Tube
Water Valve
Leveling & Door
7
 Loading...