

Page 1
Epicure Range Cooking Guide
Family-Owned. American-Made.
Page 2
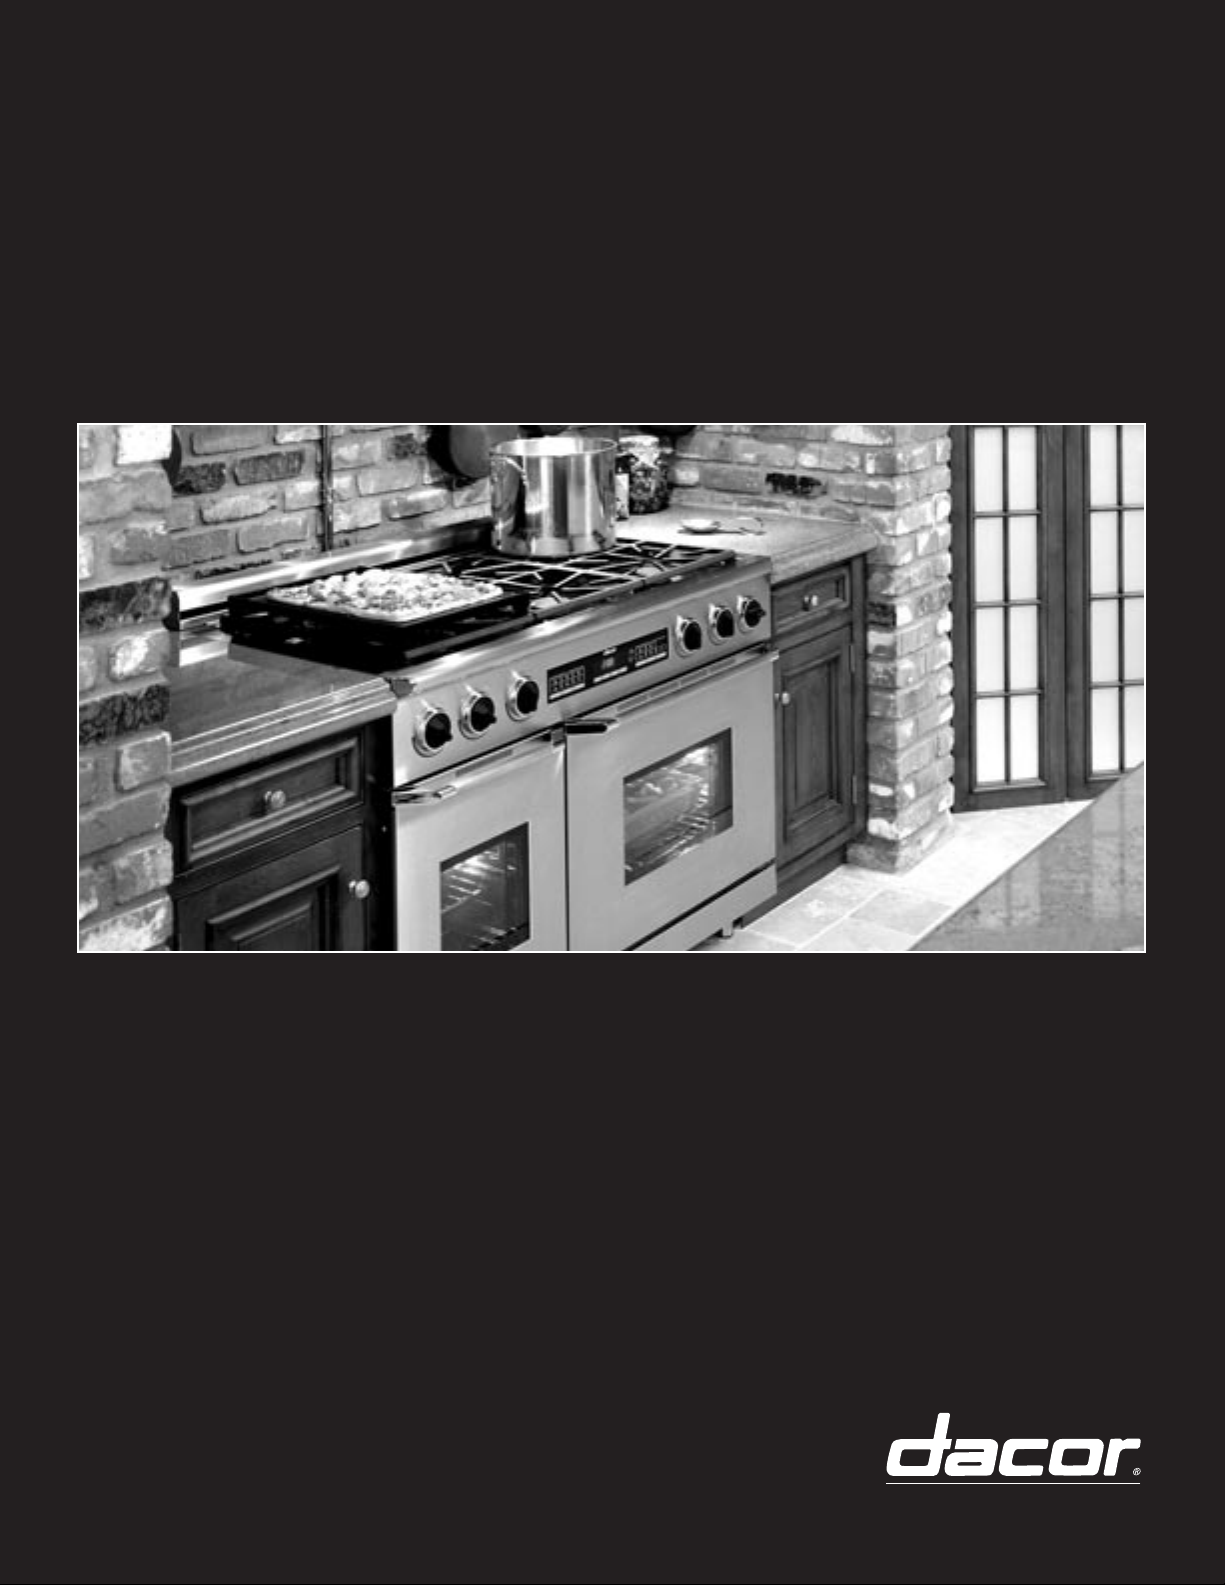
Sizzling, delicious, restaurant-style flavor right out of your own range! Your new range offers the
best of everything--an easy-to-control gas cooktop gives you great power from the hottest sear to
the lowest simmer. Our patented gas flame broiler gives the perfect combination of moist and sear
from broiled foods. And Dacor’s Exclusive 4-part Pure Convection™ System will give you beautifully
browned, baked and roasted goods.
As you begin cooking on your new Dacor range, you’ll find that Pure Convection™ makes it easier
and more efficient to get wonderful results. Meats will sear beautifully and stay succulently moist.
Cookies and baked goods will rise and brown nicely, even if more than one rack is used at a time.
Included in this guide are useful tips, easy-to-read charts, and over 30 of my favorite recipes. Also
included are a few tried-and-true Dacor Family recipes from our founder and 1st chef, Stan Joseph.
This guide will help you maximize the use of your new Dacor range. It will help you decide which
mode of cooking will give you the best results, and will also inspire you to create your own favorite
recipes with excellent results. Creating, testing, and preparing this guide has been a personal and
professional pleasure. I know you’ll be pleased with the results of your new range. Special thanks to
my Assistant chef, Heather Kahn-Gisi.
Enjoy cooking on your new range and Bon Appetit!
Leslie L. Sassaman
Dacor Corporate Chef
Page 3

Quick Reference Guide . . . . . . . . . . . . . . . . . . . . . . . . . . . . . . . . . . . . . . . . . . . . . . . . . . . . . . . . . . . . . . . . . . . . . . . . . . 1
Selecting a Baking Mode . . . . . . . . . . . . . . . . . . . . . . . . . . . . . . . . . . . . . . . . . . . . . . . . . . . . . . . . . . . . . . . . . . . . . . . . 2
Pure Convection- What It Means . . . . . . . . . . . . . . . . . . . . . . . . . . . . . . . . . . . . . . . . . . . . . . . . . . . . . . . . . . . . . . . . . 3
Baking Tips for Using Convection . . . . . . . . . . . . . . . . . . . . . . . . . . . . . . . . . . . . . . . . . . . . . . . . . . . . . . . . . . . . . . 4-5
ERD30 & ERD48 Notes . . . . . . . . . . . . . . . . . . . . . . . . . . . . . . . . . . . . . . . . . . . . . . . . . . . . . . . . . . . . . . . . . . . . . . . . . . . 5
Multi-rack Baking Tips . . . . . . . . . . . . . . . . . . . . . . . . . . . . . . . . . . . . . . . . . . . . . . . . . . . . . . . . . . . . . . . . . . . . . . . . . . 6
Roasting Tips . . . . . . . . . . . . . . . . . . . . . . . . . . . . . . . . . . . . . . . . . . . . . . . . . . . . . . . . . . . . . . . . . . . . . . . . . . . . . . . . . . . 7
Turkey Tips . . . . . . . . . . . . . . . . . . . . . . . . . . . . . . . . . . . . . . . . . . . . . . . . . . . . . . . . . . . . . . . . . . . . . . . . . . . . . . . . . . 8-10
Gas Infrared Broiling . . . . . . . . . . . . . . . . . . . . . . . . . . . . . . . . . . . . . . . . . . . . . . . . . . . . . . . . . . . . . . . . . . . . . . . . . . . 11
Cooking Charts:
Single Rack Baking Chart . . . . . . . . . . . . . . . . . . . . . . . . . . . . . . . . . . . . . . . . . . . . . . . . . . . . . . . . . . . . . . . . . . . .12-14
Multirack Baking Chart . . . . . . . . . . . . . . . . . . . . . . . . . . . . . . . . . . . . . . . . . . . . . . . . . . . . . . . . . . . . . . . . . . . . . . . . .15
Convection Roasting Charts for Meats, Poultry and Fish . . . . . . . . . . . . . . . . . . . . . . . . . . . . . . . . . . . . . . . . . . . . 16
Roasted Vegetable Guidelines Chart . . . . . . . . . . . . . . . . . . . . . . . . . . . . . . . . . . . . . . . . . . . . . . . . . . . . . . . . . . . . . 17
Gas Infrared Broiling Chart . . . . . . . . . . . . . . . . . . . . . . . . . . . . . . . . . . . . . . . . . . . . . . . . . . . . . . . . . . . . . . . . . . . . . . 18
Appetizers and Side Dishes
Oven Braised Shrimp Scampi . . . . . . . . . . . . . . . . . . . . . . . . . . . . . . . . . . . . . . . . . . . . . . . . . . . . . . . . . . . .20
Oven Roasted Tiny New Potatoes . . . . . . . . . . . . . . . . . . . . . . . . . . . . . . . . . . . . . . . . . . . . . . . . . . . . . . . . 20
Spinach Artichoke Dip . . . . . . . . . . . . . . . . . . . . . . . . . . . . . . . . . . . . . . . . . . . . . . . . . . . . . . . . . . . . . . . . . . 21
Baked Brie with Caramelized Onions . . . . . . . . . . . . . . . . . . . . . . . . . . . . . . . . . . . . . . . . . . . . . . . . . . . . . .21
Sage Stuffing . . . . . . . . . . . . . . . . . . . . . . . . . . . . . . . . . . . . . . . . . . . . . . . . . . . . . . . . . . . . . . . . . . . . . . . . . . 22
Teriyaki Shrimp Kabobs . . . . . . . . . . . . . . . . . . . . . . . . . . . . . . . . . . . . . . . . . . . . . . . . . . . . . . . . . . . . . . . . . 23
Grilled Asparagus . . . . . . . . . . . . . . . . . . . . . . . . . . . . . . . . . . . . . . . . . . . . . . . . . . . . . . . . . . . . . . . . . . . . . . 24
Thai Vegetable Stir Fry . . . . . . . . . . . . . . . . . . . . . . . . . . . . . . . . . . . . . . . . . . . . . . . . . . . . . . . . . . . . . . . . . . 24
Sauces, Stews and Soups
Stan Joseph’s Vinha D’Alhos . . . . . . . . . . . . . . . . . . . . . . . . . . . . . . . . . . . . . . . . . . . . . . . . . . . . . . . . . . . . 26
Osso Buco . . . . . . . . . . . . . . . . . . . . . . . . . . . . . . . . . . . . . . . . . . . . . . . . . . . . . . . . . . . . . . . . . . . . . . . . . . . . 27
Bordelaise Sauce . . . . . . . . . . . . . . . . . . . . . . . . . . . . . . . . . . . . . . . . . . . . . . . . . . . . . . . . . . . . . . . . . . . . . . .28
Chili Con Carne . . . . . . . . . . . . . . . . . . . . . . . . . . . . . . . . . . . . . . . . . . . . . . . . . . . . . . . . . . . . . . . . . . . . . . . . 28
Quick Breads and Yeast Breads
Mrs. Gleason’s Homemade Yeast Rolls . . . . . . . . . . . . . . . . . . . . . . . . . . . . . . . . . . . . . . . . . . . . . . . . . . . . 30
Lemon Blueberry Muffins . . . . . . . . . . . . . . . . . . . . . . . . . . . . . . . . . . . . . . . . . . . . . . . . . . . . . . . . . . . . . . . 30
Banana Bread . . . . . . . . . . . . . . . . . . . . . . . . . . . . . . . . . . . . . . . . . . . . . . . . . . . . . . . . . . . . . . . . . . . . . . . . . 31
Garlic Bread . . . . . . . . . . . . . . . . . . . . . . . . . . . . . . . . . . . . . . . . . . . . . . . . . . . . . . . . . . . . . . . . . . . . . . . . . . . 32
Hapa French Toast . . . . . . . . . . . . . . . . . . . . . . . . . . . . . . . . . . . . . . . . . . . . . . . . . . . . . . . . . . . . . . . . . . . . . 32
Honey Whole Wheat Bread . . . . . . . . . . . . . . . . . . . . . . . . . . . . . . . . . . . . . . . . . . . . . . . . . . . . . . . . . . . . . 33
Cracked Pepper Foccaccia . . . . . . . . . . . . . . . . . . . . . . . . . . . . . . . . . . . . . . . . . . . . . . . . . . . . . . . . . . . . . . 34
Main Entrees
Pure Convection™ Prime Rib Roast . . . . . . . . . . . . . . . . . . . . . . . . . . . . . . . . . . . . . . . . . . . . . . . . . . . . . . .36
Roasted Rosemary Lemon Chicken . . . . . . . . . . . . . . . . . . . . . . . . . . . . . . . . . . . . . . . . . . . . . . . . . . . . . . .36
Pure Convection™ Roasted Turkey . . . . . . . . . . . . . . . . . . . . . . . . . . . . . . . . . . . . . . . . . . . . . . . . . . . . . . 37
Curry Pork Tenderloin . . . . . . . . . . . . . . . . . . . . . . . . . . . . . . . . . . . . . . . . . . . . . . . . . . . . . . . . . . . . . . . . . . 38
Buffalo Chicken Pizza . . . . . . . . . . . . . . . . . . . . . . . . . . . . . . . . . . . . . . . . . . . . . . . . . . . . . . . . . . . . . . . . . . . 39
Hickory Smoked Steaks . . . . . . . . . . . . . . . . . . . . . . . . . . . . . . . . . . . . . . . . . . . . . . . . . . . . . . . . . . . . . . . . . 40
Leftover Grilled Turkey Parmesan Sandwiches . . . . . . . . . . . . . . . . . . . . . . . . . . . . . . . . . . . . . . . . . . . . 40
Salmon Fillets with Lemon Dill Buerre Blanc . . . . . . . . . . . . . . . . . . . . . . . . . . . . . . . . . . . . . . . . . . . . . . 41
Chicken Marsala . . . . . . . . . . . . . . . . . . . . . . . . . . . . . . . . . . . . . . . . . . . . . . . . . . . . . . . . . . . . . . . . . . . . . . . 42
Table of Contents
T
Page 4

Desserts
Cream Cheese Pound Cake Using Timed Delay Feature . . . . . . . . . . . . . . . . . . . . . . . . . . . .44
Angelfood Cake . . . . . . . . . . . . . . . . . . . . . . . . . . . . . . . . . . . . . . . . . . . . . . . . . . . . . . . . . . . . . . . . . . . . . . . . 45
Lemon Lover’s Cookies . . . . . . . . . . . . . . . . . . . . . . . . . . . . . . . . . . . . . . . . . . . . . . . . . . . . . . . . . . . . . . . . . . 45
Sally’s Oatmeal Cookies . . . . . . . . . . . . . . . . . . . . . . . . . . . . . . . . . . . . . . . . . . . . . . . . . . . . . . . . . . . . . . . . . .46
Sally’s Grandmother’s Ginger Snap Cookies . . . . . . . . . . . . . . . . . . . . . . . . . . . . . . . . . . . . . . . . . . . . . . . . 46
Creamy Pumpkin Pie . . . . . . . . . . . . . . . . . . . . . . . . . . . . . . . . . . . . . . . . . . . . . . . . . . . . . . . . . . . . . . . . . . . . .47
Toasted Coconut Creme Brulee . . . . . . . . . . . . . . . . . . . . . . . . . . . . . . . . . . . . . . . . . . . . . . . . . . . . . . . . . . .48
Common Baking Problems and Solutions . . . . . . . . . . . . . . . . . . . . . . . . . . . . . . . . . . . . . . . . . . . . . . . . . . . . . . 49-50
Weights and Measures . . . . . . . . . . . . . . . . . . . . . . . . . . . . . . . . . . . . . . . . . . . . . . . . . . . . . . . . . . . . . . . . . . . . . . . . .51
Notes . . . . . . . . . . . . . . . . . . . . . . . . . . . . . . . . . . . . . . . . . . . . . . . . . . . . . . . . . . . . . . . . . . . . . . . . . . . . . . . . . . . . . . . . .52
Table of Contents
T
Page 5

1
QUICK REFERENCE GUIDE ERD30, ERD36, ERD48, ERD60
Q
TO SET THE CLOCK:
• Press CLOCK on control panel
• Press Up/Down arrows to reach correct time
(Note: “a.m.” and “p.m.” will show while you are setting the time but will not show when the time is displayed on the control panel).
TO BAKE, PURE CONVECTION, OR CONVECTION BAKE:
• Press desired cooking mode
• Press Up arrow to set temperature (oven automatically defaults to 350˚)
• Oven temperature begins counting from 135˚
• When oven is finished preheating, it will tone and you may put food in the oven
TO INCREASE/DECREASE OVEN TEMPERA
TURES:
• Press selected cooking mode
• Press Up or Down arrows to reach desired new temperature
TO BROIL OR CONVECTION BROIL:
• Press broil mode
• Press Up arrow to set temperature (“HI” equals 555˚).
• The Gas Broiler does not need to be preheated, but works best if you wait a couple of minutes before adding food.
• The electric broiler in the ERD48 companion oven works best if you allow it to preheat about 10 minutes.
TO SET TIMERS:
• Press TIMER 1 or TIMER 2
• Hold down Up arrow to desired time. It will count in seconds first, then scroll faster with more time.
• Release UP arrow, it will begin to count down.
• When time is up, the timer will tone.
• To stop the tone without shutting off the oven, press TIMER 1 or TIMER 2 once.
TO ADD MORE TIME TO THE TIMERS, OR CANCEL THE TIMER BEFORE THE TIME IS UP:
• Press appropriate TIMER 1 or TIMER 2 button.
• To add more time, press Up arrow to desired new time.
• To cancel timer before time is up, press appropriate timer button twice :00 will flash
TO TURN THE OVEN OFF:
• Press CANCEL/SECURE (this function will not turn the oven lights nor the timers off)
TO LOCK THE CONTROL PANEL:
• Press and hold CANCEL/SECURE for 6 seconds. You will hear one beep when activated and OFF will read on the control panel.
• This feature is useful when cleaning the control panel, or preventing accidentally turning the oven on.
TO UNLOCK THE CONTROL PANEL:
• Press and hold CANCEL/SECURE for 6 seconds. You will hear one beep and OFF will disappear from the control panel.
TO SET TIMED DELAY COOKING:
• Be sure the correct time of day is set (a.m. or p.m.)
• Adjust rack positions and set food into oven
• Press cooking mode
• Press Up or Down arrows to set temperature
• Press COOK TIME- this will be the amount of time it takes to cook the food
• Press STOP TIME- this will be the time you would like for the food to be DONE
• You must press STOP TIME in order for this method of cooking to work
• The convection fan and the cooling fan will go on after programming this feature, even if it does not start right away
TO SELF-CLEAN OVEN:
• Remove all oven racks and filter from the oven
• Press SELF CLEAN
• Press Up arrow to set desired amount of time- 2-4 hours
• Door will lock. After it unlatches and cools, wipe up ash with hot, soapy water
Page 6

SELECTING A BAKING MODE
M
2
PURE CONVECTION
This mode uses the third element, located behind the baffle in the back of the oven cell. Air is circulated by the convection
fan. This cooking mode will provide the most even heat from rack to rack. Use this mode to do any multi-rack baking, roasting, and complete meals. This mode is especially great for baked goods that are mostly exposed to the convection air in a
shallow baking pan. Souffles, cakes, cookies, pastries and free-form yeast breads (such as French Bread) are a few examples. When using this mode for roasting, raise the food up on a “v-shaped” rack inside of a roasting pan. This will allow air
to circulate around the roast, lock in juices, and give it a beautiful golden sear, while shortening the cooking time in most
cases.
CONVECTION BAKE
This mode uses the bottom bake element and the fan in the back to circulate the air. There is a no direct heat from the top
and no heat from the rear element. This mode is best for turkeys over 25 pounds, Earthenware-baked items, baking stone
items, or dense items that need bottom heat in order to cook correctly. Lasagna, pizzas, pies, and loaf breads are best in this
mode.
BAKE
This mode uses bottom heat only. There is no heat from the upper element and no heat from the third element. This mode is
best for items baked in a water bath, such as creme brulee, or items that are completely covered. When using bake, use
rack positions 1 or 2 to get the food as close to the heat source as possible. This will help the food bake closer to the stated
times.
BROIL/GRILL
This mode uses the element located in the top of the oven cavity only. There is no need to preheat the broiler before using it.
Foods should be placed 4-6 inches from the surface of the broiler for best results. Center the broiler pan lengthwise, then
push it all the way to the back wall to get the correct broiling position. Smaller cuts of meat, cut vegetables, breads, and
some desserts are best for broiling.
ERD48 COMPANION OVEN ONLY
CONVECTION BROIL
This mode uses the element located in the top of the oven cavity only and heat is circulated by the convection fan. It is an
electric element, and needs a preheat of about 10 minutes in order to cook foods correctly. Center the broiler pan under the
broiler for best results. Fish, vegetables, and garlic bread broil best on convection broil. Larger cuts of meat and poultry are
best on Standard Broil.
Page 7

DACOR’S 4 - PART PURE CONVECTION™ SYSTEM
3
Dacor’s Pure Convection™, simply the very best convection system available today, is a total approach to cooking.
Use this cooking mode when preparing complete meals, and for single or multi-rack baking. Temperatures can be set, in
five-degree increments, from 135-555˚F.
Dacor’s 4-Part Pure Convection™ system makes complete meal multi-rack cooking a natural, everyday occurrence. Foods
will cook evenly, from one rack to another, while the system’s filter eliminates the transfer of food flavors/aroma from dish to
dish. The filter also keeps your oven cleaner, longer.
Please refer to this drawing to ensure a recipe’s proper rack position.
Rack positions are recommended throughout the book.
While many convection ovens simply heat air with two elements in the oven chamber, Dacor’s Pure Convection™ system utilizes a third heating element. It surrounds the convection fan, located outside the oven’s cooking area.
Additionally, a filter and baffle separate the food from the
oven’s heat source. The filter purifies the heated air circulating throughout the oven, maintaining an extremely clean
cooking environment. The baffle channels the heated air,
circulated by the convection fan, evenly throughout the oven.
With Dacor’s Pure Convection™ cooking mode the rear
heating element, mentioned earlier, is the oven’s heating
source. The convection fan draws air from the oven chamber. It forces the air through the filter and across the hot convection-heating element. The heated air is directed through
the convection baffle back into the oven chamber. The baffle
then distributes the heated air evenly throughout the oven to
insure uniform cooking results (See figure 1).
The externally heated air, constantly moving throughout the
oven, allows many foods to cook in 10% less time and at tem-
peratures 25˚ lower....saving you both time and energy.
Figure 2 - Oven Rack Positions
Figure 1 - Pure Convection™ Air Flow
Direction of Air Flow
5
555
4
555
4
555
3
3
555
2
2
555
1
1
Page 8

1. In all Dacor ovens, oven rack positions count up from the bottom, rack 1 is the bottom; rack 5 is the top.
2. Oven temperatures range from 135˚ - 555˚, and can be set at 5-degree increments.
3. Always allow the oven to preheat fully before adding food. For delicate baked items, it is very important to allow for a
longer preheat to help stabilize the oven temperatures.
4. If using a recipe that requires a “cold oven start,” use the Timed Delay Feature. See recipe in How to Program Timed
Delay Baking or the Use and Care manual for specific instructions.
5. When converting original single-rack recipes to convection recipes, reduce the oven temperature by 25 degrees. Keep
in mind that hot air is circulating around the food in addition to its normal radiant heat. Foods will brown a lot faster than
in conventional ovens, therefore the temperature would need to be reduced.
6. In most cases, your time will also decrease when using convection in single-rack baking. The larger and more dense a
food is, the more time savings you will see.
7. When baking more than one rack of food at a time, however, there is larger cold mass going into the oven. Since the
oven will take longer to recover temperature, there will be an increase in baking times for Multi-rack cooking.
8. The rack positions, temperatures and times in the baking, roasting and broiling charts are recommended. Each recipe
has many variables involved from ingredients to technique and the actual times and temperatures may vary because of
this.
9. Develop a habit of looking through the oven door window instead of opening the door to check food. This will prevent
heat from escaping. In more delicate foods or in multi-racked food cooking, this could make a huge difference in the
evenness of the baked goods. When the oven is completely full and every rack position is used, it has more mass. When
heat is lost by opening the door, the element will come on to compensate for the loss. It will then take longer for the
temperature to come back up to continue cooking the food.
10. Be familiar with your oven timers. These will help you keep an eye on your foods.
11. For best results, measure ingredients carefully and follow tested recipes. This is especially important in baked goods,
which can be more temperamental than other foods.
12. To rise yeast breads in the oven, place the dough in a greased bowl inside of the oven. Cover it, and turn on the halogen
lights. These lights will emit just enough heat to proof yeast breads. Alternately, turn the oven onto Standard Bake at 135˚,
then before placing the dough in the oven, turn the oven off and turn the lights on. The insulation around the oven cell
will retain heat and provide a draft-free environment to rise yeast breads.
RECOMMENDED BAKEWARE:
• If purchasing bakeware, there are two special pans required for convection cooking: low rimmed, light colored aluminum
cookie sheets and a roasting pan with a “V- shaped” rack that fits inside. Almost any bakeware will work in this ovenjust be sure that if the dish is covered or a thicker, denser pan, use Convection Bake or Standard Bake.
• Use pan size and type recommended by the recipes.
• Shiny, reflective pans are best for cakes, quick breads, muffins, cookies, and pies. This will prevent the crust from
browning too fast, as a darker finish may cause it to do so.
• Medium-gauge aluminum sheets with low sides are best in the convection modes so that the air is able to circulate fully
around the food.
• Bake most frozen foods in their original foil containers, and place on a cookie sheet. Follow the package recommendations for baking.
Baking Tips for Using Convection
4
Page 9

Baking Tips for Using Convection
• When using glass bakeware, only lower the temperature by 25 degrees (Most glass cookware manufacturers also
recommend lowering the temperature 25 degrees when using their products. It only needs to be lowered once).
P
AN PLACEMENT TIPS:
• When placing pans on oven racks, make sure the long side of the pans run left to right and are parallel with the oven
door.
• When using Standard Bake or Convection Bake mode, allow 2 inches of space around all sides of the pan to allow the
heat to rise.
• When using the Convection modes, remember to keep the pans forward and away from the convection filter. This positioning ensures proper airflow throughout the oven chamber.
• Aluminum foil can be used on the oven racks to catch overspill and can also be used to cover foods during the baking
process in any mode. DO NOT, however, line the bottom of the oven with aluminum foil. Remove foil, along with the oven
racks, during self-cleaning.
5
ERD30/ERD48/ERD60 COMPANION OVEN NOTES
E
The ERD48 includes a companion oven-which is a fully featured, self-cleaning oven.
Following are a few notes about cooking with this oven:
• Since the oven’s capacity is much smaller, you may find that cook times are much faster. Items cook faster in this oven as
far as roasting and baking.
• Follow the same guidelines as the large oven on selecting baking modes for best results.
• The broiler in this oven is electric. The broiler pan sent with the oven will fit with the shortest end front to back. To center
it correctly, push it all the way to the back.
• Position the broiler pan 4-6 inches from the surface of the food to the surface of the broiler.
• Broil times will increase slightly with the electric broiler. It is also best to preheat the electric broiler for about 10 minutes
for best results.
• The companion oven also offers Convection Broil. This mode works great for fish and broiled vegetables. It sears the fish
beautifully without having to flip it, and vegetables will also sear quickly.
• Thicker cuts of steak or poultry should be cooked on Standard Broil. This will prevent the food from searing rare.
• Dacor’s ACS18 cookie sheets or a commercial half sheet pan, measuring 12 x 18” will fit in the ERD48 companion oven.
ERD30/ERD60 NOTES:
• A commercial sized sheet pan, measuring 18 x 25” will fit in the large cell of an ERD36 & ERD48. This type of pan will not
fit in an ERD30/ERD60. Dacor’s ACS30- 30” cookie sheets should be used.
• The BTU’s in the broiler of an ERD30/ERD60 is slightly less than the ERD36 & ERD48. Broil times will slightly increase
because of this.
• Baking and roasting times may slightly decrease due to the smaller oven capacity also.
Page 10

1. Center the pans on the rack for best baking results.
2. Allow oven to preheat an additional 20-30 minutes after the preheat tone when Multi-rack baking delicate items, such
as cookies and cakes. This will help the temperatures to stabilize while reducing the chance for heat loss when opening
the oven door.
3. Load the oven as quickly as is safely possible. This will prevent heat loss due to the open door. Check foods using the
oven lights and through the window.
4. Remove each pan as soon as food is done. All pans do not need to be removed from the oven at the same time.
5. When baking on two racks, use positions 2 and 4; 1 and 3 or 1 and 4. Use rack positions 1, 3, and 5 when baking on three
racks.
6. Adapt a single-rack recipe to multiple-rack baking by increasing time to the baking process. More time is necessary
because the additional cold mass in the oven causes longer temperature recovery time.
7. Always follow the “Bake Ware Selection” tips in your oven’s “Use and Care” manual.
Multi-Rack Baking Tips
B
6
Page 11

7
1. Convert conventional Standard Bake recipes to Convection recipes by reducing the temperature 25 degrees and the cooking time by
10-15%.
2. Always roast meats fat-side up, on a roasting rack, in a shallow pan. Use a pan that fits the size of the food being prepared (use the
broiler pan accompanying your Dacor oven.) No basting is required when the fat-side is up. It is not necessary to add water to the pan.
Water causes a steam effect. “Roasting” is a dry-heat process.
3. Place poultry breast-side up in a shallow pan, on a rack, that fits the size of the food being cooked. Once again, you can use the broiler
pan accompanying your oven. Brush poultry with melted butter, or oil, before roasting. This will help seal in juices and aid in the
browning process of meats.
4. Tall- sided pans are not recommended when roasting in convection. They interfere with the oven’s heated air circulation over the food.
A rim of 2-3” is fine if the roast is raised up on a “V-shaped rack.” This will catch any juices and still allow air circulation around the
roast.
5. When using a meat thermometer, insert the stem part of the thermometer halfway into the center of the roast’s thickest portion. For
poultry, insert stem (between the body and leg) into the thickest part of the inner thigh. Avoid touching bone, fat or gristle with the
probe’s tip (It will give you inaccurate readings). After taking an initial temperature reading, insert the probe a 1/2” further. Take
another reading. If the temperature registers below the first reading, continue cooking until desired temperature is reached.
6. It is okay to remove meats from the oven when the temperature reads 5-10˚ F below the desired temperature. The meat continues to
cook after being removed. This is called “carryover” cooking and can be utilized for 10-15 minutes in order to make carving easier and
to help the meats retain their juices.
7. There is no need to foil tent or cover roasted meats in the Pure Convection™ mode. If this is your preferred method of roasting, however, use Standard Bake rather than Pure Convection™ or Convection Bake because the convection air will never reach the food and
will not aid in roasting or searing.
8. Roasting times always vary according to the size, shape and quality of meats and poultry. Less tender cuts of meat are best prepared
in Standard Bake and may require moist cooking techniques. Please follow your favorite cookbook’s recipes for these types of dishes.
9. Lining your roasting pan with foil makes for easy clean up.
Dacor Convection Oven Roasting Tips
Page 12

The following are a few turkey tips that might come in handy during the holidays. As a good rule of thumb, plan on serving 1 pound of
turkey per person. This will allow some extras for the big eaters and the fabulous turkey sandwiches for the days after the holidays.
WHAT’S THE LARGEST-SIZED BIRD THAT WILL FIT IN MY OVEN?
PLANNING YOUR MEAL: A FEW POINTS TO REMEMBER
• Allow between 1 to 5 days for turkeys to defrost, depending on the size.
• One pound of turkey per person should be plenty.
• Follow recipe suggestions below.
• Time each side dish and the turkey to insure proper preparation, cook time, rest time, and carve time for each item. Plan out which item
will be cooked first and which could be kept warm after cooking.
•Your Dacor oven has two timers that are extremely handy for large meals. Set them to remind you when to place the 2nd and 3rd dishes
in the oven or on the cooktop.
PROPER THAWING OF YOUR TURKEY
Frozen turkeys may prevent bacteria from growing, but it does not kill them. Therefore, it is important to keep turkeys out of
the Temperature Danger Zone- 40˚ – 140˚. Never defrost a turkey by placing it on the counter. It can cause foodborne illness.
THERE ARE TWO WAYS TO SAFELY DEFROST A TURKEY:
1. Under refrigeration. This requires adequate refrigerator space, advanced planning, and is the preferred method for defrosting a
turkey. The turkey should be placed on the lowest possible shelf to prevent any juices from spilling into other foods. A high-rimmed pan
( 2-3”) is required to catch any juices. Defrost times will depend on the size of the bird. On average, it will take at least a day or two for
the bird to be completely defrosted. Plan on defrosting and cooking within a two day time period.
2. Using a Large Sink and Running Water. The turkey may be defrosted by placing it in a sink full of running water or in a sink of water that
will be changed every half hour. Ample room is needed for loose particles and overflow. Special care must be taken in cleaning and
sanitizing every tool used in preparation of the turkey. Hot water and a bleach- based cleanser should be used to sanitize the sink and
utensils used.
* Using Pure Convection. You may use Pure Convection at 135˚ to defrost a partially frozen turkey for same-day cooking. Place turkey on
an oven cooking rack. It will take approximately 8-11 minutes per pound to defrost the turkey. This is not recommended with frozen solid
turkeys as it will remain in the Temperature Danger Zone for too long.
Holiday Turkey Tips
T
OVEN CELL SIZE TURKEY SIZE-IN POUNDS
Large Cell-ERD30, ERD36,
ERD48, ERD60
30+
Companion Oven-ERD48 17
8
Page 13

UNSTUFFED TURKEYS
1. Place turkey on a roasting rack in a roasting pan. Use a roasting pan that allows the turkey to rest at least 3/4 above the
sides of the pan. This allows the convection air to flow freely around the bird, giving it a nice, brown sear. It also helps to
lock in the juices inside of the turkey, creating a moist, tasteful product.
2. Pre-heat the oven to 325˚- 350˚. Turkeys 8-25 pounds, use the Pure Convection™ mode. If it is over 25 pounds, use the
Convection Bake mode. Larger turkeys simply need that bottom heat from Convection Bake in order to cook properly.
3. The best rack position for the turkey is either rack position 1 or 2. If you are roasting only one turkey, place the turkey with
the rack facing side to side. If you are roasting 2 turkeys in one oven cell, two 10 x 13” pans with racks will fit front to back
in the ERD30 and ERD60 ovens; or two 13 x 16” pans with racks will fit in the ERD36 and ERD48 large oven. The turkeys’
cavities should face the window.
4. The time it will take to cook will be approximately 10-12 minutes per pound for an unstuffed bird. Begin checking the
internal temperatures with an instant-read thermometer about 20 minutes before the expected time of completion.
Internal temperatures should read 170˚ in the breast, 180˚ in the thigh.
STUFFED TURKEYS
1. Follow the same baking instructions as above.
2. A turkey under 20 pounds and stuffed should be roasted on Pure Convection™. Anything over 20 pounds and stuffed
should be roasted on Convection Bake, and baking times will increase to 14-15 minutes per pound.
3. Always take internal temperatures with an instant-read thermometer of both the turkey and the stuffing to insure safe
serving. Please refer to the chart below for temperature information.
Holiday Turkey Tips
T
PRODUCT INTERNAL TEMPERATURE MINUTES PER POUND
Turkey-Unstuffed 180 in the thigh 10-12
Turkey-Stuffed 180 in the thigh 14-15
Stuffing 165 10-11
9
Page 14

10
OTHER HELPFUL HINTS
1. Spray roasting rack and roasting pan with nonstick cooking spray. This will make cleaning up easier.
2. Rinse and pat dry the turkey with paper towels.
3. An olive oil rub helps seal in the juices and aids in browning the turkey.
Please refer to the recipes in the following pages for ideas.
4 It is best to use fresh herbs in the olive oil rub, since dried herbs may brown too quickly.
5. For added flavor, slit the skin at the bottom of the breast to create a “pocket” between the skin and the breast. Insert the olive oil rub
underneath the skin.
6. Chopped onions, carrots, celery, and whole herbs may be inserted into the cavity of the bird. This helps retain moisture while adding
flavor to the turkey. These vegetables can be used to flavor homemade gravy after the turkey has reached its safe internal
temperature.
7. Never discard turkey drippings. It adds flavor to stuffing, makes a great stock for soups and stews, and makes the best gravies and
sauces to serve along with your turkey. If you must discard it, let it cool and scrape into the trash. Do not throw it down the sink, as it
may clog drains.
8. If there are not enough drippings in the bottom of the pan to make your favorite gravy, keep in mind that they are still inside the turkey.
You may need to compensate with additional stock or broth.
9. No basting is necessary when using the Pure Convection™ mode. If you are using a special sauce or marinade, however, you may
want to baste it a couple of times during the cooking process. Do this during the last hour of cooking.
10. It is better to prepare stuffing on the side, instead of stuffing the turkey. Stuffing adds insulation, making it harder for the stuffing to
reach a safe internal temperature of 165˚, while the turkey may register a much higher temperature, therefore producing a drier
product. It also lengthens the cooking process. Since minimum internal temperatures cannot always be reached, we recommend
cooking a separate casserole dish of stuffing.
11. It is acceptable to cover wings and legs that seem to be browning too quickly with foil. Keep in mind that Convection will brown a
turkey quickly, which will help it to remain moist.
12. If you are completely covering a turkey in a roasting pan or using an oven roasting bag, convection is not necessary. Standard Bake is
the best mode for this type of roasting, simply because the convection air is not able to reach the turkey.
13. Instead of doing one really large bird, try 2 medium- sized birds in one oven cell! In Dacor’s oven, you can place two 15 pound turkeys
side-by-side on roasting racks. Think of it: four breasts, four legs- it’s enough for 30 people! Another reason to try this is because the
smaller the bird, the more tender it will be. And the time will remain the same for one bird- 10-12 minutes per pound! Your two birds at
15 pounds each will cook in about 2 hours!
14. Timed Delay Cooking- We do not recommend using the time delay function on your oven to cook your turkey. It is hard to keep protein
foods out of the Temperature Danger Zone- from 40˚ – 140˚. In using timed delay, you are allowing a raw turkey to sit in the oven for an
extended period of time, which allows bacteria to grow and a prospective foodborne illness to occur.
15. Most Important Tip of All: Be sure to clean and sanitize every utensil used in preparation of the turkey. This includes cutting boards,
knives, kitchen sinks, and, most importantly, your hands. Hot water and a bleach-based cleanser should be used on utensils, and ashot-as-you-can-stand-it water and antibacterial soap should be used on your hands.
Holiday Turkey Tips
T
Page 15

Broiling is a quick and flavorful way to prepare many foods. In broiling, the heat source radiates from above in the oven cell
to cook foods with a dry and intense heat. This high heat keeps the juices inside the meat while browning the outside. Foods
that can be broiled should be tender, should have some fat content to preserve moisture and flavor, and should be an individual portion size. Broiling in the oven is completed with the oven door completely shut. Keep in mind that it is normal and necessary for some smoke to be present to give the food a smoky, barbecued flavor. The broil temperatures and rack positions
may be adjusted.
FOODS THAT CAN BE BROILED:
• Meats, such as beef, chicken, veal, lamb, and pork
• Sausages (Be sure to puncture the skin to prevent bursting)
• Bacon (broiled flat or rolled)
• Seafood (Both fish fillets and shellfish)
• Vegetables that are tender and have a high moisture content, such as onions, zucchini, squash, and peppers
• Garlic breads, toasts, etc.
Thin items should be cooked at high heat and as quickly as possible.
Medium thick items should be started on high heat to sear the food, then finished in a cooler part of the broiler/oven cell by
dropping the rack position down or by lowering the temperature of the broiler.
Thick items should also be started on high heat to sear the food, then finished in the oven at a lower temperature.
Times and temperatures for broiling may vary due to desired doneness of the food. Foods will often have to be flipped half
way through the broiling cycle.
TIPS FOR SUCCESSFUL BROILING:
1. The broiler needs only a few minutes to preheat. It will cycle on and off to maintain the temperature that you have selected. The element is on when a small red icon that shows “on” with a box around it appears on the control panel.
2. Bring foods to room temperature for about 15-20 minutes before broiling. Chilled foods will reduce the temperature under
the broiler. The product will not brown/ sear as well.
3. To keep meat from curling, slit fatty edges.
4. Trim the outer layer of fat from steaks and chops.
5. Cuts of meat that are too thin (smaller than 1/4”) may dry up too quickly, while foods that are too thick (2” or larger) may
only sear from the outside and remain raw in the center. Please refer to the above section that addresses thin/ thick.
6. For best results, thicker cuts of meat should be placed about 4” – 6” away from the broiler.
7. A 2-part broiler pan (provided with the unit) should always be used. This allows for fats to drip down into the pan below,
reducing smoking and spattering. Using a sheet pan instead of the broiler pan may cause fats to be redirected into the
heat, causing flare-ups.
8. Aluminum foil may be used on the bottom portion of the 2-part broiler pan only. If foil is used on the top slotted piece
(grill), fats are not allowed to drain properly, resulting in flare-ups, smoking, and spattering.
9. It is best to use tongs to flip the food item half way through the cooking process. Piercing the meat with a fork allows
juices to escape.
10. Meats can be brushed with oil or butter to maintain moisture and aid in the searing process.
11. To prevent sticking, lightly grease the broiler grill. Excess grease will result in heavy smoking.
12. Marinating meats, poultry and seafood is an excellent way to retain flavor in broiled foods.
13. Be sure to center the broiler pan underneath the broiler for maximum coverage-center the pan lengthwise, then push it
all the way to the back.
14. Although the broiler is variable in temperature, it is easier to get better results by using appropriate rack positions.
It is an intense heat, so it is easier to control by lowering rack positions.
GAS INFRARED BROILING
11
Page 16

FOOD PAN SIZE MODE/RACK
CONV TEMP
&
TIME
STANDARD BAKE
TIME & TEMP
USE RACK
POSITIOn 1 OR 2
ANGEL FOOD CAKE 10” tube pan Pure Conv-3
350˚
40-45 min
Lowest rack position
350˚
45-50 Min
BACON
Jelly roll pan or half sheet
pan with rim
Pure Conv-3
375˚
20-25 min
400˚
30-35 min
BAGELS, AFTER BOILING Cookie sheet Pure Conv-3
425˚
15-18 min
450˚
20 min
BISCOTTI Cookie sheet Pure Conv-3
350˚
15 min, then 5 min per side
slice into 1/2” pieces
375˚
30 min, then 5 min per side
slice into 1/2” pieces
BISCUITS Cookie Sheet Pure Conv-3
350˚
20 min
375˚
25 min
BLIND-BAKED
PIE CRUST
(UNFILLED)
8”-9” pie dish-
glass or metal
Conv Bake-2
375˚
10-12 min
400˚
12-14 min
BLIND-BAKED TART
(UNFILLED)
10” tart pan Pure Conv-3
350˚
15 min
375˚
20 min
BREAKFAST CASSEROLE-
SAUSAGE AND EGG
9” x 13”
ceramic baking dish
Conv Bake-2
350˚
40-45 min
375˚
50-55 min
BROWNIES
8”x 8” square pan
9”x 13” baking dish
Pure Conv-3
325˚
25-30 min
350˚
35-40 min
BUNDT CAKE 8”-10” Bundt pan Conv Bake-2
325˚
50-55 min
350˚
55-60 min
CAKES-CHIFFON OR
SPONGE
Jellyroll pan Pure Conv-3
350˚
15 min
375˚
20 min
CAKES-CHIFFON OR
SPONGE
10” Tube Pan Pure Conv-3
325˚
35 min
350˚
40 min
CAKES-SPONGE, CHIFFON
8” Round
9” x 13” Baking dish
Pure Conv-3
350˚
18-20 min
375˚
20-25 min
CHEESECAKE
8”-10” springform Conv Bake-2
325˚
1 to 1 1/2 hours
350˚
1 to 1 1/2 hours
CHEESECAKE IN
WATER BATH
8”-10” springform
on cookie sheet
Pure Conv & Conv Bake
not rec
N/A
350˚
1 to 1 1/2 hours
CINNAMON ROLLS
Cookie sheet Pure Conv-3
375˚
20-25 min
400˚
25-30 min
SINGLE RACK BAKING CHART
Please keep in mind that these charts are simply a guide.
Ingredients, temperatures, and cooking method can all affect the timing of various foods.
You may need to vary the time and temperature due to your personal circumstances.
12
Page 17

FOOD PAN SIZE MODE/RACK
CONV TEMP
&
TIME
STANDARD BAKE
TIME & TEMP
USE RACK
POSITIOn 1 OR 2
COBBLER Baking dish Pure Conv-3
400˚
20-25 min
425˚
30 Min
COFFEE CAKES 9” round pan Pure Conv-3
325˚
40-45 min
350˚
45-50 min
COOKIES (CHOC CHIP, SUGAR,
OATMEAL RAISIN, PEANUT
BUTTER, ETC.)-FROZEN DOUGH
Cookie sheet Pure Conv-3
325˚ or 350˚
12-15 min
375˚
15-20 min
COOKIES (CHOC CHIP, SUGAR,
OATMEAL RAISIN, PEANUT
BUTTER, ETC.)
REFRIGERATED DOUGH
Cookie sheet Pure Conv-3
325˚ or 350˚
10-12 min
375˚
12-14 min
CORNBREAD 8”x 8” square pan Pure Conv-3
375˚
20-2 min
400˚
25-3 min
CREME BRULEE
IN WATER BATH
small ceramic baking dishes
on cookie sheet
Std Bake-2 N/A
350˚
55-60 min
CRISPS
(APPLE, FRUIT, ETC.)
Baking dish Conv Bake-2
350˚
40-45 min
375˚
45 min
CROISSANTS Cookie sheet Pure Conv-3
375˚
20-25 min
400˚
25-30min
CUPCAKES 12- cup muffin tin Pure Conv-3
350˚
20-25 min
375˚
25-30 min
DOUBLE CRUSTED
FRUIT-FILLED PIES
9” pie dish Conv Bake-2
400˚ for 20 min
350˚ for 30-40 min
425˚ for 20 min
350˚ for 40-45 min
ECLAIRS
PROFITEROLES
CREAM PUFFS
Cookie sheet Std Bake-2
400˚
15-20min
425˚
20-25 min
MACAROONS Cookie sheet Pure Conv-3
325˚
20-25 min
350˚
25-30 min
MEATBALLS, FROZEN Cookie sheet Pure Conv-3
350˚
20-25 min
375˚
30-35 min
MEATLOAF 9”x 5” loaf pan
Conv Bake-2 325˚
1 1/2 hrs
350˚
1 1/2 hrs
MERINGUE-COOKIES
Cookie sheet
Pure Conv & Conv Bake
not rec
N/A
200˚-250˚
1 to 3 hours
MERINGUE-PIE TOPPING
On top of pie Pure Conv-3
350˚
12 min
375˚
15 min
SINGLE RACK BAKING CHART
13
Page 18

14
FOOD PAN SIZE MODE/RACK
CONV TEMP
&
TIME
STANDARD BAKE
TIME & TEMP
USE RACK
POSITIOn 1 OR 2
MUFFINS 12 cup muffin tin Pure Conv-3
350˚
20 min
375˚
20-25 min
PHYLLO Cookie sheet Pure Conv-3
375˚
5 min
400˚
5 min
PIZZA Cookie sheet Conv Bake-2
375˚
10-12 min
400˚
12-14 min
POPOVERS
popover pan or
small glass cups
Pure Conv-3
450˚ for 20 min;
350˚ for 20 min
450˚ for 20 min;
350˚ for 20 min
POUND CAKE 9” x 5” loaf pan Pure Conv-3
350˚
55-60 min
375˚
1 - 1 hr 15 min
PUFF PASTRY Cookie sheet Pure Conv-3
350˚
15 min
375˚
20 min
QUICK BREADS-
BANANA, GINGERBREAD,
BLUEBERRY, ETC.
8”x 8” square pan;
9”x 5” loaf pan
Conv Bake-2
325˚-350˚
50-55 min
350˚-375˚
55-75 min
SAUSAGES
LINKS OR PATTIES
Cookie sheet with rim
Puncture links with a fork
Pure Conv-3
325˚
15-20 min
350˚
20-25 min
SCONES Cookie sheet Pure Conv-3
350˚
15-17 min
375˚
18-20 min
SINGLE CRUSTED
CUSTARD PIES-
PUMPKIN, PECAN
9” pie dish Pure Conv-3
425˚ for 10 min;
325˚ for 30-35 min
450˚ for 10 min;
350˚ for 40-45 min
SOUFFLES
Large souffle dish or
small glass dishes
Pure Conv-3
350˚ for 25 min large dishes
13-14 min for small dishes
375˚ for 30 min large dishes
15 min for small dishes
SWEET BREADS,
STOLLEN
Cookie sheet Pure Conv-3
350˚
25-30 min
375˚
30-35 min
TART-CHOCOLATE,
LEMON, ETC.
10” tart pan Pure Conv-3
350˚
20-25 min
375˚
25-30 min
TURNOVERS,
PINWHEELS,
DANISH PASTRIES
Cookie sheet Pure Conv-3
375˚
18-20 min
400˚
20-25 min
YEAST BREAD-FREE FORM
(WHITE, WHEAT, CHALLAH,
RYE, FRENCH, ETC.)
Cookie sheet Pure Conv-3
350˚
30-35 min
375˚
35-40 min
YEAST ROLLS
Cookie sheet;
9”X13” baking pan
Pure Conv-3
375˚
20-25 min
400˚
25-30 min
YEAST BREAD-RICH BREAD
(ITALIAN, SOURDOUGH,
PUMPERNICKEL)
9”x 5” loaf pan Conv Bake-2
350˚
25-30 min
375˚
30-35 min
SINGLE RACK BAKING CHART
Page 19

15
FOOD PAN SIZE
Number of
Pans
Best Rack
Mode
Rack Conv Temp. (F)
Conv Time
(min)
12” ROUND
FROZEN PIZZA
Cookie sheet 2
Conv Bake
(Rotate halfway
through)
2, 4 375˚ 25-30 min
BACON
Cookie sheet
with rim
3 Pure Conv
1, 3, 5
375˚ 30-35 min
BISCOTTI Cookie sheet 2 Pure Conv 2, 4 350˚
25 min, slice
then 5 min per side
BISCUITS Cookie Sheet 2 Pure Conv
1, 3
or
2, 4
350˚ 20-25 min
CAKES-SPONGE,
CHIFFON
8” Round 4 Pure Conv 2, 4 350˚ 35-40 min
CINNAMON ROLLS Cookie Sheet 2 Pure Conv 2, 4 375˚ 25-30 min
COOKIES (CHOC CHIP,
SUGAR, OATMEAL
RAISIN, PEANUT BUTTER,
ETC.)-FROZEN DOUGH
Cookie Sheet
2, 3, or 4
Pure Conv
1-4
2, 3, 4
2, 4 or 1, 3
325˚
25-30 min
22-25 min
20-22 min
CUP CAKES 12 cup Muffin Tin 2 Pure Conv 2, 4 350˚ 25-30 min
REFRIGERATED
COOKIE DOUGH
Cookie Sheet 2 Pure Conv
1, 3
or
2, 4
325˚ 20-25 min
ECLAIRS, PROFITEROLES,
GOUGERES,
CREAM PUFFS
Cookie Sheet 2 Pure Conv 2, 4 400˚ 25-30 min
FROZEN ENTREES Mfr’s pans 4 Pure Conv 2, 4 350˚ 35-40 min
LAYER CAKE 9” Round Pan 2 Pure Conv 2, 4 325˚ 35-40 min
MEATBALLS,
FROZEN
Cookie sheet
with rim
2 Pure Conv 2, 4 375˚ 25-30 min
MUFFINS
12 cup muffin tin 2 Pure Conv
1, 3
or
2, 4
375˚ 20-25 min
ROLLED SUGAR
COOKIES
Cookie sheet 2 Pure Conv 2, 4 325˚ 15-20 min
YEAST BREAD
FREE FORM
Cookie sheet 2 Pure Conv 2, 4 350˚ 35-40 min
YEAST BREAD-
LOAF
9”x 5”Loaf Pan 2
Conv Bake
(Rotate pans
halfway through)
1, 3
or
1, 4
350˚ 30-35 min
YEAST ROLLS Cookie sheet 2 Pure Conv 2, 4 350˚ 20-25 min
Multi-RACK BAKING CHART
Page 20

Type & Cut
Weight
(Lbs.)
Conv
Mode
Conv
Temp. (˚F)
& Rack
Position
Conv
Temp. (˚F)
(Minutes
per LB.)
Standard
Bake Temp.
(˚F)
Standard
Bake Temp.
(Minutes
per LB.)
Min
Internal
Temp (˚F)
BEEF RIB ROAST
-MEDIUM RARE
-MEDIUM
-WELL DONE
4-6 lbs.
Pure Conv
350˚
1 or 2
24
26
28
375˚
30
35
40
145
160
170
BONELESS ROLLED
RUMP ROAST
-MEDIUM
-WELL DONE
4-6 lbs.
Pure Conv
350˚
1 or 2
20
22
375˚
25
30
160
170
ROUND TIP ROAST
-MEDIUM
-WELL DONE
3-4 lbs.
Pure Conv
350˚
1 or 2
24
25
375˚
28
30
160
170
LEG OF LAMB
WITH BONE
MEDIUM RARE
3-5 lbs.
Pure Conv
325˚
1 or 2
24-25
350˚
30-35 145
BONELESS ROLLED
PORK ROAST
-MEDIUM
-WELL DONE
3-5 lbs.
Pure Conv
350˚
1 or 2
24-25
28-30
375˚
30-35
35-38
155
170
1” THICK PORK
CHOPS
-MEDIUM
-WELL DONE
1-2 lbs.
Pure Conv
350˚
1 or 2
N/A
375˚
T
otal Time:
65-75
minutes
155
170
FULLY-BAKED HAMCOVERED IN FOIL
4-5 lbs.
Not rec N/A
N/A
325˚
T
otal Time:
55-60
minutes
140
WHOLE FRYER
CHICKEN
3-4 lbs.
Pure Conv
350˚ or 375˚
1 or 2
T
otal Time:
1 hour
15 minutes
375˚
T
otal Time:
2 hours
180
in the thigh
WHOLE ROASTING
CHICKEN
6-7 lbs.
Pure Conv
350˚ or 375˚
1 or 2
Total Time:
1 hour
45 minutes
375˚
Total Time:
2 1/2 hours
180
in the thigh
TURKEY
-UNSTUFFED
8-20 lbs.
20-24 lbs.
24-30 lbs.
Pure Conv
Pure Conv
Conv Bake
325˚
1 or 2
10-11
12-13
12-13
350˚
18-20 180
in the thigh
TURKEY
-STUFFED
8-20 lbs.
20-24 lbs.
24-30 lbs.
Pure Conv
Pure Conv
Conv Bake
325˚
1 or 2
12-13
13-15
14-15
350˚
17-20
22-24
25-27
180
in the thigh
BONELESS TURKEY
BREAST
2-4 lbs.
Pure Conv
375˚
1 or 2
Total Time:
30 minutes
400˚
Total Time:
35-40
minutes
170
CORNISH
GAME HENS
4 total
Pure Conv
375˚
1 or 2
Total Time:
45-55
minutes
400˚
Total Time:
1 hour
15 minutes
165
in the thigh
FRESH
FISH FILLETS
4 total
Pure Conv
350˚
1 or 2
Total Time:
20-25
minutes
375˚
Total Time:
25-30
minutes
N/A
Convection Roasting Guidelines for meat, Poultry, & Fish
16
Page 21

17
Food Preparation Mode/Temp (˚F) Cooking Time
ASPARAGUS
Snap off woodsy stem.
Blanch in boiling water for 3-4 minutes.
Pure Conv
400˚
10 min
BEETS
Wrap in foil.
Peel after roasting.
Standard Bake
350˚
1 hour
BRUSSELS SPROUTS Lightly grease casserole dish.
Pure Conv
400˚
45 min
EGGPLANT
Lightly grease casserole dish-
cube or slice
Pure Conv
400˚
10-15 min
FENNEL
Lightly grease casserole dish.
Pure Conv
375˚
15-20 min
FRESH BABY CARROTS/
PARSNIPS
Peel and trim-
leave whole or cube.
Pure Conv
350˚
30-35 min
GARLIC-WHOLE BULB
Cut top off. Drizzle with olive oil,
salt & pepper. Cover with foil.
Standard Bake
350˚
30-35 min
GREEN BEANS Lightly grease casserole dish.
Pure Conv
350˚
20-25 min
NEW POTATOES
Scrub & trim or cube.
Lightly grease casserole dish.
Pure Conv
375˚
40-45 min
ONIONS
Peel & cube. Wrap in foil.
Drizzle with olive oil, salt & pepper.
Standard Bake
350˚
40-45 min
POTATOES-BAKING SIZE
1/2 LB. EACH
Scrub potato, poke with fork in center.
Place directly on oven rack.
Pure Conv
375˚
1 hour 15 min
SQUASH BUTTERNUT, ACORN,
PUMPKIN
Halve squash. Rub with vegetable oil.
Place cut side down on cookie sheet.
Pure Conv
375˚
20-25 min
TOMATO
Slice and toss in olive oil & fresh herbs.
Place in single layer on baking rack inside
of cookie sheet.
Pure Conv
350˚
25-30 min
TURNIPS
Wrap in foil.
Peel after roasting.
Standard Bake
350˚
1 hour
ZUCCHINI &
YELLOW SQUASH
Cut lengthwise into 1/4” slices. Place in
lightly greased casserole dish or on cookie
sheet in a single layer.
Pure Conv
350˚
40-45 min
Roasted Vegetable Guidelines
Page 22

18
TYPE & CUT WEIGHT
BEST RACK
POSITION
BROILING
TEMP (˚F)
1ST SIDE 2ND SIDE
1” THICK SIRLOIN BEEF STEAK
-RARE
-MEDIUM
-WELL DONE
10 ounce 4 HI
5
6
7
4
5
6
3/4” THICK SIRLOIN BEEF STEAK
-RARE
- MEDIUM
-WELL DONE
10 ounce 4 HI
3
4
5
2
4
6
1” THICK SIRLOIN STEAK
KABOBS ON SKEWER
12 ounce 4 HI 6 5
FOUR, 1/4” THICK
HAMBURGER PATTIES
-RARE
-MEDIUM
-WELL DONE
1 pound total 3 HI
3
4
5
2
3
4
FOUR BONELESS, SKINLESS
CHICKEN BREASTS
1 pound total 3 HI 4 4
THREE CHICKEN BREASTS WITH BONE
2 1/2 pounds total 3 HI
Start with bone side
up-8
7
CHICKEN PIECESLEGS, THIGHS, BREASTS
2 1/2 pounds total 3 HI 6 7
FOUR, 3/4”-1” LAMB RIB CHOPS
12 ounce 4 HI 3 3
LAMB SHOULDER
1 pound 3 HI 8 7
FOUR, 3/4”-1” THICK
PORK LOIN CHOPS
1 1/4 pounds total 3 HI 7 7
FOUR, 1” THICK FRESH
SALMON STEAKS
1 1/2 pounds total 4 HI 4 4
1” THICK FRESH FISH FILLETS
1 pound 4 HI 4 4
1/2” THICK FRESH FISH FILLETS
1 pound 4 HI 3 2
BACON, SLICED
1/2 pound 3 HI 3 3
CALVES LIVER
1/2 pound 3 HI 5 4
GRAPEFRUIT HALVES
4 halves 3 HI 7-9 Do not turn
TOMATO HALVES
4 halves 3 HI 6 Do not turn
GARLIC BREAD
2 large slices 3 500 1-2 Turn if necessary
GRATINEE-BREADCRUMBS OR
CHEESE ON CASSEROLE
9”x13” broil-proof
baking dish
3 HI 3-4
CREME BRULEE
(4) 4 oz broil-proof
baking dishes
4 HI 2-3
GAS INFRARED BROILING CHART
Page 23

Appetizers and Side Dish Recipes
Page 24

RECIPES
20
Oven Braised Shrimp Scampi
This shrimp works well as an appetizer or can be mixed in with angel hair pasta for a meal.
1/4 cup olive oil
1/4 cup butter
3 pounds large raw shrimp, peeled and deveined
2 Tbsp minced garlic (about 4 cloves)
1 Tbsp minced fresh ginger
1/2 cup Italian parsley, chopped
1/2 to 1 tsp crushed red pepper flakes
1/2 cup dry white wine
1 Tbsp lemon juice
Salt and cracked black pepper, to taste
Preheat your oven to 375˚ on Pure Convection™. Add olive oil and butter to a large, ovenproof gratin dish. Melt butter and oil
together in the preheated oven. Remove from oven and stir in shrimp, garlic, ginger, Italian parsley, and crushed red pepper flakes.
Stir to completely coat shrimp. Drizzle with white wine and lemon juice. Place in oven and cook until shrimp becomes pink and
begins to curl, about 15-18 minutes. Stir halfway through the cooking process if needed.
Serves 4.
Oven Roasted Tiny New Potatoes
2 pounds Tiny New or Red Bliss Potatoes
1/4 cup olive oil
2 Tbsp balsamic vinegar
1 Tbsp fresh thyme
1 Tbsp fresh Italian parsley
1 Tbsp fresh basil
5 cloves garlic, minced
Salt and black pepper, to taste
Preheat oven to 400˚ on Pure Convection™. After preheat, place an empty 9x13 x2” baking dish in the oven for 10 minutes.
When you add the potatoes, this will prevent them from sticking and will help them brown better. Cut potatoes into 1/2- to 1-inch
quarters and place in a large bowl. In a small bowl, combine olive oil, balsamic vinegar, thyme, Italian parsley, basil, and garlic. Pour
mixture over potatoes and toss potatoes to coat. Season with salt and pepper. Pour potatoes into preheated baking dish. Bake until
potatoes are tender and browned, about 30-35 minutes. Stir the potatoes once or twice during baking.
Makes 4 servings.
Page 25

Spinach Artichoke Dip
8 ounce box frozen chopped spinach or 2 cups fresh chopped spinach
1 (15 ounce) can artichoke hearts
3 cups mayonnaise
1-2 Tbsp garlic, minced
1 cup Parmesan cheese, shredded
Salt and pepper, to taste
Preheat oven to 350˚ on Pure Convection™. Rinse and drain frozen or fresh chopped spinach. Drain and roughly chop artichoke
hearts. In a large mixing bowl, combine spinach, artichokes, mayonnaise, garlic, and Parmesan cheese. Season with salt and
pepper. Add mixture to a baking dish. Bake for 15-20 minutes, or until sides bubble and top browns lightly.
Serve with toast points, warm tortilla chips, or fresh chopped vegetables.
Makes 4 cups.
Baked Brie with Caramelized Onions
1 sheet puff pastry dough, thawed
1 wheel of Brie cheese, about 6“ in diameter
1 egg, lightly beaten
1 medium onion, small diced
1 Tbsp butter
Salt and pepper, to taste
Preheat oven to 350˚ on Pure Convection™. Cut off top rind of Brie. Place in the center of puff pastry dough. Fold the corners of the
dough above the cheese, until it is completely covered. Make sure there are no uncovered pieces of cheese. Brush puff pastry with
egg. Bake until puff pastry has risen and is a light golden brown. While the puff pastry is baking, prepare the caramelized onions. In
a medium sauté pan, melt butter. Add onions, stirring occasionally, until they reach a golden brown, about 10 minutes. Season with
salt and pepper. Let the Brie sit for a few minutes, then slice the top off the puff pastry and Brie. Stir the caramelized onions into the
soft cheese in the center. Serve with crackers or toast points.
Makes 1 (6 “) round.
RECIPES
21
Page 26

RECIPES
22
Sage Stuffing
If using Earthenware, enamel-coated steel, or other heavy ceramic bakeware, use Convection Bake. The heat will transfer better
when using this mode.
12 slices day old bread, cut into 1/2-inch cubes
1/2 cup unsalted butter
1 1/2 cups white onion, chopped
3/4 cup celery, small diced
1/4 cup carrot, small diced
Preheat oven according to the chart below. Grease a 9 x 13- inch ceramic baking dish. Place bread cubes on baking sheet and dry
in oven for 10 to 15 minutes. Transfer bread to a large mixing bowl and reserve. Melt butter in large sauté pan. Add onion, celery
and carrot and cook for 5 minutes, until translucent. Add to bread cubes and toss. Add egg and adjust seasonings with sage, salt
and pepper. Add just enough pan drippings to moisten the bread. Pour mixture baking dish and bake until top is brown and a tooth-
pick inserted in the center comes out clean.
Additional seasonings may be added to the stuffing. Fresh herbs are preferred to dried-they add great color and flavor. Good ones
to try are:
Serves 4
1 large egg, lightly beaten
1 1/4 Tbsp fresh sage, chopped
1 1/4 tsp salt
1/2 tsp ground black pepper
1/2 to 1 cup reserved drippings from turkey pan or chicken stock
PURE CONVECTION™ CONVECTION BAKE STANDARD BAKE
RACK POSITION Not recommended 2 2
TEMPERATURE (˚F) N/A 325 350
TIME (MINUTES) N/A 30-35 minutes 40-45 minutes
Rosemary
Basil
Ta rragon
Chervil
Italian Parsley
Thyme
Oregano
Chives or green onion
Page 27

RECIPES
23
Teriyaki Shrimp Kabobs
TERIYAKI SAUCE:
1 cup soy sauce
3 cloves garlic, mashed
2 Tbsp fresh ginger, minced
2 Tbsp sugar
2 stalks green onions, chopped
1 Tbsp sesame seeds
Combine all teriyaki sauce ingredients and pour into a 1 gallon, plastic ziploc bag. Add shrimp, tomatoes, green bell peppers, onion,
and pineapple to marinate. Let marinate a minimum of 1 hour (maximum 4 hours) in the refrigerator.
Soak skewers in steeping hot water for 10 minutes. This will prevent them from burning and splintering.
Place oven rack on second highest position. Preheat oven to Broil on “HI”. Lace skewers with shrimp and vegetables, alternating
each. Place about half of them onto broiler pan or sheet pan with rim. Broil on “HI” for 3 minutes, turn skewers over to other side
and continue to broil for another 3-4 minutes. Remove cooked skewers onto serving platter and repeat process with remaining
skewers.
Serves 4.
FOR KABOBS:
1 pound large shrimp ( 31 to 40 count), peeled and deveined
1 package cherry tomatoes (about 20)
2 green bell peppers, cut into large pieces
1 large white onion, cut into large pieces
1 (16 oz) can pineapple, cut into chunks
1 package long wooden skewers (about 20 are needed)
Page 28

24
RECIPES
C
Grilled Asparagus
This recipe uses Dacor’s Grill accessory- #AEGR14. The intense cooktop heat gives the asparagus beautiful markings and smoky
flavor. Since the grill is one solid piece and has a high-temperature nonstick coating on it, clean up is easy!
2 bunches asparagus
3-4 cloves garlic, minced
1/4 cup olive oil
Juice of 1 lemon
Sea salt, to taste
Bring a large stock pot of water up to a boil. Meanwhile, break off the woodsy end of the asparagus- hold 2” below the floret end
and snap in two pieces. Wherever it snaps is the woodsy end you want to remove. When the water is boiling, blanch the
asparagus for 3-4 minutes. This allows the asparagus to retain a bright green color and it becomes more digestible. Drop in ice
water for 1 minute. This step can be done one day in advance and refrigerated until use.
In a large ziploc bag or large casserole dish, toss together asparagus, garlic, olive oil, and lemon juice. Let sit for a minimum
15 minutes- maximum 1 hour.
Fix grill accessory onto cooktop and turn both burners to medium high. It is best to start with a medium high temperature to allow
the grill to reach a good temperature (Think “smokin’ hot!) and then adjust the temperature down as needed. With tongs, place
asparagus onto grill. All of it should fit- just line it up next to each other to cover the entire surface of the grill. Let it sit for 3-4
minutes, then use the tongs to turn the asparagus to get browning on all sides. Platter and serve immediately.
Serves 12.
This recipe uses our wok ring accessory (AWR) along with a rounded- bottom wok for quick and flavorful wok cooking.
A 10-piece wok kit is available also- accessory # A30.
In a medium sized bowl, combine oyster sauce, cornstarch, rice vinegar, garlic, and crushed red pepper. Mix well. Set aside. Adjust
wok onto wok ring. Heat on medium high to high. Test by dropping a small amount of water onto wok. If it “dances” and evaporates
quickly, it is ready. Add sesame oil and pick up wok to swirl. Add vegetables. Using two wooden spoons, quickly toss vegetables.
They should be sizzling, but not browning. Continue to toss for four minutes total. Vegetables should be hot and crisp. Add sauce
and allow thickening, about 2-3 minutes. Toss until garlic is fragrant. Serve immediately.
Serves 6.
Thai Vegetable Stir Fry
2 cups broccoli florets
1 pound green snow peas, threads on sides
peeled off
1/2 medium onion, cut into slices
1 can water chestnuts, drained
FOR SAUCE:
1/2 cup oyster sauce
2 Tbsp cornstarch
2 Tbsp rice vinegar
1 garlic clove, minced
1 Tbsp crushed red pepper flakes
FOR STIR FR
Y:
2 Tbsp sesame oil
2 red bell peppers, cut into strips
1 green bell pepper, cut into strips
4 carrots, cleaned and cut into 1/8” rounds
4 ribs celery, cut into 1” pieces
Page 29

Sauces, Stews and Soup Recipes
Page 30

RECIPES
26
Stan Joseph’s Vinha D’Alhos
(Portuguese Marinated Pork)
This is a wonderful, flavorful recipe developed by Stan Joseph, Dacor’s founder and 1st chef.
It has been a traditional holiday recipe in his family for years, and we are happy to pass it on to you!
4 pound rolled, boneless pork roast
1 cup red or white wine vinegar
2 garlic cloves, mashed or minced
1 tsp ground cumin
1/2 tsp ground allspice
1/2 tsp ground cinnamon
Pinch of ground cayenne pepper
1 Tbsp salt
1 tsp cracked black pepper
In a large casserole dish, mix all of the above ingredients and marinate the pork overnight in the refrigerator. Pierce the roast
several times with a skewer and extend the marinating time an additional 12 hours. Preheat oven to 325˚ on Standard Bake. Place
one rack in position 1, counting up from the bottom. Place roast in a covered roasting pan and braise with marinade. Baste with
marinade once or twice during cooking. The roast’s internal temperature should be 160˚ in the thickest, middle section for medium.
Serves 8.
Page 31

RECIPES
27
Osso Buco
Osso Buco is traditionally cooked with veal shanks, and is braised over a cooktop for hours and hours to develop the flavor. Since
this stew is completely covered and then placed in the oven, I prefer to use Standard Bake on all oven types. By using this indirect
heat, no scorching occurs on the bottom of the pan, allowing for the true flavor of this delicious stew to come out!
3 1/2- 4 pounds Veal shanks or Beef Shanks (about 3)
Salt and pepper, to taste
1 cup all- purpose flour, for dusting
1/4 cup olive oil
4 stalks celery, cut into large cubes
4 carrots, cut into large cubes
1 large onion, cut into large cubes
4-5 cloves garlic, minced
1 (6-ounce) can tomato paste
1/2 cup red wine
1 cup beef stock
Salt and pepper, to taste
Set oven rack on position 1, counting up from the bottom. Remove all other racks. Preheat oven to Standard Bake at 350˚. Salt and
pepper veal or beef shanks, then dust with flour. Set aside. In a large, ovenproof stockpot with a lid, heat oil. Add veal or beef
shanks and brown them, about 4-5 minutes. Flip over and brown them on the other side. Remove to a plate and set aside. Do not
drain oil from pan. Add celery, carrots, and onion. Cook until translucent, about 5 minutes. Add garlic and stir until fragrant. With a
wooden spoon, stir in tomato paste and cook for a few minutes to get the raw tomato flavor out. Reduce heat to low and “deglaze”
the pan with red wine. Continue to stir and let reduce slightly. Slowly add in beef stock to make a thick sauce. Add shanks back into
sauce. Bring mixture to a boil. Place lid over the stockpot, and place entire stockpot in the oven. Let stew cook in the oven for 1 1/2
hours. Cook until meat falls off the bone.
Serves 8.
Page 32

RECIPES
28
Bordelaise Sauce
1 1/2 cups beef stock
3/4 cup dry red wine
2 Tbsp shallot, finely chopped
1/2 tsp fresh thyme, crushed
1 bay leaf
3 Tbsp unsalted butter, softened
2 Tbsp all-purpose flour
1 Tbsp chopped fresh parsley
In a medium saucepan, heat 1 Tablespoon butter. Add shallot and cook until soft, about 2 minutes. Add the rest of the butter and
flour. Stir to make a paste. Slowly add in red wine, let thicken. Add in beef stock and bring to a boil. Reduce heat and simmer for
about 5 minutes. Add thyme and bay leaf. Simmer uncovered for 15 to 20 minutes. Remove bay leaf. Stir in parsley. Place on simmer
plate on low until service. Serve warm over beef.
Makes about 2 cups sauce.
Chili con Carne
2 pounds ground beef
Salt and pepper, to taste
1 medium onion, chopped
1 red serrano chili
1 green serrano chili
1 red bell pepper
1 green bell pepper
1 Anaheim chili
5 cloves garlic, chopped
In an 8-quart stock pot, brown ground beef, drain fat and season with salt and pepper. Meanwhile, remove stems and seeds from
serrano chilis, bell peppers and Anaheim chilis. Finely chop. Add to ground beef along with onion and garlic and cook until fragrant.
Add cayenne, cumin, and oregano. Cook for a couple of minutes. Add tomato puree and cook. “Deglaze” with beer and let reduce
slightly. Add veal or beef stock. Stir in undrained tomatoes and beans. If chili needs to be thickened add tomato paste. Transfer to
a simmer plate and hold for up to 4 hours if needed. Season with salt and pepper.
Makes about 2 quarts.
2 Tbsp ground cayenne pepper
1 Tbsp ground cumin
1 Tbsp ground oregano
8 oz. can tomato puree or tomato sauce
1 cup brown veal stock or beef broth
1/2 bottle beer (8 oz.)
14 0z. can diced tomatoes
14 1/2 oz. can pinto beans, drained
1 Tbsp tomato paste, as needed
Salt and pepper, to taste
C
Page 33

Quick Bread and Yeast bread Recipes
Page 34

RECIPES
30
Mrs. Gleason’s Homemade Yeast Rolls
2 packages dry yeast
2 cups lukewarm water (between 105-110˚)
1/2 cup sugar
6 1/2- 7 cups all- purpose flour
1 1/2 tsp salt
1 egg, room temperature
1/4 cup plus 2 Tbsp unsalted butter, softened
Combine dry yeast, lukewarm water and sugar in a large mixing bowl. Let sit for 10 minutes or until it becomes foamy and yeast and
sugar dissolve. Add 2 cups of flour and salt. Add 1/4 cup butter and egg. Beat in remaining flour until smooth. Knead for 10 minutes
on a floured surface. Put dough into a greased bowl and cover with a damp cloth. Place in a warm, draft-free environment to rise
for about 1 1/2 to 2 hours before baking. Shape into 2-3 inch balls for rolls. Place in two greased 9 x 13 x 2” pans, spacing them
about 1” apart from each other. Brush rolls with 2 tablespoons melted butter. Cover and let rest for 2 hours before baking. Adjust
oven racks to positions 2 and 4. Preheat oven to 375˚ on Pure Convection™. Bake until golden brown.
Makes about 2 dozen rolls.
Lemon Blueberry Muffins
Homemade muffins are very easy to make, and if you have access to fresh blueberries, it will make all the difference in this recipe.
3/4 cup fresh blueberries, rinsed and picked through
1 1/2 cups plus 2 Tablespoons all-purpose flour
2 tsp baking powder
1/4 cup plus 2 Tablespoons sugar
1/2 tsp salt
Preheat oven to 375˚ on Pure Convection™. Dredge blueberries in 2 Tablespoons flour- this will help prevent them from sinking to
the bottom of the muffin. Set aside. Combine remaining flour, baking powder, sugar and salt in a mixing bowl. In a separate bowl,
beat together milk, egg, butter, almond extract, and lemon zest. Add to dry ingredients until moistened. Fold in blueberries. Spoon
batter into greased or paper-lined muffin tin. Bake for 15-20 minutes, or until risen and golden brown. Let cool slightly and serve.
Makes 1 dozen.
1 cup milk
1 egg
1/3 cup butter, melted
1 tsp almond extract
Zest of 1 lemon
Page 35

RECIPES
31
Banana Bread
2 Tbsp ground cinnamon with 1/4 cup sugar
1 Tbsp unsalted butter
3 ripe medium-sized bananas
1 cup butter
2 cups sugar
4 eggs
Preheat oven according to the chart below. In a small mixing bowl, combine cinnamon and 1/4 cup sugar. Butter a 9 x 5” loaf pan,
then sprinkle half of the cinnamon sugar mixture inside, shaking the pan to coat up the sides. Save the remaining half for the top of
the loaf. In a large mixing bowl, add peeled bananas. Mash the bananas using a fork or a potato masher. Add butter and sugar, stirring to mix. Add eggs one at a time. Add vanilla. In a medium-sized mixing bowl, combine flour, baking soda and salt. Add to banana
mixture slowly and mix completely. Pour batter into prepared loaf pan. Sprinkle remaining cinnamon and sugar mixture on top of the
batter. Bake until golden brown or until a toothpick inserted in the middle comes out clean.
Makes one loaf (about 10-12 slices).
3 Tbsp milk
1 tsp vanilla
2 cups all- purpose flour
1 tsp baking soda
1/2 tsp baking powder
1/2 tsp salt
1/2 cup chopped walnuts (optional)
PURE CONVECTION™ CONVECTION BAKE STANDARD BAKE
RACK POSITION Not recommended 2 1 or 2
TEMPERATURE (˚F) N/A 325 350
TIME (MINUTES) N/A 55-60 minutes 60-65 minutes
Page 36

RECIPES
32
Garlic Bread
1 cup butter, softened
5-6 cloves garlic, mashed
1 large shallot, minced
1/2 lemon peel, finely chopped
1/4 -1/2 cup fresh Italian parsley, chopped
1 large loaf French bread, cut in half lengthwise
In a large food processor combine butter, garlic, shallots, lemon peel, and Italian parsley. Evenly spread butter mixture over French
bread halves. Adjust rack to position 3, counting up from the bottom. Turn on broiler and broil bread until golden brown, about 1-2
minutes. Watch the bread carefully as it will burn quickly. Slice and serve warm.
Makes 1 cup compound butter.
Serves 6.
Hapa French Toast
King’s Hawaiian bread, sliced 1/2” thick (makes about 8-10 slices) then cut in half crosswise to make 16-20 slices
5 eggs, beaten
2 cups sugar
1 cup milk
2 Tbsp rum (or 2 teaspoons vanilla extract)
2 cups macadamia nuts, finely ground
1 jar coconut syrup, or any other flavor works, too!
2 Tbsp butter
Combine eggs, sugar, milk and rum in a large shallow dish. Put the ground macadamia nuts in another dish. Preheat griddle on
medium heat for about 7-8 minutes. Dip Hawaiian bread in egg and sugar mixture on both sides, let drain slightly, then dip into
macadamia nuts on both sides. Place on griddle immediately. Fry until nuts and bread begin to caramelize, about 3-4 minutes. Flip
and repeat process on other side. Place syrup in a small saucepan, then on the simmer plate to keep warm.
The macadamia nuts can be ground in a food processor, but “pulse,” do not blend. Macadamia nuts are very high in oil and will
form a paste if processed for too long.
Serves 8-10.
C
Page 37

Honey Wheat bread
This slightly sweet wheat bread turns out beautifully on Dacor’s Convection Bake. It rises nicely and has a crispy crust
on the bottom.
2 1/4 cup warm water (105-115˚)
1/2 cup honey
3 Tbsp firmly packed brown sugar
2 packages dry yeast
1 cup instant nonfat dry milk
In a large mixer with dough hook attachment, combine warm water, honey, brown sugar and yeast. Mix lightly and let sit until
bubbly, about 5 minutes. Stir in nonfat dry milk, butter, and egg. Turn mixer on low to mix. Add bread flour and salt. Scrape down
the sides of the bowl with a rubber spatula. Add enough wheat flour to make a soft dough. Knead in the mixer for 7-8 minutes, or
turn dough out onto a floured surface and knead by hand for 10 minutes. The dough should be smooth and elastic. Place in greased
bowl, lightly oil the top of the dough and cover. Let rise in a warm, draft-free environment for at least 1 hour or until doubled in size.
Preheat oven according to the charts below. Punch down dough and place on a floured surface. Divide dough in half. Roll half of
the dough with a rolling pin into an 8 x 13 x 1” rectangle. Roll dough from the 8” side lengthwise, as if making a jellyroll, until a loaf
forms. Press to release air bubbles and pinch edges to seal. Repeat with other half of dough. Place loaves seam side down in two
greased 9 x 5” loaf pans. Bake on rack position 2 until loaves rise and brown, and bread sounds hollow when tapped on the bottom.
Remove from loaf pan and cool on baking rack- this will prevent the bottom from becoming soggy. Let cool and slice.
Makes 2 loaves.
2 Tbsp butter, melted and cooled
1 egg, lightly beaten
1 tsp salt
2 cups bread flour
5 to 6 cups whole wheat flour
PURE CONVECTION™ CONVECTION BAKE STANDARD BAKE
RACK POSITION Not recommended 2 or 3 1 or 2
TEMPERATURE (˚F) N/A 350 375
TIME (MINUTES) N/A 30-35 minutes 35-40 minutes
RECIPES
33
Page 38

Cracked Black Pepper Foccaccia
For cracked black pepper, take whole black peppercorns and roughly crush them using the bottom of a sauté pan. You can also
chop them in a coffee grinder or food processor.
2 cups warm water (105-115˚)
1 Tbsp dry active yeast
1/3 cup olive oil plus 1 tablespoon, divided
4 3/4 cups bread flour
1 Tbsp sea salt
In the bowl of a heavy-duty mixer fitted with the dough hook attachment, add warm water and yeast. Let mixture proof until bubbling
and foamy, about 5 minutes. Add olive oil and 2 cups bread flour, set mixer on low to blend. Add remaining flour, then add cracked
black pepper and sea salt. Continue to mix for about 7-8 minutes or until a smooth, elastic dough forms.Scrape dough into a large,
oiled bowl or cover with plastic wrap. Let dough rise in a warm, draft-free area until doubled in volume, about 1 hour.
Lightly oil a 15 x 10 x 1” baking sheet. Slide dough into pan. Using the remaining 1 Tablespoon of oil on your fingertips, stretch dough
to fit inside of the pan. Gently “dock” the dough by making small fingerprints over the surface of the dough. Sprinkle basil, oregano,
and Parmesan cheese over the top of the dough. Cover loosely in plastic wrap and let rise for 30 minutes. Preheat oven on Pure
Convection™ at 425˚. Bake foccaccia bread until deep golden brown in color, about 30-33 minutes. Transfer to a rack to cool. Slice
into 2 x 2” squares.
Makes 1 (15 x 10”) loaf.
1 Tbsp fresh basil, chopped
1 Tbsp fresh oregano, chopped
1/4 cup shredded Parmesan cheese
Sea salt, to taste
RECIPES
34
Page 39

Main Entree recipes
43
Page 40

RECIPES
36
Pure Convection Rib Roast
This roast cooks best on Pure Convection™ because it will cook faster and give the roast a beautiful sear.
Be sure to raise the roast on a “V- shaped” rack. This allows the convection air to circulate around the roast.
Approximate Prep time: 10 minutes
Approximate Cook time: About 24-25 minutes per pound
6 pound rib roast, boned and retied (this makes carving easier)
1/4 cup olive oil
1 Tbsp coarse ground kosher salt
1 Tbsp coarse ground black pepper
1/4 cup fresh rosemary, chopped; plus two whole sprigs
10 cloves garlic- 5 cloves minced, 5 cloves slivered
Preheat your Dacor oven to 350˚ on Pure Convection™. Place one rack in the number two position and remove all others.
Poke the slivered garlic into the roast. Make a rub out of the chopped garlic, olive oil, and rosemary. Rub on the roast to coat. Salt
and pepper to taste.
Spray the roasting pan with nonstick cooking spray, and place two sprigs of fresh rosemary in the bottom of the pan. Place the
roast on a rack tall enough so that most of the roast is above the sides of the roasting pan. The roast should be placed fat- side up.
Cook at 350˚ on Pure Convection™ for about 2 1/2 to 3 hours, or until internal temperature reaches 145˚ for medium rare, 160˚ for
medium, or 170˚ for well done. Remove from the oven and let rest for 15-20 minutes before carving. Cut and remove the butcher’s
string and lift the roast off the ribs to carve. Slice thinly against the grain and transfer to a serving platter. Serve warm.
Serves 12.
Roasted Lemon Rosemary Chicken
4-5 pound roasting chicken
1 cup Italian parsley, chopped
1/4-1/2 cup fresh rosemary, chopped
1 cup olive oil
Preheat oven to 350˚ on Pure Convection™. Clean and dry the chicken. Clean and cut the lemon in half and place inside the chicken
cavity with several rosemary sprigs. Make a rub with Italian parsley, rosemary, and garlic powder. Season the outside of the
chicken with the rub, salt, and pepper. Place on rack in roasting pan. Roast until golden brown and internal temperature reaches
180˚ in the thigh. Cook time should be about 1 hour 30 minutes. Allow chicken to rest 5-10 minutes before carving.
Serves 4.
1 lemon, halved lengthwise
1 tsp garlic powder
Salt, to taste
Pepper, to taste
Page 41

RECIPES
37
Pure Convection™ Roasted Turkey
12-15 pound fresh turkey
3/4 cup olive oil
2 Tbsp fresh rosemary, chopped, plus 2 whole sprigs
1 Tbsp fresh thyme, chopped
2 Tbsp fresh sage, chopped
1/2 cup fresh Italian parsley, chopped
Salt, as needed
Black Pepper, as needed
1 white onion, peeled and quartered
Preheat oven to 350˚ on Pure Convection™. Place one rack in the number one position and remove all others.
Remove neck and gizzard from the turkey, wash turkey with cold water and dry with paper towels. Set aside.
Chop all fresh herbs, except for two whole sprigs rosemary and mix into the olive oil. Rub the turkey inside the cavity and out with
the olive oil mixture and salt and pepper to taste. Peel and quarter the onion and place in the turkey cavity.
Spray the roasting rack with a nonstick spray. Place the turkey on a rack tall enough so that most of the turkey is above the sides of
the roasting pan. Place turkey in a preheated oven.
Cook the turkey on Pure Convection™ at 350˚ for approximately 10 minutes per pound or until the internal temperature reaches 180˚
in the thigh. Remove and let rest for 14-15 minutes before carving.
This recipe can be doubled with an additional turkey without adding any cooking time.
Serves 12-15.
Page 42

RECIPES
38
Curry Pork Tenderloin
2 pork tenderloins, about 3/4 pound each
1/2 cup vegetable oil
2 Tbsp Madras curry powder
1 tsp ground black pepper
1 Tbsp fresh gingerroot, minced
1 Tbsp garlic, minced
Rub pork tenderloin lightly with vegetable oil. Make a rub out of curry powder, black pepper, ginger, and garlic. Rub tenderloins with
spices. Place both on a flat roasting rack in a roasting pan. Cover and refrigerate for at least 1 hour. Preheat oven to 350˚ on Pure
Convection™. Cook until internal temperature reaches 155˚. Cook time will be about 30-35 minutes. Let sit for 5-10 minutes before
carving.
Serves 4.
* You may also use a 3-4 pound pork roast with this recipe. Marinate it the same way and cook it at the same temperature.
Cook time will be closer to 2 hours for a roast of this size.
Page 43

Buffalo Chicken Pizza
DOUGH:
1 1/4 cups warm water
1 Tbsp active dry yeast
1/4 tsp sugar
1 Tbsp olive oil
3 cups all-purpose flour
1 tsp salt
FOR DOUGH:
Place water, yeast and sugar in a bowl. Let the mixture become bubbly and foamy, about 5 minutes. Add oil. Add flour one cup at a
time. Add salt. Knead dough for 10 minutes to form a smooth ball. Place dough in a well-greased bowl that is covered with plastic
wrap and let rise until doubled, about 1 to 1 1/2 hours. Remove dough and shape into (2) 8-inch circles.
Preheat oven according to the chart below. Cut chicken into bite- sized pieces. Heat a sauté pan with oil. Add chicken and cook
until no longer pink. In a small mixing bowl, stir hot sauce and melted butter together. Place chicken pieces into hot sauce mixture.
Divide the pizza sauce between the two pizzas. Sprinkle the chicken, red onion, celery, and shredded jack cheese in that order onto
each pizza. Place on a pizza stone or pizza pan in the oven on rack position 1 and cook until the crust is done underneath and the
cheese is melted, about 20-25 minutes. Top with cilantro. Cut into 6 slices. Serve with blue cheese dressing on the side.
Makes 2, 8-inch pizzas.
RECIPES
TOPPINGS:
2 boneless, skinless chicken breasts
1 Tbsp oil
1/2 cup hot sauce
2 Tbsp butter, melted
1/2 red onion, chopped
2 stalks celery, chopped
1 cup shredded jack cheese
1/2 cup prepared pizza sauce
2 Tbsp cilantro, chopped
1 jar blue cheese dressing
PURE CONVECTION™ CONVECTION BAKE STANDARD BAKE
RACK POSITION Not recommended 1 1
TEMPERATURE (˚F) N/A 400 425
TIME (MINUTES) N/A 20-25 minutes 25-30 minutes
39
Page 44

1/2 cup shredded Parmesan cheese
1 tsp garlic salt
2 eggs
8 slices French or sourdough bread
4 Tbsp butter
In a shallow dish, combine Parmesan cheese and garlic salt. In a separate shallow dish, lightly beat eggs. Heat Dacor griddle or
small nonstick pan or over medium heat. Add 1 tablespoon butter. Dip only one side of the bread into the egg, then in the Parmesan
and garlic mixture. Place onto griddle or pan, dipped side down. Top bread with turkey, Monterey Jack cheese, tomato and
avocado. Dip one side of second slice of bread into egg then Parmesan and garlic mixture. Place on top of sandwich, dipped
side up. Cook sandwich until browned and Monterey Jack cheese is melted, about 3-4 minutes, then flip and repeat on other side.
Repeat process with remaining ingredients, adding more butter as needed. Slice in half and serve warm.
Makes 4 sandwiches.
Hickory Smoked Steaks
4 New York steaks, about 1” thick (10-12 ounces each)
1 Tbsp hickory smoked salt seasoning
1/2 Tbsp garlic powder
1/2 Tbsp cracked black pepper
Season the steaks liberally with hickory smoked salt, garlic powder, and cracked black pepper. Place steaks on broiler pan. Make
sure oven rack is in position 4, or 4 to 6 inches from the broiler to the surface of the steaks. Turn broiler on to 500˚. Center broiler pan
with steaks under broiler. Place the pan lengthwise and push it all the way to the back. Broil for 5-6 minutes to sear, remove pan
from oven, flip the steaks over and broil for 4-5 minutes. Remove steaks and let sit for 5-10 minutes. Slice and serve.
Serves 4.
RECIPES
40
Leftover Grilled Turkey Parmesan Sandwich
C
8 slices leftover turkey, sliced thin
4 slices Monterey Jack cheese
1 tomato, sliced thin
1 avocado, peeled, seeded and sliced thin
Page 45

RECIPES
41
Salmon Fillets with Lemon Dill Buerre Blanc
Buerre blanc is a wonderful sauce that is based on butter. It is very delicate and can break easy- meaning that the acids (lemon and
wine) will separate out from the butter. Our simmer plate will hold this delicate sauce for 20 minutes without breaking.
LEMON DILL BUERRE BLANC:
1 tsp lemon juice
1/2 cup dry white wine
1 tsp white wine vinegar
1 cup butter, cut into chunks
1 Tbsp fresh dill, chopped
1 tsp salt
FOR SALMON:
4 Salmon fillets, about 1” thick, cut on the bias or “tranche” cut, about 5-6 ounces each
1/3 cup mayonnaise
Salt and white pepper, to taste
LEMON DILL BUERRE BLANC:
Place white wine and white wine vinegar in a small saucepan. Reduce down to 2 tablespoons. Over low heat, drop chunks of
butter in, one by one and “swirl” to incorporate. Drop the next piece in only as the other has fully melted. This will help the butter
emulsify with the lemon juice and wine. Once all the butter is incorporated, add lemon juice and salt and place the saucepan on a
simmer plate on low. Stir in dill right before service.
SALMON:
Lightly brush each portion of salmon with mayonnaise to coat. This helps to seal in the moisture. Season with salt and white pepper
to taste. Place on ungreased broiler pan. Adjust rack position to 4, counting up from the bottom. Turn gas infrared broiler to “HI.”
The broiler will only take about 2 minutes to get hot enough to cook, and you may place the salmon in after this time. Place the
broiler pan in the oven so it is centered under the broiler- all the way to the back and in the center. Broil fish for 4 minutes, searing
lightly. Flip and repeat on other side.
Pour lemon dill buerre blanc over salmon and serve immediately.
Serves 4.
Page 46

RECIPES
42
Chicken Marsala
4 boneless, skinless chicken breasts
1/4 cup all purpose flour
1/4 tsp dried marjoram
1/8 tsp salt
1/8 tsp black pepper
1 cup fresh button mushrooms, sliced
2 Tbsp green onions, minced
3 Tbsp unsalted butter, divided
1/4 cup chicken broth
1/4 cup dry Marsala
2 Tbsp fresh Italian parsley, chopped
Place each chicken breast between 2 pieces plastic wrap. Pound lightly to 1/4 inch thickness. Remove plastic wrap. In a shallow
bowl, stir together flour, marjoram, salt, and black pepper. Lightly press chicken pieces into flour mixture on both sides. Set aside.
In a large sauté pan over medium high heat, cook mushrooms and green onions in 1 Tablespoon butter until tender. Remove from
sauté pan. Cook chicken in remaining 2 Tablespoons butter in sauté pan until brown on both sides and no pink appears in the
center- about 3-6 minutes a side. Add in mushrooms and green onions. Add broth and Marsala. Cook, uncovered, for 2 to 3 minutes
or until mushroom mixture thickens slightly, stirring occasionally. Transfer to serving platter. Spoon mushroom mixture over chicken
and garnish with Italian parsley.
Serves 4.
Page 47

Dessert recipes
Page 48

Cream Cheese Pound Cake
This recipe, along with others that require foods to be cooked in a “cold start” oven or an oven that has not been preheated, works
well on our timed delay baking feature.
* Before using this feature, make sure that the clock has been set to the correct time and the correct a.m. or p.m. settings. This
does not show on the clock display, but it is very important as to what time of day you would like the food completed.
Nonstick cooking spray
1/2 pound butter (2 sticks), softened
1/2 cup vegetable shortening
8 ounces cream cheese, softened
3 cups sugar
Dash of salt
6 eggs
3 cups cake flour
2 Tablespoons vanilla extract
Spray (2) 9 x 5- inch loaf pans with nonstick cooking spray. In a large mixing bowl, combine butter, vegetable shortening, cream
cheese, sugar and salt. Mix together until well creamed. Add eggs 1 at a time mixing after each addition. Add flour 1 cup at a time.
Add vanilla and combine. Divide batter into loaf pans.
Place both loaves in cold oven on rack position 2.
TO SET TIMED DELAY:
• Press Convection Bake mode and the “down” arrow until you reach 325˚.
•Press “Cook Time” button. This refers to “how long will it take the pound cake to cook.” Use the “Up” arrow to enter 55 minutes.
• Finally, press the “Stop Time” button. This refers to “what time do I want this pound cake to be ready.” Use the “Up” arrow to
select the time of day you wish to have dessert.
• If you wish to start the pound cake now, don’t enter a new time into the “Stop Time”, just press “Stop Time” once. You must not
skip this step, or the oven will go through its normal preheat with the broiler. Notice that the 55 minutes has been added into the
“Stop Time” for you.
• When the pound cake is done, 3 tones will sound and you can remove it , let cool, and enjoy your perfectly cooked pound cake.
• If you are not around to hear the tone, the oven will go into a “Hold” mode. It will display “Hold” on the screen and maintain
150˚. The oven is going into a “Hold” mode at 150˚ so that the food will not be in the temperature danger zone (40˚-140˚). Keep in
mind that the pound cake will continue to cook in the hold mode due to the residual heat in the oven, but it will be safe to serve
to your guests. It will remain in this mode for 2 hours.
Makes 2- 9x5 loaves.
RECIPES
44
Page 49

RECIPES
Angelfood Cake
1 1/2 cups egg whites (10-12 large eggs)
1 1/2 cups sifted powdered sugar
1 cup sifted cake flour
1 1/2 tsp cream of tartar
1 cup granulated sugar
1 tsp almond extract
Preheat oven to 350˚ on Pure Convection™. Let egg whites come to room temperature. Sift powdered sugar and cake flour
together. Add cream of tartar to whites. Beat with electric mixer until soft peaks form. Gradually add granulated sugar, beating
until stiff peaks form. Add almond extract. Fold dry mixture into whites 1/4 at a time. Stir with a whisk to incorporate fully. Pour into
ungreased 10” tube pan. Using a rubber spatula, cut through batter to get rid of air pockets. Bake until risen and browned, about
40-45 minutes. Top should spring back and should not be sticky in the folds. Immediately invert on rack, leave in pan.
Cool thoroughly. Loosen sides and remove cake. Let cool and slice to serve.
Makes 1- 10-inch cake (about 12 slices).
45
Lemon Lover’s Cookies
1 cup butter flavored vegetable shortening
1 1/2 cups sugar
1 Tbsp water
1 1/2 tsp lemon extract
2 Tbsp lemon juice
2 eggs
1 tsp finely grated lemon peel
Preheat oven to 325˚ on Pure Convection™. Mix coconut with lemon juice in a small bowl and let sit for 10 minutes. Cream together
vegetable shortening and sugar until fluffy. Mix water, lemon extract, lemon juice with coconut, eggs and lemon peel in a bowl. Add
to shortening mixture. Sift together flour, cream of tartar, baking soda, salt and poppy seeds in a bowl. Add to mixer and beat until
combined. Drop by rounded teaspoonfuls, about 2 inches apart on lightly greased cookie sheet. Bake until lightly browned around
edges, about 12 minutes.
Makes about 2 dozen cookies.
3/4 cup flaked coconut
2 1/2 cups all purpose flour
1 1/2 tsp cream of tartar
1 tsp baking soda
1/4 tsp salt
1 Tbsp poppy seeds
Page 50

Sally’s Oatmeal Cookies
1 cup vegetable shortening
3/4 cup brown sugar
3/4 cup granulated sugar
1 1/4 cups flour
1 tsp baking soda
1/2 tsp salt
1/2 tsp ground cinnamon
Preheat oven to 325˚ on Pure Convection™. In a mixer, cream together vegetable shortening, brown sugar and granulated sugar.
Add vanilla extract and eggs and beat on low speed. In a small bowl sift together flour, baking soda, salt, cinnamon and allspice.
Gradually add to the mixer. Mix until combined. Stir in rolled oats, raisins and walnuts. Drop by rounded tablespoonfuls on two lightly
greased cookie sheets. Bake until light golden in color, about 11-13 minutes.
Makes about 2 dozen.
RECIPES
1/4 tsp ground allspice
3 cups rolled oats
1/2 cup raisins
1/2 tsp vanilla extract
2 eggs
1/2 cup chopped walnuts, chopped
Sally’s Grandmother’s Ginger Snap Cookies
1 1/2 cups vegetable shortening
2 cups sugar
2 eggs
1/2 cup molasses
4 cups all-purpose flour
2 tsp baking soda
2 tsp ground cinnamon
2 tsp ground cloves
2 tsp ground ginger
Preheat oven to 325˚ on Pure Convection™. Spray cookie sheet with nonstick cooking spray. In a mixer, cream together vegetable
shortening and sugar. Add in eggs one at a time. Add in molasses. In a small bowl, combine flour, baking soda, cinnamon, cloves,
and ginger. Slowly add the flour mixture to the wet mixture. Scrape the sides of the mixture to blend thoroughly. Shape into 1 inch
balls. Place on prepared cookie sheet about 2 inches apart. Bake until golden brown, about 14-15 minutes.
Makes 3 dozen.
46
Page 51

Creamy Pumpkin Pie
RECIPES
PURE CONVECTION™ CONVECTION BAKE STANDARD BAKE
RACK POSITION Not recommended 2 2
TEMPERATURE (˚F) N/A
400 for 10 min,
350 for 20-25 min plus 10 min
425 for 15 min,
350 for 35-40 min plus 10 min
TIME (MINUTES) N/A 40-45 minutes 60 min-1 hour 5 min
PIE DOUGH:
1 cup all-purpose flour
1/2 cup unsalted butter, cut into cubes
1/2 cup ice cold water
For the pie crust, combine flour and salt in a mixing bowl. Cut in cubes of butter to form small pieces, about the size of a pea. Drizzle
in water. Add just enough until the dough forms a ball. Wrap in plastic and refrigerate for 30 minutes. Roll dough out on a floured
surface to fit a 9” round pie dish.
Preheat oven according to the chart below. In a large bowl, combine pumpkin pie filling ingredients until well blended. Pour filling
in pie crust. Bake, then reduce temperature to 350˚. Remove pie from oven and add sour cream topping on top of the pumpkin pie
filling:
For the sour cream topping, combine sour cream, sugar, and vanilla. Spread on top of pie. Decorate top with pecan halves. Bake
for an additional 10 minutes.
Serves 8.
FILLING:
1 (16 oz) can pumpkin pie filling
1 (14 oz) can sweetened condensed milk
2 eggs, beaten
2 tsp pumpkin pie spice or 1 tsp cinnamon,
1/2 tsp ginger, 1/2 tsp nutmeg
1/2 tsp salt
47
TOPPING:
1 1/2 cups sour cream
2 Tbsp sugar
1 tsp vanilla
2 cups pecan halves, to decorate
Page 52

Toasted Coconut Crème Brulee
RECIPES
PURE CONVECTION™ CONVECTION BAKE STANDARD BAKE
RACK POSITION Not recommended Not recommended 2
TEMPERATURE (˚F) N/A N/A 325
TIME (MINUTES) N/A N/A 30-40 minutes
(6) 4-ounce broil proof ceramic dishes
2 cups heavy cream
2 cups sweetened flake coconut
5 egg yolks
Preheat oven according to the charts below. Place coconut flakes on a cookie sheet. Toast for about 10 minutes, or until golden
brown. Be careful when opening the oven door to remove the coconut as the oils can burn your eyes.
In a heavy saucepan, heat the heavy cream. Slice down the center of the vanilla bean and add it to the cream. Add the toasted
coconut. Remove from heat and set aside, letting the toasted coconut steep in the cream. In a large mixing bowl, combine egg
yolks, 1/3 cup sugar, and salt. Beat with a whisk until just combined. Strain coconut and vanilla bean out of cream into a bowl, then
slowly whisk together cream into egg mixture. Be sure not to add it too quickly at the beginning, because it will cause the yolks to
curdle. With a fingernail, scrape vanilla beans out of the pod into the cream. Place six 6-ounce broiler- proof custard cups in a
3-quart rectangular baking pan. Pour egg custard mixture evenly into dish and carefully transfer to preheated oven. Using a
measuring pitcher, pour enough hot water into the baking pan around the custard cups to reach half way up the sides of the dishes.
This will act as a buffer to slowly cook the custard without browning. You want the crème brulee to be set but not cooked. Bake
until only about a dime- sized piece in the center of the custard still shakes. Remove from the water bath and cool on an oven rack.
Cover and chill for at least 1 hour up to overnight. Before serving, let custard stand at room temperature for 20 minutes- this will
help prevent the dishes from cracking during the “brulee.” Sprinkle an even layer of superfine sugar or brown sugar over the
surface of the custard, using an index finger to fill it in. Set oven to Standard broil on “HI” and set the oven rack on position 4
(counting up from the bottom). Place custard cups with sugar on them close together on a small cookie sheet. Place pan in the
center of the rack under the broiler all the way to the back, and broil for 4-5 minutes, or until the top browns and creates a hard
shell over the custard. Serve immediately.
* To make your own superfine sugar, grind granulated sugar in a food processor.
Serves 6.
1/3 cup sugar
1/8 tsp salt
1/2 vanilla bean
1/2 cup superfine sugar* or brown sugar
48
Page 53

COOKIES AND BISCUITS BURNED AT THE
BOTTOM
Oven door opened too often
Dark, absorbent pan was used
Incorrect rack position being used and pan is
too close to the heat source
Standard Bake or Convection Bake mode is
being used
Pan is too large and too close to element
Set minute timer to shortest recommended
time and look through window to check doneness
Use shiny, reflective pans with low sides
Check cookies by looking through the oven
door’s window instead of opening door
Use recommended rack position and use Pure
Convection
Use smaller pan
COOKIES AND BISCUITS ARE TOO BROWN
ON TOP
Rack position being used is too high
Oven not fully preheated
The pan’s sides are too high
Use the rack positions recommended in this
guide
Allow oven to preheat fully before placing
food in the oven
Use recommended pan size
CAKE SIDES ARE BURNT AND CAKES ARE
NOT DONE IN THE CENTER/ CAKES BURST
ON TOP
Oven too hot Reduce temperature
POOR VOLUME FOR CAKES AND
BAKED GOODS
Too little flour/Too much liquid
Oven too hot
Measure ingredients carefully
Lower oven temperature
UNEVEN CAKE SHAPE Batter spread unevenly
Oven rack not level
Shake pan lightly to evenly out batter
Make sure oven rack is properly in place
Place cakes in center of oven rack for best
results
CAKE TEXTURE IS TOUGH OR CRUMBLY Too much flour
Too little sugar or shortening
Batter overmixed
Decrease flour
Increase sugar or fat
Do not overmix batter- use recommended mix
times
COOKIES ARE TOO CRISP Low moisture in product
High sugar and fat content
Thin shape
Baked too long
Increase liquid
Decrease sugar or fat
Cut/roll larger pieces
Decrease baking time
COOKIES ARE TOO SOFT Too much liquid
Low sugar or fat
Underbaked
Large/ thick shape
Decrease liquid
Increase sugar or fat
Increase cooking time
Cut slightly smaller
Common Baking Problems and Solutions
49
Page 54

50
COOKIES ARE TOO CHEWY Too much egg
High sugar and liquid, but low fat content
The pan’s sides are too high
Overmixed
Decrease egg content
Increase fat content
Use recommended pan size
Do not overmix when adding flour
PIE DOUGH IS TOO TOUGH Overmixing dough Use minimal mixing times when adding
water
PIE DOUGH IS CRUMBLY Not enough water; too much shortening Increase water; decrease fat
PIE DOUGH SOGGY OR RAW ON BOTTOM Oven temperature too low; not enough bot-
tom heat
Increase temperature
Use Convection Bake or Standard Bake
Use lower rack position
PIE DOUGH SHRINKS Dough overworked
Too much water
Use minimal mixing times
Decrease water
PIE FILLING BOILS OUT No steam vents cut across the top
Oven temperature too low
Filling hot when put in shell
Crust not sealed; too much filling
Cut steam vents in top crust
Increase oven temperature and use
Convection Bake and Standard Bake
Allow filling to cool before adding to pie shell
Seal crust; don’t overfill the pie crust
CURDLING OF CUSTARD OR SOFT FILLINGS Overbaked Decrease baking times
YEAST BREAD SPLIT OR BURST CRUST Overmixing dough
Oven too hot
Use minimal mixing times- just until dough is
elastic
Decrease oven temperature
BLISTERS ON BREAD CRUST Too much liquid
Improper fermentation
Decrease liquid
Make sure loaves ferment at correct time and
temperature
BREAD TOO DENSE OR CLOSE- GRAINED Too much salt
Too little liquid
Too little yeast
Underproofed
Decrease salt
Increase liquid
Increase yeast
Increase proofing time
BREAD CRUST TOO DARK Oven too hot Decrease oven temperature
Allow oven to preheat fully
BREAD CRUST TOO LIGHT Too low temperature Increase temperature
Use lower rack position
Use Standard Bake or Convection Bake
Common Baking Problems and Solutions
Page 55

3 teaspoons = 1 Tablespoon 1 Tablespoon = 1/2 fluid ounce
4 Tablespoons = 1/4 cup 1 cup = 8 fluid ounces
5 1/3 Tablespoons = 1/3 cup 1 cup = 1/2 pint
8 Tablespoons = 1/2 cup 2 cups = 1 pint
1 pint = 16 fluid ounces 1 quart = 32 fluid ounces
1/2 gallon = 64 fluid ounces 1 gallon = 128 fluid ounces
10 2/3 Tablespoons = 2/3 cup 4 cups = 1 quart
12 Tablespoons = 3/4 cup 2 pints = 1 quart
16 Tablespoons = 1 cup 4 quarts = 1 gallon
GROUND MEAT AND MEAT MIXTURES
F˚
Beef, Pork, Veal, Lamb
160
Turkey, Chicken 165
Fresh Beef, Veal, Lamb
Medium Rare 145
Medium 160
Well Done 170
Poultry
Chicken and Turkey, Whole 180
Poultry Breasts, Roast 170
Poultry Thighs, Wings 180
Duck and Goose 180
Pork
Medium
160
Well Done
170
Ham
Fresh (raw)
160
Pre-cooked (to reheat)
140
Minimum Safe Internal Temperatures for Various Foods
Please note that the minimum safe internal temperatures are subject to change. This is due to the changing bacteria and the
temperatures required to eradicate it. Visit the website below for the most current information.
These cooking temperatures are from the USDA Meat and Poultry Hotline
(800) 535-4555 or www.fsis.usda.gov
A WORD ABOUT CARR
Y-OVER COOKING
After foods are pulled out of the oven, it will continue to cook. Carry-over cooking affects all foods- the larger the item, the longer
the carry- over time. It is best to let the foods rest after it comes out of the oven for 10 to 15 minutes. This will allow meat to retain its
juices and baked goods continue to set, making it easier to carve and cook to a safe temperature to serve.
Weights and Measures
51
Page 56

52
notes
 Loading...