

Page 1
RANGE MODEL: ER30DSRSCH
3-Inch Side Panel Kit,
P/N ARSP3
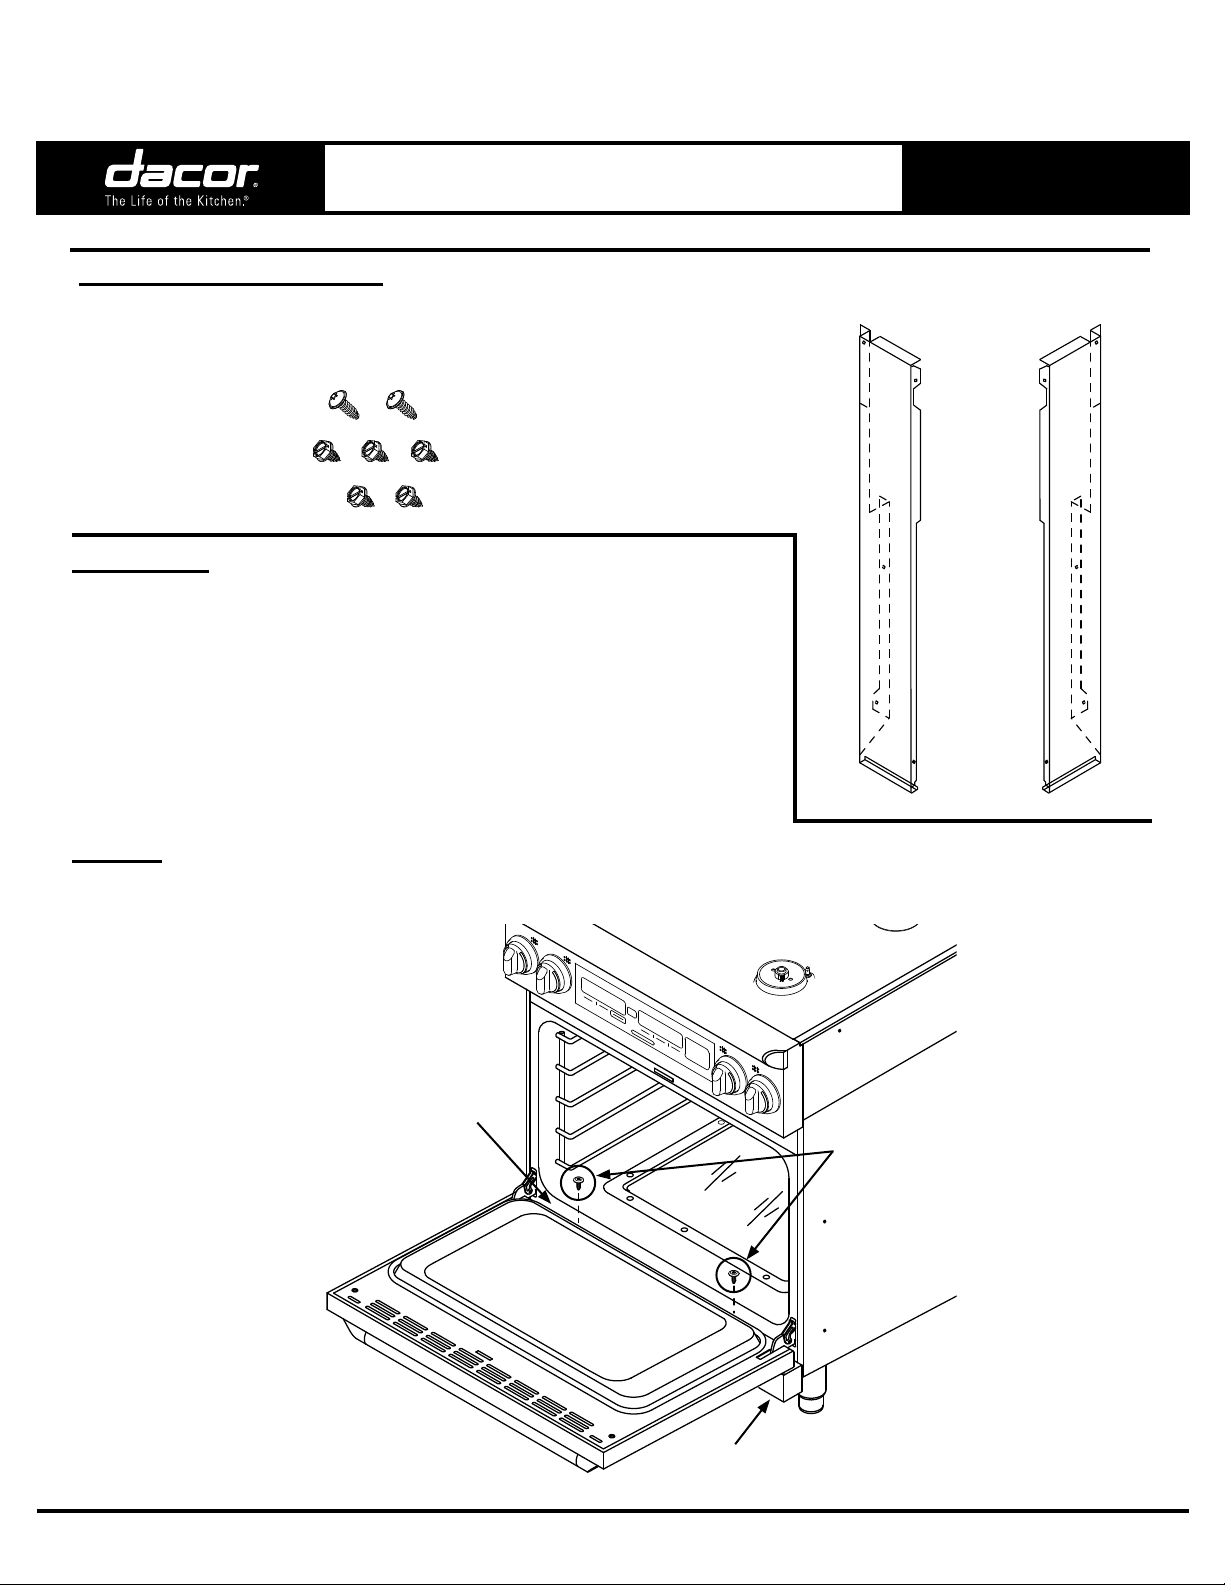
Parts included with this kit:
Hardware Kit
2 X Torx Screw (83709)
5 X Sheet Metal Screw
(83023)
Instructions:
Installing the 3-Inch Side Panel Kit
(Model ER30DSRSCH)
For self-rimming installations with non-standard countertop
depths, installation of the optional side panel kit may be
necessary to cover the sides of the range that protrude from
the cabinet.
INSTALLATION
INSTRUCTIONS
2 Side Panels
To install the side panel kit:
STEP 1: Open the oven door. Remove and retain the two screws on the top of the kick panel. The
screws are accessed through the space between the door and the oven opening.
Space between
door and oven
opening
Remove and
retain screws
Kick Panel
Part No. 102496 Rev. A
Page 2
3-Inch Side Panel Kit
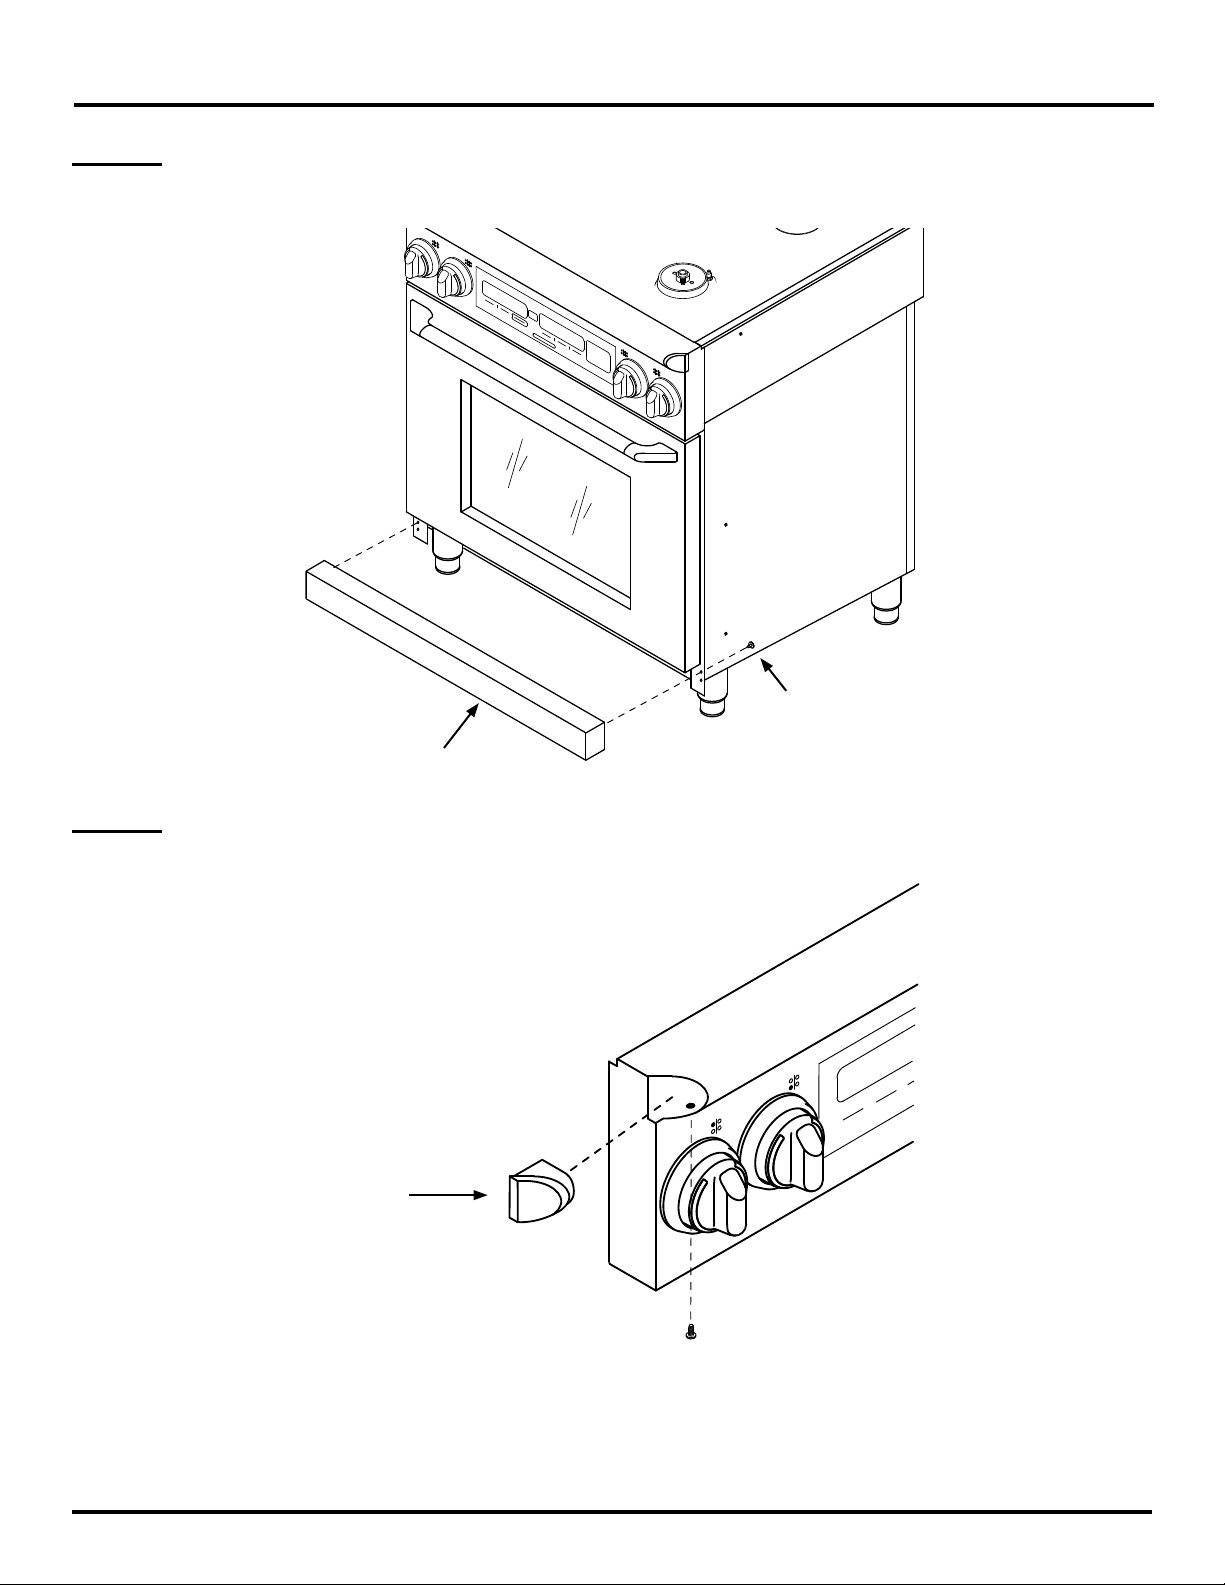
STEP 2: Close the door. Remove and retain the two screws from the back of the kick panel as
shown below. Pull the kick panel free from the front of the unit.
Remove and
retain screw,
Kick Panel
both sides
STEP 3: Remove the left end cap retaining screw from under the rim of the control panel and re-
move the end cap.
End Cap
Page 2
Page 3

STEP 4: Hold the left side panel in
position on the side of the
range. Locate the center
mounting hole. Remove and
retain the screw attached to
the chassis beneath it.
STEP 5: Insert the tabs on the trim
piece into the slots on the
range.
3-Inch Side Panel Kit
Hex screw
Side Panel
Torx screw
Hex screw
Torx screw
Hex screw
Front Panel
STEP 6: Use the hex head screw (83023) removed from the side, a Torx head screw removed from
the kick panel and the hex screws from the kit to attach the side panel to the range. Three
(3) hex head screws attach the side. One (1) Torx head screw (83709) inserts through the
end cap hole to attach the top of the side panel. One (1) Torx head screw (83709) inserts
through a hole in the front panel to attach the bottom of the side panel.
STEP 7: Reinstall the end cap.
STEP 8: Repeat steps 3 to 7 for the
right side panel. NOTE:
There is an additional hex
screw (83023) in the kit
for the right side panel
because the center mounting screw is not reused as
with the left side (do not
Space between
door and oven
opening
Reattach screws
perform step 4).
STEP 9: Reattach the kick panel
to the range by snapping
the ball studs on the back
of the panel into the holes
on the front panel of the
range. Open the door and
reattach the kick panel top
screws removed in step 1.
Page 3
Kick Panel
Page 4

Dacor ● 1440 Bridge Gate Drive, Diamond Bar, CA 91765 ● Tel: (800) 793-0093 ● FAX: (626) 403-3130 ● www.Dacor.com
 Loading...