

Note: Front and Back cover can be printed in large quantities and used for nearly all of our manuals.
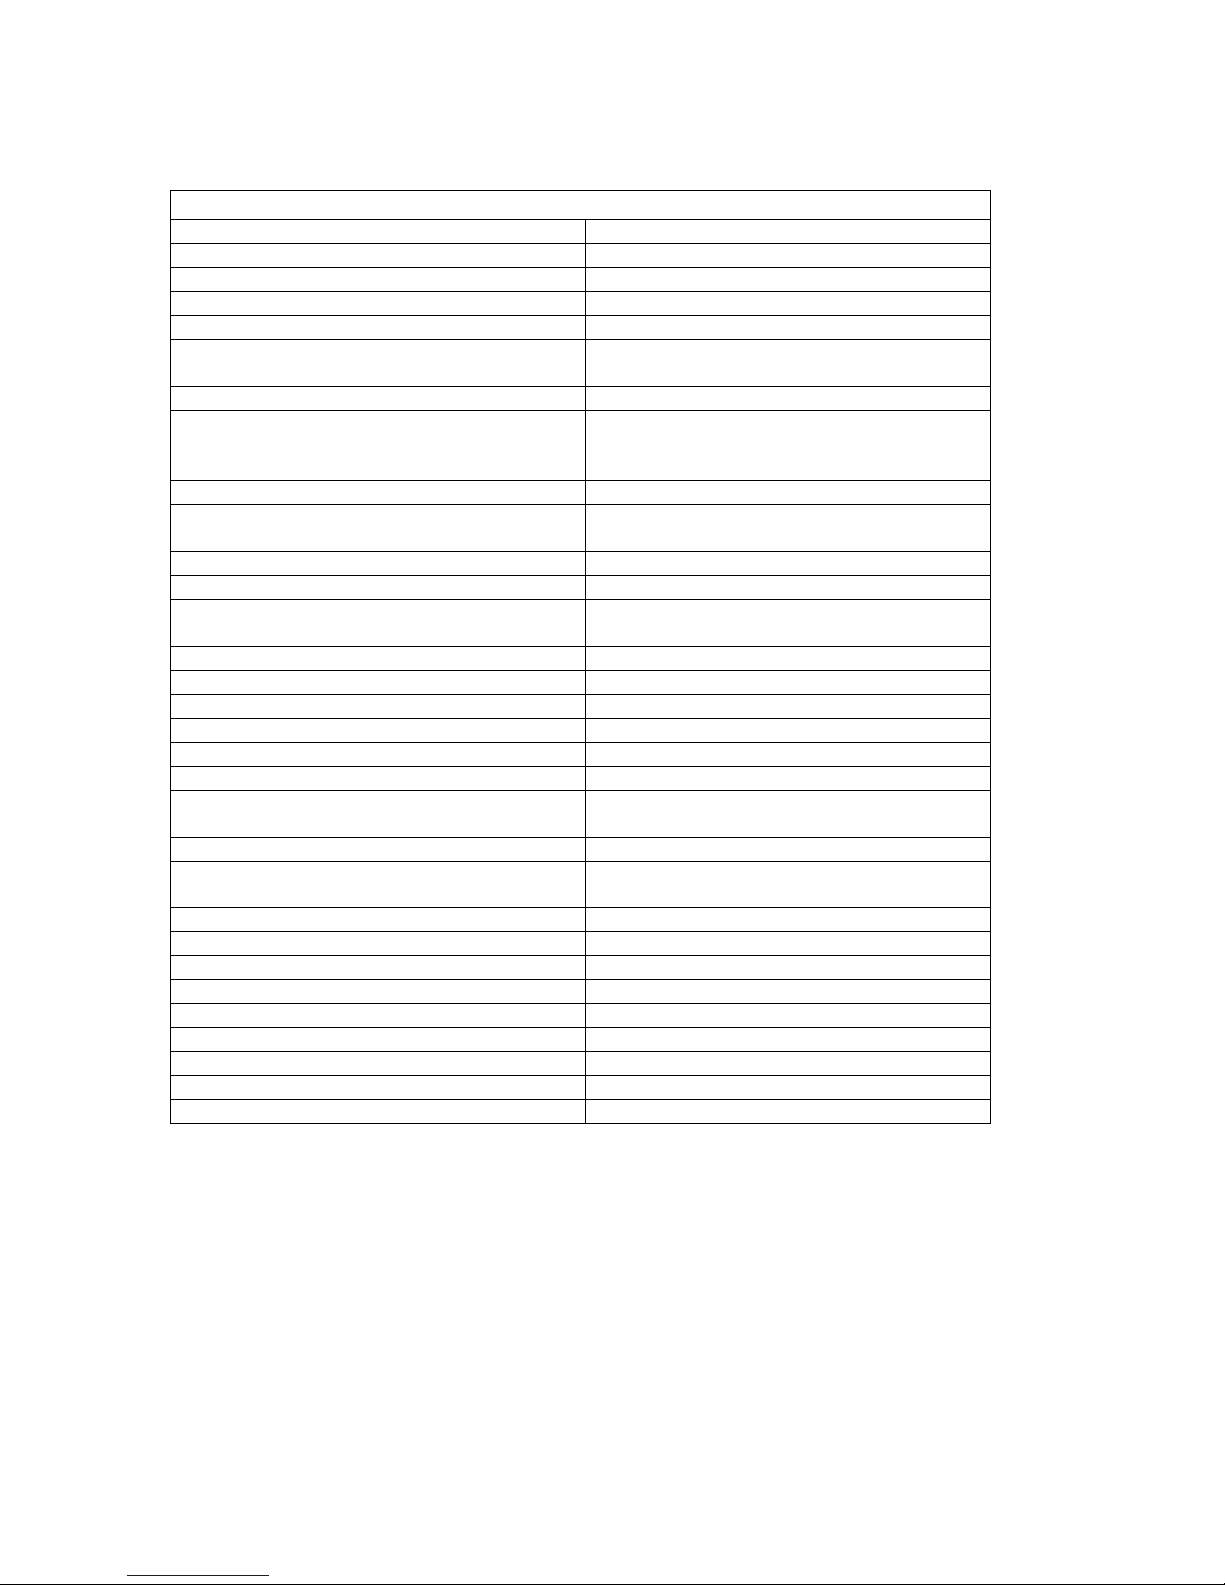
Manual Print Specs
Part number LT-03150 Rev B to C
Manual title Cybex 500C&R Owner’s Manual
Binder Black Plastic Spiral
Cover 10 point Carolina, coated 2 sides (or Cybex
approved equiv.)
Colors PMS 228 and Black
Cover Die Cut Rectangle cut out of Front Cover 4” x 1.25”as
indicated in the file. Black line for reference
only.
Files combined. The files will be supplied as separate chapters.
The vendor is to combine files as needed.
Number of inside 8 ½ x 11 pages 13 sheets
Definition: 1 page = Single sided
2 pages = 1 sheet
Number of 11 x 17 pages 0
Paper stock for inside pages 60# Cougar or Cybex approved equiv.
Text Color Black
Warranty Card 8 ½ x 11 with perf – BRC (business reply card)
Black over black
67# white vellum or 90# index or Cybex
approved equiv.
Print Quality Digital = minimum of 600 dpi
Film = minimum of 150 line screen
Proofing Required. Digital proofs preferred.
File Types QuarkXPress or pdf
Other Requirements 3 hole drilled

Cybex and the Cybex logo are registered trademarks of Cybex International, Inc.
DISCLAIMER: Cybex International, Inc. makes no representations or warranties regarding the contents of this manual. We
reserve the right to revise this document at any time or to make changes to the product described within it without notice or
obligation to notify any person of such revisions or changes.
© 2001, Cybex International, Inc. All rights reserved. Printed in United States of America.
10 Trotter Drive Medway, MA 02053 • 800-766-3211 • 508-533-4300 • FAX 508-533-5183
www.eCybex.com • techhelp@cybexintl.com • techpubs@cybexintl.com • LT-03150 Rev C • October 2002
Cybex 500C Cycle & 500R Recumbent Cycle
Owner’s Manual
Cardiovascular Systems
Part Number LT-03150 Rev C

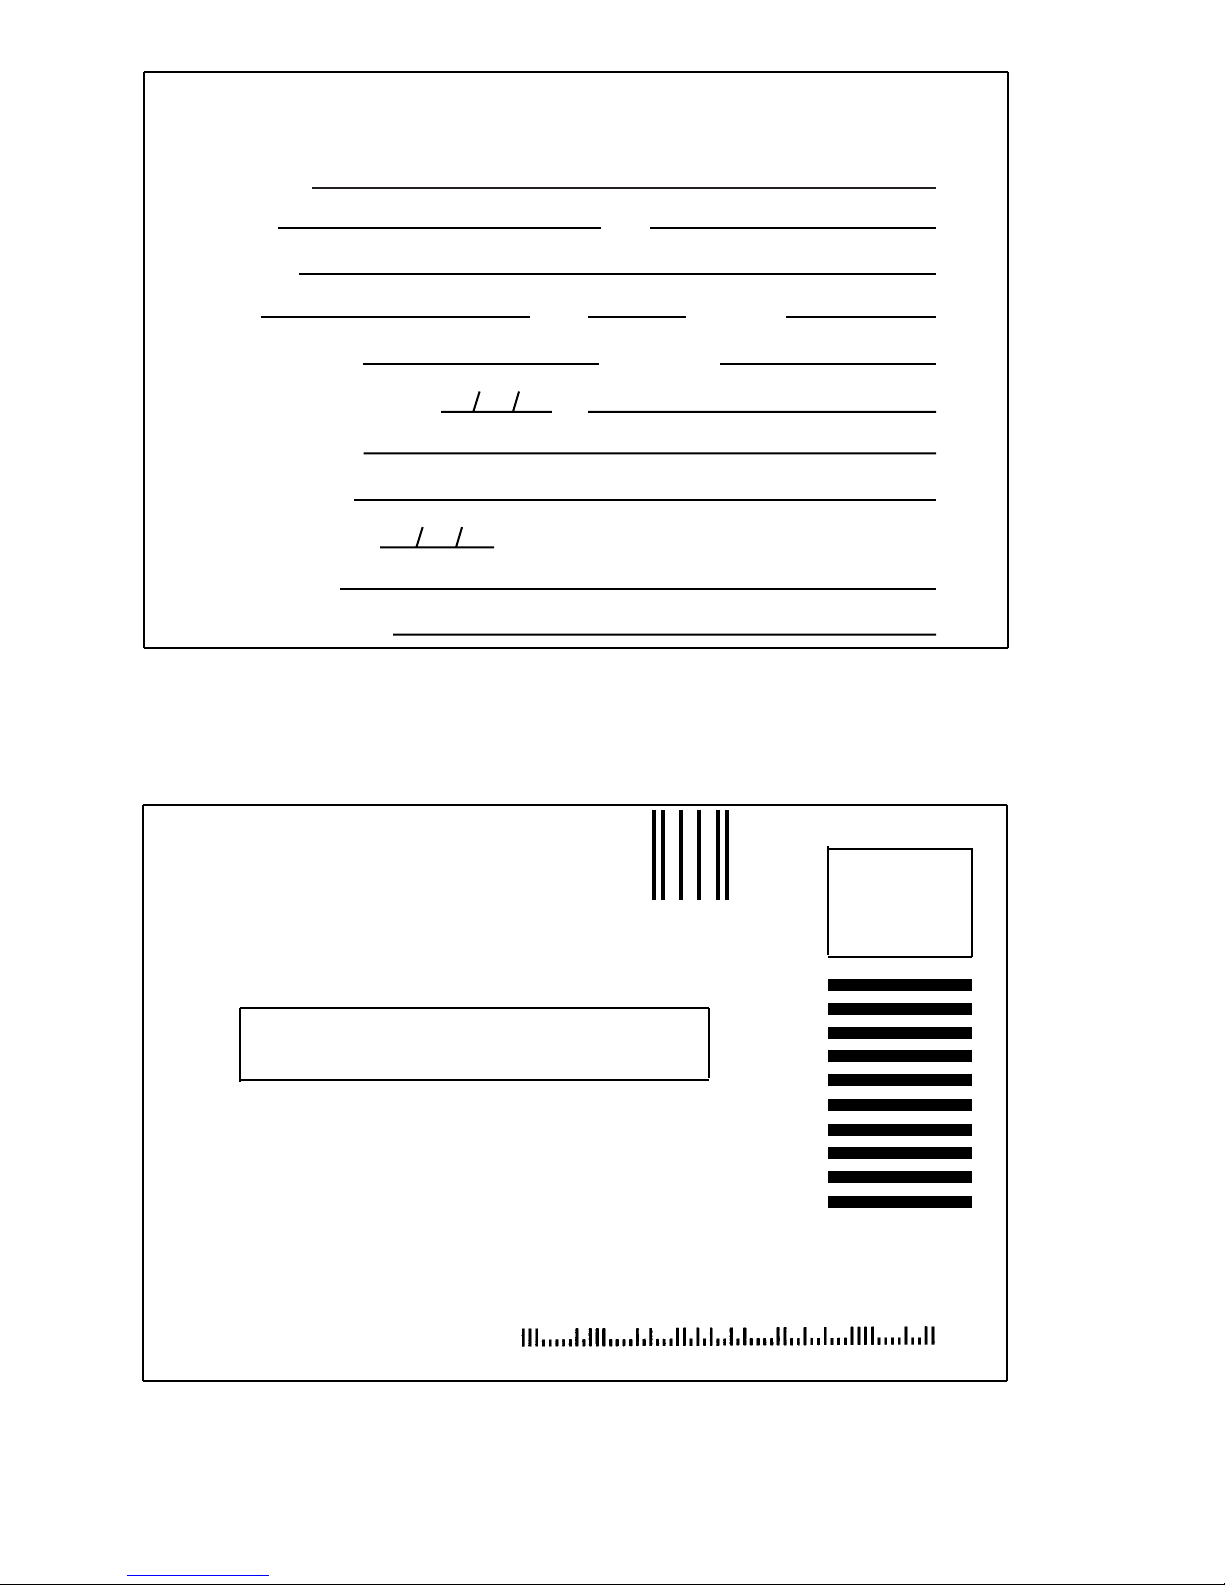
To validate this warranty, complete the following information and return this card
to Cybex within ten days of equipment installation.
Company:
Name: Title:
Address:
City: State: Zip Code:
Installation Date (m/d/y):
Serial Number:
Cybex International
10 Trotter Drive
Medway, MA 02053-9934
NO POSTAGE
NECESSARY
IF MAILED
IN THE
UNITED STATES
Date of purchase:
Dealer/Other:
City/State/Country:
Phone: ( ) Fax: ( )
By:
Model Number:
Where did you purchase your CYBEX equipment?
IMPORTANT WARRANTY INFORMATION
BUSINESS REPLY MAIL
FIRST CLASS MAIL PERMIT NO. 73 MEDWAY, MA
POSTAGE WILL BE PAID BY ADDRESSEE

About This Manual
An Owner’s Manual, part number LT-03150 is shipped with each 500 C/R Cycle.
Refer to this manual for 500C Cycle, 500R Recumbent, BikeMax 1000 Cycle and BikeMax
1000 Recumbent models.
NOTE: The BikeMax1000 Cycle/Recumbant Owner’s manual, part number LT-03086 is no
longer available.
To purchase additional copies of the 500C and 500R Owner’s Manual, part number LT-03150,
contact Cybex Customer Service at 888-462-9239 or 508-533-4300. To contact Cybex with
comments about this manual, you may send an email to techpubs@cybexintl.com.
Important Voltage Information
If you are using the optional power adapter make sure that the optional adapter has the
correct voltage requirements for your area.
The power requirements for the optional adapter are;
• 110V - 115 VAC ±10%, 60 Hz
• 220V - 220 VAC ±15%, 50 Hz/60 Hz grounded circuit
! WARNING: Do not attempt to use this unit with an extension cord.
IMPORTANT SAFETY INSTRUCTIONS: Read and Save
1. Read all instructions before using this equipment.
2. DANGER: DISCONNECT FROM SUPPLY CIRCUIT BEFORE OPENING.
AVERTISSEMENT: DECONNECTEUR DU CIRCUIT D'ALIMENTATION AVANT D'OURVRIR.
3. Unplug all electrical appliances before cleaning and after use.
4. Close supervision is necessary when this equipment is used by or near children or disabled
persons.
5. Use this equipment for the intended use as described in this manual.
6. Never operate equipment that has a damaged power cord or plug.
7. Never drop or insert any object into any opening on this equipment.
8. Do not use outdoors.
9. To disconnect, switch off power switch (just above power cord plug), then remove plug
from outlet.
In the presence of power line "noise" such as fast transients, the equipment may require that
power be switched off and then back on again, to resume normal operation.
IMPORTANT GROUNDING INSTRUCTIONS
Warning:
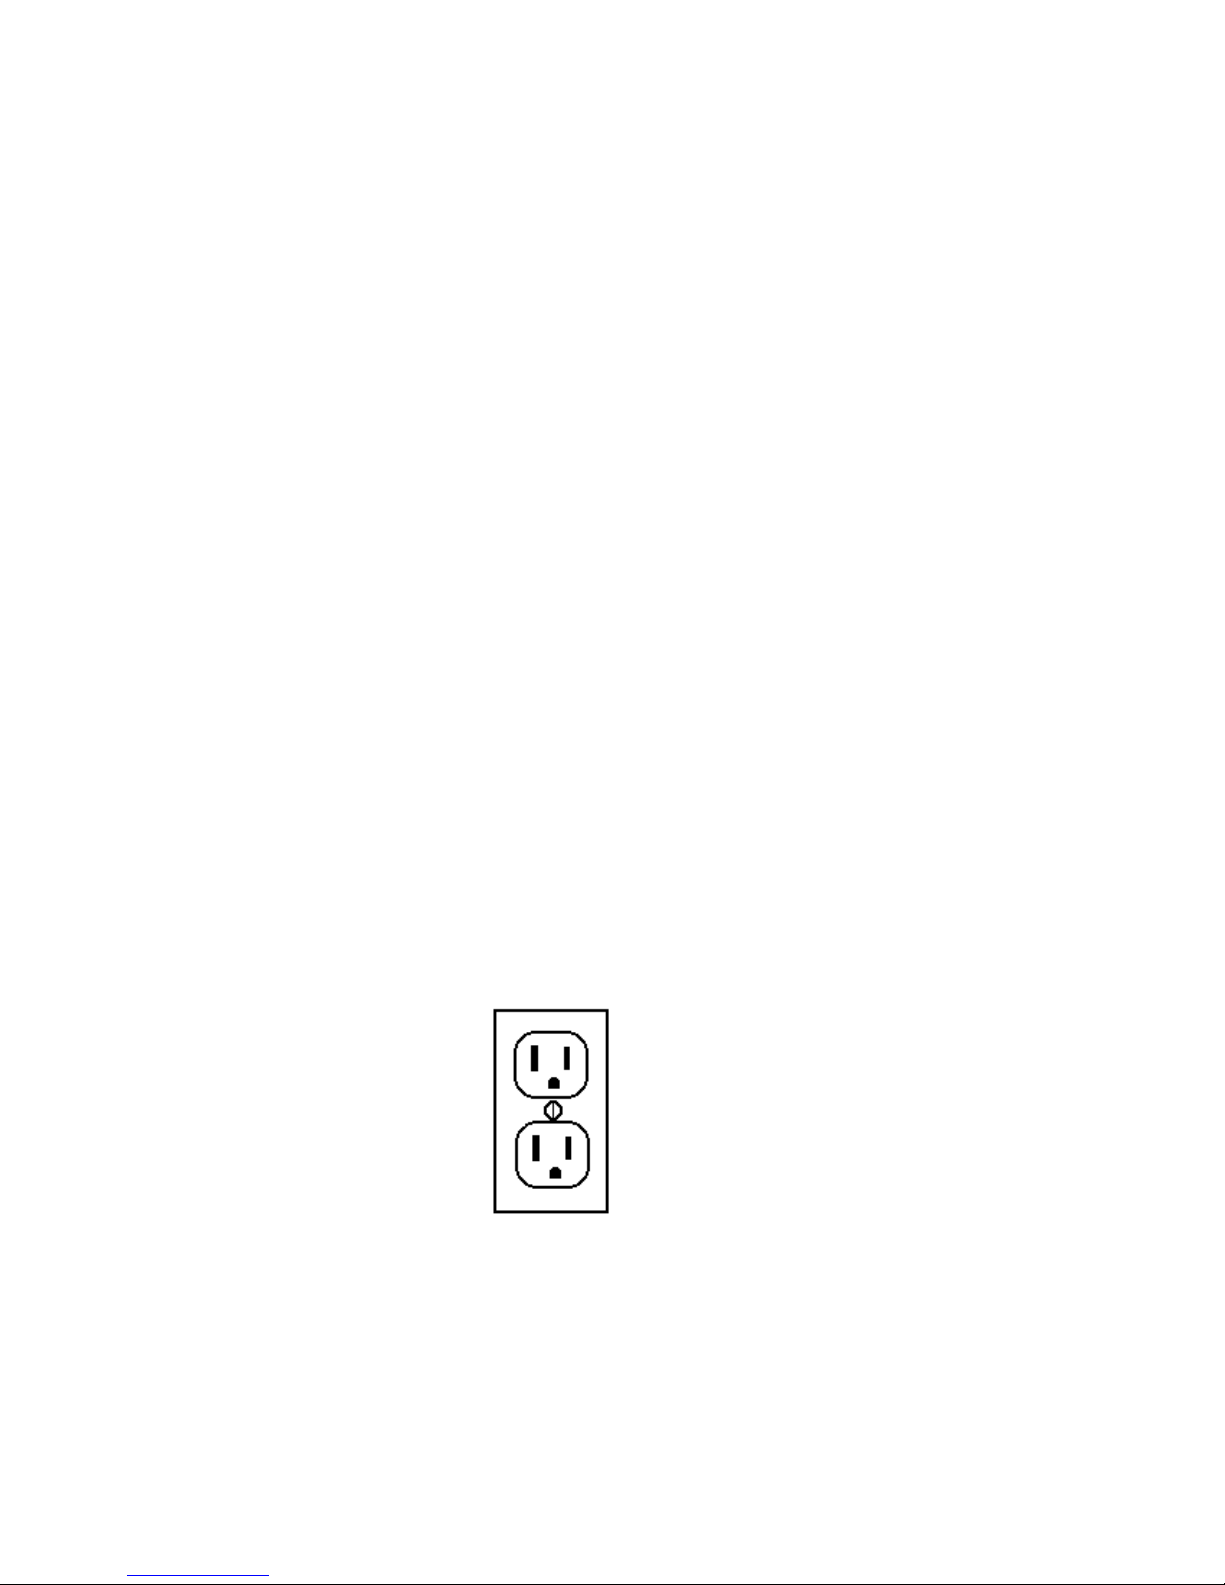
Connect This Equipment to a Properly Grounded Outlet
ATTENTION -
BRANCHER CET EQUIPMENT UNE PRISE CORRECTEMENT RELIEÉ À LA TERRE
This equipment is for use only on a nominal 120-volt circuit and has a grounding outlet that
looks like the outlet illustrated in Figure A, below. This equipment must be grounded. No
adapter should be used. It has been supplied with a cord having an equipment grounding
conductor and plug. This plug must be plugged only into a properly installed grounded outlet.
Failure to do so can result in the risk of electrical shock. Do not modify the plug provided with
this product-if it does not fit, have a qualified electrician install the proper style outlet.
© 1999 Cybex International
All other trademarks and product names are the property of their respective holders.
Figure A - Grounded Outlet

Table Of Contents
Chapter 1
Introduction
The Cybex 500 Series Cycle ....................................1-1
Chapter 2
Assembly and Setup
Assembly Overview ...........................................2-1
Unpacking Your 500 Series Cycle ...............................2-1
Assembling the 500R Recumbent Cycle..........................2-2
Parts List for the 500R Recumbent Cycle .....................2-2
Attaching the Seat Back Assembly ...........................2-3
Attaching the Display Upright................................2-3
Attaching the Display Console ...............................2-3
Installing the Optional Polar Heart rate Receiver ...............2-5
Assembling the 500C Cycle (Upright) ............................2-5
Parts List for the 500C Cycle................................2-5
Attaching the Display Upright................................2-6
If Your Cycle Has a Polar Heart Rate Receiver .................2-6
Attaching the Handlebars ...................................2-7
Attaching the Display Console ...............................2-7
Plugging in the 500C Cycle and 500R Recumbent Cycle ..........2-7
Setting Options ...............................................2-8
Chapter 3
Let’s Ride
Overview .....................................................3-1
Before You Start ..............................................3-1
Bicycle Mode and Exercise Mode ............................3-2
Your Workout ..................................................3-2
Manual Mode ..............................................3-3
Using the Preset Programs ..................................3-4
The Workout Display...........................................3-5
Workout Summary ..........................................3-7
Chapter 4
The Heart Rate Program
Heart Rate Monitor ............................................4-1

The Cybex 500 Series Cycle
Welcome to the Cybex 500 series cycle, the perfect cycle for any health club or other group
exercise environment. Durability, ease of use, flexible programming, and group racing
capability make the 500R Recumbent Cycle and 500C Cycle (upright) ideal for both individual
and partnered workouts.
Page 1-1
Chapter 1 - Introduction
500R Recumbent Cycle 500C Cycle

Features include:
• Simple to Use: The console leads you through the simple steps to start a workout. Or just
get on and start pedaling.
• Continuous Performance Monitoring: The convenient, easy-to-read console shows
the progress of the workout-distance, speed, calories burned, and more.
• Built-in Workout Profiles: Three standard workouts offer combinations of calorie
burning, strength training, and endurance training to satisfy almost everyone.
• Optional Heart Rate Programs: With its optional heart rate monitor, you can program a
workout to reach and keep you at your optimal heart rate.
• Setup Mode: You can change the default settings and limits to match the way
you want to operate.
So, the 500 series cycle is ideal for:
• Someone who's never used a cycle before uses manual mode, choosing a gear and
pedaling speed to match what he or she can do.
• Regular exercisers who want to push themselves can use the standard programs
to increase strength and endurance.
• Serious athletes who know their abilities and needs can custom-tailor the exact
workouts they want.
Page 1-2
Cybex 500C Cycle and 500R Recumbent Owner’s Manual

This chapter describes how to unpack and assemble your 500 series cycle and how to use
setup mode to configure the cycle for your situation.
Assembly Overview
It's easy to assemble the 500C Cycle (upright) and 500R Recumbent Cycle - it will probably
take about 45 minutes. You need these common tools:
• 3/16" Allen wrench
• 7/16" Wrench or socket wrench and ratchet
• #2 Phillips screwdriver
• ½" Box-end or open-end wrench (if you have the optional Polar heart rate monitor for the
500R Recumbent Cycle)
Here's an overview of the steps in the assembly:
1. Unpack your 500 series cycle and make sure you have all the parts.
2. Follow the detailed assembly instructions. There are separate sections on assembling the
500C Cycle and the 500R Recumbent Cycle.
3. If you choose to, plug in your cycle.
Unpacking Your 500 Series Cycle
Use the 7/16" socket or wrench to remove the brackets holding the chassis feet to the pallet.
Remove all the other parts from the shipping carton. Make sure you have all the parts by
checking against the parts list for your type of cycle - recumbent or upright.
Page 2-1
Chapter 2 - Assembly and Setup

A
1
8
3
10
2
DETAIL A
7
12
4
9
6
5
Figure 3. Attach Handlebar and Seat Back Assembly
Cybex 500C Cycle and 500R Recumbent Cycle Owner’s Manual
Page 2-2
Figure 1
Please refer to Figure 1 (shown below) for “Attach Seat Back Assembly” and “Attach the
Display Upright” sections listed on page 2-3.
Assembling the 500R Recumbent Cycle
Parts List for the 500R Recumbent Cycle
The following parts are included with the 500R Recumbent Cycle:
Part# Qty Description
LT-03086 1 Owner’s Manual
HX-00438 1 Wrench, 3/16 Hex Key
HS-13948 4 5/16-18 x 3/8” Screw
HS-41107 4 5/16-18 x 1-1/2” Screw
HS-41109 7 #10-24 x 3/4” Screw
HW-53018 6 Lock Washer
AX-61309 1 Seat Back Assembly
AX-62026 1 Display Upright
Varies 1 Configuration Kit
Varies 1 Display Console
Varies 1 Main Chassis Base
Varies 1 Configuration Kit

Attaching the Seat Back Assembly
As shown in Figure 1 on the previous page, attach the seat back assembly (2) to the seat
shuttle with four 5/16 x 1-1/2 button head cap screws (9) and lock washers (14), using a
3/16" hex wrench. NOTE: If you have difficulty aligning the screws, loosen the four button-
head cap screws on the back of the seat. Attach seat supports to the seat shuttle and fully
tighten, then tighten the screws on the seat back.
Attaching the Display Upright
All of the cable connections are shown in detail A of Figure 1. Connect the two ends of the
ribbon cable (5 and 6) which emerge from the bike base and the display upright (3). If you
have the Polar heart rate monitor option, connect the ends of the Polar cable (4 and 9). To
help support the display upright, move the seat forward and rest the handlebar of the upright
on the seat.
Loosen the top cover screw (see Detail A of Figure 1). Feed excess cable into the upright. Lift
the display upright and slide it down over the neck, taking care not to pinch the ribbon cable.
Fasten the display upright using three 5/16-18 x 3/8” button-head cap screws (8) and lock
washers (12). Tighten the top cover screw at the front of the cycle.
Attaching the Display Console
As shown in Figure 2 on the next page, attach the ribbon cable from the display upright to
the back of the display console (9). The connector is keyed so you cannot insert it backwards.
Attach the green ground cable to the single flat connector next to the ribbon cable connector.
Make sure the cables are firmly connected before continuing.
Cybex 500C Cycle and 500R Recumbent Cycle Owner’s Manual
Page 2-3

Cybex 500C Cycle and 500R Recumbent Cycle Owner’s Manual
If you have the optional Polar heart rate monitor, attach the heart rate monitor cable to
the back of the console. See Figure 2, Detail A.
Use the four Phillips-head screws (10) to attach the display console to the console back-plate.
See Figure 3 (located on the next page).
Important: You must still screw the three screws into the open holes in the back plate to
protect the electronics from the environment.
Page 2-4
Figure 2
©

Remove the plate at the rear of the
cycle (item 3 shown in Figure 3). Plug
the cable, already inside the seat rail,
into the Polar receiver (2). Loosen nut
(4) on inside of seat rail, and slide the
Polar receiver bracket onto the bolt (8)
shaft. Tighten the nut to secure the
bracket, and replace the rear plate (3).
See Figure 3.
Assembling the 500C Cycle (Upright)
Parts List for the 500C Cycle
Part# Qty Description
LT-03150 1 Owner’s Manual
HX-00438 1 Wrench, 3/16 Hex Key
HS-41106 7 #10-24 x 1/2” Screw
HS-41072 4 5/16-18 x 3/4 Button Head Screw
HS-41126 3 5/16-1” Button Head Screw
HW-53018 7 Lock Washer
AX-61026 1 Termination Plug
AW-61033 1 Communications Cable
AF-61351 1 Handlebar
AX-70387 1 Display Upright
Varies 1 Configuration Kit
Varies 1 Display Console
Varies 1 Main Chassis Base
Varies 1 Configuration Kit
Page 2-5
Cybex 500C Cycle and 500R Recumbent Cycle Owner’s Manual
Figure 3
If Your Cycle Has a Polar Heart Rate Receiver

Attaching the Display Upright
See Figure 4 for this step. Lay the display upright on the ground and plug the ribbon cable
from the upright to the ribbon cable in the chassis. Tuck the cables inside the chassis
upright tube to make sure they don't get pinched when you attach the upright. Slide the
upright down over the upright on the chassis. Using a 3/16" hex wrench, secure them with
three 5/16" by 1" button-head screws (HS-41126) and washers (HW-53018). Stand up the
chassis/display upright combination.
If Y
our Cycle Has a Polar Heart Rate Receiver
Remove the lower three round plugs from the display upright. Find the Polar cable in the
configuration kit (it's the short cable with small brown connectors on each end). Feed the
unlabeled end of the cable through the largest of the three holes until it emerges through the
hole in the display console mounting plate. The end with the "POLAR" label should stick out
of the lower part of the display upright.
Plug the "POLAR" end of the cable into the receiver module. Push the cable and connector
into the frame hole so the receiver module rests against the display upright. Attach the
receiver to the upright with the two provided screws.
Cybex 500C Cycle and 500R Recumbent Cycle Owner’s Manual
Page 2-6
Figure 4

Attaching the Handlebars
As shown in Figure 4, detail A (located on the previous page), use the 3/16" hex wrench
to attach the handlebar to the console back-plate with four 5/16" button-head screws
(HS-41072) and lock washers (HW-53018).
Attaching the Display Console
Remove the display console from the configuration
kit Attach the ribbon cable from the display upright
to the back of the display board. The connector is
keyed so you cannot insert it backwards. Attach the
green ground cable to the single flat connector next
to the ribbon cable connector. Make sure the cables
are firmly connected before continuing. See
Figure 5.
If you have the Polar heart rate monitor
option, attach the heart rate monitor cable
to the back of the console.
Plugging in the 500C Cycle and 500R Recumbent Cycle
Because of its alternator design, you do not need to plug your 500C Cycle and 500R
Recumbent Cycle into a wall socket; it generates all the electricity it needs from the power of
your pedaling. An optional power adapter lets you plug the 500C Cycle and 500R
Recumbent Cycle in if you want; this makes some features easier to use. Simply plug the
adapter into the outlet on the front (wheel side) of the 500C Cycle and 500R Recumbent
Cycle. There is no power switch; you may unplug the adapter to turn off the display
(normally you can leave it on all the time).
Cybex 500C Cycle and 500R Recumbent Cycle Owner’s Manual
Page 2-7
©
Figure 5
Figure 6
Use the four Phillips-head screws from the
configuration kit to attach the display console
to the console back-plate. See Figure 6.
Important: You must still screw the three
screws into the open holes in the back plate to
protect the electronics from the environment.
HS-41006

Cybex 500C Cycle and 500R Recumbent Cycle Owner’s Manual
Page 2-8
Setting Options
The 500 series cycle offers an easy-to-access setup menu to let you match the cycle's
default settings and limits to your users' needs and the way you want to run your facility. You
can set the maximum workout length, the language and measurement units used on the
display, and more.
To set options:
1. Enter setup mode by holding down the Switch Display key while pedaling to activate the
console. You must keep pedaling while you change the settings.
2. For each of the following settings, use the up and down arrows to choose the value you
want, then press Enter to move on to the next option.
• Longest Workout Time ("Long Prog"): The longest time a user is allowed to set for his
or her workout. The original setting is 20 minutes. You can change this up to the
absolute maximum of 60 minutes.
• Default Workout Time ("Def Prog"): This is the default time shown when a user begins
a workout. The factory setting is 20 minutes; you can set this as high as the Maximum
Workout Time.
• Idle Time ("Until Idle"): How long the bike remembers workout information after a
work out, or if someone stops during a workout. You can set this to 30 seconds, one
minute, or two minutes. You can also choose to have no idle time; the bike will
remember the information until someone starts a new workout.
The idle time setting is used only if you have your 500 series cycle plugged in! If
you are using pedaling power to operate the console, 500C Cycle and 500R
Recumbent Cycle can remember workout information only for about 10 seconds after
someone stops pedaling.
• Always Prompt or Get On and Go: If you choose "Get On and Go," a user can get on
the 500 series cycle and start a manual workout without entering any workout
information. The default is "Full Set Up."
When a user chooses "Get On and Go" operation, the 500C Cycle and 500R
Recumbent Cycle uses the default workout length (the one set as "First Workout
Time").
• Key Beep: Should the console keys beep when pressed? Choose Yes or No
• USA Readout, Euro, or International ("Intl"): The USA readout uses miles for distance
and calories/hour for power; the Euro readout uses metric units for distance and
watts for power; the Intl readout uses metric units for distance and calories/hour for
power.
3. When you're done setting options, press the Clear key twice to save your settings and
leave setup mode.
If you decide not to change the settings, stop pedaling and let the console turn off with
out leaving setup mode. All settings keep their previous values.

So far, we've discussed what the club or facility owner needs to do to get the cycle ready to
use. This chapter describes how to use it: what each exerciser needs to do to get the most
out of his or her workout.
Overview
This is how you work out on the 500C Cycle and 500R Recumbent Cycle.
1. Get on and start pedaling to activate the console.
2. Enter how long you want to work out.
3. Select manual mode or a program.
4. Choose your effort level.
5. Enjoy your workout!
During your workout, watch your progress on the console; if you want, you can change the
pedaling resistance or program at any time. When you're done, the 500C Cycle and 500R
Recumbent Cycle shows information about your total workout: distance pedaled, calories
burned, and more.
The rest of this chapter tells you more about your choices at each of these steps. The optional
heart rate program is discussed in Chapter 4.
Before You Start
To get the most out of a 500C Cycle and 500R Recumbent Cycle workout, be sure to follow
these general exercise rules:
• Check with your doctor before starting any new exercise program.
• Wear comfortable workout clothing.
• Drink plenty of water or other fluids before, during, and after exercising.
• Stay loose and relaxed while working out.
• If you start to hurt, stop pedaling.
When pedaling, you should have a smooth, even stroke, using both legs equally. Adjust the
seat so your knees are still slightly bent at full extension.
To adjust the 500C Cycle (upright) seat: (1) Pull the adjust pin out and allow the seat to
drop to the lowest position. (2) Place your feet in the pedals and stand up above the
seat. (3) Grasping the "horn" of the seat, pull the seat up underneath you, allowing the
ratcheting adjust mechanism to lock into the correct position. To adjust the 500R
Recumbent Cycle seat, use the handle under the right side of the seat.
Chapter 3 - Let’s Ride
Page 3-1

Cybex 500C Cycle and 500R Recumbent Cycle Owner’s Manual
For best results, pedal at 64 RPM or faster.
Bicycle Mode and Exercise Mode
The 500 series cycle offers two types of controlled resistance to give you your choice of
workout. In manual mode, the 500C Cycle and 500R Recumbent Cycle is in bicycle mode;
during a program (including the heart rate program), it is in exercise mode.
• Bicycle mode simulates riding a real bicycle across level ground. You choose from 21 gear
settings; at higher settings, there is more resistance-it's harder to pedal, but you go farther
for every pedal revolution. At any given setting, you can do more work by pedaling faster.
You can reach the highest work level only at high pedaling speeds.
Higher speeds require much more work than lower: 20 mph, for example, takes three
times as much effort as 10 mph. At high speeds, you can stop pedaling temporarily and
"coast," just as on a real bicycle.
• In exercise mode, the level you set determines the amount of work you do when you
pedal. If you change your pedaling speed, the 500C Cycle and 500R Recumbent Cycle
adjusts the resistance so you are doing the same amount of work. If you want to do more
or less work, you change the setting, not your pedaling speed. This lets the 500C Cycle
and 500R Recumbent Cycle control the amount of work you are doing at any time, so you
get the maximum benefit from the various programs.
If you slow your pedaling speed below 64 RPM, the 500C Cycle and 500R Recumbent
Cycle decreases the resistance (and workload). This is necessary so you can begin
pedaling from a stop.
In summary: In manual mode, you are in bicycle mode: changing the level setting changes the
resistance on the pedals, just like shifting gears on a real bike. During programs, you are in
exercise mode: changing the level changes your total workload; the 500C Cycle and 500R
Recumbent Cycle adjusts the resistance on the pedals to keep the work constant as you
change pedaling speeds.
Your Workout
There are two basic ways to use the 500C Cycle and 500R Recumbent Cycle: in manual
mode or using one of the preset workout programs. The following sections tell you how to
use each of these modes.
500C Cycle and 500R Recumbent Cycle's heart rate control program is covered in Chapter 4.
These instructions assume you are using the bike's alternator feature: the cycle is not
plugged into the wall; it uses the power generated by pedaling to light the console. If
you do have the cycle plugged in, you don't have to start pedaling before choosing a
workout mode, and the length of time it remembers information if you pause or after a
workout is determined by the idle time setting, as described in Chapter 2.
Page 3-2

Manual Mode
In manual mode, you tell the 500C Cycle and 500R Recumbent Cycle how long you want to
work out; you can adjust your pedaling speed and level ("gear") at any time during the
workout. Follow these steps:
1. Get on the 500 series cycle and start pedaling to activate the console.
If your 500C Cycle and 500R Recumbent Cycle is set for "Get On and Go" operation,
it will automatically go into manual mode and use the default workout length. To
change the length, press Clear twice, then continue with step 2.
2. The display will show the default workout length in the "Speed" field, and the light next to
"Time" at the right of the console will flash. You can change the workout length using the
up and down arrow keys, up to the maximum for this 500C Cycle and 500R Recumbent
Cycle. Press Enter.
3. The light next to "Program" now flashes. Press the Manual program key.
4. Select the effort level you want by pressing
the up or down arrow. If you hold the key
down, the setting will continue to change.
Pick a level that gives you a good workout
at a comfortable pedaling speed without
causing pain. You can adjust the level at
any point in your workout - if you feel like
you're straining, decrease the level to
make it easier to pedal. Remember, you're
in bicycle mode during a manual workout;
setting a new level changes the resistance
on the pedals.
5. Enjoy your ride!
During your workout, the console shows your progress and statistics about your workout. For
details about these displays, see the section "The Workout Display," later in this chapter.
You can change from manual mode to one of the programmed workouts during your
workout. Just press the key for the program you want.
If you need to pause during a workout, the cycle will remember your workout information for
about 10 seconds. If you stop for longer than this, the 500C Cycle and 500R Recumbent
Cycle loses the information, and you'll have to start a new workout.
When you finish, you see a workout summary giving statistics for your total workout. See "The
Workout Display," below, for a description.
Cybex 500C Cycle and 500R Recumbent Cycle Owner’s Manual
Page 3-3
Manual key
Time and
Program
indicators

Using the Preset Programs
The 500C Cycle and 500R Recumbent Cycle includes three preset workout profiles you can
choose from. These profiles vary the cycle level at set intervals to maximize either fat burning,
strength training, or endurance building. During a program, the 500C Cycle and 500R
Recumbent Cycle is in exercise mode; if you change your pedaling speed, it varies the
resistance to keep your workload at the same effort level for that part of the program. To use
a workout program:
If you have the heart rate monitor option, there are four. The heart rate programs are
described in Chapter 4.
1. Get on the 500C Cycle and 500R Recumbent Cycle and start pedaling to activate the
console.
If the 500C Cycle and 500R Recumbent Cycle is set for "Get On and Go" operation, to
use the default workout length, just get on the bike and start pedaling, then press the
program key. If you want to set the workout length, start pedaling, press Clear twice,
then continue with step 2.
2. The display will show the default workout length in the "Speed" field, and the light next to
"Time" at the right of the console will flash. You can change the workout length using the
up and down arrow keys, up to the maximum for the 500C Cycle and 500R Recumbent
Cycle. Press Enter.
When you change the length of a program, the 500C Cycle and 500R Recumbent Cycle
intelligently adjust the program's profile to match your setting. For the fat burning and
strength programs, it adds or removes repetitions of the center section; for the endurance
program, it increases or decreases the length of the center section. The warm-up and
cool-down periods stay the same. If you set the workout length to five minutes, you'll do
just the warm-up and cool-down.
3. The light next to "Program" now flashes. Press the key for the program you want. The
graphs on the program keys show a "profile" of each workout. The higher bars indicate
higher workloads. Each program begins with a warm-up and ends with a cool-down
period; as you can see, the middle sections vary according to the type of workout.
4. Select the effort level you want by pressing the up or down arrow. (If you hold the key
down, the setting will continue to change.)
This adjusts the entire program up or down.
Pick a setting that gives you a comfortable
workout, without causing pain at the hardest
parts of the program. You can adjust the
level at any point in your workout if you
feel like you're straining, lower the level to
decrease the effort needed.
5. Enjoy your workout.
Page 3-4
Cybex 500C Cycle and 500R Recumbent Cycle Owner’s Manual
Time and
Program
Indicators
Program keys

Cybex 500C Cycle and 500R Recumbent Cycle Owner’s Manual
While you're pedaling, the console shows your progress and statistics about your workout. For
details about these displays, see the section "The Workout Display," later in this chapter.
You can change to manual mode or another program during your workout. Just
press the key for the program you want.
If you need to pause during a workout, the cycle will remember your workout information for
about 10 seconds. If you stop for longer than this, the 500C Cycle and 500R Recumbent
Cycle loses the information, and you'll have to start a new workout.
When you finish, you see a workout summary giving statistics for your total workout. See "The
Workout Display," below, for a description.
The Workout Display
During your workout, the 500C Cycle and 500R Recumbent Cycle console keeps you
continuously updated about your progress. The Progress Indicators at the top of the console
and the Workout Graph in the middle give you different views of your workout.
• The three Progress Indicators show six categories of information. At the beginning of a
workout the three top categories are shown. Pressing the Switch Display button at the
right of the fields switches between categories; the lights over and under each field
indicate which information is currently displayed. If you hold down Switch Display for half
a second, the fields will alternate between categories every five seconds.
Page 3-5
Workout Graph
Switch Display
key

Cybex 500C Cycle and 500R Recumbent Cycle Owner’s Manual
The top three categories are:
Elapsed Time How long you've pedaled so far.
Calories Burned The number of calories you've burned in this workout.
Speed Your current speed in miles or kilometers per hour.
The three bottom categories are:
Heart Rate or If you have the heart rate monitor option, this is your current heart rate
Level in beats per minute. If you don't have the heart rate monitor, it is the
current speed setting for the cycle. In bicycle mode, this is the gear: the
amount of resistance on the pedals; in exercise mode, it's a measure of
the work you're performing.
Distance In miles or kilometers. This is based on the power required by an
average cyclist on a road bike on a level surface.
RPM Your current revolutions per minute
• The Workout Graph in the middle of the console uses columns of lights to show the
progress of your workout. In manual mode, each column represents 1/15th of your work
out and shows the highest speed you reached in that period.
In a program, the Workout Graph shows a detailed view of the current portion of your
workout: each column of lights represents a 15 second segment, so the entire display
covers 225 seconds (a little under four minutes). The height of the columns shows the
relative level (power required); the blinking column is where you are right now. As you go
through your workout, the blinking column moves slowly from left to right; when it reaches
the right-most column, your workout is almost over. For example:
The blinking column (shown as empty circles) indicates the workout is approximately half
over. The power required will stay the same for the next 90 seconds (six columns), then
decrease.
Page 3-6

Cybex 500C Cycle and 500R Recumbent Cycle Owner’s Manual
Workout Summary
If you keep pedaling to keep the console lit after your workout, the Progress Indicators show
"End," then alternate between the upper and lower sets of values (described above), so you
can see the totals for your workout.
This display will continue as long as you keep pedaling.
Page 3-7

Heart Rate Monitor
As an option, the 500C Cycle and 500R Recumbent Cycle includes a heart rate monitor
harness you can wear during a workout to continuously monitor your heart rate. In either
manual or program mode, the heart rate monitor merely gives you more information - it lets
you see your current heart rate at any time.
However, used with the 500C Cycle and 500R Recumbent Cycle Heart Rate Control program,
this option lets you design a workout tailored to your age and condition by gradually bringing
you to your target heart rate, then keeping you at that heart rate for the rest of the workout. To
use the heart rate program:
1. Get on your cycle and start pedaling to activate the console.
If the cycle is set for "Get On and Go" operation, start pedaling, press Clear twice,
then continue with step 2.
2. The display will show the default workout length in the "Speed" field, and the light next to
"Time" at the right of the console will flash. You can change the workout length using the
up and down arrow keys, up
to the maximum. Press
Enter.
3. The light next to “Program"
now flashes. Press the HR
Control key.
4. The light next to "Age"
flashes. Use the up and
down arrow keys to set
your age. Press Enter.
5. The display will show your
target heart rate (based on
your age) and the percentage
of your maximum heart rate.
Use the up and down arrow keys to set the target heart rate you want for this workout and
press Enter.
Over the first few minutes of your workout, your cycle will gradually build you up to your
target heart rate. It will then keep you at this rate until the cool-down period at the end of the
workout.
While you're pedaling, the fields at the top of the console show statistics about your workout.
For details about this display, see "The Workout Display" in Chapter 3. The workout graph
shows a horizontal line representing your target heart rate. Each column of lights is your heart
rate for a segment of the workout, moving from right to left. Each light represents ten beats
per minute. The blinking column is your current heart rate.
Chapter 4 - The Heart Rate Program
HR Control
Program key
Time,
Program,
Age and
Target
Indicators
Page 4-1

If you need to pause during a workout, the cycle will remember your workout information for
about 10 seconds. If you stop for longer than this, the cycle loses the information, and you'll
have to start a new workout.
When you finish, you see a workout summary giving statistics for your total workout and your
heart rate as you recover. See "The Workout Display" in Chapter 3 for a description.
Cybex 500C Cycle and 500R Recumbent Cycle Owner’s Manual
Page 4-2

 Loading...