

Page 1

CyberLink
ActionDirector
User's Guide
Page 2

Copyright and Disclaimer
All rights reserved.
To the extent allowed by law, ActionDirector IS PROVIDED “AS IS”,
WITHOUT WARRANTY OF ANY KIND, EITHER EXPRESS OR IMPLIED,
INCLUDING WITHOUT LIMITATION ANY WARRANTY FOR
INFORMATION, SERVICES, OR PRODUCTS PROVIDED THROUGH OR IN
CONNECTION WITH ActionDirector AND ANY IMPLIED WARRANTIES
OF MERCHANTABILITY, FITNESS FOR A PARTICULAR PURPOSE,
EXPECTATION OF PRIVACY, OR NON-INFRINGEMENT.
BY USING THIS SOFTWARE, YOU AGREE THAT CYBERLINK WILL NOT BE
LIABLE FOR ANY DIRECT, INDIRECT, OR CONSEQUENTIAL LOSS
ARISING FROM THE USE OF THIS SOFTWARE OR MATERIALS
CONTAINED EITHER IN THIS PACKAGE.
The terms and conditions here under shall be governed and
construed in accordance with the laws of Taiwan.
ActionDirector is a registered trademark along with other company
and product names mentioned in this publication, used for
identification purposes and remain the exclusive property of their
respective owners.
Manufactured under license from Dolby Laboratories. Dolby and the
double-D symbol are registered trademarks of Dolby Laboratories.
Confidential unpublished works. Copyright 1995-2005 Dolby
Laboratories. All rights reserved.
For DTS patents, see http://patents.dts.com. Manufactured under
license from DTS Licensing Limited. DTS, the Symbol, & DTS and the
Symbol together are registered trademarks, and DTS 5.1 Producer is a
trademark of DTS, Inc. © DTS, Inc. All Rights Reserved.
International Headquarters
Mailing Address CyberLink Corporation
15F., No. 100, Minquan Rd., Xindian Dist.
New Taipei City 231, Taiwan (R.O.C.)
Web Site http://www.cyberlink.com
Telephone 886-2-8667-1298
Fax 886-2-8667-1385
Copyright © 2017 CyberLink Corporation. All rights reserved.
Page 3

Contents
Introduction
................................................................................................1Welcome
.................................................................................................2DirectorZone
.................................................................................................2ActionDirector Versions
................................................................................................3System Requirements
ActionDirector Projects
................................................................................................4Setting Project Aspect Ratio
................................................................................................5Opening Saved Projects
................................................................................................5Exporting Projects
Storyboard Window
................................................................................................7Rooms
................................................................................................8Library Window
.................................................................................................9Searching the Library
.................................................................................................10Filtering Media in the Library
.................................................................................................12Library Menu
................................................................................................13Preview Window
.................................................................................................13Preview Player Controls
.................................................................................................14Playing 360° Media Files
.................................................................................................15Taking a Screen Snapshot
.................................................................................................15Preview /Display Options
.................................................................................................16Zoom In/Out
.................................................................................................16Undocking the Preview Window
................................................................................................17Expanding the Library/Preview Window
..................................................1
..................................................4
..................................................7
i
Page 4

Cyb erLink ActionDirector
................................................................................................17Function Buttons
Importing Media
................................................................................................19Importing Media Files
.................................................................................................20Importing 360° Media Files
.................................................................................................21Importing ActionDirector Projects
Downloading Effects and Templates from
................................................................................................21
DirectorZone
Adding Video Clips and Images to
the Storyboard
Editing Media on the Storyboard
................................................................................................28Splitting a Clip
................................................................................................29Trimming Video Clips
................................................................................................31Cropping Images
................................................................................................32Rotating Media Clips
................................................................................................32Fixing and Enhancing Media Clips
................................................................................................34Fixing Video Clips
................................................................................................36Setting a Media Clip's Duration
................................................................................................37Changing the Shape of Media
Editing 360° Videos
..................................................19
..................................................22
..................................................28
..................................................39
Adding Intro/Outro Effects
.................................................................................................41Adding Text, Images, and Backgrounds
.................................................................................................43Modifying Intro/Outro Effect Position
.................................................................................................43Modifying Title Text Properties
.................................................................................................45Applying Animation Effects to Title Text
..................................................40
................................................................................................40Modifying Titles in the Title Designer
Adding Action Effects in the Action
Camera Center
ii
..................................................46
................................................................................................47Creating Action Effects on Video Clips
Page 5

................................................................................................53Action Camera Center Settings
................................................................................................54Changing the Action Camera Center Content
View Designer
Adding Video Effects
..................................................56
................................................................................................57Customizing Direction of View in 360º Video Clips
................................................................................................61Creating Little Planet Videos
..................................................69
Using Transitions
Adding Background Music
Producing Your Project
.................................................................................................75Producing Regular HD Video
.................................................................................................76Producing a 360° Video
.................................................................................................77Uploading Regular HD Video
.................................................................................................83Uploading a 360° Video
Using the Theme Designer
.................................................................................................86What are Theme Templates?
.................................................................................................87Importing Media Files into the Theme Designer
.................................................................................................94Taking Snapshots from Videos
..................................................70
................................................................................................70Adding Transitions to a Single Clip
................................................................................................71Adding Transitions Between Two Clips
..................................................72
..................................................74
................................................................................................74Utilizing Intelligent SVRT
................................................................................................75Producing and Saving to a Video File
................................................................................................77Uploading Video to Online Media Sites
..................................................85
................................................................................................86Overview
................................................................................................89Adding Theme Templates/Sequences
................................................................................................91Adding Media Clips
................................................................................................94Importing More Media Files
................................................................................................95Editing Media Clips
iii
Page 6

Cyb erLink ActionDirector
................................................................................................96Editing Background Music
................................................................................................98Editing Title Text
................................................................................................98Replacing Background Images
................................................................................................99Adding Transitions Between Sequences
................................................................................................99Previewing and Saving
ActionDirector Preferences
ActionDirector Hotkeys
..................................................101
................................................................................................101General Preferences
................................................................................................102DirectorZone Preferences
................................................................................................102Editing Preferences
................................................................................................103File Preferences
................................................................................................103Hardware Acceleration Preferences
................................................................................................104Project Preferences
................................................................................................104Produce Preferences
................................................................................................105Improvement Program Preferences
..................................................106
Appendix
Technical Support
iv
..................................................109
................................................................................................109Intelligent SVRT: When Is Used?
................................................................................................110Licensing and Copyright Information
.................................................................................................111Lice nses and Copyrights
..................................................123
................................................................................................123Before Contacting Technical Support
................................................................................................124Web Support
................................................................................................124Help Resources
Page 7
Introduction
Note: this document is for reference and informational use only. Its content
and the corresponding program are subject to change without notice.
Note: you can also quickly access your saved ActionDirector projects in
the Welcome window. See Opening Saved Projects for more information.
Chapter 1:
Introduction
This chapter introduces CyberLink ActionDirector, outlines its key features, and
reviews the minimum system requirements for the program.
Welcome
Welcome to the CyberLink family of digital media tools. CyberLink ActionDirector is
a digital video editing program designed specifically for action camera
enthusiasts like you, as it helps you quickly create high-impact, pro-looking
videos that showcase the action.
When you launch the program from the start menu, or the CyberLink
ActionDirector shortcut on the desktop, you are prompted to choose one of the
following editing modes:
·
Storyboard: select this option to edit your video on the storyboard.
Storyboard editing is a flexible and very intuitive way to quickly create your
video. See Storyboard Window for an overview of the storyboard and the
editing features it includes.
·
Theme Designer: in the Theme Designer you can use theme templates to
create impressive, professional looking videos with style, almost instantly. See
Using the Theme Designer for more information and detailed steps on using
this feature.
·
360° E ditor: select this option to perform 360° video editing. See Importing
360° Media Files for information on importing these types of media files, or
Editing 360° Videos for information on how to edit them.
1
Page 8

Cyb erLink ActionDirector
Note: you can prevent CyberLink ActionDirector from auto checking for
updates/upgrades in General Preferences.
DirectorZone
DirectorZone is a free web service that lets you search for and download theme
templates, title templates, and transitions created by CyberLink and other users of
CyberLink software.
To access the benefits of DirectorZone, you can sign in by:
·
clic king the S ign in to DirectorZone link in the top right corner of the
CyberLink ActionDirector window.
·
clic king the button at the top of the window to open the ActionDirector
preferences, and then on the DirectorZone tab. See DirectorZone Preferences
for more information.
Also, be sure to periodically click the button to check out the latest
DirectorZone B ulletin and view the Popular templates on D irectorZone. Just click
in either of these sections in the Notifications window to view the bulletin or
download these templates. Or go to https://directorzone.cyberlink.com to find out
more information on the features and benefits of the DirectorZone web service.
ActionDirector Versions
The features that are available to you within CyberLink ActionDirector are
completely dependent on the version you have installed on your computer.
To determine your version of CyberLink ActionDirector, click on the CyberLink
ActionDirector logo in the top left corner or select ? > About CyberLink
ActionDirector.
Updating ActionDirector
Software upgrades and updates (patches) are periodically available from CyberLink.
CyberLink ActionDirector automatically prompts you when either is available.
To update your software, do this:
1. Click the button to open the Notifications window.
2
Page 9
Introduction
Note: you must connect to the Internet to use this feature.
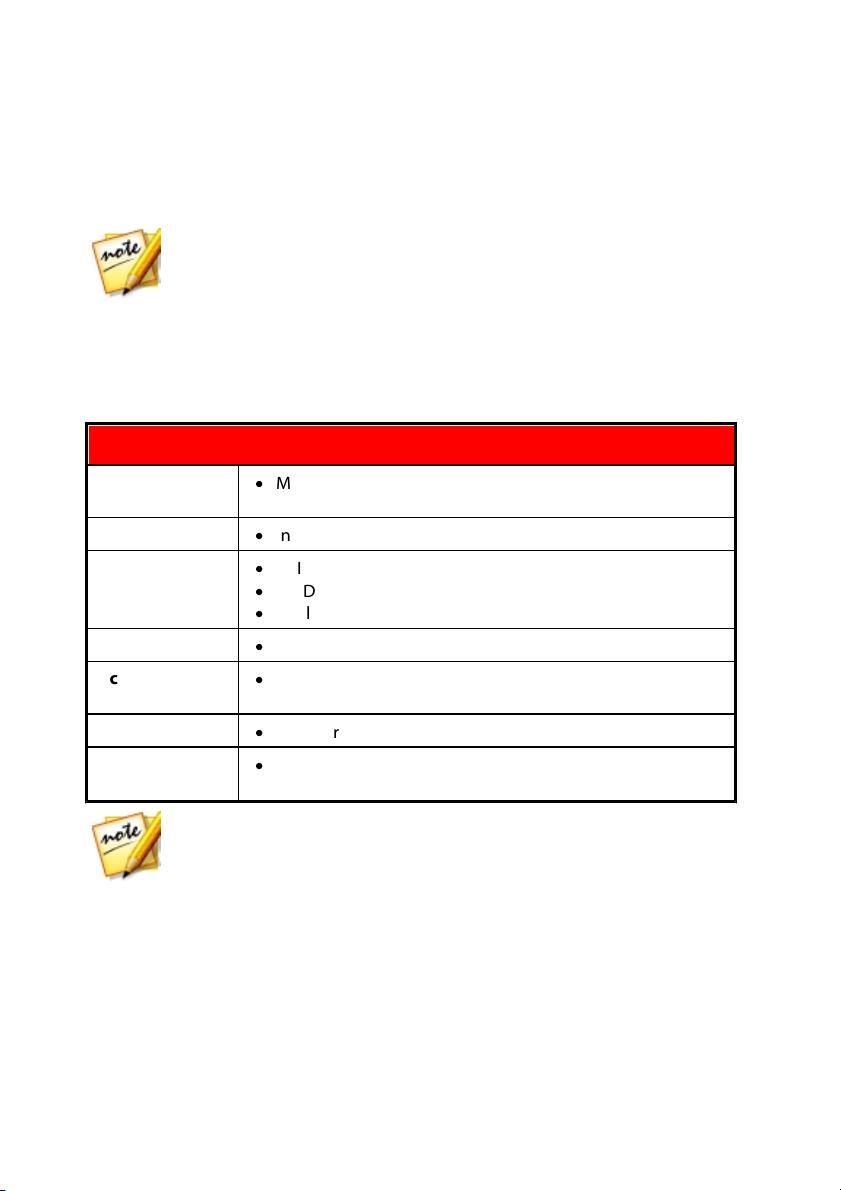
System R equirements
Operating
System
·
Microsoft Windows 10, 8/8.1, 7
Processor (CPU)
·
Intel Core i3 or AMD A6
Graphics
Processor (GPU)
·
ATI/AMD: Radeon HD 7000 series
·
NVIDIA: GeForce GTX 600 series
·
Intel: HD Graphics
Memory
·
2 GB
Screen
Resolution
·
1024 x 768, 16-bit color
Hard Disk S pace
·
2 GB for installation
Internet
Connection
·
Required for program activation, online services and
activation of some import/export formats
Note: please consult the CyberLink web site (https://www.cyberlink.com)
for the most recent system requirements information.
2. Check the New U pdates and U pgrade Info sections.
3. Select an item in these sections to open your web browser, where you can
purchase product upgrades or download the latest patch update.
System Requirements
The system requirements listed below are recommended as minimums for general
digital video production work.
3
Page 10
Cyb erLink ActionDirector
Note: a CyberLink ActionDirector project (.acs) file essentially contains a
list of the media clips and effects used in your project, and a log of all the
edits you want to make to your media. Project files do not include the media
clips in them. If you want to save all your video production files in one place,
use the Pack Project Materials function. To do this select, File > Pack
Project M aterials from the menu.
Chapter 2:
ActionDirector Projects
When working on a new video production, click the button to save it as a .acs
file, a project file format that is used exclusively by CyberLink ActionDirector. These
project files can be imported directly into the storyboard, if required. See Importing
ActionDirector Projects for more information.
Use the options in the File menu to save, create new, or open existing projects in
CyberLink ActionDirector. When you create a new project, CyberLink ActionDirector
resets your media library. If you want to create a new video production using the
same media that's currently in your library, select F ile > New Workspace.
The changes you make to your media in CyberLink ActionDirector do not affect the
original media you imported into the program. Since your edits are all saved in the
project file, you can trim, edit, or remove clips, but still keep your original files on
your hard drive, untouched. So let yourself get creative. If you end up changing
things too drastically, you can always start over.
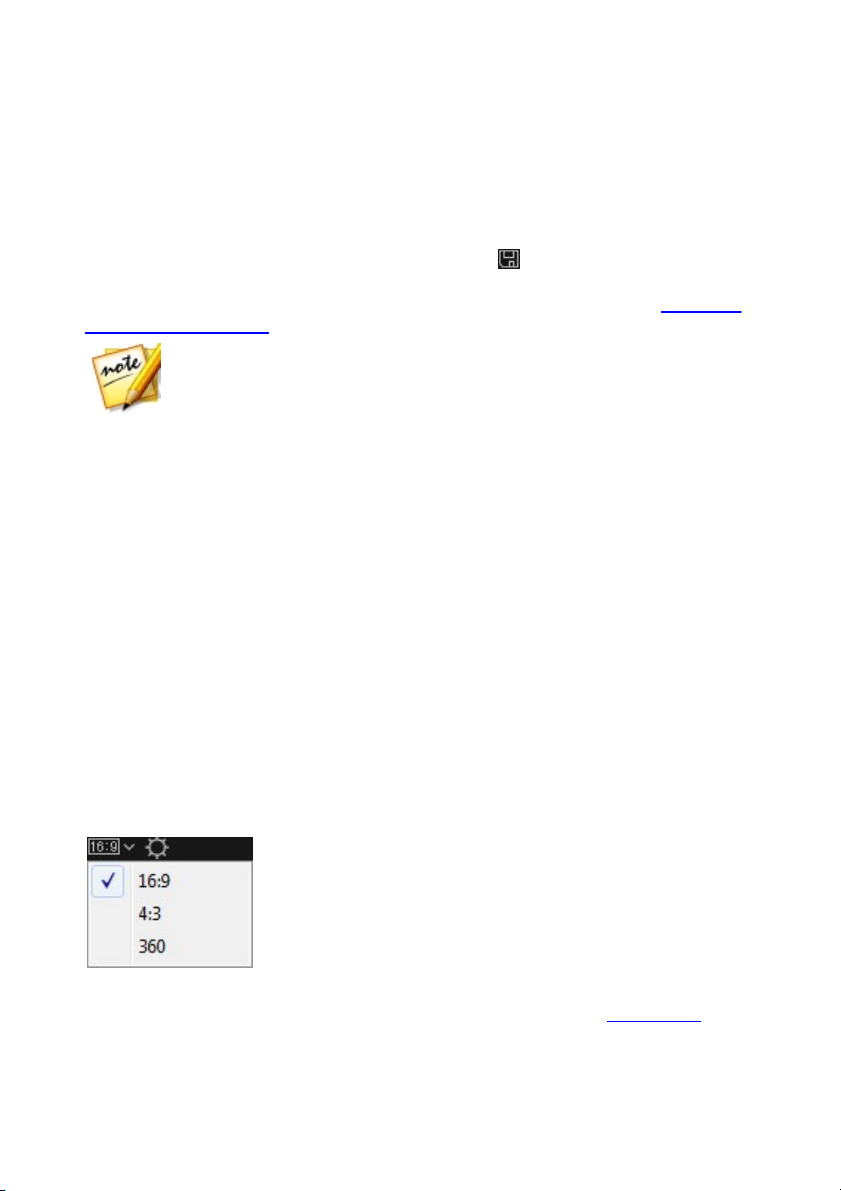
Setting Project Aspect Ratio
To set the aspect ratio for your project, and your outputted video, select 4:3 or 16:9
from the aspect ratio drop-down at the top of the window. The preview window
changes according to the aspect ratio you select.
When you select 360, your project will actually have an aspect ratio of 2:1 and is for
users wanting to create and produce 360 virtual reality videos. See Editing 360°
4
Page 11
ActionDirecto r Projects
Videos for information on how to edit 360 projects, and Playing 360° Media Files for
more information on the extra preview window controls available in these types of
projects.
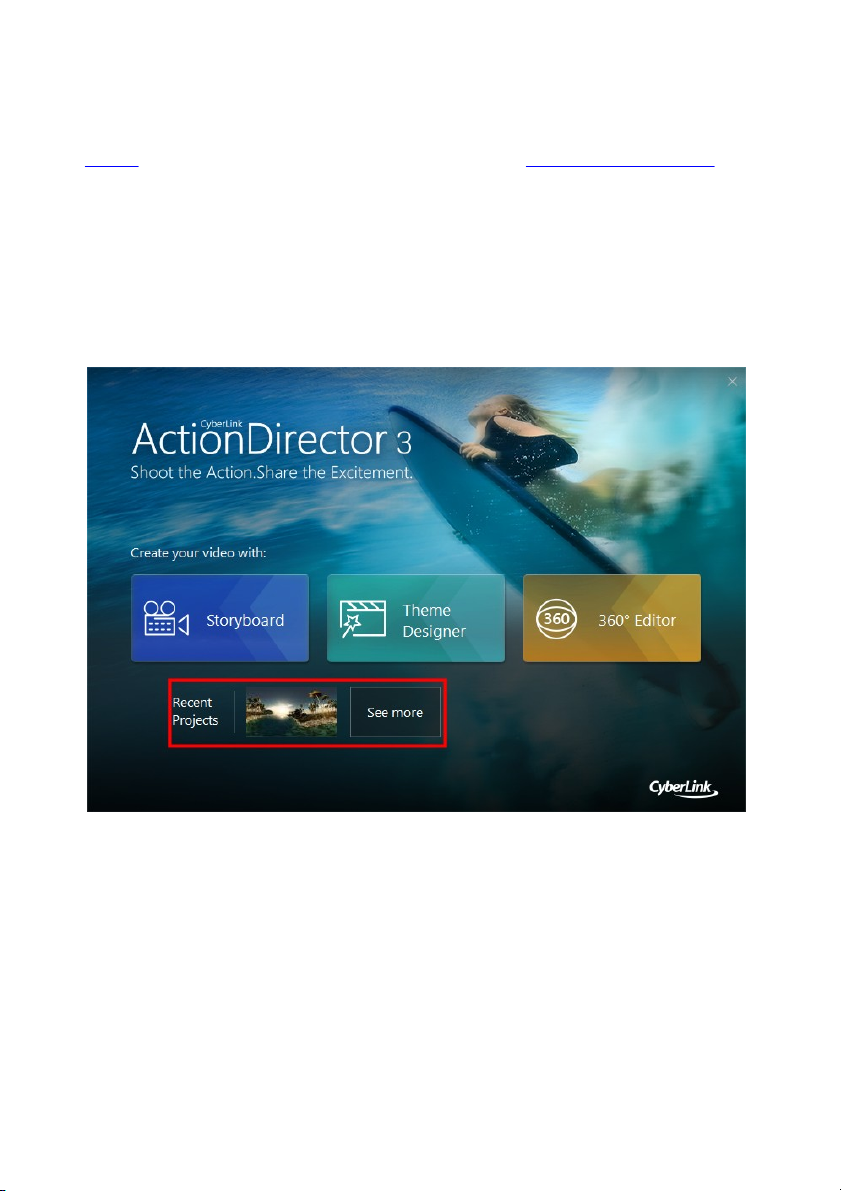
Opening Saved Projects
You can open previously saved projects at any time when in the storyboard window
by selecting Open Project f rom the File menu. You can also open projects directly
on the ActionDirector launch window.
The most recent projects you were working on display at the bottom of launch
window. Just click the project thumbnail to open it, or click See m ore to find
another saved project.
Exporting Projects
You can export your CyberLink ActionDirector projects by packing all the materials
in a folder on your computer's hard drive. Exported projects can then be imported
into another computer running CyberLink ActionDirector.
5
Page 12

Cyb erLink ActionDirector
To export your project to a folder select File > Pack Proj ect Materials.
6
Page 13
Storyb oard Win dow
Chapter 3:
Storyboard Window
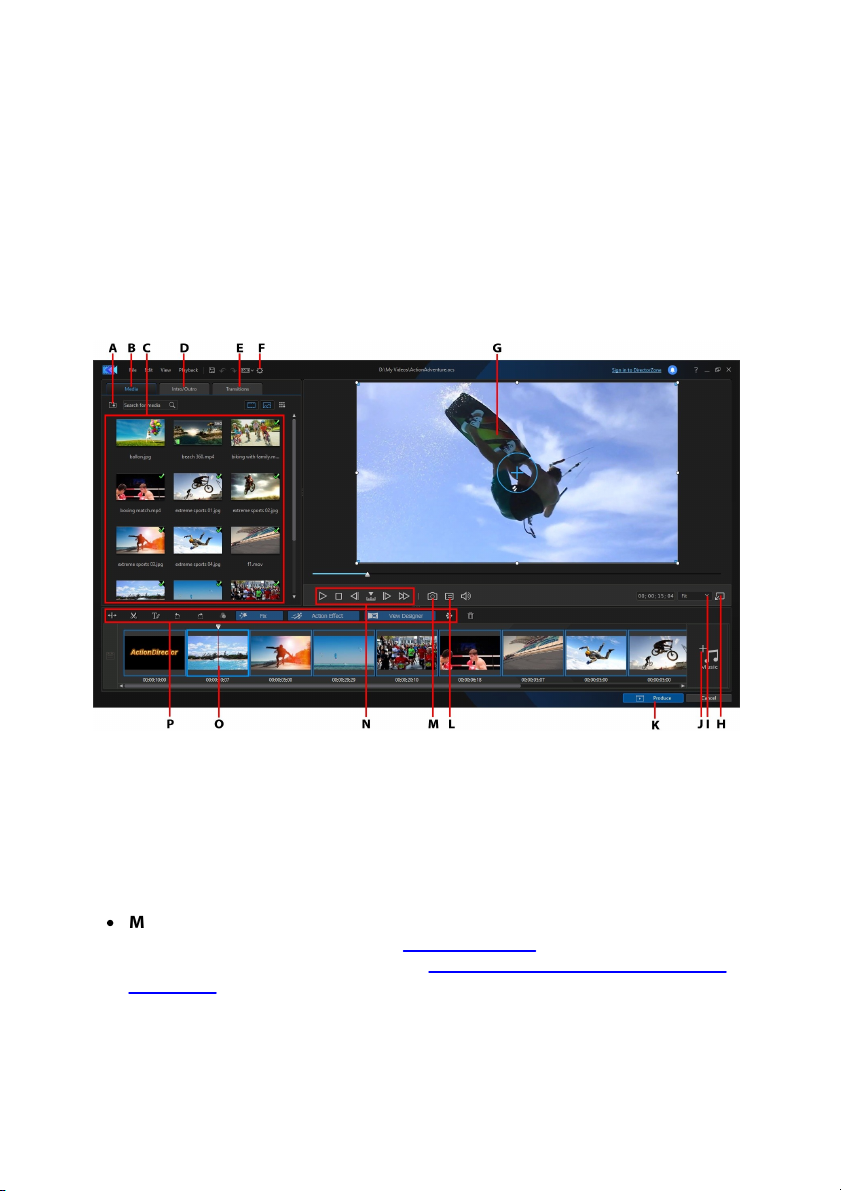
In the storyboard window is where you edit together your video production. The
storyboard is a large graphical display of all the video clips and images in your
video production. When you select Storyboard on the CyberLink ActionDirector
launch window, the program displays as follows.
A - Imp ort Med ia, B - Me dia R oom, C - Li brary Window , D - Intro/Outro Effects Roo m, E - Transitions
Rooms, F - ActionDirector Preferences, G - P review Wind ow, H - Un dock P review Window , I - Zoom
In/ Out, J - Add Background Musi c, K - P roduc e Video , L - Preview Quali ty/Disp lay Optio ns, M - Take
Snapshot, N - Preview Pl ayer Controls, O - Storyboard Workspac e, P - Func tion Bu ttons
Rooms
There are three rooms in the storyboard window of CyberLink ActionDirector:
·
Media room: this room contains all the video files and images that you import
into CyberLink ActionDirector. See Importing Media for information on
importing media into this window, or Adding Video Clips and Images to the
Storyboard to learn how to add media files to the storyboard workspace.
7
Page 14
Cyb erLink ActionDirector
·
Title room: this room contains a library of title effects that when applied to
your project, add credits or comments to your production. For more
inform ation, see Adding Title Effects.
·
Transition room : this room contains transitions that you can use on or
between clips in your project. Transitions let you control how media appears
and disappears in your project, and changes from one clip to the next. For
more information, see Using Transitions.
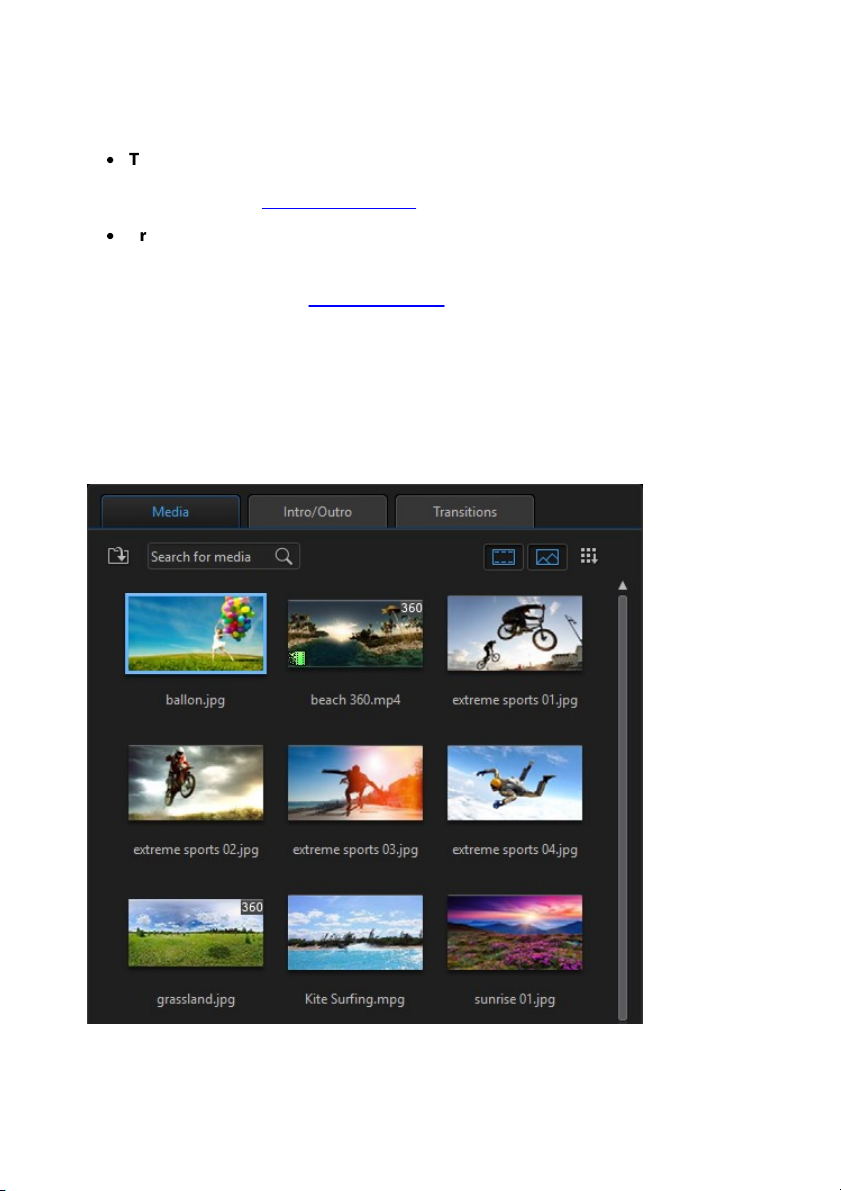
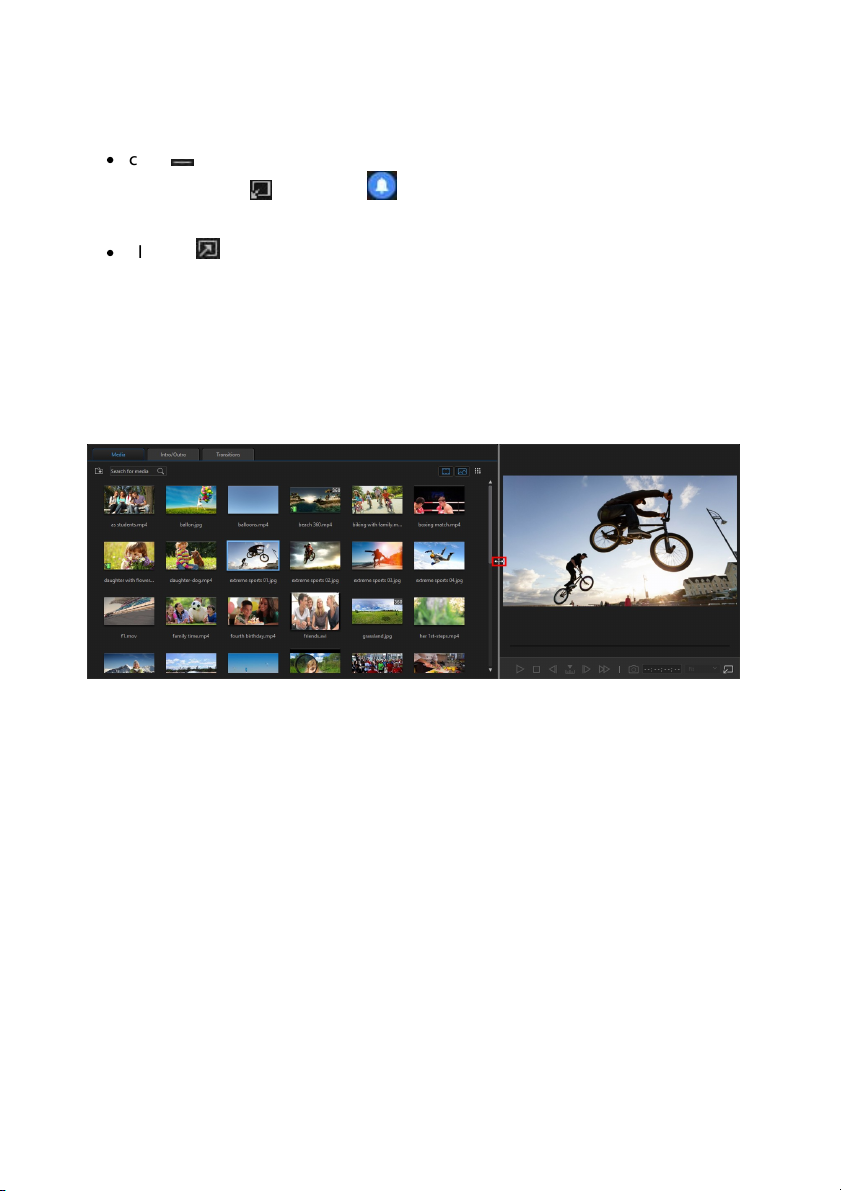
Library Window
The library window contains all of the media you in CyberLink ActionDirector,
including your video files and images. When you are in other rooms (Title Room,
Transition Room, etc.) it contains the effects, titles, and transitions you apply to
your media.
8
Page 15
Storyb oard Win dow
Note: if you cannot see all of the media or content in a specific room, you
can resize the library window to display it. See Expanding the
Library/Preview Window for more information.
The media content and available buttons that display in the library window depend
on the room you are currently in.
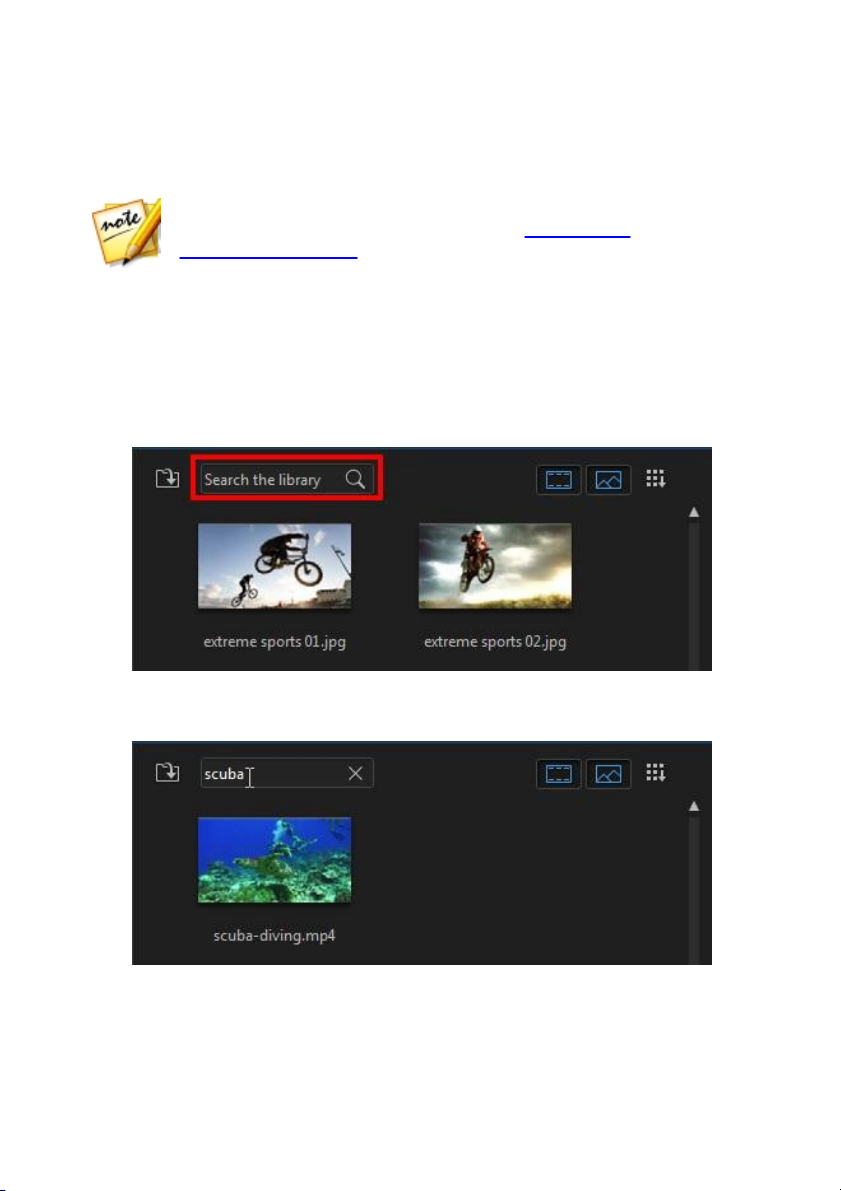
Searching the Library
If you are looking for specific media files, effects, or templates in a library window,
use the search function to find them.
To search in the library, do this:
1. Enter in a keyword in the search field located on top of the library window.
2. CyberLink ActionDirector filters the content in the library window based on
the keywords entered.
9
Page 16

Cyb erLink ActionDirector
Note: click on to clear the search results.
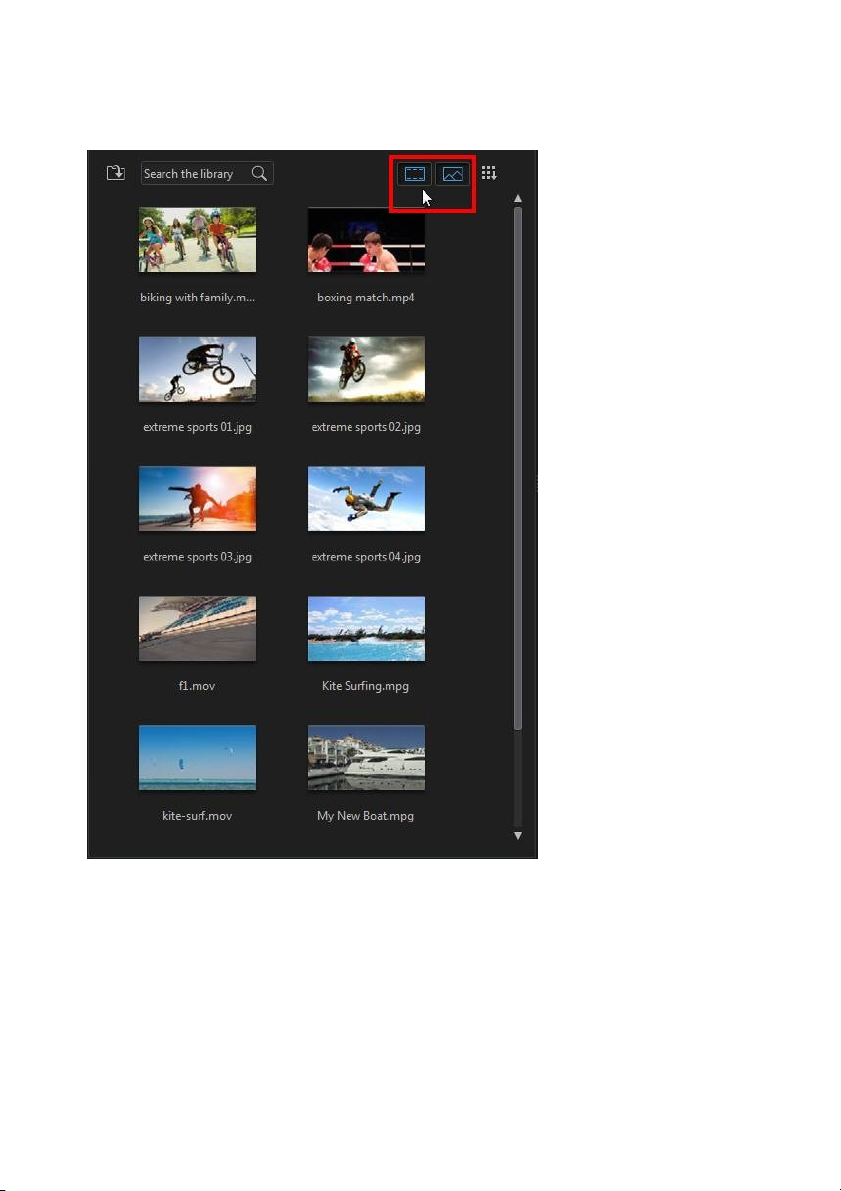
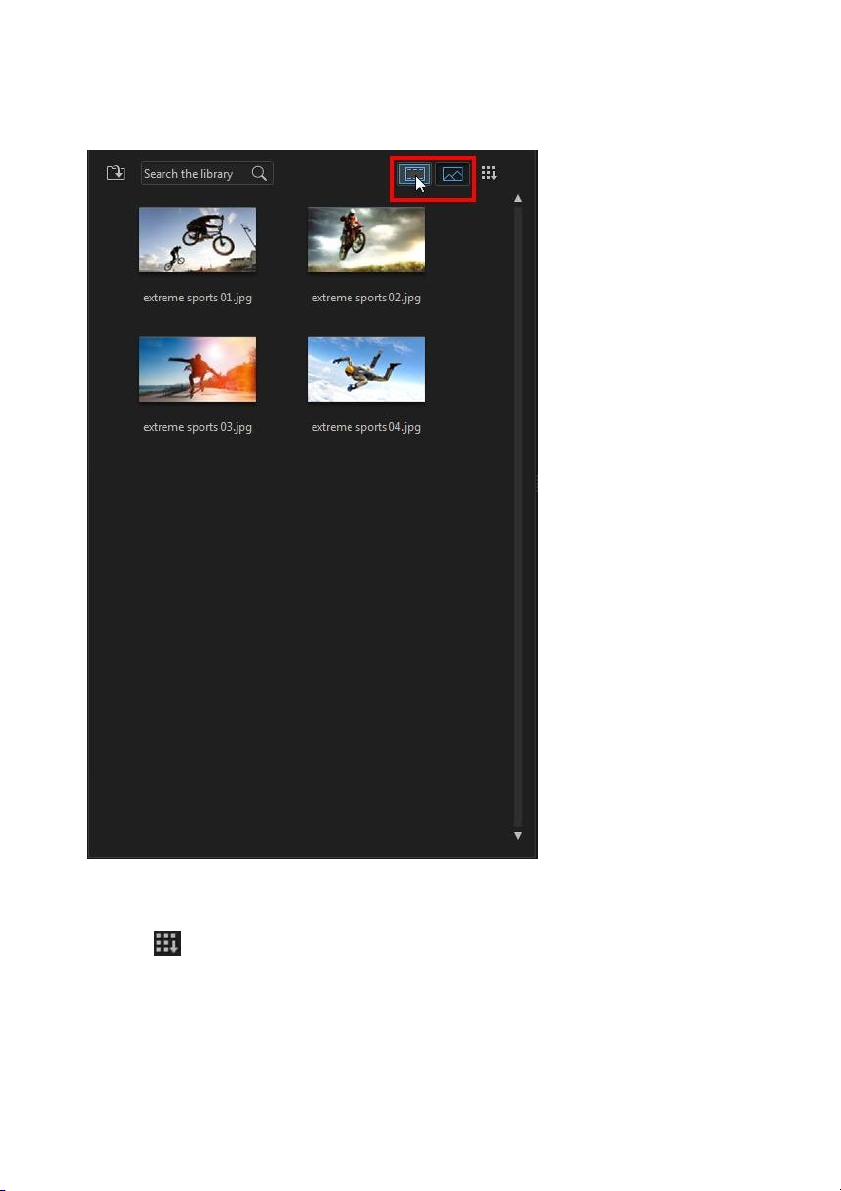
Filtering Media in the Library
You can filter the media files that are in the library by file type, using the two
buttons above the library window. Click these buttons to hide media so you can
more easily find what you are looking for.
10
Page 17
Storyb oard Win dow
11
Page 18
Cyb erLink ActionDirector
Library Menu
Click on to access the library menu. In the library menu you can sort the
content in a room by name, date created, file size, and more. You can also select all
the content in the room or change the media/effect thumbnail display size. Other
12
Page 19
Storyb oard Win dow
Note: you can resize the preview window to fit your personal preference.
See Expanding the Library/Preview Window for more information.
options that are available in the library menu, but are dependent on the specific
room you are in.
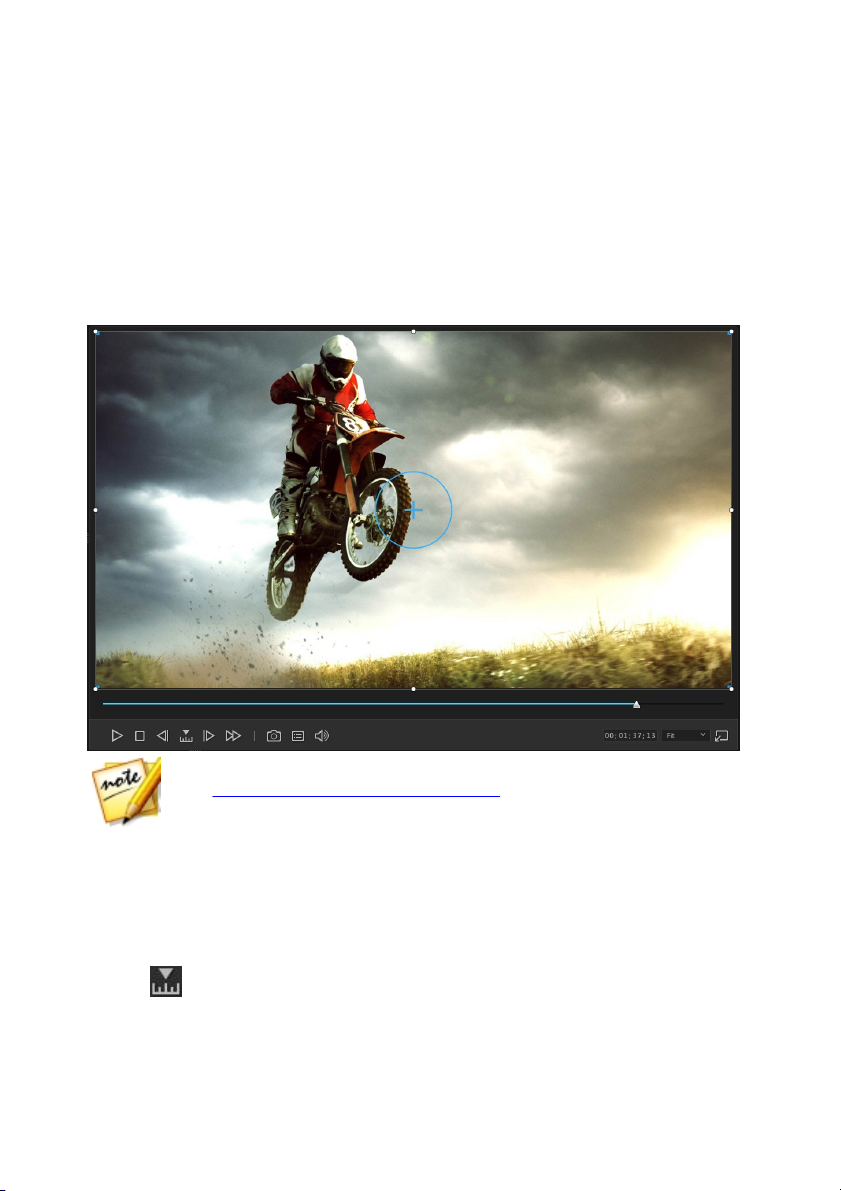
Preview Window
While creating your video production, you can preview it in the preview window
using the available player controls.
Preview Player Controls
With the player controls you can preview your production as you edit, including
playing your project from the current storyboard position, or pausing and stopping
playback.
Use the button to select a seek by method (frame, second, minute, segment)
and then use the buttons on either side of it for a more precise step through of your
13
Page 20
Cyb erLink ActionDirector
Note: you can also click and drag your mouse in the preview window to
explore the 360° environment.
current video production. You can also click and drag the playback slider, or enter
in a specific timecode in the time field, and then press the enter key on your
keyboard to quickly find a specific scene.
Playing 360° Media Files
After 360° video and image files are imported into the media library, they can be
played back. To play back a 360° media file, do this:
1. First, ensure your project's aspect ratio is set to 360. See Setting Project Aspect
Ratio for more information.
2. Select the 360° media file in the media library or on the project timeline.
3. Click to enable the 360° viewer mode.
4. If it is a video file, click the play button to start playing it back.
5. Use the 360 controls to view and explore the 360° environment.
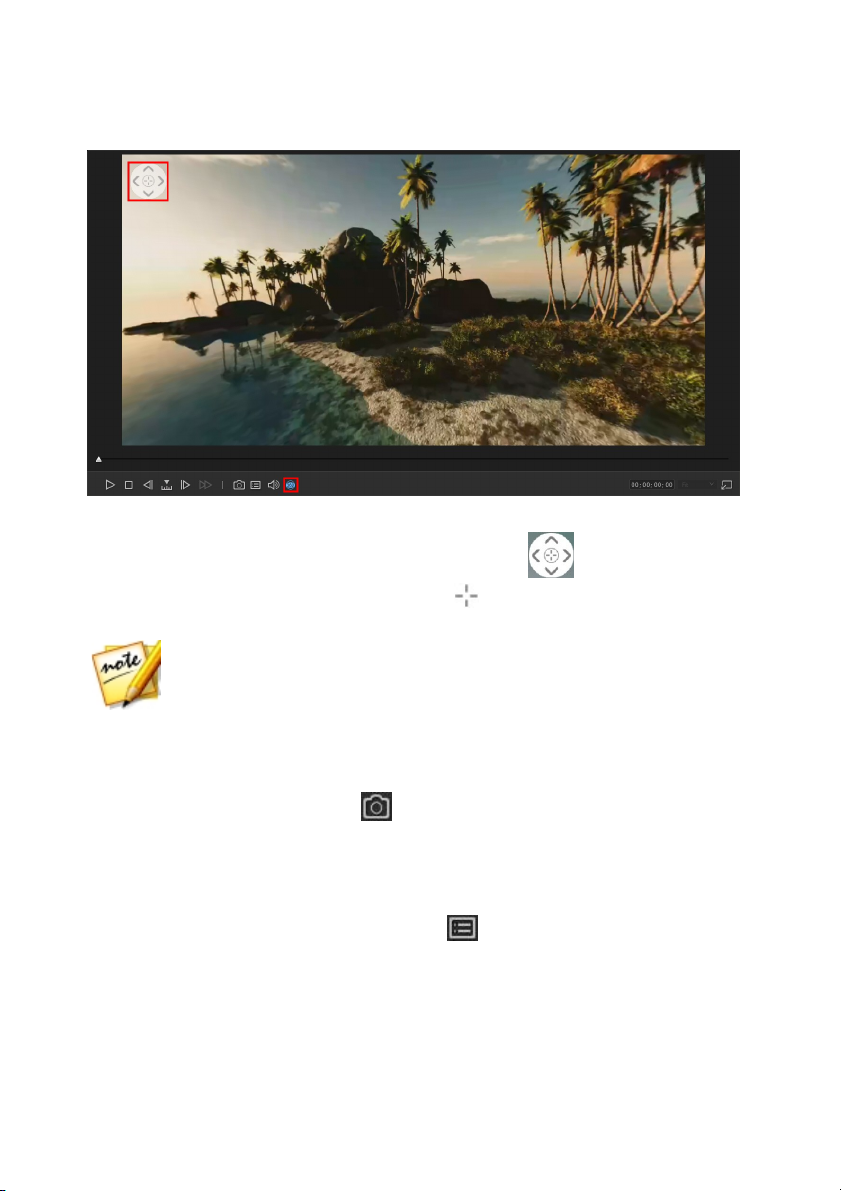
360 Controls
When you play 360° media files, there are extra 360 controls available in the preview
window.
14
Page 21
Storyb oard Win dow
Note: you can also use your mouse's scroll wheel to zoom in and out within
the 360° view.
When viewing or playing a 360° media file, you can click and drag on the preview
window to pan around the 360° environment or use the controls to pan left,
right, up, or down. Note that you can click the in the middle of the controls at
any time to reset to the default viewing position.
Taking a Screen Snapshot
While previewing your project, you can take a still screen snapshot and save it as a
JPG image file. To do this click the button on the player controls.
Preview/Display Options
CyberLink ActionDirector includes some preview and display options that help
make your editing experience easier. Click on to set the preview quality or
display grid lines on the preview window.
15
Page 22
Cyb erLink ActionDirector
Note: Full HD and HD preview resolution are only available when
CyberLink ActionDirector is installed on a 64-bit operating system.
Preview Quality
Click , select Preview Quality, and then a preview quality from the list (Full HD*,
HD*, high, normal, low) to set the resolution/quality of the video used when
previewing your video in the preview window. The higher the quality you select, the
more resources that are required to preview your video project.
Grid Lines
When you place media on the storyboard, use the grid lines to help with the precise
placement on your video project's image. Click the button, select Grid Lines,
and then select the number of lines you want to display in a grid over the video
image. Use this grid to more precisely place the title text or PiP media on the video
image.
Once enabled, media and title effects will snap to the grid lines on the preview
window.
Zoom In/Out
When you place media on the storyboard, use the Fit drop-down underneath the
preview window to zoom in or out on the video. Zooming in is useful for precise
placement of media on the preview window.
Undocking the Preview Window
Click the button to undock the preview window. Once undocked, you can
preview your production at full screen or move it to an extended desktop. You can
also resize the timeline and library window to your liking.
Once undocked, you can:
·
click to view your production at full screen, or to maximize the
preview window.
16
Page 23
Storyb oard Win dow
·
click to minimize the preview window, and hide it so you can edit more
freely. Click on next to the button to show the minimized preview
window.
·
clic k on to re-dock the preview window.
Expanding the Library/Preview Window
You can expand the size of the library and the preview window to fit your personal
preference.
Simply drag the border between the library window and the preview window to
resize them to your liking. This allows you to get the most out of your display
device space by customizing the size of the preview window, or increasing the
amount of content you can view in the media, title, or transition room.
Function Buttons
When you select media that is on the storyboard, whether it's a video clip, image,
effect, title effect, etc., several function buttons display above the storyboard. These
buttons let you perform a variety of tasks or gain access to some important features
of CyberLink ActionDirector.
17
Page 24

Cyb erLink ActionDirector
The function buttons that are available depend on the type of media content you
select. However, whenever you select media, the is always displayed. Click
to remove the selected media content from the storyboard.
18
Page 25
Impo rting Media
Note: media you import is saved in the current CyberLink ActionDirector
project you are working on. You can also select Fi le > New Work space to
create a new project, while maintaining the current media in the library.
Note: if you import media files that are on a removable device into the
media library, they will be removed if the removable device is disconnected.
For best results, it is recommended that you copy the media to your
computer's hard drive before importing.
Note: ** to enable, you must download the DivX codec online. Available on
Windows 32bit only.
Chapter 4:
Importing Media
The first step when using CyberLink ActionDirector is to import your video clips and
photos into the media room library. You can import videos and images one by one,
or import the entire contents of a folder into the program.
Importing Media Files
If you already have video and image files that you want to use in your production
on your computer's hard drive, you can import the files directly into CyberLink
Action Director's media library in the Media Room. You can also import media files
that are on a removable device.
CyberLink ActionDirector supports the following file formats:
Image: Animated-GIF, BMP, GIF, JPEG, PNG, TIFF
CyberLink ActionDirector also supports the import of the following camera RAW
image formats, which are then converted to JPEG once imported: ARW (SONY), CR2
(Canon), DNG (Ricoh), ERF (Epson), KDC (Kodak), MRW (Konica Minolta), NEF (Nikon),
NRW (Nikon), ORF (OLYMPUS), PEF (Pentax), RAF (Fujifilm), RW2 (Panasonic), SR2
(SONY), SRF (SONY)
Video: 3GPP2, AVCHD (M2T, MTS), AVI, DAT, DivX**, DV-AVI, DVR-MS, DSLR video
clip in H.264 format with LPCM/AAC, FLV (H.264), MKV, MP4 (XAVC S), MOD, MOV ,
MOV (H.264), MPEG-1, MPEG-2, MPEG-4 AVC (H.264), MVC (MTS), TOD, VOB, VRO,
WMV, WMV-HD, WTV in H.264/MPEG2 (multiple video and audio streams).
19
Page 26
Cyb erLink ActionDirector
Note: you can also drag and drop media onto the CyberLink ActionDirector
window to import it into the program.
Note: if an imported 360° media file is not displaying correctly (no 360°
logo), it usually means the file is not using the 360 equirectangular
projection video format required for editing. See the documentation for your
360 camera manufacturer for information on producing the video file in this
format.
PowerPoint files: CyberLink ActionDirector supports the import of PowerPoint files
in the PPT and PPTX formats. During import, each of the PowerPoint slides are
converted to PNG image files, which are then added to the media library.
To import media into CyberLink ActionDirector, click and then select one of the
following options:
·
Im port Media F iles: import media files individually.
·
Im port a Media F older: import the entire contents of a folder that contains the
media files you want to use in your current project.
Importing 360° Media Files
You can import and edit video and image files that were captured with a 360
camera. Once imported, the 360° media files are automatically detected and
indicated by a 360° logo in the top right of the thumbnail. For 360° images,
CyberLink ActionDirector will auto level out the horizon if the image is tilted/not
level.
See Playing 360° Media Files for information on the additional preview controls
available in the preview window for these types of media files.
Setting 360 Projection Format
If CyberLink ActionDirector did not detect your 360° media file and you are sure it
has been produced for playback and editing, you can manually set the 360
projection format. You can also disable 360° mode for a file that was mistakenly
detected as a 360° media file.
To set the 360 projection format, do this:
1. Right-click on a 360° media file in the media library and then select Set 360
Projection Format.
20
Page 27

Impo rting Media
2. Select the 360 projection format by selecting one of the following:
·
Equirectangular (360°): equirectangular video is the standard projection used
in 360° media files. Equirectangular projection displays the 360° environment,
which is a sphere, onto a rectangular video screen.
·
2D Format (Not 360 °): select this option if the selected media file is actually
2D content.
Importing ActionDirector Projects
CyberLink ActionDirector projects (.acs files) you worked on and saved previously
can be imported and then directly inserted into your video production's storyboard.
To do this, select File > Insert Project from the menu. All of the media in the
original project will be imported into the current project's media library, and also
inserted at the current position of the storyboard slider.
Downloading Effects and Templates from DirectorZone
If you are looking for additional title effects or transitions for your library, you can
click D ownload Templates to download them directly from the DirectorZone web
site in to the Title Room or Transition Room.
Visit the DirectorZone web site for more information: www.directorzone.com.
21
Page 28

Cyb erLink ActionDirector
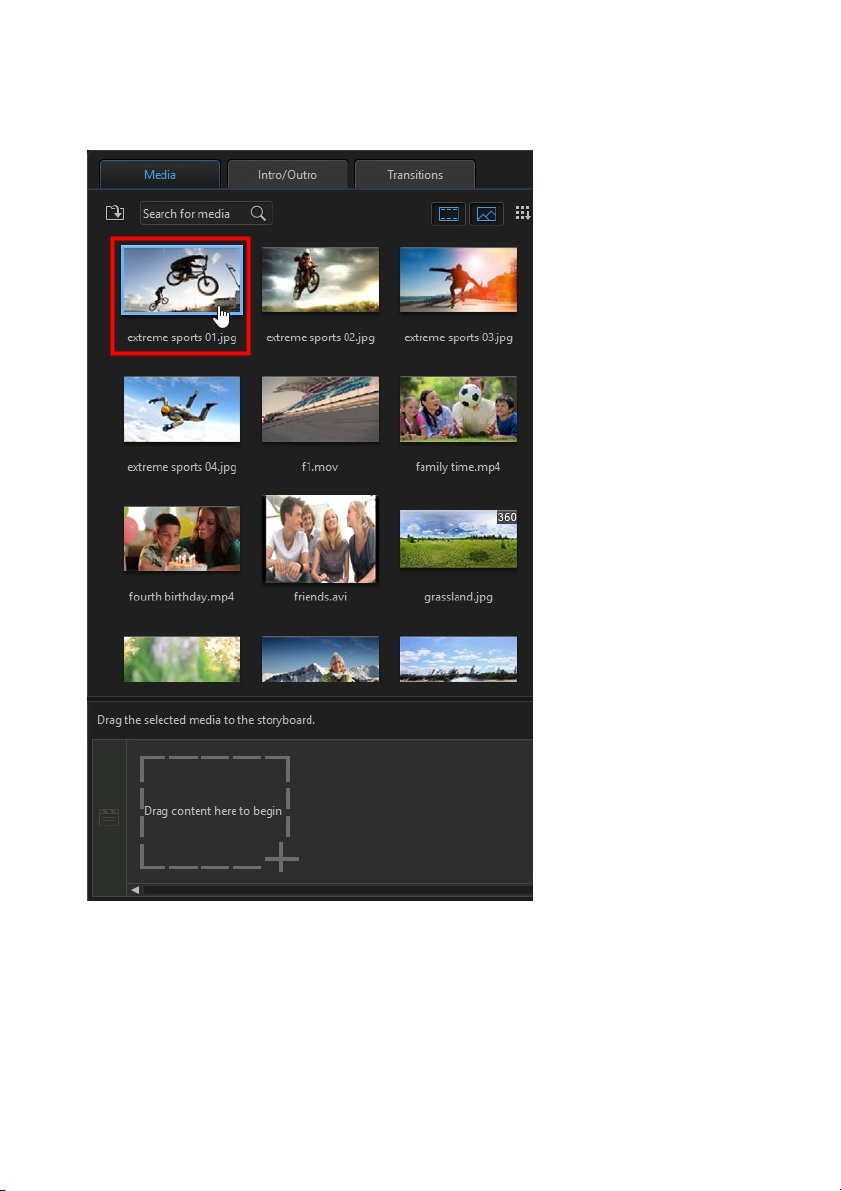
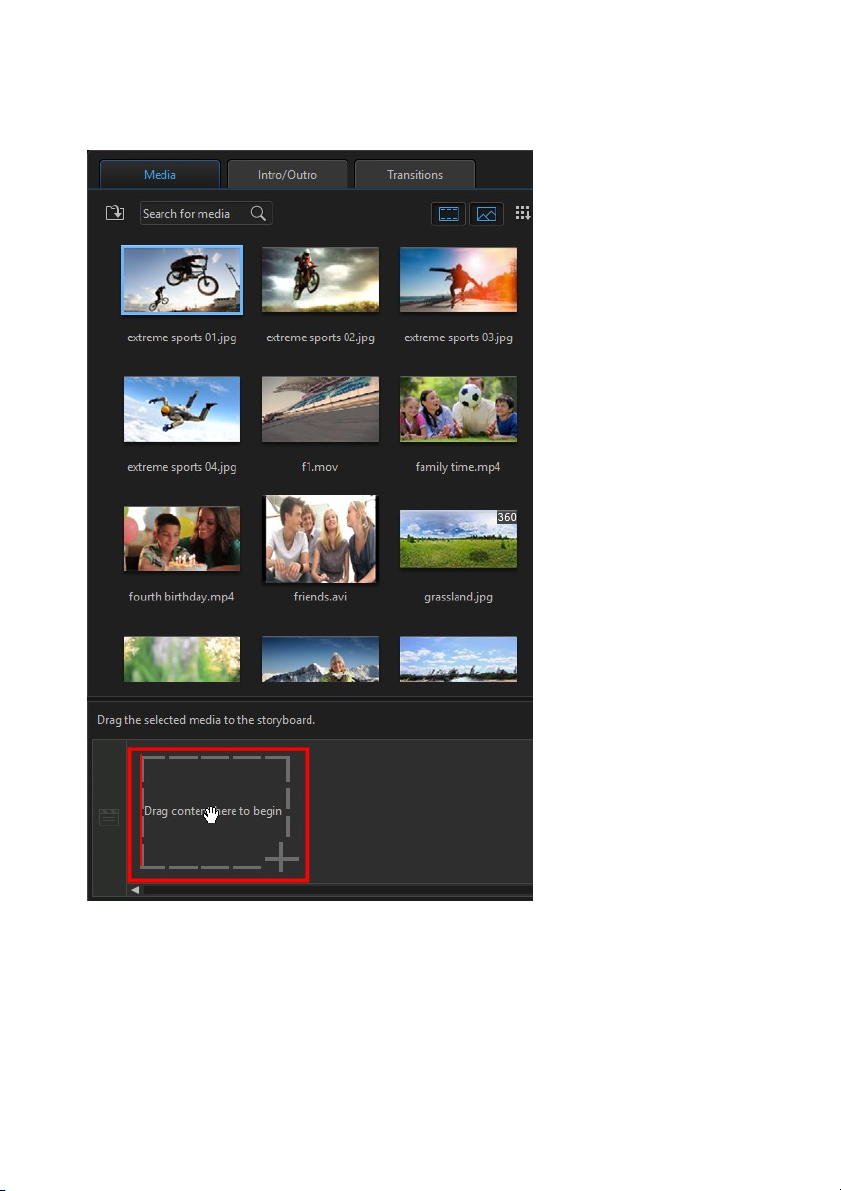
Chapter 5:
Adding Video Clips and Images to the Storyboard
To start creating your video production, begin adding video clips and images to the
storyboard. To add a media clip to the storyboard, just select it in the media room
and then drag and drop it on the storyboard.
22
Page 29
Addin g V ideo Clips and Images to the Story board
23
Page 30
Cyb erLink ActionDirector
24
Page 31

Addin g V ideo Clips and Images to the Story board
Repeat this process to continue adding your media clips to the storyboard. You add
the media clips in the order that tells the story you want to tell.
25
Page 32

Cyb erLink ActionDirector
You do not have to add the media clips after the last clip on the storyboard. They
can also be dragged and dropped between two existing clips.
If the media clips are not in the correct sequence on the storyboard, you can click
and drag them to different positions.
26
Page 33

Addin g V ideo Clips and Images to the Story board
27
Page 34

Cyb erLink ActionDirector
Chapter 6:
Editing Media on the Storyboard
Once you have your video clips and images on the storyboard you can start editing
them. Editing is a broad term that encompasses a number of different functions,
including splitting, trimming, applying fixes, and much more.
This section describes all of the editing processes you can perform on your media
clips.
Splitting a Clip
You can quickly split a media clip that is on the storyboard into two separate clips.
To do this, move the playback slider (or use the player controls) to the position in
the clip where you want to split it. Next, click the button above the
storyboard to separate it into two clips.
28
Page 35

Editin g M edia o n th e Sto ryboard
Note: when you trim video clips, the program does not delete any of the
original source media's content. It just marks the requested edits on the
clips and then applies the edits when it renders the final video during
production.
You can also use it to quickly remove unwanted portions of a media clip, or if you
want to insert other media between the two portions.
Trimming Video Clips
Use the trim functions to remove unwanted portions from the beginning and/or
ends of a video clip.
29
Page 36

Cyb erLink ActionDirector
To trim a video clip, select it on the storyboard and then click the button
above the storyboard.
A - Preview Area, B - Marked P ositions i n Cli p, C - Ma rk Out Po sition Sl ider, D - Selec ted Con tent, E Mark I n Posi tion Sli der, F - Pla yer Controls
To trim a video clip, do this.
1. Select the video clip on the storyboard you want to trim, and then click on the
button above the storyboard.
2. Use the player controls to find where you want the trimmed clip to begin, and
then click to set the mark in position or drag the mark in position slider
to this position.
30
Page 37

Editin g M edia o n th e Sto ryboard
Note: you can reenter the trim window to refine the trimmed clip at any time.
3. Use the player controls to find where you want the trimmed clip to end, and
then click to set the mark out position or drag the mark out position
slider to this position.
4. If required, you can preview what the trimmed clip will look like by clicking
Output and then clicking the play button on the player controls. Click Original
if you want to play the original video.
5. Click OK to set your changes and trim the clip.
Cropping Images
You can completely customize the aspect ratio of the images in your video
production or crop out unwanted portions of a photo, using the crop image
function.
To crop an image, do this:
1. Select the image on the storyboard and then click the button above
the storyboard. You can also right-click on the image and then select Crop
Image.
2. Set the aspect ratio or size of the crop area by selecting one of the following:
·
4:3: gives the crop area, and the resulting cropped image, a 4:3 aspect ratio.
·
16:9: gives the crop area, and the resulting cropped image, a 16:9 aspect ratio.
·
Freeform: select if you want to manually resize the crop area on the image
and give the resulting cropped image a custom aspect ratio.
·
Custom: select if you want to set a custom aspect ratio for the cropped image
using the Width and Height fields.
·
Crop size: similar to custom, you can manually enter the image size you want
in the Width and Height fields.
31
Page 38

Cyb erLink ActionDirector
Note: enable the Compare adjustments in split preview option for a
before and after comparison in the preview window.
3. If required, drag the crop area to the position on the photo you want to keep.
All areas outside the crop area will be removed from the image.
4. Click OK to set your changes and crop the image.
Rotating Media Clips
If the orientation of a media clip is incorrect, you can quickly rotate it in the
storyboard. To rotate a media clip, select it on the storyboard and then click to
rotate it 90 degrees counterclockwise. Click to rotate it 90 degrees clockwise.
Fixing and Enhancing Media Clips
Select a video clip or image on the storyboard and then click the button to
apply fixes and make enhancements to these clips.
Video Denoise
This tool removes video noise from a video clip, including High-ISO and TV signal
noise. Once enabled, drag the slider to increase or decrease the level of denoise on
the video.
Audio Denoise
Use audio denoise on video clips that were recorded outdoors, in a room with poor
acoustics, in a car, or other noisy locations. The audio denoise tool uses CLNR
(CyberLink Noise Reduction) technology to improve your video's audio quality and
reduce background noise. Select the N oise type from the drop-down menu and
then use the Degree slider to adjust the amount of denoise applied.
32
Page 39

Editin g M edia o n th e Sto ryboard
Color Adjustment
Lets you manually adjust the color attributes (exposure, brightness, contrast, hue,
etc.) of the video image or a photo. Once enabled, you cannot use other fixes or
enhancements. Use the sliders to adjust the attributes as follows:
·
Exposure: use on media clips that are over or underexposed. A lower value
darkens all the colors in the clip, while a higher value lightens them.
·
Brightness: use to increase or decrease the brightness of the media clip's
image.
·
Contrast: use to adjust contrast, or the difference between light and dark areas
of the media clip.
·
Hue: use to fine tune the shade or purity of the colors in the media clip.
·
Saturation: use to adjust the saturation of the colors in a media clip. A smaller
value moves the colors towards black and white, while a higher value
increases the overall intensity of color in the clip.
·
Vibrancy: use to make the colors in a media clip brighter and more vivid, by
enhancing the duller colors.
·
Highlight healing: is applied to areas of media clips that are overexposed to
recover detail in the highlights and brighter areas.
·
Shadow: use to enhance detail in dark sections of the media clip by
lightening shadows and underexposed areas.
·
Sharpness: use the slider to adjust the amount of sharpness applied to the
media clip.
Color Enhancement
Color Enhancement dynamically adjusts the color saturation ratio in video. Use the
available slider to make the colors in the video more vivid, without affecting skin
tones.
33
Page 40

Cyb erLink ActionDirector
Note: lens correction is not available in 360 projects.
Note: if none of the lens profiles match your camera, you can download more
from DirectorZone or manually fix the distorted video using the controls in
this window. See more details below.
Fixing Video Clips
Select a video clip on the storyboard and then click the Fix function button to open
the Action Camera Center to stabilize shaky video, adjust video white balance, or
add color presets. You can also use lens correction to remove fisheye distortions
and vignettes.
Lens Correction
Select the Lens Correction option to import lens profiles to auto correct distorted
videos, or use the controls to manually correct them if they have a fisheye
distortion or vignette effect.
When you enter the Action Camera Center, manually select the lens profile, using
the Maker and Model drop-downs, that matches the camera your video was shot
with. Once selected, CyberLink ActionDirector will auto correct the video.
34
Page 41

Editin g M edia o n th e Sto ryboard
Note: video stabilizer is not available in 360 projects.
Downloading Lens Profiles from DirectorZone
If your video camera's lens and profile are not available in CyberLink ActionDirector
you can click the button to download more lens profiles from DirectorZone.
Once downloaded, click the button to import it. CyberLink ActionDirector
should auto detect the imported profile and then correct the selected video.
Fisheye Distortion
The fisheye distortion section helps correct videos that appear distorted. Dragging
the slider to the right straightens lines that bend away from the center, correcting
barrel distortions. Dragging it to the left straightens lines that bend towards the
center, fixing pincushion distortions in videos.
Vignette Removal
Use the following sliders to remove an unwanted vignette effect on videos that was
caused by a camera lens or the lighting environment:
·
Vignette amount: use this slider to adjust the level of vignette removal on the
video.
·
Vignette midpoint: drag the midpoint slider to the left to increase the size of
the area (towards the center of the video) where the vignette removal is
applied. Drag it right to decrease the size, towards the corners.
Video Stabilizer
Select the Video S tabilizer option to employ motion compensation technology to
correct shaking videos. This tool is ideal for use with videos taken without a tripod
or recorded while moving.
Once enabled, drag the Strength slider to increase or decrease the level of
correction.
35
Page 42

Cyb erLink ActionDirector
Note: to set the duration of a video, see Trimming Video Clips.
Select the F ix rotational camera shake option if the clip has segments where the
camera rotates from side to side. Select the Use enhanced stabilizer option to
improve the output quality of some video clips. Using this feature requires more
computing power, so it is recommended that you switch to non-real time preview
or render a preview for the applied range.
White Balance
Select the White B alance option and then Color temperature to adjust the video's
color temperature or create a specific atmosphere. Once enabled, use the slider to
adjust the color of the video image. A lower value applies a colder temperature,
while a higher value creates an atmosphere that is warmer. Use the Tint slider to
adjust the color level of the clip.
Select the White calibration option and then click to color correct the video
image. By indicating which portion of the video image should be white, CyberLink
ActionDirector automatically adjusts the other colors accordingly to be more vivid
and true.
Color Presets
Select the Color Presets option to instantly transform the color and look of your
video clips. To apply a color preset, just select it.
Setting a Media Clip's Duration
When you add images and title effect templates to the storyboard, you can set how
long they are displayed in your video production. Unlike video clips which have a
maximum length, these media clips can have any duration you want.
To set a media clip's duration, do this:
1. Select the clip on the storyboard.
2. Click the the button above the storyboard (or right-click on the clip,
select Set Clip Attributes, and then select S et Duration).
36
Page 43

Editin g M edia o n th e Sto ryboard
3. In the Duration Settings window, enter in the how long you want it to display
in your video production. You can set the duration down to the number of
frames.
4. Click on OK.
Changing the Shape of Media
CyberLink ActionDirector lets you change the shape of the media in your video
production. Both videos and images added to the storyboard have freeform
properties, so you can easily change their shape to create media that is different
from the usual rectangle or square shape.
To change the shape of a media clip, do this:
1. Select a media clip on the storyboard. The media crosshairs will be displayed.
2. Use your mouse to click and drag the blue nodes in the corners of the media
clip, changing it to the desired freeform shape.
37
Page 44

Cyb erLink ActionDirector
38
Page 45

Editin g 360° Vid eos
Chapter 7:
Editing 360° Videos
If you want to render (produce) or upload your imported 360° media files, you first
need to add them to the storyboard. See Adding Video Clips and Images to the
Storyboard for detailed information.
Once added to the storyboard you can produce it right away, or make some edits
to the media file. When editing 360° videos, please note the following:
·
you can add more than one 360° media file on the storyboard. In the
produced 360° video, the media files will play in the order they are arranged
on the storyboard. You can use transitions between the media files if required,
add stylish video effects, or include title effects created in the Title Designer.
·
the adding of non-360° media files or effects is not recommended, as the
content will appear distorted in the produced 360° video file.
·
see the Editing Your Media on the Storyboard section for information on
some of the editing you can perform on your 360° media files. You can split,
trim, o r make color adjustments on 360° video clips that are on the
storyboard, and more.
·
in the Action Camera Center you can speed up portions of the 360° video and
more.
·
you can add background music to your 360° video.
Once you are done editing your 360° video, click the Produce button to produce it,
which renders it as a 360° video file. See Producing a 360° Video for more
information. You can also upload it directly to YouTube or Facebook. See
Uploading a 360° Video for more information.
39
Page 46

Cyb erLink ActionDirector
Note: the text in the intro/outro effect template cannot be added or modified
in the storyboard or in the preview window. Click the Ti tl e Design er button
to edit the text in the template.
Chapter 8:
Adding Intro/Outro Effects
Intro/Outro effects let you add text to your video production, such as open and
closing credits. You add intro/outro effect templates to the storyboard the same
way you add media clips, and they can be customized in the Title Designer.
To add a intro/outro effect template to the storyboard, do this:
1. Click on the button above the storyboard, or click the Intro/Outro tab
to open the Title room.
2. Browse through the available intro/outro effect templates. You can click one
to view a preview in the preview window.
3. When you find the intro/outro effect template you like, drag and drop it on
the storyboard. See Adding Video Clips and Images to the Storyboard for
more detailed instructions, since the process is the same.
Once added to the storyboard, select the intro/outro effect template and then click
the Title Designer button to edit it in the Title Designer. See Modifying Titles in the
Title Designer for more information. For information on setting the amount of time
the intro/outro effect appears in your video production, see Setting a Media Clip's
Duration.
Modifying Titles in the Title Designer
In the Title Designer you can customize the intro/outro effects in your project.
Intro/Outro effects contain character presets, animation, and background options
that you can modify to fit your video project.
To open the Title Designer, select a intro/outro effect on the storyboard and then
clic k the Title Designer button.
40
Page 47

Addin g In tro/Outro Effects
Note: if you'd like to perform additional editing after closing the Title
Designer, just select the title again in the storyboard and then click the
Ti tl e Design er button.
A - Text Properties Tab, B - Title Properties, C - Ti tle Animation Effect Tab, D - Insert Text/Background s,
E - Title Text, F - TV Sa fe Zone/G rid Lines, G - Pl ayer Controls
Once you are done modifying the intro/outro effect in the Title Designer, click the
OK button to close the window and set your changes in your video production.
Adding Text, Images, and Backgrounds
Each intro/outro effect template can contain one or more title text boxes. It can
also contain images and a background that the text displays over.
41
Page 48

Cyb erLink ActionDirector
Note: to remove the imported background image, just click the
button.
Adding Title Text
By default there is one title text box in the Title Designer when it's opened. To edit
the text in the title text, just click in the box, ensure the default text is selected, and
then type in your text.
You can also add additional title text boxes. To add new title text, click on the
button and then click in the preview window to add the title text box to the desired
position. Type in the required text in the new title text box.
See Modifying Title Text Properties for more information on customizing the
default title text properties to fit the intro/outro effect you are trying to create.
Inserting Backgrounds
Your intro/outro effect can consist of a background that the title text displays over.
To set a background, do this:
1. Click on the button.
2. Browse to and then select the image on your computer you want to use as the
background, and then click Open.
3. When prompted, select the adjustment setting for the background that best
fits your requirements.
Adding Images
You can insert your own images into your intro/outro effect template.
To add a image, do this:
1. Click on the button.
42
Page 49

Addin g In tro/Outro Effects
Note: click on to use the TV safe zone and grid lines to help with the
precise placement of the intro/outro effect on the master video. Select Snap
to Referen ce Lines to have the intro/outro effect snap to the grid lines, TV
safe zone, and boundary of the video area.
2. Browse to and then select the image on your computer you want to add, and
then click Open.
3. Once added, resize and reposition the image in the Title Designer as required,
just like a title.
Modifying Intro/Outro Effect Position
You can change the position and orientation of the title text in a intro/outro effect,
quickly and easily.
To modify title text or orientation:
·
click on the title text, and then drag it to a new position.
·
clic k on above the title text or image, and drag it right or left to change its
orientation.
·
click and drag a corner or side to resize the title text.
Modifying Title Text Properties
Click on the Text tab to change the properties of the selected title text.
Modifying Text Properties
Click on the Text properties tab to modify everything from the text size, style, color,
as well as adding borders, and much more.
Applying Character Presets to Title Text
Select the Character Presets option to apply a defined character preset to title text.
After you have applied a defined character preset you can refine it using the other
properties on the tab, if required.
To apply a character preset to title text, ensure the text box is selected in the
preview window and then click on a character preset in the list.
43
Page 50

Cyb erLink ActionDirector
Note: once you are done customizing all of the text properties on the tab,
cl ick on to save the character preset to your favorites. To find and
use saved character presets, select M y F avor i tes in the Character types
drop-down.
Customizing Font Type
Select the F ont Type option to set the font type and size of the selected title text.
You can also select the font face color, bold or italicize text, change the line and
text spacing, and set the text alignment in the text box.
If the font type you are using supports it, you can select the Kerning check box to
reduce the space between the letters in the title text.
Applying a Border
Select the Border option to add a border around the title text. Available options
allow you to change the border's size, and add an opacity or blur effect.
You can customize the border color using the following options in the Fill type
drop-down:
·
Uniform color: select this option if you want the border to be one solid color.
Click the colored square to open the color palette and select the desired
border color.
·
2 c olor gradient: select this option if you want the border color to change
from one color to another using a gradient. Click the colored squares to set
the beginning and ending colors, and then drag the Gradient direction
control to set which way the color flows.
·
4 c olor gradient: select this option if you want the border to consist of four
colors. Click the colored squares to set the colors in each of the four corners
of the border.
Opacity
Select this option to use the Opacity slider to set the level of transparency of the
selected title text.
44
Page 51

Addin g In tro/Outro Effects
Applying Animation Effects to Title Text
Click on the Effect tab to apply animations to title text, such as text fades, text
motion, or wipes.
To apply animation to text, do this:
1. Select the title text you wish to animate in the preview window.
2. Select the S tarting Effect option and then select an animation from the
available list.
3. Select the E nding Effect option and then select an animation from the
available list.
45
Page 52

Cyb erLink ActionDirector
Chapter 9:
Adding Action Effects in the Action Camera Center
In the Action Camera Center you can add effects that highlight the action
sequences in the video.
To open the Action Camera Center, select a video clip on the storyboard and then
click the Ac tion Effect button.
A - Fix Video Clips, B - Add Actio n Effects, C - Preview Window, D - Action Cam era Center Settings, E Zoom on Tim eline, F - Actio n Camera Center Timeli ne
Once in the Action Camera Center, you can:
·
Fix Video Clips
46
Page 53

Addin g Actio n Ef fects in the Action Camera Cente r
Note: to edit content created with the Action Camera Center, click on it on
the storyboard and then click on the Action Effect function button above
the storyboard.
Note: before you finish creating your action effects, configure the Action
Camera Center Settings to ensure the best output results.
Note: use the zoom controls above the Action Camera Center timeline to
zoom in on the video clip's timeline to more precisely add the time shift.
·
Create Action Effects
When you are done editing the video clip, click the OK button to save your
changes. Your changes are applied to the video clip and updated on the
storyboard.
Creating Action Effects on Video Clips
Click on the Effect tab in the Action Camera Center to highlight action sequences in
your videos clips with time shifts and freeze frames. Time shifts let you replay,
reverse, or alter the speed of key moments in your videos, while freeze frames
pause and zoom in on the action.
Creating Time Shifts
Time shifts let you highlight action in video clips by adding slow motion or replays
on key moments. To create a time shift, do this:
1. On the Effect tab, use the player controls or drag the Action Camera Center
timeline slider to the position in your video clip where you want the time shift
to start.
2. Click on the Create time shift button. CyberLink ActionDirector will create the
time shift, which is indicated in orange on the timeline.
47
Page 54

Cyb erLink ActionDirector
Note: the length of the original time shift is dependent on how much you
have zoomed in on the Action Camera Center timeline.
Note: you can create more than one time shift on a video clip. Just repeat
the above steps to add another.
3. If required, drag each end of the time shift so that it covers the segment of the
video you want to add the effect to.
4. Apply the effect as required (see below) to the time shift
segment.
Replay
In the Replay section, select the Apply replay and reverse option if you want to loop
the selected segment of video in the time shift. Once selected, indicate how many
times you want the segment to play by setting it in the Play times field. Select the
Add reverse effect option if you want the video to reverse forward and backward as
it loops playback.
Speed
In the Speed section, select the Apply speed effect option to speed up or slow down
just the selected segment of video in the time shift. Once selected, you can enter a
new Duration for the segment in the field provided, or use the Speed multiplier
slider. Drag it left to slow down the segment, or right to speed it up.
When you apply a speed effect to a segment of video, by default the change in the
speed in the video is instantaneous once the timeline slider enters the time shift. If
you want it to be more gradual and look smoother, you can use the Ease in/out
options. Select Ease in if you want the change of speed at the beginning of the time
48
Page 55

Addin g Actio n Ef fects in the Action Camera Cente r
Note: if you also selected the Apply repl ay and reverse option, in the
Apply effect to drop down select whether to apply the speed effect to the
first or last play of the time shift segment.
shift to gradually speed up/slow down to the specified speed. Select Ease out if you
want the video to gradually return to the original video speed at the end of the time
shift.
Stop Motion
Select the S top Motion tab and then the Apply stop motion option to add a stop
motion effect on the selected segment of video in the time shift. This effect pauses
on a frame of video for a specified number of frames, before jumping to the
current frame of video. Drag the slider right to increase the number of frames the
video will pause for, or drag it left to reduce the number of frames.
Zoom and Pan
In the Zoom and Pan section you can add zooms and pans on the selected segment
of video in the time shift.
To add a zoom and pan in a time shift segment:
1. Drag the timeline slider to the moment in the segment where you want to be
zoomed in/out on a portion of the video frame, and then click to add a
keyframe marker.
49
Page 56

Cyb erLink ActionDirector
2. Resize and move the focus area box as required. Make it smaller to zoom in on
a portion of the video, or make it larger to zoom out. Moving the focus area
box will add a pan as the camera moves to the location of the box by the time
the timeline slider reaches the keyframe.
50
Page 57

Addin g Actio n Ef fects in the Action Camera Cente r
Note: in the above example, the zoom in will begin at the beginning of the
time shift. Once the keyframe is reached, the camera will start zooming
back out.
3. If required, you can add more keyframes to customize the effect. For example,
you can add another keyframe to hold the zoom, which is done by keeping
the focus area box the same size and following the subject (moving the focus
area box).
51
Page 58

Cyb erLink ActionDirector
Note: use the zoom controls above the Action Camera Center timeline to
zoom in on the video clip's timeline to more precisely find the frame.
Adding Freeze Frames
Add a freeze frame to pause a frame of video for a specified duration. To add a
freeze frame, do this:
1. On the Effect tab, use the player controls or drag the Action Camera Center
timeline slider to the position in your video clip where you want the freeze
frame.
2. Click on the Add freeze frame button. CyberLink ActionDirector will add a
freeze frame, which is indicated by the blue indicator.
52
Page 59

Addin g Actio n Ef fects in the Action Camera Cente r
Note: you can add more than one freeze frame to a video clip. Just repeat
the above steps to add another.
Note: if you also selected the Apply repl ay and reverse option, in the
Apply effect to drop down select whether to apply the freeze frame to the
first or last play of the time shift segment.
Note: * optional feature in CyberLink ActionDirector. Check the version
table on our web site for detailed versioning information.
3. In the Duration field, enter how long you want the video to pause on this
frame of video.
Applying Zoom Effect
Select the Apply zoom effect option if you want to zoom in and out on the paused
frame of video. Once selected, resize and align the focus box to the part of the
video frame where you want the zoom to occur.
Action Camera Center Settings
Click the button in the Action Camera Center window to open the settings
window. The available options are as follows:
Audio setting:
·
Remov e audio: select this option if you want to mute the audio in the entire
video clip.
·
Keep audio: select this option if you want to keep the audio in the edited
video clip. Select the K eep audio pitch (0.5X to 2X only) if you are changing
the speed of the video. Selecting this will stretch the audio to match the new
video's length, minimizing the warping of the sound as the video speed
changes.
Interpolation setting:
·
Apply interpolated technology for smoother result (w hen available): select this
option when reducing the speed of the video. CyberLink ActionDirector uses
frame interpolated technology* to create a more advanced and smooth slow
motion effect.
53
Page 60

Cyb erLink ActionDirector
Note: if you would like to view the individual clips created by the Action
Camera Center so you can edit them directly on the storyboard, just rightclick on the file and then select Show Individual Clips.
Changing the Action Camera Center Content
Once you have created your action effects in the Action Camera Center and
imported the resulting video clip into the storyboard, you can edit it like any other
video clip on the storyboard. However, if you find that you want to edit or refine the
effects more, you can do this by re-entering the Action Camera Center.
To edit content created with the Action Camera Center, click on it on the storyboard
and then click on the Action Camera Center function button above the storyboard.
Editing Content
When you re-enter in the Action Camera Center, you can refine any of the fixes you
made on the Fix tab. Click on the Effect tab to edit any action effects you created,
or add new ones. To edit a created time shift, just select it on the video timeline,
and then adjust its parameters as required.
For freeze frames, select the freeze frame indicator,
54
Page 61

Addin g Actio n Ef fects in the Action Camera Cente r
Note: if you want to remove a time shift or freeze frame from a video clip,
just select it on the Action Camera Center timeline and then click the
button.
and then adjust the freeze frame settings as required.
When you are done, click OK to save your changes and import the updated content
into the storyboard.
55
Page 62

Cyb erLink ActionDirector
Chapter 10:
View Designer
In non 360 projects, the View Designer lets you customize the direction of view in
360º video clips for use in conventional/standard 2D video productions. You can
also use it to create new unique videos with your 360º video clips that look like little
planets.
To do this, select a 360° video clip on the storyboard and then select View D esigner.
A - Direction of Vi ew/Little P lanet P roperties, B - Sel ect Projection M ode, C - P review Window , D Displ ay/Hid e Keyframe Ti meline, E - Key frame Ti meline
See Customizing Direction of View in 360º Video Clips and Creating Little Planet
Videos for more information about these View Designer features.
56
Page 63

View Design er
When you are done customizing the video, click the OK button to save your
changes and create the conventional video. Your changes are applied to the video
clip and updated on the storyboard.
Customizing Direction of View in 360º Video Clips
360° videos allow the viewer to choose where they look during playback. When
creating a standard 2D/conventional video (non 360 project) using 360° footage,
you can customize this direction of view in 360° video clips using keyframes.
To customize the direction of view in a 360° video clip, do this:
1. Select a 360° video clip on the storyboard and then select View Designer.
2. In the Projection mode drop-down, ensure that Standard 2D is selected.
3. Click to add a keyframe at the beginning of the video.
57
Page 64

Cyb erLink ActionDirector
4. If required, set the direction you want the camera (audience's view) to be
pointing at the beginning of the video. You can do this by clicking and
dragging your mouse in the preview window, or using the navigation controls
in the top left corner of the preview window.
5. Use the playback controls, or drag the timeline slider to a point in the video
where you want the camera to have a different direction of view, and then
pause the video.
6. Once again, set the direction of view by clicking and dragging on the preview
window, using the navigation controls, and/or the Zoom in/out slider. This
will add another keyframe to the Direction of view keyframe timeline, and the
audience will have this view at this point in the video's playback.
58
Page 65

View Design er
Note: if required, you can also use the X, Y, Z rotation and Zoom (or use
your mouse's scroll wheel) sliders to customize the view at the first or any
keyframe.
7. Repeat steps 5 and 6, changing the direction of view as many times as
required (or setting all the points (keyframes) where you want the camera to
be facing at specific times in the video clip).
59
Page 66

Cyb erLink ActionDirector
Note: if you want to edit the video after closing the View Designer, just
select it again on the storyboard and then View Designer to reenter the
window.
8. When you are done, use the playback controls to preview the video. Click OK
to save your changes and add the updated video to the storyboard.
Ease In/Out
Adjusting the direction of view and X, Y, and Z rotation sliders lets you manually
create camera movements in your video. To change the direction of view/camera
movement, you indicate when in the video you want the camera to be facing a
specific direction by adding keyframes. To create the camera movement, CyberLink
ActionDirector will ensure the camera is facing in the selected direction at the
specified time in the video. However, this may cause the camera movements to
appear jerky. To make the sudden camera movements look smoother, be sure to
enable the E ase in/out option.
60
Page 67

View Design er
Note: if you cannot find the keyframe timeline in the View Designer, just
cl ick the button under the preview window to display it.
Modifying Direction of View Keyframes
At any time you can modify the keyframes added, by selecting them and changing
the direction of view/zoom, or by dragging the keyframe to another position on the
keyframe timeline.
To remove a keyframe, select it on the keyframe timeline and then click .
Creating Little Planet Videos
In the View Designer you can use 360º video clips to create little planet videos. To
create a little planet video, do this:
1. Select a 360° video clip on the storyboard and then select View Designer.
2. In the Projection mode drop-down, select the Little Planet option to transform
the video.
61
Page 68

Cyb erLink ActionDirector
Customizing the Look of Your Little Planet
Video
When creating a little planet video, use the direction of view sliders, fly in/out, and
keyframes to customize the look of your final video.
Direction of View
Use the X, Y, Z rotation sliders and keyframes to customize the look of your little
planet video. See Customizing Direction of View in 360º Video Clips for more details
on how to use these to customize the direction of view to your liking.
Fly Out
Select the F ly out option if you want the video to begin as a regular video, and then
fly out to reveal the little planet.
62
Page 69

View Design er
63
Page 70

Cyb erLink ActionDirector
You can modify the look and timing of the fly out by adjusting the added
keyframes.
64
Page 71

View Design er
Fly In
Select the F ly in option if you want the video to end as a regular video, by flying in
on the little planet.
65
Page 72

Cyb erLink ActionDirector
66
Page 73

View Design er
You can modify the look and timing of the fly out by adjusting the added
keyframes.
67
Page 74

Cyb erLink ActionDirector
Ease In/Out
Adjusting the direction of view, and adding a fly out and in, may cause movements
in your video to appear jerky. To make them look smoother, be sure to enable the
Ease in/out option.
68
Page 75

Addin g V ideo Effects
Note: the effect is applied for the entire duration of the selected clip. If you
only want it applied to a portion of it, you can split the clip and then apply the
effect to the portion you want. See Splitting a Clip for more information.
Note: media clips on the storyboard that have an effect applied have an i
icon in the bottom left corner of its storyboard thumbnail.
Note: only one video effect at can be applied to each media clip on the
storyboard.
Note: to remove an applied effect from a media clip, reenter the Effects
panel, make sure the clip is selected, and then click on No Effect in the top
left.
Chapter 11:
Adding Video Effects
You can add stylish video effects to your video production to make it unique. Video
effects can be applied to both video clips and images on the storyboard, even when
editing 360° video projects.
To add a video effect on a media clip in the storyboard, do this:
1. Select a video file or image on the storyboard.
2. Click the button above the storyboard to open the Effects panel.
3. Find a video effect you like and then click it to instantly apply it to the
selected clip.
4. Once applied, you can preview it in the preview window.
5. To apply a different effect to this clip, ensure it is still selected and then click
on the new effect.
6. When you are done adding the video effect, click to close the Effects panel.
69
Page 76

Cyb erLink ActionDirector
Note: if you only want a transition to be at the beginning of a clip, this can
only be done by adding it to the first clip on the storyboard. Once added,
you can then move the clip to another position on the storyboard.
Chapter 12:
Using Transitions
Click the Transition tab to open the Transition Room and access a library of
transitions that you can use on or between image and video clips in your video
production. Transitions let you control how media appears and disappears in your
project, and changes, or transitions, from one clip to the next.
Adding Transitions to a Single Clip
By adding a transition to a single clip, you can control how the clip appears and/or
disappears in your production.
To add a transition to a single clip, do this:
1. Click on Transitions tab to open the Transition Room.
2. Select a transition effect and then drag it to the beginning (prefix transition) of
the first clip on the storyboard.
3. Select a transition effect and then drag it to the end (postfix transition) of the
last clip on the storyboard.
70
Page 77

Usin g Transitio ns
Note: if you only want a transition at the end of a clip, this can only be done
by adding it to the last clip on the storyboard. Once added, you can then
add more clips after it on the storyboard.
To change the duration of the transition, click on the Duration button above the
storyboard. If you want to remove the transition from the clip, just click on it in the
thumbnail and then press the Delete key on your keyboard.
Adding Transitions Between Two Clips
You can also add a transition between two image and video clips on the
storyboard.
To add a transition between two clips, do this:
1. Click on Transitions tab to open the Transition Room.
2. Select a transition effect and then drag it between the two clips on the
storyboard.
To change the duration of the transition, click on the Duration button above the
storyboard. If you want to remove the transition from between the clips, just click
on it in the first thumbnail and then press the Delete key on your keyboard.
71
Page 78

Cyb erLink ActionDirector
Chapter 13:
Adding Background Music
You can easily add background music to your video production. To add
background music, do this
1. Click on the Music button to the right of the storyboard. The Add Background
Music window opens.
2. Click on the button.
3. Browse to the music you want to add, select it, and then click Open. You can
repeat this step multiple times, or select more than one music file to add
more music.
4. In the Trim audio section you can trim the length of the music files you
added as background music as follows:
·
use the player controls to find the desired start point for the music, and then
click .
·
use the player controls to find the desired end point for the music, and then
click .
·
drag the markers on the music timeline to set the desired start and end times
manually.
5. In the mix audio section:
·
drag the slider left (towards B ackground music) to increase the volume of the
music in your video. Doing this will also reduce the volume of the audio in the
video clip's on the storyboard.
·
drag the slider right (towards Video's audio) to increase the volume of the
audio in the video clip's on the storyboard. Doing this will reduce the volume
of the background music you added.
6. Select the Loop playback option if you want the music to play continuously
during the entire duration of the video. When the music ends, it will loop back
to the beginning.
72
Page 79

Addin g B ackgroun d M usic
Note: if you'd like to edit the background music after closing the Add
Background Music window, just click on the Music button again.
7. Select the Auto fade in/out option to have the background music gradually
fade in and out during the production.
8. Click OK to save your changes and add the background music to the video.
73
Page 80

Cyb erLink ActionDirector
Note: before you produce your project, you can also click Go to Theme
Designer to use theme templates to add style to your video production.
CyberLink ActionDirector will create a render preview of your finished video
production and then import it into the Theme Designer. See Using the
Theme Designer for more detailed information.
Chapter 14:
Producing Your Project
When you are done creating your video production, and you are satisfied with the
results after viewing it in the preview window, it's time to produce it. Producing
simply means compiling (or rendering) the separate elements your project contains
into a playable video file.
To begin producing your project, click the Produce button in the bottom right
corner. In the Produce dialog you have two options:
·
Produce & Save: select this option if you want to create a video file on your
computer's hard drive. See Producing and Saving to a Video File for detailed
information.
·
Produce & Share: select this option if you want to render your video
production and then have it uploaded to a social media web site such as
Facebook, YouTube, or Vimeo. See Producing and Sharing to Online Media
Sites for detailed information.
Utilizing Intelligent SVRT
Intelligent SVRT (Smart Video Rendering Technology) is a proprietary rendering
technology from CyberLink that assists in the output of your video productions by
suggesting which video profile you should use.
Based on the format of original video clips in your project, what portions of the
clips were modified (and therefore require rendering during production), and which
portions of them were not changed (and thus can be skipped over during the
rendering process), Intelligent SVRT suggests the video profile that will result in the
best output quality possible, and save you the most time during production.
To utilize Intelligent SVRT, click the I ntelligent SVR T button on the File tab.
74
Page 81

Producin g Y our Project
Note: if you're not sure which video file format you should output your
production in, click the Intelligent SVRT button for assistance. See Utilizing
Intelligent SVRT for more information on using this feature.
Note: H.264 AVC and WMV video file formats support up to 4K resolution
(Ultra HD). Before production, be sure to select the desired video resolution
in the P rof il e na me/Qua l ity drop-down.
In the Intelligent SVRT dialog that displays, CyberLink ActionDirector auto selects
the video profile it suggests you use to output your video production, and some
other video profiles you can utilize.
To select a video profile, just select it in the Intelligent SVRT dialog and then click
Apply. The selected video profile is auto highlighted and selected as you proceed to
produce. The video profile you used is also saved in the dialog, and will always be
available when utilizing Intelligent SVRT.
Producing and Saving to a Video File
You can produce your video and save it as a video file that you can watch on a
computer, mobile device, and more.
Producing Regular HD Video
You can output your video production as a video file, which you can watch on a
computer, burn to disc, or output to a portable device.
You can output your project to one of the following formats:
·
H.264 AVC (.MP4)
·
Windows Media
To output your video production, do this:
1. Select a video file format by clicking it (H.26 4 AVC (.MP4) or Windows Media).
2. Select the Pr ofile name/Quality you want to use to create the file. This
selection determines the video resolution, file size, and overall quality of the
outputted file.
75
Page 82

Cyb erLink ActionDirector
Note: H.264 AVC video file format supports up to 4K resolution (Ultra HD).
Before production, be sure to select the desired video resolution in the
Pr ofi l e nam e/Qua li ty drop-down.
Note: a 360 video preview is not available during production.
3. Check the production details and that the file will be outputted to the folder
on your computer where you want it. Click to set another output
folder.
4. If required, select E nable preview during production to preview your video
during production. Selecting this option will increase the time required to
produce your file.
5. Click the Start button to begin producing your file.
Producing a 360° Video
You can output your 360° video file in either of the following formats:
·
H.264 AVC (.MP4)
To output your video production, do this:
1. Select a video file format by clicking it (H.26 4 AVC (.MP4)).
2. Select the Pr ofile name/Quality you want to use to create the file. This
selection determines the video resolution, file size, and overall quality of the
outputted file.
3. Check the production details and that the file will be outputted to the folder
on your computer where you want it. Click to set another output
folder.
4. If required, select E nable preview during production to preview your video
during production. Selecting this option will increase the time required to
produce your file.
5. Click the Start button to begin producing your file.
76
Page 83

Producin g Y our Project
Note: in some versions of ActionDirector, you can produce and upload up to
4K resolution (Ultra HD) video to social web sites. Before production, be
sure to select the desired video resolution in the Profile name/Qua lity
drop-down.
Playing Your 360° Video
Once the production is complete, the 360° video file is automatically imported into
your media library. To play it back, just select it in the media library and then use
the playback and 360 controls. See Playing 360° Media Files for more information.
360° video files can also be played on your compatible Samsung device, or you can
upload and then play it on YouTube and Facebook. See Uploading a 360° Video for
more information.
Uploading Video to Online Media Sites
On the Online tab you can upload your video production to online media web sites.
Uploading Regular HD Video
On the Online tab you can upload your video production to one of the following
online media web sites:
·
Facebook
·
YouTube
·
Dailymotion
·
Vimeo
·
Niconico Douga
·
Youku
Uploading Video to Facebook
To upload your video to Facebook®, do this:
77
Page 84

Cyb erLink ActionDirector
Note: if the size/length of the your video exceeds the maximum allowed,
ActionDirector will separate the video into smaller/shorter videos, upload
these videos, and then create a playlist for you on YouTube.
Note: the quality option available on YouTube is also dependent on the
original captured video quality and the bandwidth of the user who is
watching the video.
1. Click the Facebook button.
2. Select the desired quality of your video from the Profile type drop-down list.
3. Enter a Title and Description for your video in the fields provided. The text
you enter is included on Facebook once uploaded.
4. If required, select E nable preview during production to preview your video
during production. Selecting this option will increase the time required to
produce the file before upload.
5. Click Start to begin.
6. Click Authorize and then grant ActionDirector permission to upload videos to
your Facebook account by following the steps in the Facebook Authorization
windows.
7. ActionDirector proceeds to produce and upload the video file. Click Close
when done to return to the program.
Uploading Video to YouTube
To upload your video to YouTube, do this:
1. Click the YouTube Videos button.
2. Select the desired quality of your video from the Profile type drop-down. The
quality you select will result in the corresponding quality option being
available after the video is fully processed on YouTube.
3. Enter a Title and Description for your video in the fields provided. The text
you enter is included on YouTube once uploaded. Also select one of the
Video categories and enter in some keyword Tags that users can search for to
find your video.
4. Set whether you want the video to be Public or Private once it is uploaded to
YouTube.
78
Page 85

Producin g Y our Project
Note: sign in to DirectorZone and then select Share video on
DirectorZone if you want to show others how you adjusted the clips in your
video production. When selected, your uploaded video also displays on
DirectorZone.
Note: if the size/length of the your video exceeds the maximum allowed,
ActionDirector will separate the video into smaller/shorter videos, upload
these videos, and then create a playlist for you on Dailymotion.
Note: the quality option available on Dailymotion is also dependent on the
original captured video quality and the bandwidth of the user who is
watching the video.
5. If required, select E nable preview during production to preview your video
during production. Selecting this option will increase the time required to
produce the file before upload.
6. Click Start to begin.
7. Click Authorize and then grant ActionDirector permission to upload videos to
your YouTube account by following the steps in the YouTube Authorization
windows.
8. ActionDirector proceeds to produce and upload the video file. Click Close
when done to return to the program.
Uploading Video to Dailymotion
To upload your video to Dailymotion, do this:
1. Click the Dailymotion button.
2. Select the desired quality of your video from the Profile type drop-down. The
quality you select will result in the corresponding quality option being
available after the video is fully processed on Dailymotion.
3. Enter a Title and Description for your video in the fields provided. The text
you enter is included on Dailymotion once uploaded. Also select one of the
Video categories and enter in some keyword Tags that users can search for to
find your video.
4. Set whether you want the video to be Public or Private once it is uploaded to
Dailymotion.
79
Page 86

Cyb erLink ActionDirector
Note: sign in to DirectorZone and then select Share video on
DirectorZone if you want to show others how you adjusted the clips in your
video production. When selected, your uploaded video also displays on
DirectorZone.
Note: if the size/length of the your video exceeds the maximum allowed,
ActionDirector will separate the video into smaller/shorter videos, upload
these videos, and then create a playlist for you on Vimeo.
Note: the quality option available on Vimeo is also dependent on the
original captured video quality and the bandwidth of the user who is
watching the video.
Note: sign in to DirectorZone you can select Share vi deo on
DirectorZone if you want to show others how you adjusted the clips in your
video production. When selected, your uploaded video also displays on
DirectorZone.
5. If required, select E nable preview during production to preview your video
during production. Selecting this option will increase the time required to
produce the file before upload.
6. Click Start to begin.
7. Click Authorize and then grant ActionDirector permission to upload videos to
your Dailymotion account by following the steps in the Dailymotion
Authorization windows.
8. ActionDirector proceeds to produce and upload the video file. Click Close
when done to return to the program.
Uploading Video to Vimeo
To upload your video to Vimeo, do this:
1. Click the Vimeo button.
2. Select the desired quality of your video from the Profile type drop-down. The
quality you select will result in the corresponding quality option being
available after the video is fully processed on Vimeo.
3. Enter a Title and Description for your video in the fields provided. The text
you enter is included on Vimeo once uploaded. Also enter in some keyword
Tags that users can search for to find your video.
4. Set whether you want the video to be Public or Private once it is uploaded to
Vimeo.
80
Page 87

Producin g Y our Project
Note: if the size/length of the your video exceeds the maximum allowed,
ActionDirector will separate the video into smaller/shorter videos, upload
these videos, and then create a playlist for you on Niconico Douga.
Note: the quality option available on Niconico Douga is also dependent on
the original captured video quality and the bandwidth of the user who is
watching the video.
Note: sign in to DirectorZone you can select Share vi deo on
DirectorZone if you want to show others how you adjusted the clips in your
video production. When selected, your uploaded video also displays on
DirectorZone.
5. If required, select E nable preview during production to preview your video
during production. Selecting this option will increase the time required to
produce the file before upload.
6. Click Start to begin.
7. Click Authorize and then grant ActionDirector permission to upload videos to
your Vimeo account by following the steps in the Vimeo Authorization
windows.
8. ActionDirector proceeds to produce and upload the video file. Click Close
when done to return to the program.
Uploading Video to Niconico Douga
To upload your video to Niconico Douga, do this:
1. Click the Niconico Douga button.
2. Enter your Niconico Douga Username and Password. If you don't have an
account, click the S ign Up to N iconico link to get one.
3. Select the desired quality of your video from the Profile type drop-down. The
quality you select will result in the corresponding quality option being
available after the video is fully processed on Niconico Douga.
4. Enter a Title and Description for your video in the fields provided. The text
you enter is included on Niconico Douga once uploaded. Also enter in some
keyword Tags that users can search for to find your video.
5. Set whether you want the video to be Public or Private once it is uploaded to
Niconico Douga.
81
Page 88

Cyb erLink ActionDirector
Note: if the size/length of the your video exceeds the maximum allowed,
ActionDirector will separate the video into smaller/shorter videos, upload
these videos, and then create a playlist for you on Youku.
Note: the quality option available on Youku is also dependent on the
original captured video quality and the bandwidth of the user who is
watching the video.
Note: sign in to DirectorZone you can select Share vi deo on
DirectorZone if you want to show others how you adjusted the clips in your
video production. When selected, your uploaded video also displays on
DirectorZone.
6. If required, select E nable preview during production to preview your video
during production. Selecting this option will increase the time required to
produce the file before upload.
7. Use the player controls in the preview window to find the frame of video in
your production you want to use as the video's thumbnail on the Niconico
Douga web site, and then clic k the S et Thumbnail button.
8. Click Start to begin.
9. Click Authorize and then grant ActionDirector permission to upload videos to
your Niconico Douga account by following the steps in the Niconico Douga
Authorization windows.
10. ActionDirector proceeds to produce and upload the video file. Click Close
when done to return to the program.
Uploading Video to Youku
To upload your video to Youku, do this:
1. Click the Youku button.
2. Select the desired quality of your video from the Profile type drop-down. The
quality you select will result in the corresponding quality option being
available after the video is fully processed on Youku.
3. Enter a Title and Description for your video in the fields provided. The text
you enter is included on Youku once uploaded. Also select one of the Video
categories and enter in some keyword Tags that users can search for to find
your video.
4. Set whether you want the video to be Public or Private once it is uploaded to
Dailymotion.
82
Page 89

Producin g Y our Project
Note: in some versions of ActionDirector, you can produce and upload up to
4K resolution (Ultra HD) video to social web sites. Before production, be
sure to select the desired video resolution in the Profile name/Qua lity
drop-down.
5. If required, select E nable preview during production to preview your video
during production. Selecting this option will increase the time required to
produce the file before upload.
6. Click Start to begin.
7. Click Authorize and then grant ActionDirector permission to upload videos to
your Youku account by following the steps in the Youku Authorization
windows.
8. ActionDirector proceeds to produce and upload the video file. Click Close
when done to return to the program.
Uploading a 360° Video
On the Online tab you can upload your 360° video to either Facebook or YouTube.
Once uploaded, you can click and drag on the Facebook/YouTube player window,
or use any available 360 controls, to rotate and view the entire 360° video.
Uploading 360° Video to Facebook
To upload your 360° video to Facebook®, do this:
1. Click the Facebook button.
2. Select the desired quality of your video from the Profile type drop-down list.
3. Enter a Title and Description for your video in the fields provided. The text
you enter is included on Facebook once uploaded.
4. If required, select E nable preview during production to preview your video
during production. Selecting this option will increase the time required to
produce the file before upload.
5. Click Start to begin.
6. Click Authorize and then grant ActionDirector permission to upload videos to
your Facebook account by following the steps in the Facebook Authorization
windows.
83
Page 90

Cyb erLink ActionDirector
Note: if the size/length of the your video exceeds the maximum allowed,
ActionDirector will separate the video into smaller/shorter videos, upload
these videos, and then create a playlist for you on YouTube.
Note: the quality option available on YouTube is also dependent on the
original captured video quality and the bandwidth of the user who is
watching the video.
Note: sign in to DirectorZone and then select Share video on
DirectorZone if you want to show others how you adjusted the clips in your
video production. When selected, your uploaded video also displays on
DirectorZone.
7. ActionDirector proceeds to produce and upload the video file. Click Close
when done to return to the program.
Uploading 360° Video to YouTube
To upload your 360° video to YouTube, do this:
1. Click the YouTube Videos button.
2. Select the desired quality of your video from the Profile type drop-down. The
quality you select will result in the corresponding quality option being
available after the video is fully processed on YouTube.
3. Enter a Title and Description for your video in the fields provided. The text
you enter is included on YouTube once uploaded. Also select one of the
Video categories and enter in some keyword Tags that users can search for to
find your video.
4. Set whether you want the video to be Public or Private once it is uploaded to
YouTube.
5. If required, select E nable preview during production to preview your video
during production. Selecting this option will increase the time required to
produce the file before upload.
6. Click Start to begin.
7. Click Authorize and then grant ActionDirector permission to upload videos to
your YouTube account by following the steps in the YouTube Authorization
windows.
8. ActionDirector proceeds to produce and upload the video file. Click Close
when done to return to the program.
84
Page 91

Usin g th e The me De signe r
Note: this feature is not available when editing a 360º video project.
Chapter 15:
Using the Theme Designer
The Theme Designer lets you add style and a professional video look to your video
production, with fully customizable theme templates. A theme may consist of one
or more theme templates, or individual sequences from different theme templates.
As you customize the theme template, you can also fully customize how your
media is displayed, giving you more creative control over your outputted movie.
To open the Theme Designer click Theme Designer on the ActionDirector launch
window, or Go to Theme Designer in the Produce dialog.
85
Page 92

Cyb erLink ActionDirector
A - Med ia Tab, B - Effects Tab, C - Seq uence Content Area, D - Added Sequences Area, E - Sel ected
Sequence, F - Title Settings, G - Theme Background Music , H - Sequenc e Bac kground Im age, I Transition Settings, J - P review Window , K - Preview Controls, L - Take Snapshot from Vi deo, M - Auto
Fill Medi a Slo ts
Overview
Themes that you edit in the Theme Designer consist of theme templates and your
media files. Your media files may consist of:
·
images and video clips you import into the Theme Designer.
·
a render preview of the video production created in the storyboard window.
·
all the images and video clips you had in the media room in the storyboard
window.
·
snapshot images you create in the Theme Designer. See Taking Snapshots
from Videos for more information.
What are Theme Templates?
Theme templates are used to create a video production, with a specific type of
theme or style, and can be downloaded from DirectorZone. Theme templates
consist of a number of sequences. Each of these sequences contain elements, some
of which are customizable and some of which are not.
The customizable elements include the text and media (images, videos, and
background music) you add to each sequence. You can add effects on this media
and set how and when it is displayed. You can also set the background image on
some sequences, and select the transition between each sequence in templates
named "with transitions". Non-customizable elements include any animation
included in the sequences.
When selecting a theme template to use in the Theme Designer, you can choose to
add one or more theme templates, creating a more original production. You can
even just select some of the sequences in a theme template, or mix and match the
sequences used.
There are three types of sequences: opening, middle, and closing sequences.
Opening and closing sequences usually contain text, while the elements in middle
sequences are much more random.
86
Page 93

Usin g th e The me De signe r
Note: once the render preview and media files are imported into the Theme
Designer, the Add Theme Templates/Sequences window displays. See
Adding Theme Templates/Sequences for more information on the next
steps.
Note: if you want to import additional media files into the Theme Designer
after you have entered it, see Importing More Media Files.
Importing Media Files into the Theme Designer
There are two ways you can enter the Theme Designer in CyberLink ActionDirector,
so the process for the initial import of media files depends on the path you take. If
you entered the Theme Designer from the storyboard window, CyberLink
ActionDirector will:
·
create a render preview of your video production and then import it into the
Theme Designer.
·
import all of the video files and images you have in the media room, whether
they were used in your production or not, into the Theme Designer.
If you enter the Theme Designer from the launch window, you will see an import
window that helps you import your media files.
Importing Media Files
When you select Theme Designer on the ActionDirector launch window, you
import your media files as below.
1. After selecting Theme Designer, the import media window displays.
87
Page 94

Cyb erLink ActionDirector
Note: you can also click on the Import icon if you just want to import media
files individually.
2. Click on and then select one of the following options:
·
Im port Media F iles: import media files individually.
·
Im port a Media F older: import the entire contents of a folder that contains the
media files you want to use.
3. Browse to and select the media files you want to import and
the n click Open.
4. Click on Next to import the media files into the Theme Designer
and display the Add Theme Templates/Sequences window. See
Adding Theme Templates/Sequences for more information on the
next steps.
88
Page 95

Usin g th e The me De signe r
Adding Theme Templates/Sequences
In the Theme Designer you can use one or more theme templates, or just certain
selected sequences, to create your video.
When you first enter the Theme Designer, you are prompted to select a theme
template.
To add a theme template, just select it in the window and all of its sequences will be
added.
89
Page 96

Cyb erLink ActionDirector
Note: you can preview a theme template in the preview window by selecting
it and then using the available playback controls.
If you don't want to use all the theme template's sequences, just deselect the ones
you don't want to use.
90
Page 97

Usin g th e The me De signe r
Note: the number of media files you can add to a sequence is dependent on
its design.
You can also select sequences from other theme templates and include them in
your video. The Theme Designer will remember the order of your selections.
Click OK once you have selected all the sequences. They will be loaded into the
added sequences area of the Theme Designer.
If you'd like to add more sequences, just click the button. You can drag and
drop the sequences to reorder them, or right click to remove the selected one.
Adding Media Clips
Once you have selected the theme templates (and their sequences) that you want
to use, you can start adding your images and video files to them.
To add media into the selected sequences, do this:
91
Page 98

Cyb erLink ActionDirector
Note: some of the media slots in sequences allow you to add both images
and videos into them, while others only allow one type of media.
Note: the media that is available on the Media tab are the videos and
images you imported into the Media Room library. Click Impor t M edi a to
import media from your computer's hard drive.
1. In the added sequences area, select the individual sequence you want to add
media to. Note the number of media slots that are available in the sequence
content area. The number of available slots varies from sequence to sequence.
2. Click on the Media tab and then drag and drop the media that you want in the
sequence to the desired slot.
3. Continue this process until all the media slots have been used.
92
Page 99

Usin g th e The me De signe r
4. Select the next sequence, and then repeat steps 2 and 3 until all the media
slots have been filled.
93
Page 100

Cyb erLink ActionDirector
Note: if you want a media file to continue playing from one sequence to the
next, ensure the Continue from last clip in the previous sequence is
selected. The first media slot will be auto populated with the content from
the last media slot on the previous sequence. Deselect this option if you
want new media displayed in the next sequence.
Note: when adding media you can also click the button to
auto fill all the empty media slots in the sequences. Select Auto Fill by
Library Order to fill by the created date, as displayed in the Media Room
li brary. Select Auto Fill Using Videos Fi rst if you want to add the video
clips first.
5. Continue selecting all the sequences in your video until all of the media slots
and sequences contain media.
Importing More Media Files
Once you are in the Theme Designer, there are two ways you can import more
media files into the window.
·
To import more video files and images located on your hard drive, click the
Im port Media button.
·
To take still snapshots from videos in the Theme Designer, click the Snapshot
button. See Taking Snapshots from Videos for more information.
Taking Snapshots from Videos
You can take a snapshot from a paused video and then import the image into the
Theme Designer to use in your video production.
To take a snapshot, do this:
1. In the main Theme Designer window, select the video file you want to use and
then click the Snapshot button.
2. In the Snapshot window, use the playback controls to find the video frame
you want to take a snapshot of. Pause the video and use the and
buttons to find the precise frame you want to capture.
3. Click the . The snapshot image is captured.
4. Repeat the steps to take as many snapshots from the video as you wish.
94
 Loading...