

Cyber Acoustics CA-4100 Instructions Manual
CA-4100 Computer Speakers
CA-4100
Magnetically Shielded
Amplified Computer Speakers
CA-4100 Computer Speakers
P r e c a u t i o n T i p s
• Use only the AC/DC power adapter supplied with these speakers. Cyber Acoustics
cannot be held responsible for damage caused by other power supplies.
• Disconnect the power supply before making any connections.
• Although the CA-4100 satellite speakers are magnetically shielded, keep discs
and tapes away from them. The subwoofer speaker is not magnetically
shielded. Keep away from monitor, disc, etc. Cyber Acoustics is not responsible
for any damage caused by misuse.
• Keep your speakers away from extreme heat or humid and wet conditions.
T r o u b l e s h o o t i n g
Speakers produce no sound
• Are the speakers getting power? Is the power indicator light on? Check the power
supply connections.
• Is there any output from your sound card? Check your sound card setting. Also, you
can check the speakers easily by connecting them to another music source such as
a portable CD player or cassette player. Just plug them into the headphone jack or
line out jack. If the speakers work on this other source, they are OK and the problem
is with the soundcard.
• No sound from rear speakers: Check rear speaker volume control. Note: Sound
from the front/master volume control must be turned up before sound output
can be heard from rear channel.
Speakers produce weak sound
• Again, check your soundcard setting. Make sure your software speaker volume
control is turned up to a desired level.
One speaker does not play
• Check the balance control on your mixer software.
• Check the plug connections.
Customer Service
If you have questions or need assistance with your speakers, please call or consult our
web site.
Tel: 360 883 0333
Web site: www.cyb er-acoustics.com
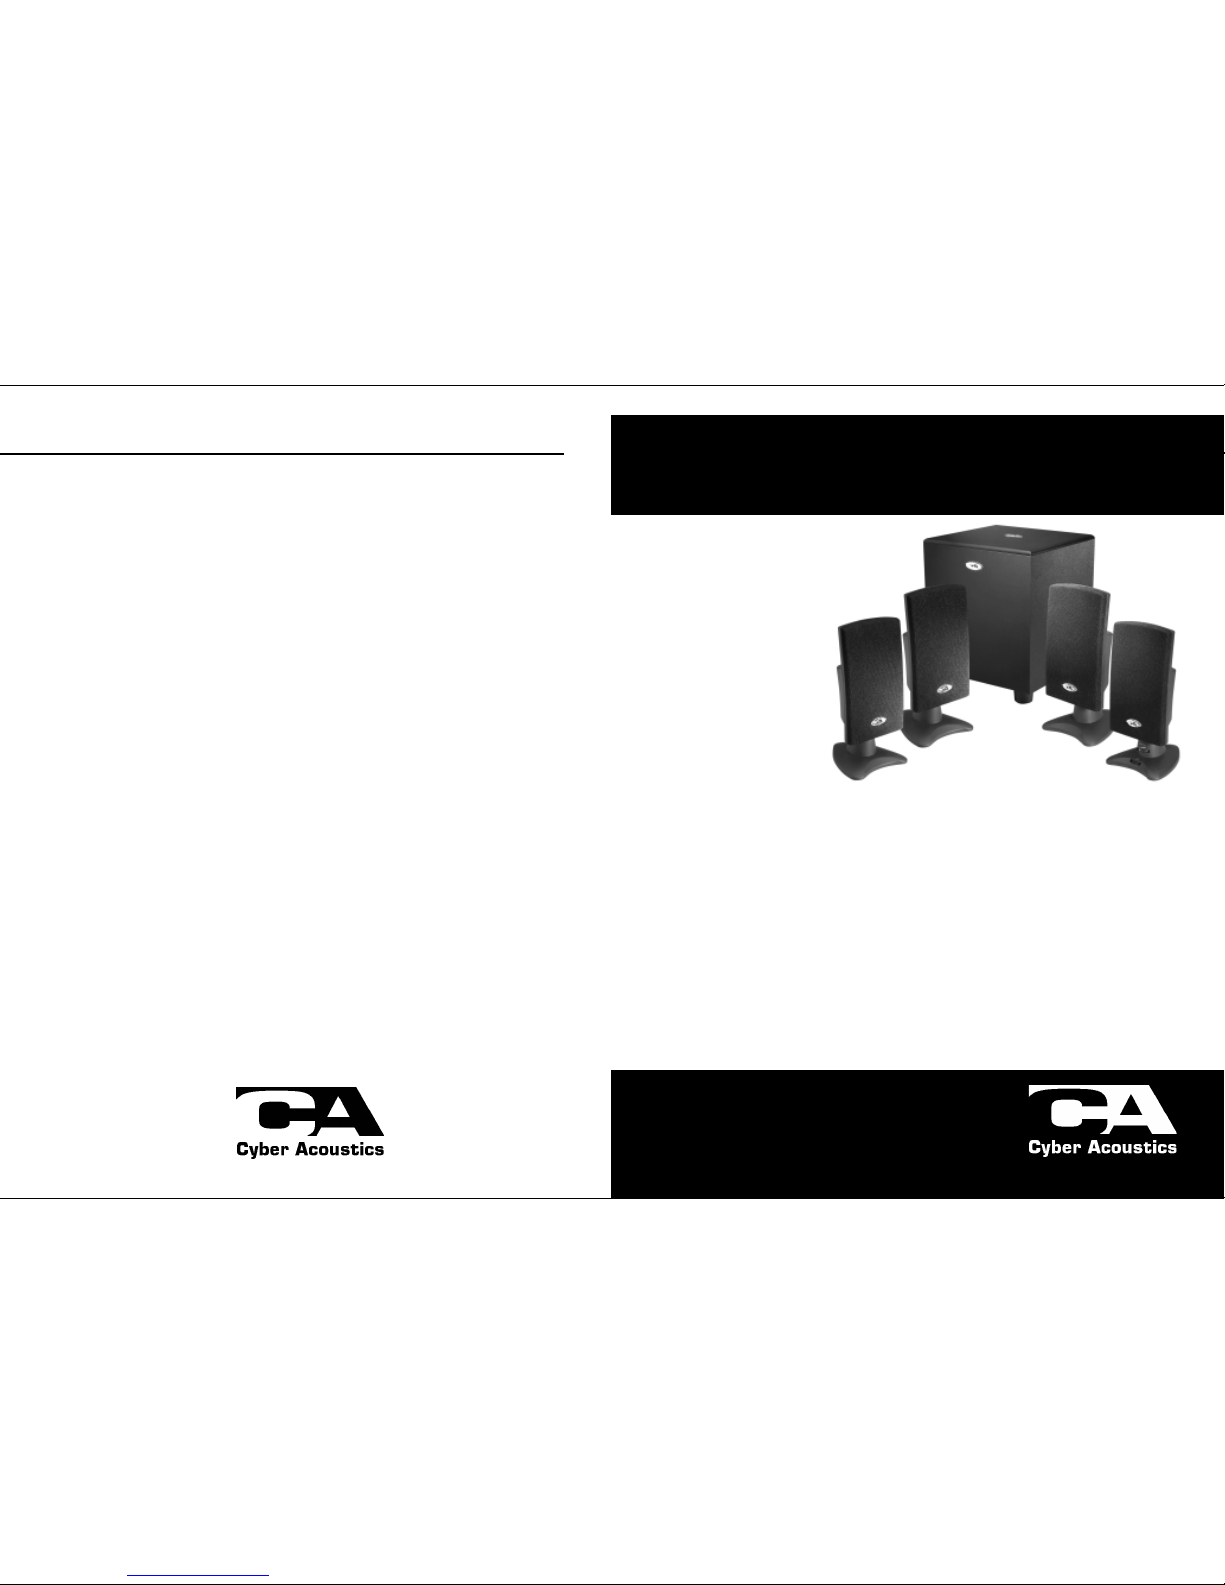
Thank you for purchasing the CA-4100 Quad
Surround computer speaker system by
Cyber Acoustics. This 4.1 surround
system is designed to provide multi-
channel sound for multimedia
games and audio. It is perfect for
3D positional audio sound cards
(sound cards with front and rear/
surround outputs, otherwise known
as 4-channel) but it can also be
used with standard 2-channel
sound cards (sound cards with only
one output jack).
Outputs of 3D positional audio sound cards are usually marked as “Out 1” and “Out 2” or “front” and
“surround” but this may vary. Consult your sound card user guide. When connected to a 3D positional audio
sound card, the CA-4100 will play back sounds so they appear to be coming from all directions. Sounds
will literally be in front of you, behind you, below you, etc. It is the perfect gaming experience!
If your computer’s sound card is a standard 2-channel type, the CA-4100 will still operate as a stereo
amplified system with all four satellites playing. The right front and right rear/surround speakers will playback
one channel while the left front and left rear/surround speakers will playback the other channel. While this will
still surround you with sound, you may want to upgrade your computer system with a 3D positional sound
card if you want the ultimate gaming experience.
This multimedia speaker system is easy to install and all plugs and jacks are color coded. The following
pages will illustrate the set up and connections in easy step, by step procedures.
Note: In case of 2-channel (one stereo output) sound cards, insert the green (front) plug to the sound card output. There is no need to hook
up the black (rear) cable. The CA-4100 will automatically process the stereo information so the right front and right rear/surround speakers will
playback one channel while the left front and left rear/surround speakers will playback the other channel. Again, there is no need to hook up the
black (rear) cable when connecting to a 2-channel sound card.
CA-4100 Computer Speakers CA-4100 Computer Speakers
P r e p a r i n g t h e S p e a k e r s
Please read the entire manual before making any connections. Follow these steps before connecting or
attempting to turn speakers on:
1) After you finish reading the entire manual, come back to this point. Before you take the next step, familiarize
yourself with the outputs on your sound card. Determine if you have a 2-channel or 3D positional (4-channel)
sound card and make sure you know which jacks are the output/outputs.
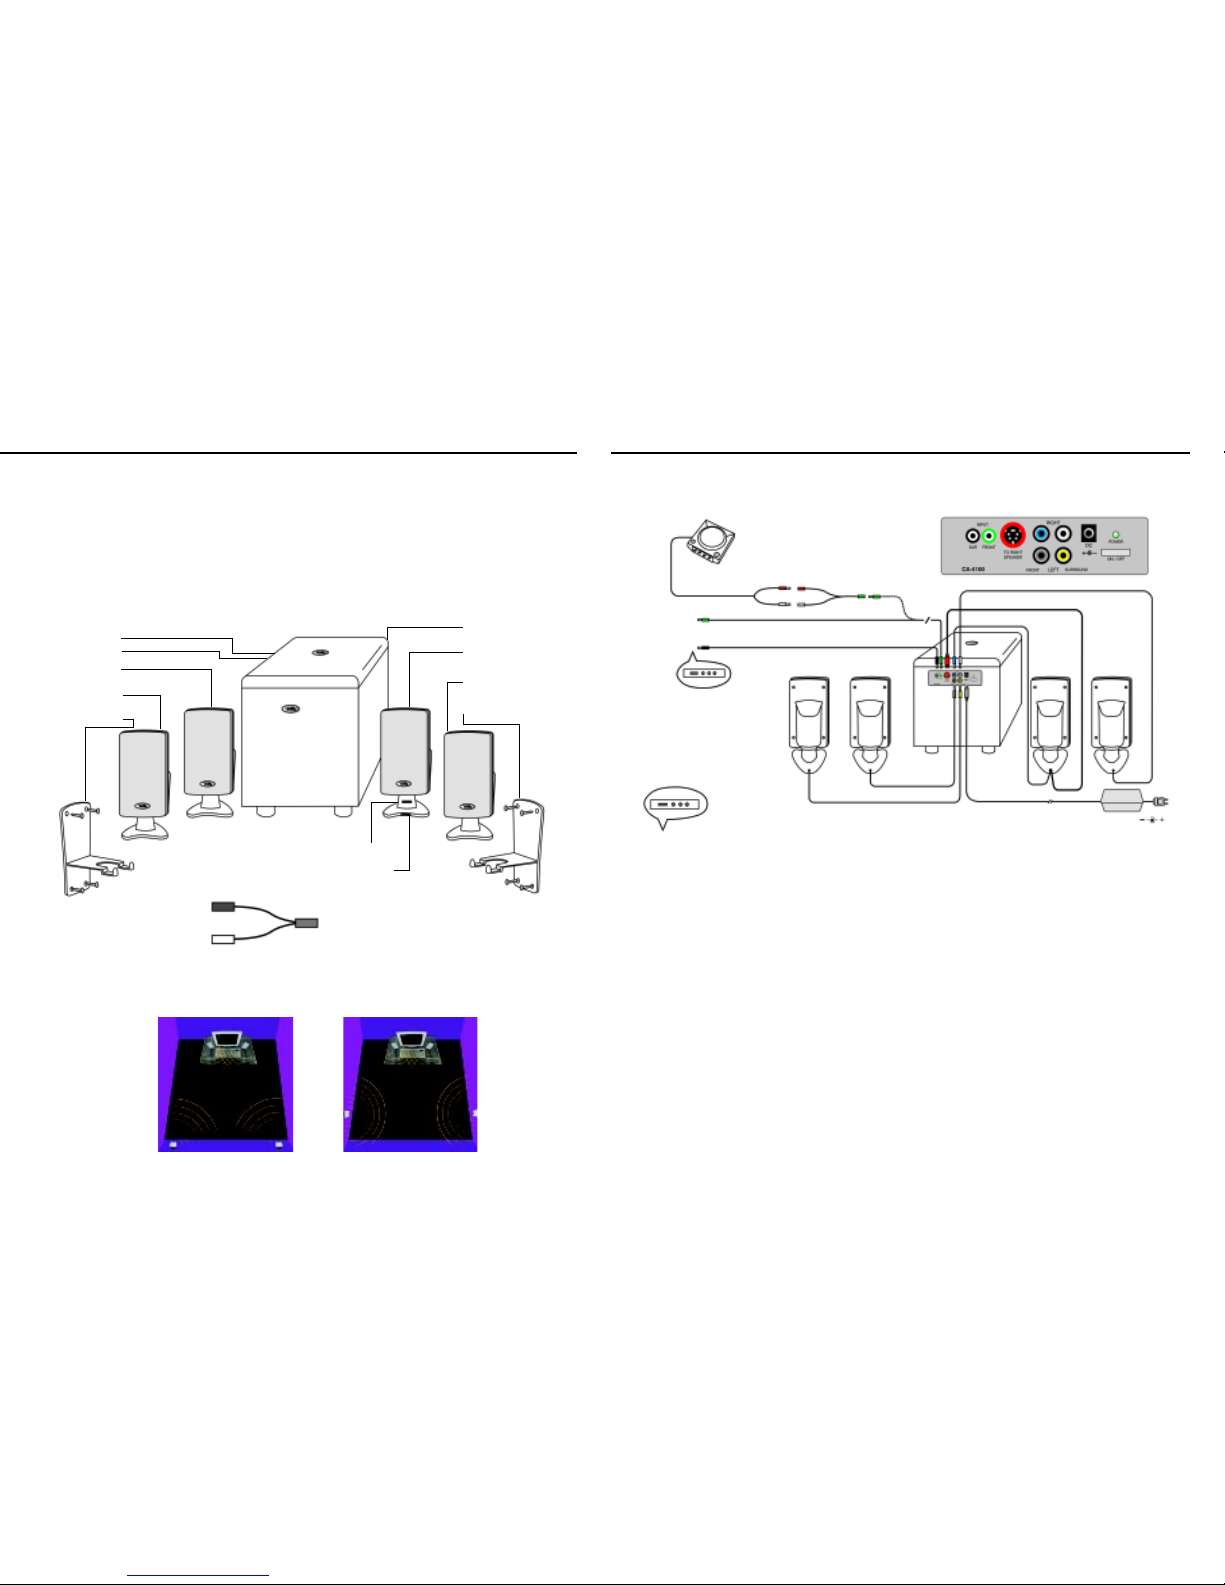
2) Take the speakers and all cables out of the box and familiarize yourself with each component.
See diagram below which helps illustrate each piece and the features:
•
•
• Powered sub woofer
•
C o n n e c t i o n s
The following diagram illustrates the connections to the computer sound card and power source.
• Right front
satellite speaker
• Right rear
satellite speaker
• Wall bracket
T u r n i n g o n t h e S p e a k e r s
1) Follow above connection diagram and connect speakers to your computer sound card.
2) Check that the volume controls are turned down to the minimum position.
3) Connect the power adapter by inserting the cable into the back of the sub woofer “DC12V” input jack.
4) Turn the system on by pressing the “power ” switch in. Check to make sure the power indicator light comes on.
5) When testing your speaker system on a 3D positional audio sound card, consult your sound card user guide
for details. Normally a sound card like this will have a test program that ensures that all channels are playing
through the proper speaker. When checking your speaker system on a 2-channel sound card, use a regular
audio CD in your systems CD / DVD device.
6) Slowly turn up the volume controls up to the desired listening level. NOTE: The rear/surround speakers volume
level can only be as loud as the front satellites. In other words, you have to turn up the front/master volume up
before you can turn up the rear volume.
7) Your computer sound card has different ways to adjust your volume and tones. Consult your sound card user
guide to change any desired settings. Normally, the speaker volume control in your software should be turned
up to approximately 75%.
3) Start placing your speakers in the desired positions. The following diagrams illustrate a couple of
recommended options. Note: Do not secure/mount the wall brackets until you have finished all connections
and have made sure the system is functioning properly.
Power on/off
Power indicator
Left front
satellite speaker
Left rear
satellite speaker
Wall bracket
•
•
•
•
•
•
•
Front/master volume control •
Rear satellite volume control •
•
•
•
•
•
•
Green to front channel output
of soundcard
AC/DC adapter to DC 12V
Black to rear (surround) channel
output of soundcard
Yellow - Left rear speaker
Gra y - Le ft
front speaker
Red - Volume controls
White - Right rear speaker
Blue - Right front speaker
Video game connection
When connecting to video games such as
Nintendo®, Sega®, and Playstation®, connect your
game audio output (red & white) cables to the red
and white jacks on the special “Y” cable. Connect
the green plug from the speakers to the green jack
on the “Y” cable.
This product is not endorsed by or licensed by Sony, Nintendo or Sega.
PlayStation is a registered trademark of Sony Corporation
Nintendo is a registered trademark of Nintendo Corporation
Sega is a registered trademark of Sega Corporation
Note:
“Y” adapter cable
for video game
applications
 Loading...