

Page 1

TV2010
Colour Television
OPERATION
MANUAL
Please read these instructions carefully
Before operating this product
Page 2
INTRODUCTION
Thank you for purchasing our product. To ensure that you fully
understand the capabilities of this television set, please read this entire
manual carefully, and keep it handy for future reference.
INSTALLATION
• Locate the TV set in a room where direct light does not reflect on
the screen. Total darkness or a reflection on the picture screen can
cause eye strain. Soft and indirect lighting is recommended for
comfortable viewing.
• Allow enough space between the TV set and the wall to permit
ventilation. Avoid excessively warm locations to prevent possible
damage to the cabinet or premature component failure.
• Never connect this TV set to DC supply or any other power supply
than the one indicated in SPECIFICATIONS section.
• Do not install the TV set in a location near heat sources such as a
radiator, air ducts, and direct sunlight or in a closed area without
proper ventilation.
• Do not cover the ventilation openings when using the TV set.
CAUTION
Never tamper with any components inside the set or adjust any controls
other than those mentioned in this manual. All television receivers are
high voltage instruments and the tube is manufactured using a vacuum
process. If the tube is broken, glass fragments will be violently expelled.
Scratching or chipping of the tube is dangerous and should be avoided.
When cleaning the television ensure the set is unplugged and use only a
dry soft cloth to remove the dust. During a thunder storm unplug both
the power cord and aerial plug to protect the set from damage. Only a
qualified technician should attempt any adjustments or repairs inside the
television
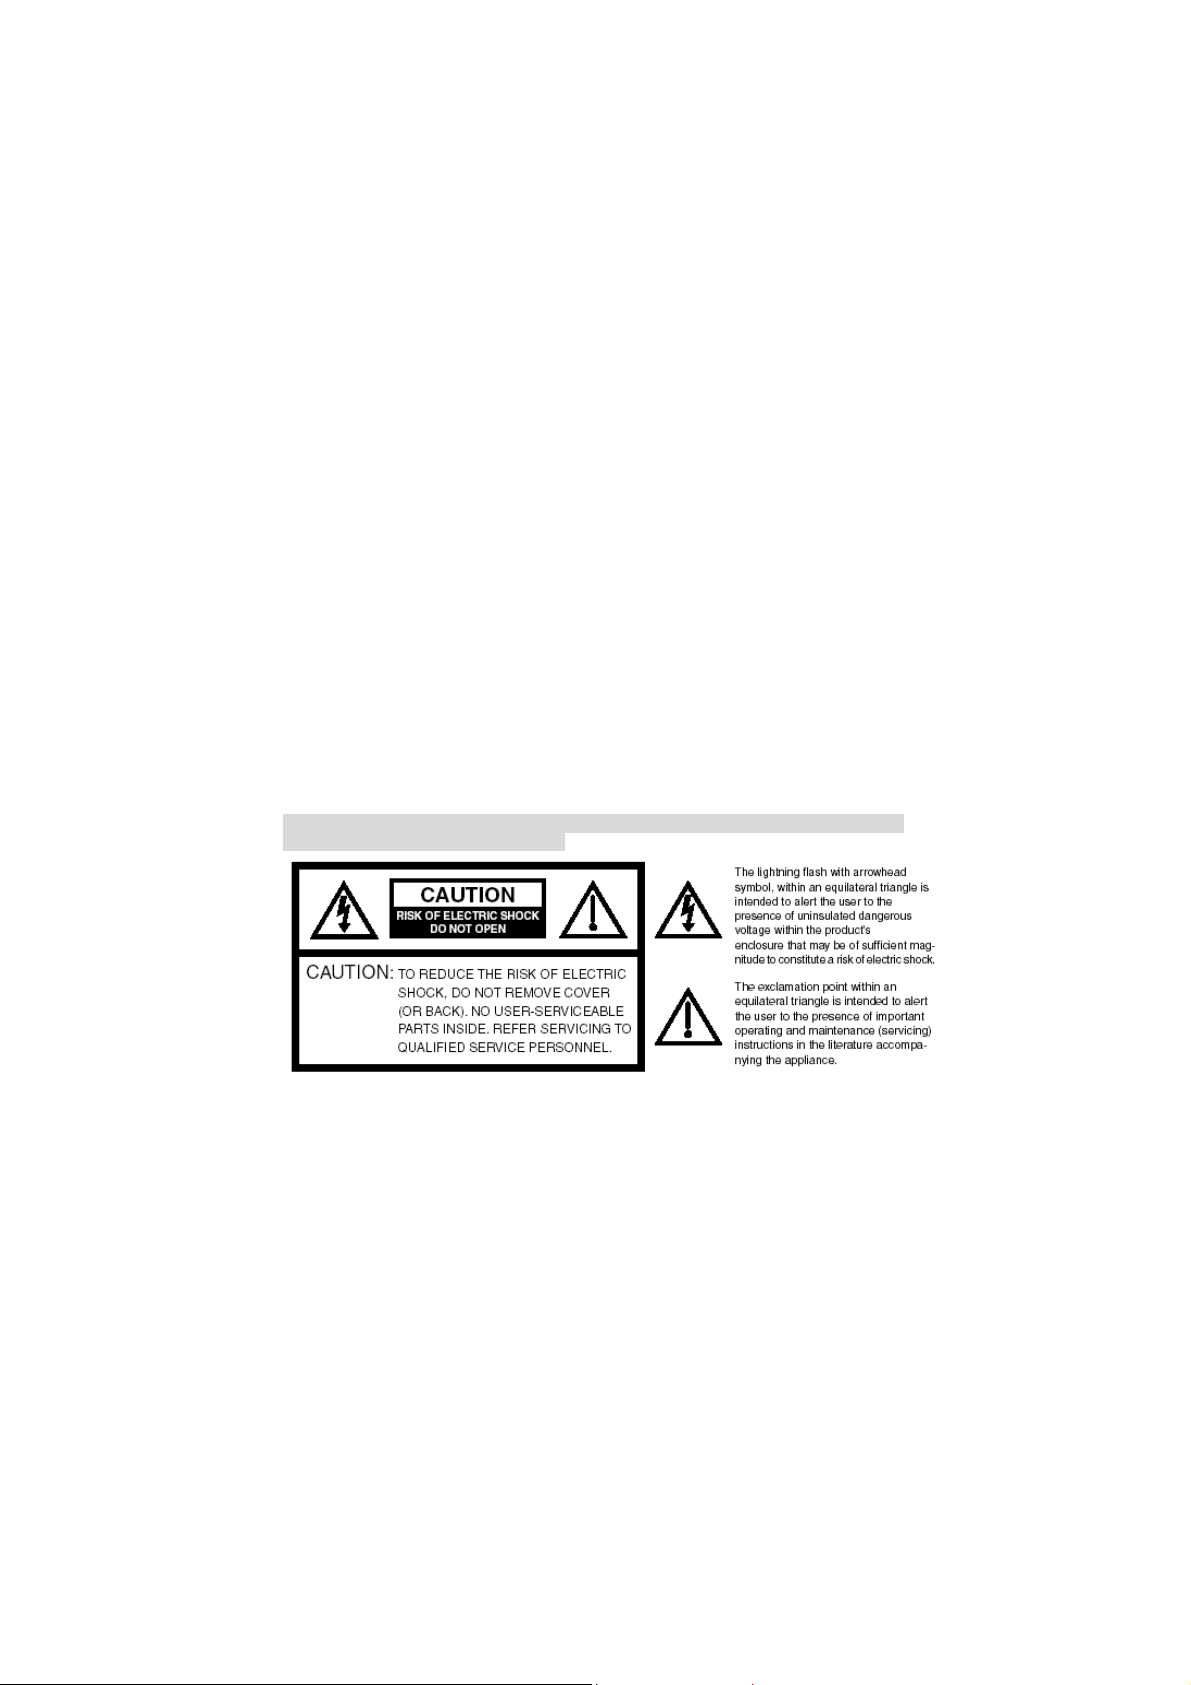
IMPORTANT SAFETY INFORMATION
WARNING: TO PREVENT FIRE OR SHOCK HAZARD, DO NOT EXPOSE THIS
APPLIANCE TO RAIN OR MOISTURE.
Page 3
IMPORTANT SAFEGUARDS
1. READ INSTRUCTIONS
All the safety and operating instructions should be read
before the unit is operated.
2. RETAIN INSTRUCTIONS
The safety and operating instructions should be retained
for future reference.
3. HEED WARNINGS
All warnings on the unit and in the operating instructions
should be adhered to.
4. FOLLOW INSTRUCTIONS
All operating and use instructions should be followed.
5. CLEANING
Unplug this unit from the wall outlet before cleaning. Do not
use liquid cleaners or aerosol cleaners.
6. ATTACHMENTS
The manufacturer of this unit does not make any
recommendations for attachments, as they may cause
hazards.
7. WATER AND MOISTURE
Do not use this unit near water. For example, near a
bathtub, washbowl, kitchen sink, laundry tub, in a wet
basement, or near a swimming pool.
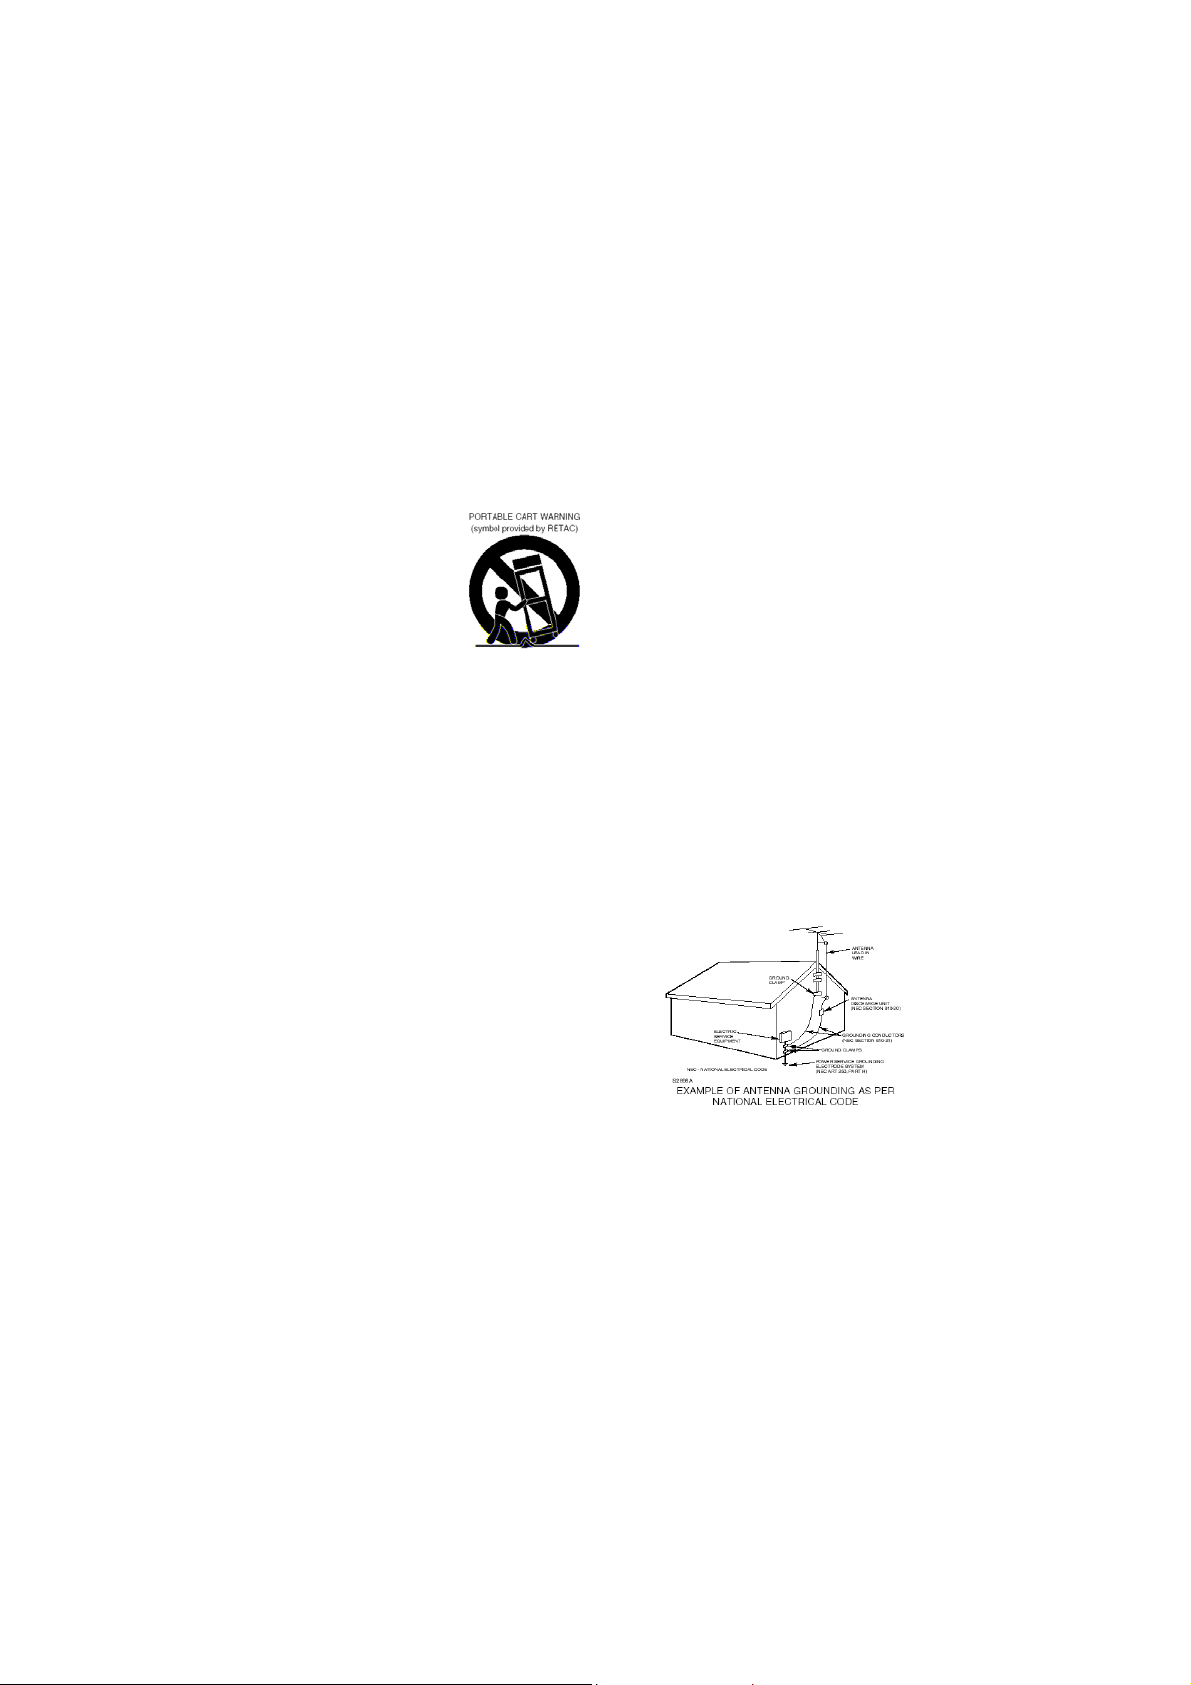
8. ACCESSORIES
Do not place this unit on an unstable cart, stand, tripod,
bracket, or table. The unit
may fall, causing serious
injury and serious damage to
the unit.
An appliance and cart
combination should be moved
with care. Quick stops,
excessive force, and uneven
surfaces may cause the
appliance and cart
combination to overturn.
9. VENTILATION
Slots and openings in the cabinet back or bottom are
provided for ventilation, and to ensure reliable operation of
the unit, and to protect it from overheating. These openings
must not be blocked or covered; the openings should never
be blocked by placing the unit on a bed, sofa, rug, or other
similar surface. This unit should never be placed near or
over a radiator or heat source. This unit should not be
placed in a built-in installation such as a bookcase or rack
unless proper ventilation is provided or the manufacturer's
instructions have been adhered to.
10. POWER SOURCE
This unit should be operated only from the type of power
source indicated on the rating plate lf you are not sure of
the type of power supply to your home, consult your
appliance dealer or local power company. For units
intended to operate from battery power, or other sources,
refer to the respective pages in this User Manual for their
operating instructions.
11. GROUNDING OR POLARIZATION
This unit is equipped with a polarized alternating current
line plug (plug having one blade wider than the other). This
plug will fit into the power outlet only one way. This is a
safety feature. If you are unable to insert the plug fully into
the outlet, try reversing the plug. If the plug should still fail
to fit, contact your electrician to replace your obsolete
outlet, Instead of the polarized alternating-current line plug,
your unit may be equipped with a 3-wire grounding-type
plug (a plug having a third grounding pin). This plug will
only fit into a grounding-type power outlet. This too, is a
safety feature. If you are unable to insert the plug into the
outlet, contact your electrician to replace your obsolete
outlet. Do not defeat the safety purpose of the
grounding-type plug.
12. POWER-CORD PROTECTION
Power-supply cords should be routed so that they are not
likely to be walked on or pinched by items placed upon or
against them, paying particular attention to cords at plugs,
convenience receptacles, and the point where they exit
from the appliance.
13. LIGHTNING
To protect your unit from a lightning storm, or when it is left
unattended and unused for long periods of time, unplug it
from the wall outlet and disconnect the antenna or cable
system. This will prevent damage to the unit due to
lightning and power ling surges.
14. POWER LINES
An outside antenna system should not be located in the
vicinity of overhead power lines or other electric light or
power circuits, or where it can fall onto or against such
power lies or circuits. When installing an outside antenna
system, extreme care should be taken to keep from
touching such power lines or circuits, as contact with them
might be fatal.
15. OVERLOADING
Do not overload wall outlets and extension cords, as this
can result in a risk of fire or electric shock.
16. OBJECT AND LIQUID ENTRY
Do not push objects through any openings in this unit, as
they may touch dangerous voltage points or short out parts
that could result in fire or electric shock. Never spill or
spray any type of liquid into the unit.
17. OUTDOOR ANTENNA GROUNDING
If an outside antenna or cable system is connected to the
unit, be sure the antenna or cable system is grounded to
provide some protection against voltage surges and
built-up static charges, Section 8 10 of the National
Electrical Code (NEC), ANSI/NFPA 70, provides
information with respect to proper grounding of the mast
and supporting structure, grounding of the lead-in wire to
an antenna discharge unit, size of grounding conductors,
location of antenna discharge unit, connection to grounding
electrodes, and requirements for the grounding electrode.
See figure below.
Page 4

18. SERVICING
Do not attempt to service this unit yourself as opening or
removing covers may expose you to dangerous voltage or
other hazards. Refer all servicing to qualified service
personnel.
19. DAMAGE REQUIRING SERVICE
Unplug this unit from the wall outlet and refer servicing to
qualified service personnel under the following conditions:
a) When the power-supply cord or plug is damaged.
b) If liquid has been spilled, or objects have fallen
into the unit.
c) If the unit has been exposed to rain or water.
d) If the unit does not operate normally by following
the operating instructions. Adjust only those
controls that are covered by the operating
instructions, as an improper adjustment of other
controls may result in damage and will often
require extensive work by a qualified technician to
restore the unit to its normal operation.
e) If the unit has been dropped or the cabinet has
been damaged.
f) When the unit exhibits a distinct change in
performance, this indicates a need for service.
20. REPLACEMENT PARTS
When replacement parts are required, be sure the service
technician uses replacement parts specified by the
manufacturer or those that have the same characteristics
as the original part. Unauthorized substitutions may result
in fire, electric shock or other hazards.
21. SAFETY CHECK
Upon completion of any service or repairs to this unit, ask
the service technician to perform safety checks to
determine that the unit is in proper operating condition.
22. HEAT
The product should be situated away from heat sources
such as radiators, heat registers, stoves, or other products
(including amplifiers) that produce heat.
23. CONNECTING
When you connect the product to other equipment, turn off
the power and unplug all of the equipment from the wall
outlet. Failure to do so may cause an electric shock and
serious personal injury, Read the owner s manual of the
other equipment carefully and follow the instructions when
making any connections.
24. NOTE TO CABLE TV SYSTEM INSTALLER
This reminder is provided to call the Cable TV system
installer's attention to Article 820-40 of the NEC that
provides guidelines for proper grounding and, in particular,
specifies that the cable ground shall be connected to the
grounding system of the building, as close to the point of
cable entry as practical.
25. DISCONNECTING
To disconnect the main POWER, you must unplug the
power cord from the AC outlet. The power switch DOES
NOT completely disconnect power.
THE CAUSES OF INTERFERENCE
Incorporated in your TV set is the most up-to-date technology to eliminate
interference. Local radiation however, can create disturbances which in turn, can
noticeably affect the picture. Proper installation and a good antenna are your best
safeguards against these disturbances.
Interference
Moving ripples across the screen are caused by nearby transmitting or receiving shortwave radio
equipment.
Diathermy
Herringbone pattern and partial picture loss can result from the operation of diathermy equipment
from a nearby medical center or hospital.
Snow
Weak TV signals from long distant stations result in an unsteady picture and give the effect of
falling snow. An antenna adjustment or antenna amplifier may be needed.
Ghost
Multiple images caused by TV signals reflected back from surrounding buildings, hills, aircraft, etc.
are minimized by proper antenna positioning.
Car Ignition
Nearby cars and electrical motors can cause small streaks across the picture or make the picture
roll.
Page 5
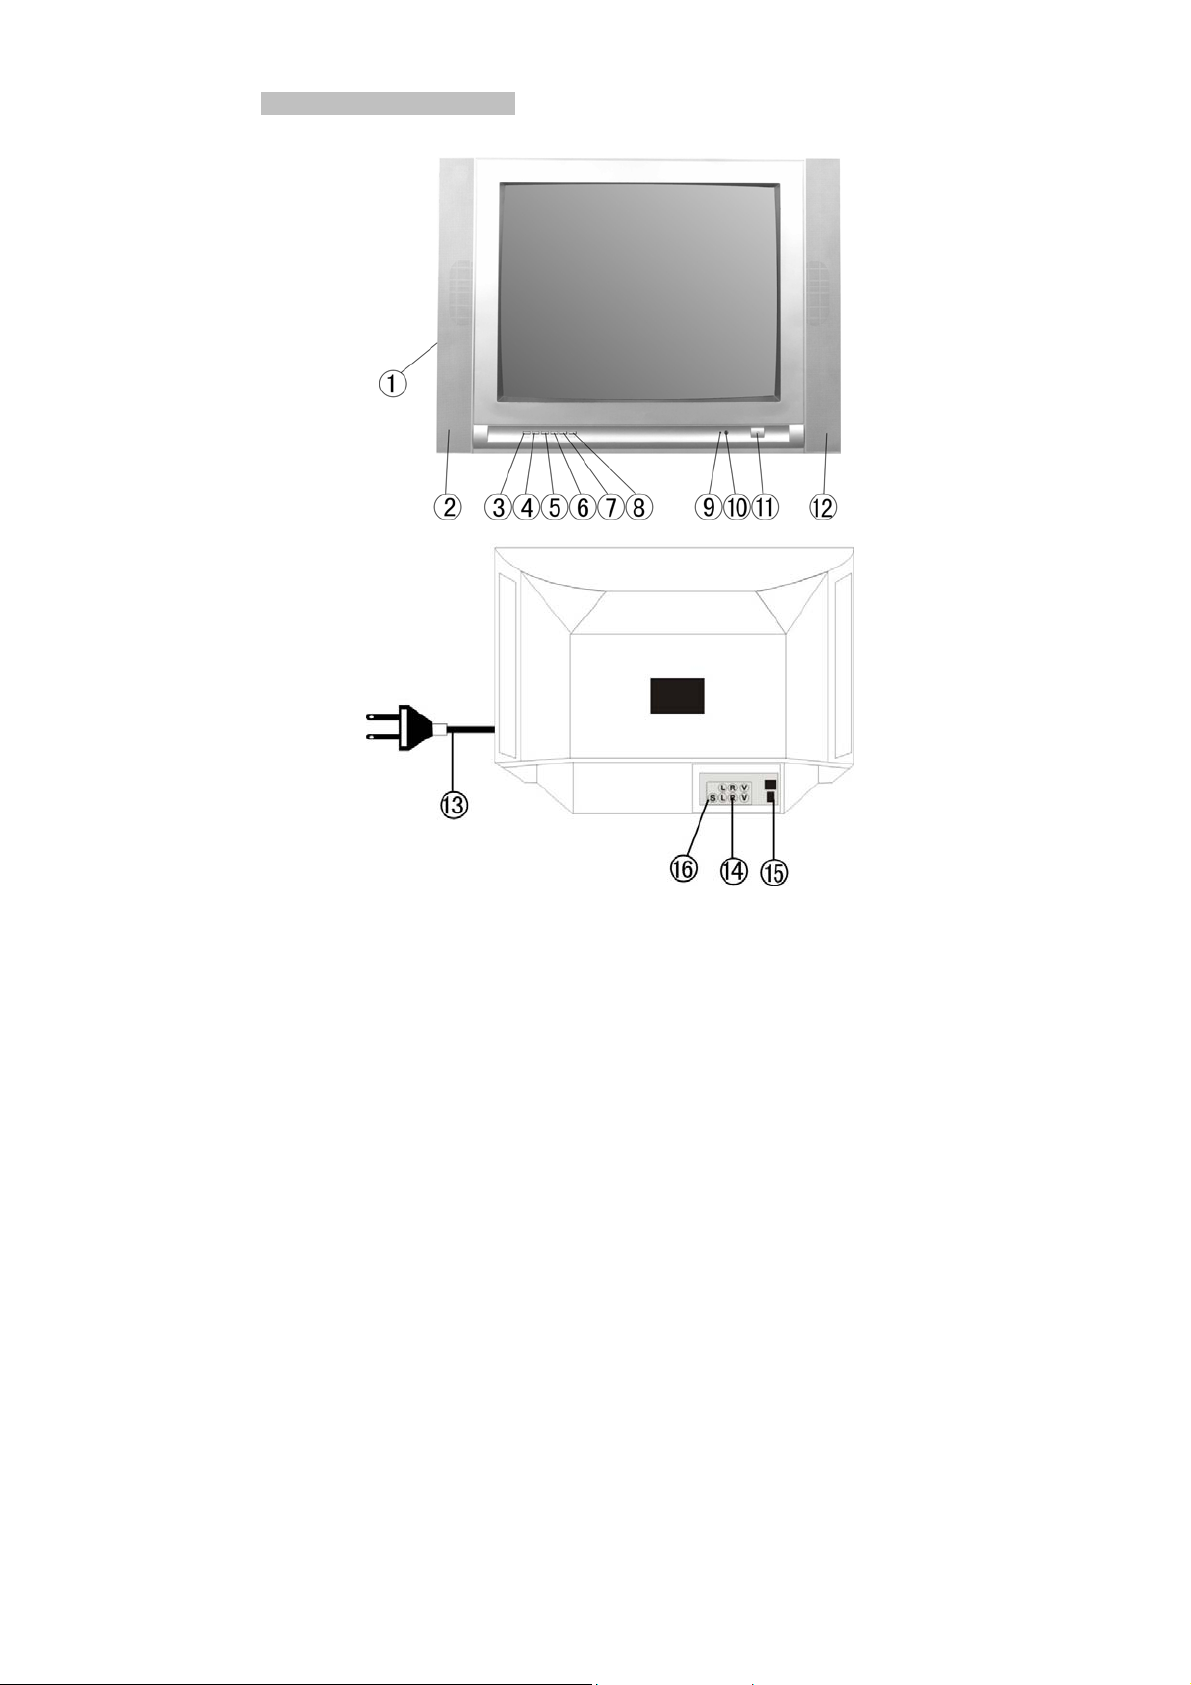
LOCATION OF CONTROLS
Television Set
1. Side A/V Inputs
2. Speaker
3. TV/AV Selector
4. Menu Button
5. Volume Down Button
6. Volume Up Button
7. Channel Down Button
8. Channel Up Button
9. Power Indicator
10. Remote Sensor
11. Main Power Switch
12. Speaker
13. AC power Cord
14. Audio/Video-input and output jacks
15. Antenna terminal (75 ohms)
16. S-VIDEO
Page 6

Connection to Other Devices
This TV set can be connected to a VCR, DVD player, video camera, game system or any other A/V
component.
DVD Player
Side Jacks
Video/Audio equipment can be connected to AUDIO and VIDEO IN jacks located on the back or side panel
of the TV set.
VCR
OUT
IN
Page 7

REMOTE CONTROL
Page 8

USING THE REMOTE CONTROL
Installing batteries
Notes:
Use only the size and type of batteries
specified.
Do not mix different types of batteries
together or old batteries with fresh ones.
Remove the batteries when remote
control will not be used for a long period of
time.
Avoid direct sunlight, incandescent lamp,
fluorescent lamp or any other strong light
shines on batteries.
Do not try to recharge batteries; they are
not intended to be recharged.
Do not drop, dampen or disassemble
the remote control.
When the batteries are about to wear out, the remote control may be unstable.
Do not throw the batteries into a fire; dispose of used batteries in the specified
manner.
Effective Range of the
POWER ON/OFF
To Switch the TV Set On and OFF
When the TV is plugged into an AC outlet, the main POWER is ON and the TV is in Standby mode.
The TV set can be put in stand-by mode (OFF) or ON by pressing the “Power on/Standby” button
on the remote control or by pressing the Main Power Switch in front of the TV.
Notes:
Please unplug the AC cord when you may not use the unit for an extend period of
time.
Page 9

SELECTING INPUT SIGNAL
Watching AV program
This TV set provides AV input terminals for your convenient connection to VCR, or other video
equipments. To watch video program from AV inputs, press
TV/AV button repeatedly until you see the appropriate input
indicator on the screen.
TV
AV1
Notes:
AV1: Select AV1 when viewing the signals
from the video equipment connected to the AV1 IN
terminals.
AV2: Select AV2 when viewing the signals
from the video equipment connected to the AV 2 IN
S-Video
AV2
terminals.
S-Video: Select “S-Video” when viewing the
signals from the video equipment connected to the S-VIDEO IN terminals.
Switching from AV to TV
When the TV set is in AV mode, you can press TV/AV button repeatedly to switch back to TV mode.
TUNING IN
TV/CATV selection
Before your TV can memorize the available channels,
you must specify the type of signal source that is
connected to the unit (i.e., an antenna or cable system):
1. Press MENU repeatedly to display Search
menu.
2. Press CH- or CH+ to select Signal Input.
3. Press V- or V+ to select Air or CATV.
4. Press DISP button on the remote control to
clear the menu screen.
Notes:
Select Air if using VHF/UHF antenna, select CATV if using Cable TV.
Setting the channels into memory
This TV is equipped with a channel memory feature which allows channels to skip up or down to
the next channel set into memory, skipping over unwanted channels. Before selecting channels,
they must be programmed into the TV’s memory.
1. Press MENU repeatedly to display Search menu.
2. Press CH- or CH+ to select Auto Search.
3. Press V+ to start the search. (The TV will begin memorizing all the channels available in
your area.)
4. Press DISP button on the remote control to clear the menu screen.
To skip unwanted channel
After presetting the channels, you can skip unwanted channels so that only the channels you want
to watch can be accessed with Channel up/down buttons.
Page 10

1. Press MENU button repeatedly to display Search menu.
2. Press CH- or CH+ to select Channel menu item.
3. Press V- or V+ to select the unwanted channel.
4. Press CH- or CH+ to select Skip.
5. Press V- or V+ to select Skip ON.
Thus, after exiting the menu, the channel will then be skipped when you select programs with the
Channel up/down button. If you want to skip other unwanted channels, repeat steps above to
change the channel number.
Notes:
You can select the skipped channel by pressing the direct channel select buttons.
To restore a skipped channel
Use direct channel select buttons (0-9) to select the channel you want to restore. Enter into Search
menu, press CH- or CH+ to select Skip, press V- or V+ to select Skip Off.
Fine Tuning
Fine tuning is not necessary under normal conditions. However, in area of inferior broadcast
conditions where adjustment is necessary for a better picture and sound, use Fine tuning.
1. Select the channel you want to fine-tune.
2. Enter into Search menu, press CH- or CH+ to select Fine Tune,
3. Press and hold V- or V+, the channel begins fine tuning until the best possible picture and
sound is achieved. (Press V- to fine-tune downward, while V+ to fine-tune upward. The
AFT function will be set to OFF mode automatically)
4. To exit the menu, press DSP button or repeatedly press MENU button.
Auto Fine Tuning (AFT)
If picture and sound's effect of the channel is instead poor by making use of Fine Tune, you can
correct them by making use of AFT. Enter into Search menu, press CH- to select AFT then press
V-or V+ to select AFT On.
CHANNEL SELECTION
You can select your desired TV program by one of the following methods.
Use Direct Channel Select buttons
► AIR Mode Direct Channel Selection
When the Signal Input menu option in Search menu is in the Air position, all channels can be
selected by directly entering the channel number.
► CATV Mode Direct Channel Selection
When the Signal Input menu option in Search menu is in the CATV position, channels can be
selected as follows:
Method 1:
Directly enter the channel number and wait for some time.
Method 2:
1-9: Press “0” twice, then 1-9 as needed. For example, to select channel 2, press “002”.
10-99: Press “0”, then the remaining 2 digits. For example, to select channel 12, press “012”.
100-125: Press the 3 digits in order. For example, to select channel 120, press “120”.
Use Channel up/down buttons
Press CH+ button, the channel number increases; Press CH-button, the channel number decreases.
Use previous channel button
Press
button to switch between the current channel and the previous one.
Page 11

Use DSP button to know the current channel number
V-V
Press DSP button to display the current TV state. If in TV program 12 ST SAP viewing, then it will
display the current channel number, sound mode and remaining sleep time (if set).
To scan programs
Press SCAN button, the TV set will scan the channels from current channel to higher channels one
by one, every program will be displayed for about one second and then go on scanning. Press
SCAN button again, the screen will settle at the current scanned channel.
PICTURE ADJUSTMENT
To select the picture mode
You can select the picture quality instantly among three
preset modes and one user-set mode.
Press │P│ button to select the desired picture quality.
Standard, Dynamic, Mild and User (user-set) can be
selected cyclically.
Dynamic Standard
Mode Picture quality
Standard
Dynamic
Mild
User
Display normal pictures
Display dynamic pictures
Display soft pictures
The picture quality you set
User
Mild
Picture adjustment
1. Press MENU button to display the Picture
menu.
2. Press CH+ or CH- to select item.
3. Press V+ or V- to adjust the level; or you can
also make use of button to adjust picture.
Every time you press button, one picture
adjustment menu bar will appear. Then make
use of V+ or V- button to adjust the level.
4. To exit the menu, press the DSP button
Item
Brightness darker lighter
Contrast weaker
Color paler deeper
Sharpness softer sharper
*Tint purplish greenish
stronger
+
Notes:
The adjusted level is stored in the User position.
Page 12

SOUND CONTROLS
Adjusting Volume
1. Use Volume up/down button
2. Press V- button, the volume decreases; Press
V+ button, the volume increases.
3. Make use of Sound menu to adjust volume
4. Press MENU twice to display Sound menu,
then make use of V+/-button to adjust the level.
Use MUTE button
Press MUTE button on the remote control to cut off the
sound from TV. To resume the sound, press this button again.
TIMER SETTING
Setting clock time
Making use of this function can set the
current time for the TV.
1. Press MENU repeatedly to display the Timer
menu.
2. Press CH- or CH+ to select Clock.
3. Press V- to set the hour (0-12), press V+ to
set the minute (00-59).
Notes:
Before setting the ON timer and OFF timer, please set the Clock item first.
Setting ON timer/ON program
With the ON timer, the TV will automatically turn on to a preset channel at a preset
time.
1. In Timer menu, press CH- or CH+ to select On Time.
2. Press V- to set the hour (0-12), press V+ to set the minute (00-59).
3. Press CH- to select On Program.
4. Press V- or V+ to set the TV ON
5. Press CH- to select Repeat; Press V-or V+ to select Once or Everyday.
6. Press
button to switch the TV to standby mode. At the preset time, the TV will turn on
automatically to the preset channel. If you set the Repeat item to Once, this function
effects only once; If set to Everyday, this function effects everyday.
Setting OFF timer
With the OFF timer, the TV will automatically switch to standby mode at a preset time.
1. In Timer menu, press CH- or CH+ to select Off Time.
2. Press V- to set the hour (0-12), press V+ to set the minute (00-59).
3. Press CH- to select Repeat. Press V- or V+ to select Once or Everyday.
4. Once the preset time has elapsed, the TV will automatically go into standby mode.
5. If you set the Repeat item to Once, this function effects only once; If set to Everyday, this
function effects everyday.
Page 13

Setting sleep timer
Making use of the Sleep timer function allows you to have the set automatically turn off after a
preset time.
For example, if you would like the TV to auto turn off in 60 minutes, you can press
repeatedly until the screen displays the desired amount of time. If you want to cancel the sleep
timer, you can press
button repeatedly until 0 displays on the screen.
button
SYSTEM SETTINGS
To select OSD language
There are multi OSD languages in this TV set
provided for you to select (OSD: on-screen display)
1. Press MENU repeatedly to display Settings
menu.
2. Press CH+/- to select Language.
3. Press V+ or V- to select a proper OSD
language.
Setting Blue Screen
If the Blue Screen is turned on, the TV will appear a blue screen when there is no input signal.
1. Enter into Settings menu.
2. Press CH- or CH+ to select Blue Screen.
3. Press V+ or V- to turn on/off blue screen.
Picture Enhance setup
Turning on Picture Enhance can enhance the picture quality.
1. Enter into Settings menu.
2. Press CH- or CH+ to select Picture Enhance.
3. Press V+ or V- to turn on/off Picture Enhance.
4. To exit the menu, press DSP button or repeatedly press MENU button.
CLOSED CAPTIONS
The Closed Caption broadcasts can be viewed in two modes: CAPTION and TEXT. For each mode, four
channels are available.
The [CAPTION] mode shows subscripts of dialogues and commentaries of TV dramas and news
programs while allowing a clear view of the picture.
The [TEXT] mode displays various information over the picture (such as TV program schedule, weather
forecast, etc.) that is independent of the TV programs.
* To exit the menu, press DSP button or repeatedly press MENU button.
The unit decodes and displays the closed captions that are broadcast with certain TV shows. These
captions are usually subtitles for the hearing impaired or foreign language translations. All VCRs record
the closed caption signal from television programs, so home-recorded video tapes also provide closed
captions. Most prerecorded commercial video tapes provide closed captions as well.
Notes: Not all the programs and videos will offer closed captioning.
Page 14

SPECIFICATIONS
Television System: NTSC/M
Receiving channel: 181 channel tuner (Frequency synthesized tuning)
Audio output: 2 speakers of 3W each
Audio output mode: RF-MONO, A/V STEREO
Antenna impedance: 75 ohm terminal
Output terminal: Video input 1vp-p/75 Ohm, audio input 400mV
Closed caption: NTSC/M receiving time (cc1-cc4/tt1-tt4)
OSD Language: English/French
Power: AC 90-130V, 50/60 Hz
(Length Width Height):
Measurements
20" – 600 x 482 x 445 (mm)
24" – 710 x 485 x 515 (mm)
27" – 777 x 500 x 577 (mm)
Net Weight: 20" – 21 kg, 24" – 28 kg and 27" – 35 kg
Accessories: one remote control
one instruction manual
two batteries (AAA)
Note: Design and specifications are subject to change without prior notice
TROUBLESHOOTING GUIDE
Should this unit exhibit a problem, check the following before seeking service:
Symptoms
No picture, no sound
Poor sound, picture OK
Poor picture, sound OK
of set
Solution
is probably a station trouble
Check aerial for broken wires
ry different channel, if it is okay, it
Check aerial connections on back
Re-orient aerial (if indoor type)
as an appliance
Probably local interference, such
Adjust contrast control
Adjust fine tuning control
Adjust brightness control
Check if station is broadcasting in
colour
Adjust colour control
Check if on/off switch is on
Check if system switch is correct
heck Batteries in Remote control
 Loading...