

Page 1
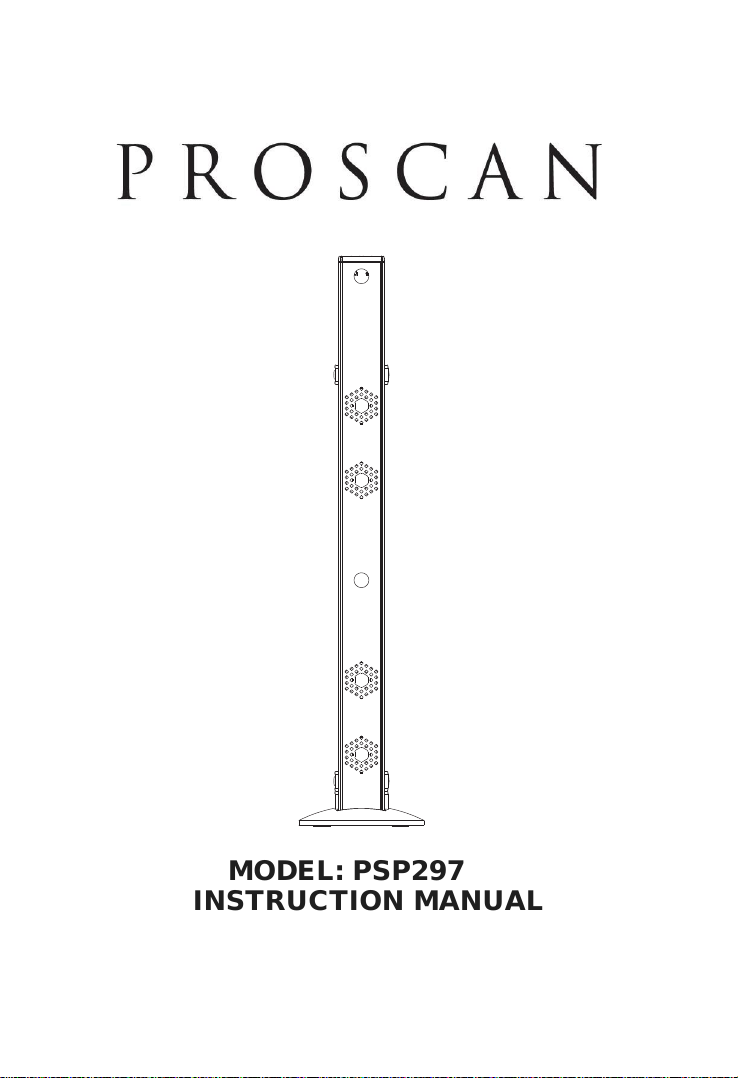
MODEL: PSP297
INSTRUCTION MANUAL
Please read this instruction manual carefully and keep it for future reference.
Page 2
CAUTION: TO REDUCE THE RISK OF ELECTRIC SHOCK, DO NOT
REMOVE COVER (OR BACK). NO USER-SERVICEABLE
PARTS INSIDE. REFER SERVICING TO QUALIFIED
SERVICE PERSONNEL.
The lighting flash with arrowhead symbol within an
equilateral triangle is intended to alert the user to
the presence of uninsulated “dangerous voltage
within the product’s enclosure that may be of
sufficient magnitude to constitute a risk of electric
shock to persons.
The exclamation point within an equilateral triangle
is intended to alert the user to the presence of
important operating and maintenance (servicing)
instructions in the literature accompanying the
appliance.
FCC NOTICE:
This equipment has been tested and found to comply
with the limits for a Class B digital device, pursuant to
part 15 of the FCC Rules. These limits are designed to
provide reasonable protection against harmful
interference in a residential installation. This equipment
generates, uses and can radiate radio frequency energy
and, if not Installed and used in accordance with the
instructions, may cause harmful interference to radio
communications.
However, there is no guarantee that interference will not
occur in a particular installation. If this equipment does
cause harmful interference to radio or television
reception, which can be determined by turning the
equipment off and on, the user is encouraged to try to
correct the interference by one or more of the following
measures:
Reorient or relocate the receiving antenna.
Increase the separation between the equipment and
receiver.
Connect the equipment into an outlet on a circuit
different from that to which the receiver is connected.
Consult the dealer or an experienced radio/TV
technician for help.
FCC WARNING:
To assure continued compliance, follow the attached
installation instructions and use only shielded cables
when connecting to other devices. Modifications not
authorized by the manufacturer may void user`s authority
to operate this device.
WARNING:
TO REDUCE THE RISK OF FIRE OR ELECTRIC
SHOCK, DO NOT EXPOSE THIS PRODUCT TO RAIN
OR MOISTURE.
WARNING:
TO REDUCE THE RISK OF FIRE OR ELECTRIC
SHOCK, AND ANNOYING INTERFERENCE, USE THE
RECOMMENDED ACCESSORIES ONLY.
WARNING:
To reduce the risk of fire or electric shock, do not expose
this apparatus to rain or moisture. The apparatus shall
not be exposed to dripping or splashing
filled with liquids, such as
apparatus.
vases shall not be placed on
and that objects
1
Page 3

Before using the unit, be sure to read all operating instructions carefully. Please note that these
are general precautions and may not pertain to your unit.
For example, this unit may not have the capability to be connected to an outdoor antenna.
1) Read these instructions.
All the safety and operating instructions should be read before the product is operated.
2) Keep these instructions.
The safety
3) Heed all warnings.
All warnings on the product and in the operating instructions should be adhered to.
4) Follow all instructions.
All operating and use instructions should be followed.
5) Do not use this apparatus near water.
Do not
sink or laundry tub; in a wet basement; or near a swimming pool.
6) Clean only with dry cloth.
Unplug this product from the wall outlet before cleaning. Do not use liquid cleaners or aerosol
cleaners
7) Do not block any ventilation openings. Install in accordance with the manufacturer's
instructions.
Slots and openings in the cabinet and in the back or bottom are provided for ventilation, to ensure
reliable operation of the product and to protect it from overheating
blocked or covered. The openings should never be blocked by placing the product on a bed, sofa,
rug or other similar surface. This product should never be placed near or over a radiator or heat
source. This product should not be placed in a built
unless proper ventilation is provided or the manufacturer's instructions have been adhered to.
8) Do not install near any heat sources such as radiators, heat registers, stoves, or other
apparatus(including amplifiers) that produce heat.
9) Do not defeat the safety
has two blades with one wider than the other. A grounding type plug has two blades and a
third grounding prong. The wide blade or the third prong are provided for your safety. If the
provided plug does not fit
obsolete outlet.
10)Protect the power cord from being walked on or pinched particularly at plugs, convenience
receptacles, and the point where they exit from the apparatus.
11)Only use attachments/accessories specified by the manufacturer.
12)Use only with
with the apparatus. When a cart is used, use caution when moving the cart/apparatus
combination to avoid injury from tip-over.
An appliance and cart combination should be moved with care.
Quick stop, excessive force and
appliance and cart combination to overturn.
and operating instructions should be retained for future reference.
use this product near water and moisture, for example: near a bathtub, washbowl, kitchen
. Use a dry cloth for cleaning.
. These openings must not be
-in installation such as a bookcase or rack
purpose of the polarized or grounding-type plug. A polarized plug
into your outlet, consult an electrician for replacement of the
the cart, stand, tripod, bracket, or table specified by the manufacturer, or sold
uneven surfaces may cause the
13) Unplug this apparatus during lightning storms or when unused for long periods of time.
To protect your product from a lightning storm, or when it is left unattended and unused for long
periods of time, unplug it from
will prevent damage to the product due to lightning and power-line surges.
14) Refer all servicing to qualified service personnel. Servicing is required when the apparatus
has been damaged in any way, such as power-supply cord or
been spilled or objects have fallen into the apparatus, the apparatus has been exposed to rain
or moisture does not operate normally, or has been dropped.
15) Power source
This product should be operated only from the type of power source indicated on the marking label
If you are not sure of the type of power supply to your home, consult your appliance dealer or local
power company. For products intended to operate from battery power, or other source, refer to the
operation instructions.
the wall outlet and disconnect the antenna or cable system. This
plug is damaged, liquid has
2
.
Page 4
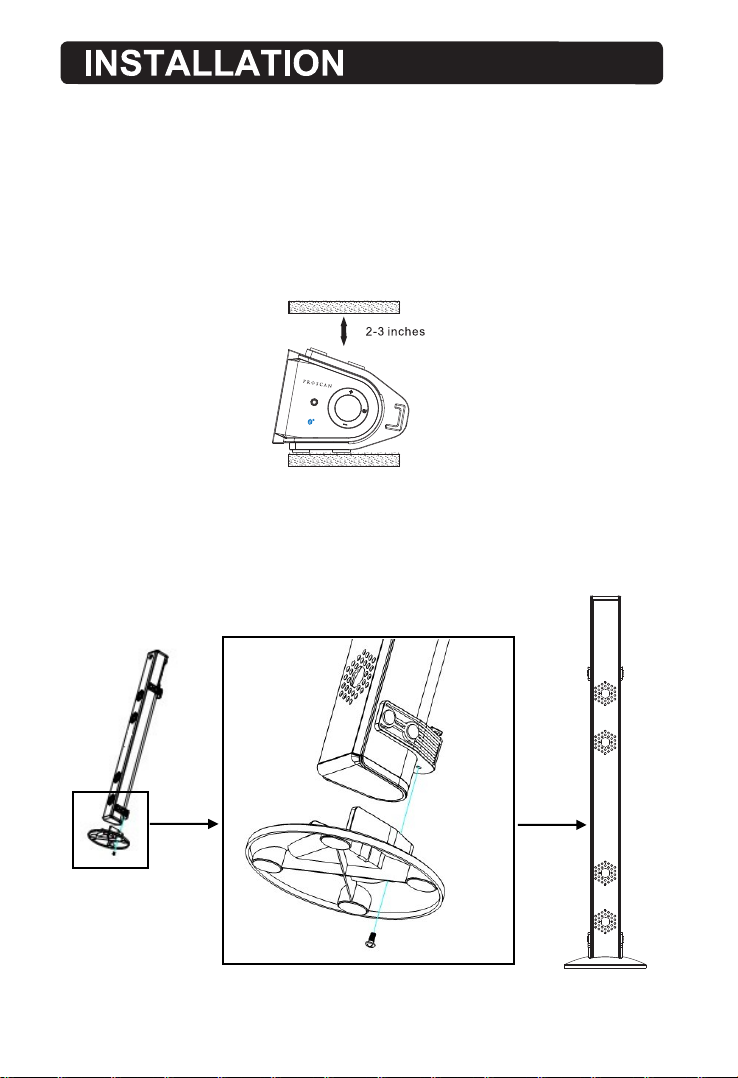
1. Placing the device on table
Ventilation
When placing the Sound Bar on an entertainment center, bookshelf, or any type of
enclosed space, be sure to allow at least 2-3 inches of space around the Sound Bar
for ventilation. If the Sound Bar is enclosed in a tight space, without ventilation, heat
generated from the Sound Bar could produce a potential heat hazard.
V
O
L
U
M
E
A
U
X
I
N 2
FM SCAN
SOURCE
V
O
L
U
M
E
2. Placing on floor in vertical
Fixing the base with the unit body by supplied screw.
Put the unit on flat surface floor.
3
Page 5

MOUNTING
We recommend having this speaker professionally mounted. By using the included
wall mounting accessories, the sound bar can be mounted onto a wall.
26.9 inches
FM ANT
DC IN 16V
AUX 1OPTICAL IN
4
Page 6

PRODUCT OVERVIEW
Front View
Back View
Model No.:PSP297
FM ANT
DC IN 16V
AUX 1OPTICAL IN
TOWER STEREO SYSTEM
POWER SUPPLY: DC 16V 3A
POWER CONSUMPTION:48W
FM FREQUENCY RANGE:87.5-1 08MHz
IC: 10765A-SBB086FG
Imported by Curtis Inte rnati onal Lt d
S/N:A140 410881000 0001
MANUFACTURED DATE: Apr 2 014
Remote Sensor
Mode Indicator
FM ANT
FM ANT (Antenna)
Side View
AUX-IN 1
AUX-IN 2 Jack
AUX-IN 1
OPTI CAL IN
AUX IN 1 jacks
OPTICAL IN jack
FM SCAN
A
U
X
I
N 2
VOLUME DOWN
DC IN 16 V
DC IN jack
VOLUME UP
V
O
FM SCAN
V
O
L
U
M
E
5
L
U
M
E
SOURCE
POWER/SOURCE
Page 7

REMOTE CONTROL
1. STANDBY
2. VOL- ( volume down )
3. SOURCE
4. BASS -
5. TREBLE -
6. /TUNE -
7. /MO/ST
( play/pause/mono/stereo )
8. (mute)
9. VOL+ ( volume up )
10. BASS +
1
2
3
4
5
6
7
STANDB Y
8
9
PAIR
MO/ST
10
11
12
13
14
11. PAIR
12. TREBLE +
13. EQ ( Equalizer )
14. /TUNE +
BATTERY INSTALLATION
- Befo re inst al latio n
Remo ve and di sc ard the i nsulati on tab. O ut of the box t he Remo te C ontro l
has a ba ttery a nd w ill be us able afte r the tab i s re moved .
-Rep lace ba tt ery for t he remote c ontro l
1. Pus h and sli de o ut the ba ttery hol der as Fi gu re 1 belo w.
2. Rep lace th e ba ttery w ith a new CR2 025 but ton cell wi th the po la rity (+ )
side u pward .
3. Sli de into t he b atter y holder.
BATTERY PRECAUSIONS
• Neve r recha rg e the bat teries, a pply he at to them or t ake the m ap art.
• Batt ery sha ll n ot be exp osed to exc essiv e he at such a s sunsh in e, fire o r the lik e.
• Do not t hrow th e ba tteri es in fire!
• Atten tion sh ou ld be dra wn to the env ironm ental asp ects of b at tery di sposa l.
• If the r emote con trol is n ot going to b e used fo r a lo ng time , remov e th e batte ry
to avo id dama ge c aused b y battery l eakag e corrosi on.
POWE R CONTR OL
- To turn the un it on
• Conn ect the s up plied AC /DC ada pt er.
• Pres s STANDBY button t o turn on t he u nit.
- To turn the un it off
• Pres s STANDBY button o n the rem ot e contr ol or hol d STAND BY button i n
the right side of the unit.
NOTE :
If the u nit is no t us ed for a lo ng period o f time, d is conne ct the po we r adapt er.
6
Page 8

FM RADIO
Powe r on t he unit a nd p ress th e SO URCE
button on control plate until the indicator light turns purple.
1. Press FM SCAN button on control plate to search manually to play the searched
2
. Press button on remote control to search manually to play the searched
3
. Press and hold
station is found.
4
. Press
NOTE:When power is off,or unplugging the adapter,station need to be re-searched.
-Dur ing playb ack
•Pre ss MUTE b ut ton to tu rn off t he soun d. Pres s ag ain to re su
•Pre ss VOLU ME +/- but tons to adj ust the v ol ume lev el.
•Pre ss BASS +/ - butto ns to adjus t bass le ve l.
•Pre ss TREBLE+/ -butt on s to adju st treb le l evel.
•Pre ss EQ but to n to swit ch betwee n POP/J AZ Z/CLA S /ROC K/NOR M.
or
or
on remote control to search station automatically until a
/MO/ST button on remote control to switch between "Mono" and "Stereo" mode.
button on remote control or the SOURCE
e soun d.
me th
station.
station.
7
Page 9

AUX-IN 1 CONNECTION
- RCA AUX IN so ur ces may i nclud e
•TV/ DVD/V CR
- RCA AUX IN co nn ectio n
1. Con nect th e RC A audio ca ble (supp lied) t o the audio o utput j ac k on DVD
play er and AUX 1 o r AUX 2 j ack on th e rear of DVD.
2. Pre ss SOUR CE b utton r epeated ly until the indictaor turns green.
FM ANT
Whi te
OPTIC AL IN
Red
AUX-IN 1
DC IN 16V
-Dur ing playb ack
•Pre ss MUTE b ut ton to tu rn off t he soun d. Pres s ag ain to re sume th e so und.
•Pre ss VOLU ME +/- but tons to adj ust the v ol ume lev el.
•Pre ss BASS +/ - butto ns to adjus t bass le ve l.
•Pre ss TREBLE+/ -butt on s to adju st treb le l evel.
•Pre ss EQ but to n to swit ch betwee n POP/J AZ Z/CLA SSIC/ RO CK/NO RMAL.
8
Page 10

AUX-IN 2 CONNECTION
- AUX I N sourc e ma y inclu de:
•Per sonal a ud io play ers
•Per sonal c om puter s or laptop s
- AUX IN co nnect io n:
1. Con nect a st er eo 3.5m m jack cabl e (supp lied) bet ween th e he adpho ne or
L
INE/ Audio o ut put of th e persona l audio p layer and t he AUX-IN 2 jack on the
side of the unit.
2. Pow er on the u ni t and pre ss SOURCE b utton r ep eated ly un
turns orange.
Set y our per so nal aud io play er /comp uter to pla y.
NOTE : If there is n o sound o r if the volu me is not l ou d enoug h, you ma y
incr ease the se tting o n th e sourc e.
A
U
X
-
Con nect to t he outp ut
soc ket of ex terna l
aud io devi ces (Mp 3,
Com puter, e xt.)
To AUX IN Ja c
on th e unit
IN 2
til the indicator
FM SCAN
V
O
L
U
M
V
OL
U
M
E
SOURCE
E
-Dur ing playb ack
•Pre ss MUTE b ut ton to tu rn off t he soun d. Pres s ag ain to re sume th e so und.
•Pre ss VOLU ME +/- but tons to adj ust the v ol ume lev el.
•Pre ss BASS +/ - butto ns to adjus t bass le ve l.
•Pre ss TREBLE+/ -butt on s to adju st treb le l evel.
•Pre ss EQ but to n to swit ch betwee n POP/J AZ Z/CLA S /R OCK/N ORM.
9
Page 11

BLUETOOTH
-Pairing
1. Press SOURCE button repeatedly to enter BT mode. The indicator is blue.
2. Turn o ff t he B luetoot h fu nctio na lity of oth er d evice s th at are pair ed w ith you r
unit . On ly one de vi ce can be use d wi th the Bl ue tooth fun ct ion at a ti me .
3. Turn o n Bl uetoo th f unction al ity on yo ur B luetoot h de vice. Typi ca lly, Bl uetoo th
control s are foun d on the device’s tools or settin gs me nu (s ee your user manual) .
Turn on B lu etoot h co nnectiv it y and mak e yo ur device “ di scove ra ble”.
4. Choose “add a new Bluetooth device”or “setup Bluetooth device”on your device.
It wil l st art to sear ch. Once “ ”sho ws o n your de vi ce, selec t it . If your
devi ce p rompt s yo u for a pass co de , pleas e en ter "0000". If t he p airin g at tempt
fail s or t imes ou t, p lease sta rt p airin g pr ocedure a ga in.
5. Afte r yo ur devi ce a nd the have c on necte d ea ch other, a so un d
can be h ea rd.
NOTE :
The un it w ill aut om aticall y re conne ct t he last pai re d devic e wh en Blue to oth
mode i s re selec te d from othe r mo de. If fo r so me reason t he B lueto ot h
conn ec tion is l os t due to exte rn al fact or s or will not a ut o recon ne ct, you
must clear the " " from your Blue Tooth device list and begin the paring
proc es s again .
Press PAIR button on remote control to disconnect the current connection of the unit
with the external device.
PSP297
-During playback
Mak e sur e the Blue tooth connection betwe en th e uni t and the devic e is activated.
•Pre ss
resu me playin g.
•Pre ss button t o sk ip forwar d to t he next t ra ck and button t o
skip b ac kward t o th e previou s tr ack.
•Pre ss M UTE but to n to turn off the s ou nd. Press a ga in to res um e the sound .
•Pre ss V OLUME +/ - buttons t o ad just th e vo lume leve l.
•Pre ss B ASS+/ - bu ttons to ad ju st bass l ev el.
•Pre ss T RE BLE+/-b ut tons to a dj ust trebl e le vel.
•Pre ss E Q butto n to s witch bet we en POP/ JA ZZ/CLAS /ROCK/NO RM.
b ut ton to susp end momen ta rily th e pl aying tra ck . Press
PSP297
"0000"
unit
again to
10
Page 12

CONNECT THROUGH OPTICAL
OPTICAL IN source may include TV, DVD, etc.
(Only for PCM format)
DVD
Optical Cable (not included)
FM ANT
AUX-IN 1
OPTIC AL IN
Optical Input Jack of the unit
1. Connect one end of Optical cable to the "Optical In " jack on the rear of the unit
as the figure above.
2. Connect the other end to the optical jack on the external device.
3. Power ON the unit.
4. Press the SOURCE button repeatedly until the indicator turns Indigo.
5. Plays the music in the external player as usual.
-Dur in g pl ay back
•Pre ss M UT E bu tton to turn off the so un d. P re ss again to r es um e th e sound.
•Pre ss V OL UM E+/- button s to a dj ust the volum e le ve l.
•Pre ss B AS S+ /- button s to a dj us t bass level.
•Pre ss TREBL E+ /- buttons to ad ju st t re ble level .
•Pre ss E Q bu tt on to switch be tw ee n POP/JAZZ/ CL AS / RO CK /NORM.
DC IN 16V
11
Page 13

TROUBLESHOOTING GUIDE
&KHFNWKHIROORZLQJVEHIRUHUHTXHVWLQJVHUYLFH
6<03720 3266,%/(&$86( 3266,%/(628/7,21
No power
AC plug not connected to the
wall outlet
Plug to the wall outlet.
No sound
Sound distortion
Remote not
working
Bluetooth
reception failure
Volume in minimum position
The connected device is not
in payback mode
Input source incorrect
Bass level of the connected
device too high
Volume level too high
The battery is
The external device is far from
the unit
Have not paired
consumed
Raise volume level by pressing the VOL
(Volume) + button
Play the music/movie in the connected
device as usual
volume level of it is in high level
Press the SOURCE button repeatedly to
set the input source to the desired mode
Reduce the bass level of the connected
device
Reduce the volume level by pressing
the
VOL (Volume ) - button
Replace with new battery
Put the external BT device close to the
unit
Pair both unit as BT pairing page
and make sure the
12
Page 14

GENERAL SPECIFICATIONS
AC INPUT.................................................................................................100-240V~50/ 60Hz
DC INPUT...................................................................................... DC 16V; 3A,
Radio Coverage......................................................................................FM 87.5 -108.0 MHz
---
Output power .........................................................................
Bluetooth Effective Range in Open Aera...............................................................Up to 32 feet
Remote Effective Range.....................................................................................Up to 16 feet
1 x AC/DC Adaptor
1 x Remote Control, using CR 2025 button cell ( Included)
1 x Stereo Audio Connection Cable with 3.5mm stereo plugs
1 x User's Manual
1 x RCA Connection Cable
1 x Speaker Base
2 x Metal Brackets ( For Wall Mount )
4 x Plastic Inserts ( For Wall Mount )
4 x Metallic Screws ( For Wall Mount )
1 x Screw ( For Plastic Base Mount )
2x10W RMS + Subwoofer 20W
13
Page 15

 Loading...