

Page 1

PLDED3273-UK
Page 2

Contents
z Introduction
z Warning
z Caution
z Important Information
z Attaching or Removing the Stand
z Installing Batteries to the Remote Control
z Identifying Front and Rear Panel
z Connection Suggestion
z Main Unit Description
z Remote Control
z OSD Basic Adjustment
z How Do I Clean The TV
z Troubleshooting
z Specifications
Page 3

Introduction
Thank you very much for purchasing your LED TV. It serves as a normal colour TV
and a PC monitor. To enjoy your set fully from the very beginning, read this manual
carefully and keep it handy for future reference.
INSTALLATION
Locate the receiver in the room where direct light does not strike the screen. Total
darkness or a reflection on the picture screen can cause eyestrain. Soft and indirect
lighting is recommended for comfortable viewing.
Allow enough space between the receiver and the wall to permit ventilation.
Avoid excessively warm locations to prevent possible damage to the cabinet or
premature component failure.
This TV can be connected to AC 100-240V~ 50/60Hz.
Do not install the TV in a location near heat sources such as radiators, air ducts,
direct sunlight, or in closed compartments and closed areas. Do not cover the
ventilation openings when using the TV.
6
The indicator light will last for about 30 seconds after the power has been turned
off.
Wait until the indicator light goes out before repowering the TV.
Accessories list for this TV set:
x
User manual x1
Warranty card x1
x
x
Remote control x1
Battery (pair, AAA) x1
x
Page 4
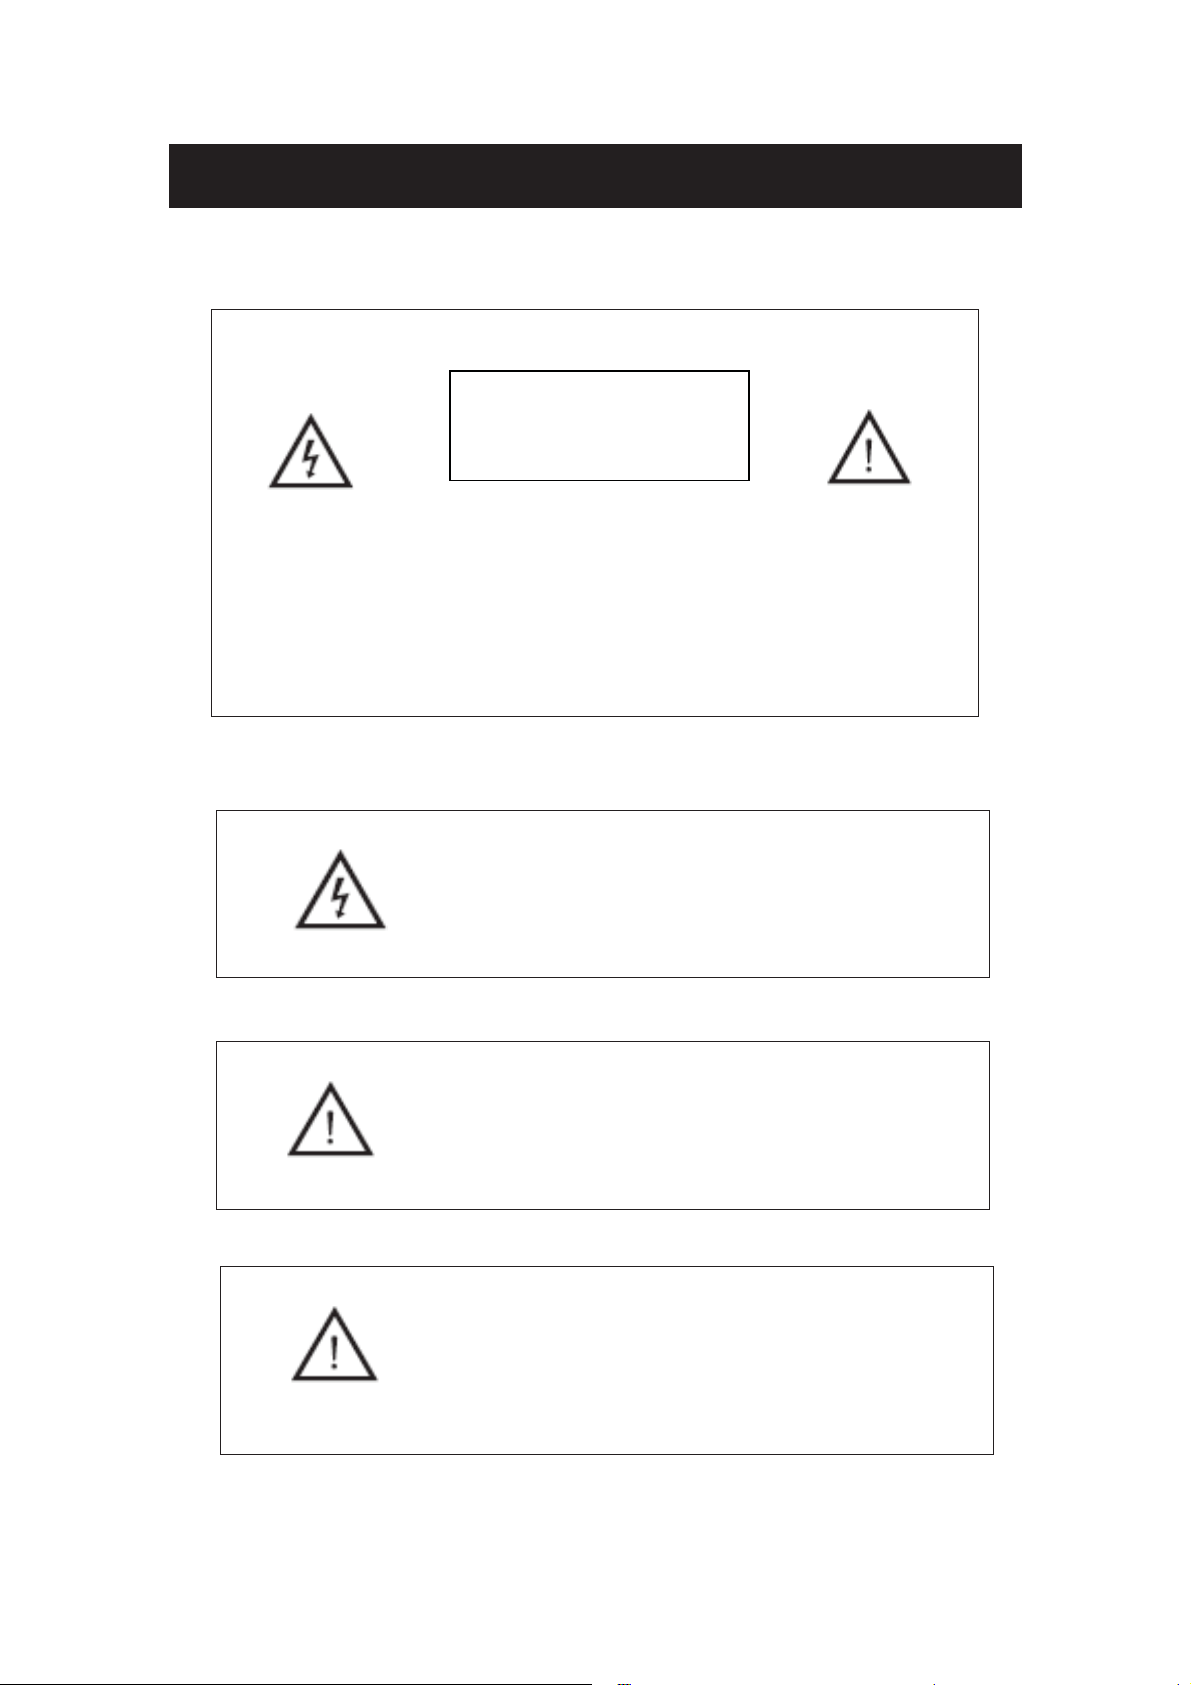
Warning
RISK OF ELECTRIC SHOCK
CAUTION
DO NOT OPEN
CAUTION: TO AVOID THE RISK OF ELECTRIC SHOCK.
DO NOT REMOVE COVER (OR BACK).
NO USER- SERVICEABLE PARTS INSIDE.
REFER SERVICING TO QUALIFIED SERVICE PERSONNEL
This symbol is intended to alert the user to avoid the risk
of electric shock. This equipment may only be disassembled
by qualified service personnel.
.
This symbol is intended to alert the user to the presence
of important operation and maintenance instructions in
the literature accompanying the equipment.
Class I structures of equipment should be connected to the grid
power output with a protective earth connection on the socket.
Power plug as a broken applianceˈ
broken installations should
be easy to operate.
Page 5
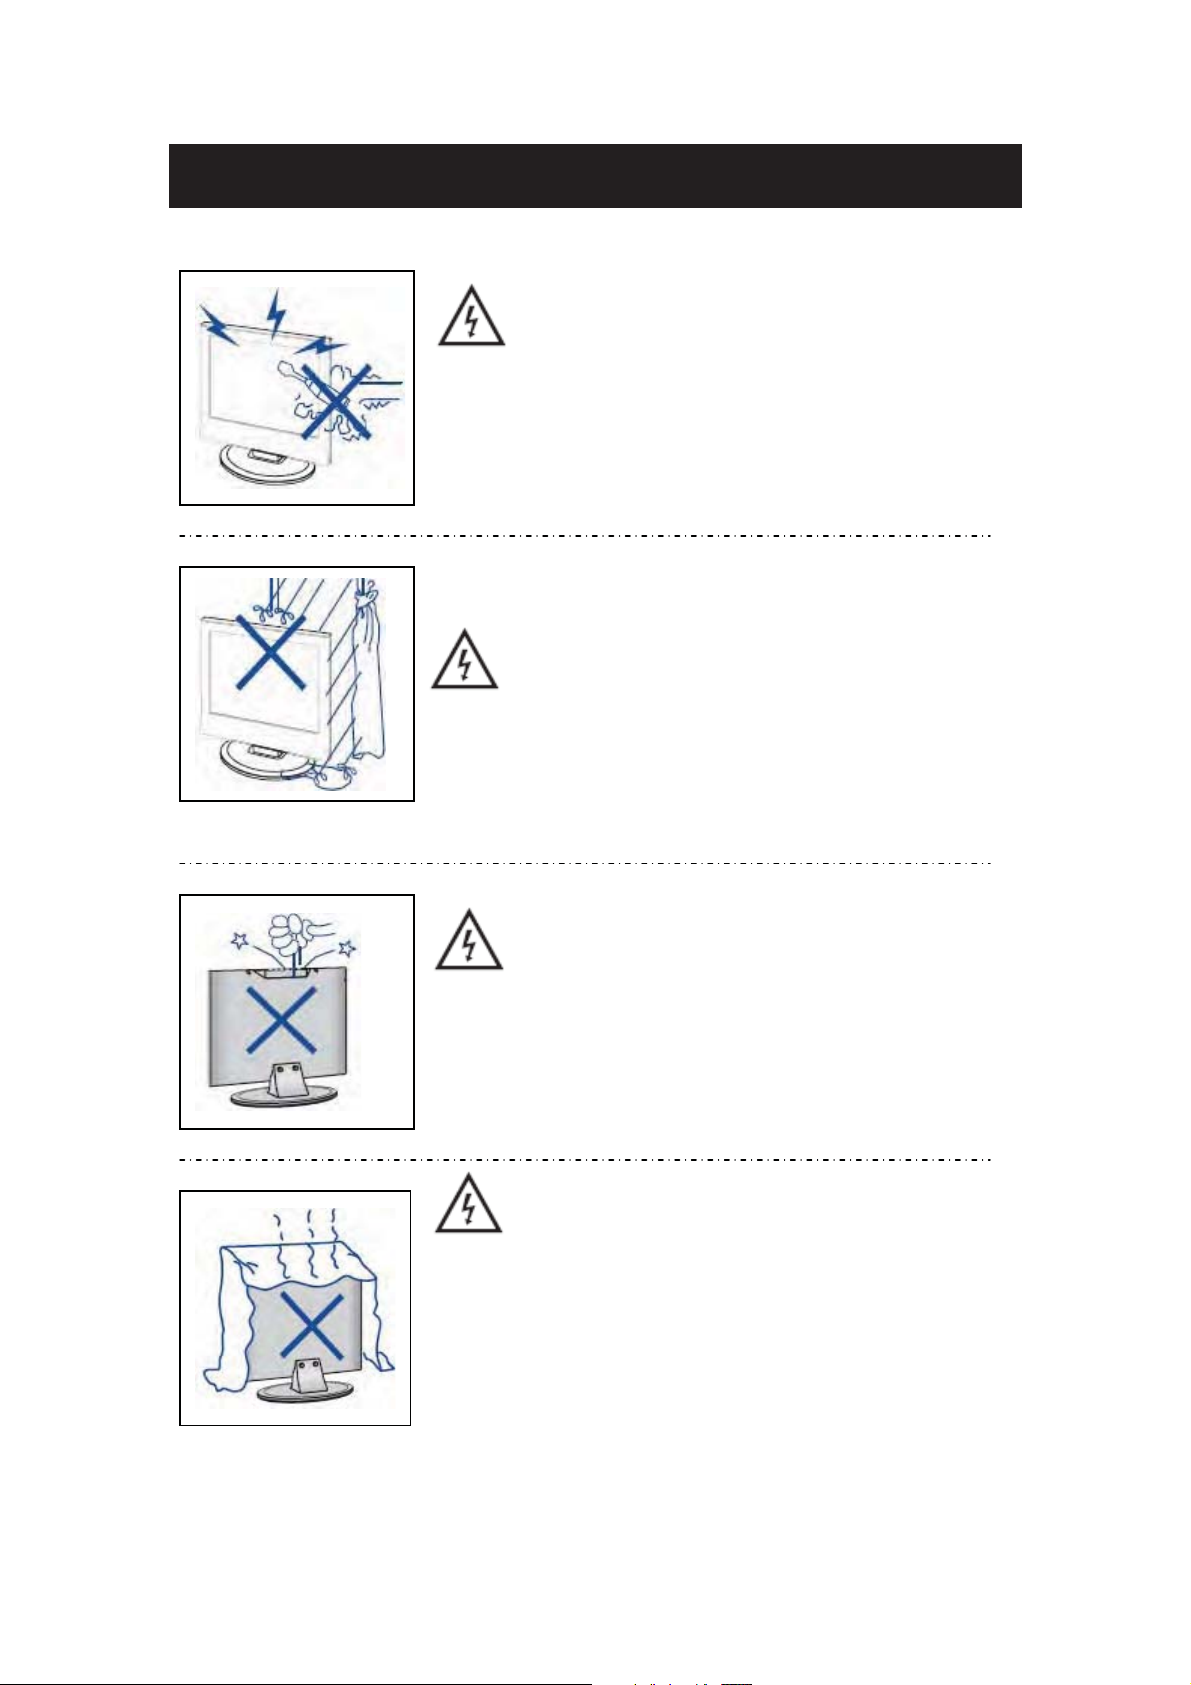
Caution
Caution
High voltages are used in the operation of this product.
- Do not open the product's casing. Refer servicing
to qualified service personnel .
Caution
To prevent fire or electrical shock hazard, do not expose
the main unit to
filled with liquids, such as vases, on the apparatus.
rain or moistureˈdo not place objects
Caution
Do not drop or push objects into the television cabinet
slots or openings. Never spill any kind of liquid on the
television receiver.
Caution
Avoid exposing the main unit to direct sunlight and other
sources of heat. Do not stand the television receiver
directly on other products which give off heat: e. g. video
cassette players and audio amplifiers. Do not block the
ventilation holes in the back cover. Ventilation is essential
to prevent failure of electrical components. Do not squash
the power supply cord under the main unit or other heavy
objects.
Page 6
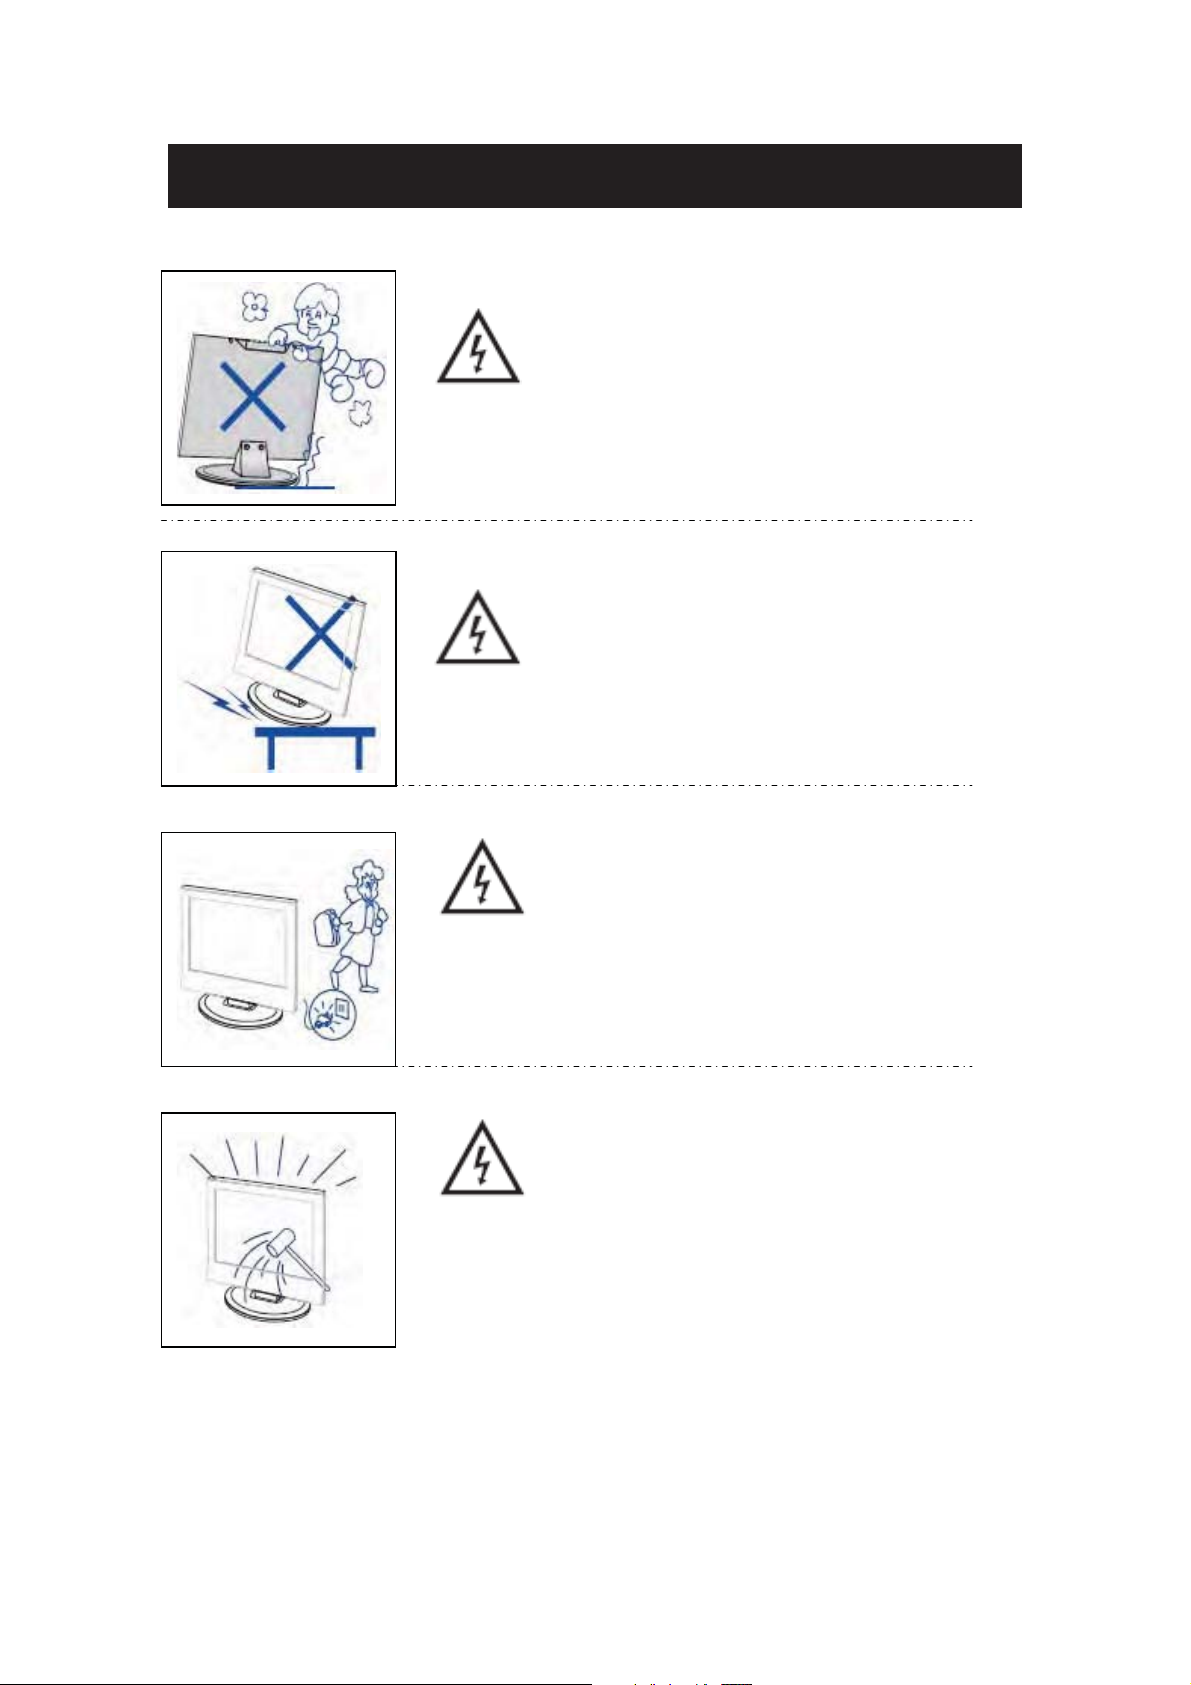
Never stand on, lean on or suddenly push the product
or its stand. You should pay special attention to
children.
shelf or table. Serious injury to an individual and
damage to the television may result if it should fall.
Do not place the main unit on an unstable cart stand,
Caution
Caution
Caution
Caution
When the product is not used for an extended period
of time, it is advisable to disconnect the AC power
from the AC outlet.
Caution
is therefore breakable. This product must not be dropped
or banged. If the LED Panel breaks be careful of being
injured by broken glass.
The LED panel used in this product is made of glass and
Page 7
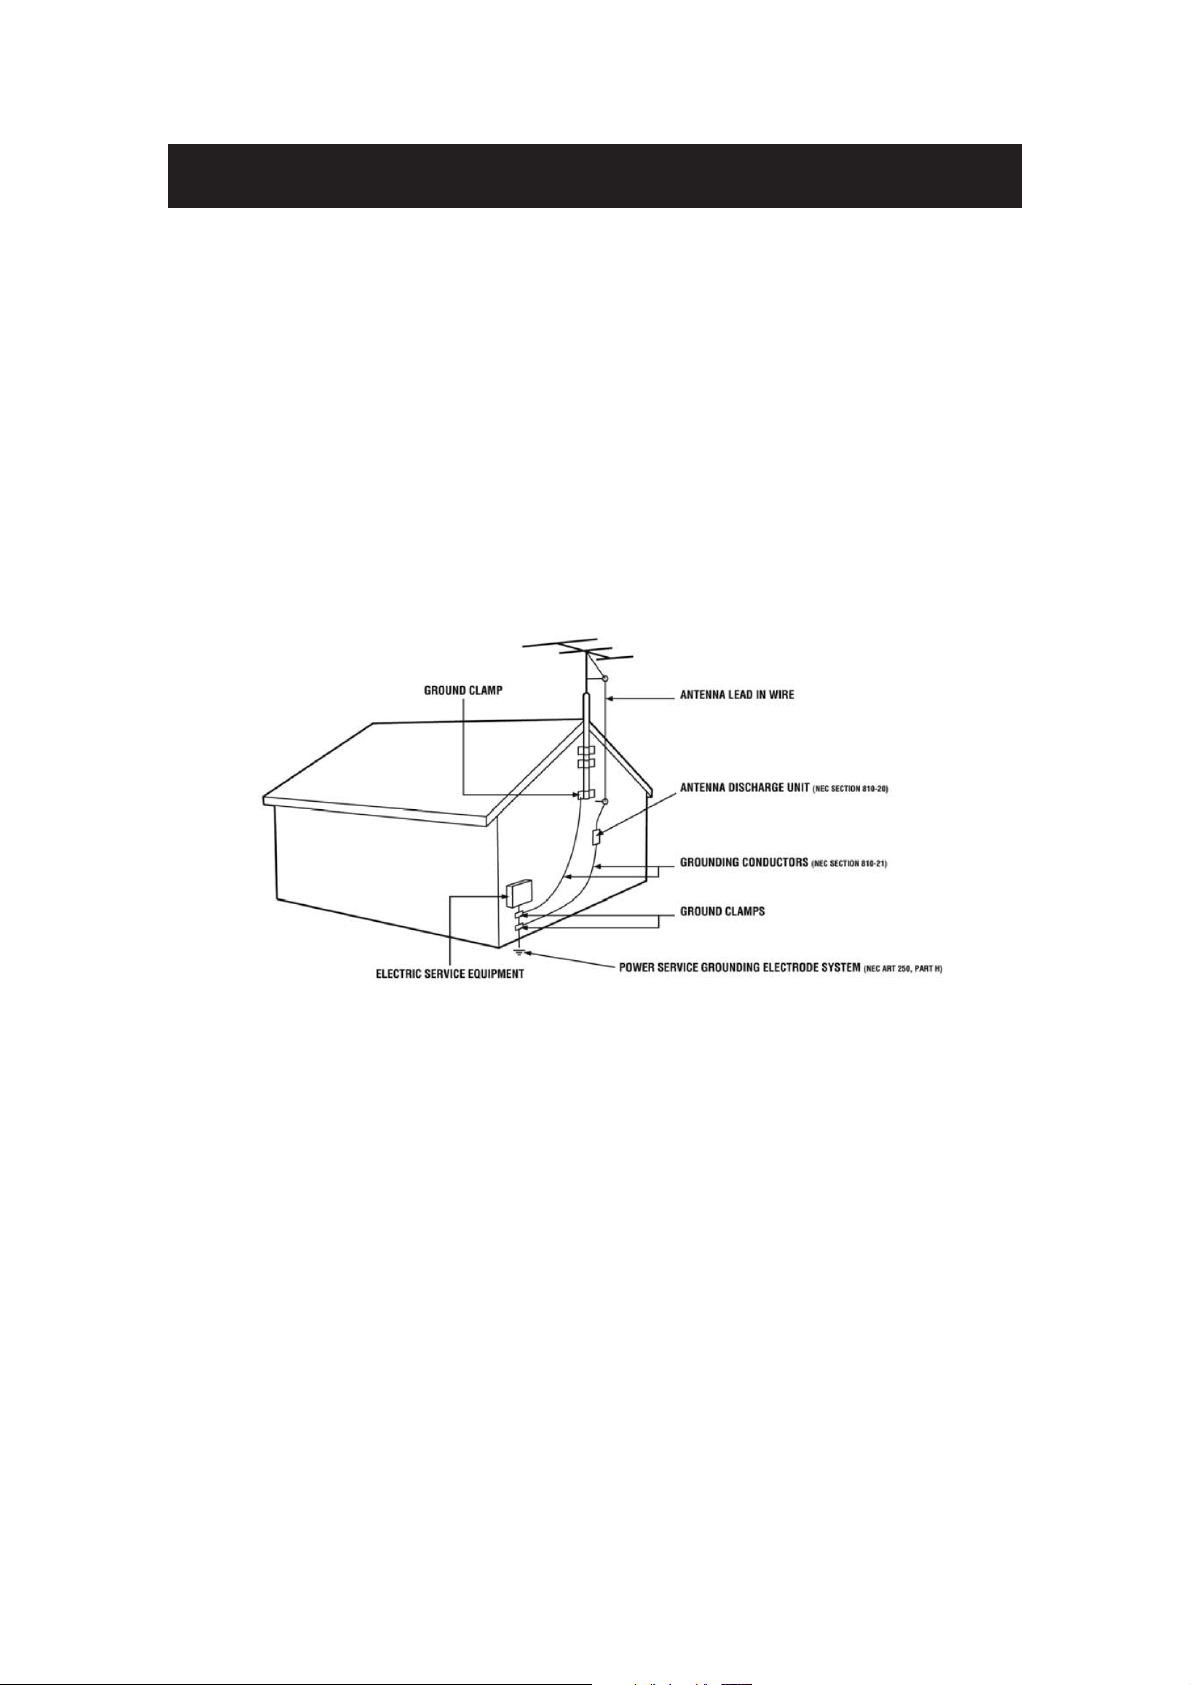
Important Information
Television Antenna Connection Protection
External Television Antenna Grounding
If an outside
cable system is electrically grounded to provide some protection against voltage surges and
static charges. Article 810 of the National Electrical Code, ANSI/NFPSA 70, provides
information with regard to proper grounding of the mast and supporting structure, grounding of
the lead-in wire to an antenna discharge unit, size of the grounding conductors, location of
antenna discharge unit, connection to grounding electrodes, and requirements of the grounding
electrode.
antenna or cable system is to be connected to the TV, make sure that the antenna or
Lightning Protection
For added protection of the TV during a lightning storm or when it is left unattended or unused
for long periods of time, unplug the TV from the wall outlet and disconnect the antenna or cable
system.
Power Lines
Do not locate the antenna near overhead light or power circuits, or where it could fall into such
power lines or circuits.
Page 8
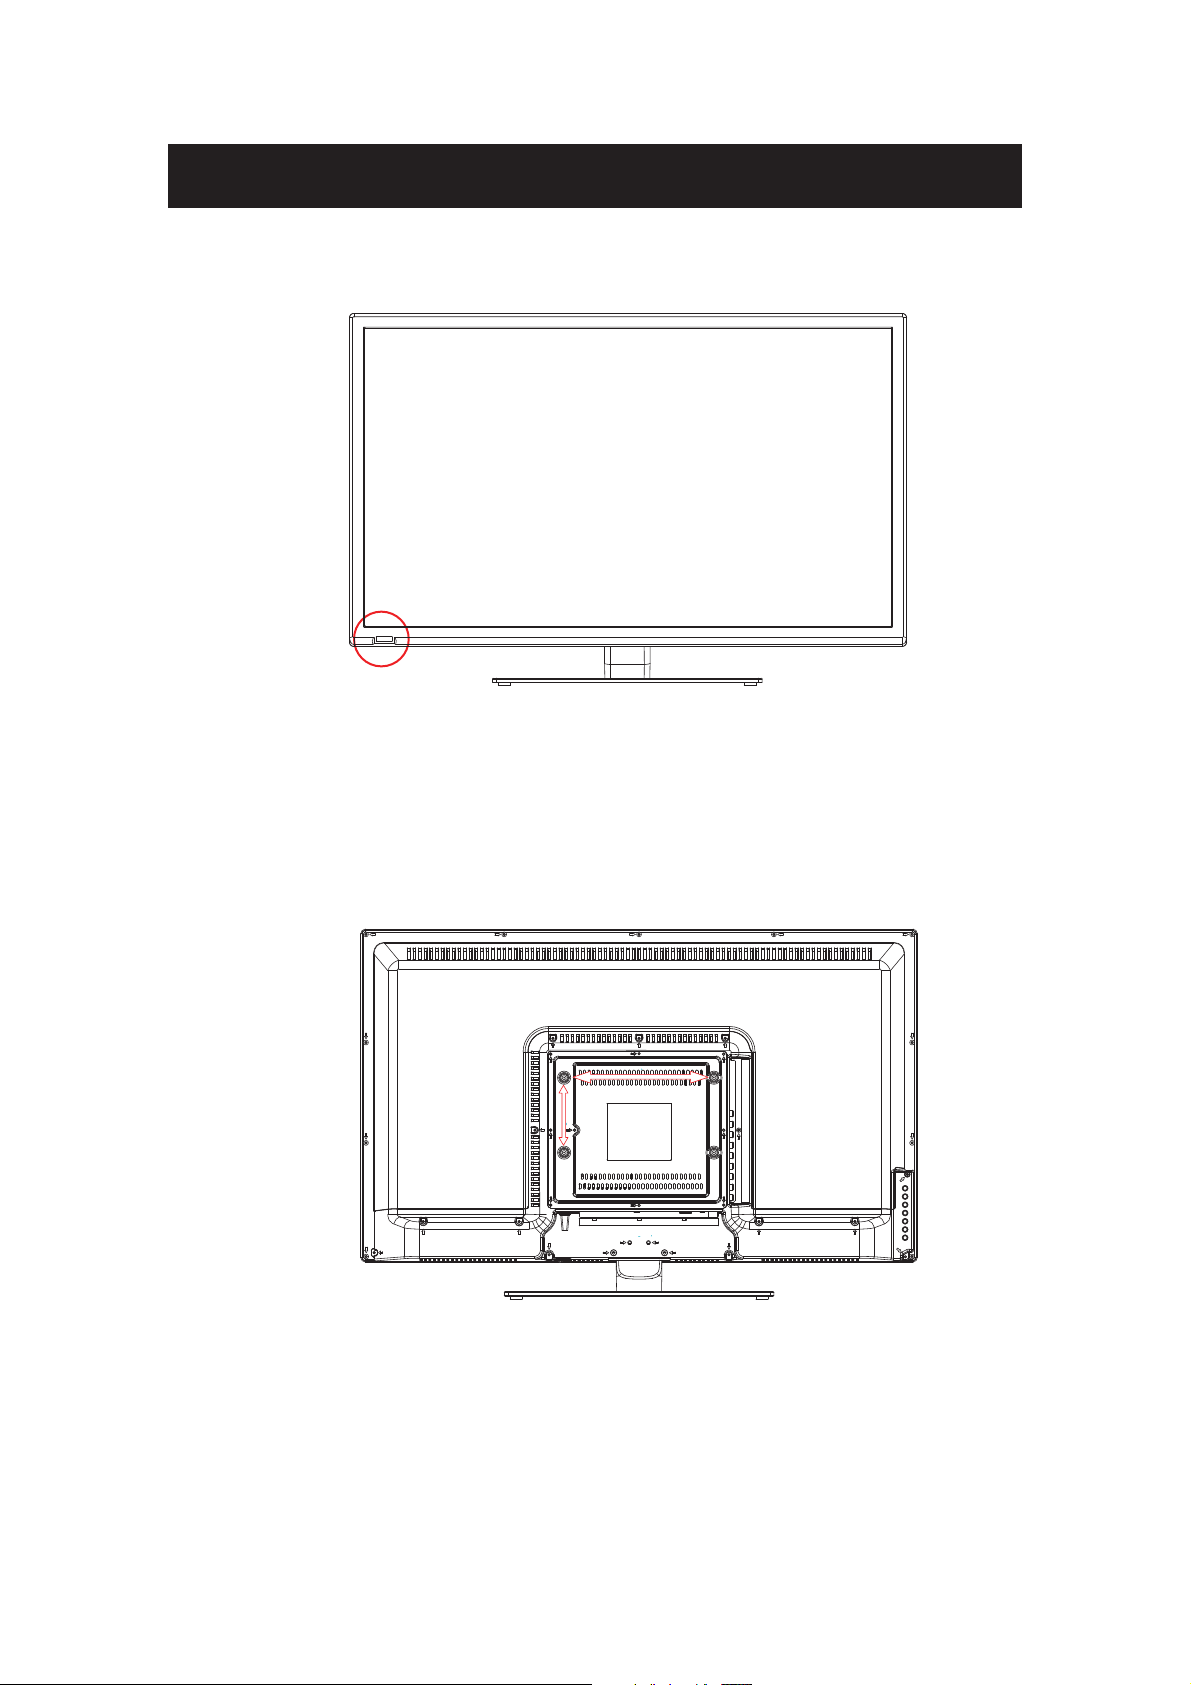
Attacthing or Removing the Stand
1.To attach the base place the display unit flat on a table. Afterwards attach the stand onto
.dnats eht eruces ot swercs 3 eht ni wercS .dnats eht fo mottob eht
Page 9
2. To remove the stand, remove the 4 screws in the area and the stand will come off.
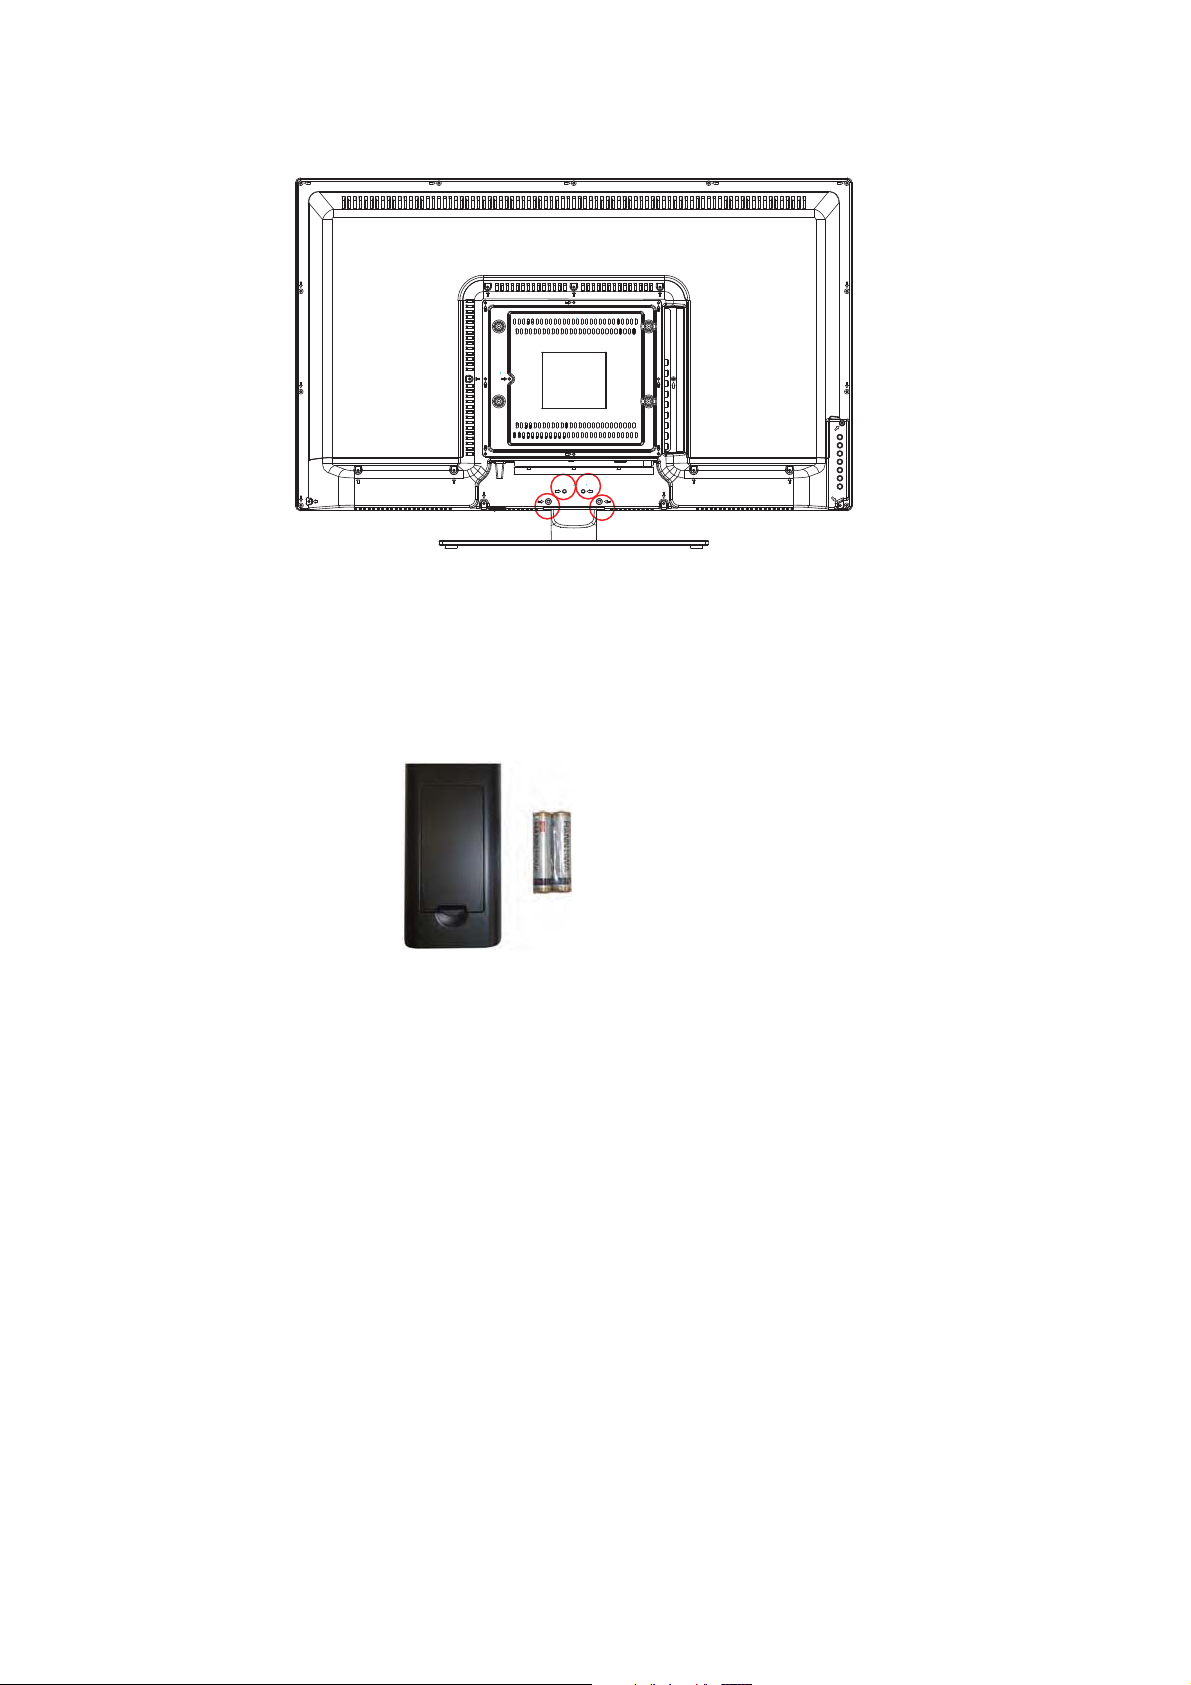
Installing Batteries to the Remote Control
Please insert two AAA batteries into the remote control. Make sure that you match the (+)
and (-) symbols on the batteries with the (+) and (-) symbols inside the battery compartment.
Afterwards, re-attach the battery cover.
Please note:
Only use AAA batteries.
Do not mix new and old batteries. This may result in cracking or leakage that may pose a
fire risk or lead to personal injury.
Inserting the batteries incorrectly may also result in cracking or leakage that may pose a
fire risk or lead to personal injury.
Dispose the batteries in accordance with local laws and regulations.
Keep the batteries away from children and pets.
If the remote control is not used for a long time, remove the batteries.
Keep the remote control away from moisture, sunlight, and high temperatures.
Page 10
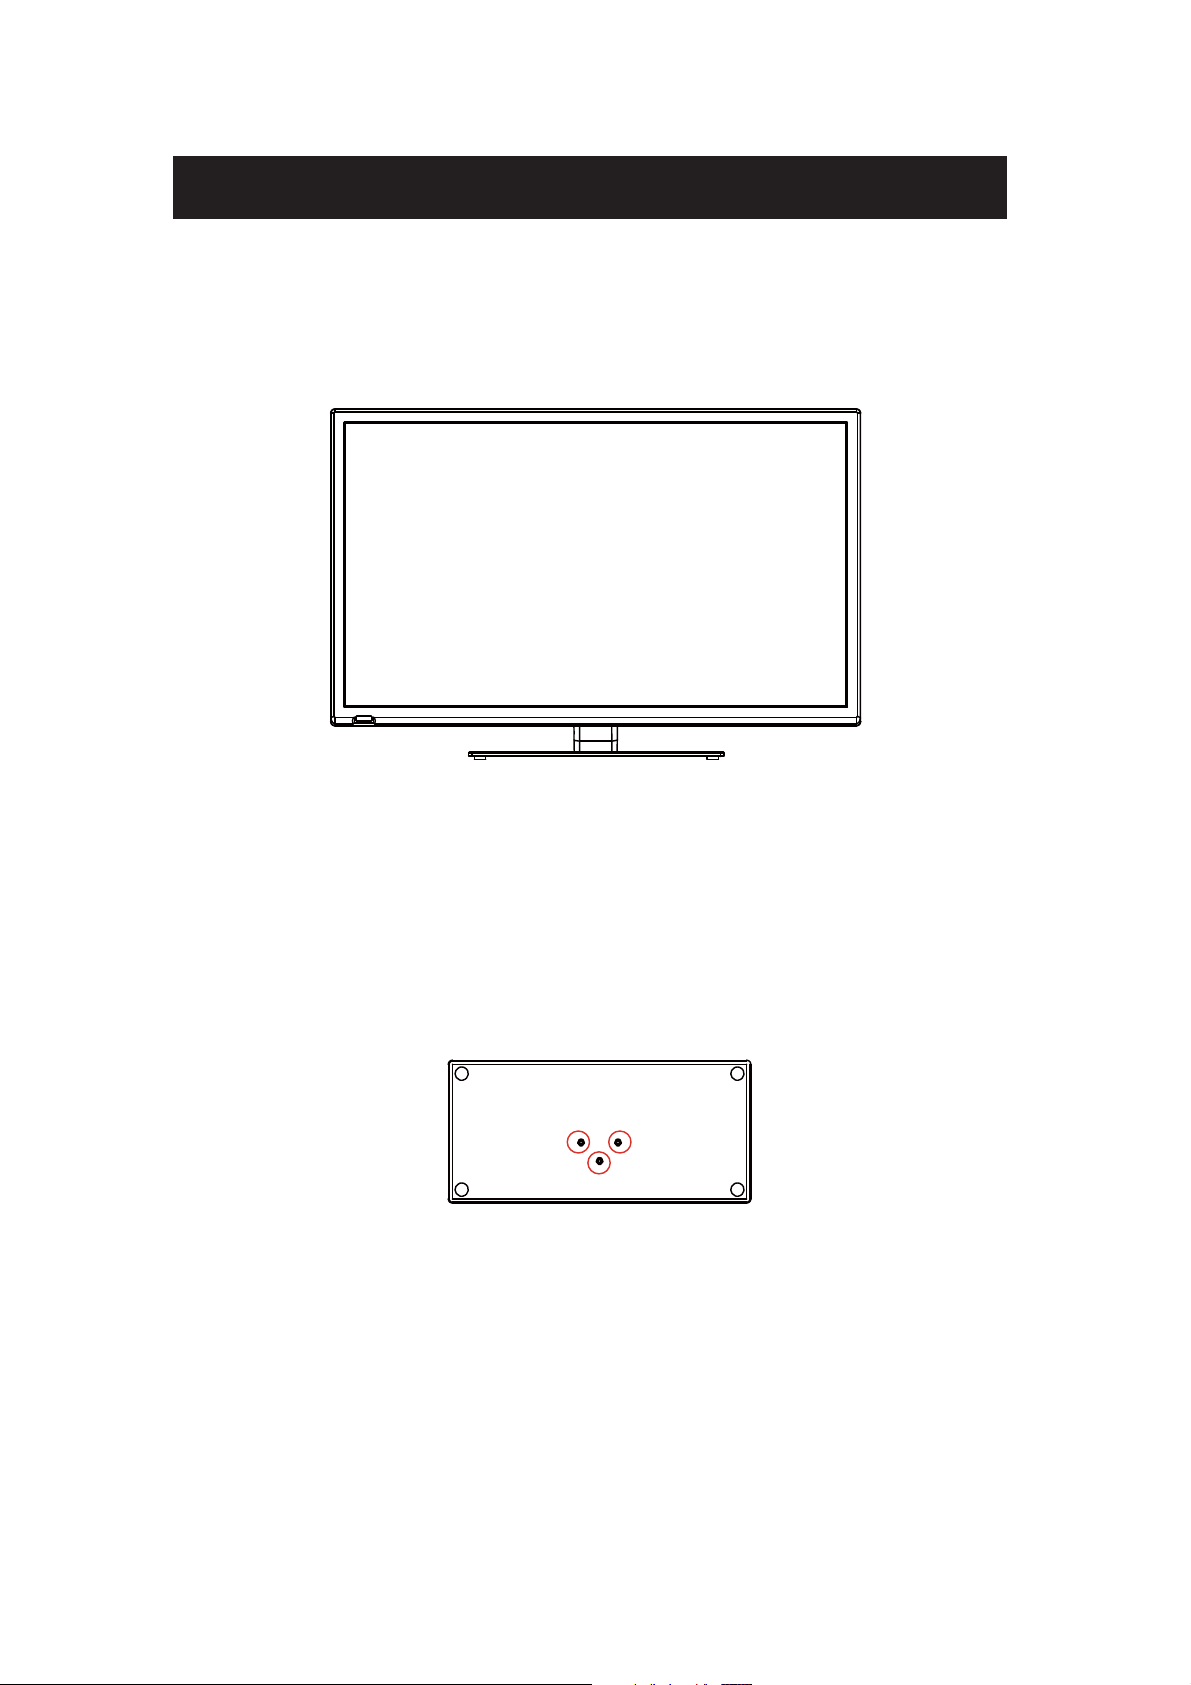
Identifying Front and Rear Panel
Front View
INDICATOR LIGHT – The light is red when power is plugged in but the TV is not turned on.
The light turns blue when the TV is turned on. Because of the LED in the panel, the TV
might take 10 – 12 seconds to power on.
REMOTE SENSOR – The remote sensor receives all the commands from the remote control.
Rear View Mounting Pattern
Mounting Specification : 100mm x 200mm using screw size M6. Length of screw should not
exceed 8mm. Please Note : The 8mm length of screw refers to how deep the screw can go
inside the mounting holes. When you’re buying screws, you should add the original 8mm to
the thickness of your mounting plate in order to get the total screw length.
Page 11

Main unit description
Control Panel Button Function
VOL+ : Volume up.
VOL- : Volume down.
CH+: TV channel up.
CH- : TV channel down.
MENU : Press to select the main menu.
SOURCE : Select the input signal.
POWER : Turn the TV on or off.
TV Terminal Connections
1. Video input terminal.
2. AUDIO input terminal.
3. SCART input terminal.
4. PC AUDIO terminal.
5. VGA input terminal.
6.ANT input terminal.
7. Mini-YPBPR input terminal.
8.EARPHONE output terminal.
9. HDMI1 input terminal.
10.HDMI2 input terminal.
11.HDMI3 input terminal.
12. CI slot.
13.USB input terminal.
14.COAX output terminal.
6
Page 12

Optional Configuration as below:
Connect the USB to the USB jack on the set.
NOTE
Ɣ,WLVRQO\P$0$;RI'&FXUUHQWRXWSXWZKHQ\RXFRQQHFWZLWK86%MDFN
Ɣ 7RHQVXUH WKH0RELOH+' ZRUNV ZHOO \RXVKRXOGXVH RWKHU SRZHU VXSSO\IRU WKH0RELOH +'
And do not use the USB jack in the same time.
Ɣ,WVXSSRUWV0RELOH+' E\ FRQQHFWLQJ ZLWK86%MDFNPXVWPRUHWKDQ *% 7KH SDUWLWLRQV RI
the Mobile HD can’t be more than 4 partitions. The max partition is 2TB. It supports FAT/FAT32
document. The max FAT document is 4GB and the max FAT32 document is 2TB.
7
Page 13

Remote control
: Press this button to Turn the TV on or off.
: Press this button to mute or restore sound.
NICAM/A2: In the TV condition, press this key to select the stereo
mode.
ASPECT:
PMODE: Select picture mode.
SMODE:
0-9:
-/---
: Switch back and front between the current and previous channels.
Repeat the program in MEDIA
DISPLAY:
FREEZE: Press to hold the picture.
( The U disk will be formatted when in burning , please do not
store important files in the U disk )
AUTO: Adjust the picture automatically in pc mode.
RED, GREEN, YELLOW, BLUE: Correspond to the different
colored subjects.
SLEEP: Set the sleep timer.
SOURCE:
ENTER:
NOTE˖ press this button to display “channel list” in TV source.
MENU: Press this button to enter the main menu for various
optional adjustable setting.
EXIT:
CH/CHƷ: Change the channel up and down.
VOL/VOLƷ: Adjust the volume.
SUBTITLE: Open or close subtitle.
(Used for models with DTV function only)
T.S HIFT: Press the button to pause current DTV program and start
record background
(Used for models with DTV function only)
HOLD:
(Used for European region only)
˖Press to start playing the MEDIA, or to pause playing.
(Used for models with MEDIA function only)
REVEAL: Press this button to reveal the hidden information in Teletext page. Press again to hide the
information.
Press to adjust picture ratio.
Select sound mode.
Select and switch to a channel using 0 - 9.
: Switch the program digit.
Display TV information.
: Start to record.
Press to change signal source.
Enter the selected option or execute the selected operation.
Exit the OSD (On-screen display).
Freeze a multi-page passage on screen in Teletext mode.
8
Page 14

˖Press to play backward
˖
(Used for models with MEDIA function only)
SIZE: Display the top, bottom or all of page to read easily in Teletext
mode.
˖Press to play forward.
(Used for models with MEDIA function only)
INDEX: Press this button to go to the index page in Teletext.
˖Stop playing the Media.
(Used for models with MEDIA function only)
˖Skip to previous chapter
(Used for models with MEDIA function only)
S.PAGE: Carry out the function of SUBCODE in the text while enter the
text display mode.
˖Skip to next chapter
(Used for models with MEDIA function only)
TEXT: Press to enter the Teletext mode.
FAV: Switch between customer set " Favorite List"
AUDIO: Press to select the DTV audio.
(Used for models with DTV function only)
DTV˖
NOTE˖ press this button to display “Record list” in DTV
EPG:
(Used for models with DTV function only)
Press to switch to DTV (Digital TV) mode.
Enter electronic program guide.
TV/RADIO : Switch between TV and RADIO
(Used for models with DTV function only)
9
Page 15

OSD basic adjustment
Installation Guide
If this is the first time you are turning on the TV and there are no programs in the TV
memory, the installation Guide menu will appear on the screen.
1. Press the “c/d/e/f” button to select the local language.
2. Press the “c/d/e/f” button to select mode.
3. Press the “c/d/e/f” button to select the local country you want to
4. Press the “c/d/e/f” button to select Air or cable.
5. Press the “c/d/e/f” bu t to n to s e l e c t m ode : D TV + ATV, D TV,A T V.
6. Press the “c/d/e/f” button to select ĀON”or “OFF”.
Note: Searching for platform will take a long time, please be patient!
10
Page 16

Page 17

2.Analog Manual Scan
Press “c/d” button to select “Manual
scan” and press the “f” button to Analog
manual scan.
Press “MENU” button to return the
previous menu. Press “EXIT” button to exit
the menu.
.Digital Manual Tuning
3
Press “c/d” button to select “Diigital
Manual Scan” and press the “d” button to
start.
Press “MENU” button to return the
previous menu.
Press “EXIT ” button to exit the menu.
4. Channel Edit
Press “c/d” button to select “Channel Edit” and press the “ENTER” button to enter.
a. DELETE
Press “c/d” button to select the program and press “RED” button once to delete the program.
b. SKIP
Press “c/d” button to select the channel
which you want to skip and press the
“GREEN” button to skip . Press “GREEN”
button again to cancel the setting.
c. MOVE
Press “c/d” button to select the
channel and press the “BLUE” button to
move . Then press the “c/d” button to
select the channel with which you want to
move. Press “BLUE” button again to
confirm.
12
Page 18

5. Signal information (only use in DTV)
Press “c/d” button to select “Signal
information” and press the “ENTER”
button . Press “MENU” button to return
the previous menu. Press “EXIT” button
to exit the menu.
PICTURE
You can select the type of picture, which best corresponds to your viewing.
Press the “MENU” button to enter the OSD menu. Then press “e/f” button to select the
“PICTURE” menu. Press “c/d” button to select “Picture Mode” and press the “e/f” button to
select.
1. Press “c/d” button to select “Brightness” and press the “e/f” button to enter brightness
adjustment menu to adjust brightness.
2. Press “c/d” button to select “Contrast” and press the “e/f” button to enter contrast
adjustment menu to adjust contrast.
3. Press “c/d” button to select “Sharpness” and press the “e/f” button to enter sharpness
adjustment menu to adjust sharpness.
4. Press “
c/d” button to select “Saturation” and press the “e/f” button to enter Saturation
adjustment menu to adjust saturation.
13
Page 19

5. Press “c/d” button to select “Hue’’ and press the “e/f” button to enter hue adjustment menu
to adjust hue.
Note:
The 'hue' item is used in NTSC mode only.
6. Press “c/d” button to select “Sharpness” and press the “e/f” button to enter sharpness
adjustment menu to adjust sharpness.
7. Press “c/d” button to select “Color Temp” and press the “e/f” button to select mode˖
StandardˈCoolˈWa rm..
8. Press “c/d” button to select “Aspect Ratio” and press the “e/f” button to select.
9. Press “c/d” button to select “Advanceed Settings” and press the “f” button to enter
Advanceed Settings adjustment menu to adjust.
SOUND
You can select the type of sound, which best corresponds to your listening.
Press the “MENU” button to enter the OSD menu. Then press “e/f” button to select the
“SOUND” menu.
SPDIF PCM
Sound Type Stereo
1. Press “c/d” button to select “Sound Mode” and press the “e/f” button to select mode.
2. Press “c/d” button to select “Treble” and press the “e/f” button to adjust.
3. Press “c/d” button to select “Bass” and press the “e/f” button to adjust.
4. Press “c/d” button to select “Balance” and press the “e/f” button to adjust.
5. Press “c/d” button to select “Surround sound’’and“e/f” button to selectĀON”or “OFF”.
6. Press “c/d” button to select “EQ Setting’’and“e/f” button to enter EQ Setting adjustment
menu to adjust EQ..
7. Press “c/d” button to select “AVL” and press the “e/f” button to select “On” or “Off”.
Press “c/d” button to select “SPDIF” and press the “e/f”button to select “PCM” or “Off” or “Auto”.
8.
9. Press “c/d” button to select “Sound Type” and press the “e/f” button to select.
14
Page 20

LOCK SYSTEM
Press the “MENU” button to enter the OSD menu. Then press “e/f” button to select the
“Lock System” menu. The default password is “0000”.
Note: The administrator password is “8899’’.
1. Press “c/d” button to select “Enable’’and then press “e/f” button to select “On” or “Off”
2. Press “c/d” button to select “channel locks” and press the “f” button to select channel˄s˅to
lock .
3. Press “c/d” button to select “Parental Rating” and press the “e/f” button to set.
4. Press źŸEXWWRQWRVHOHFW³Lock Keypad”, then press button to select “On” or “Off”, The
key board will be invalid if you set Lock Keypad “On”.
5. Press źŸEXWWRQWRVHOHFW³Hotel Mode” and press the “f” button to enter the sub-menu to
set.
6. Press źŸEXWWRQWRVHOHFW³New Password” and set your new password.
7. Press źŸEXWWRQWRVHOHFW³Clear Lock”and then press the “f” button to clear.
15
Page 21

SETUP
Press the “MENU” button to enter the OSD menu. Then press“e/f” button to select the “SETUP”
menu.
HDMI CEC Control
1. Press “c/d” button to select “OSD Language” and press the “e/f” button to select the OSD
language which you desire.
2. Press “c/d/” button to select “Audio Language” and press the “f” button to enter the Audio
language adjustment menu to select the Audio language which you desire.
3. Press “c/d” button to select “Subtitle” and press the “f” button to select “On” or “Off”.
Note: This function is only used for DTV source.
4. Press “c/d” button to select “Teletext” menu and press the “f” button to enter sub-menu.
5. Press “c/d” button to select “Blue Screen” and press the “e/f’’ button to select ĀOn” or
“Off”.
6. Press “c/d /e/f ”button to select Mode Setting.
7. Press “c/d/e/f” button to select “Time Setting”.
8. Press “c/d” button to select “HDMI CEC Control” menu and press the “f” button to enter sub-menu.
9. Press “c/d/e/f” button to select “PVR Settings”.
10. Press “c/d” button to select “First Time Installation”, then press “ENTER” button to set
relevant options including OSD language, country and tuning.
11. Press “c/d” button to select “Reset”, then press “ENTER” a dialogue. Press “e” button
selecting “Yes” to restore all setting to default setting.
12. Press “c/d” button to select “Software Update (USB)”, then press “ENTER” button to
update software using USB.
16
Page 22

PC
Press the “MENU” button to enter the OSD menu. Then press “e/f’’ button to select the
“PC Setting” menu. (Only available in PC mode).
1. Press “c/d” button to select “Auto Adjust” menu and press the “f”button to auto adjustment.
2. Press “c/d” button to select “H Position” and press the “e/f” button to adjust.
3. Press “c/d” button to select “V-Position” and press the “e/f” button to adjust.
4. Press “c/d” button to select “Phase” and press the “e/f” button to adjust.
5. Press “c/d” button to select “Clock” and press the “e/f” button to adjust.
17
Page 23

DTV Features
Favorite List
When the source is selected as DTV, users can enter Favorite List by pressing “FAV” button.
The “Favorite List” window is illustrated as follows:
Program Information
When the source is selected as DTV, you can press “display” button to display the channel’s
information. The program information window is illustrated as follows:
Audio
When the source is selected as DTV, users can enter the Setup menu to enter the “Audio
Language” menu . The “audio language” window is illustrated, and press “
“audio language” menu .
c/d” button to select the
18
Page 24

Electronic Program Guide˄˄EPG
˅
Electronic Program Guide (EPG) provides program information which will be broadcasted
now or in the future. The system will display EPG window by pressing “EPG” button. DATE and
TIME information is displayed on the right of the window. The left side shows all channels. The
right side shows the programs in the channel. The selected program is also displayed on the top of
the screen.
1. Press the “c/d” button to select the
“program”. You can press “RED” button
to enter record mode. Press “GREEN”
button to display the program’s detail.
Press “YELLOW” button to Check details
at PVR’s Schedule List introduction. Press
“Blue” button to enter remind setting.
2. Press the “c/d” button to select “CH”
and press the “e/f” button to select the
channel number to see the current
channel’s program forecast.
Note: The U disk will be formatted when in burning, please do not store important files in the U disk.
Subtitle
When the source is selected as DTV, users
can go to the menu to set.
Note: The pictures in regard to function are
provided for reference purposes only.
Common interface
Press the “e/f” button to select Common interface,then press ENTER button to enter sub menu.
Only available when there is CI card under DTV.
19
Page 25

USB Features
Press the “SOURCE” button to change to the “MEDIA” source.
Photo
1. Press the “Ż / Ź” button enter the “PHOTO” option, and press enter button to enter
2.Press ŻŹEXWWRQWRVHOHFWGULYHGLVN\RXZDQWWRZDWFKWKen press enter button to enter.
3.Press “BLUE” button to enter the sub menu to set.
4. Press the “EXIT” button to back to the previous menu.
20
Page 26

Music
1. Press ŻŹEXWWRQWRVHOHFW086,&LQWKHPDLQPHQXWKHQ SUHVV HQWHU EXWWRQWRHQWHU
2. Press Ż / ŹEXWWRQWRVHOHFWGULYHGLVN\RXZDQWWRZDWFKWKHQSUHVVenter button to enter
3. Press “BLUE” button to enter the sub menu to set.
4. Press the “exit” button to back to the previous menu
Movie
1.
Press ŻŹEXWWRQWRVHOHFW 029,( LQWKHPDLQPenu, then press enter button to enter
2. Press
3. Press “BLUE” button to enter the sub menu to set.
4. Press the “exit” button to back to the previous menu.
c/d button to select drive disk you want to watch, then press enter button to enter
21
Page 27

Text
1. Press ŻŹEXWWRQWRVHOHFW7(;7LQWKHPDLQPHQXWKHQSUHVVHQWHUEXWWRQWRHQWHU.
2. Press
3. Press “BLUE” button to enter the sub menu to set.
4. Press the “EXIT” button to back to the previous menu.
c/d button to select drive disk you want to watch, then press enter button to enter
22
Page 28

PVR Operation
In DTV source, press the “MENU” button
to enter the OSD menu. Then press“Ż / Ź”
button to select the “Setup” menu.
1. Press “c/d” button to select “PVR
Settings” and press the “ENTER”or “Ź´
button to enter.
a) Press “Ż / Ź” button to
select “File Manager” and press
the “ENTER” button to check
PVR file system.
b) Press “Ż / Ź” button to
select “Device List” and press
the “ENTER” button to the sub
menu.
23
Page 29

c ) Press “c/d” button to select “Scheduled Record” and press the “ENTER” button to set.
Note:
1. The U disk will be formatted when in format, please do not store important files in the U
disk.
2. Press “
” button for the first time to start recording, for the second time, the sign of
recorder will be slimmed down, but it's still under recording.
24
Page 30

IMPORTANT
How do I Clean the TV?
1. The power cable has to be removed from the socket before cleani
2. Do not use volatile solvent (alcohol, rosin, and toluene) to clean the TV. These
types of chemicals might damage the housing and the LED glass.
Cleaning the bezel and remote control
1. Use a 100% cotton cloth or micro-fiber cloth for cleaning.
2. If the remote control or bezel is dirty to the point where you cannot simply dry
wipe it, please lightly dampen the wiping material (the wiping material cannot
be dripping wet, because if water drips into the panel it will cause
malfunction and possible permanent damage to the panel which will not be
covered under the warranty) with clean water and wipe again. Wipe the
display with a dry micro-fiber cloth or 100% cotton cloth afterwards.
Please Note :
• Make sure you wring the water out of the cloth before cleaning the
bezel or remote in order to prevent water from penetrating into the
electronics.
ng the TV.
Cleaning the Screen
1. Use a 100% cotton cloth or micro-fiber cloth for cleaning.
2. The LED screen glass is extremely fragile. Do not scrape it with any ma t erial.
Do not press or tap the screen to avoid cracking. When the screen is dirty to the
point where you cannot simply dry wipe it, please lightly dampen the wiping
material with clean water and wipe again. Wipe the display with a dry
micro-fiber cloth or 100% cotton cloth afterwards.
Page 31

Troubleshooting
Troubleshooting
The following table contains the common problems and the solutions to thes
you contact the technicians.
Problems Solutions
Connect power cord correctly.
Turn on power.
NO PICTURE
ABNORMAL
COLORS
PICTUR
E IS TOO
DARK
AUDIO ONL Y NO
PICTURE
PICTURE ONLY NO
AUDIO
REMOTE C
DOES NOT WORK
ONTROL
Connect video cable correctly.
Select the input signal source with proper cable connection with the source button.
Match the colors on the cables to the ports off the back
port.
our
Adjust y
Make sure you have connected both your video and audio cables.
The TV’s tuner sig
Make sure the audio cable is connected.
Readjust your volume via the remote control.
The TV’s tuner sig
Tur
n off the TV, unplug it from the socket. Remove the batteries out of the remote for 30 minutes.
Press the remote buttons and the power button randomly for a good 2 seconds, and then reinstall the
batteries. Try the remote to see if it works. For battery removal instructions.
The TV’s remote sensor is also housed in the same
sure there is line of sight from the remote control’s front sensor to the remote sensor of the TV.
ast, brightness and lamp settings from the OSD Menu. For adjust controls
contr
nal must not be lower than 65 %.
nal must not be lower than 65 %.
of the television. I.E. red cable to red colored
place as the power indicator light. Please make
e problems. Please check this list before
CANNOT RECEIVE
SUFFICIENT
CHANNELS
THROUGH THE
ATSC/NTSC TUNER
NO COLOR
WEAK SIGNAL OR
NO PROGR
SYMBOL ON
SCREEN
TV’S UNIVERSAL
REMOTE CODE
The TV’s tuner signal must not be lower than 65 %. Change the direction of your antenna and rescan
your channels. If you have cable call up your cable company and ask about signal strength of your
local cable.
Please adjust your picture setup and ma
down. For adjustment controls.
The TV’s tuner signal must not be lower than 65 %. Check your signal.
The TV’s tuner signal must not be lower than 65 %. Change the direction of your antenna and rescan
AM
your channels. If you have cable call up your cable company and ask about signal strength of your
local cable.
This television follows NEC’s universal remo
through your own universal r
ke sure the saturation and the RGB are not turned all the way
te code. To find the actual code you must read
emote’s guide book.
Page 32

Problems Solutions
TV CHANNELS ARE
BLOCKED
UNIVERSAL REMO
CODE
THE TV TURNS ON OR
OFF SLOWLY A
SCREEN SHOWS UP
NO SOUND ON PC Make sure you have a 3.5 m
HDCP VIDEO SAYS N
HDCP SUPPORT
VIDEO HAS NO
HDCP
AUDIO
CANNOT GET 1360X768
ON PC VG
PICTURE IS
DISTORTED OR HAS
ABNORMAL SOUND
PICTUR
COVER THE ENTIRE
SCREEN
PICTURE QUALITY IS
HORRIBLE!!
PICTURE HAS PIXELS
THAT ARE
DISPLAYING THE
SAME COLOR
ND THE
SLOWLY
A
E DOES NOT
ALWAYS
Check your auto lock function’s settings inside the OSD.
about them.
This TV follows NEC’s univer
TE
them.
This TV is a High Definition liquid cr
to power up and show the picture.
STEREO INPUT.
O
Reboot your HDCP video device but turning them off and unplugging the power cord. Wait up to 8 minutes
to plug the power back in to see if it works or not.
Make sure you have a 3.5 mm mini-jack cable connected from your HDCP video device’s sound output to the
TV’s VGA STEREO INPUT. If your HDCP video device uses RCA AUDIO jacks, you’ll need to obtain a
RCA audio converted into 3.5 mm mini-jack cable.
Make sure the TV is recognized as plug and play monitor. Try updating your video card’s drivers as well. If
that does not help, most likely you’ll need to upgrade your video card to a newer one.
This might be from interference from large electrical appliances, cars, motorcycles, or fluorescent lights. If
the TV is close to the wall, try moving the TV to another room in your house to see if the problem still occurs.
I
f you’re using HDMI or a TV digital channel make sure you use the ASPECT button to switch to 16:9 format.
If you are using VGA, use the AUTO ADJUST function to adjust to the screen. Please Note : If you are using
regular analog TV, AV, or component in 480i resolution, use the ASPECT button to switch to 16:9 in order to
fill up the screen. Please Note : This note this feature will distort the picture.
For best i
“Standard Definition” from a digital source. Standard, analog TV will always be noticeable inferior to HD
because your TV has video that is many times better than old TV’s and so you can see interference and
deficiencies you did not KNOW you had.
Your TV is manufactured using an extremely high level of precision technology, however, sometimes some
pixels of your TV may not display. Pixels defects within industry specifications are inherent to this type of
product and do not constitute a defective product.
mage quality, view HD widescreen programs where possible. If HD content is not available view
You may have locked up some channels but forgot
sal remote code. Please check your hand book for NEC’s codes then apply
ystal display panel TV. It requires a few more seconds than normal TVs
m mini-jack cable connected from your pc’s sound output to the TV’s VGA
I CANNOT CHANGE
THE TIME MAN
BIG BLACK BOX IN
THE MI
SCREEN
UALLY
DDLE OF
Your TV syncs time automatically according to your local TV channel. This function only works while the
TV’s tuner is connected to an ANTENNA.
You have turned on closed captioning and are using TE
closed captioning and the box will disappear.
XT1 – TEXT4. Change the setting to CC1 or turn off
Page 33

Problems Solutions
SWITCHING A
CHANNEL
SOURCE CHANGES
THE VOLUME
THERE IS NOISE OR
TRASH PIXELS
THE SCREEN
TIPS FOR HIGH
DEFINITION
TIPS FOR LETTERBOX
CONTENT USERS
I CANNOT FIND THE
VOLUME
CHANNEL CHANGING
BUTTONS
TV TURNS OFF
AUTOMATICALLY
AFTER 5 MINUTES
MY TV PICTURE IS
VER
OR
USERS
AND
Y DIM
Different channels and inputs will sometimes have this effect because the channel signal’s own volume
is already loud. There is no way remove this completely. The TV has an AUTO VOLUME LEVEL
function that can combat this type of effect. Please make sure that function is turned on.
When your TV’s resolution is higher than the digital channel’s broadcast resolution, the signal is
ON
up-converted to match your TV’s resolution. Up-converting can cause this type of effect.
The TV is an ideal platform for viewing High Definition Content. The best image quality can be
achieved by HDMI, YPbPr (Component), then VGA. However, due to variances in broadcast
practices, it is possible some image distortions can occur.
Letterboxed (Widescreen) versions of DVD movies are most commonly formatted for standard 4:3 TVs.
The TV has the capability of expanding this content so the entire screen is filled at the expense of the
image proportion. To use this function press the aspect button on the remote control and cycle among
the available options.
The buttons are represented by the buttons located on the remote control. changes the
channels and changes the volume.
The TV features a power saving mode which will automatically turn off the TV, if there’s no signal
provided for more than 5 minutes.
Check to see if you are under POWER SAVING mode for your picture mode. Keep pressing the
PICTURE button on the remote control to cycle out of POWER SAVING.
Page 34

16:9, Zoom1, Zoom2, Auto, 4:3
Mild / Personal / Dynamic
Sharpness / Saturation / Hue
Page 35

PAL/SECAM/DVB-T
PAL/SECAM
Personal
120Hz/300Hz/500Hz/1.2KHz/3.0KHz/7.5KHz/10KHz/
PAL/SECAM/DVB-T
DVB-T
TELETEXT
PAL/SECAM/DVB-T
Mini YPbPr,
1 CI Slot,
1 input x Scart,
 Loading...