

Page 1

LT7029 TABLET PC
ANDROID 2.3 INSTRUCTION MANUAL
Dear User,
Thank you for purchasing our product.
Before using this device, please setting the touch calibration for three times and read
the instructions carefully.
Contents:
1. Notice------------------------------------------------------------------------------------------------2
2. Accessories---------------------------------------------------------------------------- ------------2
3. Hardware Specifications-------------------------------------------------------------------------3
4. Startup and shutdown--------------------------------------------------------------- -------------3
5. Desktop----------------------------------------------------------------------------------------------6
5.1 Main Menu Operation-------------------------------------------------------------------------6
6. Button-------------------------------------------------------------------------------------------------7
7. System Settings------------------------------------------------------------------------------------8
7.1 Wifi Wireless Connection---------------------------------------------------------------------8
7.2 Display ------------------------------------------------------------------------------------------10
7.2.1 Screen brightness --------------------------------------------------------------------------10
7.2.2 Standby screen------------------- ------------------------------------------------------------11
7.2.3 HDMI settings---------------------------------------------------------------------------------11
7.3 Applications---------------------------------------------------------------------------------------12
7.3.1 Instanll applications------------------------------------------------------------------------12
7.3.2 Unstall applications-------------------------------------------------------------------------15
7.4 Privacy---------------------------------------------------------------------------------------------16
7.4.1 Factory data reset---------------------------------------------------------------------------16
7.5 Language&keyboard---------------------------------------------------------------------------17
7.5.1 Select language-----------------------------------------------------------------------------17
7.5.2 Android keyboard---------------------------------------------------------------------------17
7.5.2.1 Input languades---------------------------------------------------------------------------17
7.6 Touch Calibration--------------------------------------------------------------------------------18
7.7 Date&Time----------------------------------------------------------------------------------------19
8.Calendar-----------------------------------------------------------------------------------------------20
9.Clock---------------------------------------------------------------------------------------------------20
10.Music--------------------------------------------------------------------------------------------------22
11. Video-------------------------------------------------------------------------------------------------25
12. Gallery-----------------------------------------------------------------------------------------------26
13. Network----------------------------------------------------------------------------------------------27
13.1 Web browsing-----------------------------------------------------------------------------------27
Page 2

13.2 Online video&audio ---------------------------------------------------------------------------27
14.Wallpaper--------------------------------------------------------------------------------------------27
15. Recording-------------------------------------------------------------------------------------------29
16. Camera----------------------------------------------------------------------------------------------30
16.1 take photo--------------------------------------------------------------------------------------30
16.2 camecorder------------------------------------------------------------------------------------31
17.Slide Me----------------------------------------------------------------------------------------------31
18. Market-----------------------------------------------------------------------------------------------33
19. Email-------------------------------------------------------------------------------------------------37
20. External equipment-------------------------------------------------------------------------------43
20.1 USB connection------------------------------------------------------------------------------43
20.2 OTG use---------------------------------------------------------------------------------------44
20.3 Keyboard and mouse------------------------------------------------------------------------44
21.TF card setting-------------------------------------------------------------------------------------44
22. Firmware upgrade--------------------------------------------------------------------------------48
22.1 Update by Micro SD card--------------------------------------------------------------------53
23. Questions Treatment-----------------------------------------------------------------------------57
24.Trouble Shooting-----------------------------------------------------------------------------------57
1. Notice:
*Before using this device,please adjust screen touch calibration.
* This product is a high precision electronic product, do not disassemble.
* Avoid using this product in the following conditions: high and low temperature,
moisture, dust, strong magnetic fields and beat,long-time exposure to sunlight.
* Please use a wet cotton or cloth wring to wipe gently on the product shell, do not
use other chemical cleaning solution. This product should not be dripping or
splashing water, such as glass filled with a liquid items.
* To use the headphone volume in large might cause permanent hearing damage.
* In order to avoid traffic accidents,do not cross the road, driving motor vehicle or
bicycle when use headphones.
* Please only use permitted battery, charger and accessory, the other type of
products would violate the warranty regulations and might be dangerous.
* Please follow the relevant local environmental regulations to deal with obsolete
machines and accessories.
* When product in the course of any questions, please contact your loca l dealer or
the company's customer service center.
* For those cause the product damage, repair or other causes of memory loss
coating, the Company have no responsibility, please follow the user manual for
standard operation, and timely backups.
2. Accessories
1* 5V 2A Ac adapter
1* User manual
1* Earphone
Page 3
1* USB cable
1* OTG cable
1* Touch pen
1* Warranty card
1* Car Charger
1*Deluxe car bag
3. Hardware specification
Device hardware parameters
Processor
Memory
Storage
Wireless
USB
Video
output
Audio
Pictures JPG, JPEG, GIF, BMP, PNG
Telechips Tcc8902 High-performance ARM 11 processors
Frequency 1000MHz Support hardware OpenGL 2.0 3D graphics
256MB DDR2 RAM
Memory built-in 4GB Support Micro SD card to expand memory upto
32GB
IEEE802.11b/g wireless network
USB2.0 OTG high speed interface and USB1.1
HDMI 1.3 Full HD Video Output Interface
Video format: AVI(H.264, DIVX, DIVX, XVID, rm, rmvb, WMV, MOV, MP4
(H.264, MPEG, DIVX, XVID), DA T(VCD), VOB(DVD), MPEG , MPG, FLV
3.5mm headphone jack
High-quality stereo loud speaker
Built-in microphone
Headset maximum output power of 40mW
Frequency response: 20Hz-20KHz
SNR: greater than 90db
Audio format: MP3,WMA,MP2,OGG,AAC,M4A,MA4,FLAC,APE,3GP,WAV
7.0 inch
16 million colors
Resistive single touch panel
203 * 132 * 12mm
Screen
Other
Size
Resolution WVGA 800*480
Color
Operating
Size
Color Silver back case and black screen
Weight 360g
Battery Built-in lithium polymer battery 3500AH
4.Startup and shutdown
*Boot: Press and hold the power button, the system will enter the startup process, as
Page 4

below:
Boot logo startup ...
System has been starting, entering the Android system:
Page 5
The system enter the default home interface.
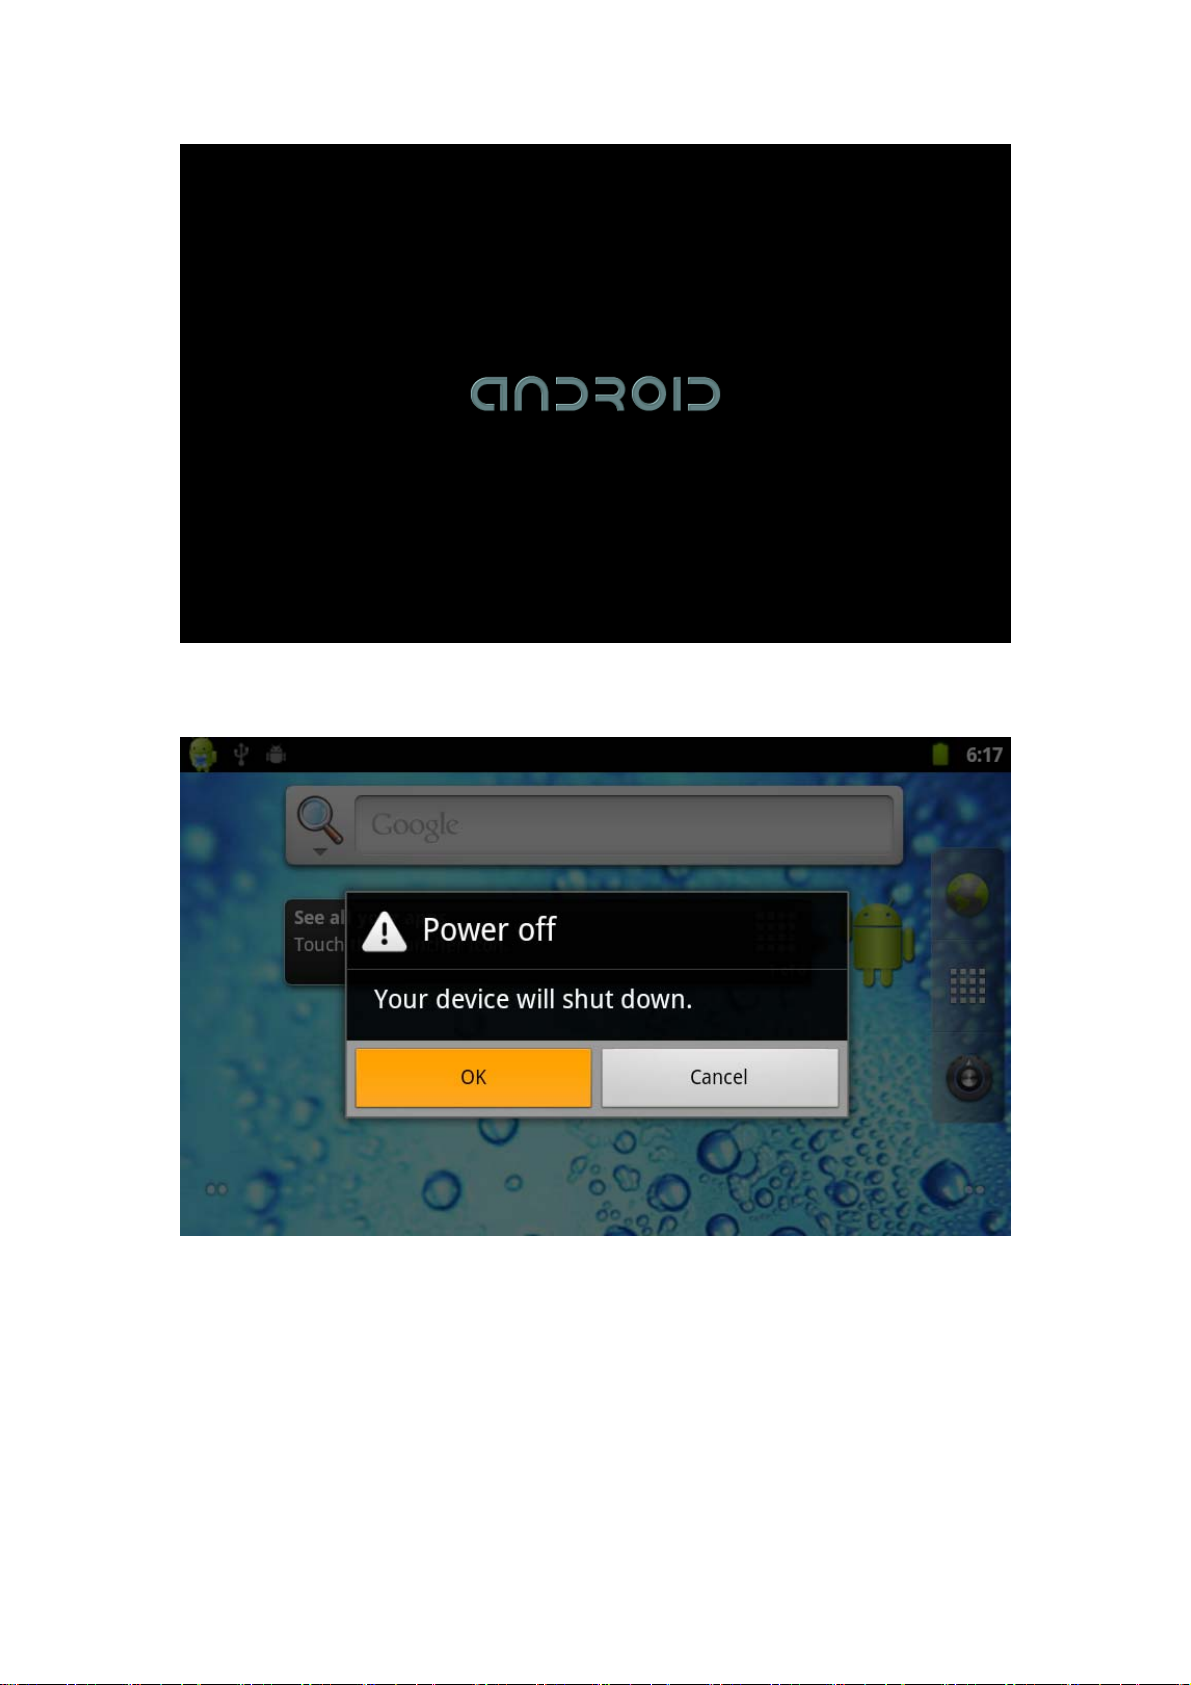
*Shutdown: Press the power button, pop-up device options as below
Click OK, you can safely shut down.
*Sleep: the machine under normal operating conditions, Short press the power button,
enter hibernation and screen will close. Short press the power button again and
screen open, make sure unit in normal mode. In this way can reduce power
consumption.
Page 6
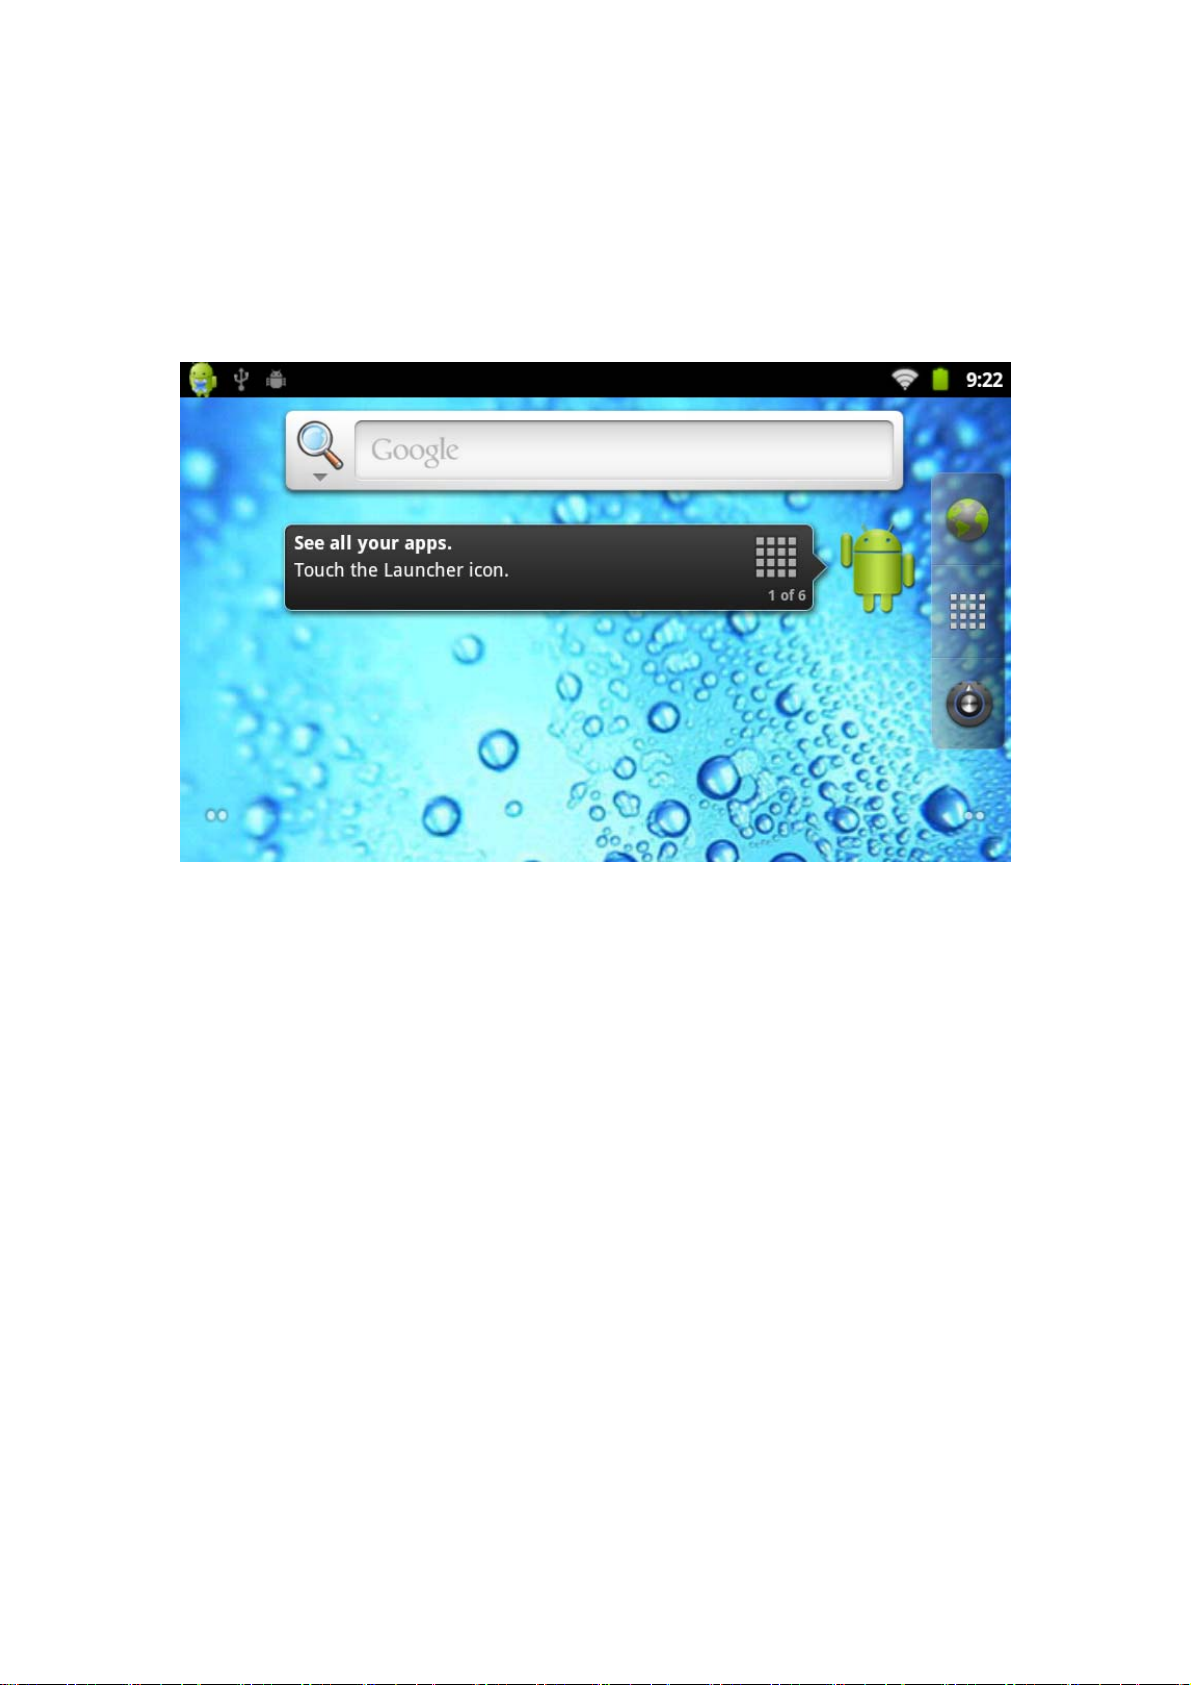
5.Desktop
When System finish normal starting, push up the holding-down latch,Desktop can see
Android2.3(The figure).
The default desktop are: Status Bar、Quick Search Bar、Main menu label and a
number of shortcut icons form.
The status bar to display the current system of network status,Battery,Time
information. Quick search bar for Web search by typing key words. Middle right of the
screen is the main menu table stop,click or drag to the main menu bar to start the
default.
5.1 Main Menu Operation
Press and drag the main interface of the desktop, the main menu will be from bottom
to top as below:
Page 7
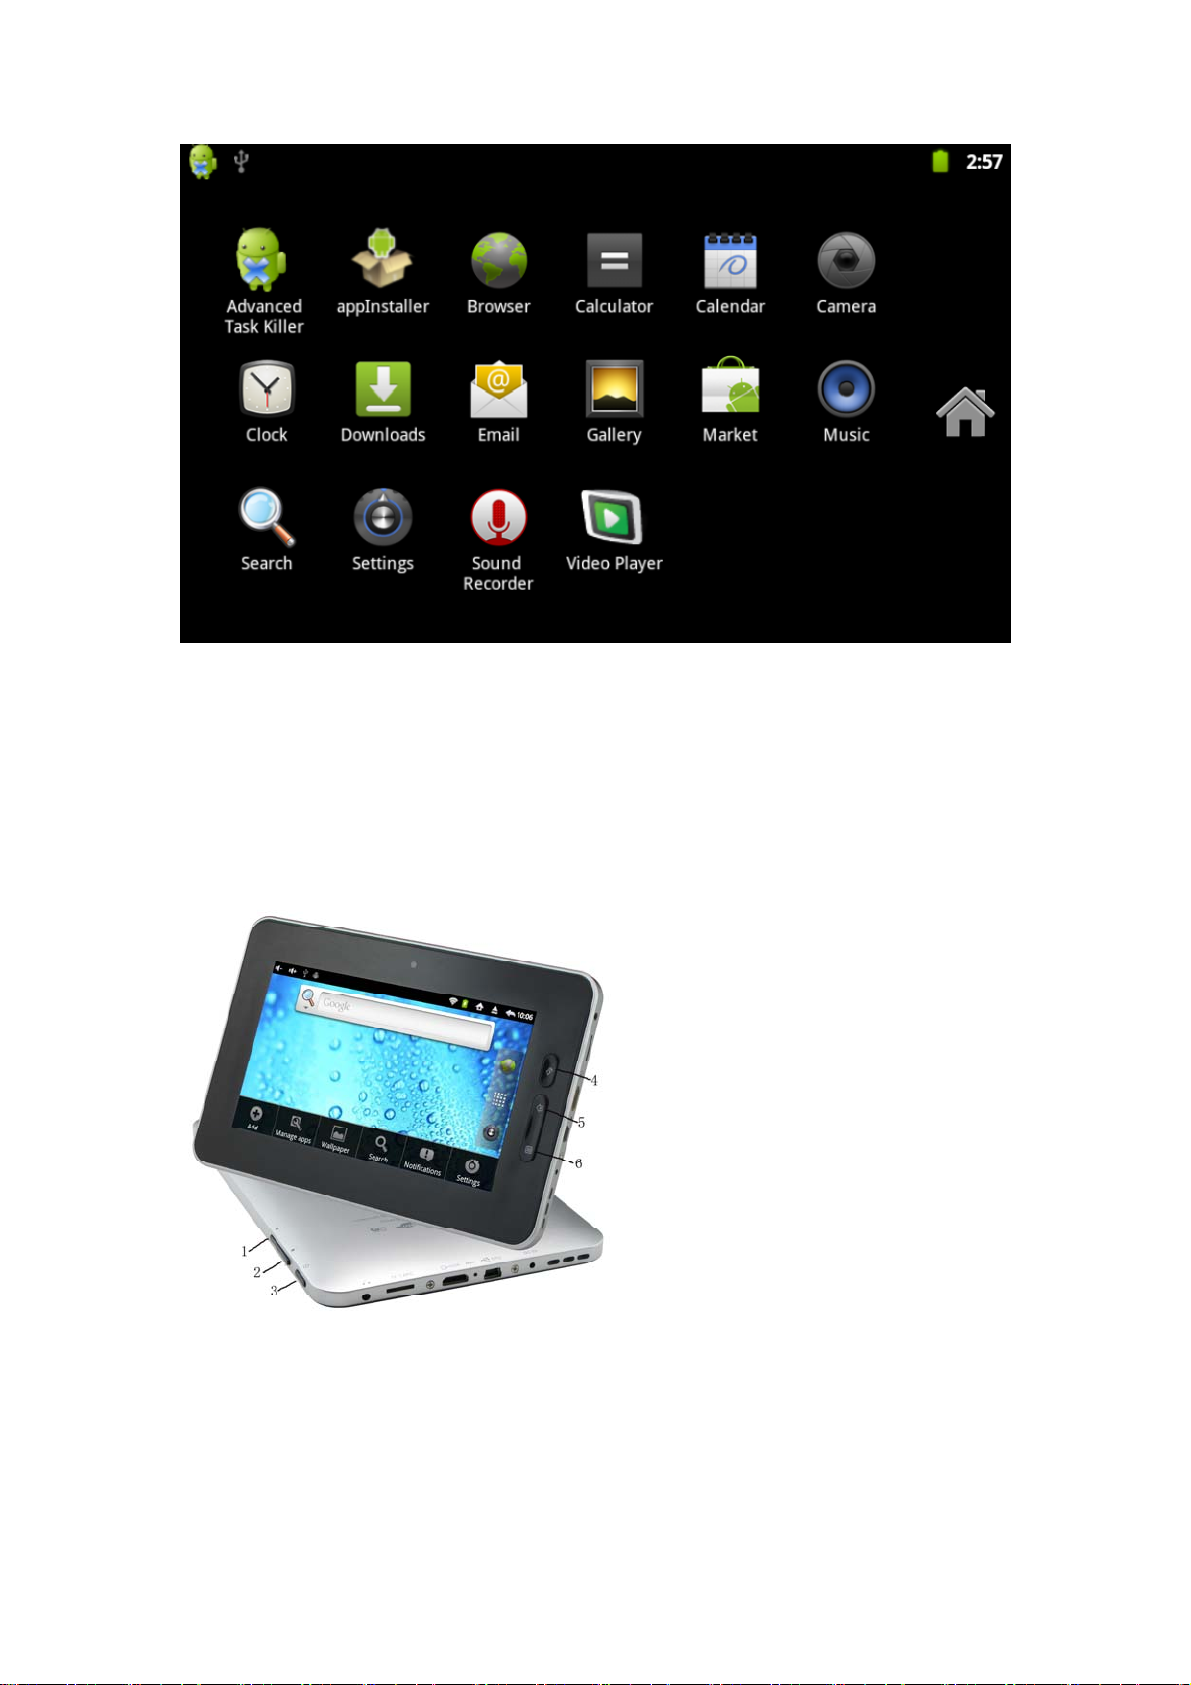
In the main menu, the system can run existing applications, install a new application,
start the touch calibration, music player, video player, web browsing, games and other
operations.
6.Button
1 - Volume + : increase volume
2 - Volume - : reduce volume
3-Power key: Press and switch machines. Short press to enter or leave the
hibernation.
4-Return: Return to last interface
Page 8
5-Home button: Back to the home screen
6-Menu button: Displays the current form of the menu items (if any).
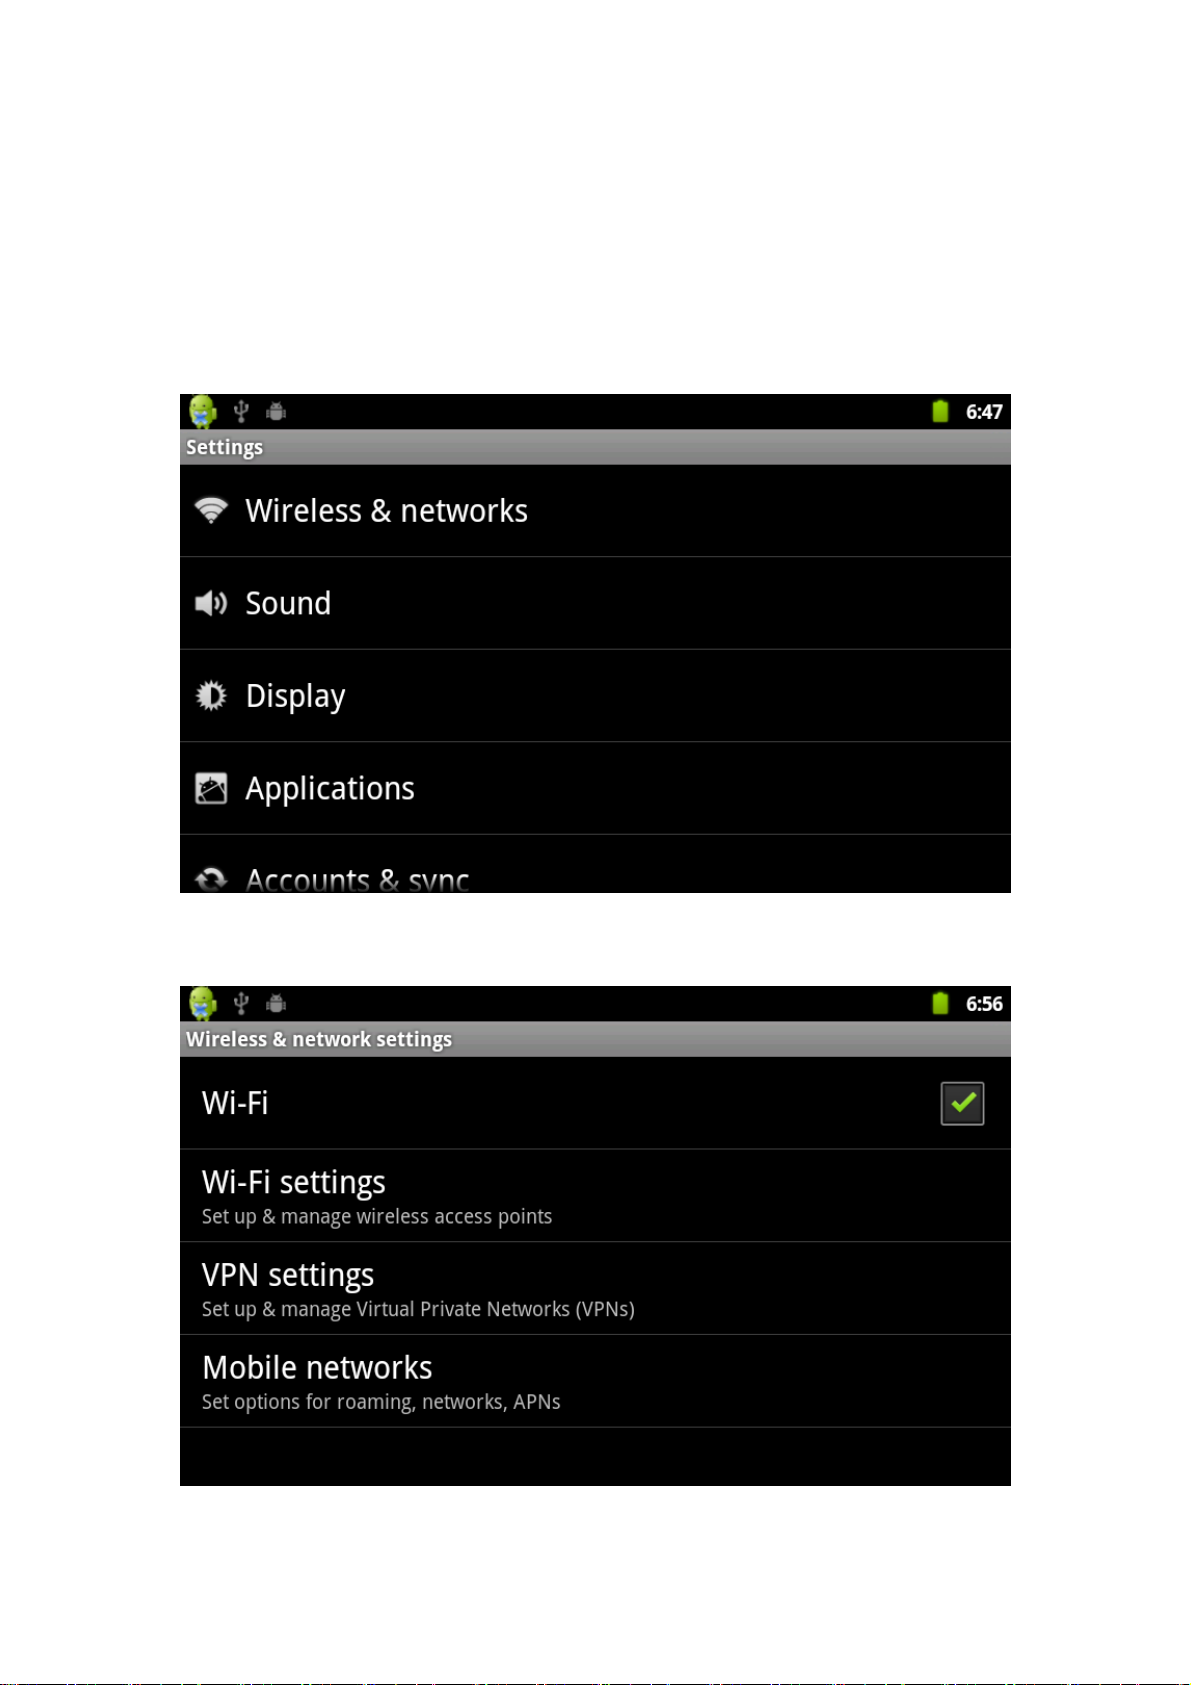
7.System Settings
Click the "Settings" icon on the main menu interface, enter system settings interface
as below:
7.1 WIFI Wireless Connection
Click "Wireless & Networks" on settings menu to enter "Wi-Fi" setting as below:
click the Wi-Fi column can open or close the WIFI feature. When Wi-Fi turn on,click
Page 9
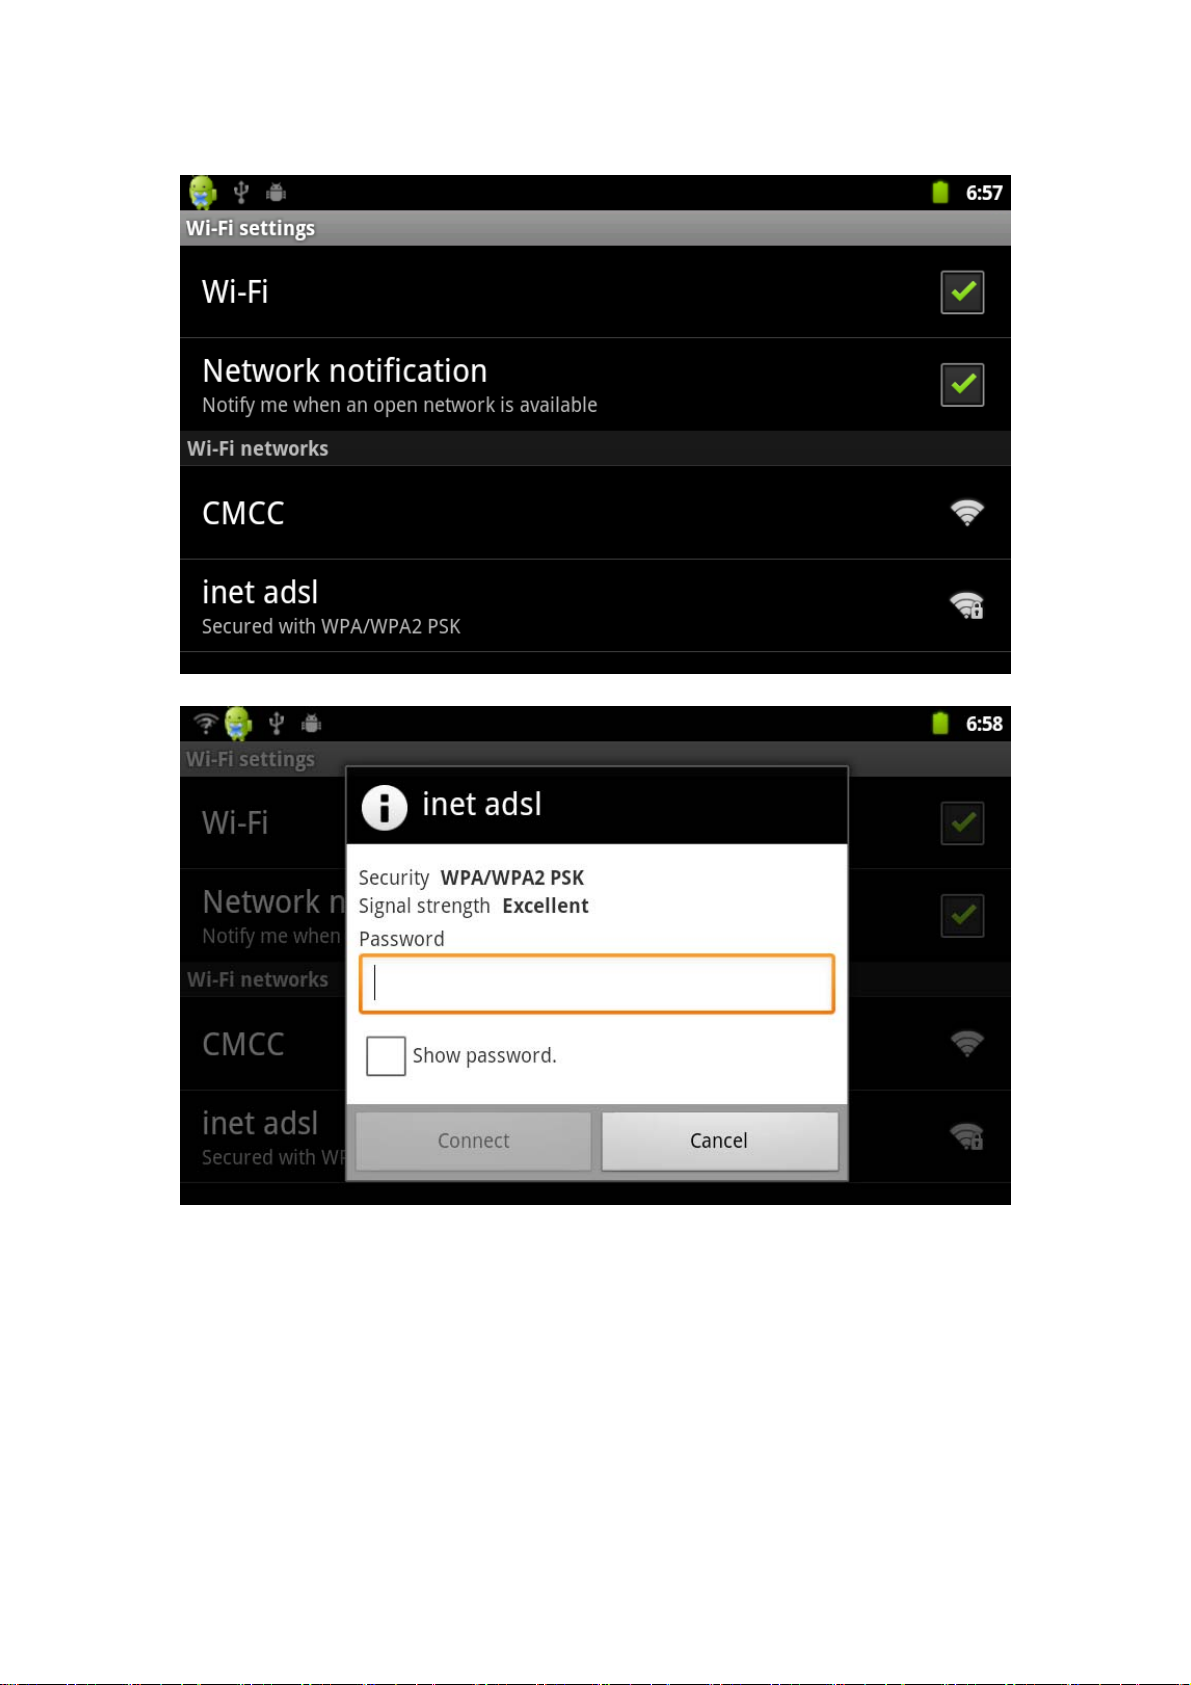
“Wi-Fi settings” and interface will appear "Network notification" as below:
Choose one working networks in your area,enter password,like below:
After input correct password and networks will appear Wi-Fi “Connected”.Like below:
Page 10
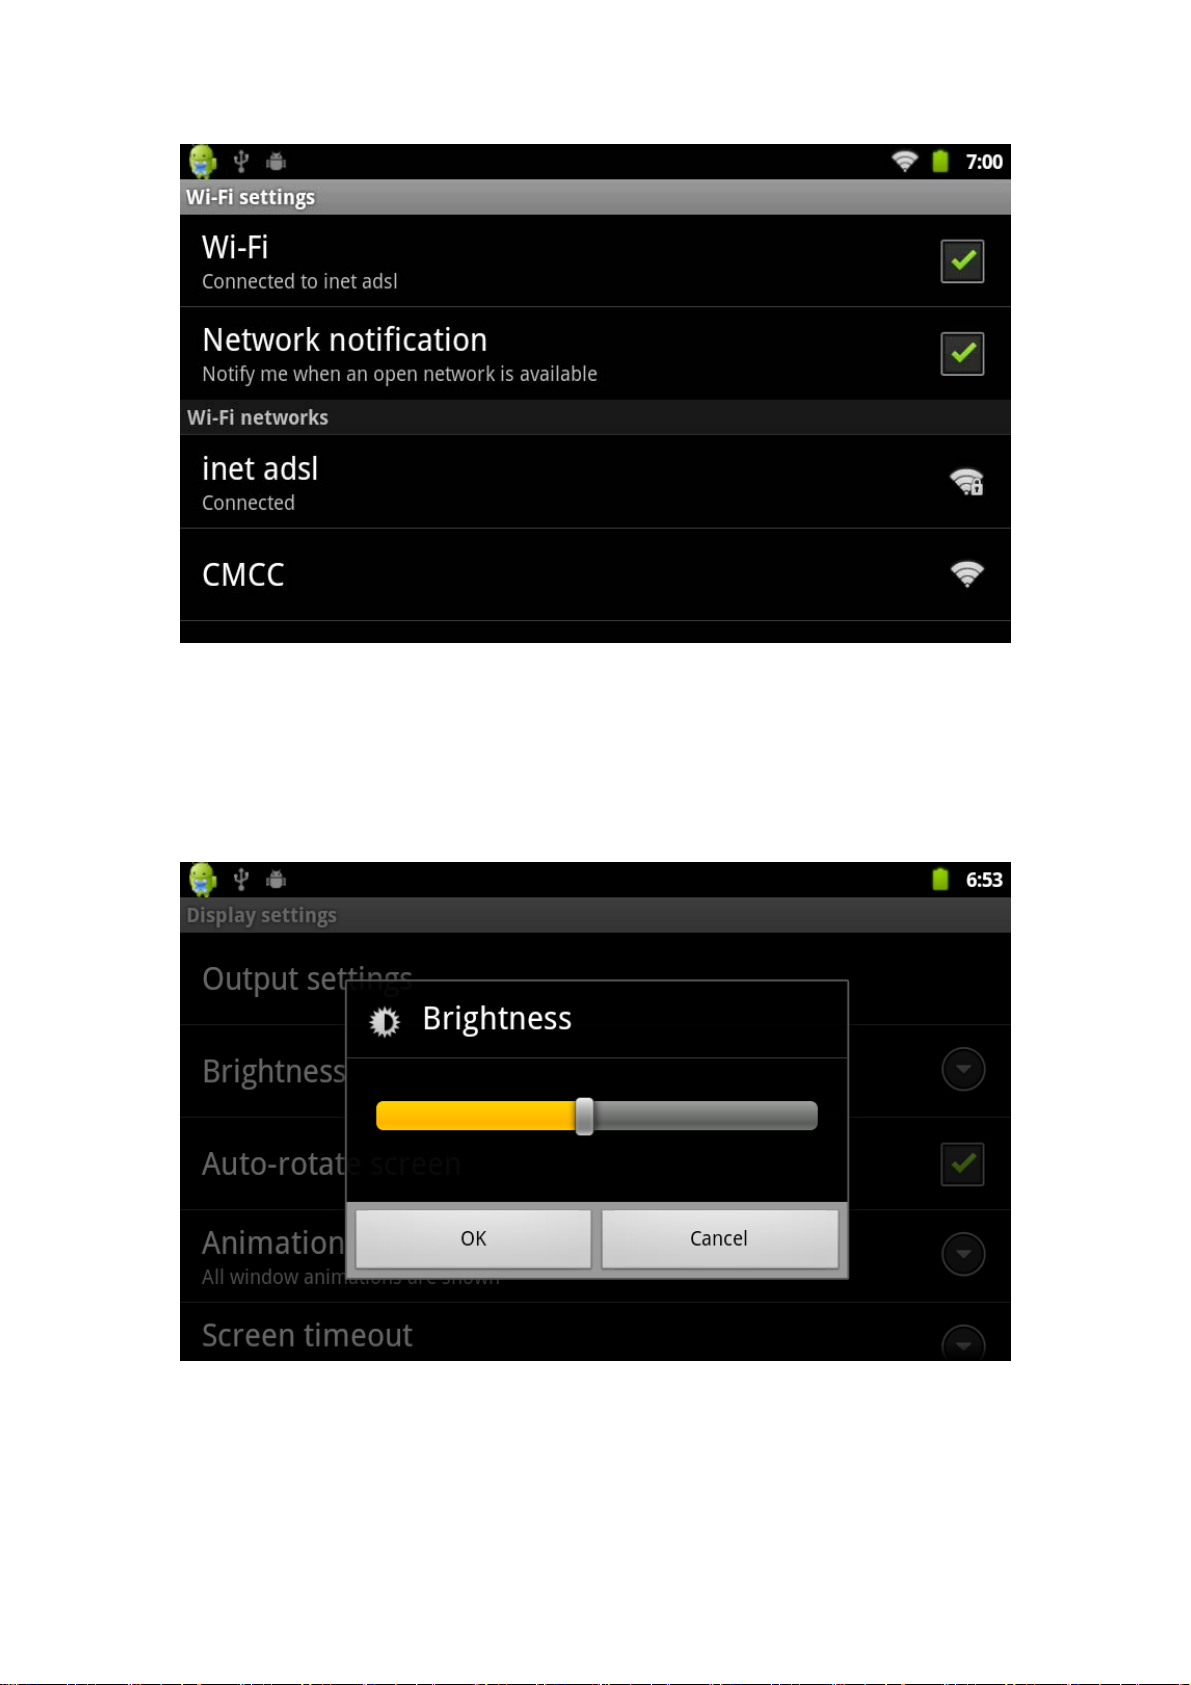
7.2 Display
7.2.1 Screen brightness
Click “Display” on settings menu, enter the display settings interface, select
“Brightness and show below:
Scroll left to reduce the brightnees,scroll right to increase the brightness,then
click“OK”.
Page 11
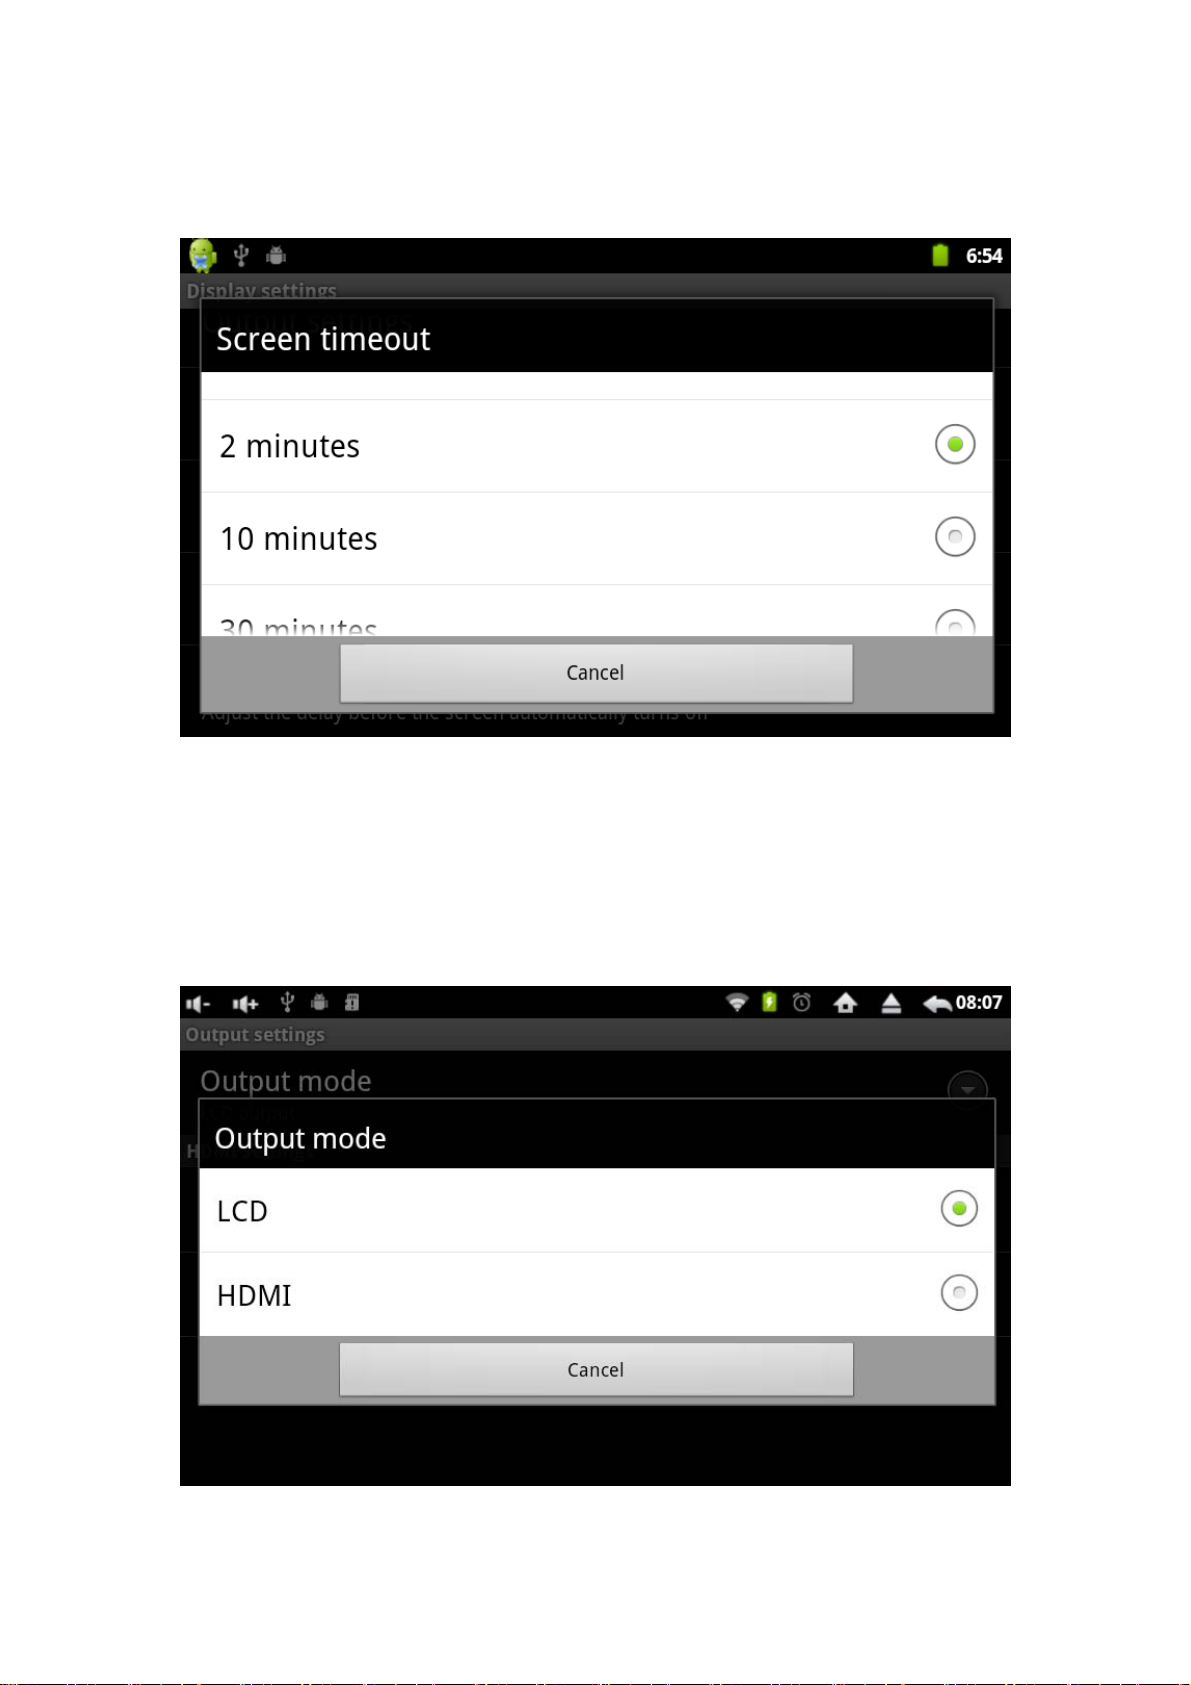
7.2.2 Standby screen
Click “Screen timeout” on Display settings and will show as below:
Select the time and the screen will shut down automatically when unit standby.
Note: In the video mode, the screen auto-shut down is not available..
7.2.3 HDMI
Device supports LCD and HDMI 1080p mode. The system default at LCD.Before
connecting device to HDMI equipment by HDMI cable, please default at HDMI model.
Click “Display” on Settings menu and click “Output settings" will show as below:
Click HDMI and device screen will show on HDMI equipment. After finishing HDMI
Page 12
operation,do remember to default at LCD mode. All video files play by device should
be under LCD mode.
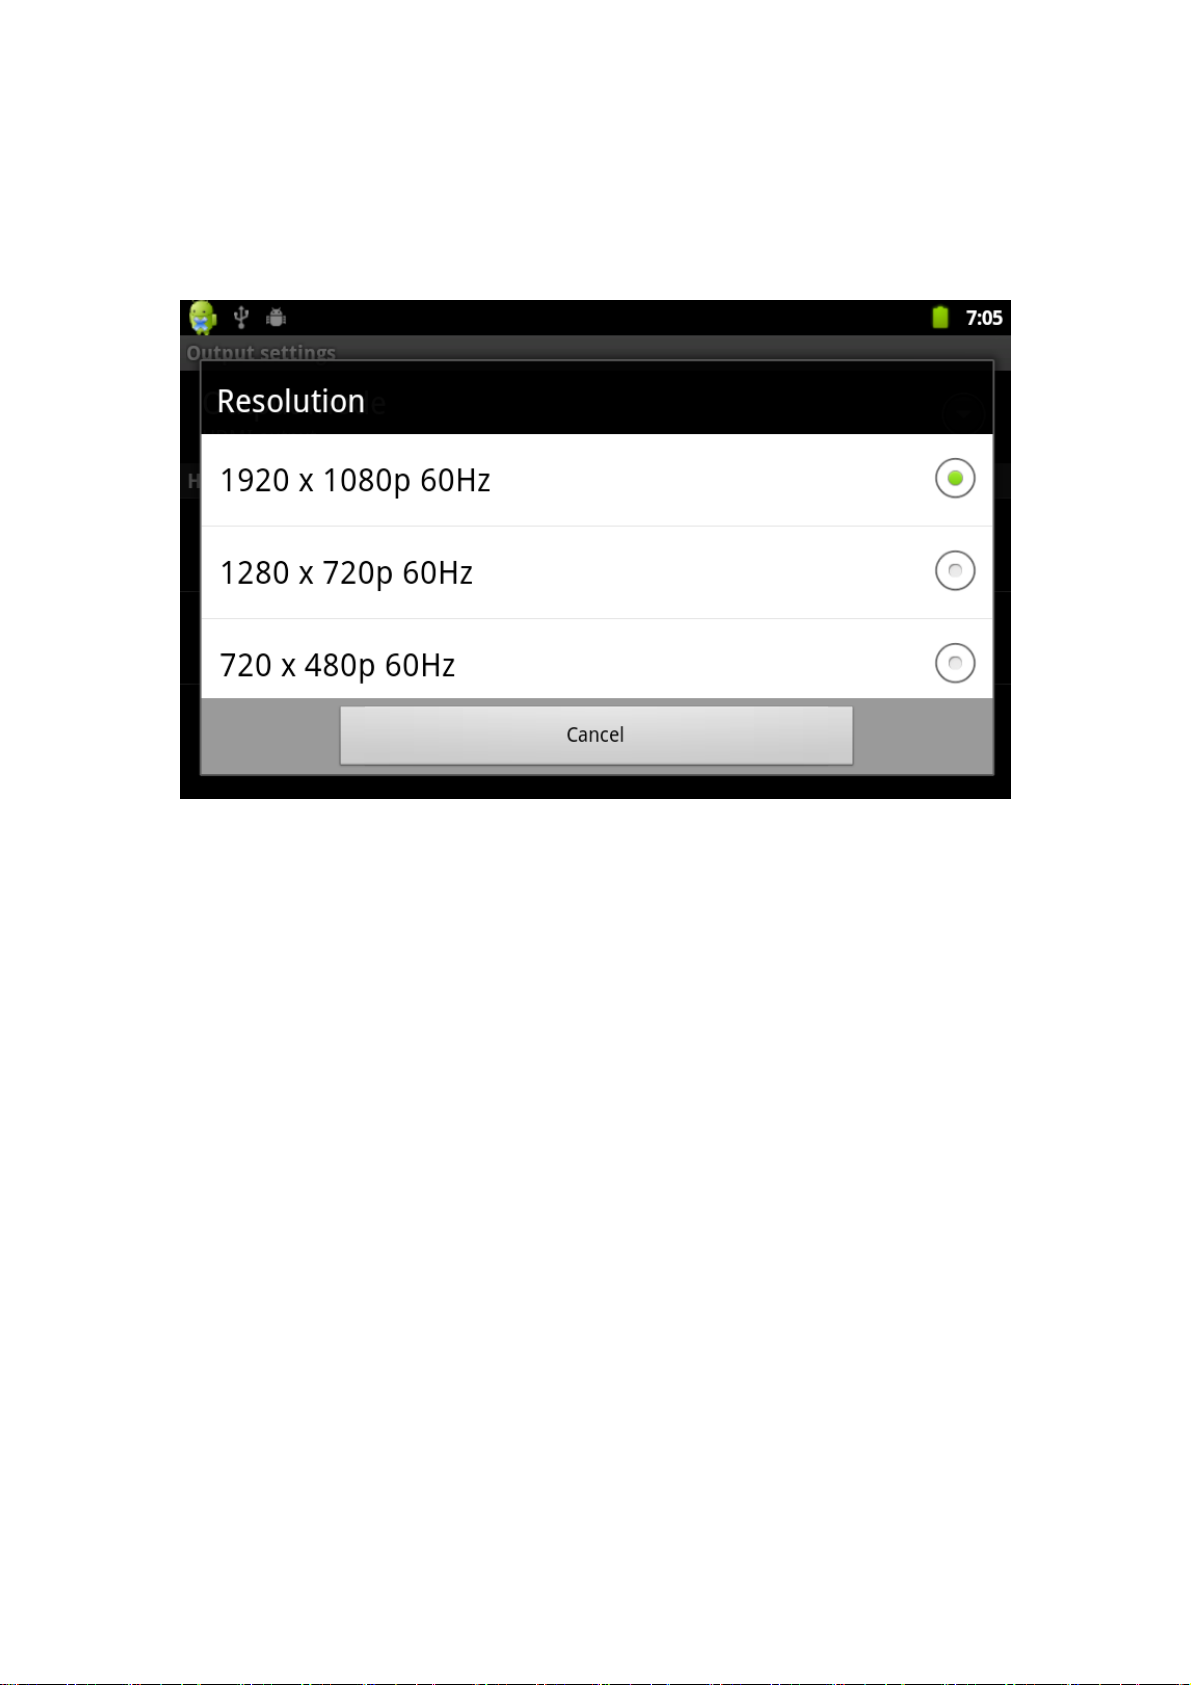
When select HDMI output, the output format can be choosed in HDMI settings.Enter
“Output settings”,select “Resolution” as below:
7.3 Applications
7.3.1 Installation: Android system can install the applications by variety of ways,
such as USB, third-party software or google market. Below is one of installations by
Appinstaller:
1.Click the Settings and enter Applications menu like below:
Page 13
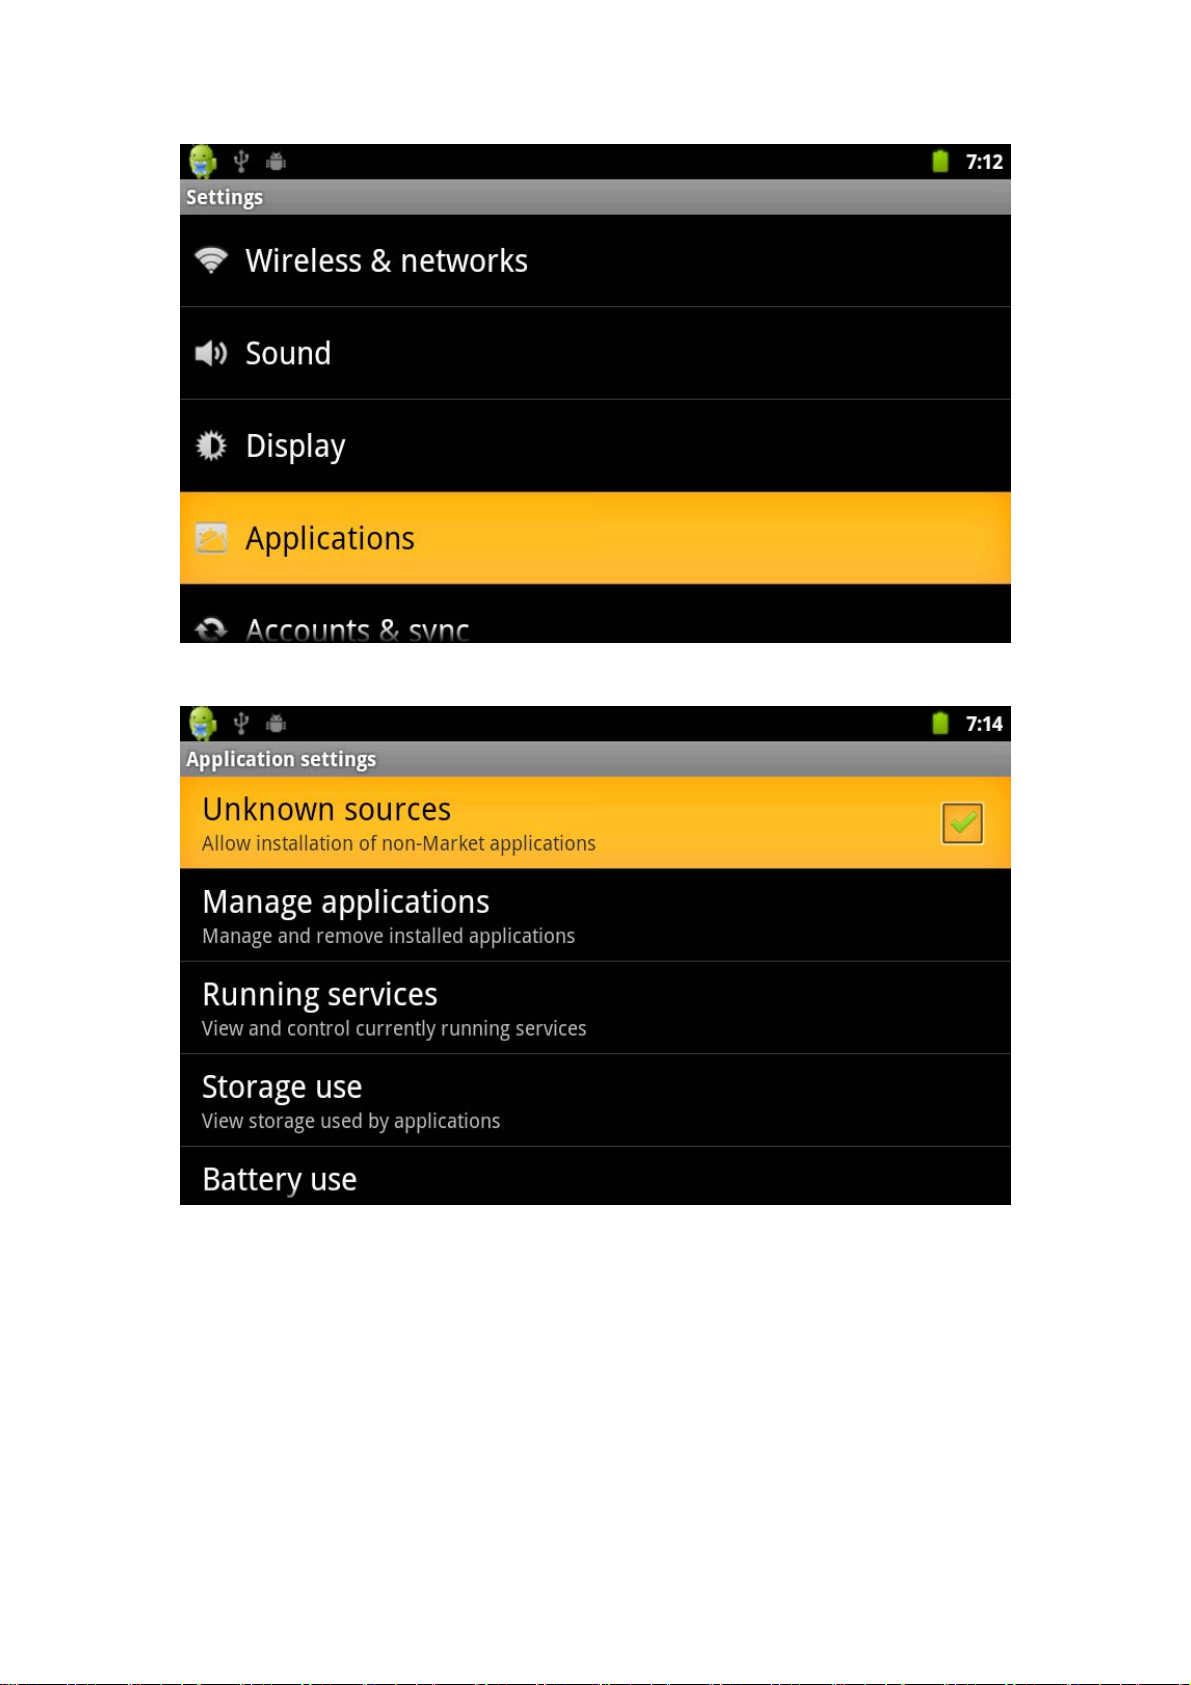
2. Click “Unknown Sources”, then click “OK”, like below:
3. Copy the .apk to MicroSD or Local/sdcard/ or download from market place,
system will default NAND FLASH as search list. If download from market place, click
“appInstaller”on main menu and check the apps in “Installer” as below:
Page 14
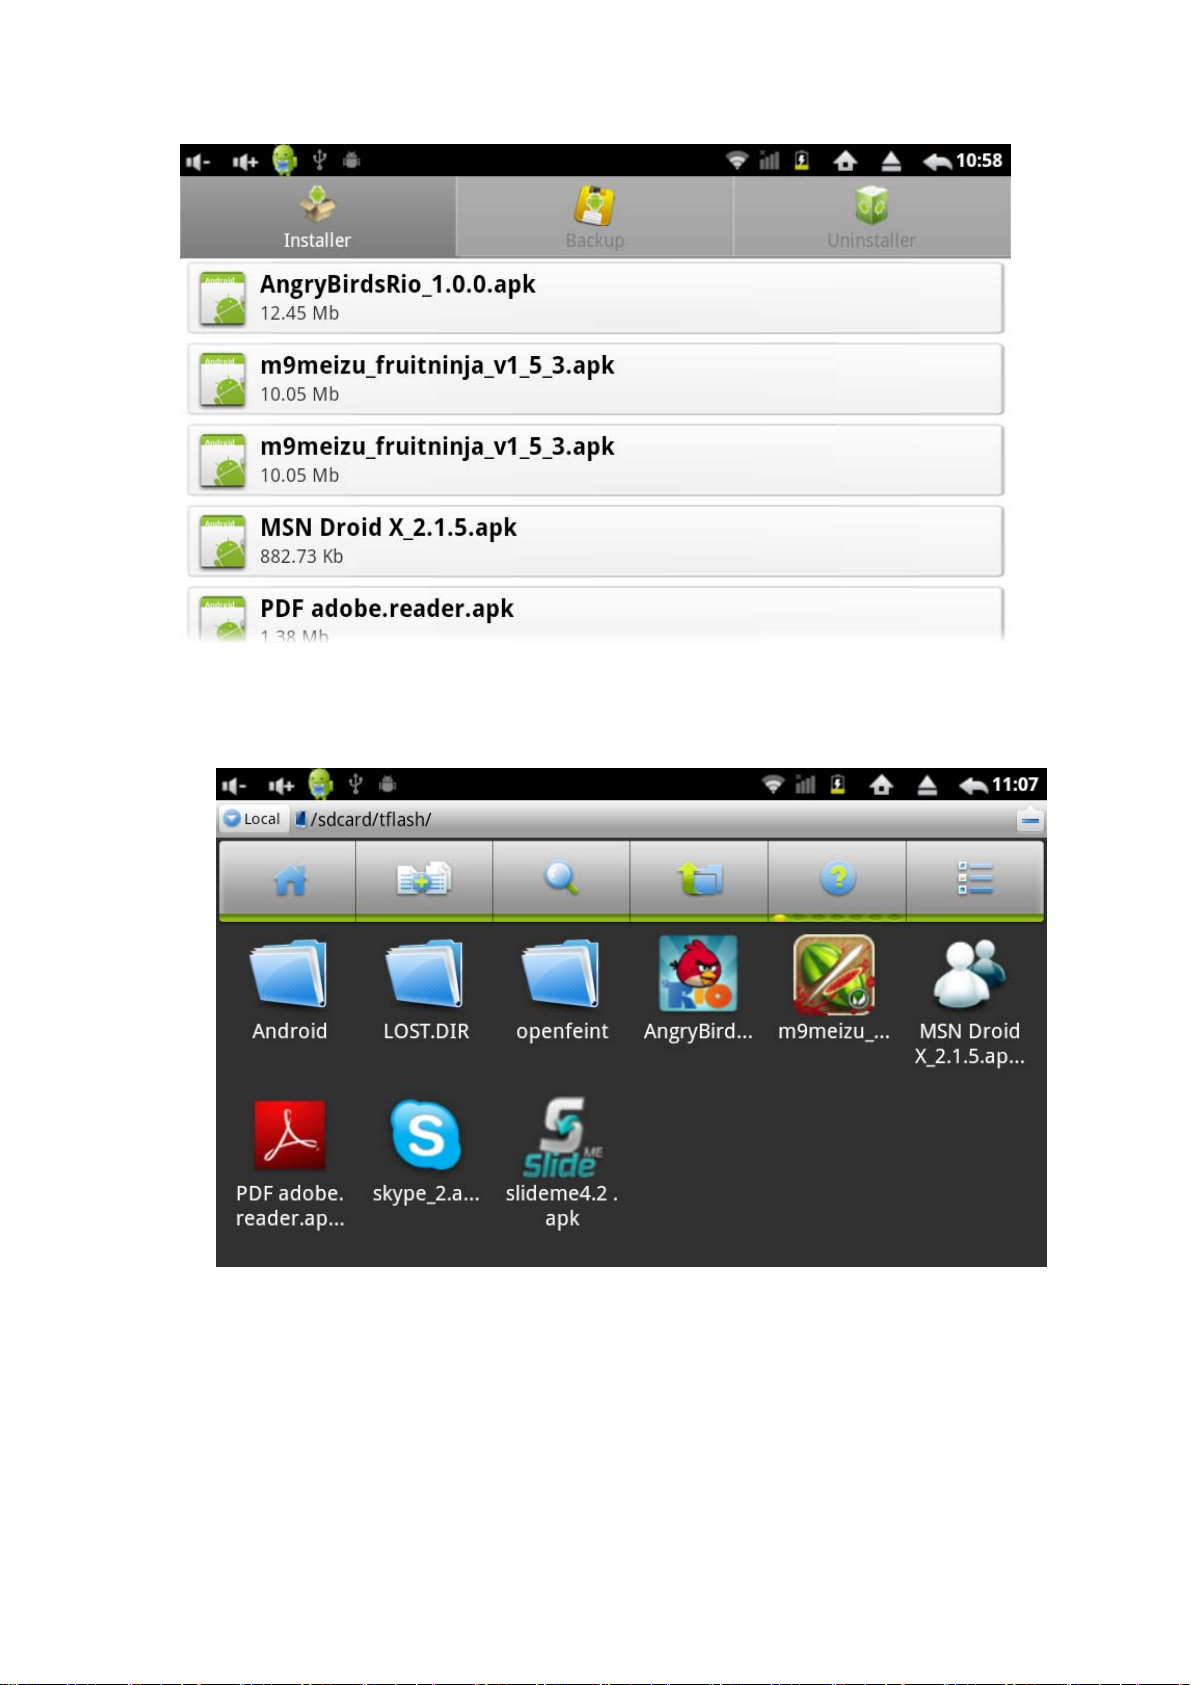
4. If the.apk in microSD card or local /sdcard/,user can check the apps from
“appInstaller” or change the search list to local:/sdcard/ as below:
5. Select all available applications to install and will show as below:
Page 15
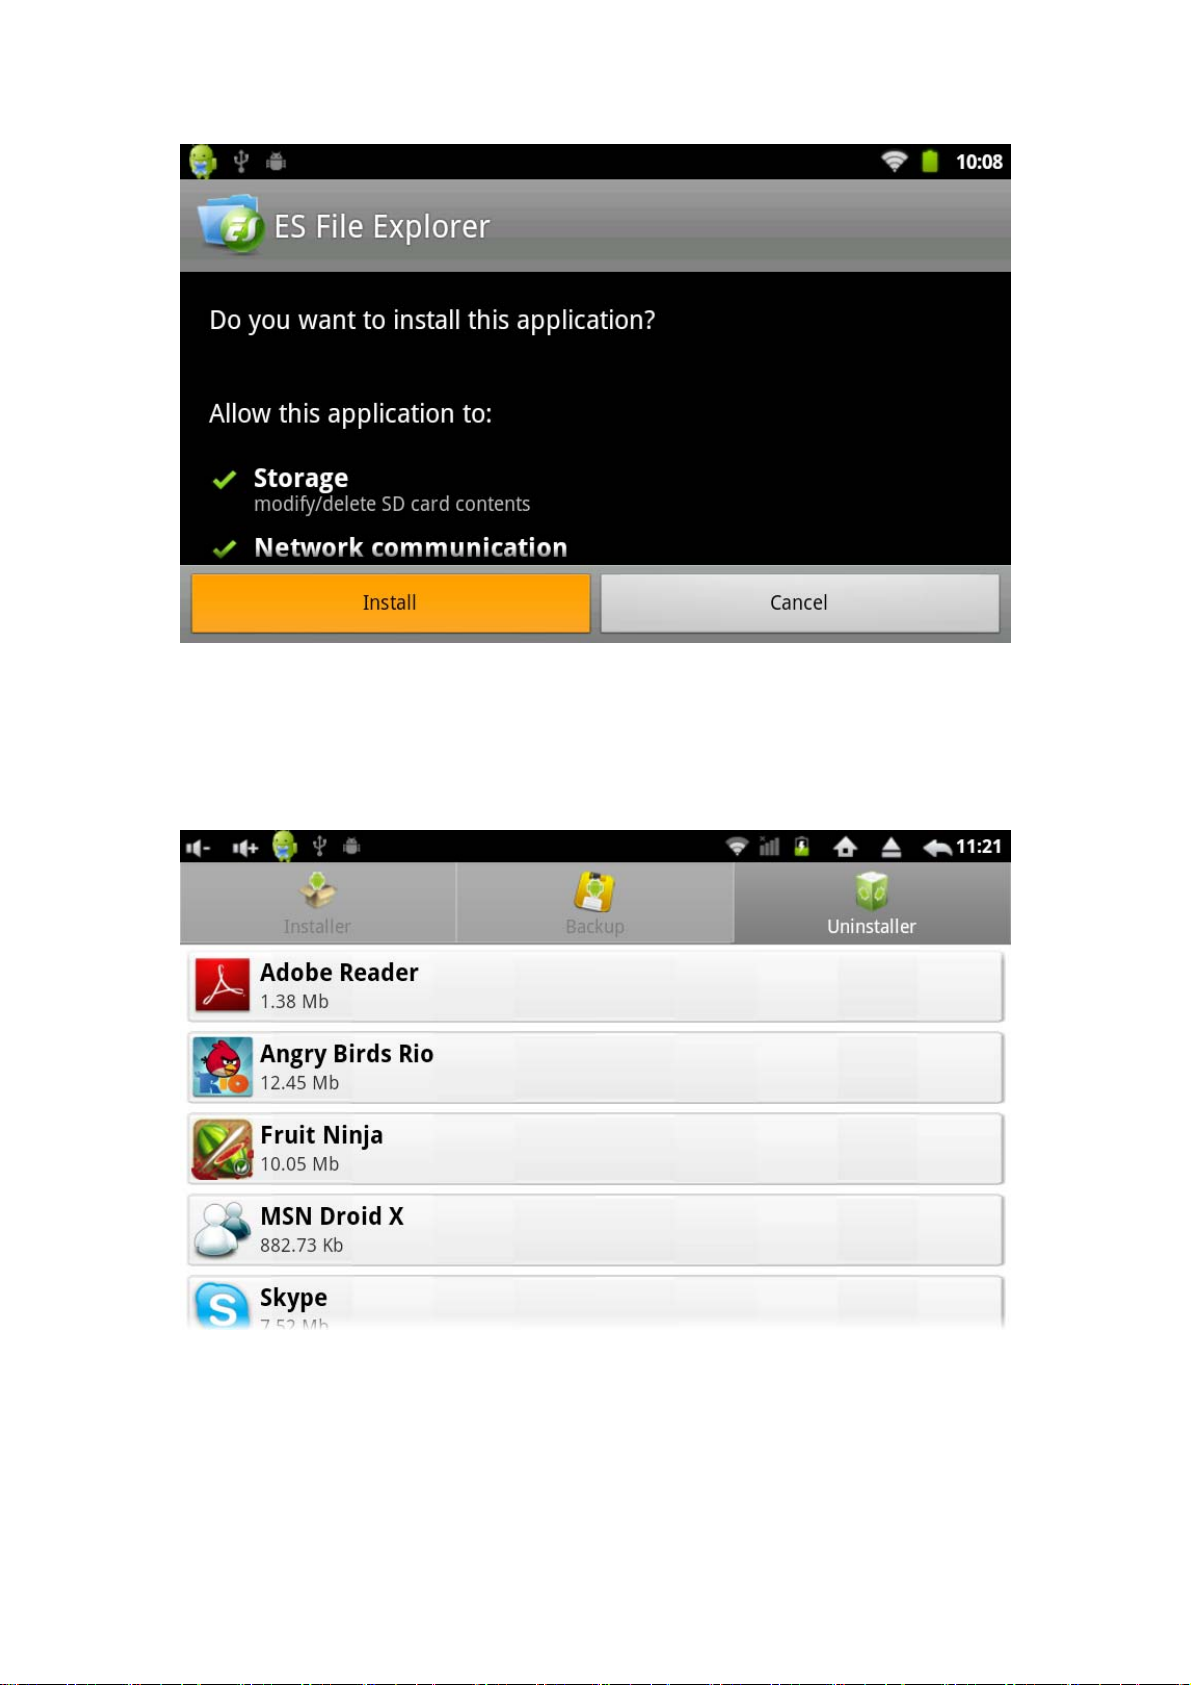
System will install automatically by prompt. Users can install application by
Android Market,PC or online download.
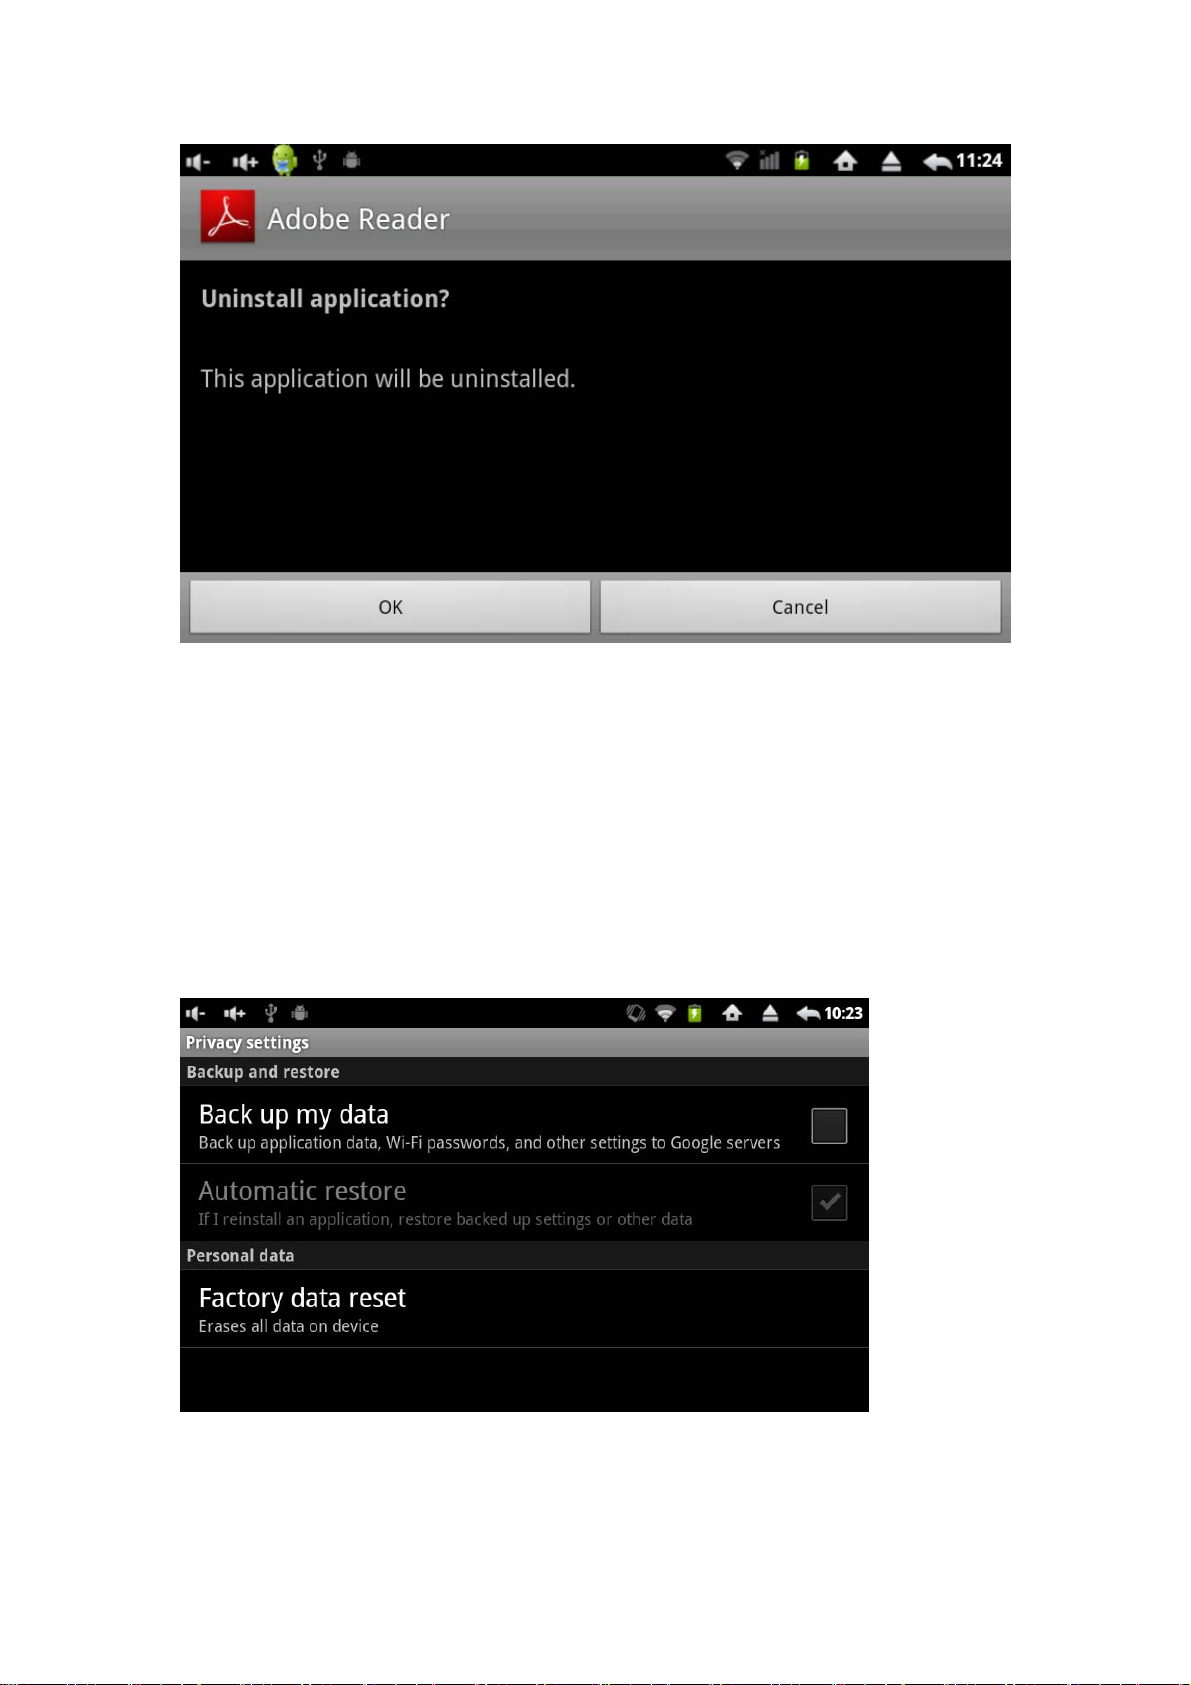
7.3.2 Uninstall applications:
Click “appInstaller”-“Uninstaller”,check the installed apps as below:
Click the uninstall apps,system will unstall automatically by promt as below:
Page 16
User also can manage the 3rd party apps or Android default applications from
Ex File Explorer.Select “Settings” - “Applications” - “Manage
applications”,check the download or installed applications or uninstall
applications or Running ect.information.
7.4 Privacy
7.4.1
Click “Privacy” on settings menu to enter “Privacy settings” as below:
Factory data reset
Click “Factory data reset” to enter reset, connect device to DC power and click
“Reset device”, after several minutes,unit will reset automatically.
Page 17

Note:Do remember to connect PC to DC power when reset. All the apps from
third-part and datas will be deleted and return to the factory default.
7.5 Language&keyboard
7.5.1 Select language
On settings menu,click “Language&keyboard”-“Select language” to choose the
language as below:
7.5.2 Android keyboard
Click “Android keyboard” on “Language&keyboard settings”, choose the operation like
below:
7.5.2.1 Input languades
Page 18
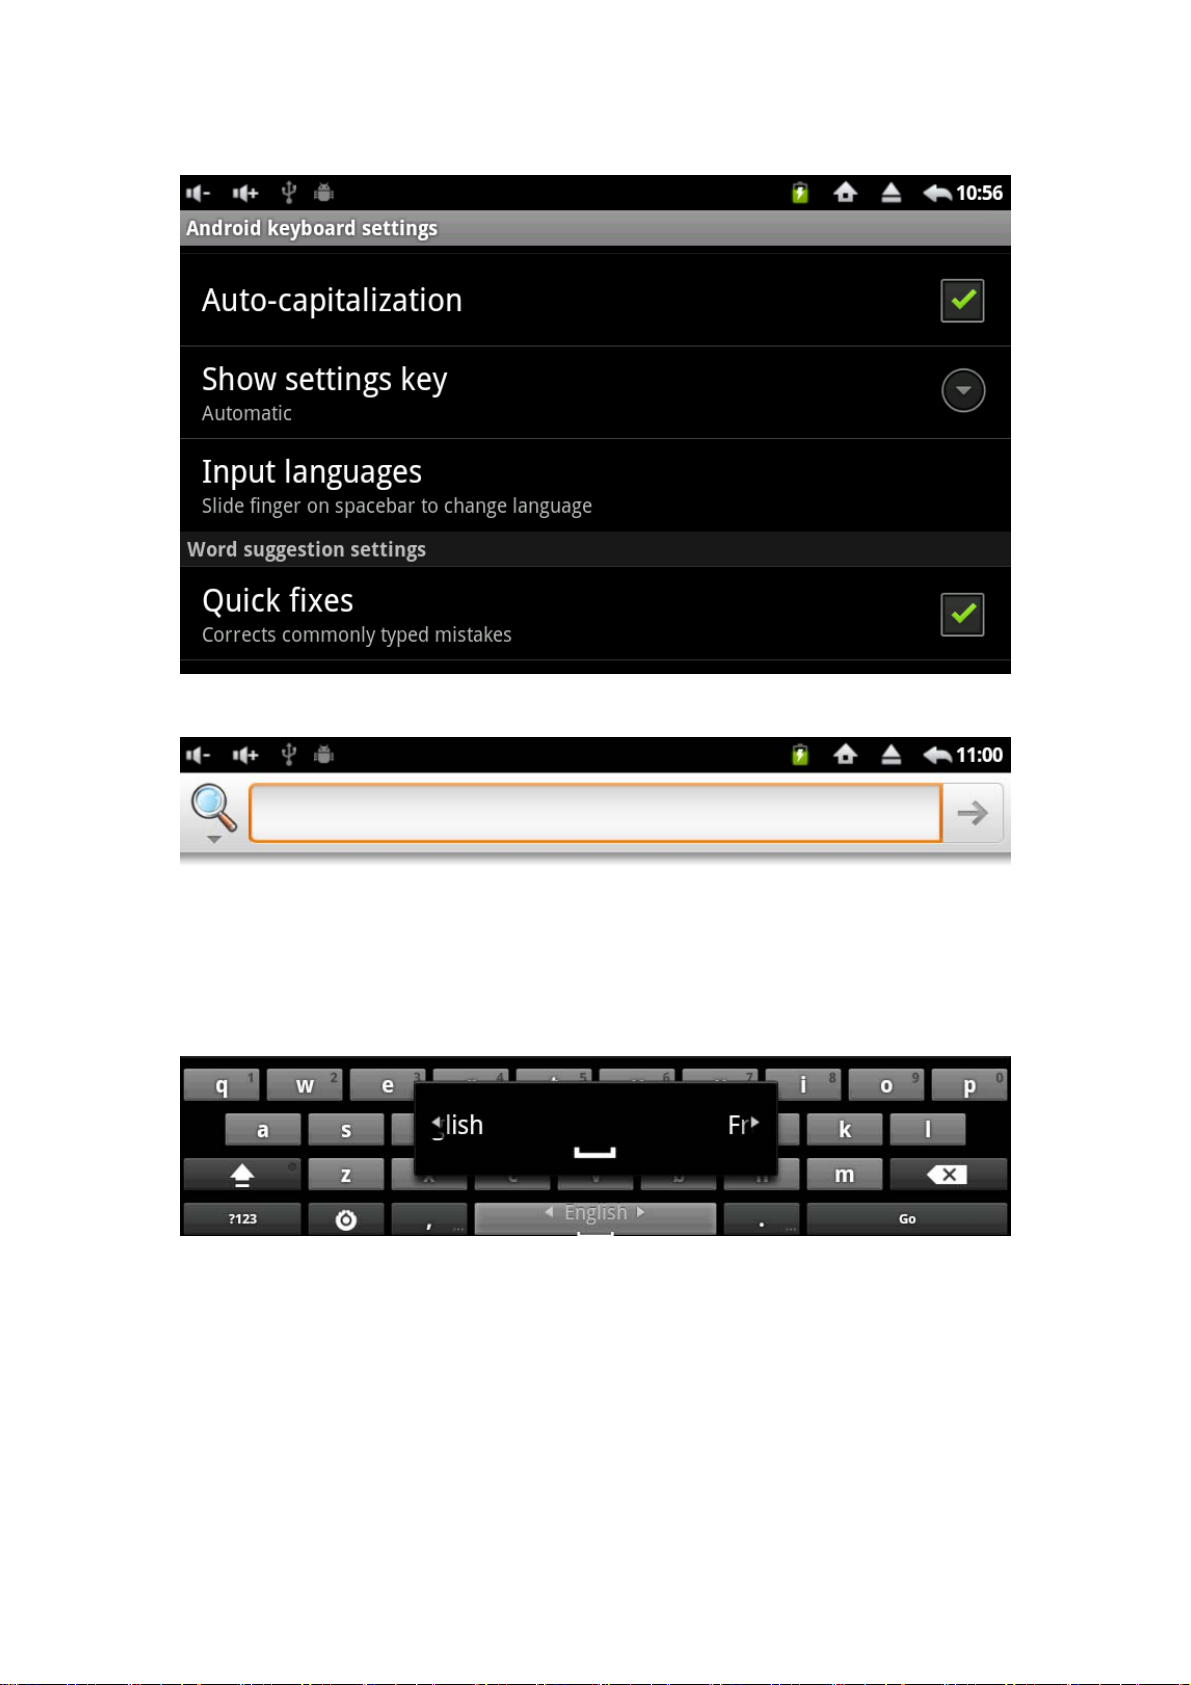
Click “Input languages” on “Android keyboard settings” menu as below:
Select the languages you want,slide finger on spacebar to change language
like bow:
7.6 Touch Calibration
Click “Settings”-“Touch calibration”to enter calibration procedure. Follow the
instruction to operate twice,after calibrating successful,system will prompt and exit
automatically as below:
Page 19

After finishing calibration, unit will come into effect by re-starting.
7.7 Date and time settings
Click "Date and time" to enter settings interface, there are Set date,Select time
zone, Set time, Time format, date format functions. The operations are same.
For example, choose to set the date, as below:
Click +: increase month,day and year
Click -: reduce month,day and year
The year form can use input mode. Click year number and an interface will come out
as below, enter the desired number and select “Done”.
Page 20

When finish setting, click "Set" if you enter the number is legal and the operation is
successful, the system will show new date on “Set date”.
8.Calendar
Before entering calendar,please choose the coporate or google account. If company
email server compatible with google, user can use coporate to sign in. If not,choose
personal googal account to sign in or creat a new account or sign in.
9.Clock
Click “Clock” on the main menu to enter an interface as below:
Page 21

Click “Alarm” icon to enter Alarms setting as below:
Click “Add alarm” to setting the time want to alarm and then click “set” as below:
Click “Repeat” and select the day want to repeat,click “OK”.
Click “Ringtones” to select the ringtones, click “OK” and back to “Set alarm”
interface,click “Done” and back to the “Alarms” menu, alarm setting time will show on
the alarm interface.
Click
and select “Gallery” to fast enter gallery interface as below:
Page 22

Note: This function only for pictures, therefor,only Gallery is working, Video can’t play
pictures.
click
to enter music play interface;click back to desktop.
10. Music
Click “Music” on main menu and enter music play interface.The system will list all
default audio files and user data.Like below:
Page 23

User can transfer audio files to unit by USB or Micro SD,also can download files by
network.
Click “Songs”, long press the song name and will appear as below:
Click “Add to playlist” and an interface will appear as below:
Move the songs to existing folder you want. If want to establish new folder,please click
“New”,input the folder name and click “Save” as below:
Page 24

Click “ play”,the song playing interface will appear as below
Click to enter “Now playing”menu, long press song name and appear
same interface as click “Songs”, please refer to above operation.
Page 25

11.Video
Click “Video” on main menu and enter “video”menu, system will list all the video files
and pictures,like below:
Select video file and enter play menu,like below. Click “Play”,”Pause”,”Fast
forward”,”Fast back”,” Progress bar” ect.buttons to control playing.
Page 26

12.Gallery
Click “Gallery”on main menu and enter “Gallery” interface,system will list all pictures
and video files,like below:
Click picture and enter picture play interface,like below.Select “Zoom in”,”Zoom
out”,”Previous”,”Next” ,“Delete” ect.operation. Click “More” and select “Details”,”Set
as”,”Crop”,”Rotate Left”,”Rotate Right”,”Settings” ect.function.
Page 27

13.Network
13.1 Web browsing
When connect network,open browser and input URL can browse the web page
quickly;or input website and browse web page in search bar on main desktop. Like
below:
13.2 Online video and audio
Download video/ TV / Music online play software by Google Market or other ways and
install on the unit.Open the installed software can watch video,online TV or listen to
the online radio.
User also can download other third-part network software including web browse,video
play,website client-side,
Instant communication software ect.
14. Wallpaper
System support static and 3D wallpaper. On the desktop,press Menu button and will
list “Add”,”Manage apps”,”Wallpaper”,”Search”,Notifications” and “Settings” as below:
Page 28

Click “Wallpaper” and an interface will come out as below:
Click “Gallery”: choose the system provide picture as static wallpaper.
Click “Live wallpapers”:choose the 3D wallpaper from system provide.
Click “Wallpapers”: choose User-defined picture as wallpaper.
Or click “Add” on the desktop by press Menu button,an interface will come out
as below:
Page 29

Click“Wallpapers”and will come out same operation as above.
15.Recording
Click “Sound Recorder”to enter recorde interface like below:
Note:When recording need to insert Micro SD card and record files will be saved in
mirco SD card.
Click “Record” button starting,click “Stop” button and select “Paly” to play the record
file. Click “Use this recording”button to save file and find the record file in micro SD
Page 30

card;if no need to save,click “Discard”.
16.Camera
16.1 take photo
Click “Camera” on main menu to enter camera interface as below:
Click the camera shutter like below,picture will be saved in Gallery. Click the
square on the right top and see the pictures.
When take photos,user can set photo mode by the list on the right of screen.
Page 31

16.2 Camcorder
Push the button to camcorder model,click shutter to start VCR and click shutter again
to stop. VCR will be saved in Gallery.
17. Slide Me Setting
Before using “Slide Me”, please make sure device connect to wifi. Click
“Slide Me” on the main menu, an interface will show as below:
Select the store path for SAM downloads. If select “Internal”, system
will default all download apps in internal, user have to go to
“appInstaller” to check which had downloaded and installed. If select
“SDcard”, system will create a folder name “SlideME” and default the
download apps in this folder as below:
Page 32

Click “SlideME” folder to enter downloads to check the download apps
as below:
For example, click E-book from “SlideME Marketplace”, click one of book
applications, an interface show as below:
Page 33

Click “Download”,device will reimind “Install” or “Cancel”, click “Install”,
system will remind permissions as below:
Click “ok”--“Install”, application will be downloaded and installed
automatically. When system show “Application installed”, click “Open”
to enter the application, click “Done” to enter application compatibility
introduction.In this interface,user can “Open”,”Uninstall” or
”Redownload” the current application.
If want to delete the installed application, please refer to the “Uninstaller
applications” setting.
Page 34

18. Market
Before using market ,please make sure network is working.
Click "Market" on main menu ,an interface will come out as below:
Click “ Next” and come out as below:
If have no Gmail account, click create as below:
Page 35

Enter first name,last name and account name like below ,make sure user name
if available.
Select ”Next” and come out as below:
Page 36

Set password for the above account, click “Next” as below:
Click “I agree, Next “ as below:
Page 37

Fill in Security Code, click “Next” to enter market as below:
Click “Apps”or”Games”to select what you want.Or click search menu to enter keyword
which you look for.
19.E-mail
Click "Email" on main menu to enter e-mail set up. The first step will be asked to
configure the account information as below:
Page 38

Before using email,please make sure email link is working.
For example, ivy7735@126.com: input the email address and valid password, click
"Next" and come out as below:
Email server is POP3 . Click POP3 and server setting will come out as below:
Page 39

Please set parameter according to the email Service Providers. Such as POP3
server,system default “pop.126.com”,port is “110”,click “Next” to enter “inspect server
setting”.If setting correct,an interface “outgoing server settings” will come out as
below:
SMTP server “126.com” change to “smtp.126.com”, revise port “587” to “25”, drag the
scroll bard and click “Next” to enter "Check outgoing server settings" interface. If the
settings is correct, will enter the following interface:
Page 40

Click “Next” and enter account user-defined interface as below:
Input the name you want to show on the email address,click “Done” to enter email
interface.It will load emails automatically and display list as below:
Page 41

Select one email to reply or delete or open inclosure ect.operation as below:
lick Menu button or “ ” will show as below:
C
Page 42

Click “Refresh”to check new emails.
Click “Compose”to write email to new email address.
Click”Folders”to check Inbox,Drafts,Outbox,Sent,Trash ect.information.
Click”Account settings” to check mailbox information.
Click ”Accounts” will show as below:
To exit mailbox,short press the mailbox will show as below:
Page 43

Click “Remove account”and then click “ok”,system will exit email
automatically.
To add new mailbox,click Menu button or “ ” will show as below:
Click “Add account” to creat new mailbox.
20.External devices
20.1 USB connection
Page 44

Connect device to PC via USB, the default connection method is the synchronous
mode.Drag the top status bar and pull-down,an interface come out as below:
"USB connected ":means intenal memory
Click “USB connected” to enter “USB Mass storage”,click “Turn on USB storage”
and “OK” to enter device disk on PC. Load files to the disk you want , when finished
loading, click “turn off USB storage “ and check files in /nand folder of ES Explorer.
20.2 OTG
Support FAT32 format mobile devices: such as U disk. Removable disk.
Plug and Play connection method:
Connect device USB OTG port and external device by OTG cable.
20.3 Keyboard Mouse
Support plug and play USB mouse, keyboard equipment
21. TF Card and USB Disk Setting
Insert T-Flash card or USB Disk,unit will scan automatically. Don’t open tfcard
or USB folder before finishing scanning,or device will remind data wrong and
can’t recognize the contents. When the taskbar stop scanning means finishing
scanning.
Click “ES File Explorer” to enter local disk /sd card/ interface as below:
Page 45

Click “tflash” folder to enter T-Flash card as below:
Short press the file to open it, long press the file will show an interface as
below:
Page 46

Select the operation you want. For example, move the file from TF card to local
disk/sd card/:
Click “Cut” or “Copy”, back to /sd card/ interface as below:
Click
as below:
to see the “Cut” or “Copy’ files, long press one file and will show
Page 47

Select “Paste All” and the files will move to /sd card/ automatically. If want to
delete the files, long press the file and click “delete”.
If want to delete the files, long press the file and click “delete”.
When device connect USB disk by OTG cable, the taskbar will show TF card
icon as below:
Device default “scsi_sda1” as USB disk folder. If move files from USB disk to
device or TF card, the operation is same as tfcard to sdcard.
Page 48

22.Firmware Upgrade
Android upgrade process will format the internal flash memory , if necessary, back up
your data in advance.
Android device upgrade require special PC upgrade tool. If End-user want to
upgrade device, please contact local wholesaler or company service or
download driver, upgrade tool and software from the supplier’s website.
Download driver and install: After decompress the drive file"vtcdrv.rar",appear the
two files as follow:
double-click"VTC Driver Installer 4.1 for 2000_XP.EXE" driver file.
Upgrade file include: lk.rom and tcc8900_mtd.img.
Upgrade process is as follows: (in order to upgrade the Windows XP example)
1: Download and unzip upgrade tool.
2: Download and extract the upgrade files.
3: In the PC side running the upgrade tool FWDN 【If prompted to install drivers,
install the driver FWDN directory】. The upgrade files will be added to the FilePath
lk.rom and tcc8900_mtd.img list, as below.
Page 49

Press the “Home” button on device, connect device to PC by USB cable .At this
point, PC-side FWDN program interface appears as follows:
Initialization complete, loosen the "Home" key and click FWDN interface to the right
of "Nand Data" area, interface as below:
Page 50

Please fill out the correct option according to the diagram of each:
ImageFilePath: Nand Data files store the resulting path can be chosen at random.
Number Of Partion : 1
Partion 1: Select FAT format
Partion Lable:a
When finish setting,click CreateImage button as below:
Click "OK" and interface come out as below:
Page 51

Please select “Low format whole memeory before download” and click “Start”.
System starting to upgrade.
The upgrade process similar to the following interface come out:
Click “OK” and continue to upgrade:
Page 52

After finishing upgrade, the interface prompts as below:
Draw out the USB cable,press and hole the "Power on/off" key for 6 seconds,
device will be re-starting and upgrade complete.
Note: the first boot after the upgrade process is little slow, it’s normal. The second
boot will be faster.
Page 53

22.1 Update by Micro SD card
1. Copy the download Update programs to Micro SD card,the file rename:
update. zip.
2. Shutdown the device.
3. Firstly long press the Volume- button, meanwhile,long press the Power ON/OFF
button without loosen until the screen appear below interface, loosen Volum- key.
4.Short press Home button on front of device,will appear as below:
5.Short press Volum+ can select rotative,when select 2nd (apply sdcard:update.zip),
short press the VOL- to confirm upgrade,system will upgrade automatically as below:
Page 54

6.Pls wait some minitues,system will enter below interface automatically:
Short press Volume+ and select 1st (reboot system now),short press Volume- to
confirm,system will restart automatically.
The first boot after the upgrade process is relatively slow.
When finish restarting, the interface will appear as below:
Page 55

At this time, the screen touch is not working, Please be patience to wait 10
seconds. The system will automatically appear the following interface:
Press “MENU” button to go on touch screen calibration as below:
Page 56

Please click the middle point of red round one by one until touch screen
calibration complete.
Press “Return” button to exit and restart device.
Note: the first boot after the upgrade process is relatively slow, it is normal. The
second boot much faster.
Page 57

23. Questions Treatment
1: What is Android?
A: Android is an open source operating system name basic on Linux which
announced by Google on Nov.5,2007.
2: What is APK?
A: APK is short write of Android Package,it’s Android package.
3: How to obtain APK?
A:Download and install online by PC or android market.
4: What’s the operating system version of device?
A: Device verson is Android 2.3, built in hardware 3D acceleration and run most
android apks.
5: Device if can charge via USB?
A: yes,the machine can be charged by connecting to PC via USB. But it’s better to
charge by Ac adapter 5V 2A.
24. Troule Shooting
Problem Potential Reason Solution
Device can’t open screen
1. Battery low power
2. Device short
3. Battery broken or unit
can’t charge
1. Connect device to
DC power and
starting
automatically.
2. Resent device
3. Change or repair the
device by local
service.
Page 58

Screen touch no function
1. Touch calibration not
accurate
2. Wrong operation on
device
3. Touch screen broken
1. Calibrate the touch
screen for one or
three time and
retarting device.
2. Wipe data or reboot
device to delete all
user data(see bottom
operation 1)
3. Change new Touch
screen by local
service.
Wifi No Function
MicroSD card not read
1. Device can’t connect to
wifi
2. Device connect to wifi
but no function
3. Device can’t scan wifi
network
1. Device didn’t scan
successful MicroSD
card
2. Wrong data operation
before device finishing
scanning.
3. MicroSD card is inferior
or short.
1. Reset device and
connect to available
wifi again.
2. Check the MAC
address and input
the IP address (See
bottom operation 2)
3. WIFI lax inside or
broken,change or
repair by local
service.
1.Don’t open “tflash”
folder before finishing
scanning.
2.Restart or reset device
and insert MicroSD card
to scan again.
3.Change better or
format MicroSD card.
USB Disk not read
1. Device didn’t scan
successful USB Disk
2. Wrong data operation
before finishing
scanning
3. USB Disk not work or
shot
4. OTG cable broken
1. Don’t open
“scsi_sda1” folder
before finishing
scanning.
2. Restart or rest device
and connect USB
disk by OTG cable
again.
3. Change or format
USB disk
4. Change new OTG
cable
Page 59

Device power off or restarting
automatically
1. Wrong data operation
2. Device short
1. Restart device or
reset factory data .
2. If device power off or
restarting again and
again,repair by local
service
Device can’t play video
Device can’t connect to TV by
HDMI
Device earphone output no
sound
Device video recording weak
1. Video file error
2. Device play video can
hear voice but no
picture
1.Device wrong defalt
mode
1. Earphone broken
2. Device earphone jack
broekn
Device Mic short
design
1. Check the file format
or change another
file
2. Device should be
default at “LCD”
mode.
1.If only connect to TV
by HDMI, device must
be default at
“HDMI”mode.
1. Change new
earphone
2. Repair by local
service
If only device audio
recording no
problem, it’s ok. Not
defective.
1.Touch screen no function reboot:
Power off device. Press “Power” and “V-“ button at the same time and will
appear as below:
Page 60

Press “Home” button and select “wipe data/factory rest” by press “V-“ as
below:
Click “Power” and Select “Yes—delete all user data” by “V-“ button will
appear as below:
Page 61

Click “Power” button and device starting reboot as below:
When device appear “Data wipe complete”,click “Power” button and device will
starting automatically.
NOTE: The first time starting device will be slow after rebooting. The second
time will be fast.
Before entering main menu,do not do any action until device appear touch
calibration as below:
Page 62

Press “Menu” button to enter calibration. Do calibrate accurate. After
calibrating,restart the device and will come into effect.
2.Wifi IP address setting
When device connect to wifi but no function,please check mac
address.Press “Menu” button on the wifi settings interface will appear as
below:
Click “Advanced” and click “Use static IP” will appear as below:
Page 63

Input the correct “IP address”-“Gateway”-“DNS 1” and will work normal.
Pictures for reference only, product appearance,function please refer to
the real device, the product rules and design are subject to change
without prior notice
 Loading...