

Page 1
INSTRUCTION
AND RECIPE
BOOKLET
Cuisinart® Griddler® Grill & Panini Press
For your safety and continued enjoyment of this product, always read the instruction book carefully before using.
GR-11
Page 2

CONTENTS
Important Safeguards .................. 2
Parts and Features
Before the First Use...................
Assembly Instructions ................ 4-
Operating Instructions.................
User Maintenance
Cleaning and Care ....................
Storage.............................
Warranty ............................
.................... 3
. 3
5
. 6
..................... 6
. 6
. 7
. 7
Important
SafeguardS
When using electrical appliances, basic safety
precautions should always be followed to
reduce the risk of fire, electric shock, and/or
injury to persons including the following:
1. READ ALL INSTRUCTIONS.
2. Unplug from outlet when not in use and
before cleaning. Allow to cool before
putting on or taking off parts, and before
cleaning appliance.
3. Do not touch hot surfaces; use handle.
4. To protect against fire, electric shock, and
injury to persons, DO NOT IMMERSE
CORD OR PLUG in water or other liquids.
5.
This appliance should not be used by
or near children
6. Do not operate any appliance with a
damaged cord or plug, or after the
appliance has malfunctioned or has been
damaged in any manner. Return the
appliance to the nearest Customer Service
Center for examination, repair or
adjustment.
7. The use of accessory attachments not
recommended by Cuisinart may result in
fire, electric shock, or risk of injury to
persons.
8. Do not use outdoors.
9. Do not let power cord hang over
edge of table or counter, or touch
hot surfaces
10. Do not place on or near hot gas or
electric burner, or in a heated oven
11. Unplug the unit when finished using.
.
.
.
12. Do not use appliance for other than
intended use.
13. Extreme caution must be exercised when
moving an appliance containing hot oil or
other hot liquids.
14. To disconnect, remove plug from wall
outlet.
15. WARNING: TO REDUCE THE RISK OF
FIRE OR ELECTRIC SHOCK, ONLY
AUTHORIZED PERSONNEL SHOULD DO
REPAIRS.
16. Do not operate your appliance in an
appliance garage or under a wall cabinet.
When storing in an appliance garage
always unplug the unit from the
electrical outlet. Not doing so could
create a risk of fire, especially if the
appliance touches the walls of the garage
or the door touches the unit as it closes.
SaVe tHeSe
InStruCtIonS
for HouSeHoLd
uSe onLY
SPECIAL CORD SET
INSTRUCTIONS
A short power-supply cord is provided to reduce
the risks resulting from becoming entangled in
or tripping over a longer cord. Longer extension
cords may be used if care is exercised in their
use.
If a long extension cord is used, the marked
electrical rating of the extension cord should be
at least as great as the electrical rating of the
appliance, and the longer cord should be
arranged so that it will not drape over the
countertop or tabletop where it can be pulled on
by children or animals, or tripped over.
NOTICE
This appliance has a polarized plug (one blade is
wider than the other) to reduce the risk of electric
shock. This plug will fit in a polarized outlet only
one way. If the plug does not fit fully in the outlet,
reverse the plug. If it still does not fit, contact a
qualified electrician. Do not modify the plug in
any way.
2
Page 3

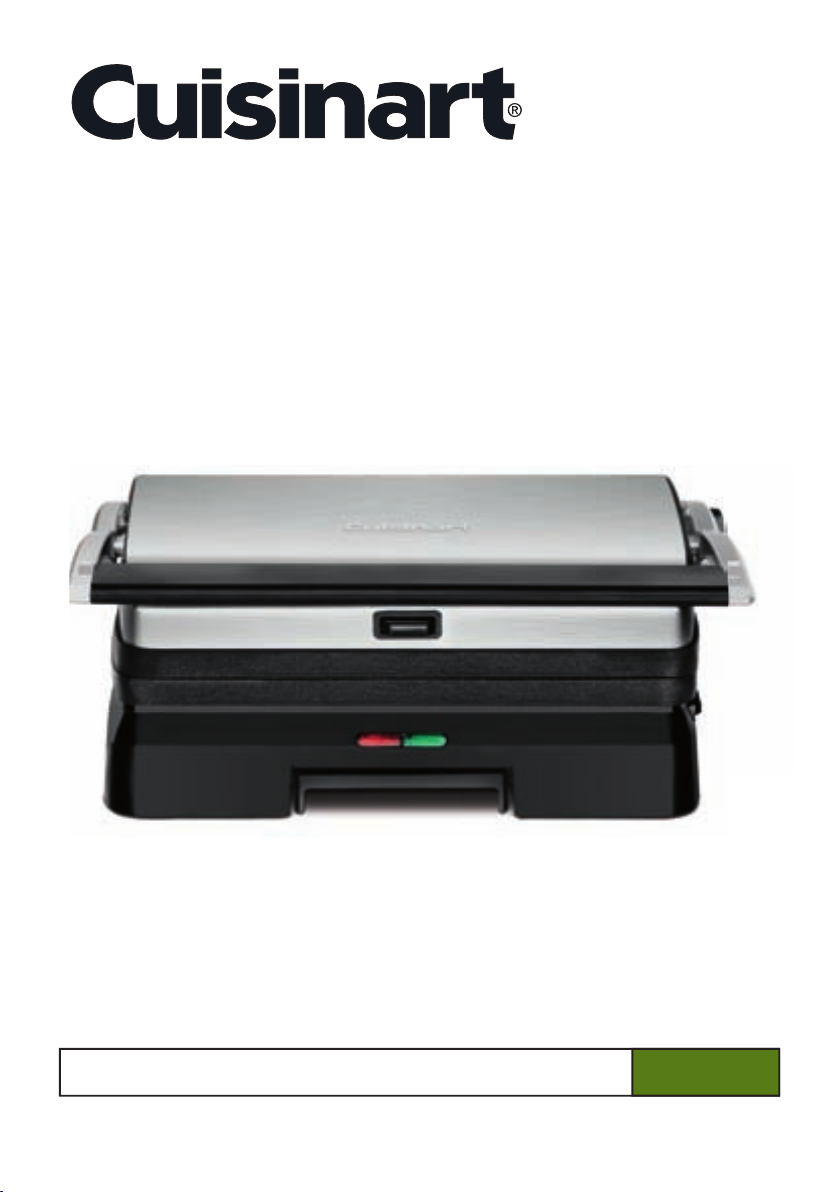
PARTS AND FEATURES
1. Base and Cover
Solid construction with stainless steel selfadjusting cover.
2. Panini-Style Handle
Sturdy cast-metal handle adjusts cover
to accommodate thickness of food.
3. Removable Grill Plates
Perfect for grilling sandwiches,
chicken and vegetables.
steak, burgers,
Nonstick and
dishwasher safe for easy cleanup.
4. Indicator Lights
Signal Power On and Ready to Cook.
5. Drip Tray
Collects grease and can be removed from
base for easy cleanup (dishwasher safe).
6. Plate Release Buttons
Push in to release and remove
cooking plates.
7. Hinge Release Button
Allows the cover to lie back for
cooking in the flat position.
8. Adjustable Front Feet
Tilt the unit to increase grease drainage.
All materials that come in contact with food
are BPA free.
BEFORE THE FIRST USE
Remove all packaging materials and any
promotional labels or stickers from your grill.
Be sure all parts (listed under Parts and
Features above) of your new appliance have
been included before discarding any packaging
materials. You may want to keep the box and
packing materials for use at a later date.
Before using your Cuisinart
Panini Press for the first time, wipe the base
and cover with a damp cloth. Thoroughly clean
cooking plates and drip tray. The plates and
drip tray are dishwasher safe. Refer to
Assembly Instructions (page 4) for plate
removal.
Contact Grill
Use the Griddler
®
Grill &
Panini Press as a
Contact Grill to cook
burgers, boneless pieces
of meat, thin cuts of
meat and vegetables.
®
Griddler® Grill &
6
3
3
4
5
8
2
1
7
1
6
5
The Contact Grill function works best when you
want to cook something in a short amount of
time or when you are looking for a healthy
method of grilling. When cooked on the
Contact Grill, food will cook quickly because
you are grilling both sides of the food at the
same time. The ribs on the grill plates
combined with the grease spout at the rear of
the plates allow the grease to drip from the
meat and drain off the plates.
Rest the cover on top of the food until it has
reached the desired cooked temperature.
The Griddler
®
Grill & Panini Press was designed
with a unique handle and hinge that allow the
cover to adjust to the thickness of the food.
You can easily grill anything with even results,
from a thinly-sliced potato to a sirloin steak.
When cooking more than one food item in the
Contact Grill, it is important that the thickness
of food items be consistent so the cover will
close evenly on the food.
Panini Press
Use the Griddler
®
Grill &
Panini Press as a Panini
Press to grill sandwiches,
breads and quesadillas.
The word “panini” is
Italian for grilled
sandwiches. Panini can
include any combination of ingredients such as
vegetables, meat and cheese layered between
two pieces of fresh-baked bread. The sandwich
is then pressed between two grill plates to toast
3
Page 4
the bread and warm the sandwich. Experiment
making a variety of savory or sweet sandwiches
for any meal. We recommend using fresh-baked
bread to produce the best-tasting panini.
Popular breads used for panini are focaccia (a
flat bread frequently baked with rosemary, salt
and onion on top), michetta (a small round roll
with a crisp crust), ciabatta (a rectangular bread
with a slightly domed crust) and thick slices of
classic Italian bread.
The Griddler
Panini Press in the same manner that it
functions as a Contact Grill. The Griddler
®
Grill & Panini Press functions as a
®
Grill
& Panini Press was designed with a unique
handle and hinge that allow the cover to adjust
to the thickness of the sandwich you are
preparing, and to rest there evenly. Light
pressure can be applied to the handle to press
and heat the sandwich to your liking.
When cooking two or more panini, it is
important that the thickness of the sandwiches
be consistent so the cover will close evenly on
the panini.
Full Grill
Use the Griddler
®
Grill & Panini Press as a Full
Grill to cook burgers, steak, poultry (we do not
recommend cooking
bone-in chicken, since it
does not cook evenly on
an open grill), fish and
vegetables.
“Full Grill” refers to using
the Griddler
®
Grill & Panini Press with the cover
lying flat, creating a double, flat cooking surface.
In this position, the foods you are grilling will
have to be turned over for cooking.
Cooking on the Full Grill is a versatile method
of using the Griddler
®
Grill & Panini Press. With
the Full Grill, you have double the surface area
for grilling. You have the option of cooking
different types of foods on separate plates
without combining their flavors, or cooking
large amounts of the same type of food.
The Full Grill position also accommodates
different cuts of meat with varying thicknesses,
allowing you to cook each piece to your liking.
ASSEMBLY
INSTRUCTIONS
Place Griddler® Grill & Panini Press on a clean,
flat surface where you intend to cook. The
®
Griddler
in three ways:
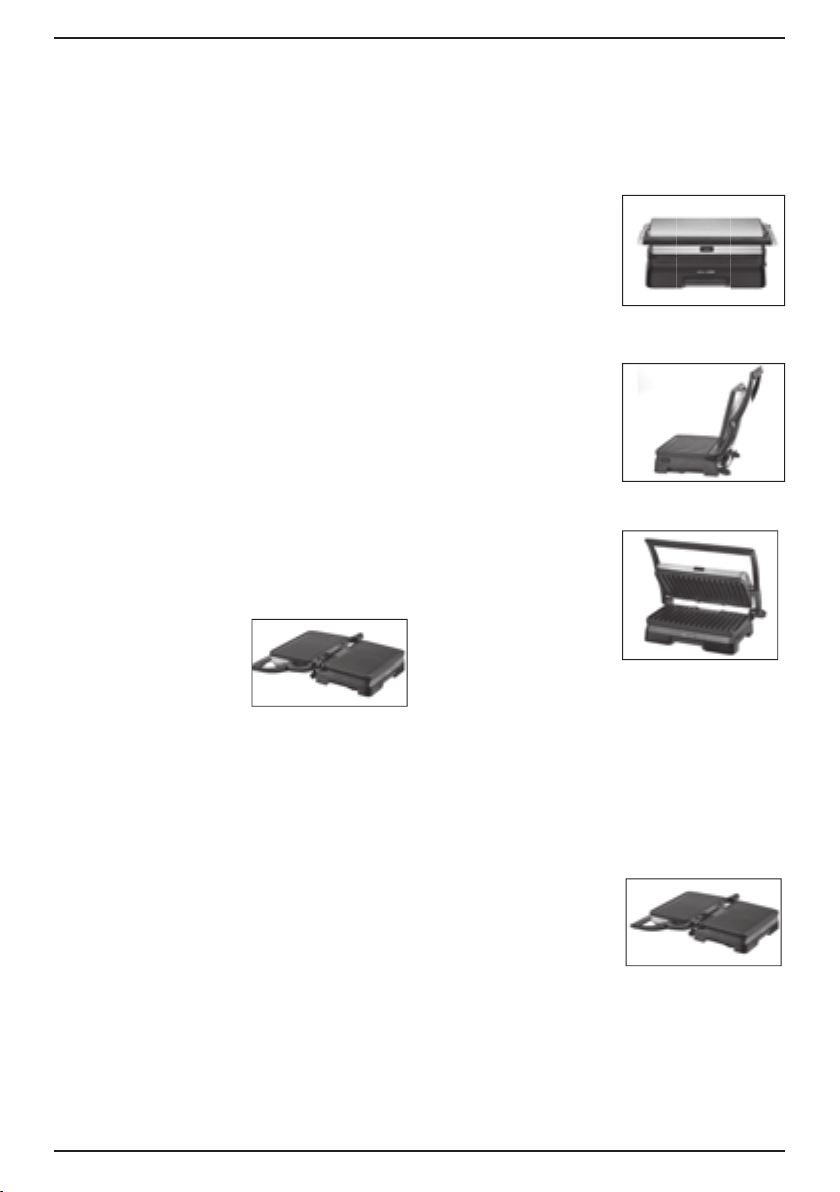
Closed Position – Upper
plate/cover rests flat on
lower plate/base. This is
your starting and heating
position and when using
the Contact Grill or Panini
Press functions.
Open Position – Upper
plate/cover is open and
in the 100° position.
Open the cover to this
position before using
the Griddler
Panini Press as a
Contact Grill or Panini Press.
To adjust the Griddler
Grill & Panini Press
to this position, simply
lift the handle until you
feel it come to a locking
position. The unit will
stay in this position until
you close the cover or
continue to open it to the flat position.
The cover will stay in the open position until
you lower the handle for cooking. When this is
done, the hinge will release itself so that the
upper plate lies flat on the top of the food you
are preparing. This allows you to cook your
food evenly from both top and bottom. When
you lift the handle to open the Griddler
Panini Press after cooking, the cover will remain
in the flat position,
parallel to the lower
plate. In order to lock the
cover back into the open
position, you must close
the Griddler
Panini Press, without any food in place, and
open it again.
Grill & Panini Press can be positioned
®
Grill &
®
®
Grill &
®
Grill &
4
Page 5
Flat Position – Upper plate/cover is level with
lower plate/base. The upper and lower plates
line up to create one large cooking surface. The
®
Griddler
Grill & Panini Press is in this position
when it is used as a Full Grill.
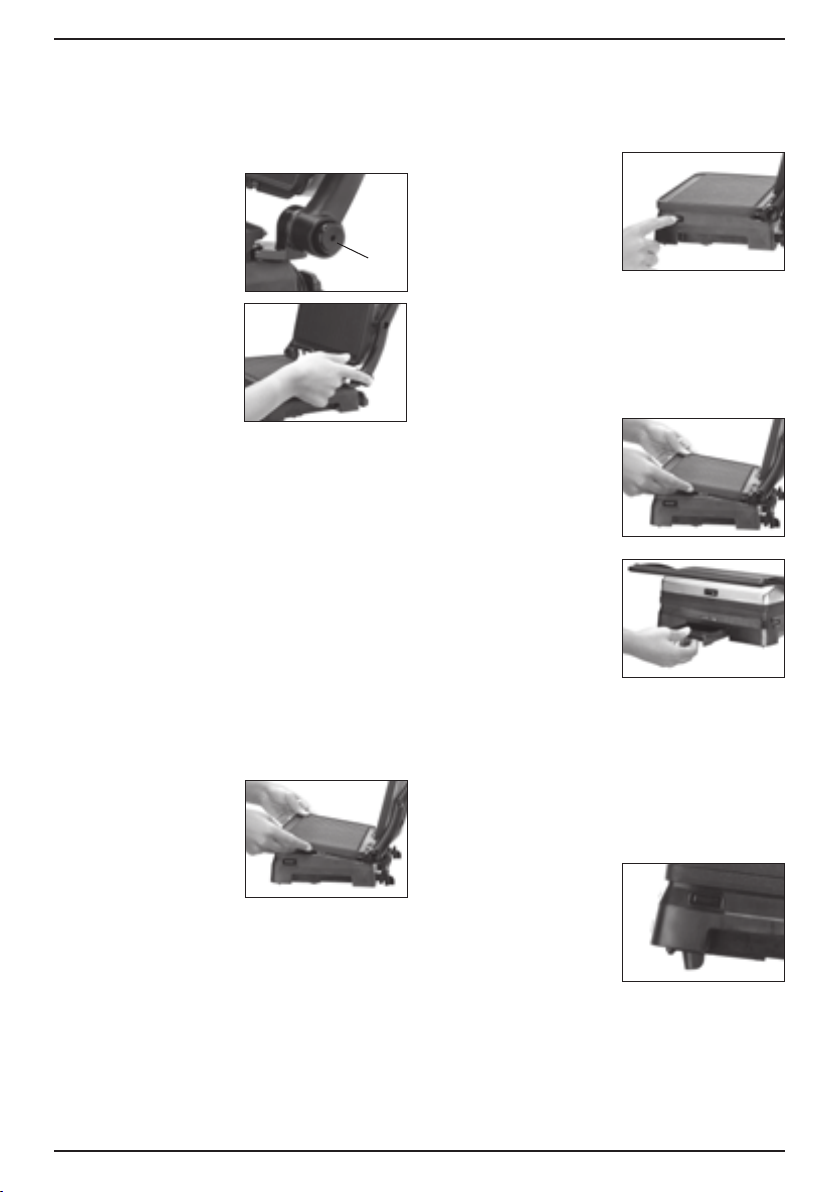
1. To adjust the
Griddler
®
Grill &
Panini Press to this
position, locate the
hinge release button
on the right arm.
1.
Hinge
release button
2. With your left hand on
the handle, use your
right hand to push
the hinge release
button. Push the
handle back until the
cover rests flat on the
2.
counter. The unit will stay in this position until
you lift the handle and cover to return it to
the closed position.
If the Griddler
®
Grill & Panini Press is already in
the open position and you wish to adjust it to
the flat position, pull the handle slightly toward
you and then press the hinge release button.
Push the handle back until the cover rests in
the flat position. Pulling the handle forward
slightly before pressing the hinge release
button will take some of the pressure off the
hinge and you will be able to adjust the
®
Griddler
Grill & Panini Press more easily.
To insert cooking plates
Adjust the Griddler
®
Grill & Panini Press to the
flat position. Insert one plate at a time. Each
plate is designed to fit in
either the upper housing
or the lower housing of
the Griddler
Panini Press.
If you are facing the
Griddler
®
Grill &
®
Grill & Panini
Press, the drip spout should be at the rear of
the plate. Locate the metal brackets at the
center of the housing. Tilt the back end of the
plate and line up the cutouts at the back of the
plate with the metal brackets. Slide the plate
underneath the brackets and push down the
front end of the plate. It will snap into place.
Turn the Griddler
®
Grill & Panini Press around
and insert the second plate into the upper
housing as you did with the first plate.
To remove cooking plates
1. Once the Griddler
®
Grill & Panini Press has
cooled, adjust to the flat position. Locate the
plate release buttons:
a. Lower plate
release button
located on right
side of the base.
b. Upper plate
release button
1.
located at the front
forward-facing top cover in the center.
Press firmly on button and the plate will
pop up slightly from the base.
2. Grasp the plate with two hands, slide it out
from under the metal brackets, and lift it out
of the base.
To position drip tray
Slide the drip tray into
the front of the base at
the center according to
the instruction on the
tray.
2.
Grease from the food
will run off the plates
through the grease
spout and into the drip
tray. Grease should be
safely disposed of after
the Griddler
®
Grill &
Panini Press has cooled down completely. The
drip tray can be cleaned in the dishwasher.
To adjust front feet
If grilling meats or other food where adequate
grease drainage is required, raise the two front
feet located at the underside of the grill to
engage tilt feature.
5
Page 6

OPERATING
INSTRUCTIONS
Once the Griddler® Grill & Panini Press is
assembled properly, plug the cord into a
standard electrical outlet. The red indicator light
will illuminate to indicate that the power is on.
If you intend to use the Griddler
Press in the flat position, but you do not need
the entire surface, it is recommended to use the
bottom plate.
We recommend you preheat in the closed
position. It may take up to 8 minutes to reach
operating temperature. When the thermostat has
reached operating temperature, the green
indicator light will indicate that the Griddler
& Panini Press is ready for cooking. During
operation, the light will continue to turn on and
off as the thermostat regulates the temperature.
This is normal
Always exercise caution when handling the
Griddler
the housing will become hot during use. To open
the Griddler
.
®
Grill & Panini Press during cooking, as
®
Grill & Panini Press, grasp the black
plastic area of the handle. This part of the handle
stays cool to the touch while cooking. The arms
are made of die-cast aluminum and will become
hot during use. Do not touch them during or
immediately following cooking.
The cover is made of stainless steel and will
become very hot and should not be touched
during or immediately following cooking. If you
need to adjust the cover, be sure to use oven
mitts to prevent burns.
The lower housing is made of plastic, and while
it will become very warm, it will not burn you. If
you need to move the Griddler
Press during cooking, be sure to handle it from
the base only while wearing oven mitts. Do not
touch the cover.
Allow the Griddler
®
Grill & Panini Press to cool
down before handling (at least 30 minutes).
NOTE: The first time you use the Griddler
& Panini Press, it may have a slight odor and
may smoke a bit. This is normal and common
to appliances with nonstick surfaces.
®
Grill & Panini
®
Grill & Panini
®
Grill
®
Grill
USER MAINTENANCE
• Never use metal utensils, as they will scratch
the nonstick plates. Instead, use only wooden
or heat-proof plastic utensils.
• Never leave plastic utensils in contact with
the hot grill plates.
• In between recipes, use a wooden or heat-
proof plastic utensil to scrape excess food
buildup through grease channels and into drip
cup, then wipe off any residue with a paper
towel before proceeding with next recipe.
• Allow the Griddler
®
Grill & Panini Press to
cool down completely (at least 30 minutes)
before cleaning.
• Any other servicing should be performed by
an authorized service representative.
CLEANING AND CARE
CAUTION: BEFORE CLEANING APPLIANCE,
MAKE SURE IT IS UNPLUGGED AND HAS
COOLED DOWN COMPLETELY.
Once you have finished cooking, unplug the
power cord from the wall outlet. Allow the unit
to cool down for at least 30 minutes before
handling.
Dispose of grease from the drip tray once
cooled. The drip tray can be cleaned by hand
or in the dishwasher.
Press the plate release buttons to remove
plates from the housing. Be sure that the plates
have cooled completely before handling (at
least 30 minutes). The cooking plates can be
washed in the dishwasher. Do not use metal
objects such as knives or forks for cleaning. Do
not use a scouring pad for cleaning; the
nonstick coating can be damaged.
If you have been cooking seafood, wipe the
cooking plates with lemon juice to prevent the
seafood flavor from transferring to the next
recipe.
The housing base and cover can be wiped
clean with a soft, dry cloth. For tough stains,
dampen cloth. Never use an abrasive cleaner or
harsh pad.
6
Page 7

STORAGE
Always make sure the
®
Griddler
Grill & Panini
Press is cool and dry
before storing. The
power cord can be
wrapped around the back of the base for
storing.
WARRANTY
Limited One-Year Warranty
This warranty is available to consumers only. You
are a consumer if you own a Cuisinart® Griddler®
Grill & Panini Press that was purchased at retail
for personal, family or household use. Except
as otherwise required under applicable law, this
warranty is not available to retailers or other
commercial purchasers or owners. We warrant that
your Cuisinart® Griddler® Grill & Panini Press will
be free of defects in materials and workmanship
under normal home use for 1 year from the date of
original purchase.
We recommend that you visit our website, www.
cuisinart.com for a fast, efficient way to complete
your product registration. However, product
registration does not eliminate the need for the
consumer to maintain the original proof of purchase
in order to obtain the warranty benefits. In the
event that you do not have proof of purchase date,
the purchase date for purposes of this warranty will
be the date of manufacture.
CALIFORNIA RESIDENTS ONLY
California law provides that for In-Warranty Service,
nia residents have the option of returning
Califor
a nonconforming product (A) to the store where it
was purchased or (B) to another retail store that
sells Cuisinart products of the same type. The
retail store shall then, according to its preference,
either repair the product, refer the consumer to an
independent repair facility, replace the product,
or refund the purchase price less the amount
directly attributable to the consumer’s prior usage
of the product. If neither of the above two options
results in the appropriate relief to the consumer,
the consumer may then take the product to an
independent repair facility, if service or repair can be
economically accomplished. Cuisinart and not the
consumer will be responsible for the reasonable cost
of such service, repair, replacement, or refund of
nonconforming products under warranty. California
residents may also, according to their preference,
return nonconforming products directly to Cuisinart
for repair or, if necessary, replacement by calling
our Consumer Service Center toll-free at 800-726-
0190. Cuisinart will be responsible for the cost of the
repair, replacement, and shipping and handling of
such nonconforming products under warranty.
BEFORE RETURNING YOUR CUISINART
PRODUCT
If your Cuisinart
should prove to be defective within the warranty
period, we will repair or, if we think necessary,
replace it. To obtain warranty service, please call
our Customer Service Center toll-free at 1-800726-0190 or write to: Cuisinart, 7475 North Glen
Harbor Blvd, Glendale, AZ 85307. To facilitate the
speed and accuracy of your return, enclose $10.00
for shipping and handling. (California residents
need only supply a proof of purchase and should
call 1-800-726-0190 for shipping instructions.)
Please be sure to include your return address,
description of the product’s defect, product serial
number, and any other information pertinent to
the return. Please pay by check or money order.
NOTE: For added protection and secure handling
of any Cuisinart® product that is being returned, we
recommend you use a traceable, insured delivery
service. Cuisinart cannot be held responsible for
in-transit damage or for packages that are not
delivered to us. Lost and/or damaged products are
not covered under warranty.
Your Cuisinart
been manufactured to the strictest specifications
and has been designed for use only in 120 volt
outlets and only with authorized accessories
and replacement parts. This warranty expressly
excludes any defects or damages caused by
attempted use of this unit with a converter, as
well as use with accessories, replacement parts
or repair service other than those authorized
by Cuisinart. This warranty does not cover any
damage caused by accident, misuse, shipment or
other than ordinary household use. This warranty
excludes all incidental or consequential damages.
Some states do not allow the exclusion or limitation
of these damages, so these exclusions may not
apply to you. You may also have other rights, which
vary from state to state.
Important: If the nonconforming product is to
be serviced by someone other than Cuisinart’s
Authorized Service Center, please remind the
servicer to call our Consumer Service Center at
1-800-726-0190 to ensure that the problem is
properly diagnosed, the product is serviced with
the correct parts, and to ensure that the product is
still under warranty
®
Griddler® Grill & Panini Press
®
Griddler® Grill & Panini Press has
.
7
Page 8

Any trademarks or ser vice marks of third parties
referred to herein are the trademarks or service
marks of their respective owners.
©2013 Cuisinart
150 Milford Road
East Windsor, NJ 08520
Printed in China
13CE000807
E IB-11499-ESP
Page 9

reCIpeS
Breakfast Danish Panini .............................................10
Grilled PB and Banana Panini ........................................10
Tomato, Prosciutto and Mozzarella Panini ...............................10
Smoked Turkey, Roasted Pepper and Swiss Cheese Panini with Pesto Mayo ...11
Grilled Cheese with Tomato and Avocado ...............................11
Grilled Reuben ....................................................12
Grilled BLT with Cheddar ............................................12
Brie, Apple and Onion Panini .........................................13
Grilled Flatbread...................................................13
Classic Tomato Bruschetta ..........................................14
Grilled Antipasto...................................................14
Sliders...........................................................15
Easy Quesadillas for Two ...........................................15
Grilled Steak with Scallion Butter......................................15
Grilled Scampi-Style Shrimp .........................................16
Grilled Herb Chicken ...............................................16
Chocolate Panini ..................................................17
S’mores Panini ....................................................17
Grilled Pineapple Sundae............................................17
9
Page 10

Breakfast Danish Panini
A sweet Danish-like breakfast treat, perfect
with a cup of coffee.
Makes 2 panini
4 slices cinnamon raisin bread
2 teaspoons unsalted butter, softened
2 ounces cream cheese, softened
pinch kosher salt
¼ teaspoon pure vanilla extract
1 teaspoon granulated sugar
2 tablespoons apricot jam (raspberry
or strawberry works well too)
1. Preheat grill in the closed position.
2. Brush one side of each slice of bread with
the butter. Lay 2 slices of bread on a work
surface, buttered side down.
3. In a small mixing bowl, stir the cream
cheese, salt, vanilla and sugar together
until smooth. Divide evenly and spread on
top of two of the non-buttered sides of
the bread. Spread 1 tablespoon of the jam
on top of each. Top with remaining bread,
buttered side up.
4. Place sandwiches on the bottom grill plate
and close. Grill panini for 2 minutes, or until
lightly toasted.
5. Let rest for 1½ to 2 minutes. Cut in half on
the diagonal and serve warm.
Nutritional information per panini:
Calories 406 (39% from fat) • carb. 55g • pro. 8g
• fat 18g • sat. fat 10g • chol. 38mg • sod. 429mg
• calc. 423mg • ber 2g
Grilled PB and Banana Panini
This sandwich was made famous by Elvis.
You can use all natural peanut butter, our
preference, but you may want to increase the
amount of honey to make it a bit sweeter.
Makes 2 panini
4 slices white or whole-wheat
sandwich bread
2 teaspoons unsalted butter, softened
2 tablespoons creamy peanut butter
pinch kosher salt
1 teaspoon honey (use about 2
teaspoons if using unsweetened/
natural peanut butter)
1 large banana, sliced into thin rounds
1. Preheat grill in the closed position. Brush
one side of each slice of bread with the
butter. Lay 2 slices of bread on a work
surface, buttered side down. Top the two
slices evenly with the peanut butter, salt
and honey. Then layer the banana slices
evenly on each. Top with remaining bread,
buttered side up.
2. Place sandwiches on the bottom grill plate
and close. Grill panini for 2 to 2½ minutes,
or until lightly toasted.
3. Let rest for 1 minute. Cut in half on the
diagonal and serve warm.
Nutritional information per panini:
Calories 429 (30% from fat) • carb. 63g
• pro. 15g • fat 15g • sat. fat 4g • chol. 10mg
• sod. 547mg • calc. 313mg • ber 9g
Tomato, Prosciutto and
Mozzarella Panini
Be sure to use the freshest ingredients for this
classic Italian sandwich.
Makes 2 panini
4 slices ciabatta
½ tablespoon olive oil
1 ounce (2 thin slices) prosciutto
1 plum tomato, cut into ¼-inch slices
4 fresh basil leaves
2 ounces fresh mozzarella, sliced
1. Preheat grill in the closed position.
2. Brush one side of each slice of bread
with the oil. Lay 2 slices of bread on a
work surface, oiled side down. Build the
sandwiches in this order: prosciutto,
tomato, basil and cheese, evenly dividing
the ingredients between the sandwiches.
Top with remaining bread, oiled side up.
3. Place sandwiches on the bottom grill plate
and close, applying medium pressure to
the handle for 30 seconds. Grill panini for 4
to 5 minutes, or until cheese is melted and
bread is nicely toasted.
10
Page 11

4. Let rest for 1 to 2 minutes. Cut in half on the
diagonal and serve warm.
Nutritional information per panini:
Calories 313 (38% from fat) • carb. 31g • pro. 15g
• fat 13g • sat. fat 4g • chol. 22mg • sod. 780mg
• calc. 108mg • ber 2g
Grilled Cheese with Tomato
and Avocado
The perfect summer sandwich when tomatoes
are perfectly ripe.
Makes 2 panini
Smoked Turkey, Roasted
Pepper, and Swiss Cheese
Panini with Pesto Mayo
This hearty sandwich is full of gourmet avor.
Makes 2 panini
1 tablespoon mayonnaise
1 tablespoon pesto
4 slices artisan wheat bread
2 teaspoons olive oil
4 ounces thinly sliced smoked turkey
1 roasted red pepper, drained and sliced
into ½-inch strips
2 thin slices red onion
(about ¼ small red onion)
2 ounces Swiss cheese, sliced
(about 4 slices)
1. Preheat grill in the closed position.
2. Combine the mayonnaise and pesto in a
small bowl; reserve. Brush one side of each
slice of bread with the oil. Lay 2 slices of
bread on a work surface, oiled side down
and spread with the pesto mayonnaise. Build
the sandwiches in this order: turkey, pepper,
onion and cheese, evenly dividing the
ingredients between the sandwiches.
Top with remaining bread, oiled side up.
3. Place sandwiches on the bottom grill plate
and close, applying light pressure to the
handle for 30 seconds. Grill panini for 4 to 5
minutes, or until the cheese is melted and the
bread is nicely toasted.
4. Let rest for 1 to 2 minutes. Cut in half on the
diagonal and serve warm.
4 slices sourdough or hearty Italian or
wheat bread
2 teaspoons olive oil
2 ounces Cheddar, sliced (about 3 to 4
thin slices)
½ medium avocado, sliced
1 plum tomato, cut into ¼-inch slices
¼ to ½ teaspoon kosher salt
pinch freshly ground black pepper
2 teaspoons mayonnaise
1. Preheat grill in the closed position.
2. Brush one side of each slice of bread with the
oil. Lay 2 slices of bread on a work surface,
oiled side down. Build the sandwiches in this
order: ½ of the cheese, avocado, tomato,
salt and pepper and remaining ½ of cheese,
evenly dividing the ingredients between the
sandwiches. Spread the mayonnaise on the
inside of the remaining slices of bread and
place on top of the sandwiches, oiled side
up.
3. Place sandwiches on the bottom grill plate
and close, applying medium pressure to
the handle for 20 seconds. Grill panini for 4
to 6 minutes, or until cheese is melted and
sandwiches are evenly grilled and golden.
4. Allow panini to rest for about 2 minutes.
Then slice each sandwich in half and serve.
Nutritional information per panini:
Calories 304 (69% from fat) • carb. 15g • pro. 10g
• fat 24g • sat. fat 8g • chol. 33mg • sod. 514mg
• calc. 228mg • ber 3g
Nutritional information per panini:
Calories 440 (49% from fat) • carb. 33g • pro. 23g
• fat 24g • sat. fat 7g • chol. 60mg • sod. 1126mg
• calc. 350mg • ber 4g
11
Page 12

Grilled Reuben
A homemade version of the deli favorite. We also
provide you with a very simple recipe for a quick
Russian dressing.
Makes 2 panini
4 slices rye bread
2 teaspoons olive oil or unsalted butter,
softened
4 teaspoons Russian* or Thousand
Island dressing
4 ounces corned beef, thinly sliced
½ cup sauerkraut, well drained
1 ounce Swiss cheese (about 2 slices)
1 tablespoon unsalted butter, melted
1. Preheat grill in the closed position.
2. Brush one side of each slice of bread with the
oil. Lay 2 slices of bread on a work surface,
oiled side down. Spread 1 teaspoon of
Russian dressing on the inside of each slice
and the sandwiches in this order: corned
beef, sauerkraut and Swiss, evenly dividing
the ingredients between the sandwiches. Top
with remaining bread, oiled side up.
3. Place sandwiches on the bottom grill plate
and close, applying medium pressure to the
handle for 30 seconds. Grill panini for 4 to 6
minutes, or until cheese is melted and bread
is nicely toasted.
4. Allow to rest for about 2 minutes. Cut in half
on the diagonal and serve warm.
*For a simple Russian dressing, put the following
in a small bowl and stir until fully combined:
1
⁄3 cup mayonnaise; 2½ tablespoons ketchup; 2
tablespoons relish; salt and pepper to taste
Nutritional information per panini:
Calories 442 (38% from fat) • carb. 31g • pro. 15g
• fat 13g • sat. fat 4g • chol. 22mg • sod. 780mg
• calc. 108mg • ber 2g
Grilled BLT with Cheddar
Really this is a BATC, because we use arugula
instead of the traditional lettuce, and add some
Cheddar into the mix. You’ll wonder why you
haven’t been eating BLTs like this all along!
Makes 2 panini
4 slices sourdough bread
2 teaspoons olive oil or unsalted butter,
softened
4 to 6 slices cooked bacon*
1 plum tomato, cut into ¼-inch slices
pinch kosher salt
pinch freshly ground black pepper
1 large handful arugula (approximately
½ cup packed)
2 ounces Cheddar, sliced (about 3 to 4
thin slices)
2 teaspoons mayonnaise
1. Preheat grill in the closed position.
2. Brush one side of each slice of bread with the
oil. Lay 2 slices of bread on a work surface,
oiled side down. Build the sandwiches in
this order: bacon, tomato, salt and pepper,
arugula and cheese. Spread the mayonnaise
on the non-oiled side of the remaining two
pieces of bread, and then place on top of
each sandwich, oiled side up.
3. Place sandwiches on the bottom grill plate
and close, applying medium pressure to
the handle for 20 seconds. Grill panini for 4
to 6 minutes, or until cheese is melted and
sandwiches are evenly grilled and golden.
4. Allow panini to rest for about 2 minutes.
Cut in half on the diagonal and serve warm.
* You can cook the bacon on the grill prior
to cooking your panini. Grill bacon in the at
position with the feet in the tilted position,
until fully cooked through and crisp, about
6 to 8 minutes per side. Once cooked,
remove and reserve on paper towels to drain.
Carefully wipe excess oil from the plates.
Close grill and keep unit on until ready to
cook panini.
Nutritional information per panini:
Calories 509 (78% from fat) • carb. 12g • pro. 16g
• fat 44g • sat. fat 16g • chol. 72mg • sod. 838mg
• calc. 235mg • ber 1g
12
Page 13

Brie, Apple and Onion Panini
This recipe combines sweet, savory and creamy
all in one sandwich.
Makes 2 panini
4 slices artisan whole wheat bread
½ tablespoon olive oil
2 teaspoons honey mustard
½ cup thinly sliced apple, preferably
Granny Smith (about ½ small apple)
¼ cup thinly sliced onion (about ¼ small
to medium onion)
2 ounces Brie, sliced
¼ teaspoon ground cinnamon
1
⁄8 teaspoon kosher salt
1. Preheat grill in the closed position.
2. Brush one side of each slice of bread with
the oil. Lay 2 slices of bread on a work
surface, oiled side down, and spread with the
honey mustard. Build the sandwiches in this
order: apple, onion and Brie, evenly dividing
the ingredients between the sandwiches.
Sprinkle with cinnamon and salt and top with
remaining bread, oiled side up.
3. Place sandwiches on the bottom grill plate
and close, applying medium pressure to the
handle for 30 seconds. Grill panini for 4 to 5
minutes.
4. Allow panini to rest for about 2 minutes.
Cut in half on the diagonal and serve warm.
Grilled Flatbread
Our recipe is for a basic herb atbread, but the
possibilities are endless. See our note below for
some other options, including stuffed bread.
Makes 4 servings
½ pound prepared pizza dough (store
bought or homemade – see
www.cuisinart.com for recipes)
2 tablespoons olive oil
1 sprig fresh rosemary, leaves removed
and stems discarded
1 garlic clove, peeled and finely chopped
kosher salt, to taste
1. Preheat grill in the closed position.
2. While the unit is heating, roll out the dough
to a rectangle slightly smaller than the plate,
about 10 inches wide. Loosely cover with a
piece of plastic wrap until ready to grill.
3. In a small bowl or liquid measuring cup, stir
together the oil, rosemary and garlic.
4. Once the grill has preheated, remove the
plastic and brush the rosemary/garlic oil on
the top of the dough. Place the oiled side
down on the bottom plate and then brush the
other side (now the top of the dough). Close
the unit and grill for about 5 to 6 minutes, or
until dark golden grill marks are present and
bread is cooked through. Sprinkle with salt,
slice and serve immediately.
Nutritional information per panini:
Calories 285 (41% from fat) • carb. 32g • pro. 10g
• fat 13g • sat. fat 6g • chol. 28mg • sod. 606mg
• calc. 81mg • ber 4g
Note: There are countless variations of grilled
atbreads. You can grill plain, without any oil
and then top with fresh or cooked vegetables.
You can also stuff the bread – after grilling,
carefully remove from the grill and cut in half
horizontally. Our favorite is to brush with a pesto
oil (pesto thinned out with a bit of olive oil),
grated Parmesan and a bit of fresh mozzarella.
If using cheese, be sure that you leave a ½- to
1-inch border. Put the other half of the atbread
on top of the llings and then put back on the
grill. Cook until cheese is melted, an additional 3
to 4 minutes.
Nutritional information per serving:
Calories 174 (39% from fat) • carb. 23g • pro. 4g
• fat 8g • sat. fat 1g • chol. 0mg • sod. 306mg
• calc. 3mg • ber 1g
13
Page 14

Classic Tomato Bruschetta
Always a popular appetizer. The topping can
be made up to a day in advance and stored in
the refrigerator until ready to serve. For a show-
stopping presentation, seek out a mixture of red,
orange and yellow grape tomatoes.
Grilled Antipasto
Serve on a large platter with some
wedges of grilled flatbread for your next
party. The colors of the vegetables will
brighten any table.
Makes 12 bruschetta
12 slices (½-inch thick) French bread
(baguette)
2 tablespoons extra virgin olive oil, divided
1 cup grape tomatoes, chopped (about
¼-inch pieces)
¼ teaspoon kosher salt
1 to 2 pinches freshly ground black pepper
2 garlic cloves, peeled and finely chopped
2 large fresh basil leaves, thinly sliced
(chiffonade)
grated or shredded Parmesan, for
sprinkling (optional)
1. Preheat grill in the closed position.
2. Using 1 tablespoon of the oil, brush all the
bread on both sides. Once the unit has
preheated, put all the bread onto the grill and
cook 3 to 5 minutes, until lightly browned.
3. While bread is grilling, prepare topping. In a
small bowl, stir together the tomatoes, salt,
pepper, garlic and basil with the remaining
oil.
4. Once bread is grilled, transfer to a platter
or large plate. Evenly divide the topping on
the grilled bread. Sprinkle with Parmesan if
desired; serve immediately.
Nutritional information per bruschetta:
Calories 116 (23% from fat) • carb. 19g • pro. 4g
• fat 3g • sat. fat 0g • chol. 0mg • sod. 197mg
• calc. 16mg • ber 1g
Makes 4 servings
½ medium eggplant, cut into ¼-inch-thick
slices
1 small red or yellow pepper (or ½
medium-large), cored, quartered and
cut into ¼-inch strips
1 small summer squash or zucchini,
halved and cut into ¼-inch strips
2 garlic cloves, peeled and smashed
1
⁄3 cup pitted niçoise olives
2 tablespoons olive oil
½ teaspoon kosher salt
pinch freshly ground black pepper
2 sprigs fresh thyme (leaves only)
½ teaspoon grated lemon zest
1. Preheat grill in the closed position.
2. While the unit is preheating, toss all of the
ingredients, except for the lemon zest,
together in a large bowl. Once hot, put
to ½ of the vegetables on the grill plates.
Tossing occasionally, cook until grill marks
are visible and vegetables are tender. Repeat
with remaining vegetables. The entire grilling
process will take about 15 to 20 minutes.
3. Remove and toss with the lemon zest.
Serve immediately.
Nutritional information per serving:
Calories 86 (70% from fat) • carb. 5g • pro.1g
• fat 7g • sat. fat 1g • chol. 0mg • sod. 271mg
• calc. 16mg • ber 3g
1
⁄
3
14
Page 15

Sliders
These mini burgers are a great addition to any
summer menu and kid-friendly too.
Makes 6 sliders
½ pound ground chuck
¼ small onion, grated
½ tablespoon Worcestershire sauce
¼ teaspoon kosher salt
¼ teaspoon freshly ground black pepper
6 miniature buns or rolls
1. Adjust feet to the tilted position. Preheat grill
in the closed position.
2. In a medium bowl add the rst ve
ingredients and with clean hands, gently mix
together to combine. Divide the meat into 6
patties, each about 1½ ounces and 2 inches
in diameter.
3. Arrange the sliders on the bottom plate.
Close, applying light pressure to the handle
for 10 seconds. Grill for 1 to 1½ minutes.
Remove the burgers and place each in a bun.
Serve immediately.
Note: For toasted buns, halve each and grill in
the closed position for 30 seconds. Remove
from the grill and proceed with cooking the
burgers.
2 flour tortillas (10 inches)
3 ounces Monterey Jack, shredded
1. Preheat grill in the closed position.
2. In a medium bowl combine the pepper,
jalapeño and onion with the salt, pepper, chili
powder and 1 tablespoon of the oil.
3. Once the grill has preheated, carefully open
it into the at position and evenly divide
the vegetables between the plates. Grill
for about 10 minutes, turning occasionally,
until vegetables are soft and slightly golden.
Remove vegetables and set aside. Carefully
wipe grill clean with a paper towel and return
to the closed position.
4. Place both tortillas on a at work surface.
Evenly divide the vegetables on the bottom
halves of the tortillas and top with the
shredded cheese, leaving a ½-inch border
around the edge. Fold the top halves of the
tortillas over the lling. Brush the outsides of
the quesadillas with the remaining oil.
5. Place one quesadilla on the bottom grill
plate and close. Grill for 4 to 5 minutes, until
cheese is melted and grill marks are visible.
Repeat with remaining quesadilla and serve.
Nutritional information per serving:
Calories 484 (51% from fat) • carb. 41g • pro. 16g
• fat 27g • sat. fat 9g • chol. 38mg • sod. 1242mg
• calc. 333mg • ber 8g
Nutritional information per slider:
Calories 168 (33% from fat) • carb. 18g • pro. 10g
• fat 6g • sat. fat 2g • chol. 23mg • sod. 323mg
• calc. 23mg • ber 0g
Easy Quesadillas for Two
We cannot think of a simpler yet more
satisfying snack.
Makes 2 servings
1 medium red bell pepper, cored and
thinly sliced
1 medium jalapeño, seeded and thinly
sliced
¼ large red onion, thinly sliced
½ teaspoon kosher salt
¼ teaspoon freshly ground black pepper
1 teaspoon chili powder
1½ tablespoons vegetable oil, divided
Grilled Steak with
Scallion Butter
Flavored butter is a simple way to elevate your
steak to restaurant quality.
Makes 2 servings
2 tablespoons unsalted butter, softened
1 teaspoon finely chopped scallion
¼ teaspoon grated lime zest
¼ teaspoon soy sauce, reduced-sodium
2 boneless rib-eye steaks, 1-inch thick
(about 8 ounces each)
2 teaspoons vegetable oil
½ teaspoon kosher salt
¼ teaspoon freshly ground black pepper
15
Page 16

1. In a small bowl combine the butter, scallion,
zest, and soy sauce until smooth. Cover with
plastic wrap and set aside in the refrigerator
until ready to use.
2. Adjust feet to the tilted position. Preheat the
grill in the closed position.
3. Coat both steaks with the oil and season with
salt and pepper.
4. Once the grill has preheated, place the
steaks on the bottom plate and cook closed
for 4 to 5 minutes for medium rare, or until
desired doneness.
5. Remove steaks from the grill and let rest for 5
minutes. Right before serving, top each steak
with the butter.
Nutritional information per serving:
Calories 510 (62% from fat) • carb. 1g • pro. 46g
• fat 35g • sat. fat 16g • chol. 164mg • sod. 739mg
• calc. 32mg • ber 0g
Grilled Scampi-Style Shrimp
These buttery, fragrant shrimp work well as an
appetizer or entrée.
Makes 2 servings
3 tablespoons unsalted butter
2 teaspoons fresh lemon juice
¾ teaspoon grated lemon zest
2 garlic cloves, finely chopped
pinch red pepper flakes (optional)
½ pound large shrimp (about 10), peeled
and deveined, tails attached
1
⁄8 teaspoon kosher salt
1
⁄8 teaspoon freshly ground black pepper
½ teaspoon finely chopped parsley
plates. Grill shrimp for 4½ to 5 minutes,
turning halfway through, until shrimp are
opaque. Remove from grill and garnish with
parsley. Serve immediately.
Nutritional information per serving:
Calories 237 (68% from fat) • carb. 3g • pro. 16g
• fat 18g • sat. fat 12g • chol. 188mg • sod. 785mg
• calc. 69mg • ber 0g
Grilled Herb Chicken
This simple yet avorful chicken is great in salads,
wraps and sandwiches, but also stands well
on its own.
Makes 2 servings
2 tablespoons olive oil
juice from one lemon
1 garlic clove, peeled and finely chopped
1 teaspoon fresh thyme leaves (from
about 3 sprigs)
¾ teaspoon kosher salt
¼ teaspoon freshly ground black pepper
2 boneless, skinless chicken breasts
(about 7 ounces each)
1. Whisk olive oil, lemon juice, garlic, thyme,
salt and pepper together in a mixing bowl.
Add the chicken and toss to coat. Cover and
let marinate in refrigerator for 30 minutes.
2. Adjust feet to the tilted position. Preheat the
grill in the closed position. Remove chicken
from marinade, shake off excess, and place
on the lower grill plate. Cook in the closed
position until chicken is cooked through and
juices run clear (about 10 to 20 minutes,
depending on the thickness of the chicken).
1. In a small a saucepan combine the butter,
lemon juice, zest, garlic and red pepper
(if using). Cook over low heat just until the
butter melts. Transfer to a medium bowl and
cool to room temperature.
2. Pat shrimp dry and season both sides with
salt and pepper. Add shrimp to the butter
mixture and toss to coat all pieces evenly.
Let shrimp marinate for about 5 minutes.
3. Adjust feet to the tilted position. Preheat
the grill in the closed position. When grill is
preheated, evenly arrange shrimp on both
Nutritional information per serving:
Calories 401 (46% from fat) • carb. 3g • pro. 51g
• fat 20g • sat. fat 3g • chol. 151mg • sod. 1130mg
• calc. 25mg • ber 1g
16
Page 17

Chocolate Panini
A decadent treat – make sure to serve with
a cold glass of milk.
Makes 2 panini
4 slices Italian or semolina bread
2 teaspoons unsalted butter, softened or
olive oil
4 ounces semisweet chocolate
(1 standard baking chocolate bar,
such as Ghirardelli)
pinch kosher salt
3. Place sandwiches on the bottom grill plate
and close. Grill panini for 4 minutes. Allow
panini to rest for 1 to 2 minutes, Cut in half
on the diagonal and serve warm.
Nutritional information per panini:
Calories 252 (43% from fat) • carb. 34g • pro. 4g
• fat 13g • sat. fat 5g • chol. 5mg • sod. 144mg
• calc. 57mg • ber 1g
Grilled Pineapple Sundae
Grilled fruit makes a healthy and elegant
end to any meal.
Makes 2 servings
1. Preheat grill in the closed position.
2. Brush one side of each slice of bread with
the butter. Lay 2 slices of bread on a work
surface, buttered side down. Top the two
slices evenly with the chocolate and a
sprinkle of salt. Top with remaining bread,
buttered side up.
3. Place sandwiches on the bottom grill plate
and close. Grill panini for 2 to 2½ minutes
or until bread is toasted and chocolate has
melted.
4. Allow panini to rest for 1 to 2 minutes. Cut in
half on the diagonal and serve warm.
Nutritional information per panini:
Calories 363 (50% from fat) • carb. 46g • pro. 4g
• fat 22g • sat. fat 11g • chol. 0mg • sod. 172mg
• calc. 34mg • ber 4g
S’mores Panini
Close your eyes and you will think that
you are sitting around the campre with
this childhood favorite.
Makes 2 panini
4 slices Italian or semolina bread
2 teaspoons unsalted butter, softened or
olive oil
1 bar (1.55 ounces) milk chocolate
4 standard marshmallows, halved
1. Preheat grill in the closed position.
2. Brush one side of each slice of bread with
the butter. Lay 2 slices of bread on a work
surface, buttered side down. Top the two
slices evenly with the chocolate and halved
marshmallows. Top with remaining bread,
buttered side up.
¼ cup packed light brown sugar
2 tablespoons unsalted butter
¼ teaspoon grated orange zest
½ teaspoon orange juice
pinch kosher salt
pinch freshly ground black pepper
2 pineapple rings, ½-inch thick
½ cup vanilla ice cream
2 tablespoons macadamia nuts, toasted
and roughly chopped
2 sprigs fresh mint, optional
1. In a small saucepan combine the rst 6
ingredients and set over low heat. Cook until
the butter has melted and the sauce has
small bubbles around the outside and is a
pourable consistency, about 3 to 5 minutes.
Keep over low heat.
2. Preheat the grill in the closed position. Brush
one side of the pineapple slices with some
of the brown sugar-butter sauce. When
the grill is preheated, place the pineapple
slices coated side down on the bottom grill
plate. Brush the tops of the pineapple with
more of the sauce and cook closed for 4 to
5 minutes, until the pineapple has softened
slightly and grill marks are visible. Brush with
more sauce during cooking if desired.
3. Remove pineapple to serving dishes. Top
each ring with vanilla ice cream, nuts and a
generous drizzle of remaining brown sugarbutter sauce. Garnish with mint, if using, and
serve immediately.
Nutritional information per serving:
Calories 358 (51% from fat) • carb. 43g • pro. 2g
• fat 21g • sat. fat 11g • chol. 45mg • sod. 170mg
• calc. 60mg • ber 1g
17
Page 18

NOTES:
18
Page 19

NOTES:
19
Page 20

NOTES:
20
Page 21

20
N OTAS:
Page 22

19
N OTAS:18Panini "S'mores"
Page 23

• Calcio 60mg • Fibra 1g
• Colesterol 45mg • Sodio 170mg
• Proteínas 2g • Grasa 21g • Grasa saturada 11g
Calorías 358 (51% de grasa) • Carbohidratos 43g
Información nutricional por porción:
(opcional) y servir inmediatamente.
de mantequilla/azúcar. Adornar con menta
nueces y una generosa cantidad de salsa
para servir. Cubrir con helado de vainilla,
3. Retirar de la parrilla y disponer sobre platos
con más salsa durante la cocción si desea.
que tenga las marcas de la parrilla. Cepillar
hasta que la piña esté un poco más suave y
cerrar las placas y asar durante 4–5 minutos,
superior de cada aro de piña con más salsa,
apuntando hacia abajo. Cepillar la parte
piña sobre la placa inferior, el lado con salsa
la salsa de mantequilla/azúcar. Colocar la
Cepillar un lado de cada aro de piña con
2. Precalentar la parrilla en posición cerrada.
Mantener caliente, a fuego lento.
se formen burbujas a la orilla de la salsa.
3–5 hasta que la mantequilla se derrita y que
una cacerola. Cocer a fuego lento durante
1. Combinar los 6 primeros ingredientes en
2 ramitas de menta fresca (opcional)
tostadas y picadas grueso
2 cucharadas de nueces de Macadamia,
½ taza de helado de vainilla
2 aros de piña de ½ pulgada de espesor
1 pizca de pimienta negra recién molida
1 pizca de sal kosher
½ cucharadita de jugo de naranja
¼ cucharadita de ralladura de naranja
2 cucharadas de mantequilla sin sal
¼ taza llena de azúcar rubio
Cantidad: 2 porciones
elegante; perfectas al nal de cualquier comida.
Las frutas asadas son un postre saludable y
Sundae de piña asada
• Calcio 57mg • Fibra 1g
• Colesterol 5mg • Sodio 144mg
• Proteínas 4g • Grasa 13g • Grasa saturada 5g
Calorías 252 (43% de grasa) • Carbohidratos 34g
Información nutricional por sándwich:
Cortar diagonalmente y servir caliente.
minutos. Dejar reposar durante 1–2 minutos.
inferior y cerrar las placas. Asar durante 4
3. Colocar los sándwiches sobre la placa
apuntando hacia arriba.
los sándwiches, el lado con mantequilla
con chocolate y malvaviscos. Cerrar
abajo. Cubrir el interior de cada rebanada
lado con mantequilla apuntando hacia
de pan sobre una supercie plana, el
de pan con mantequilla. Poner 2 rebanadas
2. Untar levemente un lado de cada rebanada
1. Precalentar la parrilla en posición cerrada.
4 malvaviscos, cortados en la mitad
leche
1 barra de 1.55 onza de chocolate con
oliva
temperatura ambiente, o aceite de
2 cucharadas de mantequilla sin sal a
4 rebanadas de pan italiano o de sémola
Cantidad: 2 panini
favorito de la infancia.
delante de una fogata, disfrutando de este
Cierre sus ojos y le parecerá que está sentado
Page 24

• Calcio 34mg • Fibra 4g
• Colesterol 0mg • Sodio 172mg
Información nutricional por sándwich:
("semisweet")
oliva
temperatura ambiente, o de aceite de
leche fría.
Panini de chocolate
17
• Calcio 25mg • Fibra 1g
• Proteínas 4g • Grasa 22g • Grasa saturada 11g
Calorías 363 (50% de grasa) • Carbohidratos 46g
diagonalmente y servir caliente.
4. Dejar reposar durante 1–2 minutos. Cortar
y que el chocolate esté derretido.
2–2½ minutos, hasta que el pan esté tostado
inferior y cerrar las placas. Asar durante
3. Colocar los sándwiches sobre la placa
mantequilla apuntando hacia arriba.
encima. Cerrar los sándwiches, el lado con
con chocolate y esparcir un poco de sal
abajo. Cubrir el interior de cada rebanada
lado con mantequilla apuntando hacia
de pan sobre una supercie plana, el
de pan con mantequilla. Poner 2 rebanadas
2. Untar levemente un lado de cada rebanada
1. Precalentar la parrilla en posición cerrada.
1 pizca de sal kosher
4 onzas de chocolate semi-dulce
2 cucharadas de mantequilla sin sal a
4 rebanadas de pan italiano o de sémola
Cantidad: 2 panini
Una exquisita delicia. Sírvalos con un vaso de
• Colesterol 151mg • Sodio 1130mg
• Proteínas 51g • Grasa 20g • Grasa saturada 3g
Calorías 401 (46% de grasa) • Carbohidratos 3g
Información nutricional por porción:
que el jugo salga claro.
pechugas), hasta que el pollo esté cocido y
10–20 minutos (según el espesor de las
inferior. Cerrar las placas y asar durante
Escurrir el pollo y colocarlo sobre la placa
Precalentar la parrilla en posición cerrada.
2. Alzar los pies delanteros del aparato.
marinar en el refrigerador durante 30 minutos.
Agregar el pollo y revolver. Cubrir y dejar
ajo, el tomillo, la sal y la pimienta en un tazón.
1.
Combinar el aceite de oliva, el jugo de limón, el
piel
7 onzas cada una) deshuesadas y sin
pechugas de pollo (de aproximadamente
2
molida
¼ cucharadita de pimienta negra recién
¾ cucharadita de sal kosher
(aproximadamente 3 ramitas)
1 cucharadita de hojas de tomillo fresco
1 diente de ajo, finamente picado
jugo de un limón
2 cucharadas de aceite de oliva
Cantidad: 2 porciones
simplemente para comer así.
ideal para preparar ensaladas o sándwiches, o
Este simple, sin embrago sabroso pollo es
Pollo a la parrilla con hierbas
Page 25

• Calcio 69mg • Fibra 0g
• Colesterol 188mg • Sodio 785mg
• Proteínas 16g • Grasa 18g • Grasa saturada 12g
Calorías 237 (68% de grasa) • Carbohidratos 3g
Información nutricional por porción:
inmediatamente.
de la parrilla y decorar con perejil. Servir
tiempo, hasta que estén opacos. Retirar
4½–5 minutos, dándole vuelta a mitad de
sobre ellas. Asar los camarones durante
Abrir las placas y colocar los camarones
Precalentar la parrilla en posición cerrada.
minutos.
Dejar marinar durante aproximadamente 5
mantequilla.
Combinar los camarones con la mezcla de
sazonar ambos lados con sal y pimienta.
dejar enfriar a temperatura ambiente.
derretido. Reservar, en un tazón mediano, y
lento, justo hasta que la mantequilla se haya
en una cacerola pequeña. Cocer a fuego
ralladura, el ajo y las hojuelas de pimienta
molida
limpios y con cola
(aproximadamente 10), pelados,
(opcional)
plato principal.
Camarones asados
16
• Calcio 32mg • Fibra 0g
• Colesterol 164mg • Sodio 739mg
Información nutricional por porción:
3. Alzar los pies delanteros del aparato.
2. Secar los camarones con papel toalla y
1. Combinar la mantequilla, el jugo de limón, la
½ taza de perejil fresco, finamente picado
⁄8 cucharadita de pimienta negra recién
1
⁄8 cucharadita de sal kosher
1
½ libra de camarones grandes
1 pizca de hojuelas de pimienta roja
2 dientes de ajo, finamente picados
¾ cucharadita de ralladura de limón
2 cucharaditas de jugo de limón fresco
3 cucharadas de mantequilla sin sal
Cantidad: 2 porciones
restaurante.
Este plato fragante es perfecto como aperitivo o
molida
(aproximadamente 8 onzas cada uno)
deshuesados de 1 pulgada de espesor
cucharadita de salsa de soya baja en sodio
finamente picada
temperatura ambiente
de cebolleta
• Proteínas 46g • Grasa 35g • Grasa saturada 16g
Calorías 510 (62% de grasa) • Carbohidratos 1g
bistec.
nuez de mantequilla aromatizada sobre cada
minutos. Justo antes de servir, colocar una
5. Retirar de la parrilla y dejar reposar por 5
carne poco hecha), o al gusto.
placas y asar durante 4–5 minutos (para
4. Colocar la carne sobre la parrilla, cerrar las
sal y pimienta.
3. Cepillar la carne con el aceite y sazonar con
Precalentar la parrilla en posición cerrada.
2. Alzar los pies delanteros del aparato.
y refrigerar hasta el momento de usar.
pequeño. Cubrir con una película de plástico
ralladura y la salsa de soya en un tazón
1. Combinar la mantequilla, la cebolleta, la
¼ cucharadita de pimienta negra recién
½ cucharadita de sal kosher
2 cucharaditas de aceite vegetal
2 entrecots de res (filetes "rib-eye")
¼
¼ cucharadita de ralladura de limón
1 cucharadita de cebolleta ("scallion"),
2 cucharadas de mantequilla sin sal, a
Cantidad: 2 porciones
sencilla de elevar su bistec a calidad de
Usar mantequilla aromatizada es una manera
Bistec asado con mantequilla
Page 26

15
• Calcio 333mg • Fibra 8g
• Colesterol 38mg • Sodio 1242mg
• Proteínas 16g • Grasa 27g • Grasa saturada 9g
Calorías 484 (51% de grasa) • Carbohidratos 41g
Información nutricional por porción:
con la otra quesadilla. Servir.
y que tenga las marcas de la parrilla. Repetir
minutos, hasta que el queso esté derretido
inferior y cerrar las placas. Asar durante 4–5
5. Colocar una quesadilla sobre la placa
el aceite remanente.
mitad. Cepillar la orilla de las quesadillas con
½ pulgada alrededor. Doblar la tortilla en la
vegetales y el queso, dejando una orilla de
Cubrir la mitad inferior de cada tortilla con los
4. Poner las tortillas sobre una supercie plana.
placas con papel toalla y cerrarlas.
ligeramente dorados. Reservar. Limpiar las
de vez en cuando, hasta que estén suaves y
aproximadamente 10 minutos, volteándolos
sobre las placas. Asar los vegetales durante
3. Abrir las placas y disponer los vegetales
del aceite en un tazón mediano.
la sal, la pimienta, el chile y una cucharada
2. Combinar el pimiento, el jalapeño, la cebolla,
1. Precalentar la parrilla en posición cerrada.
3 onzas de queso Monterey Jack, rallado
diámetro
2 tortillas de trigo de 10 pulgadas de
1½ cucharada de aceite vegetal
1 cucharadita de chile en polvo
molida
¼ cucharadita de pimienta negra recién
½ cucharadita de sal kosher
¼ cebolla roja grande, en rodajas finas
rodajas finas
1 jalapeño mediano, sin semillas y en
1 pimiento rojo mediano, en rodajas finas
Cantidad: 2 porciones
• Calcio 23mg • Fibra 0g
• Colesterol 23mg • Sodio 323mg
• Proteínas 10g • Grasa 6g • Grasa saturada 2g
Calorías 168 (33% de grasa) • Carbohidratos 18g
Información nutricional por mini hamburguesa:
hamburguesas.
posición cerrada. Retirar de la placa y asar las
en la mitad y asarlos durante 30 segundos, en
Nota: Si desea tostar los pancitos, cortarlos
hamburguesas. Servir inmediatamente.
Asar durante 1–1½ minuto. Armar las
levemente la agarradera por 10 segundos.
inferior. Cerrar las placas, presionando
3. Colocar las hamburguesitas sobre la placa
diámetro.
aproximadamente 1½ onza y 2 pulgadas de
con las manos. Formar 6 hamburguesitas de
un tazón mediano, revolviendo suavemente
2. Combinar los cinco primeros ingredientes en
Precalentar la parrilla en posición cerrada.
1. Alzar los pies delanteros del aparato.
6 mini pancitos
molida
¼ cucharadita de pimienta negra recién
¼ cucharadita de sal kosher
½ cucharada de salsa Worcestershire
¼ cebolla pequeña, rallada
½ libra de carne de res (paleta) molida
Cantidad: 6 mini hamburguesas
verano y le encantan a los niños.
inglés, son una gran adición a cualquier menú de
Estas mini hamburguesas, llamadas "sliders" en
Mini hamburguesas
sabroso y llena.
Quesadillas
Este tentempié es muy sencillo. Sin embargo, es
• Calcio 16mg • Fibra 3g
• Colesterol 0mg • Sodio 271mg
• Proteínas 1g • Grasa 7g • Grasa saturada 1g
Calorías 86 (70% de grasa) • Carbohidratos 5g
Page 27

14
⁄
3
a ½
1
Información nutricional por porción:
Servir inmediatamente.
ralladura.
3. Retirar de la parrilla y combinar con la
debería demorar 15–20 minutos.
con el resto de los vegetales. El proceso
las marcas de la parrilla. Reservar. Repetir
que los vegetales estén tiernos y que tengan
de los vegetales sobre las placas. Asar hasta
ralladura, en un tazón grande. Colocar
2. Combinar todos los ingredientes, excepto la
1. Precalentar la parrilla en posición cerrada.
½ cucharadita de ralladura de limón
solamente)
2 ramitas de tomillo fresco (hojas
1 pizca de pimienta negra recién molida
½ cucharadita de sal kosher
2 cucharadas de aceite de oliva
deshuesadas
⁄3 taza de aceitunas "niçoises"
1
2 dientes de ajo, majados
tiras de ¼ pulgada
o calabacín ("zucchini") pequeño, en
1 calabacín amarillo ("summer squash")
¼ pulgada
cortado en cuartos, y luego en tiras de
1 pimiento rojo o amarillo pequeño,
pulgada
½ berenjena mediana, en rodajas de ¼
Cantidad: 4 porciones
remanente en un tazón pequeño.
la pimienta, el ajo, la albahaca y el aceite
la cobertura. Combinar los tomates, la sal,
3. Mientras el pan está tostándose, preparar
ligeramente.
pan durante 3–5 minutos, hasta dorarse
con una cucharada del aceite. Asar el
2. Cepillar un lado de cada rebanada de pan
1. Precalentar la parrilla en posición cerrada.
queso Parmesano rallado (opcional)
rebanadas
2 hojas de albahaca fresca, finamente
2 dientes de ajo, finamente picados
1–2 pizcas de pimienta negra recién molida
¼ cucharadita de sal kosher
de ¼ pulgada
1 taza de tomates de pera, en pedazos
extra
2 cucharadas de aceite de oliva virgen
pan francés
12 rebanadas de ½ pulgada de espesor de
Cantidad: 12 "bruschettas"
de pera rojos, naranjas y amarillos.
Para un efecto visual hermoso, combine tomates
guardarse en la nevera hasta el momento de usar.
cobertura puede prepararse el día anterior y
Este bocadillo siempre es muy popular. La
"Bruschettas" clásicas
iluminará la mesa.
próxima fiesta. El color de los vegetales
pedazos de pan de pizza durante su
Sírvalo sobre un plato grande con
Antipasto asado
• Calcio 16mg • Fibra 1g
• Colesterol 0mg • Sodio 197mg
• Proteínas 4g • Grasa 3g • Grasa saturada 0g
Calorías 116 (23% de grasa) • Carbohidratos 19g
Información nutricional por "bruschetta":
encima (opcional). Servir inmediatamente.
rebanadas. Esparcir queso Parmesano
plato grande. Dividir la cobertura entre las
4. Una vez tostado, poner el pan sobre un
• Calcio 3mg • Fibra 1g
• Colesterol 0mg • Sodio 306mg
• Proteínas 4g • Grasa 8g • Grasa saturada 1g
Calorías 174 (39% de grasa) • Carbohidratos 23g
Información nutricional por porción:
minutos, hasta que el queso esté derretido.
regresarlo sobre la parrilla. Asar durante 3–4
½–1 pulgada sin queso. Cerrar el sándwich y
queso Mozzarella fresco, dejando una orilla de
rellenarlo con queso Parmesano y un poco de
mezcla de pesto con aceite de oliva, y luego
favorita consiste en untar el pan con una
horizontalmente en la mitad. Nuestra receta
retirarlo cuidadosamente de la placa y cortarlo
puede rellanar el pan – después de asarlo,
añadir vegetales crudos o cocinados. También
Puede asar masa simple, sin aceite, y luego
Page 28

13
solamente)
descubrir nuestra receta)
casera (visitar www.cuisinart.com para
spizza rellenos.
asados
• Calcio 81mg • Fibra 4g
• Colesterol 28mg • Sodio 606mg
Información nutricional por sándwich:
de sándwiches de pan de pizza asados.
Nota: Existe una cantidad innita de variaciones
caliente.
de la parrilla. Salpicar con sal, cortar y servir
masa esté cocida y que tenga las marcas
y asar durante 5–6 minutos, hasta que la
abajo, y cepillar el otro lado. Cerrar las placas
inferior, el lado cepillado apuntando hacia
aromatizado. Colocar la masa sobre la placa
4. Cepillar un lado de la masa con el aceite
tazón pequeño.
3. Combinar el aceite, el romero y el ajo en un
plástico hasta el momento de usar.
Cubrir sin apretar con una película de
aproximadamente 10 pulgadas de ancho.
ligeramente más pequeño que un plato, de
2. Estirar la masa hasta formar un rectángulo
1. Precalentar la parrilla en posición cerrada.
sal kosher, a su gusto
1 diente de ajo, finamente picado
1 ramita de romero fresco (hojas
2 cucharadas de aceite de oliva
½ libra de masa de pizza comprada o
Cantidad: 4 porciones
variaciones, incluso sándwiches de pan de
innitas. Véase la nota más abajo para descubrir
con hierbas básico, pero las posibilidades son
La receta a continuación es para pan de pizza
y cebolla
Sándwiches de pan de pizza
• Proteínas 10g • Grasa 13g • Grasa saturada 6g
Calorías 285 (41% de grasa) • Carbohidratos 32g
Cortar diagonalmente y servir caliente.
4. Dejar reposar durante 2 minutos.
segundos. Asar durante 4–5 minutos.
moderada sobre la agarradera durante 30
inferior y cerrar las placas, aplicando presión
3. Colocar los sándwiches sobre la placa
lado con aceite apuntando hacia arriba.
con canela y sal y cerrar los sándwiches, el
la manzana, la cebolla y el queso. Salpicar
Armar los sándwiches, disponiendo en orden:
de cada rebanada con la mostaza con miel.
aceite apuntando hacia abajo. Untar el interior
pan sobre una supercie plana, el lado con
de pan con aceite. Poner 2 rebanadas de
2. Cepillar levemente un lado de cada rebanada
1. Precalentar la parrilla en posición cerrada.
⁄8 cucharadita de sal kosher
1
¼ cucharadita de canela en polvo
2 onzas de queso Brie, en tajadas
pequeña o mediana)
(aproximadamente ¼ de cebolla
¼ taza de cebolla, en rodajas finas
pequeña)
(aproximadamente ½ manzana
Granny Smith), en rebanadas finas
½ taza de manzana (preferentemente
2 cucharaditas de mostaza con miel
½ cucharada de aceite de oliva
4 rebanadas de pan artesanal
Cantidad: 2 panini
salados y cremosos.
Estos sándwiches son a la vez dulces,
Panini de queso Brie, manzana
• Calcio 235mg • Fibra 1g
• Colesterol 72mg • Sodio 838mg
• Proteínas 16g • Grasa 44g • Grasa saturada 16g
Calorías 509 (78% de grasa) • Carbohidratos 12g
Información nutricional por sándwich:
hasta el momento de asar los panini.
las placas y mantener el aparato encendido
cuidadosamente con papel toalla. Cerrar
para absorber la grasa. Limpiar las placas
crujiente. Reservar, encima de papel toalla
6–8 minutos por cada lado, hasta que esté
los pies delanteros. Asar el tocino durante
de asar los panini. Abrir las placas y alzar
* Puede asar el tocino a la parrilla antes
Cortar diagonalmente y servir caliente.
4. Dejar reposar durante 2 minutos.
bien dorado.
que el queso esté derretido y que el pan esté
segundos. Asar durante 4–6 minutos, o hasta
Page 29

12
moderada sobre la agarradera durante 20
inferior y cerrar las placas, aplicando presión
3. Colocar los sándwiches sobre la placa
lado con aceite apuntando hacia arriba.
con mayonesa y cerrar los sándwiches, el
queso. Untar el interior de cada rebanada
el tomate, la sal, la pimienta, la rúcula y el
sándwiches, disponiendo en orden: el tocino,
aceite apuntando hacia abajo. Armar los
pan sobre una supercie plana, el lado con
de pan con aceite. Poner 2 rebanadas de
2. Cepillar levemente un lado de cada rebanada
1. Precalentar la parrilla en posición cerrada.
2 cucharaditas de mayonesa
(3–4 rebanadas)
2 onzas de queso Cheddar, rebanado
taza)
1 puñado de rúcula (aproximadamente ½
1 pizca de pimienta negra recién molida
1 pizca de sal kosher
pulgada
1 tomate italiano, en rodajas de ¼
4–6 tajadas de tocino cocido*
ambiente
mantequilla sin sal a temperatura
2 cucharadas de aceite de oliva o
4 rebanadas de pan de masa fermentada
Cantidad: 2 panini
derretido y que el pan esté bien dorado.
durante 4–6 minutos, o hasta que el queso esté
sobre la agarradera durante 30 segundos. Asar
cerrar las placas, aplicando presión moderada
Colocar los sándwiches sobre la placa inferior y
3.
lado con aceite apuntando hacia arriba.
y el queso suizo. Cerrar los sándwiches, el
orden: la carne curada, el repollo encurtido
ruso y armar los sándwiches, disponiendo en
cada rebanada con 1 cucharadita del aliño
apuntando hacia abajo. Untar el interior de
sobre una supercie plana, el lado con aceite
de pan con aceite. Poner 2 rebanadas de pan
2. Cepillar levemente un lado de cada rebanada
1. Precalentar la parrilla en posición cerrada.
derretida
1 cucharada de mantequilla sin sal,
(aproximadamente 2 rebanadas)
1 onza de queso suizo, rebanado
("sauerkraut"), escurrido
¼ taza de repollo encurtido
en tajadas finas
4 onzas de carne curada ("corned beef"),
dressing") o "Thousand Island"
4 cucharaditas de aliño ruso ("Russian
ambiente
mantequilla sin sal a temperatura
2 cucharadas de aceite de oliva o
4 rebanadas de pan de centeno
aún más que los BLTs tradicionales!
añadimos queso Cheddar. ¡Puede que le guste
rúcula en vez de la lechuga tradicional, y también
Preparamos estos sándwiches clásicos con
Cheddar
Sándwiches BLT con queso
• Calcio 108mg • Fibra 2 g
• Colesterol 22mg • Sodio 780mg
• Proteínas 15g • Grasa 13g • Grasa saturada 4g
Calorías 442 (38% de grasa) • Carbohidratos 31g
Información nutricional por sándwich:
pepinillos, sal y pimienta.
de ketchup, 2 cucharadas de picadillo de
⁄3 taza de mayonesa, 2½ cucharadas
1
pequeño
* Aliño ruso casero: Combinar en un tazón
diagonalmente y servir caliente.
4. Dejar reposar durante 2 minutos. Cortar
Cantidad: 2 panini
ruso casero.
delicatessen. Aún más delicioso con aliño
Una versión casera de un favorito de
Sándwiches Reuben asados
• Calcio 228mg • Fibra 3g
• Colesterol 33mg • Sodio 514mg
• Proteínas 10g • Grasa 24g • Grasa saturada 8g
Calorías 304 (69% de grasa) • Carbohidratos 15g
Información nutricional por sándwich:
Cortar en la mitad y servir inmediatamente.
4. Dejar reposar durante 2 minutos.
bien dorado.
que el queso esté derretido y que el pan esté
segundos. Asar durante 4–6 minutos, o hasta
moderada sobre la agarradera durante 20
inferior y cerrar las placas, aplicando presión
3. Colocar los sándwiches sobre la placa
Page 30

11
con aceite apuntando hacia arriba.
con mayonesa y cerrar los sándwiches, el lado
del queso. Untar el interior de cada rebanada
aguacate, el tomate, la sal, la pimienta y el resto
disponiendo en orden: la mitad del queso, el
apuntando hacia abajo. Armar los sándwiches,
sobre una supercie plana, el lado con aceite
de pan con aceite. Poner 2 rebanadas de pan
Cepillar levemente un lado de cada rebanada
2.
1. Precalentar la parrilla en posición cerrada.
2 cucharaditas de mayonesa
1 pizca de pimienta negra recién molida
¼–½ cucharadita de sal kosher
pulgada
1 tomate italiano, en rodajas de ¼
½ aguacate mediano, rebanado
(3–4 rebanadas)
2 onzas de queso Cheddar, rebanado
2 cucharadas de aceite de oliva
trigo
fermentada, pan italiano o pan de
4 rebanadas de pan de masa
Cantidad: 2 panini
una supercie plana, el lado con aceite
aceite. Poner 2 rebanadas de pan sobre
un lado de cada rebanada de pan con
tazón pequeño. Reservar. Cepillar levemente
2. Combinar la mayonesa y el pesto en un
1. Precalentar la parrilla en posición cerrada.
(aproximadamente 4 rebanadas)
2 onzas de queso suizo, rebanado
cebolla roja pequeña)
(aproximadamente un cuarto de
2 rodajas finas de cebolla roja
tiras de ½ pulgada
1 pimiento rojo asado (escurrido), en
finas
4 onzas de pavo ahumado, en rebanadas
2 cucharadas de aceite de oliva
4 rebanadas de pan artesanal
1 cucharada de pesto
1 cucharada de mayonesa
Cantidad: 2 panini
Sustancioso sándwich gourmet lleno de sabor.
mayonesa al pesto
están perfectamente maduros.
Aún más sabrosos en verano, cuando los tomates
tomate y aguacate
pimiento asado, queso suizo y
Panini de pavo ahumado,
Sándwiches asados de queso,
• Calcio 108mg • Fibra 2 g
• Colesterol 22mg • Sodio 780mg
• Proteínas 15g • Grasa 13g • Grasa saturada 4g
• Calcio 350mg • Fibra 4g
• Colesterol 60mg • Sodio 1126mg
• Proteínas 23g • Grasa 24g • Grasa saturada 7g
Calorías 440 (49% de grasa) • Carbohidratos 33g
Información nutricional por sándwich:
diagonalmente y servir caliente.
4. Dejar reposar durante 1–2 minutos. Cortar
ligeramente tostado.
que el queso esté derretido y que el pan esté
segundos. Asar durante 4–5 minutos, o hasta
moderada sobre la agarradera durante 30
inferior y cerrar las placas, aplicando presión
3. Colocar los sándwiches sobre la placa
aceite apuntando hacia arriba.
queso. Cerrar los sándwiches, el lado con
orden: el pavo, el pimiento, la cebolla y el
Armar los sándwiches, disponiendo en
cada rebanada con la mayonesa al pesto.
apuntando hacia abajo. Untar el interior de
Calorías 313 (38% de grasa) • Carbohidratos 31g
Información nutricional por sándwich:
diagonalmente y servir caliente.
4. Dejar reposar durante 1–2 minutos. Cortar
ligeramente tostado.
que el queso esté derretido y que el pan esté
segundos. Asar durante 4–5 minutos, o hasta
moderada sobre la agarradera durante 30
inferior y cerrar las placas, aplicando presión
3. Colocar los sándwiches sobre la placa
hacia arriba.
sándwiches, el lado con aceite apuntando
el tomate, la albahaca y el queso. Cerrar los
sándwiches, disponiendo en orden: el jamón,
aceite apuntando hacia abajo. Armar los
pan sobre una supercie plana, el lado con
de pan con aceite. Poner 2 rebanadas de
2. Cepillar levemente un lado de cada rebanada
1. Precalentar la parrilla en posición cerrada.
Page 31

10
rebanado
2 onzas de queso Mozzarella fresco,
4 hojas de albahaca fresca
pulgada
1 tomate italiano, en rodajas de ¼
2 rebanadas finas de jamón Prosciutto
½ cucharada de aceite de oliva
4 rebanas de ciabatta (chapata)
Cantidad: 2 panini
para preparar este sándwich italiano clásico.
Siempre utilice los ingredientes más frescos
Prosciutto y Mozzarella
Panini de tomate, jamón
• Calcio 313mg • Fibra 9g
• Colesterol 10mg • Sodio 547mg
• Proteínas 15g • Grasa 15g • Grasa saturada 4g
Calorías 429 (30% de grasa) • Carbohidratos 63g
Información nutricional por sándwich:
diagonalmente y servir caliente.
3. Dejar reposar durante 1 minuto. Cortar
ligeramente.
durante 2–2½ minutos, o hasta dorarse
placa inferior y cerrar las placas. Asar
2. Colocar los sándwiches sobre la
con mantequilla apuntando hacia arriba.
de banano. Cerrar los sándwiches, el lado
miel. Sazonar con sal. Cubrir con rodajas
rebanada con mantequilla de cacahuate y
hacia abajo. Untar el interior de cada
plana, el lado con mantequilla apuntando
2 rebanadas de pan sobre una supercie
rebanada de pan con mantequilla. Poner
Untar levemente un lado de cada
1. Precalentar la parrilla en posición cerrada.
1 banano largo, en rodajas finas
cacahuate natural/sin azúcar)
cucharaditas si usa mantequilla de
1 cucharadita de miel (utilice 2
1 pizca de sal kosher
cacahuate cremosa
2 cucharadas de mantequilla de
temperatura ambiente
2 cucharadas de mantequilla sin sal, a
integral
4 rebanadas de pan de molde blanco o
Cantidad: 2 panini
sean un poco más dulces.
un poco más de miel para que los sándwiches
cacahuate 100% natural, pero tendrá que usar
sándwich. Puede utilizar mantequilla de
Fue Elvis Presley quien popularizó este
cacahuate y banano
Panini de mantequilla de
429mg • Calcio 423mg • Fibra 2 g
Grasa saturada 10g • Colesterol 38mg • Sodio
• Proteínas 8g • Grasa 18g •
Calorías 406 (39% de grasa) • Carbohidratos 55g
Información nutricional por sándwich:
Cortar diagonalmente y servir caliente.
5. Dejar reposar durante 1½–2 minutos.
minutos, o hasta dorarse ligeramente.
inferior y cerrar las placas. Asar durante 2
4. Colocar los sándwiches sobre la placa
apuntando hacia arriba.
los sándwiches, el lado con mantequilla
con una cucharada de mermelada. Cerrar
de cada rebanada con la mezcla. Cubrir
obtener una mezcla suave. Untar el interior
crema, la sal, la vainilla y el azúcar hasta
3. En un tazón pequeño, combinar el queso
hacia abajo.
plana, el lado con mantequilla apuntando
2 rebanadas de pan sobre una supercie
rebanada de pan con mantequilla. Poner
2. Untar levemente un lado de cada
1. Precalentar la parrilla en posición cerrada.
frambuesa o fresa)
(también puede usar mermelada de
albaricoque/chabacano/damasco
2 cucharadas de mermelada de
1 cucharadita de azúcar granulado
vainilla
¼ cucharadita de extracto natural de
1 pizca de sal kosher
temperatura ambiente
2 onzas de queso crema, a
temperatura ambiente
2 cucharadas de mantequilla sin sal, a
4 rebanadas de pan de pasas y canela
Cantidad: 2 panini
una taza de café.
Una delicia, perfecta para acompañar
desayuno
Panini daneses para
Page 32

9
Sundae de piña asada ..............................................17
Panini "S'mores" ..................................................17
Panini de chocolate ................................................17
Pollo a la parrilla con hierbas .........................................16
Camarones asados ................................................16
Bistec asado con mantequilla de cebolleta ..............................15
Quesadillas.......................................................15
Mini hamburguesas ................................................15
Antipasto asado ...................................................14
"Bruschettas" clásicas ..............................................14
Sándwiches de pan de pizza asados...................................13
Panini de queso Brie, manzana y cebolla ...............................13
Sándwiches BLT con queso Cheddar ..................................12
Sándwiches Reuben asados .........................................12
Sándwiches asados de queso, tomate y aguacate ........................11
y mayonesa al pesto ...............................................11
Panini de pavo ahumado, pimiento asado, queso suizo
Panini de tomate, jamón Prosciutto y Mozzarella .........................10
Panini de mantequilla de cacahuate y banano ...........................10
Panini daneses para desayuno ...................................... 10
RECETAS
Page 33

E IB-11499-ESP
13CE000807
Impreso en la China
East Windsor, NJ 08520
150 Milford Road
©2013 Cuisinart
cionadas en ésta per tenecen a sus titulares respectivos.
Todas marcas registradas o marcas de comercio men-
Page 34

7
bajo garantía.
repararlo y asegurarse de que el producto esté
correctamente, usar las partes correctas para
1-800-726-0190 a fin de diagnosticar el problema
deberían llamar al servicio posventa de Cuisinart al
informe al personal del centro de servicio que
a un centro de servicio no autorizado, por favor
Importante: Si debe llevar el aparato defectuoso
Estado a otro.
puede tener otros derechos que varían de un
mencionadas pueden no regir para usted. Usted
o consecuentes, de modo que las limitaciones
la exclusión o limitación de daños incidentales
o consecuentes. Algunos Estados no permiten
excluye expresamente todos los daños incidentales
mal uso, negligencia o accidente. Esta garantía
y no es válida en caso de daños causados por
cubre el uso institucional o comercial del producto,
uso de un convertidor de voltaje. Esta garantía no
por Cuisinart, así como los daños causados por el
accesorios, partes o reparaciones no autorizados
excluye expresamente los daños causados por
repuesto autorizados solamente. Esta garantía
corriente de 120V, usando accesorios y partes de
de fabricación y ha sido diseñado para uso sobre
Este aparato satisface las más altas exigencias
envío no serán cubiertos bajo esta garantía.
Los productos perdidos y/o lastimados durante el
paquetes mandados a una dirección equivocada.
daños ocurridos durante el transporte o por los
seguimiento. Cuisinart no será responsable por los
paquete por un método de entrega con seguro y
mayor seguridad, le aconsejamos que mande su
otras formas de pago. IMPORTANTE: Para
información pertinente. Sentimos no poder aceptar
la descripción del problema, así como cualquier
Recuerde incluir su nombre, dirección y teléfono,
726-0190 para recibir instrucciones de envío.
una prueba de compra y deben llamar al 1-800Los residentes de California sólo necesitan dar
postal de US$10.00 por gastos de manejo y envío.
con su recibo de compra y un cheque o giro
AZ 85307. Regrese el aparato defectuoso, junto
Cuisinart, 7475 North Glen Harbor Blvd, Glendale,
1-800-726-0190 o regrese el aparato defectuoso a:
garantía, llame a nuestra línea directa gratuita al
nuestra opción). Para obtener servicio bajo esta
garantía, la reparemos o reemplazaremos (a
materiales o fabricación durante el período de
Si este aparato presentara algún defecto de
ANTES DE HACER REPARAR SU APARATO
de este
®
. Los residentes del
en una tienda,
®
garantía.
de los productos defectuosos durante el período de
los gastos de reparación, reemplazo, manejo y envío
800-800-726-0190. Cuisinart será responsable por
esto, se debe llamar a nuestro servicio posventa al
a Cuisinart para que lo reparen o lo cambien. Para
desean, mandar el aparato defectuoso directamente
residentes de California también pueden, si lo
defectuosos durante el período de garantía. Los
reparación, reemplazo o reembolso de los productos
será responsable por los gastos de servicio,
o reparar el aparato de manera económica. Cuisinart
independiente, siempre en cuando se pueda ajustar
podrá llevar el aparato a un centro de servicio
estas dos opciones no satisfacen al consumidor,
por el consumidor hasta que éste se dañe. Si
menos la cantidad imputable al uso del producto
el consumidor por el precio original del producto,
independiente, cambiará el producto o reembolsará
referirá el consumidor a un centro de servicio
tipo. La tienda, a su opción, reparará el producto,
otra tienda que venda productos Cuisinart
defectuoso a la tienda donde lo compraron o (B) a
estado de California pueden (A) regresar el producto
bajo el período de garantía
La ley del estado de California ofrece dos opciones
RESIDENTES DE CALIFORNIA SOLAMENTE
de 36 meses a partir de la fecha de fabricación.
del recibo de compra, el período de garantía será
para recibir servicio bajo esta garantía. En ausencia
embargo, registrar el producto no es necesario
la verificación de la fecha de compra original. Sin
disponible en www.cuisinart.com a fin de facilitar
Le aconsejamos que llene el formulario de registro
doméstico y según las instrucciones.
en cuando el aparato haya sido utilizado para uso
después de la fecha de compra original, siempre
defecto de materiales o fabricación durante 1 año
Cuisinart garantiza este aparato contra todo
no es para los detallistas u otros comerciantes.
estados donde la ley lo permita, esta garantía
para uso personal o casero. A excepción de los
comprado su aparato Cuisinart
solamente. Usted es un consumidor si ha
los consumidores
Esta garantía es para
un año
Garantía limitada de
GARANTÍA
Page 35

6
alrededor de la parte trasera de la base.
antes de guardarlo. El cable puede enrollarse
Asegúrese de que el aparato esté frío y seco
ALMACENAJE
metálicos.
utilice limpiadores abrasivos o estropajos
húmedo para limpiar las manchas. Nunca
paño suave seco. Utilice un paño ligeramente
Limpie el cuerpo del aparato y la tapa con un
después tengan sabor a mariscos.
limón para evitar que los alimentos cocinados
recomendamos que restriegue las placas con
Nota: Después de cocinar mariscos, le
antiadherente de las placas.
metálicos. Esto podría dañar el revestimiento
para limpiar las placas. No utilice estropajos
en el lavavajillas. No utilice utensilios de metal
retirarlas o limpiarlas. Lave las placas a mano o
enfríen durante 30 minutos o más antes de
liberación. Importante: Permita que las placas
Retire las placas, presionando los botones de
lavavajillas.
goteo. Lave la bandeja de goteo a mano o en el
Tire la grasa acumulada en la bandeja de
antes de manipularlo.
Permita que enfríe durante 30 minutos o más
Después de terminar, desenchufe el aparato.
ANTES DE LIMPIARLO.
Y PERMITA QUE ENFRÍE COMPLETAMENTE
PRECAUCIÓN: DESCONECTE EL APARATO
LIMPIEZA
INSTRUCCIONES DE
un técnico autorizado.
• Cualquier otro servicio debe ser realizado por
menos 30 minutos antes de limpiarlo.
• Permita que el aparato enfríe durante por lo
siguiente.
papel toalla antes de pasar a la receta
bandeja de goteo y que limpie las placas con
de calor para empujar los residuos en la
utensilios de madera o de plástico a prueba
recetas, le recomendamos que utilice
• Si necesita limpiar las placas entre dos
contacto con las placas calientes.
• No permita que utensilios de plástico hagan
de plástico a prueba del calor.
placas. Solamente use utensilios de madera o
dañar el revestimiento antiadherente de las
• Nunca utilice utensilios de metal. Esto podría
MANTENIMIENTO
INSTRUCCIONES DE
que lo use. Esto es normal.
humo y un ligero olor a quemado la primera vez
IMPORTANTE: Puede que el aparato produzca
menos 30 minutos antes de manipularlo.
Permita que el aparato enfríe durante por lo
tapa.
guantes para el horno/manoplas. No toque la
durante el uso, sosténgalo por la base, usando
quemaduras. Si necesita mover el aparato
el uso, pero no suficientemente para provocar
La base del aparato se volverá caliente durante
horno/manoplas.
la tapa durante el uso, utilice guantes para el
después de usar el aparato. Si necesita ajustar
toque durante el uso o inmediatamente
volverá muy caliente durante el uso. No la
La tapa, hecha de acero inoxidable, también se
inmediatamente después de usar el aparato.
el uso. No los toque durante el uso o
a presión y se volverán muy calientes durante
la agarradera están hechos de aluminio fundido
permanece fría durante el uso. Los "brazos" de
, agarre la agarradera por la
®
.
parte de plástico. Esta parte de la agarradera
abrir el Griddler
muy caliente durante el uso. No lo toque. Para
Precaución: El cuerpo del aparato se vuelve
Esto es normal
termostato regule la temperatura de las placas.
encender durante el uso, cada vez que el
El indicador verde se apagará y se volverá a
indicador verde de “listo” se encenderá. Nota:
Cuando alcance la temperatura operativa, el
minutos para alcanzar la temperatura operativa.
cerradas, El aparato puede demorar hasta 8
Permita que el aparato caliente con las placas
Page 36

5
1.
de las placas:
le aconsejamos que cocine en la placa inferior.
pero no necesita toda la superficie de cocción,
en posición abierta
®
Si desea usar el Griddler
encendido.
encenderá para indicar que el aparato está
toma de corriente. El indicador luminoso rojo se
Instale las placas y enchufe el cable en una
OPERACIÓN
INSTRUCCIONES DE
botones de liberación
completamente las placas. Localice los
1. Permita que el aparato enfríe y abra
Remoción de las placas
manera.
e instale la segunda placa, de la misma
abajo. La placa se bloqueará. Voltee el aparato
abrazaderas y presione la parte delantera hacia
debajo de las
trasera de la placa
Introduzca la parte
abrazaderas de metal.
de ésta con las
facilitar la eliminación de la grasa.
la unidad hacia atrás y
delanteros para inclinar
grasa, alce los pies
otros alimentos con
Cuando asa carne u
delanteros
Para ajustar los pies
lavavajillas.
grasa. Lave la bandeja, ya sea a mano o en el
enfríe y luego tire la
permita que el aparato
Después de cada uso,
hacia la bandeja.
evacuarán la grasa
ranuras en las placas
Durante la cocción, las
según las instrucciones especificadas en ésta.
Introduzca la bandeja de goteo en la hendidura,
bandeja de goteo
2.
Instalación de la
y álcela.
2.
abrazaderas de metal
deslícela fuera de las
con ambas manos,
2. Sostenga la placa
liberar la placa.
Presione firmemente el botón para
de las bisagras
superior está en el centro de la tapa.
1.
Botón de liberación
b. El botón de liberación de la placa
del cuerpo.
placa inferior está en la parte lateral
a. El botón de liberación de la
coincidir la parte trasera
Incline la placa y haga
abrazaderas de metal en el centro de la base.
pico para eliminar la grasa. Localice las
La parte trasera de cada placa es el lado con el
en un lado del aparato: la base o la tapa.
placa a la vez. Cada placa encajará solamente
Abra completamente el aparato. Instale una
Instalación de las placas
las placas más fácilmente.
presión sobre las bisagras y permitirá ajustar
nivel. Jalar ligeramente la agarradera aliviará la
atrás, hasta que las dos placas estén al mismo
bisagras. Luego, empuje la agarradera hacia
de deslizar el botón de liberación de las
jale ligeramente la agarradera hacia usted antes
abierta y desea llevarlas a la posición abierta,
Nota: Si las placas están en la posición semi-
posición hasta que la vuelva a cerrar.
al mismo nivel. La tapa permanecerá en esta
las dos placas estén
hacia atrás, hasta que
Empuje la agarradera
de las bisagras.
el botón de liberación
izquierda y presione
con la mano
2. Agarre la agarradera
de las bisagras.
botón de liberación
placas, utilice el
completamente las
1. Para abrir
Page 37

4
cantidades del mismo alimento.
combinar sus sabores o bien asar grandes
permite asar varios tipos de alimentos sin
usada para usar la función “parrilla abierta”.
superficie de cocción. Esta es la posición
inferior están paralelas y forman una amplia
Posición abierta – La placa superior y la placa
placa, cierre la tapa y luego ábrala de nuevo.
retire los alimentos de la
posición semi-abierta,
volver a poner la tapa en
completamente. Para
sino se abrirá
ésta no se bloqueará
los alimentos y asarlos uniformemente.
Al abrir la tapa otra vez,
como parrilla abierta para
®
automáticamente para acomodar el grosor de
abajo. Las bisagras se ajustarán
Para bajar la tapa, presione la agarradera hacia
la cierre o que la abra completamente.
esta posición hasta que
tapa permanecerá en
tapa se bloquee. La
agarradera hasta que la
simplemente alce la
placa superior,
Para abrir y bloquear la
“sandwichera panini”.
va a cocinar usando la función “parrilla” o
está dotada de una cómoda
®
en esta posición para colocar los alimentos que
a la base. Manténgala
100 grados con respeto
abierta en un ángulo de
– La placa superior está
Posición semi-abierta
“sandwichera panini”.
usada para usar las funciones “parrilla” y
sobre la placa inferior. Esta es la posición
placa superior descansa
Posición cerrada – La
le permitirá preparar una gran
®
posiciones:
aparato tiene tres
limpia, llana y segura. El
sobre una superficie
Coloque el Griddler®
DE ENSAMBLADO
como sandwichera para
INSTRUCCIONES
®
muy versátil. La amplia superficie de asado
La parrilla abierta es un método de cocción
del otro lado.
Nota: Deberá voltear los alimentos para asarlos
multiplicando por dos la superficie de cocción.
placas están completamente abiertas,
"Parrilla abierta" se refiera al hecho que las
pescado y verduras.
porque no se cocinará uniformemente),
(no le recomendamos que ase pollo con hueso,
asar carne, hamburguesas, pechuga de pollo
Utilice el Griddler
Función "parrilla abierta"
asen uniformemente.
éstos tengan el mismo grosor, para que se
tiempo, asegúrese de que
sándwiches al mismo
Si desea asar varios
gusto.
sándwich y calentar el pan a
agarradera para asar el
sándwich. Ejerza una presión leve sobre la
ajustables que acomoda todo tipo de
agarradera y de un sistema de bisagras
Griddler
a la función "asado". La parrilla/sandwichera
La función "sandwichera panini" es muy similar
rectangular) y el pan italiano.
crujiente por fuera), la ciabatta (un pan blanco
sal y cebolla), la michetta (un pancito redondo y
la focaccia (un pan plano cubierto con romero,
panes más populares para preparar panini son
recomendamos que utilice pan fresco. Los
dulces. Para obtener resultados óptimos, le
variedad de sándwiches asados, salados o
El Griddler
o a la plancha para calentarse y tostar el pan.
pan fresco. El sándwich se prensa a la parrilla
como verduras, carne y queso, entre tajadas de
incluyen una combinación de ingredientes,
parrilla” en italiano. Generalmente, los panini
La palabra “panini” significa “sándwiches a la
asar pan, sándwiches o quesadillas.
Utilice el Griddler
Función "sandwichera panini"
espesores, precisamente al gusto.
También permite asar carne de varios
uniformemente.
el mismo espesor, para que se asen
Page 38

3
mismo tiempo, asegúrese de que éstos tengan
Si desea asar varios tipos de alimentos al
como un bistec de solomillo.
Se le hará tan fácil asar rodajas finas de patata
varios espesores.
alimentos de
acomoda
ajustables que
bisagras
sistema de
agarradera y de un
de una cómoda
está dotada
®
La parrilla/sandwichera Griddler
alimentos estén cocidos.
Mantenga las placas cerradas hasta que los
máximo de grasa.
parte trasera de éstas permiten eliminar un
que las ranuras en las placas y los picos en la
forma más saludable de cocinar la carne, ya
método rápido para asar. También es una
alimentos al mismo tiempo. Por lo tanto, es un
La función “parrilla” asa ambos lados de los
delicados de carne y verduras.
hamburguesas, carne deshuesada, cortes
como parrilla para asar
®
Utilice el Griddler
Función “parrilla”
placas.
más información acerca de como remover las
sección “Instrucciones de ensamblado” para
goteo son aptas para lavavajillas. Véase la
bandeja de goteo. Las placas y la bandeja de
bistec,
ligeramente húmedo. Lave las placas y la
limpie el cuerpo y la tapa con un paño
Antes de usar el aparato por primera vez,
embalaje.
guarde el material de
aconsejamos que
estén incluidas. Le
características"
sección "Piezas y
piezas descritas en la
de que todas las
su cuerpo. Asegúrese
quite las etiquetas promocionales pegadas en
Retire el aparato del material de embalaje y
ANTES DEL PRIMER USO
contienen bisfenol A (BPA).
Las partes en contacto con líquido no
eliminación de la grasa
Inclina la unidad hacia atrás para facilitar la
8. Pies delanteros ajustables
Permite abrir las placas completamente.
7. Botón de liberación de las bisagras
Presiónelos para retirar las placas.
6. Botones de liberación de las placas
apta para lavavajillas.
Bandeja para recoger la grasa, removible y
5. Bandeja de goteo
Luces de "encendido" y "listo".
4. Indicadores luminosos
facilitar la limpieza.
Antiadherentes y aptas para lavavajillas, para
hamburguesas, pollo y verduras.
Ideales para asar sándwiches,
3. Placas extraíbles
acomodar alimentos de varias espesuras.
presión. Permite ajustar la tapa para
Sólida agarradera de metal fundido a
8
5
5
6
1
7
4
3
2. Cómoda agarradera
bisagras flotantes.
Resistente cuerpo de acero inoxidable con
1. Base y tapa
PIEZAS Y CARACTERÍSTICAS
No intente modificarla.
electricista.
entrara completamente, comuníquese con un
la toma de corriente, inviértela. Si aún no
3
1
toma de corriente polarizada. Si no entrara en
Se podrá enchufar de una sola manera en la
polarizada (una pata es más ancha que otra).
de este aparato está dotado de una clavija
2
6.
Para reducir el riesgo de electrocución, el cable
AVISO
Page 39

2
animales no puedan jalarla o tropezar con ella.
encimera o la mesa de tal forma que niños o
importante colocar la extensión sobre la
ser por lo menos igual a la del aparato. Es
La clasificación nominal de la extensión debe
que respete las precauciones siguientes.
Se podrá usar una extensión eléctrica, siempre
enganche o tropiece con un cable más largo.
para reducir el peligro de que alguien se
El cable proveído con este aparato es corto,
EXTENSIONES
RELATIVAS AL USO DE
INSTRUCCIONES
SOLAMENTE
DOMÉSTICO
PARA USO
INSTRUCCIONES
GUARDE ESTAS
puerta del armario.
especialmente si éste toca las paredes o la
conectado presenta un riesgo de incendio,
guardarlo en un armario. Dejar el aparato
desconecte el aparato antes de
adentro de un armario. Siempre
16. No haga funcionar el aparato bajo o
POR PERSONAL AUTORIZADO.
DEBEN SER REALIZADAS ÚNICAMENTE
ELECTROCUCIÓN, LAS REPARACIONES
RIESGO DE INCENDIO O
15. ADVERTENCIA: PARA REDUCIR EL
cable.
14. Para apagar el aparato, desconecte el
calientes.
que contenga aceite u otros líquidos
fin que no sea el indicado.
usarlo.
caliente, ni en un horno caliente.
quemador a gas o una hornilla eléctrica
. 6
................ 6
13. Tenga sumo cuidado al mover un aparato
. 6
. 5
12. No utilice el aparato para ningún otro
5
. 3
11. Siempre desconecte el aparato después de
. 3
10. No coloque el aparato sobre o cerca de un
haga contacto con superficies calientes.
borde de la encimera o de la mesa, ni que
9. No permita que el cordón cuelgue del
8. No lo utilice en exteriores.
incendio, electrocución o herida.
por Cuisinart presenta un riesgo de
7. El uso de accesorios no recomendados
ajuste.
autorizado para su revisión, reparación o
Regrese el aparato a un centro de servicio
hubiese caído o si estuviese dañado.
que hubiese funcionado mal o que se
clavija estuviesen dañados, después de
6. No utilice este aparato si el cordón o la
cerca de niños.
Este aparato no debería ser usado por o
5.
líquido.
CABLE O LA CLAVIJA en agua u otro
electrocución o herida, NO SUMERJA EL
4. Para reducir el riesgo de incendio,
aparato. Utilice la agarradera.
3. No toque las partes calientes de este
y antes de limpiarlo.
enfríe antes de instalar o remover piezas
en uso y antes de limpiarlo. Permita que
2. Desconecte el aparato cuando no esté
1. LEA TODAS LAS INSTRUCCIONES.
heridas, entre las cuales las siguientes:
reducir el riesgo de incendio, electrocución o
tomar precauciones básicas de seguridad para
Siempre que use aparatos eléctricos, debe
IMPORTANTES
SEGURIDAD
MEDIDAS DE
.............................. 7
Garantía
Almacenaje...........................
Instrucciones de limpieza
Instrucciones de mantenimiento ..........
Instrucciones de operación ..............
Instrucciones de ensamblado ........... 4-
Antes del prime uso....................
Piezas y características.................
Medidas de seguridad importantes ........ 2
ÍNDICE
Page 40

GR-11
cuidadosamente antes de usarlo.
Para su seguridad y para disfrutar plenamente de este producto, siempre lea las instrucciones
Parrilla/Sandwichera
®
Griddler
®
Cuisinart
RECETAS
INSTRUCCIONES & LIBRO DE
Page 41

Version no.: GR11 IB-11499-ESP
Size : 148mm(W) X 210mm(H)
Material: 105gsm gloss artpaper for whole book
Coating: Gloss Varnishing in cover
Color (Front): 4C+1C(Back)
(Back): 1C+1C(Back)
Date: 21/09/13
Co-ordinator : Astor You / Scias Liu
XieFaXing Des cription:GR11 IB-11499-ESP Box OPERATOR: Chen
XieFaXing
Code :
E-GR11 IB-11499-ESP
 Loading...