

Page 1
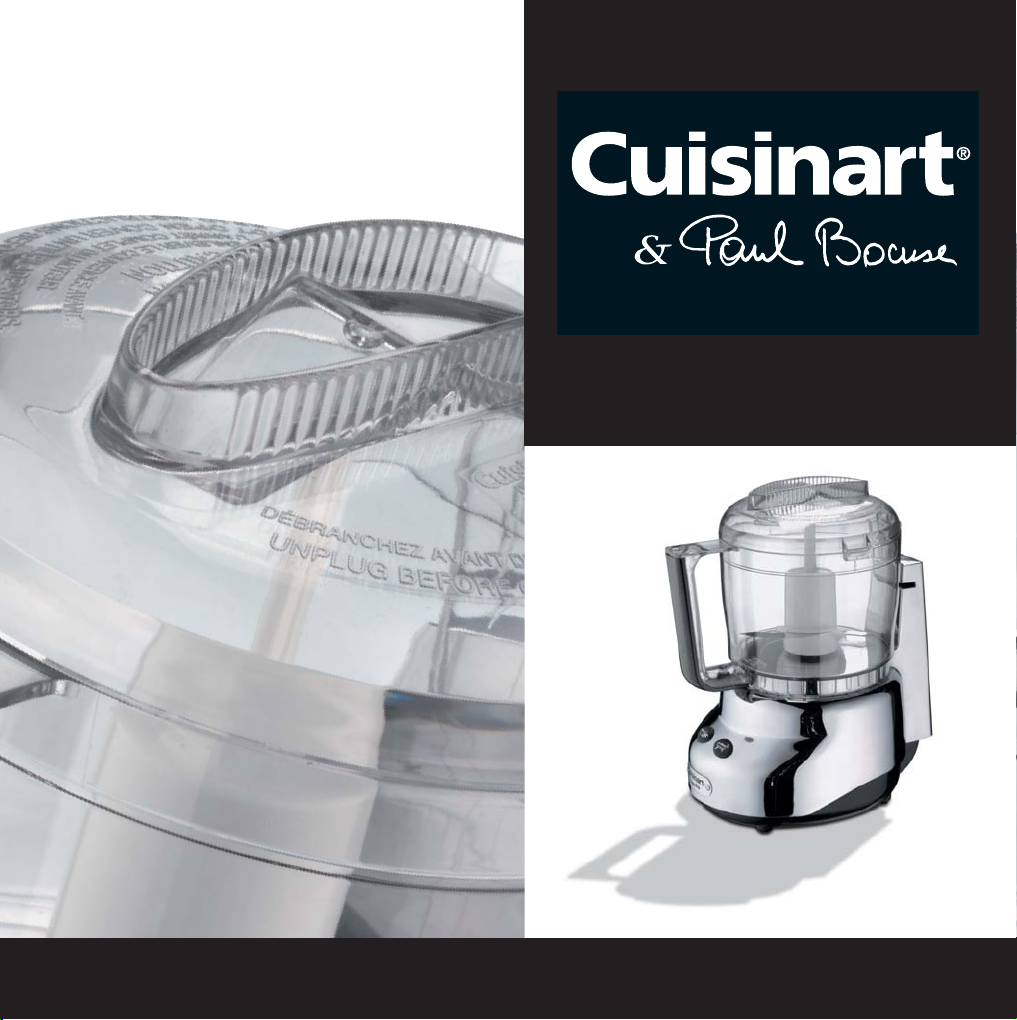
MINI PREP
MINI-PROCESSOR
ARATEUR
Instructions
DLC3E
Page 2

Page 3

SOMMAIRE
1. Introduction . . . . . . . . . . . . . . . . . . . . . . . . . . . . . . . . . . . . . . . . . . . . . . . . . . . . . . . . . . . . . . . . . . . . . . . . . . . . . . . . . . . . . . . . . . . . . . . . . . 4
2. Description . . . . . . . . . . . . . . . . . . . . . . . . . . . . . . . . . . . . . . . . . . . . . . . . . . . . . . . . . . . . . . . . . . . . . . . . . . . . . . . . . . . . . . . . . . . . . . . . . . . 4
3. Assemblage. . . . . . . . . . . . . . . . . . . . . . . . . . . . . . . . . . . . . . . . . . . . . . . . . . . . . . . . . . . . . . . . . . . . . . . . . . . . . . . . . . . . . . . . . . . . . . . . . . . 4
4. Fonctions . . . . . . . . . . . . . . . . . . . . . . . . . . . . . . . . . . . . . . . . . . . . . . . . . . . . . . . . . . . . . . . . . . . . . . . . . . . . . . . . . . . . . . . . . . . . . . . . . . . . 5
A. Hacher. . . . . . . . . . . . . . . . . . . . . . . . . . . . . . . . . . . . . . . . . . . . . . . . . . . . . . . . . . . . . . . . . . . . . . . . . . . . . . . . . . . . . . . . . . . . . . . . . . . . . 5
B. Moudre . . . . . . . . . . . . . . . . . . . . . . . . . . . . . . . . . . . . . . . . . . . . . . . . . . . . . . . . . . . . . . . . . . . . . . . . . . . . . . . . . . . . . . . . . . . . . . . . . . . . 5
5. Conseils d’utilisation. . . . . . . . . . . . . . . . . . . . . . . . . . . . . . . . . . . . . . . . . . . . . . . . . . . . . . . . . . . . . . . . . . . . . . . . . . . . . . . . . . . . . . . . . . . 5
A. Préparation des aliments. . . . . . . . . . . . . . . . . . . . . . . . . . . . . . . . . . . . . . . . . . . . . . . . . . . . . . . . . . . . . . . . . . . . . . . . . . . . . . . . . . . . . . 5
B. Hacher et réduire en purée . . . . . . . . . . . . . . . . . . . . . . . . . . . . . . . . . . . . . . . . . . . . . . . . . . . . . . . . . . . . . . . . . . . . . . . . . . . . . . . . . . . . 5
C. Moudre . . . . . . . . . . . . . . . . . . . . . . . . . . . . . . . . . . . . . . . . . . . . . . . . . . . . . . . . . . . . . . . . . . . . . . . . . . . . . . . . . . . . . . . . . . . . . . . . . . . . 5
6. Techniques de fonctionnement et quantités recommandées . . . . . . . . . . . . . . . . . . . . . . . . . . . . . . . . . . . . . . . . . . . . . . . . . . . . . . . . . 6
7. L’avis des chefs . . . . . . . . . . . . . . . . . . . . . . . . . . . . . . . . . . . . . . . . . . . . . . . . . . . . . . . . . . . . . . . . . . . . . . . . . . . . . . . . . . . . . . . . . . . . . . . 7
8. Questions/Réponses. . . . . . . . . . . . . . . . . . . . . . . . . . . . . . . . . . . . . . . . . . . . . . . . . . . . . . . . . . . . . . . . . . . . . . . . . . . . . . . . . . . . . . . . . . . . 7
9. Nettoyage et rangement . . . . . . . . . . . . . . . . . . . . . . . . . . . . . . . . . . . . . . . . . . . . . . . . . . . . . . . . . . . . . . . . . . . . . . . . . . . . . . . . . . . . . . . 7
10. Consignes de sécurité . . . . . . . . . . . . . . . . . . . . . . . . . . . . . . . . . . . . . . . . . . . . . . . . . . . . . . . . . . . . . . . . . . . . . . . . . . . . . . . . . . . . . . . . . 8
CONTENTS
1. Introduction . . . . . . . . . . . . . . . . . . . . . . . . . . . . . . . . . . . . . . . . . . . . . . . . . . . . . . . . . . . . . . . . . . . . . . . . . . . . . . . . . . . . . . . . . . . . . . . . . . 9
2. Description . . . . . . . . . . . . . . . . . . . . . . . . . . . . . . . . . . . . . . . . . . . . . . . . . . . . . . . . . . . . . . . . . . . . . . . . . . . . . . . . . . . . . . . . . . . . . . . . . . . 9
3. Assembly. . . . . . . . . . . . . . . . . . . . . . . . . . . . . . . . . . . . . . . . . . . . . . . . . . . . . . . . . . . . . . . . . . . . . . . . . . . . . . . . . . . . . . . . . . . . . . . . . . . . . 9
4. Product functions . . . . . . . . . . . . . . . . . . . . . . . . . . . . . . . . . . . . . . . . . . . . . . . . . . . . . . . . . . . . . . . . . . . . . . . . . . . . . . . . . . . . . . . . . . . . 10
A. Chop . . . . . . . . . . . . . . . . . . . . . . . . . . . . . . . . . . . . . . . . . . . . . . . . . . . . . . . . . . . . . . . . . . . . . . . . . . . . . . . . . . . . . . . . . . . . . . . . . . . . . 10
B. Grind . . . . . . . . . . . . . . . . . . . . . . . . . . . . . . . . . . . . . . . . . . . . . . . . . . . . . . . . . . . . . . . . . . . . . . . . . . . . . . . . . . . . . . . . . . . . . . . . . . . . . 10
5. Using the appliance . . . . . . . . . . . . . . . . . . . . . . . . . . . . . . . . . . . . . . . . . . . . . . . . . . . . . . . . . . . . . . . . . . . . . . . . . . . . . . . . . . . . . . . . . . 10
A. Preparing the food. . . . . . . . . . . . . . . . . . . . . . . . . . . . . . . . . . . . . . . . . . . . . . . . . . . . . . . . . . . . . . . . . . . . . . . . . . . . . . . . . . . . . . . . . . 10
B. Chopping and puréeing . . . . . . . . . . . . . . . . . . . . . . . . . . . . . . . . . . . . . . . . . . . . . . . . . . . . . . . . . . . . . . . . . . . . . . . . . . . . . . . . . . . . . . 10
C. Grinding . . . . . . . . . . . . . . . . . . . . . . . . . . . . . . . . . . . . . . . . . . . . . . . . . . . . . . . . . . . . . . . . . . . . . . . . . . . . . . . . . . . . . . . . . . . . . . . . . . 10
6. Operating techniques and recommended quantities . . . . . . . . . . . . . . . . . . . . . . . . . . . . . . . . . . . . . . . . . . . . . . . . . . . . . . . . . . . . . . . 11
7. Chefs’ tips and hints. . . . . . . . . . . . . . . . . . . . . . . . . . . . . . . . . . . . . . . . . . . . . . . . . . . . . . . . . . . . . . . . . . . . . . . . . . . . . . . . . . . . . . . . . . 12
8. Questions/Answers . . . . . . . . . . . . . . . . . . . . . . . . . . . . . . . . . . . . . . . . . . . . . . . . . . . . . . . . . . . . . . . . . . . . . . . . . . . . . . . . . . . . . . . . . . . 12
9. Cleaning and maintenance . . . . . . . . . . . . . . . . . . . . . . . . . . . . . . . . . . . . . . . . . . . . . . . . . . . . . . . . . . . . . . . . . . . . . . . . . . . . . . . . . . . . 12
10. Safety cautions . . . . . . . . . . . . . . . . . . . . . . . . . . . . . . . . . . . . . . . . . . . . . . . . . . . . . . . . . . . . . . . . . . . . . . . . . . . . . . . . . . . . . . . . . . . . . 13
1
Page 4

INHALTSVERZEICHNIS
1. Einleitung . . . . . . . . . . . . . . . . . . . . . . . . . . . . . . . . . . . . . . . . . . . . . . . . . . . . . . . . . . . . . . . . . . . . . . . . . . . . . . . . . . . . . . . . . . . . . . . . . . . 14
2. Ihr Gerät umfasst . . . . . . . . . . . . . . . . . . . . . . . . . . . . . . . . . . . . . . . . . . . . . . . . . . . . . . . . . . . . . . . . . . . . . . . . . . . . . . . . . . . . . . . . . . . . 14
3. Zusammensetzen . . . . . . . . . . . . . . . . . . . . . . . . . . . . . . . . . . . . . . . . . . . . . . . . . . . . . . . . . . . . . . . . . . . . . . . . . . . . . . . . . . . . . . . . . . . . . 14
4. Funktionen . . . . . . . . . . . . . . . . . . . . . . . . . . . . . . . . . . . . . . . . . . . . . . . . . . . . . . . . . . . . . . . . . . . . . . . . . . . . . . . . . . . . . . . . . . . . . . . . . . 15
A. Hacken . . . . . . . . . . . . . . . . . . . . . . . . . . . . . . . . . . . . . . . . . . . . . . . . . . . . . . . . . . . . . . . . . . . . . . . . . . . . . . . . . . . . . . . . . . . . . . . . . . . 15
B. Mahlen . . . . . . . . . . . . . . . . . . . . . . . . . . . . . . . . . . . . . . . . . . . . . . . . . . . . . . . . . . . . . . . . . . . . . . . . . . . . . . . . . . . . . . . . . . . . . . . . . . . 15
5. Gebrauch des Geräts. . . . . . . . . . . . . . . . . . . . . . . . . . . . . . . . . . . . . . . . . . . . . . . . . . . . . . . . . . . . . . . . . . . . . . . . . . . . . . . . . . . . . . . . . . 15
A. Vorbereitung der Nahrungsmittel. . . . . . . . . . . . . . . . . . . . . . . . . . . . . . . . . . . . . . . . . . . . . . . . . . . . . . . . . . . . . . . . . . . . . . . . . . . . . . 15
B. Hacken oder Pürieren . . . . . . . . . . . . . . . . . . . . . . . . . . . . . . . . . . . . . . . . . . . . . . . . . . . . . . . . . . . . . . . . . . . . . . . . . . . . . . . . . . . . . . . 15
C. Mahlen . . . . . . . . . . . . . . . . . . . . . . . . . . . . . . . . . . . . . . . . . . . . . . . . . . . . . . . . . . . . . . . . . . . . . . . . . . . . . . . . . . . . . . . . . . . . . . . . . . . 15
6. Unktionstechniken Und Empfohlene Mengen . . . . . . . . . . . . . . . . . . . . . . . . . . . . . . . . . . . . . . . . . . . . . . . . . . . . . . . . . . . . . . . . . . . . 16
7. Ratschläge Der Chefs . . . . . . . . . . . . . . . . . . . . . . . . . . . . . . . . . . . . . . . . . . . . . . . . . . . . . . . . . . . . . . . . . . . . . . . . . . . . . . . . . . . . . . . . . 17
8. Fragen/Antworten . . . . . . . . . . . . . . . . . . . . . . . . . . . . . . . . . . . . . . . . . . . . . . . . . . . . . . . . . . . . . . . . . . . . . . . . . . . . . . . . . . . . . . . . . . . . 17
9. Reinigung und Pflege . . . . . . . . . . . . . . . . . . . . . . . . . . . . . . . . . . . . . . . . . . . . . . . . . . . . . . . . . . . . . . . . . . . . . . . . . . . . . . . . . . . . . . . . . 17
10. Sicherheitshinweise. . . . . . . . . . . . . . . . . . . . . . . . . . . . . . . . . . . . . . . . . . . . . . . . . . . . . . . . . . . . . . . . . . . . . . . . . . . . . . . . . . . . . . . . . . 18
INHOUD
1. Inleiding . . . . . . . . . . . . . . . . . . . . . . . . . . . . . . . . . . . . . . . . . . . . . . . . . . . . . . . . . . . . . . . . . . . . . . . . . . . . . . . . . . . . . . . . . . . . . . . . . . . . 19
2. Beschrijving . . . . . . . . . . . . . . . . . . . . . . . . . . . . . . . . . . . . . . . . . . . . . . . . . . . . . . . . . . . . . . . . . . . . . . . . . . . . . . . . . . . . . . . . . . . . . . . . . 19
3. Samenvoegen . . . . . . . . . . . . . . . . . . . . . . . . . . . . . . . . . . . . . . . . . . . . . . . . . . . . . . . . . . . . . . . . . . . . . . . . . . . . . . . . . . . . . . . . . . . . . . . . 19
4. Functies . . . . . . . . . . . . . . . . . . . . . . . . . . . . . . . . . . . . . . . . . . . . . . . . . . . . . . . . . . . . . . . . . . . . . . . . . . . . . . . . . . . . . . . . . . . . . . . . . . . . 20
A. Hakken . . . . . . . . . . . . . . . . . . . . . . . . . . . . . . . . . . . . . . . . . . . . . . . . . . . . . . . . . . . . . . . . . . . . . . . . . . . . . . . . . . . . . . . . . . . . . . . . . . . 20
B. Malen . . . . . . . . . . . . . . . . . . . . . . . . . . . . . . . . . . . . . . . . . . . . . . . . . . . . . . . . . . . . . . . . . . . . . . . . . . . . . . . . . . . . . . . . . . . . . . . . . . . . 20
5. Gebruiksaanwijzingen . . . . . . . . . . . . . . . . . . . . . . . . . . . . . . . . . . . . . . . . . . . . . . . . . . . . . . . . . . . . . . . . . . . . . . . . . . . . . . . . . . . . . . . . . 20
A. Voorbereiding van de voedingsmiddelen . . . . . . . . . . . . . . . . . . . . . . . . . . . . . . . . . . . . . . . . . . . . . . . . . . . . . . . . . . . . . . . . . . . . . . . . 20
B. Hakken of pureren . . . . . . . . . . . . . . . . . . . . . . . . . . . . . . . . . . . . . . . . . . . . . . . . . . . . . . . . . . . . . . . . . . . . . . . . . . . . . . . . . . . . . . . . . . 20
C. Malen . . . . . . . . . . . . . . . . . . . . . . . . . . . . . . . . . . . . . . . . . . . . . . . . . . . . . . . . . . . . . . . . . . . . . . . . . . . . . . . . . . . . . . . . . . . . . . . . . . . . 20
6. Werkingstechnieken en aanbevolen hoeveelheden . . . . . . . . . . . . . . . . . . . . . . . . . . . . . . . . . . . . . . . . . . . . . . . . . . . . . . . . . . . . . . . . 21
7. De mening van de chefs. . . . . . . . . . . . . . . . . . . . . . . . . . . . . . . . . . . . . . . . . . . . . . . . . . . . . . . . . . . . . . . . . . . . . . . . . . . . . . . . . . . . . . . 22
8. Vragen/Antwoorden . . . . . . . . . . . . . . . . . . . . . . . . . . . . . . . . . . . . . . . . . . . . . . . . . . . . . . . . . . . . . . . . . . . . . . . . . . . . . . . . . . . . . . . . . . 22
9. Schoonmaken en opbergen . . . . . . . . . . . . . . . . . . . . . . . . . . . . . . . . . . . . . . . . . . . . . . . . . . . . . . . . . . . . . . . . . . . . . . . . . . . . . . . . . . . . 22
10. Veiligheidsinstructies . . . . . . . . . . . . . . . . . . . . . . . . . . . . . . . . . . . . . . . . . . . . . . . . . . . . . . . . . . . . . . . . . . . . . . . . . . . . . . . . . . . . . . . . 23
2
Page 5

CONTENUTO
1. Introduzione. . . . . . . . . . . . . . . . . . . . . . . . . . . . . . . . . . . . . . . . . . . . . . . . . . . . . . . . . . . . . . . . . . . . . . . . . . . . . . . . . . . . . . . . . . . . . . . . . 24
2. L’apparecchio comprende. . . . . . . . . . . . . . . . . . . . . . . . . . . . . . . . . . . . . . . . . . . . . . . . . . . . . . . . . . . . . . . . . . . . . . . . . . . . . . . . . . . . . . 24
3. Montaggio . . . . . . . . . . . . . . . . . . . . . . . . . . . . . . . . . . . . . . . . . . . . . . . . . . . . . . . . . . . . . . . . . . . . . . . . . . . . . . . . . . . . . . . . . . . . . . . . . . 24
4. Funzioni dell’apparecchio. . . . . . . . . . . . . . . . . . . . . . . . . . . . . . . . . . . . . . . . . . . . . . . . . . . . . . . . . . . . . . . . . . . . . . . . . . . . . . . . . . . . . . 25
A. Tritare . . . . . . . . . . . . . . . . . . . . . . . . . . . . . . . . . . . . . . . . . . . . . . . . . . . . . . . . . . . . . . . . . . . . . . . . . . . . . . . . . . . . . . . . . . . . . . . . . . . . 25
B. Macinare. . . . . . . . . . . . . . . . . . . . . . . . . . . . . . . . . . . . . . . . . . . . . . . . . . . . . . . . . . . . . . . . . . . . . . . . . . . . . . . . . . . . . . . . . . . . . . . . . . 25
5. Consigli d’uso. . . . . . . . . . . . . . . . . . . . . . . . . . . . . . . . . . . . . . . . . . . . . . . . . . . . . . . . . . . . . . . . . . . . . . . . . . . . . . . . . . . . . . . . . . . . . . . . 25
A. Preparazione degli alimenti . . . . . . . . . . . . . . . . . . . . . . . . . . . . . . . . . . . . . . . . . . . . . . . . . . . . . . . . . . . . . . . . . . . . . . . . . . . . . . . . . . 25
B. Tritare o ridurre in purea. . . . . . . . . . . . . . . . . . . . . . . . . . . . . . . . . . . . . . . . . . . . . . . . . . . . . . . . . . . . . . . . . . . . . . . . . . . . . . . . . . . . . 25
C. Macinare. . . . . . . . . . . . . . . . . . . . . . . . . . . . . . . . . . . . . . . . . . . . . . . . . . . . . . . . . . . . . . . . . . . . . . . . . . . . . . . . . . . . . . . . . . . . . . . . . . 25
6. Tecniche di funzionamento e quantità consigliate . . . . . . . . . . . . . . . . . . . . . . . . . . . . . . . . . . . . . . . . . . . . . . . . . . . . . . . . . . . . . . . . 26
7. Il parere degli chefs . . . . . . . . . . . . . . . . . . . . . . . . . . . . . . . . . . . . . . . . . . . . . . . . . . . . . . . . . . . . . . . . . . . . . . . . . . . . . . . . . . . . . . . . . . 27
8. Domande/Riposte . . . . . . . . . . . . . . . . . . . . . . . . . . . . . . . . . . . . . . . . . . . . . . . . . . . . . . . . . . . . . . . . . . . . . . . . . . . . . . . . . . . . . . . . . . . . 27
9. Pulizia e manutenzione . . . . . . . . . . . . . . . . . . . . . . . . . . . . . . . . . . . . . . . . . . . . . . . . . . . . . . . . . . . . . . . . . . . . . . . . . . . . . . . . . . . . . . . 27
10. Istruzioni di sicurezza. . . . . . . . . . . . . . . . . . . . . . . . . . . . . . . . . . . . . . . . . . . . . . . . . . . . . . . . . . . . . . . . . . . . . . . . . . . . . . . . . . . . . . . . 28
CONTENIDO
1. Introducción. . . . . . . . . . . . . . . . . . . . . . . . . . . . . . . . . . . . . . . . . . . . . . . . . . . . . . . . . . . . . . . . . . . . . . . . . . . . . . . . . . . . . . . . . . . . . . . . . 29
2. Su aparato tiene . . . . . . . . . . . . . . . . . . . . . . . . . . . . . . . . . . . . . . . . . . . . . . . . . . . . . . . . . . . . . . . . . . . . . . . . . . . . . . . . . . . . . . . . . . . . . 29
3. Montaje . . . . . . . . . . . . . . . . . . . . . . . . . . . . . . . . . . . . . . . . . . . . . . . . . . . . . . . . . . . . . . . . . . . . . . . . . . . . . . . . . . . . . . . . . . . . . . . . . . . . 29
4. Funciones . . . . . . . . . . . . . . . . . . . . . . . . . . . . . . . . . . . . . . . . . . . . . . . . . . . . . . . . . . . . . . . . . . . . . . . . . . . . . . . . . . . . . . . . . . . . . . . . . . . 30
A. Picar . . . . . . . . . . . . . . . . . . . . . . . . . . . . . . . . . . . . . . . . . . . . . . . . . . . . . . . . . . . . . . . . . . . . . . . . . . . . . . . . . . . . . . . . . . . . . . . . . . . . . 30
B. Moler. . . . . . . . . . . . . . . . . . . . . . . . . . . . . . . . . . . . . . . . . . . . . . . . . . . . . . . . . . . . . . . . . . . . . . . . . . . . . . . . . . . . . . . . . . . . . . . . . . . . . 30
5. Cómo utilizar el aparato . . . . . . . . . . . . . . . . . . . . . . . . . . . . . . . . . . . . . . . . . . . . . . . . . . . . . . . . . . . . . . . . . . . . . . . . . . . . . . . . . . . . . . 30
A. Preparación de los alimentos . . . . . . . . . . . . . . . . . . . . . . . . . . . . . . . . . . . . . . . . . . . . . . . . . . . . . . . . . . . . . . . . . . . . . . . . . . . . . . . . . 30
B. Picar o hacer puré . . . . . . . . . . . . . . . . . . . . . . . . . . . . . . . . . . . . . . . . . . . . . . . . . . . . . . . . . . . . . . . . . . . . . . . . . . . . . . . . . . . . . . . . . . 30
C. Moler. . . . . . . . . . . . . . . . . . . . . . . . . . . . . . . . . . . . . . . . . . . . . . . . . . . . . . . . . . . . . . . . . . . . . . . . . . . . . . . . . . . . . . . . . . . . . . . . . . . . . 30
6. Técnicas de funcionamiento y cantidades recomendadas. . . . . . . . . . . . . . . . . . . . . . . . . . . . . . . . . . . . . . . . . . . . . . . . . . . . . . . . . . . 31
7. Sugerencias de los chefs . . . . . . . . . . . . . . . . . . . . . . . . . . . . . . . . . . . . . . . . . . . . . . . . . . . . . . . . . . . . . . . . . . . . . . . . . . . . . . . . . . . . . . 32
8. Preguntas/Respuestas . . . . . . . . . . . . . . . . . . . . . . . . . . . . . . . . . . . . . . . . . . . . . . . . . . . . . . . . . . . . . . . . . . . . . . . . . . . . . . . . . . . . . . . . . 32
9. Limpiar y guardar . . . . . . . . . . . . . . . . . . . . . . . . . . . . . . . . . . . . . . . . . . . . . . . . . . . . . . . . . . . . . . . . . . . . . . . . . . . . . . . . . . . . . . . . . . . . 32
10. Normas de seguridad . . . . . . . . . . . . . . . . . . . . . . . . . . . . . . . . . . . . . . . . . . . . . . . . . . . . . . . . . . . . . . . . . . . . . . . . . . . . . . . . . . . . . . . . 33
3
Page 6

1. INTRODUCTION
Vous venez de faire l’acquisition d’un mini préparateur Cuisinart®.
Cet appareil est un outil de qualité qui vous permettra de réaliser toutes sortes
de préparations rapidement et en toute facilité. Il hache, moud, réduit en purée,
émulsionne et mélange vos aliments en quelques secondes. Sa lame offre un
côté aiguisé permettant de hacher, mélanger ou réduire en purée, tandis que le
côté plus épais permet de moudre des aliments durs tels que des grains de café
ou des noix. Equipé d’un moteur réversible puissant, il vient à bout de toutes les
tâches en quelques secondes.
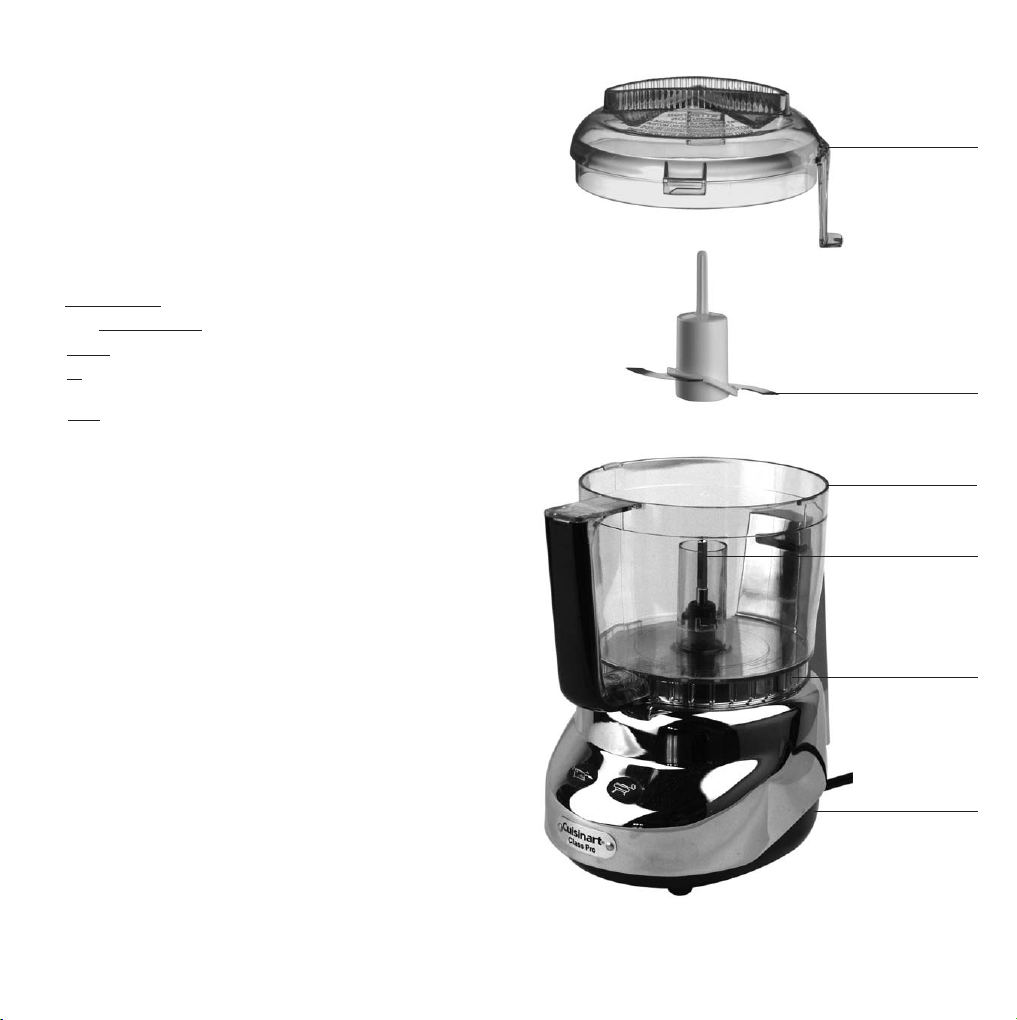
2. VOTRE APPAREIL COMPREND
1. Un moteur réversible et deux touches de commande séquentielles très
pratiques.
2. Un bol de préparation
3. Une spatule (non illustrée).
4. Un couvercle
ajouter les liquides au cours du fonctionnement.
5. Une lame
de précision professionnelle inusable. Selon son sens de
rotation, la lame vous permet de hacher ou de moudre les aliments.
de 0,6 L.
verrouillable sur le bol. Muni de deux ouvertures pour
Couvercle (4)
Lame (5)
ATTENTION ! LA LAME EST EXTREMEMENT COUPANTE. Afin d’éviter tout risque
de blessure lors du déballage de votre appareil, nous vous conseillons de
manipuler la lame avec le plus grand soin. Ne jamais toucher les parties
métalliques, et veiller à toujours saisir la lame par son moyeu central.
3. ASSEMBLAGE
1. Placer le bol de préparation sur l’axe du moteur. Le faire pivoter dans le sens
inverse des aiguilles d’une montre pour le fixer sur le bloc moteur.
2. En la tenant par son moyeu central, placer délicatement la lame sur l’axe
central du bol de préparation. Veiller à aligner les marques de la lame sur la
forme de l’axe. La lame doit être parfaitement emboîtée et au fond du bol
de préparation.
3. Placer les ingrédients dans le bol.
4. Placer le couvercle sur le bol. La languette du couvercle doit être orientée à
droite de la colonne arrière. Faire pivoter le couvercle dans le sens inverse des
aiguilles d’une montre pour le verrouiller.
N.B. L’appareil ne démarre que lorsque le couvercle est correctement
verrouillé. Il s’arrête instantanément aussitôt que le couvercle est retiré.
5. Brancher l’appareil. Il est maintenant prêt à fonctionner.
4
Bol de
préparation (2)
Axe
Moteur
réversible (1)
Enrouleur pour
cordon
d’alimentation
Page 7

4. LES FONCTIONS DE L’APPAREIL
Les touches et permettent de faire démarrer le moteur et de
l’arrêter. Il suffit de presser la touche choisie après avoir placé les ingrédients
dans le bol. Dès que la touche est relâchée, le moteur s’arrête. La lame tourne
automatiquement dans le sens voulu, selon la touche pressée.
A. HACHER
La touche s’utilise avec le côté aiguisé de la lame pour hacher, réduire
en purée et mixer les aliments de consistance molle comme les légumes cuits,
les herbes, les oignons, l’ail et la plupart des fromages.
B. MOUDRE
La touche s’utilise avec le côté plus épais de la lame pour moudre ou
hacher les aliments solides tels que les grains de café, les épices, les grains de
poivre, le chocolat et les noix.
5. CONSEILS D’UTILISATION
A. Préparation des aliments
Couper les aliments en morceaux de 1,5 cm environ. Plus les aliments sont
coupés gros, plus il faut de temps pour les hacher.
Ne remplissez pas trop le bol de préparation afin d’éviter des résultats
irréguliers et une tension inutile au moteur. En règle générale, les aliments ne
doivent pas dépasser 2/3 du bol de préparation.
IMPORTANT
• Nous vous recommandons de maintenir l’appareil d’une main
lorsqu’il fonctionne, afin de l’empêcher de bouger.
• Veiller à ne pas utiliser de quantité supérieure aux quantités
recommandées dans ce livret.
• Ne jamais faire fonctionner l’appareil plus d’une minute en
continu.
• Toujours attendre que la lame cesse de tourner avant
de retirer le couvercle.
• Ne jamais tenter de retirer le couvercle et le bol en même temps.
Le couvercle doit d’abord être ôté, puis le bol peut être retiré.
Vider d’abord le bol, puis retirer la lame.
• Pour éviter que la lame ne tombe lorsque vous videz le bol, nous
vous recommandons de la maintenir en plaçant un doigt sur
l’axe de la lame, ou en la maintenant par-dessous (en plaçant
un doigt dans l’ouverture prévue pour l’axe du moteur).
B. Hacher ou réduire en purée
Presser et relâcher la touche plusieurs fois, en veillant
à ce que les aliments retombent à chaque fois dans le fond du bol. Utiliser
la spatule pour racler les bords du bol si nécessaire. Vérifier fréquemment
la texture afin de ne pas hacher trop finement.
Hacher les herbes fraîches
Les herbes aromatiques, le bol et la lame doivent être parfaitement
propres et secs. Couper les tiges des herbes pour ne conserver que les
parties tendres. Placer les herbes dans le bol et presser
la touche plusieurs fois, jusqu’à ce que les herbes soient
suffisamment hachées. Plus vous hachez d’herbes à la fois, plus elles
seront hachées finement.
Si elles sont bien sèches lorsqu’elles sont hachées, les herbes
aromatiques se conserveront 4 à 5 jours au réfrigérateur, placées dans un
sachet fermé hermétiquement. Elles peuvent également être congelées.
Hacher la viande, la volaille, le poisson et les crustacés
Les aliments doivent être très froids, mais pas congelés. Les couper
en morceaux de 1,5 cm environ. Presser la touche pour hacher
grossièrement. Ensuite, pour hacher plus finement, laisser tourner le
moteur pendant quelques secondes. Si nécessaire, utiliser la spatule pour
ôter les aliments qui restent sur les bords.
Hacher les noix
Placer les noix dans le bol et presser la touche . Vérifier
fréquemment que les noix ne s’agglutinent pas dans le bol. Si nécessaire,
utiliser la spatule pour les répartir dans le bol.
Réduire les aliments en purée
Hacher grossièrement en procédant par impulsions puis maintenir la
touche jusqu’à obtention de la texture souhaitée. (NOTE : ce
procédé ne convient pas pour réduire les pommes de terre en purée.)
Ajouter des liquides
Vous pouvez ajouter des liquides tels que de l’eau, de l’huile ou des arômes
pendant le fonctionnement de l’appareil. Pour cela, versez le liquide à
travers l’une des deux ouvertures du couvercle. Veillez à laisser libre l’autre
ouverture pour que l’air puisse circuler.
C. Moudre
Procéder de la même manière pour les aliments durs : presser
la touche par impulsions, en veillant à ce que les aliments retombent
au fond du bol à chaque arrêt. Pour une texture plus fine, presser et maintenir
la touche pendant plusieurs secondes - jusqu’à 20 sec. pour certaines graines,
ou 40 sec. pour les grains de café.
:
:
:
:
:
5
Page 8

6. TECHNIQUES DE FONCTIONNEMENT ET QUANTITES RECOMMANDEES
INGREDIENTS HACHER MOUDRE COMMENTAIRES
Ail
Anchois
Bacon
Beurre
Café (en grains)
Cannelle (en bâtons)
Céleri
Champignons
Chocolat
Fromage à pâte dure
Fromage à pâte semi-dure
Fromage à pâte semi-molle
Fromage à pâte molle
Graines (cumin, pavot, etc.)
Herbes fraîches
Légumes cuits
Muscade
Noix, noisettes
Oignons, échalotes
Olives
Poivre (en grains)
Poivrons
Viandes, volailles, poissons
6
x
x
x
Doit être croustillant
x
x
Max. 250gr. à la fois
x
x
x
x
x
Max. 30gr. à la fois
Max. 60gr. à la fois, découpé en morceaux de 1,5cm
x
x
x
Doit être très froid
Doit être très froid
x
x
x
x
Doivent être bien sèches
Doivent être cuits jusqu’à ce qu’ils soient ramollis
Presser et relâcher plusieurs fois pour morceler, ensuite laisser tourner
pour moudre
x
x
x
x
x
x
Doivent être très froids mais pas congelés, découpés en morceaux
réguliers. Max. 150gr.
Page 9

7. L’AVIS DES CHEFS
8. QUESTIONS/ REPONSES
Que faire si ... Réponses :
1. Ne pas remplir complètement le bol du mini préparateur afin d'éviter des
résultats irréguliers et une tension inutile au moteur. En règle générale, les
aliments ne doivent pas dépasser les 2/3 du bol.
2. Sécher les herbes aromatiques avant de les hacher afin de les conserver
beaucoup plus longtemps. Les placer dans un sachet fermé hermétiquement,
elles se garderont au réfrigérateur 4 à 5 jours.
3. Pour émulsionner une préparation (vinaigrette, mayonnaise, béarnaise…)
utiliser d'abord la touche hacher pour lier la préparation puis la touche
moudre pour serrer le mélange en incorporant le liquide par le goutte à
goutte du couvercle.
4. Lors de vos achats, choisir des épices entières et les moudre à la minute
dans votre mini préparateur pour en extraire un maximum de parfums et de
saveurs.
5. Pour conserver les saveurs des épices entières, utiliser des bocaux fermés
hermétiquement avec un joint de caoutchouc.
6. Pour élaborer rapidement une crème fouettée, verser dans le bol du mini
préparateur un peu de crème liquide froide et appuyer sur la touche hacher
pendant 40 secondes. Le résultat est idéal. Ajouter un peu de sucre en fin
de préparation pour obtenir une crème chantilly.
7. Le mini préparateur permet d'élaborer rapidement pour vos enfants des
purées de légumes savoureuses. En mode hacher pour des mélanges
légumes et viandes ou légumes et poissons. En mode moudre pour des
mélanges émulsionnés avec un beurre fondu, de l'huile d'olive ou bien de
la crème.
Les ingrédients ne sont pas suffisamment hachés, il reste des
morceaux ?
Les aliments restent collés sur les
parois du bol ?
Les ingrédients liquides ne se
mélangent pas correctement ?
Mon mini préparateur ne fonctionne pas ?
Attention à ne pas trop remplir le
bol.
Utiliser le principe du moteur
réversible en appuyant alternativement sur la touche hacher
puis moudre. Cela permet aux
aliments de mieux se répartir
dans le bol.
Ils doivent être ajoutés seulement
lorsque l'appareil est en fonction
pour une meilleure liaison.
Vérifier que le système de sécurité
du couvercle est bien enclenché sur
la face arrière du mini préparateur.
9. NETTOYAGE ET RANGEMENT
Votre appareil peut être laissé sur le plan de travail de votre cuisine.
Débranchez-le lorsque vous ne l’utilisez pas. Ne laissez pas le couvercle en
position verrouillée afin d’éviter d’endommager le mécanisme.
La lame doit être rangée hors de portée des enfants.
Tous les composants de votre appareil, à l’exception de la base moteur,
peuvent être confiés au lave-vaisselle. Nous vous recommandons de
rincer le bol de préparation, le couvercle et la lame immédiatement après
utilisation afin d’éviter que les aliments ne sèchent.
Si vous lavez la lame à la main, soyez très prudent. Evitez de la laisser dans
l’eau savonneuse, où vous pourriez ne plus la voir. Manipulez-la toujours avec
la plus grande précaution.
Pour nettoyer la base de l’appareil, utiliser une éponge imbibée d’un détergent
doux. Ne pas utiliser d’éponge abrasive.
IMPORTANT : Ne jamais laisser la lame sur l’axe moteur lorsque
l’appareil n’est pas utilisé.
7
Page 10

10. CONSIGNES DE SECURITE
Comme tout appareil électroménager, votre préparateur culinaire doit être
manipulé avec précaution. Suivez les conseils ci-dessous afin d’éviter tout
risque de blessure.
• Manier la lame avec le plus grand soin. Eviter de toucher les parties
métalliques tranchantes.
• Toujours mettre la lame en place avant d’ajouter les ingrédients.
• Ne jamais placer la lame sur l’axe moteur avant d’avoir verrouillé le bol.
• Avant d’allumer l’appareil, s’assurer que la lame est enfoncée au maximum
sur l’axe moteur, et que le couvercle est correctement placé. Ne pas forcer
ou bloquer le mécanisme du couvercle.
• Utiliser la spatule uniquement lorsque le moteur est à l’arrêt. Eviter tout
contact avec les pièces en mouvement.
• Toujours attendre que la lame ait cessé de tourner avant de retirer le couvercle.
• Débrancher l’appareil avant de le nettoyer, de le mettre en place ou de retirer
les accessoires.
• Retirer le bol de la base avant d’ôter la lame.
• Veiller à empêcher la lame de tomber en la maintenant lorsque le bol est vidé.
• Utiliser exclusivement cet appareil avec les accessoires fournis par Cuisinart
• Ne pas immerger la base de l’appareil dans l’eau ou tout autre liquide.
• Débrancher l’appareil après utilisation, avant de l’assembler ou de le
démonter, avant de retirer les aliments et avant de le nettoyer. Ne jamais
laisser l’appareil branché sans surveillance. Pour débrancher, tirer sur la
fiche et jamais sur le cordon.
• Ne pas laisser le cordon dépasser du bord du plan de travail, et ne pas le
mettre en contact avec des surfaces chaudes.
• Ne pas laisser la lame sur l’axe du moteur lorsque l’appareil n’est pas utilisé.
Ranger la lame hors de portée des enfants.
• Pour éviter d’endommager le mécanisme, ne pas ranger l’appareil avec le
couvercle complètement fermé.
• Se montrer particulièrement vigilant si l’appareil est utilisé à proximité
d’enfants. Le ranger hors de portée des enfants. Ne pas laisser les enfants
utiliser le préparateur culinaire.
• Ne pas utiliser l’appareil s’il est tombé ou s’il présente des traces apparentes
de dommage.
• Cesser immédiatement d’utiliser l’appareil si le cordon est endommagé et
faire remplacer celui-ci par un professionnel.
• Aucune réparation ne peut être effectuée par l’utilisateur.
• Cet appareil satisfait aux exigences essentielles des directives 89/336/CEE
(compatibilité électromagnétique) et 73/23/CEE (sécurité des appareils électrodomestiques), amendées par la directive 93/68/CEE (marquage CE).
• Utiliser cet appareil exclusivement pour cuisiner, en suivant les instructions de
ce manuel.
• Ne pas utiliser à l’extérieur.
• A usage domestique uniquement.
8
Equipements électriques et électroniques en fin de vie.
Dans l'intérêt de tous et pour participer activement à l'effort collectif de
protection de l'environnement :
• Ne jetez pas vos produits avec les déchets ménagers.
• Utilisez les systèmes de reprise et de collecte qui sont mis à votre disposition.
Certains matériaux pourront ainsi être recyclés ou valorisés.
®
.
Page 11
1. INTRODUCTION
You have just bought a Cuisinart® Mini-Processor.
This appliance is a quality tool allowing you to realize all kinds of dishes
quickly and easily. It chops, grinds, mashes, emulsifies and mixes your foods
in a few seconds. Its blade has a sharpened edge allowing to chop, mix or
mash, while the thicker edge allows to grind hard foods such as coffee beans
or walnuts. Equipped with a powerful reversible motor, it gets through all the
operations in a few seconds.
2. YOUR APPLIANCE INCLUDES
1. A reversible motor and two very practical pulse operated touch-pad controls.
2. A 0.6-l preparation bowl.
3. A spatula (not illustrated).
that can be locked on the bowl. Provided with two openings to pour
4. A lid
liquids during the operation.
5. A blade
with professional quality and accuracy. According to its rotation
direction, the blade allows you to chop or to grind foods.
Lid (4)
Blade (5)
WARNING! THE BLADE IS EXTREMELY SHARP. In order to avoid any risk of
injury when unpacking the appliance, we recommend to handle the blade
with utmost care. Never touch the metal parts and always hold the blade by
its central hub.
3. ASSEMBLY
1. Place the preparation bowl on the motor shaft. Turn it anticlockwise to fix
it on the motor unit.
2. While holding it through its central hub, place delicately the blade on the
central shaft of the preparation bowl. Line up the marks on the blade on
the shaft form. The blade should be perfectly fitted and in the bottom of
the preparation bowl.
3. Place the ingredients in the bowl.
4. Place the lid on the bowl. The lid tongue should be oriented to the right of
the back column. Turn the lid anticlockwise to lock it.
N.B. The appliance starts only if the lid is correctly locked. It stops instantly
when the lid is removed.
5. Connect the appliance. It is now ready to start.
Preparation bowl (2)
Shaft
Reversible
motor (1)
Cord wrap
9
Page 12

4. FUNCTIONS
The and touch-pad controls allow to start and stop the motor.
Press the selected touch-pad control after having placed the ingredients in
the bowl. As soon as the touch-pad control is released, the motor stops. The
blade rotates automatically in the desired direction, according to the pressed
touch-pad control.
A. CHOP
The touch-pad control is used with the sharpened edge of the blade to
chop, mash and mix soft foods like cooked vegetables, herbs, onions, garlic
and most cheeses.
B. GRIND
The touch-pad control is used with the thicker edge of the blade to grind
or chop solid foods, like coffee beans, spices, whole peppercorns, chocolate
and walnuts.
5. USING THE APPLIANCE
B. Chopping or producing a purée
Press and release the touch-pad control several times, letting the foods
fall on the bottom of the bowl every time the button is released. Use the
spatula to scrape the sides if necessary. Check frequently the texture in order
not to chop too finely.
Chopping fresh herbs:
Aromatic herbs, bowl and blade should be perfectly clean and dry. Cut the
herbs stems so as to keep only the soft parts. Place the herbs in the bowl and
press the touch-pad control several times until the herbs are sufficiently
chopped. The more herbs you chop at a time, the finer they will be chopped.
If they are well dry when they are chopped, the aromatic herbs can keep 4 to
5 days in the refrigerator, put in a hermetically sealed sachet. They can also
be frozen.
Chopping meat, poultry
The foods should be very cold, but not frozen. Cut them into pieces of
approximately 1.5 cm. Press the touch-pad control to chop them
roughly. Then to chop more finely, let the motor rotate during a few seconds.
If necessary, use the spatula to remove the foods remaining on the sides.
, fish and shellfish:
A. Preparation of foods
Cut the ingredients into pieces of approximately 1.5 cm. The thicker the foods
are cut, the more time to chop them.
Do not overfill the preparation bowl in order to avoid irregular results and
useless stress for the motor. The foods should not come higher than 2/3 of the
preparation bowl.
IMPORTANT
• We recommend you to hold the appliance with one hand when
it is in operation, in order to prevent it from moving.
• Do not use higher quantities than recommended in this booklet.
• Never operate the appliance more than one minute nonstop.
• Always wait until the blade has stopped rotating before removing
the lid.
• Never try to remove the lid and the bowl at the same time. The
lid should be removed first, then the bowl. First empty the bowl,
then remove the blade.
• To prevent the blade from falling when you empty the bowl, we
recommend you to hold it while placing a finger on the blade
shaft, or while maintaining it from below (by placing a finger in
the opening provided for the motor shaft).
10
Chopping nuts:
Place the nuts in the bowl and press the touch-pad control. Check
frequently that the nuts do not cluster together in the bowl. If necessary, use
the spatula to distribute them in the bowl.
Producing a purée:
Chop roughly by proceeding by pulses, then keep the touch-pad control
pressed until you get the desired texture. (NOTE: this process is not suitable
to mash potatoes).
Adding liquids:
You can add liquids such as water, oil or flavours while the appliance is
operating. To this end pour the liquid through one of the two openings of the
lid. Leave the other opening free so that air can circulate.
C. Grinding
Proceed accordingly for hard foods: press the touch-pad control by
pulses, and see that the foods fall back on the bottom of the bowl at each
stop. For a finer texture, press and maintain the touch-pad control during
several seconds – up to 20 sec. for some seeds, or 40 sec. for coffee beans.
Page 13

6. OPERATING TECHNIQUES AND RECOMMENDED AMOUNTS
INGREDIENTS CHOPPING GRINDING COMMENTS
Garlic
Anchovies
Bacon
Butter
Coffee
Cinnamon (sticks)
Celery
Mushrooms
Chocolate
Hard cheeses
Semi-hard cheeses
Semi-soft cheeses
Soft cheeses
Seeds (cumin, poppy, etc.)
Fresh herbs
Cooked vegetables
Nutmeg
Nuts, walnuts
Onions, shallots
Olives
Peppercorns
(Sweet) Peppers
Meats, poultry, fish
x
x
x
Must be crispy
x
x
Max. 250g. at a time
x
x
x
x
x
Max. 30g. at a time
Max. 60g. at a time
x
x
x
Must be well chilled
Must be well chilled
x
x
x
x
Must be properly dried
Must be soft
Press and release several times to break into pieces, then allow to
run to grind
x
x
x
x
x
x
Must be well chilled but not frozen, cut into pieces of equal size.
Max. 150g.
11
Page 14

7. ADVICE FROM CHEFS
8. QUESTIONS/ANSWERS
What to do if... Answers:
1. Do not fill the mini-processor bowl completely in order to avoid uneven
results and unnecessary stress on the motor. Generally, the bowl should not
be more than 2/3 full.
2. Dry rinsed herbs before chopping them so that they last longer. Seal them
in an airtight bag; they will keep in the fridge for 4 to 5 days.
3. To emulsify a preparation (vinaigrette, mayonnaise, Béarnaise, etc.) first use
the chop mode to thicken the preparation then, to bind the mixture, use the
grind mode while adding the liquid very gradually through the drip-feed
spout.
4. When buying ingredients, select whole spices and grind them as needed
using your mini processor to maximize the aromas and flavours.
5. To preserve the flavours of whole spices, use airtight jars that have a rubber
gasket.
6. To make whipped cream quickly, pour a little cold cream into the bowl of
the mini processor and press the chop button for 40 seconds. The result is
ideal. For a Chantilly cream, add a little sugar at the end of preparation.
7. The mini processor lets you create quick, flavourful purees for your children:
use the chop mode to mix vegetables and meats or vegetables and fish, and
grind mode to emulsify with melted butter, olive oil or cream.
The ingredients are not chopped
fine enough; there are still pieces.
The food remains stuck to the
sides of the bowl.
The liquid ingredients don't mix
properly.
My mini processor doesn't work. Make sure the safety interlock on
Careful not to overfill the bowl.
Use the reversible motor option
by pressing alternatively on the
chop and the grind buttons. This
will distribute the ingredients
more evenly in the bowl.
For better mixing, add the liquid
ingredients only once the appliance is running.
the lid is engaged properly onto
the back of the mini processor.
9. CLEANING AND MAINTENANCE
You can leave your appliance on the worktop of your kitchen. Disconnect it
when not in use. Do not leave the lid in locked position in order to avoid
damage to the mechanism.
The blade should be stored out of the reach of children.
All components of your appliance, except for the motor base, can be put in
the dishwasher. We recommend to rinse the preparation bowl, lid and blade
immediately after use so as to avoid drying of the foods.
If you wash the blade manually, be very careful. Avoid leaving it in soapy
water where you could not see it anymore. Always handle it with utmost care.
To clean the motor base, use a sponge soaked in soft detergent. Do not use
abrasive sponges.
IMPORTANT: Never leave the blade on the motor shaft when the
appliance is not in use.
12
Page 15

10. SAFETY CAUTIONS
Like every household appliance, your food processor should be handled with
care. Follow the advice below in order to avoid any wound.
• Handle the blade with utmost care. Avoid touching the sharp metal parts.
• Always put the blade in place before adding the ingredients.
• Never place the blade on the motor shaft before having locked the bowl.
• Before switching on the appliance, make sure that the blade is pushed in
completely on the motor shaft and that the lid is correctly placed. Do not
force or block the lid mechanism.
• Use the spatula only when the motor is off. Avoid any contact with the
moving parts.
• Always wait until the blade stops rotating before removing the lid.
• Disconnect the appliance before cleaning it, putting it away or removing the
attachments.
• Remove the bowl from the stand before removing the blade.
• Take care to prevent the blade from falling when emptying the bowl. Keep
the blade in place by holding it from below the bowl.
• Use this appliance exclusively with the attachments supplied by Cuisinart®.
• Do not immerse the base in water or any other liquid.
• Always disconnect the appliance immediately after use, before assembling or
dismantling, before removing the foods and before cleaning. Never leave the
appliance unattended when plugged in. To disconnect pull the plug and never
the cord.
• Do not let the cord hang over the edge of the worktop and avoid any contact
with hot surfaces.
• Do not leave the blade on the motor shaft when the appliance is not in use.
Put the blade away out of the reach of children.
• In order to avoid damage to the mechanism, do not put the appliance away
with the lid completely closed.
• Be particularly vigilant if the appliance is used near children. Store out of
the reach of children. Never let children use the food processor.
• Do not use the appliance if it has fallen or if it shows apparent traces of
damage.
• Stop immediately using the appliance if the cord is damaged and have the
power cable replaced by a professional.
• No repair can be undertaken by the user.
• This appliance meets the essential requirements of guidelines 89/336/EEC
(electromagnetic compatibility) and 73/23/EEC (safety of household
appliances) as amended by guideline 93/68/EEC (CE marking).
• Use this appliance only to cook while following the instructions of this
manual.
• Do not use outside.
• For domestic use only.
Discarding electrical and electronic equipment at the end of life.
In everybody's interest and to participate actively in protecting the environment:
• Do not discard these items with your household waste.
• Use the available trade-in and collection systems.
Some materials can in this way be recycled or recovered.
13
Page 16

1. EINLEITUNG
Sie haben gerade eine Cuisinart® Mini-Küchenhelfer erstanden.
Dieses Gerät ist ein Qualitätswerkzeug, mit dem Sie alle Arten von Gerichten
schnell und einfach zubereiten können. Es hackt, mahlt, püriert, emulgiert und
mixt Ihre Zutaten in wenigen Sekunden. Die Klingen haben eine geschliffene
Seite zum Hacken, Mixen oder Pürieren, während mit der breiteren Seite
härtere Lebensmittel wie Kaffee, Bohnen oder Walnüsse gemahlen werden
können. Das Gerät ist mit einem leistungsstarken Umkehrmotor ausgestattet
und bewältigt alle Aufgaben in wenigen Sekunden.
2. IHR GERÄT UMFASST
1. Einen Umkehrmotor und zwei sehr praktische Touch-Pad-Drucktasten für
die Steuerung.
2. Ein Zubereitungsgefäß
3. Einen Spatel (nicht abgebildet).
4. Einen Deckel
, der über dem Gefäß verschlossen werden kann. Er ist mit zwei
Öffnungen versehen, um während des Betriebs Flüssigkeiten zufügen zu
können.
5. Eine robuste Klinge
Drehrichtung kann die Klinge Nahrungsmittel hacken oder mahlen.
von 0.6 L.
von Profiqualität und -genauigkeit. Je nach
Deckel (4)
Klinge (5)
VORSICHT ! DIE KLINGE IST EXTREM SCHARF. Um jedes Risiko einer
Verletzung während des Auspackens des Geräts zu vermeiden, raten wir Ihnen,
äußerste Vorsicht im Umgang mit der Klinge zu üben. Berühren Sie nie die
Metallteile und halten Sie die Klinge immer an der Mittelnabe fest.
3. ZUSAMMENSETZEN
1. Das Zubereitungsgefäß auf die Motorachse setzen. Entgegen dem
Uhrzeigersinn drehen, um es am Motorblock zu befestigen.
2. Die Klinge an der Mittelnabe festhalten und vorsichtig auf die Mittelachse
des Zubereitungsgefäßes stecken. Die Markierungen auf der Klinge mit
denjenigen auf der Achsenform in Übereinstimmung bringen. Die Klinge
sollte perfekt festsitzen und sich am Boden des Zubereitungsgefäßes
befinden.
3. Geben Sie die Zutaten in das Gefäß.
4. Befestigen Sie den Deckel auf dem Gefäß. Die Lasche des Deckels sollte sich
rechts von der Rücksäule befinden. Den Deckel im entgegengesetzten
Uhrzeigersinn drehen, um ihn zu verschließen.
Anmerkung : Das Gerät funktioniert nur, wenn der Deckel korrekt verschlossen
ist. Es schaltet sich automatisch aus, sobald der Deckel entfernt
wird.
5. Das Gerät anschließen. Es ist nun betriebsbereit.
14
Zubereitungsgefäß
Motorachse
Umkehrmotor (1)
Kabeldepot
(2)
Page 17

4. FUNKTIONEN
Mit den Drucktasten und wird der Motor ein- und
ausgeschaltet. Betätigen Sie die gewünschte Drucktaste, nachdem Sie die
Zutaten in das Gefäß gegeben haben. Sobald die Drucktaste losgelassen wird,
stoppt der Motor. Die Klinge dreht automatisch in der gewünschten Richtung,
je nachdem, welche Drucktaste betätigt wird.
A.HACKEN
Die Drucktaste wird mit der geschliffenen Seite der Klinge verwendet, um
weiche Nahrungsmittel wie gegartes Gemüse, Kräuter, Zwiebeln, Knoblauch und
die meisten Käsesorten zu hacken, zu pürieren und zu mixen.
B. MAHLEN
Die Drucktaste wird mit der dickeren Seite der Klinge verwendet, um
feste Nahrungsmittel wie Kaffeebohnen, Gewürze, ganze Pfefferkörner,
Schokolade und Walnüsse zu mahlen oder zu hacken.
5. GEBRAUCH DES GERÄTS
A. Vorbereitung der Nahrungsmittel
Schneiden Sie die Zutaten in Stücke von ca. 1,5 cm. Je dicker sie geschnitten
sind, desto länger dauert es, sie zu hacken.
Das Zubereitungsgefäß nicht überfüllen, um unregelmäßige Resultate und
unnütze Belastung des Motors zu vermeiden. Das Gefäß sollte höchstens bis
auf 2/3 seiner Höhe mit Zutaten gefüllt werden.
WICHTIG
• Wir raten Ihnen, das Gerät während des Betriebs mit einer Hand
fest zu halten, so dass es sich nicht bewegen kann.
• Verwenden Sie keine größeren Mengen als in dieser Broschüre
angegeben sind.
• Das Gerät nie länger als eine Minute ohne Unterbrechung
betreiben.
• Vor dem Entfernen des Deckels immer warten, bis sich die
Klinge nicht mehr dreht.
• Versuchen Sie nie, das Gefäß und den Deckel gleichzeitig zu
entfernen. Der Deckel sollte erst abgenommen werden, danach
das Gefäß. Zuerst das Gefäß leeren, dann die Klinge entfernen.
• Um zu verhindern, dass die Klinge während des Leerens des
Gefäßes herausfällt, können Sie sie festhalten, indem Sie einen
Finger auf die Klingenachse legen oder von außen einen Finger in
die Öffnung für die Motorachse stecken.
B. Hacken oder Pürieren
Die Drucktaste mehrmals drücken und wieder loslassen, so dass die
Nahrungsmittel wieder zurück auf den Gefäßboden fallen, wenn die Taste
losgelassen wird. Gegebenenfalls mit dem Spatel die Seiten abstreichen. Halten
Sie die Beschaffenheit gut im Auge, um nicht zu fein zu hacken.
Hacken von frischen Kräutern
Kräuter, Gefäß und Klinge sollten perfekt sauber und trocken sein. Entfernen
Sie die Stängel, so dass nur die zarten Teile bleiben. Die Kräuter in das Gefäß
geben und die Drucktaste mehrmals betätigen, bis die Kräuter fein genug
gehackt sind. Je mehr Kräuter Sie auf einmal hacken, desto feiner werden sie
gehackt.
Wenn die Kräuter gut trocken sind, wenn sie gehackt werden, können sie 4 bis
5 Tage in einer hermetisch verschlossenen Tüte im Kühlschrank verwahrt
werden. Sie können auch eingefroren werden.
Hacken von Fleisch, Geflügel, Fisch und Schalentieren
Die Nahrungsmittel sollten sehr kalt aber nicht gefroren sein. In Stücke von ca.
1,5 cm schneiden. Die Drucktaste betätigen, um sie grob zu hacken.
Danach für ein feineres Hackresultat den Motor einige Sekunden lang drehen
lassen. Gegebenenfalls mit dem Spatel die Reste von den Gefäßwänden
abstreifen.
Hacken von Nüssen
Die Nüsse in das Gefäß geben und die Drucktaste betätigen.
Regelmäßig überprüfen, dass die Nüsse nicht im Gefäß zusammenkleben. Falls
nötig mit dem Spatel im Gefäß verteilen.
Pürieren :
Durch mehrfaches kurzes Betätigen der Drucktaste grob hacken, dann die
Drucktaste gedrückt halten, bis die gewünschte Konsistenz erreicht
ist (ANMERKUNG : dieses Verfahren ist nicht für das Pürieren von Kartoffeln
geeignet).
Zufügen von Flüssigkeiten
Sie können Flüssigkeiten wie Wasser, Öl oder Aromen hinzufügen, während das
Gerät in Betrieb ist. Dafür die Flüssigkeit durch eine der zwei Öffnungen im Deckel
gießen. Die andere Öffnung frei halten, so dass die Luft zirkulieren kann.
C. Mahlen
Vorgangsweise wie auch für harte Nahrungsmittel: die Drucktaste
wiederholt kurz betätigen und die Nahrungsmittel zwischendurch wieder auf
den Gefäßboden fallen lassen. Für eine feinere Konsistenz die Drucktaste einige
Sekunden lang gedrückt halten – bis zu 20 Sekunden für gewisse Körner, oder
40 Sekunden für Kaffeebohnen.
:
:
:
:
15
Page 18

6. FUNKTIONSTECHNIKEN UND EMPFOHLENE MENGEN
ZUTATEN HACKEN MAHLEN KOMMENTARE
Knoblauch
Anchovis
Speck
Butter
Kaffee (Bohnen)
Zimt (Stangen)
Sellerie
Champignons
Schokolade
Hartkäse
Mittelharter Käse
Mittelweicher Käse
Weichkäse
Körner (Kümmel, Mohn, etc.)
Frische Kräuter
Gegartes Gemüse
Muskat
x
x
x
Muss knusprig sein
x
x
Höchstens 250g auf einmal
x
x
x
x
x
Höchstens 30g auf einmal
Höchstens 60g gleichzeitig, in Stücken von 1,5cm
x
x
x
Muss sehr kalt sein
Muss sehr kalt sein
x
x
x
x
Müssen gut getrocknet werden
Muss gegart werden, bis es weich ist
Mehrmals drücken und loslassen zum Zerstückeln, danach zum Mahlen
drehen lassen
Walnüsse, Haselnüsse
Zwiebeln, Schalotten
Oliven
Pfeffer (Körner)
Paprikaschoten
Fleisch, Geflügel, Fisch
16
x
x
x
x
x
x
Muss sehr kalt aber nicht gefroren sein, in gleichmäßige Stücke
geschnitten. Höchstens 150g.
Page 19

7. RATSCHLÄGE DER CHEFS
8. FRAGEN/ANTWORTEN
Was tun wenn ... Antworten:
1. Das Gefäß des Miniküchenhelfers nicht vollständig füllen, um gleichmäßige
Resultate zu erhalten und den Motor nicht unnötig zu belasten. Als
Faustregel sollten die Nahrungsmittel 2/3 des Gefäßes nicht übersteigen.
2. Aromatische Kräuter vor dem Hacken gut abtrocknen, um sie viel länger
bewahren zu können. In einem luftdicht verschlossenen Beutel können sie
4 bis 5 Tage im Kühlschrank aufbewahrt werden.
3. Um eine Emulsion zuzubereiten (Vinaigrette, Mayonnaise, Béarnaise…)
benutzen Sie zuerst die Taste Hacken zum binden der Zutaten und dann die
Taste Mahlen um die Mischung zu verfestigen, indem die Flüssigkeit
tropfenweise durch den Deckel eingegeben wird.
4. Beim Einkaufen können Sie ganze Gewürze wählen und sie frisch in Ihrem
Miniküchenhelfer mahlen, um ein Höchstmaß an Aroma und Geschmack zu
erhalten.
5. Benutzen Sie zum Aufbewahren von ganzen Gewürzen luftdicht
verschlossene Gläser mit Gummidichtung.
6. Um schnell Schlagsahne zuzubereiten geben Sie etwas kalte flüssige Sahne
in das Gefäß des Miniküchenhelfers und drücken 40 Sekunden lang die
Taste Hacken. Das Ergebnis ist ideal. Fügen Sie am Ende etwas Zucker hinzu,
falls die Schlagsahne etwas süßer sein soll.
7. Mit dem Miniküchenhelfer können Sie schnell sehr schmackhafte
Gemüsepürees für Ihre Kinder zubereiten. Im Hackmodus für Mischungen
von Gemüse und Fleisch oder Gemüse und Fisch. Im Mahlmodus für
Emulsionen mit geschmolzener Butter, Olivenöl oder auch Sahne.
Die Zutaten nicht ausreichend
Gehackt werden, Stücke bleiben
Die Nahrungsmittel an den
Gefäßwänden kleben bleiben ?
Flüssige Zutaten mischen sich
nicht gut?
Mein Miniküchenhelfer nicht
funktioniert?
Achten Sie darauf, das Gefäß
nicht zu sehr zu füllen.
Nutzen Sie das Prinzip des
Umkehrmotors indem Sie
abwechselnd die Taste Hacken
und die Taste Mahlen drücken. So
können sich die Nahrungsmittel
besser im Gefäß verteilen.
Sie dürfen nur hinzugefügt werden,
während das Gerät läuft, um eine
bessere Verbindung der Zutaten
zu begünstigen.
Überprüfen, ob das Sicherheitssystem
des Deckels korrekt an der
Rückseite des Miniküchenhelfers
eingerastet ist.
9. REINIGUNG UND PFLEGE
Das Gerät kann auf der Arbeitsplatte Ihrer Küche stehen bleiben. Den
Netzstecker ziehen, wenn es nicht in Gebrauch ist. Lassen Sie den Deckel nicht
in geschlossener Position, um die Mechanik nicht zu beschädigen.
Die Klinge sollte außerhalb der Reichweite von Kindern verstaut werden.
Alle Teile des Geräts, mit Ausnahme des Motorblocks, sind spülmaschinenfest.
Wir raten Ihnen, das Zubereitungsgefäß, den Deckel und die Klinge direkt nach
dem Gebrauch unter fließendem Wasser abzuspülen, so dass die Reste nicht
antrocknen.
Wenn Sie die Klingen von Hand abwaschen, gehen Sie mit Vorsicht vor. Nicht
im Spülwasser lassen, wo Sie sie nicht mehr sehen könnten. Im Umgang mit
der Klinge immer äußerst vorsichtig sein.
Zum Reinigen des Motorblocks einen Schwamm und ein mildes
Reinigungsmittel verwenden. Benutzen Sie keinen Scheuerschwamm.
WICHTIG : Niemals die Klinge auf der Motorachse belassen, wenn
das Gerät nicht benutzt wird.
17
Page 20

10. SICHERHEITSHINWEISE
Wie alle Haushaltsgeräte sollte auch diese Küchenhilfe vorsichtig behandelt
werden. Befolgen Sie die folgenden Anweisungen, um Verletzungen zu vermeiden.
• Im Umgang mit der Klinge äußerst vorsichtig vorgehen. Vermeiden Sie es,
die scharfen Metallteile zu berühren.
• Die Klinge immer befestigen, bevor die Zutaten hinzugefügt werden.
• Nie die Klinge auf der Motorachse befestigen, bevor das Gefäß verriegelt wurde.
• Vor dem Einschalten des Geräts überprüfen, dass die Klinge vollständig über
die Motorachse geschoben und der Deckel gut befestigt ist. Den
Verschlussmechanismus nicht forcieren oder blockieren.
• Den Spatel nur bei ausgeschaltetem Motor benutzen. Vermeiden Sie es,
bewegliche Teile zu berühren.
• Vor dem Entfernen des Deckels immer warten, bis die Klinge zum Stillstand
gekommen ist.
• Vor dem Reinigen oder Verstauen des Geräts oder dem Entfernen der
Zubehörteile den Netzstecker ziehen.
• Das Gefäß vor dem Entfernen der Klinge vom Sockel nehmen.
• Achten Sie darauf, dass die Klinge nicht beim Entleeren des Gefäßes herausfällt.
Halten Sie die Klinge von der Unterseite des Gefäßes her fest.
• Benutzen Sie dieses Gerät ausschließlich mit Zubehörteilen von Cuisinart® .
• Nicht in Wasser oder andere Flüssigkeiten tauchen.
• Nach dem Gebrauch und vor dem Zusammensetzen oder Auseinandernehmen,
vor der Entnahme der Nahrungsmittel und vor der Reinigung immer den
Netzstecker ziehen. Das Gerät nie unbeaufsichtigt lassen, wenn es an den
Netzstrom angeschlossen ist. Zum Ziehen des Netzsteckers am Stecker
ziehen, nie am Kabel.
• Das Kabel nicht über den Rand der Arbeitsfläche hängen lassen und jede
Berührung mit heißen Oberflächen vermeiden.
• Die Klinge nicht auf der Motorachse belassen, wenn das Gerät nicht benutzt
wird. Die Klinge außerhalb der Reichweite von Kindern verstauen.
• Um den Mechanismus nicht zu beschädigen sollte das Gerät nicht verstaut
werden, wenn der Deckel vollständig geschlossen ist.
• Besondere Vorsicht ist geboten, wenn das Gerät in der Nähe von Kindern
verwendet wird. Außerhalb der Reichweite von Kindern aufbewahren.
Lassen Sie Kinder die Küchenhilfe nicht benutzen.
• Das Gerät nicht benutzen, wenn es heruntergefallen ist oder offensichtliche
Spuren einer Beschädigung aufweist.
• Wenn das Kabel beschädigt ist, den Gebrauch unverzüglich einstellen und
das Kabel durch eine Fachkraft ersetzen lassen.
• Der Benutzer darf keine Reparaturen selber durchführen.
• Dieses Gerät entspricht den Anforderungen der Richtlinien 89/336/EWG
(elektromagnetische Kompatibilität) und 73/23/EWG (Sicherheit von
Haushaltsgeräten), abgeändert durch die Richtlinie 93/68/EWG (CEMarkierung).
• Dieses Gerät nur zu Küchenzwecken und nach den Angaben in der
vorliegenden Gebrauchsanweisung benutzen.
• Nicht im Freien verwenden.
• Nur für den Hausgebrauch bestimmt.
Abfälle von Elektrogeräten am Ende ihrer Lebensdauer.
Im Interesse aller und zur aktiven Teilnahme an den gemeinsamen
Anstrengungen zum Umweltschutz:
• Werfen Sie Ihre Produkte nicht in den Haushaltsmüll.
• Nutzen Sie die Rückgabe- und Sammelsysteme, die Ihnen zur Verfügung
stehen.
Bestimmte Werkstoffe können so wiederverwertet oder aufbereitet werden.
18
Page 21

1. INLEIDING
U heeft net een Mini-keukenrobot van Cuisinart® gekocht.
Dit apparaat is een kwaliteitstoestel, waarmee u snel en gemakkelijk allerlei
bereidingen tot stand kunt brengen. Het hakt, maalt, pureert, emulgeert en
mengt uw voedingsmiddelen in enkele seconden. Het mes heeft een scherpe
kant, om te hakken, mengen of pureren, terwijl de dikkere kant geschikt is om
harde voedingsmiddelen, zoals koffiebonen of noten, te malen. Met zijn
krachtige, omkeerbare motor, volbrengt dit apparaat alle taken in enkele
seconden.
2. UW APPARAAT OMVAT
1. Een in omkeerbare motor met twee zeer praktische pulsbedieningstoetsen.
2. Een werkkom van 0,6 L.
3. Een spatel
4. Een vergrendelbaar deksel op de kom. Voorzien van twee openingen, om
tijdens de werking vloeistoffen toe te voegen.
5. Een mes
draairichting van het mes, kunt u er voedingsmiddelen mee hakken of
malen.
OPGELET ! HET MES IS ZEER SCHERP. Om bij het uitpakken van het apparaat
te vermijden dat u zich kwetst, raden wij u aan het mes met de grootst
mogelijke voorzichtigheid te behandelen. Raak nooit de metalen delen aan, en
grijp het mes steeds vast aan de centrale naaf.
(niet afgebeeld).
met een professionele kwaliteit en precisie. Naargelang van de
Deksel (4)
Mes (5)
Werkkom (2)
3. SAMENVOEGEN
1. Zet de werkkom op de as van de motor. Laat ze tegen de wijzers van de klok
in draaien, om ze op het motorblok vast te zetten.
2. Houd het mes vast aan zijn centrale naaf en plaats het voorzichtig op de
centrale as van de werkkom. Zorg ervoor dat de merktekens van het mes
aansluiten op de vorm van de as. Het mes moet goed vastzitten onder in de
werkkom.
3. Breng de ingrediënten in de kom.
4. Zet het deksel op de kom. Het lipje van het deksel moet zich rechts van de
achterste kolom bevinden. Om het deksel te vergrendelen, laat u het tegen
de wijzers van de klok in draaien.
N.B. Het apparaat begint pas te werken, als het deksel op de juiste manier is
vergrendeld. Het valt meteen stil zodra het deksel wordt verwijderd.
5. Steek de stekker in het stopcontact. Het apparaat is nu klaar voor gebruik.
Omkeerbare
motor (1)
voor alimentatiesnoer
Oproller
As
19
Page 22

4. FUNCTIES
Met de toetsen en kunt u de motor aan- en uitzetten. Het
volstaat dat u de gekozen toets indrukt, nadat u de ingrediënten in de kom
heeft gedaan. Zodra u de toets loslaat, valt de motor stil. Het mes draait
automatisch in de gewenste richting, afhankelijk van welke toets werd
ingedrukt.
A. HAKKEN
De toets wordt gebruikt met de scherpe kant van het mes, om
voedingsmiddelen met een zachte consistentie, zoals gekookte groenten,
kruiden, uien, look en de meeste kazen te hakken, te pureren en te mixen.
B. MALEN
De toets wordt gebruikt met de dikkere kant van het mes, om
hardere voedingsmiddelen, zoals koffiebonen, specerijen, peperkorrels, chocolade
en noten, te malen of te hakken.
5. GEBRUIKSAANWIJZINGEN
A. Voorbereiding van de voedingsmiddelen
Snijd de voedingsmiddelen in stukken van ongeveer 1,5 cm. Hoe grover de
voedingsmiddelen gesneden zijn, hoe meer tijd er nodig is om ze te hakken.
Doe de werkkom niet te vol, om onregelmatige resultaten en een overbodige
belasting van de motor te vermijden. In het algemeen mogen de voedingsmiddelen
niet meer dan 2/3 van de werkkom in beslag nemen.
BELANGRIJK
• Wij raden u aan om het apparaat tijdens de werking met één
hand vast te houden, om te verhinderen dat het zich verplaatst.
• Gebruik geen grotere hoeveelheid dan de in dit boekje aanbevolen
hoeveelheden.
• Laat het apparaat nooit langer dan één minuut onafgebroken
werken.
• Wacht steeds tot het mes ophoudt met draaien, voordat u het
deksel verwijdert.
• Probeer het deksel en de kom nooit tegelijk te verwijderen. Het
deksel moet eerst worden weggenomen, daarna kan de kom
worden veriwijderd. Maak eerst de kom leeg en verwijder dan
het mes.
• Om te vermijden dat tijdens het leegmaken van de kom het mes
eruit valt, raden wij u aan om het mes vast te houden. Daartoe
plaatst u één vinger op de as van het mes, of houd u het mes
langs onder vast (door één vinger in de opening te plaatsen die
voor de as van de motor is voorzien).
B. Hakken of pureren
De toets meermaals indrukken en loslaten. Let erop dat de
voedingsmiddelen telkens onderin de kom vallen. Gebruik indien nodig de
spatel om de randen van de kom te schrapen. Controleer veelvuldig de
textuur, om niet te fijn te hakken.
erse kruiden hakken :
V
De aromatische kruiden, de kom en het mes moeten perfect schoon en
droog zijn. Snijd de stengels van de kruiden en houd alleen de zachte
delen over. Breng de kruiden in de kom en druk meermaals op de toets
,totdat de kruiden voldoende gehakt zijn. Hoe meer kruiden u
tegelijk hakt, hoe fijner ze gehakt zullen zijn.
Als de aromatische kruiden goed droog zijn wanneer ze worden gehakt,
kunnen ze in een hermetisch gesloten zak 4 tot 5 dagen in de koelkast
worden bewaard. Ze kunnen ook worden diepgevroren.
, gevogelte, vis en schaaldieren hakken :
Vlees
De voedingsmiddelen moeten zeer koud, maar niet diepgevroren zijn.
Snijd ze in stukken van ongeveer 1,5 cm. Druk op de toets
om grof te hakken. Vervolgens, om fijner te hakken, laat u de
motor gedurende enkele seconden draaien. Indien nodig gebruikt u de
spatel, om de voedingsmiddelen die op de randen achtergebleven zijn,
weg te nemen.
Noten hakken
Breng de noten in de kom en druk op de toets . Controleer veelvuldig
of de noten niet gaan samenkleven in de kom. Indien nodig gebruikt u de
spatel om ze over de kom te verspreiden.
oedingsmiddelen pureren :
V
Grof hakken door middel van pulsen. Houd daarna de toets
ingedrukt, totdat de gewenste textuur wordt verkregen. (OPMERKING : dit
procédé is niet geschikt om aardappelen te pureren).
Vloeistoffen toevoegen
U kunt vloeistoffen, zoals water, olie of aroma’s, tijdens de werking van
het apparaat toevoegen. Daartoe giet u de vloeistof door een van de twee
openingen in het deksel. Laat de andere opening vrij, zodat de lucht kan
circuleren.
C. Malen
Ga op dezelfde manier te werk voor harde voedingsmiddelen : druk op de toets
onderin de kom vallen. Voor een fijnere textuur, houd u de toets gedurende
verschillende seconden ingedrukt – tot 20 sec. voor bepaalde zaden, of 40 sec.
voor koffiebonen.
:
:
met pulsen. Let erop dat de voedingsmiddelen bij iedere stilstand
20
Page 23

6. WERKINGSTECHNIEKEN EN AANBEVOLEN HOEVEELHEDEN
INGREDIËNTEN HAKKEN MALEN COMMENTAAR
Look
Ansjovis
Bacon
Boter
Koffie (in bonen)
Kaneel (in staafjes)
Selder
Paddestoelen
Chocolade
Harde kaas
Halfharde kaas
Halfzachte kaas
Zachte kaas
Zaadkorrels (komijn, maanzaad enz.)
Verse kruiden
Gekookte groenten
Muskaatnoot
Noten, hazelnoten
Uien, sjalotten
Olijven
Peper (in bolletjes)
Paprika's
Vlees, gevogelte, vis
x
x
x
Moet knapperig zijn
x
Max. 250g. tegelijk
x
x
x
x
Max. 30g. tegelijk
x
Max. 60g. tegelijk, gesneden in blokjes van 1,5cm
x
x
x
x
Moet heel koud zijn
Moet heel koud zijn
x
x
x
Moeten goed droog zijn
Moeten gekookt worden tot ze zacht zijn
Aandrukken en meermaals loslaten om te verbrijzelen, vervolgens
x
laten draaien om te malen
x
x
x
x
x
x
Moeten heel koud zijn maar niet bevroren, in regelmatige stukken
gesneden. Max. 150g.
21
Page 24

7. DE MENING VAN DE CHEFS
8. VRAGEN/ANTWOORDEN
Wat te doen als... Antwoorden:
1. De kom van de mini-keukenrobot niet volledig vullen om onregelmatige
resultaten en onnodige belasting van de motor te voorkomen. In het
algemeen mag de voeding de kom niet voor meer dan 2/3 vullen.
2. De aromatische kruiden drogen vooraleer deze fijn te hakken om deze
langer te kunnen bewaren. Deze opbergen in een hermetisch gesloten zakje,
dan bewaren ze 4 tot 5 dagen in de koelkast.
3. Om een bereiding te emulgeren (vinaigrette, mayonnaise, bearnaise enz.)
eerst de hakken-toets gebruiken om de bereiding te binden en dan de
malen-toets om het mengsel homogeen te maken en daarbij de vloeistof
druppel voor druppel via het deksel toevoegen.
4. Bij uw aankopen volledige kruiden kiezen en deze kort malen in uw
mini-keukenrobot om er maximale geuren en smaken uit te halen.
5. Om de smaken van de volledige kruiden te bewaren, hermetisch gesloten
bokalen met een rubberen dichtingsring gebruiken.
6. Om een geklopte room te bewerken, in de kom van de mini-keukenrobot
een beetje koude vloeibare room gieten en de hakken-toets gedurende 40
seconden indrukken. Het resultaat is ideaal. Een beetje suiker toevoegen op
het einde van de bereiding om een slagroom te bekomen.
7. De mini-keukenrobot maakt het mogelijk om voor uw kinderen snel
smakelijke groetenpurees klaar te maken. In hakken-modus voor groenten- en
vlees- of vlees- en vismengsels. In malen-modus voor geëmulgeerde
mengsels met gesmolten boter, olijfolie of nog room.
De ingrediënten zijn onvoldoende
fijngehakt, er zitten nog stukken in
De voedingswaren blijven aan de
wanden van de kom kleven?
De vloeibare ingrediënten worden niet correct gemengd?
Mijn mini-keukenrobot werkt niet? Nagaan of het veiligheidssysteem
Opgelet dat u de kom niet overvult.
Het principe van de omkeerbare
motor gebruiken door afwisselend
op de hakken- en de malen-toets
te drukken. Dit zorgt ervoor dat
de voedingswaren beter verdeeld
worden over de kom.
Deze mogen alleen worden
toegevoegd als het apparaat in
werking is voor een betere binding.
van het deksel wel goed is vastgeklikt op de achterzijde van de
mini-keukenrobot.
9. SCHOONMAKEN EN OPBERGEN
Het apparaat kan op het werkblad van uw keuken blijven staan. Haal de
stekker uit het stopcontact wanneer u het apparaat niet gebruikt. Laat het
deksel niet in vergrendelde stand, om te vermijden dat het mechanisme wordt
beschadigd. Het mes moet buiten het bereik van kinderen worden opgeborgen.
Alle onderdelen van uw apparaat, met uitzondering van de motorvoet, mogen in
de vaatwasser worden gewassen. Wij raden u aan om de werkkom, het deksel
en het mes onmiddellijk na gebruik af te spoelen, om te vermijden dat de
voedingsmiddelen eraan vastkleven.
Wast u het mes met de hand, wees dan zeer voorzichtig. Laat het niet in
zeepsop liggen. U zou het uit het oog kunnen verliezen. Hanteer het steeds
met de grootste voorzichtigheid.
Om de voet van het apparaat schoon te maken, gebruikt u een in een zacht
detergens gedrenkte spons. Gebruik geen schuurspons.
BELANGRIJK : Laat het mes nooit op de motoras als het
apparaat niet wordt gebruikt.
22
Page 25

10. VEILIGHEIDSINSTRUCTIES
Zoals alle elektrische huishoudapparaten moet uw keukenmachine met
voorzichtigheid worden behandeld. Volg onderstaande raadgevingen op, om te
vermijden dat u zich kwetst.
• Hanteer het mes met de grootste zorg. Raak de scherpe metalen delen niet aan.
• Breng altijd eerst het mes aan, voordat u de ingrediënten toevoegt.
• Plaats het mes nooit op de motoras als de kom nog niet vergrendeld is.
• Voordat u het apparaat inschakelt, moet u zich ervan vergewissen dat het
mes zo ver mogelijk op de motoras is gedrukt en dat het deksel correct is
aangebracht. Forceer of blokkeer het mechanisme van het deksel niet.
• Gebruik de spatel alleen wanneer de motor stilstaat. Vermijd ieder contact
met bewegende delen.
• Wacht steeds tot het mes ophoudt met draaien, om het deksel te verwijderen.
• Neem de stekker uit het stopcontact, voordat u het apparaat schoonmaakt
of hulpstukken aanbrengt of verwijdert.
• Neem de kom van de voet, voordat u het mes wegneemt.
• Houd bij het legen van de kom het mes vast, zodat het niet kan vallen.
• Gebruik dit apparaat uitsluitend met de door Cuisinart® geleverde hulpstukken.
• Dompel de voet van het apparaat niet onder in water of een andere vloeistof.
• Haal de stekker van het apparaat uit het stopcontact na gebruik,
voordat u het apparaat assembleert of demonteert, voordat u de
voedingsmiddelen eruit haalt en voordat u het schoonmaakt. Laat de stekker
nooit in het stopcontact zonder toezicht. Om de stekker uit het stopcontact
te halen, trekt u aan de stekker en nooit aan het snoer.
• Laat het snoer niet over het werkblad hangen en breng het niet in contact
met warme oppervlakken.
• Laat het mes niet op de as van de motor als het apparaat niet wordt
gebruikt. Berg het mes op buiten het bereik van kinderen.
• Om te vermijden dat het mechanisme wordt beschadigd, bergt u het apparaat
niet op met het deksel volledig gesloten.
• Een grotere waakzaamheid is geboden als het apparaat in de buurt van
kinderen wordt gebruikt. Berg het op buiten het bereik van kinderen. Laat
kinderen de keukenmachine niet gebruiken.
• Gebruik het apparaat niet als het gevallen is of als het zichtbare sporen van
beschadiging vertoont.
• Gebruik het apparaat niet meer als het snoer beschadigd is en dan de
voedingskabel door een professioneel laten vervangen.
• Geen enkele herstelling mag door de gebruiker worden uitgevoerd.
• Dit apparaat beantwoordt aan de voornaamste vereisten van de richtlijnen
89/336/EEG (elektromagnetische compatibiliteit) en 73/23/EEG (veiligheid van
elektrische huishoudapparaten), gewijzigd door richtlijn 93/68/EEG (EG-merking).
• Gebruik dit apparaat uitsluitend voor keukenwerk en volg steeds de instructies
van deze handleiding.
• Niet buiten gebruiken.
• Uitsluitend voor huishoudelijk gebruik.
Afval van elektrische en elektronische apparaat op het einde van hun levensduur.
In het belang van iedereen en om actief mee te helpen aan de collectieve
inspanning op het vlak van milieubescherming:
• Gooi uw producten niet weg met het huishoudelijk afval.
• Gebruik de terugname- en ophalingssystemen die u ter beschikking staan.
Sommige materialen kunnen aldus worden gerecycleerd of worden benut.
23
Page 26

1. INTRODUZIONE
Avete acquistato un Minipreparatore Cuisinart®.
Un apparecchio di grande qualità che permetterà di realizzare qualsiasi tipo
di ricetta in modo facile e veloce. In pochi secondi trita, macina,
riduce in purea, emulsiona e mescola gli alimenti. Il coltello è dotato di un lato
tagliente per tritare, mescolare o ridurre in purea, e di un lato più spesso per
macinare alimenti solidi come il caffè in chicchi o le noci. Dotato di un
potente motore che può rotare in modo orario o antiorario, permette di
ottenere, in pochi secondi, ottimi risultati.
2. L’APPARECCHIO COMPRENDE
1. Un motore con moto reversibile e due tasti di comando sequenziali molto
pratici.
2. Un recipiente universale
3. Una spatola (senza foto).
4. Un coperchio
bloccabile sul recipiente. Dotato di due aperture per aggiungere
liquidi durante il funzionamento.
5. Una lama
di precisione professionale non soggetta ad usura. A seconda del
senso di rotazione, la lama permette di tritare o macinare gli alimenti.
con capacità di 0,6 L.
Coperchio (4)
Lama (5)
ATTENZIONE ! LA LAMA È MOLTO TAGLIENTE. Al momento dell’apertura
della confezione, maneggiare la lama con estrema attenzione per evitare di
tagliarsi. Non toccare mai le parti metalliche e afferrare sempre la lama dal
suo asse centrale.
3. MONTAGGIO
1. Posizionare il recipiente universale sul blocco motore. Per fissarlo, girare in
senso antiorario.
2. Afferrando la lama dal suo asse centrale, posizionarla delicatamente sul
corrispondente asse centrale del recipiente universale. Allineare le tacche
della lama sulla forma dell’asse. La lama deve incastrarsi perfettamente in
fondo al recipiente universale.
3. Mettere gli ingredienti nel recipiente.
4. Posizionare il coperchio sul recipiente. La linguetta del coperchio deve
essere orientata verso destra della colonna posteriore. Per bloccare
il coperchio in posizione, girare in senso antiorario.
N.B. L’apparecchio può funzionare solo se il coperchio viene bloccato correttamente.
L’apparecchio si spegne non appena viene tolto il coperchio.
5. Attaccare l’apparecchio alla corrente. È pronto per funzionare.
24
Recipiente
universale (2)
Asse
Motore con moto
reversibile (1)
Dispositivo alloggiacavo
Page 27

4. FUNZIONI DELL’APPARECCHIO
I tasti e permettono di avviare e arrestare il motore.
È sufficiente premere il tasto selezionato dopo aver messo gli ingredienti nel
recipiente. Non appena il pulsante viene rilasciato, il motore si ferma. La lama
gira automaticamente nel senso desiderato, in funzione del tasto selezionato.
A. TRITARE
Il tasto si utilizza con il lato affilato della lama per sminuzzare, ridurre
in purea e tritare alimenti teneri come verdure cotte, erbe aromatiche, cipolle,
aglio e la maggior parte dei formaggi.
B. MACINARE
Il tasto si utilizza con il lato più spesso della lama per macinare o
tritare alimenti solidi come caffè in chicchi o pepe in grani, spezie, cioccolato
e noci.
5. CONSIGLI D’USO
A. Preparazione degli alimenti
Tagliare gli alimenti in pezzi di circa 1,5 cm. Più gli alimenti sono tagliati
grossolanamente, maggiore è il tempo necessario per tritarli.
Per ottenere risultati regolari ed evitare inutili tensioni al motore, non introdurre
troppi alimenti nel recipiente universale. Gli alimenti non devono occupare più
di 2/3 del recipiente.
IMPORTANTE
• Per far sì che non si muova, si consiglia di tenere l’apparecchio
con una mano durante il funzionamento.
• Verificare di non aver introdotto una quantità di alimenti superiore
a quella raccomandata nel presente manuale.
• Non far mai funzionare l’apparecchio per più di un minuto
ininterrottamente.
• Aspettare sempre che la lama termini di girare prima di togliere
il coperchio.
• Non cercare mai di togliere coperchio e recipiente contemporaneamente. Prima togliere il coperchio, poi il recipiente.
Svuotare il recipiente e successivamente togliere la lama.
• Per evitare che la lama cada quando si svuota il recipiente, si
raccomanda di tenerla con un dito sull’apposito asse, o tenendola
ferma da sotto (mettendo un dito nell’apertura prevista per
l’asse del motore).
B. Tritare o ridurre in purea
Premere e lasciare più volte il tasto , facendo attenzione che gli
alimenti ricadano sempre in fondo al recipiente ad ogni stop. Se
necessario, usare la spatola sui bordi del recipiente. Verificare spesso
la consistenza per evitare di tritare troppo finemente.
ritare le erbe aromatiche
T
Erbe aromatiche, recipiente e lama devono essere perfettamente puliti e
asciutti. Togliere i gambi dalle erbe aromatiche, conservando solo la parte più
tenera. Mettere le erbe nel recipiente e premere il tasto più volte, fino
a quando le erbe risultano sufficientemente tritate. Più erbe si tritano alla
volta, più saranno tritate finemente.
Se perfettamente asciutte, una volta tritate le erbe aromatiche si conservano
4 o 5 giorni in frigo, in un sacchetto chiuso ermeticamente. Possono essere
anche congelate.
ritare carne, pollame, pesce e crostacei :
T
Gli alimenti devono essere molto freddi ma non congelati. Tagliare gli alimenti
in pezzi da 1,5 cm circa. Premere il tasto per sminuzzare grossolanamente. Poi, per tritare più finemente, lasciare girare il motore per alcuni
secondi. Se necessario, usare la spatola per togliere gli alimenti che restano
sui bordi.
riturare le noci :
T
Mettere le noci nel recipiente e premere il tasto . Controllare
spesso che le noci triturate non si ammassino, condensandosi, nel recipiente.
Se necessario, usare la spatola per ridistribuirle dentro il recipiente universale.
Ridurre gli alimenti in purea
Tritare grossolanamente usando la funzione ad impulsi tenendo il tasto
premuto fino alla consistenza desiderata. (NOTA : questo procedimento non è
adatto per ridurre in purea le patate).
Aggiungere dei liquidi
Durante il funzionamento dell’apparecchio, è possibile aggiungere dei liquidi,
come acqua o olio, o degli aromi.
Per far questo, versare il liquido da una delle due aperture del coperchio.
Verificare che l’altra apertura sia lasciata libera affinché l’aria possa circolarvi.
C. Macinare
Procedere nello stesso modo per gli alimenti duri : premere il tasto a
impulsi, facendo attenzione che gli alimenti ricadano sempre in fondo al
recipiente ad ogni stop. Per una consistenza più fine, premere e mantenere il
tasto premuto per diversi secondi : 20 secondi per certi alimenti, fino a 40 per
i chicchi di caffè.
:
:
:
25
Page 28

6. TECNICHE DI FUNZIONAMENTO E QUANTITÀ CONSIGLIATE
INGREDIENTI TRITARE MACINARE COMMENTI
Aglio
Acciughe
Bacon
Burro
Caffè (in grani)
Cannella (in bastoncini)
Sedano
Funghi
Cioccolato
Formaggio a pasta dura
Formaggio a pasta semidura
Formaggio a pasta semimolle
Formaggio a pasta molle
Chicchi (cumino, semi papav. ecc.)
Erbe aromatiche
Verdura cotta
Noce moscata
Noci, nocciole
Cipolle, scalogni
Olive
Pepe (in grani)
Peperoni
Carne, pollami, pesce
26
x
x
x
Deve essere croccante
x
x
Max. 250 gr alla volta
x
x
x
x
x
Max. 30 gr alla volta
Max. 60 gr alla volta, tagliato a pezzi da 1,5 cm
x
x
x
Deve essere molto freddo
Deve essere molto freddo
x
x
x
x
Devono essere perfettamente asciutte
Devono essere cotti al punto da risultare teneri
Premere e rilasciare più volte ridurre a pezzi, poi lasciar girare per
macinare
x
x
x
x
x
x
Devono essere molto freddi ma non congelai, tagliati a pezzi
regolari. Max. 150 gr.
Page 29

7. IL PARERE DEGLI CHEFS
8. DOMANDE/RISPOSTE
Cosa fare se ... Risposte:
1. Non riempire completamente la ciotola del minipreparatore per evitare
risultati irregolari e una tensione inutile al motore. In generale, gli alimenti
non devono superare i 2/3 della ciotola.
2. Asciugare bene le erbe aromatiche prima di tritarle, al fine di conservarle
molto più a lungo. Messe in un sacchetto chiuso ermeticamente, le erbe
aromatiche si conservano in frigo 4/5 giorni.
3. Per emulsionare un condimento ( salsa vinaigrette, maionese, béarnaise,
ecc.) utilizzare prima il tasto Tritare per legare il preparato, poi il tasto
macinare per rendere solido il miscuglio incorporando il liquide tramite il
dispositivo “goccia a goccia” del coperchio
4. Nel fare la spesa, scegliere spezie intere e macinarle subito nel
minipreparatore per conservarne il massimo di aroma e di sapore.
5. Per conservare i sapori delle spezie intere, utilizzare dei vasetti fermati
ermeticamente con una guarnizione di gomma.
6. Per preparare rapidamente la panna montata, versare nella ciotola un po' di
panna liquida fredda e premere sul tasto Tritare per 40 secondi. Il risultato
sarà eccellente. Aggiungere un po' di zucchero alla fine della preparazione
per ottenere una crema chantilly.
7. Il minipreparatore permette di elaborare rapidamente delle saporiti puree di
verdura per i bambini. In modalità Tritare per miscugli carne e verdura o
verdura e pesce. In modalità macinare per dei miscugli emulsionati con
burro fuso, olio d'oliva o panna.
Gli ingredienti non risultano
abbastanza tritati, restano dei
pezzi?
Gli alimenti restano appiccicati
sulle pareti della ciotola?
Gli ingredienti liquidi non si
mescolano correttamente?
Il minipréparatore non funziona? Controllare che il sistema di
Attenzione a non riempire troppo
la ciotola.
Utilizzare il principio del motore
reversibile premendo alternativamente sul tasto Tritare poi
Macinare. Questo permette agli
alimenti di ripartirsi meglio nella
ciotola.
Devono essere aggiunti solo
quando l'apparecchio è in funzione, affinché leghino meglio.
sicurezza del coperchio sia inserito correttamente sulla parte
posteriore del minipreparatore.
9. PULIZIA E MANUTENZIONE
L’apparecchio può essere lasciato sul piano di lavoro della vostra cucina.
Staccarlo dalla corrente quando non viene utilizzato. Non lasciare il coperchio
bloccato in posizione per evitare di danneggiare il meccanismo.
La lama deve essere riposta fuori della portata dei bambini.
Tutti li componenti del vostro apparecchio, ad eccezione della base motore,
possono essere messi in lavastoviglie. Vi raccomandiamo di sciacquare
recipiente universale, coperchio e lama subito dopo l’uso, per evitare che gli
alimenti si secchino.
Se la lama viene lavata a mano, prestare la massima attenzione. Evitare di
lasciare la lama dentro dell’acqua insaponata, dato che potrebbe risultare non
visibile. Maneggiarla sempre con la massima cautela.
Per pulire la base dell’apparecchio, usare una spugnetta con alcune gocce di
detersivo delicato. Non utilizzare spugne abrasive.
IMPORTANTE : Non lasciare mai la lama sul blocco motore quando
l’apparecchio non viene utilizzato.
27
Page 30

10. ISTRUZIONI DI SICUREZZA
Come qualsiasi elettrodomestico, il vostro robot da cucina deve essere
maneggiato con cautela. Seguire i seguenti consigli per evitare incidenti.
• Maneggiare la lama con la massima attenzione. Evitare di toccare le parti
metalliche affilate.
• Posizionare la lama sempre prima di aggiungere gli ingredienti.
• Non mettere mai la lama sul blocco motore prima di aver bloccato il recipiente
universale in posizione.
• Prima di accendere l’apparecchio, verificare che la lama sia bloccata bene in
fondo sul blocco motore, e che il coperchio sia posizionato correttamente.
Non forzare per chiudere il meccanismo del coperchio.
• Utilizzare la spatola solo quando il motore dell’apparecchio è spento. Evitare
qualsiasi contatto con le parti in movimento.
• Aspettare sempre che la lama abbia finito di girare prima di togliere il coperchio.
• Staccare sempre l’apparecchio dalla corrente prima di pulirlo, riporlo o
togliere gli accessori.
• Togliere il recipiente universale dalla base prima di estrarre la lama.
• Fare attenzione che la lama non cada, tenendola saldamente quando il
recipiente universale è vuoto.
• Utilizzare l’apparecchio esclusivamente con gli accessori Cuisinart® forniti
in dotazione.
• Non immergere la base dell’apparecchio in acqua o altro liquido.
• Staccare sempre l’apparecchio dalla corrente dopo l’uso, prima di montarlo
o smontarlo, prima di togliere gli alimenti e prima di pulirlo. Non lasciare
l’apparecchio attaccato alla corrente e incustodito. Per staccare l’apparecchio
dalla corrente, si raccomanda di tirare la spina, non il cavo.
• Fare in modo che il cavo non esca dal piano di lavoro. Evitare qualsiasi contatto
fra il cavo e superfici calde.
• Non lasciare la lama inserita sul blocco motore quando l’apparecchio non
viene utilizzato. Riporre la lama fuori della portata dei bambini.
• Per evitare danni al meccanismo, non riporre l’apparecchio con il coperchio
completamente chiuso.
• Prestare la massima attenzione se l’apparecchio viene utilizzata vicino a dei
bambini. Riporre l’apparecchio fuori della portata dei bambini. Il robot da
cucina non deve essere utilizzato da bambini.
• Non utilizzare l’apparecchio se caduto o se presenta danni evidenti.
• Interrompere immediatamente l’utilizzo dell’apparecchio se il cavo fosse
danneggiato. In questo caso farlo sostituire da uno specialista. Inoltre,
nessuna riparazione deve essere eseguita dall’utente. In entrambi i casi,
comunque, si prega di rivolgersi al proprio rivenditore o prendere contatto
con la società Conair Europe S.p.a., numero telefonico 055 340095 - Fax
055 340096.
• Questo apparecchio è conforme alle direttive 89/336/CEE (compatibilità
elettromagnetica) e 73/23/CEE (sicurezza degli apparecchi elettrodomestici),
emendate dalla direttiva 93/68/CEE (marcatura CE).
• Utilizzare l’apparecchio solo per cucinare, secondo le presenti istruzioni.
• Non utilizzare all’esterno.
• Progettato per esclusivo uso domestico.
Smaltimento di apparecchi elettrici ed elettronici alla fine del ciclo di vita.
Per il bene comune e per partecipare attivamente all'impegno collettivo di
tutela ambientale:
• non mischiare questi prodotti con i rifiuti domestici;
• utilizzare i sistemi di recupero e raccolta messi a vostra disposizione.
In questo modo sarà possibile riciclare o valorizzare alcuni materiali.
28
Page 31

1. INTRODUCCIÓN
Acaba usted de comprar el Minirrobot Cuisinart®.
Es un aparato de calidad que le permitirá hacer toda clase de preparaciones
sencilla y rápidamente. Con él puede usted hacer carne picada, puede moler,
puede hacer puré, puede emulsionar y mezclar sus alimentos en unos segundos.
Su cuchilla tiene un lado afilado para picar, mezclar o hacer puré. Con el otro
lado, más grueso y romo, puede usted moler alimentos duros como granos de
café o nueces. Tiene un motor reversible, potente, que realiza muchas tareas
en unos cuantos segundos.
2. SU APARATO TIENE
1. Un motor reversible con dos teclas muy prácticas.
2. Un receptáculo de preparación de 0,6 L.
3. Una espátula (no sale en la foto).
4. Una tapa
5. Una cuchilla
que se puede fijar en el recipiente y que tiene dos aperturas para
echar líquidos durante la utilización.
de precisión profesional que no se gasta. Se mueve en un sentido
para picar y en el otro sentido para moler.
Tapa (4)
Cuchilla (5)
¡ OJO ! LA CUCHILLA CORTA DE VERAS. Para no cortarse al sacar el aparato
de la caja le aconsejamos que trate la cuchilla con sumo cuidado. No toque
nunca las partes metálicas. Asga o agarre siempre la cuchilla por su parte central.
3. MONTAJE
1. Meta el receptáculo en el eje del motor. Para fijarlo en el bloque motor
hágalo girar en el sentido contrario a las agujas del reloj, o sea, hacia la
izquierda.
2. Agarrándola por su parte central, coloque con mucho cuidado la cuchilla en
el eje central del receptáculo. Coloque las muescas de la cuchilla en la
forma correspondiente del eje. La cuchilla debe encajar bien en el fondo del
receptáculo.
3. Meta los ingredientes en el receptáculo.
4. Ponga la tapa en el receptáculo. La lengüeta de la tapa debe mirar a la
derecha de la columna trasera. Para que la tapa pueda cerrar bien, tiene que
hacerla girar en el sentido contrario al de las agujas del reloj, o sea, hacia
la izquierda.
ATENCIÓN : El aparato no se pone en marcha si la tapa no está bien metida
en su sitio. Y el aparato se para inmediatamente cuando se levanta o se
quita la tapa.
5. Enchufe el aparato y estará listo para funcionar.
Receptáculo de
preparación (2)
Motor reversible (1)
Cordón automático
Eje
29
Page 32

4. FUNCIONES
Las teclas de y de sirven para poner en marcha el motor y
para detenerlo. Pulse la tecla correspondiente a lo que quiera hacer pero no
se olvide de que primero tiene que meter los ingredientes en el receptáculo.
Si deja de pulsar la tecla, el motor se para inmediatamente. La cuchilla gira
automáticamente en el sentido indicado por la tecla que usted pulse.
A. PICAR
La tecla se usa con el lado afilado de la cuchilla para picar y también
para hacer puré y para mezclar alimentos blandos como legumbres cocidas,
hierbas, cebollas, ajo y casi todos los tipos de quesos.
B. MOLER
La tecla se usa con el lado romo de la cuchilla para moler o picar
alimentos sólidos como granos de café o de pimienta, especies, chocolate y
nueces.
5. CÓMO UTILIZAR EL APARATO
B. Picar o hacer puré
Pulsar y soltar varias veces la tecla , asegurándose de que los alimentos
van cayendo hasta el fondo del receptáculo. Utilice la espátula para raspar los
bordes del receptáculo si hace falta. Compruebe constantemente el grosor del
picado para evitar que se pique demasiado fino.
Picar las hierbas frescas
Las hierbas aromáticas, el receptáculo y la cuchilla deben estar totalmente
limpios y secos. Corte el tallo de las hierbas para quedarse solamente con las
partes tiernas. Ponga las hierbas en el receptáculo y pulse la tecla varias
veces seguidas hasta que las hierbas estén suficientemente picadas. Cuanto
más hierbas más fino el picado.
Si están secas del todo una vez picadas, las hierbas aromáticas se conservarán
de 4 a 5 días en el refrigerador a condición de meterlas en un saquito cerrado
herméticamente. También se pueden congelar.
Picar carne, aves
Todos estos alimentos tienen que estar muy fríos pero no congelados. Hay que
cortarlos en trozos de más o menos un centímetro y medio. Pulse la tecla
para un primer picado. Si quiere picar más fino, deje que el motor
trabaje durante unos segundos más. Utilice la espátula si quedan restos en
alguna parte.
:
, pescados y crustáceos :
A. Preparación de los alimentos
Cortar los alimentos en cachitos de un centímetro y medio aproximadamente.
Cuanto más gruesos, más tiempo para picarlos.
No llene demasiado el receptáculo de preparación para evitar irregularidades
y para no obligar al motor a trabajar con una tensión excesiva no necesaria.
En general, los alimentos no deben ocupar más de los dos tercios del receptáculo
de preparación.
IMPORTANTE
• Le recomendamos que agarre el aparato con una mano cuando
funcione para que no vibre ni se mueva.
• No utilice nunca cantidades superiores a las recomendadas en
este manual.
• No use el aparato más de un minuto seguido (haga pausas).
• Espere siempre a que la cuchilla se haya parado del todo antes
de levantar la tapa.
• No intente nunca quitar la tapa y el receptáculo al mismo tiempo.
Quite primero la tapa y luego el receptáculo. Vacíe primero el
receptáculo y luego puede quitar la cuchilla.
• Para que la cuchilla no se caiga cuando vacíe el receptáculo,
ponga un dedo por encima del eje de la cuchilla o bien coloque
un dedo por encima de la cuchilla en la ranura prevista para el
eje del motor.
30
Picar nueces
Meta las nueces en el receptáculo y pulse la tecla . Tenga cuidado de
que no se le junten las nueces formando pelotas en el receptáculo. Si hace
falta, utilice la espátula para repartir las nueces por todo el receptáculo.
Puré
Primero hay que picar un poco pulsando varias veces seguidas la tecla
hasta obtener la calidad de masa deseada. (NOTA : este procedimiento no sirve
para hacer puré de patatas).
Añadir líquidos
Puede añadir líquidos como agua, aceite o aromas. Para ello, vierta el líquido
por uno de los dos agujeros de la tapa dejando libre el otro para que el aire
circule.
C. Moler
Lo mismo para alimentos duros: pulsar la tecla varias veces seguidas
asegurándose de que los alimentos cayen en el fondo del receptáculo a cada
parada. Para afinar la masa, mantenga la tecla pulsada varios segundos –
hasta 20 segundos para algunos granos y hasta 40 segundos para los granos
de café.
:
:
:
Page 33

6. TÉCNICAS DE FUNCIONAMIENTO Y CANTIDADES RECOMENDADAS
INGREDIENTES PICAR MOLER COMENTARIOS
Ajo
Anchoas
Bacon
Mantequilla
Café (en grano)
Canela (en rama)
Apio
Champiñones
Chocolate
Quesos de pasta dura
Quesos de pasta semidura
Quesos de pasta semiblanda
Quesos de pasta blanda
Semillas (comino, amapola, etc.)
Hierbas frescas
Verduras hervidas
Nuez moscada
x
x
x
Debe estar crujiente
x
x
Máx. 250 gr cada vez
x
x
x
x
x
Máx. 30 gr cada vez
Máx. 60 gr cada vez, cortado en trozos de 1,5 cm
x
x
x
Debe estar muy frío
Debe estar muy frío
x
x
x
x
Deben estar muy secas
Deben estar cocidas hasta que se ablanden
Pulsar varias veces para triturar y mantener en marcha para moler
Nueces, avellanas
Cebollas, chalotas
Aceitunas
Pimienta (en grano)
Pimientos
Carne, aves, pescado
x
x
x
x
x
x
Los alimentos deben estar muy fríos, pero no congelados y
cortados en trozos regulares. Máx. 150gr.
31
Page 34

7. SUGERENCIAS DE LOS CHEFS
8. PREGUNTAS / RESPUESTAS
Qué hacer si: Respuestas:
1. No llene completamente el recipiente del minirrobot, con el fin de evitar
resultados irregulares y una tensión inútil al motor. Como norma general,
los alimentos no deben superar los 2/3 del bol.
2. Seque las hierbas aromáticas antes de picarlas, y así le durarán mucho más
tiempo. Guárdelas en una bolsa cerrada herméticamente. En la nevera se
conservan 4 a 5 días.
3. Para emulsionar una salsa (vinagreta, mayonesa, salsa bearnesa) utilice en
primer lugar la tecla picar para ligar la preparación. Luego pase a la tecla
moler para espesar la salsa, incorporando el líquido por el dispositivo gota
a gota de la tapadera.
4. Si compra las especias en grano y las muele en el último minuto, podrá
extraer todo su aroma y su sabor.
5. Para conservar el aroma de las especias en grano, utilice tarros cerrados
herméticamente con una junta de caucho.
6. Para elaborar rápidamente nata montada, vierta en el bol del minirrobot un
poco de nata líquida fría y pulse la tecla picar durante 40 segundos.
Obtendrá un resultado perfecto. Añada un poco de azúcar para obtener
chantillí.
7. El minirrobot le permite elaborar rápidamente purés de verdura muy
sabrosos para sus hijos. Utilice la tecla picar para mezclar verduras con
carne o verduras con pescado. Utilice la tecla moler para obtener mezclas
emulsionadas con mantequilla fundida, aceite de oliva o nata.
Los ingredientes no se han triturado suficientemente y quedan
trozos sin picar.
Los alimentos se quedan pegados
a las paredes del bol.
Los ingredientes líquidos no se
mezclan correctamente.
El minirribit no funciona. Verifique que el sistema de
Tenga cuidado de no llenar
demasiado el recipiente.
Utilice el principio del motor
reversible, pulsando alternativamente la tecla picar y la tecla
moler. De esta forma, los alimentos pueden distribuirse mejor por
el bol.
Deben añadirse únicamente con
el motor en marcha, para que
liguen mejor.
seguridad de la tapadera está
enganchado en la parte trasera
del minirrobot.
9. LIMPIAR Y GUARDAR
Puede dejar el aparato en la mesa de la cocina en que lo ha utilizado.
Desenchúfelo en todo caso si no lo va a utilizar. No deje la tapa cerrada para
no estropear el mecanismo.
Esconda la cuchilla donde los niños no la puedan encontrar.
Puede lavar en el lavaplatos todos los elementos de su aparato salvo la base
del motor. Le recomendamos que enjuague el receptáculo de preparación, la
tapa y la cuchilla inmediatamente después de usarlos para que no se sequen
los restos de alimentos.
Si quiere lavar la cuchilla con la mano, tenga mucho cuidado porque se puede
cortar. No deje la cuchilla en agua jabonosa porque se le puede olvidar si no
la ve. En todo caso, tenga muchísimo cuidado.
Para limpiar la base del aparato, use una esponja humedecida en un
detergente suave. No use nunca una esponja abrasiva.
IMPORTANTE : No deje nunca la cuchilla en el eje motor cuando
no vaya a usar el aparato.
32
Page 35

10. NORMAS DE SEGURIDAD
Como todo aparato electrodoméstico, este preparador culinario tiene que
utilizarse con precaución. Respete los consejos que le damos para no herirse
ni hacerse daño.
• Trate la cuchilla con mucho cuidado. No toque las partes metálicas cortantes.
• Antes de meter los ingredientes ponga la cuchilla en su sitio.
• No ponga nunca la cuchilla en el eje motor antes de cerrar el receptáculo.
• Antes de encender el aparato hay que estar segurísimo de que la cuchilla
está metida a fondo en el eje motor y de que la tapa está bien puesta en su
sitio. No fuerce ni bloquee el mecanismo de la tapa.
• La espátula sólo se debe utilizar cuando el motor esté parado. Nunca jamás
se le ocurra tocar las piezas en movimiento.
• Antes de quitar la tapa hay que esperar que la cuchilla se haya parado del todo.
• Desenchufe el aparato antes de empezar a limpiarlo y antes de meter o
sacar los accesorios.
• Antes de sacar la cuchilla tiene que separar al receptáculo de la base.
• Tenga cuidado de que no se le caiga la cuchilla cuando vacíe el receptáculo.
• Sólo con los accesorios de Cuisinart® se debe utilizar este aparato.
• No meta nunca la base del aparato ni en el agua ni en otros líquidos.
• Desenchufe el aparato después de usarlo, antes de juntar las partes, antes
de desmontarlas, antes de retirar los alimentos y antes de ponerse a limpiarlo.
No deje nunca enchufado el aparato si nadie está presente para ver lo que
pasa o lo que pudiera pasar. Para desenchufarlo tire de la clavija, nunca del
cordón.
• No deje el cordón eléctrico colgando de la mesa de trabajo ni permita que
toque superficies calientes.
• No deje la cuchilla en el eje del motor cuando no se esté utilizando el aparato.
Esconda la cuchilla donde los niños no puedan verla ni encontrarla.
• Para no dañar el mecanismo, no guarde el aparato con la tapa completamente
cerrada.
• Tenga mucho cuidado si el aparato se usa cerca de niños. Guárdelo en un
sitio que los niños no puedan descubrir o al que no puedan llegar. No permita
nunca jamás que los niños utilicen este aparato.
• No utilice el aparato si se ha caído o si parece que está averiado.
• Deje de utilizar inmediatamente el aparato si el cordón eléctrico está
averiado. Y si está averiado tiene que llevárselo a un profesional para que
lo reemplace por otro.
• No intente nunca reparar el aparato.
• Este aparato cumple las normas esenciales de las Directivas 89/336/CEE
(Compatibilidad electromagnética) y 73/23/CEE (Seguridad de aparatos
electrodomésticos) tal como han sido enmendadas por la Directiva
93/68/CEE (marca CE).
• Utilice este aparato sola y exclusivamente para cocinar y ello respetando las
instrucciones de este manual.
• No lo utilice nunca fuera de la cocina, nunca en el exterior.
• Solamente para uso doméstico.
Residuos de equipos eléctricos y electrónicos fuera de uso.
En interés de todos, y para participar en los esfuerzos colectivos de protección
del medio ambiente:
• No se deshaga de estos productos junto con la basura doméstica.
• Utilice los sistemas de recogida que estén a su disposición.
De esta forma, algunos materiales podrán recuperarse y reciclarse.
33
Page 36

 Loading...