

Page 1
Safe Operation Practices • Set-Up • Operation • Maintenance • Service • Troubleshooting • Warranty
Op e r a t O r ’s Ma n u a l
42” Timing Deck Striper/Roller
WARNING
READ AND FOLLOW ALL SAFETY RULES AND INSTRUCTIONS IN THIS MANUAL
BEFORE ATTEMPTING TO OPERATE THIS MACHINE.
FAILURE TO COMPLY WITH THESE INSTRUCTIONS MAY RESULT IN PERSONAL INJURY.
CUB CADET LLC, P.O. BOX 361131 CLEVELAND, OHIO 44136-0019
Printed In USA
Form No. 769-03885
(February 19, 2008)
Page 2
Carriage Bolts
Flange Nuts
Flange Nuts
Carriage Bolts
Assembly & Set-Up
Contents of Carton
One 42” Timing Deck Striper/Roller• One Operator’s Manual•
3
Assembly
NOTE: On older model decks the holes used to attach the Striper/
Roller to the mowing deck will have to be drilled in order to
install the attachment.
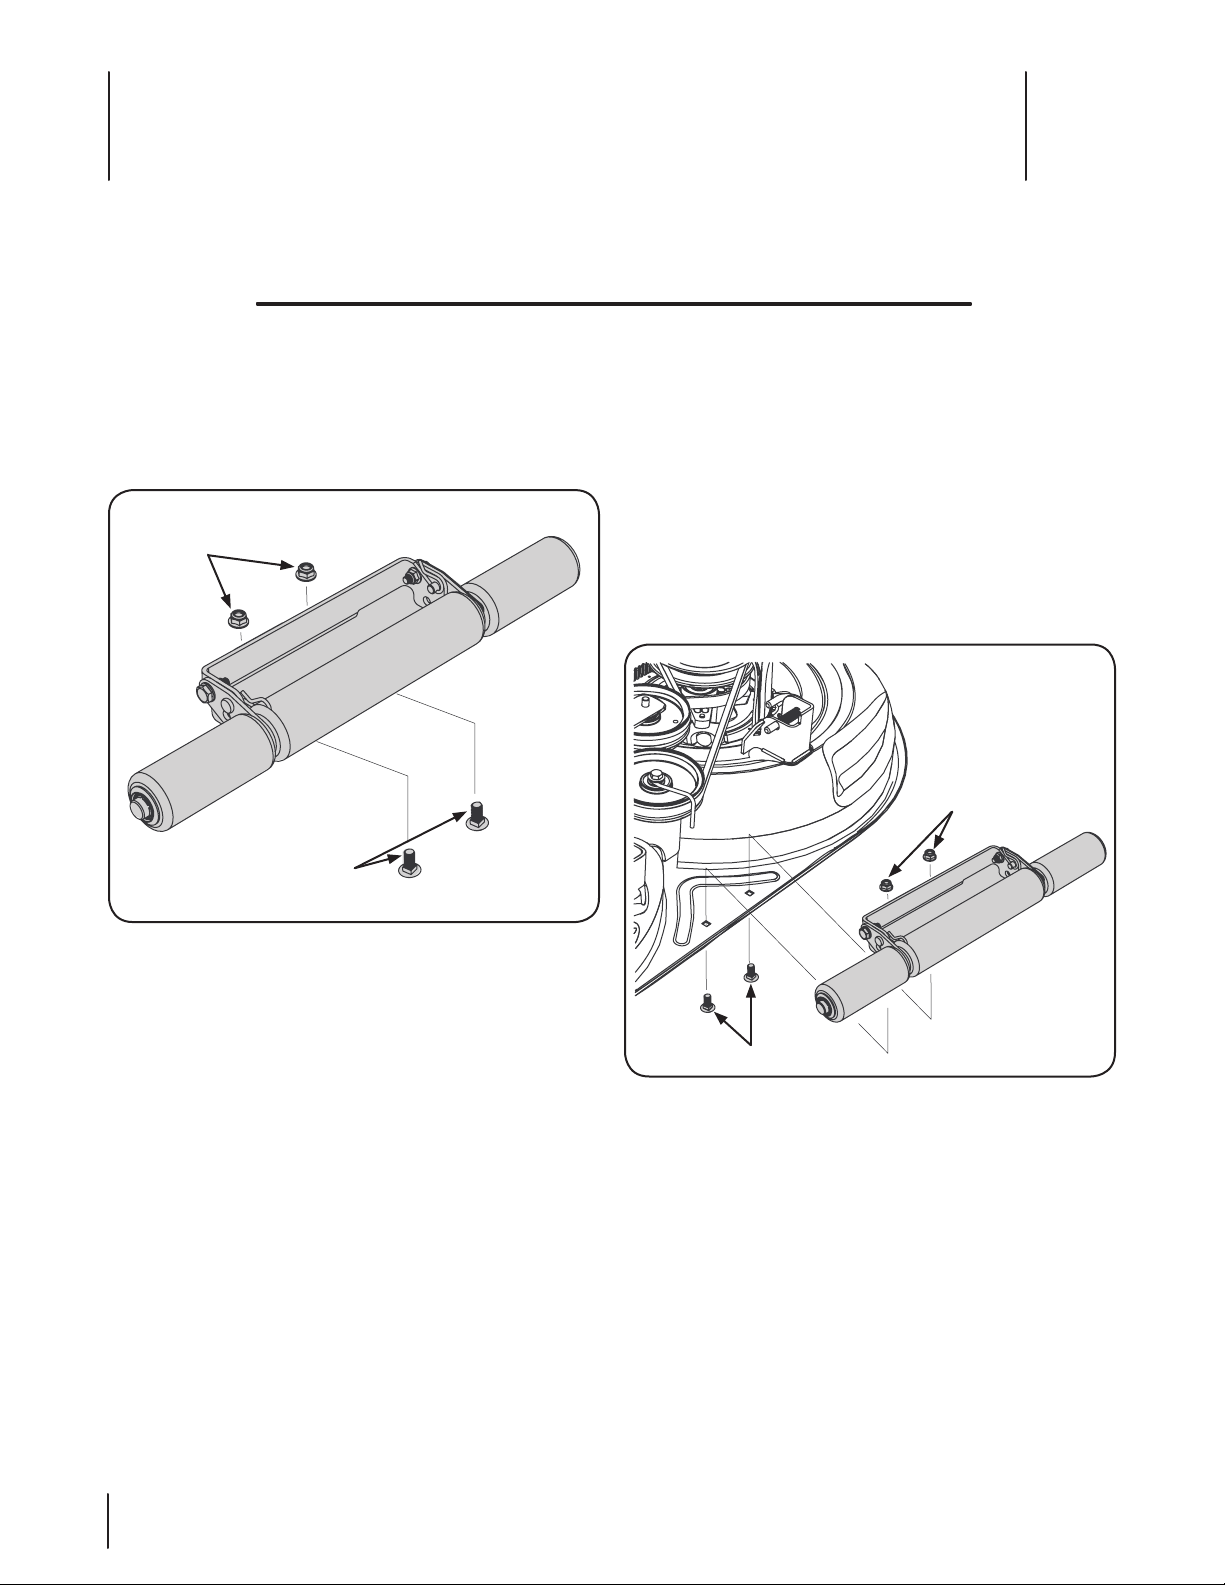
Remove the attached carriage bolts and flange nuts from 1.
the mounting bracket. See Fig. 1-1.
On the back center of the deck, lay the bracket on a spot on 2.
the deck that will not interfere with any of the belts, blades,
etc. under the deck.
When you have the bracket positioned properly use a 3.
marker to mark the location of the two holes in the bracket
onto the deck.
Use a 4. ⁄” drill bit to drill the previously marked holes.
NOTE: The deck is made of strong metal so be careful to
maintain a strong grip on the drill to ensure a clean hole
and avoid damage to the deck.
With the carriage bolts and flange nuts removed earlier, 5.
attach the Striper/Roller to the deck and tighten securely.
See Fig. 1-2.
2
Figure 1-1
NOTE: If it is neccessary to drill the holes to attach the
Striper/Roller continue on to step 2, if not skip to step 5.
Figure 1-2
Page 3

Se t-Up
Cotter Pin
Clevis Pin
Clevis Pin
The roller can be adjusted to two different heights.
Remove the cotter pins and clevis pins from each side of 1.
the Striper/Roller. See Fig. 1-3.
Figure 1-3
Move the adjustment bracket to the desired height and 2.
replace the cotter pin and clevis pin to lock into place.
3se c t i O n 2 — as s e M b l y & se t -up
Page 4

8
5
7
2
10
11
9
14
3
1
14
12
10
2
5
8
7
4
3
6
4
13
Illustrated Parts List
2
Ref. Part Number Description
1. 710-0451 Carriage Bolt, ⁄-18 x .750
2. 711 -1 42 1 Clevis Pin, ⁄ x .750
3. 712 - 04 06 3 Flange Lock Nut, ⁄-18
4. 714 -014 9B Cotter Pin
5. 726-04035 Push Nut, ⁄
6. 731-0335 Deck Roller
7. 731- 063 65 Deck Roller, 2.25 x 5.25
8. 736-0188 Flat Washer, .76 x 1.49 x .06
9. 736-3024 Flat Washer, .469 x .750 x .06
10. 738-0296 Shoulder Screw, .437 x .268 x ⁄-18
11. 747- 0 4915 Roller Rod, .75 x 22.875
12 . 783- 05916 Anti-Rot Rod Plate
13 783 -05918 Roller Bracket
14. 783-05923 Roller Plate Adjustment
4
Page 5

Notes
5
Page 6

6 nO t e s
Page 7

7 nO t e s
Page 8

U
I
N
N
E
G
F
A
C
T
O
R
To order replacement parts, call a Customer Support Representative at (800) 965-4CUB.
Locate your nearest Cub Cadet dealer at (877) 282-8684
or visit www.cubcadet.com to find the nearest Cub Cadet dealer in your area.
E
S
T
R
A
P
Y
CUB CADET LLC, P.O. BOX 361131 CLEVELAND, OHIO 44136-0019
 Loading...