

Page 1

GTi5.2E
GTi6.2E
COMPONENT SYSTEMS
BENUTZERHANDBUCH
OWNER,S MANUAL
Page 2

DEUTSCH
INSTALLATION DER LAUTSPRECHER
Der erste Schritt bei der Installation des Lautsprecher Systems sollte die sorgfältige Planung sein.
Wählen Sie eine geeignete Stelle für den Einbau sorgfältig aus. Beachten Sie die folgenden Vorschläge,
um das bestmögliche Resultat zu erreichen.
1. Wählen Sie für die Lautsprecher eine Position, bei der das Signal am besten ohne Hindernisse im
Fahrgastraum verteilt wird. Beachten Sie dabei die Position der Fahrersitze, Nackenstützen und anderer
Aufbauten im Innenraum des Autos.
2. Montieren Sie die Lautsprecher auf der linken bzw. rechten Seite in der gleichen Anordnung. Vermeiden
Sie wenn möglich, dass ein Lautsprecher höher, tiefer, weiter weg oder näher wie der dazu
gegenüberliegende Lautsprecher montiert wird.
3. Überprüfen Sie vor dem Bohren von Montagelöchern für die Lautsprecherkomponenten immer, was
sich hinter der gewählten Montagefläche befindet. Bitte beschädigen Sie auf keinen Fall
Fensterhebevorrichtungen, Kabelbäume, den Benzintank oder andere Fahrzeugteile.
4. Sie erreichen das beste Klangresultat, wenn die Lautsprecher fachgerecht in einer vorgesehenen
Lautsprecheröffnung eines Türpanel oder einer Heckablage fest montiert werden. Lücken oder lose
Stellen zwischen Lautsprecherkorb und der Montagefläche sollten abgedämmt bzw. geschlossen
werden.
ANSCHLUSS DER TIEFMITTELTÖNER
• Verbinden Sie die Plus-Anschlüsse (”+”) bzw. die Minus-Anschlüsse (”–”) der Lautsprecher
mit den entsprechenden Lautsprecher-Ausgängen des Verstärkers.
• Verwenden Sie zum Anschliesen die beiliegenden Kabel mit Stecker.
ANSCHLUSS DER HOCHTÖNER
• Verb inde n Sie die Plus-Stec ker (”weiß”) bzw. di e Minus-Stecker (”schwarz”) des Hochtöner s mit den
entsprechenden Kabeln der Kabel-Frequenzweiche, welche aus der mit ”OUTPUT” markierten Stelle
herausführen.
ANSCHLUSS DER KABEL-FREQUENZWEICHE
• Verb inden Sie die Plus-Anschlüsse (”+” ) bzw. die Minus-Ansch lüss e (” –”) des Lautsprecher-Aus gang s
Ihres Verstärkers mit den entsprechenden Anschlüssen, die aus der mit ”INPUT” markierten Stelle
herausführen.
Wiederholen Sie jeweils die Schritte für das Kanalpaar auf der anderen Fahrzeugseite.
WICHTIG: Betreiben Sie die Hochtöner niemals ohne die beiliegende Kabel-Frequenzweiche.
Page 3
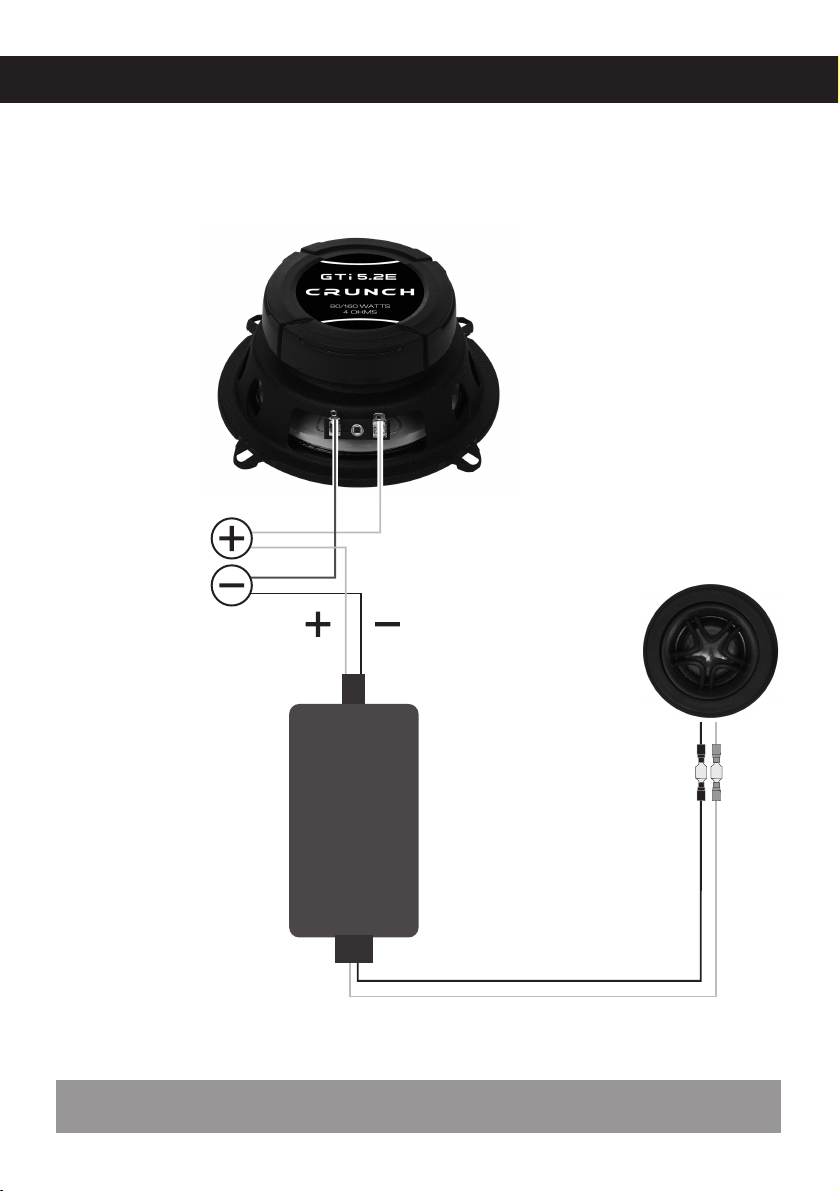
ANSCHLUSS-DIAGRAMM
DEUTSCH
TIEFMITTELTÖNER
R/L
LAUTSPRECHER-
AUSGÄNGE DES
VERSTÄRKERS
WEISS SCHWARZ
INPUT
HOCHTÖNER
KABELFREQUENZWEICHE
R/L
OUTPUT
Bitte achten Sie unbedingt auf die korrekte Polarität (+ oder –) aller Anschlüsse und Verbindungen.
WICHTIG!
R/L
Page 4
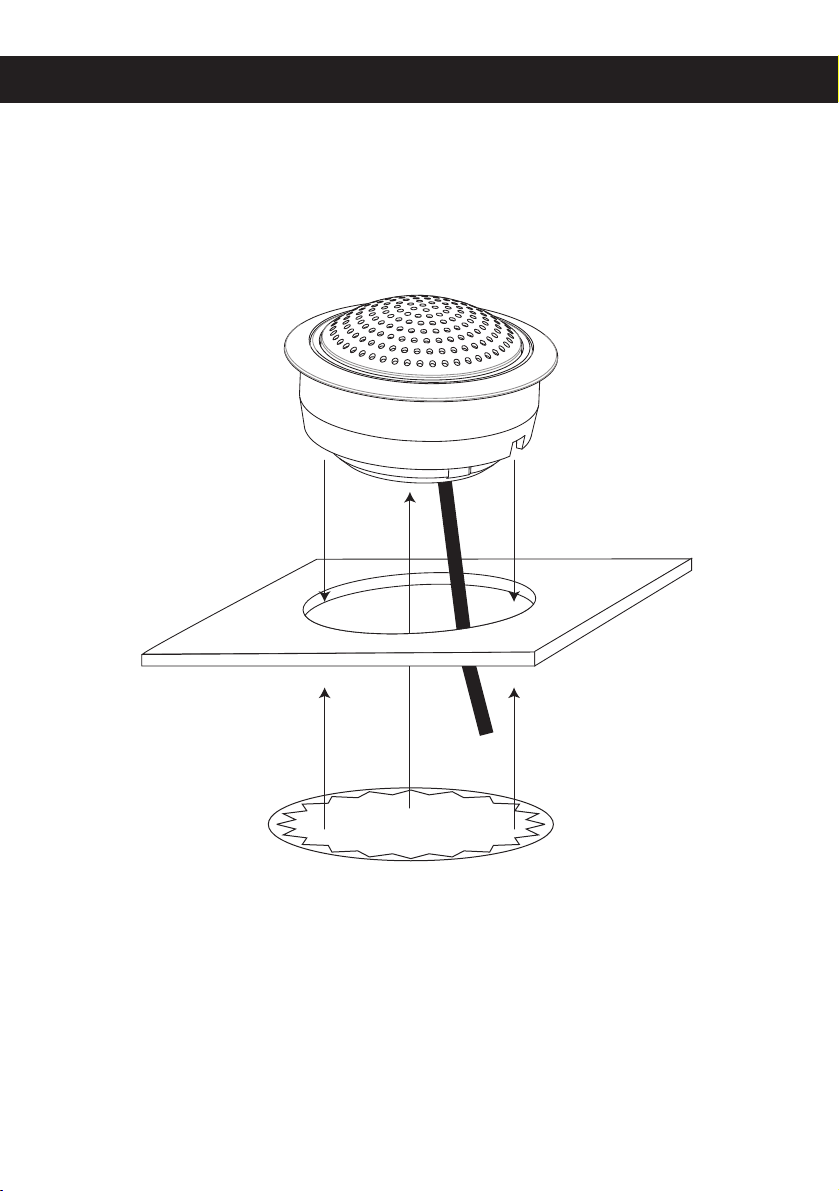
DEUTSCH
HOCHTÖNER-EINBAU
Page 5

ENGLISH
INSTALLATION
The first step of installing a speaker system is a well-thought-out planning. Choose a suitable location
for your speaker components carefully. Please observe the following suggestions to ensure proper
results and best performance:
1. Choose a location which offers none or just a minimum of obstacles between the components and
your ears. Please observe at thereto, the positions of the driver’s seat, the headrests and other
constructions of the inside of vehicle interior.
2. Mount the left and right speakers in the same array on each side, which means that they are installed
at the same height and directly across from each other. Do not install one speaker higher, lower, further
forward or further back from the opposite speaker.
3. Always check what’s behind the chosen mounting locations to ensure that there is proper clearance
for the back of the speaker components and avoid obstructions such as window tracks, wire harnesses,
gas tank etc.
4. The best performance will be achieved, when the speakers are securely mounted to a designated
speaker opening in a door panel or a rear speaker shelf. There should be no gaps between the speaker
basket and the mounting surface.
MIDWOOFER INTERCONNECTION
• Connect the positive terminals (”+”) and the negative terminals (”–”) of the speakers
with the according speaker outputs of the amplifier.
• Use for the interconnection the supplied cables with jacks.
TWEETER INTERCONNECTION
• Connect the positive jacks (”white”) and the negative jacks (”black”) of the tweeters with the according
cable plugs of the inline crossover, which lead out from the ”OUTPUT” marked position.
INLINE-CROSSOVER INTERCONNECTION
• Connect the positive terminals (”+”) and the negative terminals (”–”) of the amplifier speaker outputs
with the according cables, which lead out from the ”INPUT” marked position.
Repeat all three steps for the channel pair on the opposite side of the vehicle.
IMPORTANT: Never run the tweeter without the included inline-crossover.
Page 6
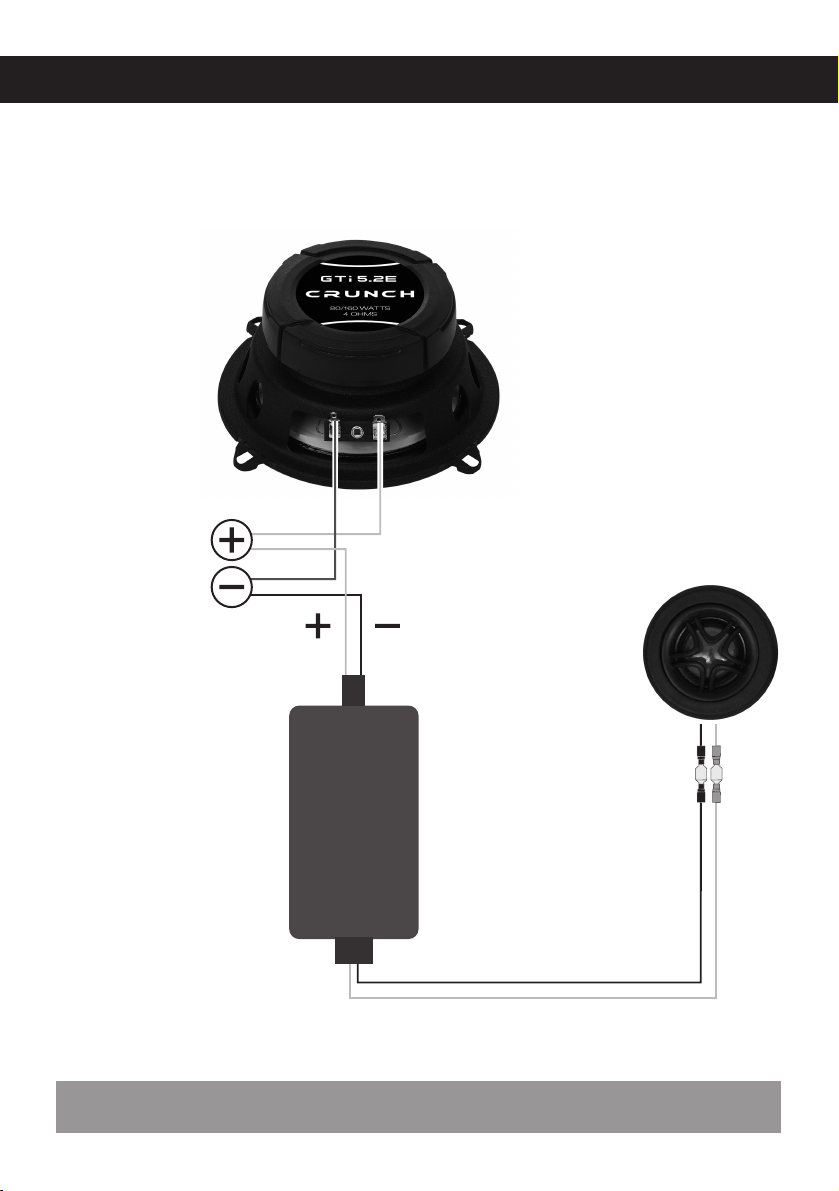
ENGLISH
INTERCONNECTION DIAGRAM
MIDWOOFER
R/L
SPEAKER
OUTPUTS OF THE
AMPLIFIER
TWEETER
R/L
WHITE BLACK
INPUT
INLINECROSSOVER
R/L
OUTPUT
IMPORTANT
Please observe the correct polarity (+ and –) of all connections.
Page 7
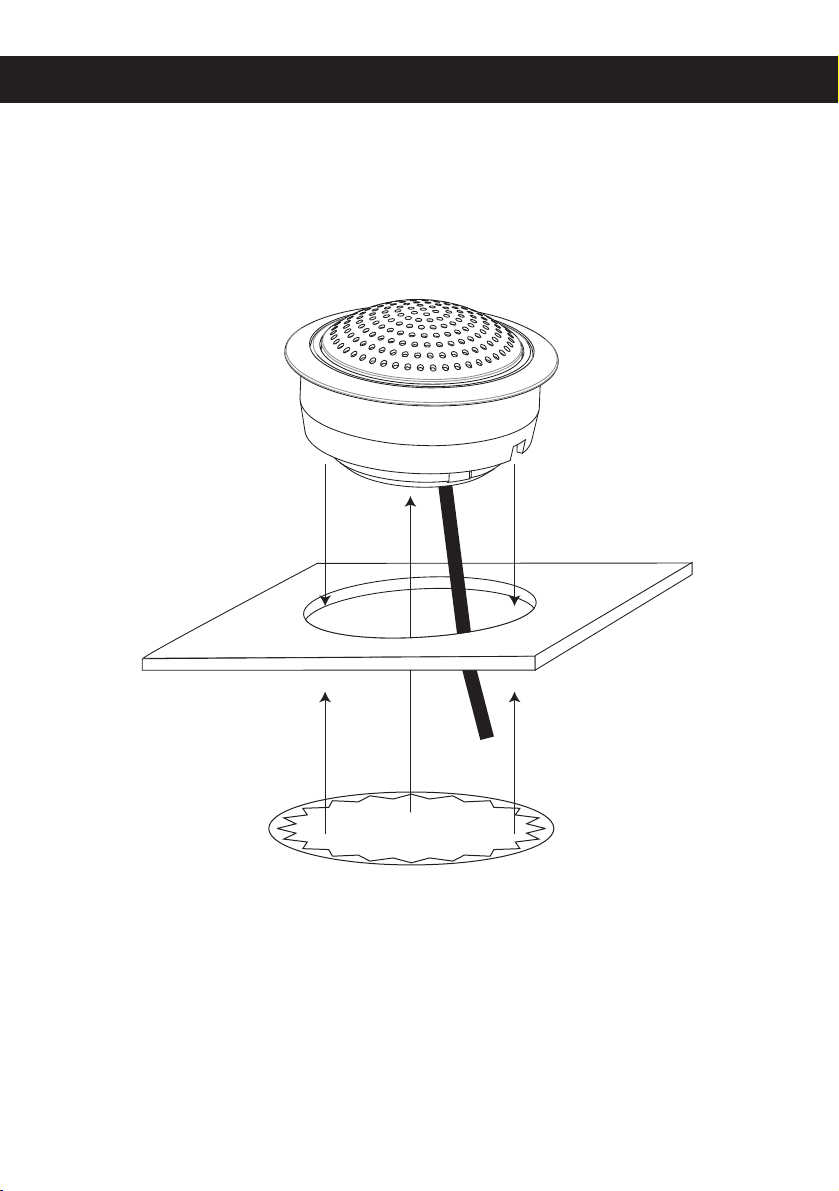
TWEETER INSTALLATION
ENGLISH
Page 8

Audio Design GmbH • www.audiodesign.de
Am Breilingsweg 3 • D-76709 Kronau (Germany)
Tel. +49 (0)7253 - 9465-0 • Fax +49 (0)7253 - 946510
 Loading...