

Page 1
Rugged, Reliable, Mobile, Secure
DataPort 30 Serial ATA Installation Guide
The DataPort 30 provides a high quality removable drive enclosure for an attractive price. The compact design allows the
DataPort 30 to fit into most desktops and mini-tower 5.35” drive
bays. The DataPort 30’s rugged design and 25k insertion rated
connector make for a great product with a low price.
Package Contents:
TM
1 – DataPort 30 Frame Assembly
1 – DataPort 30 Carrier Assembly
1 – Mounting Screw Kit
1 – Set of Keys
Mounting the Frame in the Computer
1. Turn off the computer and disconnect its power cord from the
electrical outlet. Before working on your computer, wait one
minute for any residual energy to dissipate. Ground yourself
and then remove the cover of the computer. Determine the
5.25” half-height bay where you plan to mount the DataPort
frame assembly. Remove any filler plates that may be present.
2. To mount the frame assembly in the drive bay:
a. Check the drive bay to see if mounting rails are required
(they should be provided by your computer system
manufacturer.) If required, install one on each side of the
frame. Then slide the frame in the computer and check
that it is secure.
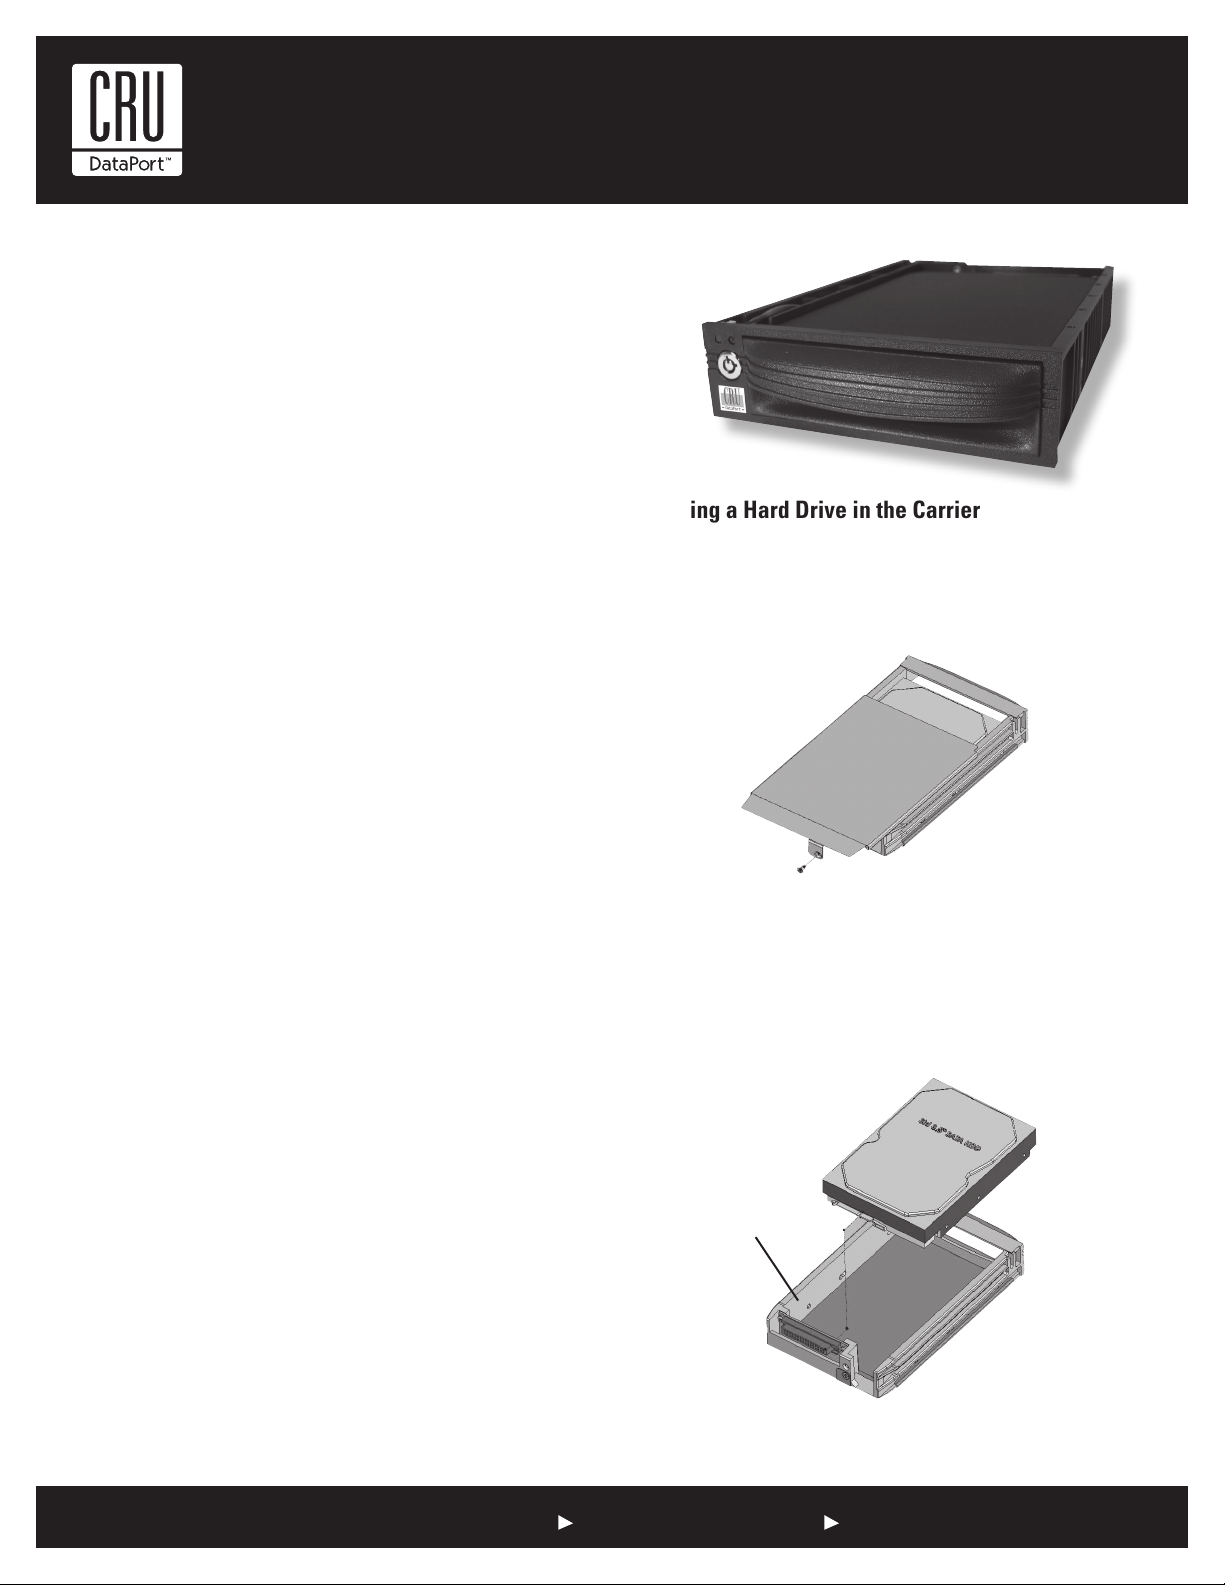
Installing a Hard Drive in the Carrier
1. Remove the top cover of the carrier.
Remove the screw securing the cover and slide the top cover
off the DataPort 30 carrier (see figure 1).
Figure 1: Removing the Cover
2. Install the hard drive in your carrier.
Slide the hard drive in from the front of the carrier and connect it
to the carrier board (see figure 2). When the hard drive is properly
connected, the rear side mount screw holes will be aligned. Use
the screws provided to secure the hard drive in the carrier.
b. If mounting rails are not required, attach the frame
Directly to the PC case using the screws provided. Either
the side or bottom mount holes on the frame may be
used.
3. Locate a SATA data cable and connect it to the SATA connector
on the frame.
4. Locate an available 15-pin SATA or 4-pin Molex power cable
from the computer power supply and plug it into the power
connector on the frame.
rear screw holes
Figure 2: Installing the drive
1-800-260-9800 www.CRU-DataPort.com
Page 2

Rugged, Reliable, Mobile, Secure
Rugged, Reliable, Mobile, Secure
TM
TM
3. Install the top cover of the carrier.
Reinstall the top cover onto the carrier and use the screw to
secure it in place.
4. Insert the carrier into the frame assembly.
Slide the carrier into the frame and lock the carrier. The lock on
the DataPort 30 serves as the power “ON/OFF” switch. When
the lock is engaged the green power LED will illuminate and
the computer will operate normally.
Trouble Shooting
No Power
Make sure the lock of the DataPort is turned to the “ON” (3 o’clock)
position and the green power LED is on. Check the power connection on back of the frame.
Drive Not Recognized By Computer
The carrier and frame must be properly seated with the keylock
turned to the “on” position. The hard drive must be properly
connected in the carrier; the SATA data cable must be properly
seated on the DataPort receiving frame and on the mother board.
Fan Failure
For fan failure contact CRU Technical Support.
For more information please contact CRU-DataPort’s Technical
Support Department by visiting our web site at URL http://www.
CRU-DataPort.com or sending an email message to support@
CRU-DataPort.com.
Product Warranty
CRU-DataPort (CRU) warrants the DataPort 30 to be free of
significant defects in material and workmanship for a period of
three years from the original date of purchase. CRU’s warranty is
nontransferable and is limited to the original purchaser.
Product Remedies
CRU’s entire liability and the original purchaser’s exclusive
remedy for any breach of warranty, shall be, at CRU’s option,
either (a) return of the price paid or (b) repair or replacement of
the hardware, provided that the hardware is returned to CRU,
with a copy of the sales receipt or applicable documentation. Any
replacement hardware will be warranted for the remainder of the
original warranty period. These remedies are void if failure of the
Limitation of Liability
The warranties set forth in this agreement replace all other warranties. CRU expressly disclaims all other warranties, including
but not limited to, the implied warranties of merchantability and
fitness for a particular purpose and noninfringement of third-party
rights with respect to the documentation and hardware. No CRU
dealer, agent or employee is authorized to make any modification,
extension, or addition to this warranty. In no event will CRU or
its suppliers be liable for any costs of procurement of substitute
products or services, lost profits, loss of information or data, computer malfunction, or any other special, indirect, consequential,
or incidental damages arising in any way out of the sale of, use
of, or inability to use any CRU product or service, even if CRU has
been advised of the possibility of such damages. In no case shall
CRU’s liability exceed the actual money paid for the products at
issue. CRU reserves the right to make modifications and additions
to this product without notice or taking on additional liability.
Register your product at www.CRU-DataPort.com.
A5-030-0002 Rev. 3.1
1-800-260-9800 www.CRU-DataPort.com
1-800-260-9800 www.CRU-DataPort.com
 Loading...