

Page 1
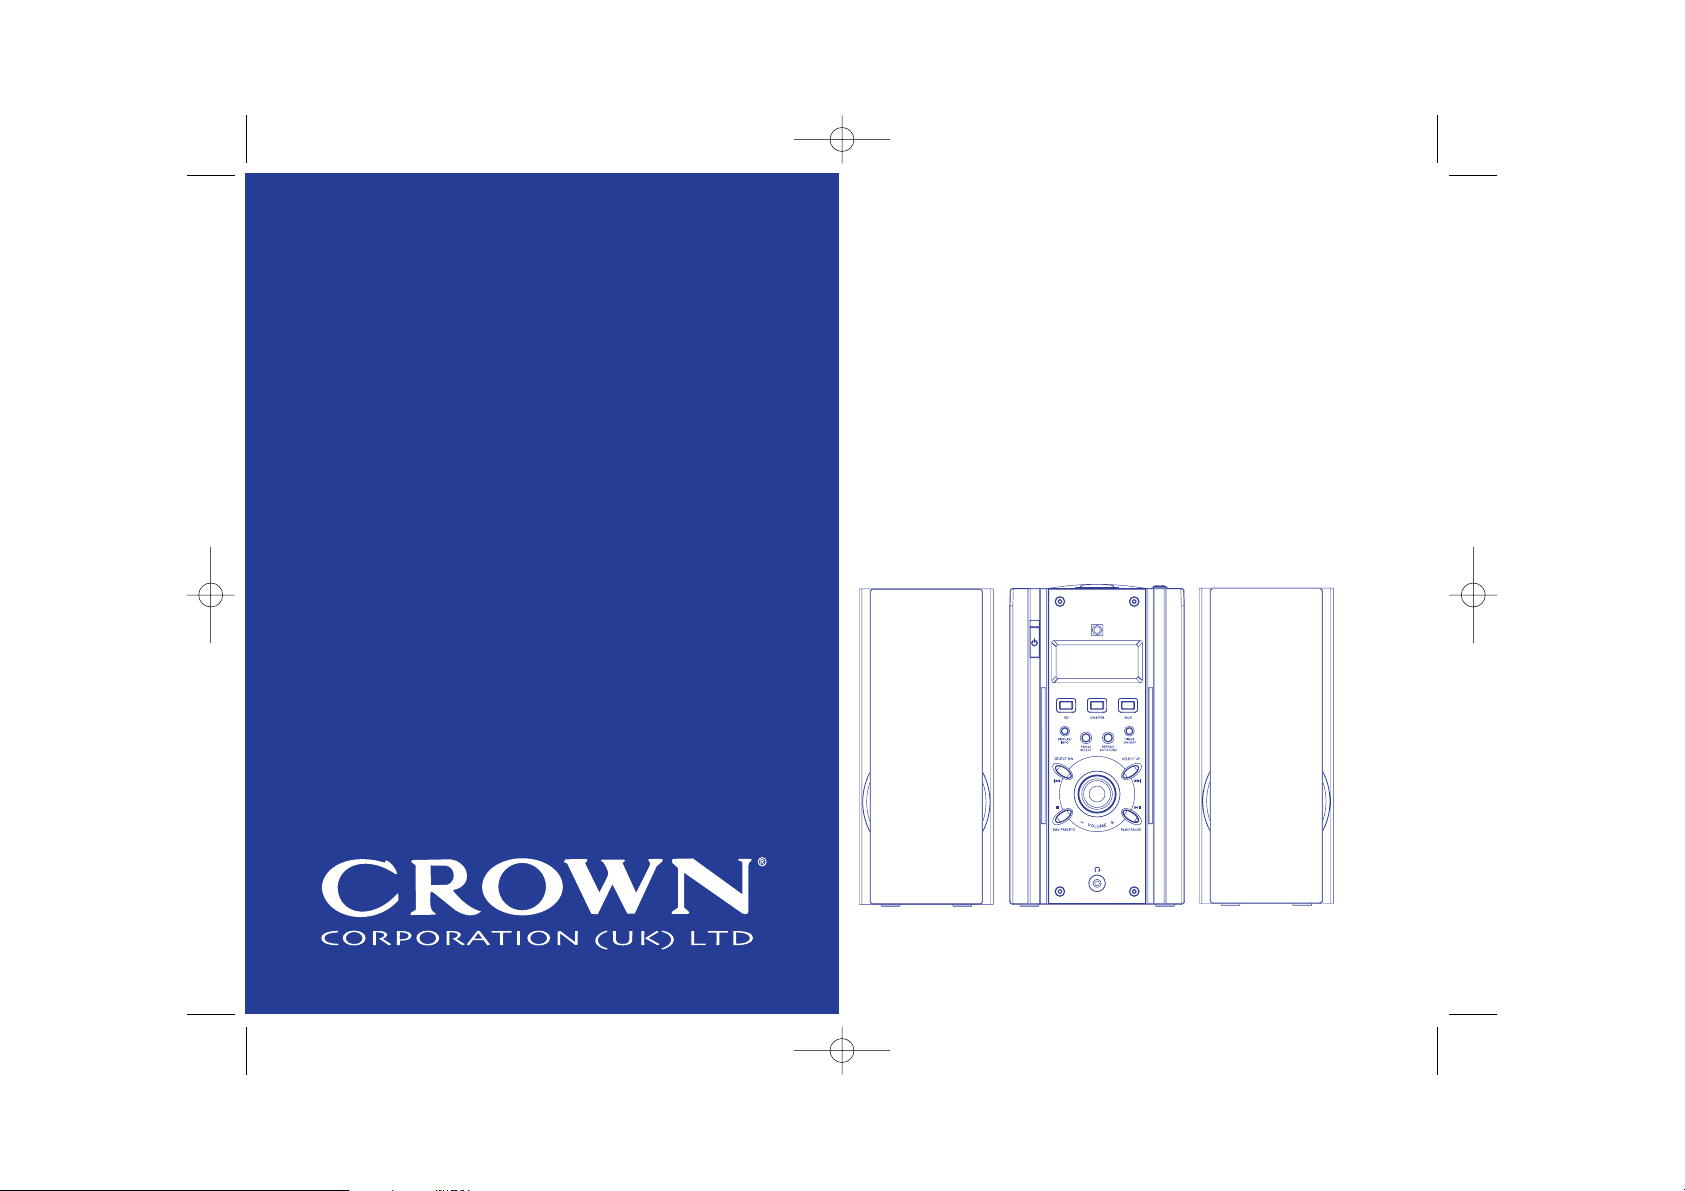
CD and DAB & FM Stereo radio
Model CRN 3299DB
guidelines for use
CRN 3299DB Draft 5.qxd 8/19/05 12:34 PM Page 2
MULTI FUNCTION DISPLAY
Page 2

2
CRN 3299DB Draft 5.qxd 8/19/05 12:34 PM Page 3
Tsunami Disaster Appeal
This charity has been launched to support people in the village of
Thirukovil, the home town of the Rev Sam the Methodist minister
from Morley who lost 31 relatives in the Tsunami. Around four hundred
families now live in temporary tented camps.
Your generous donation will provide much needed support for the
poorest survivors; primarily children, elderly and disabled who, in most
cases, have lost the majority of their families.
In an endeavour to develop skills following the loss of their fishing
industry, and give hope of rebuilding lives in the future, training programmes are planned - carpentry, brick laying and cycle repairs
for males, and sewing and embroidery classes for ladies.
The charity offers - help with love - money with pride - commitment
with concern.
Any contribution you are able to make will go directly to this much
needed area - no administration fees or expenses are levied.
Morley For Thirukovil
Registered Charity No. 1108832
Please Help, by using the donation form at the back of this booklet
For more information please visit www.samsappeal.com
Page 3

MULTI FUNCTION DISPLAY
GETTING TO KNOW YOUR SYSTEM
CD BUTTON
SKIP/SEARCH
DISPLAY SCREEN
3
STANDBY BUTTON
DAB/FM BUTTON
AUX BUTTON
SKIP/SEARCH
HEADPHONE SOCKET
STOP/FAV PRESETS
SPEAKER
AC POWER CORD
SPEAKER TERMINALS
AUX “L” & “R” INPUT
SOCKETS
Please read these instructions and the Safety guidelines on page 8 carefully before using your
Stereo CD/Radio/Alarm.
PLAY/PAUSE
STANDBY/ON
SLEEP BUTTON
(Remote Only)
STOP/FAV PRESET
PLAY/PAUSE
SKIP/SEARCH
REPEAT/AUTOTUNE
X-BASS BUTTON
(Remote Only)
VOLUME UP
VOLUME DOWN
CD BUTTON
DAB/FM
AUX BUTTON
MUTE BUTTON
(Remote only)
EQ BUTTON
(Remote only)
RANDOM
(Remote
only)
CD DOOR
AC POWER CORD
MAINS SWITCH
DAB/FM WIRE
ANTENNA
CRN 3299DB Draft 5.qxd 8/19/05 12:34 PM Page 4
Page 4
BEFORE USE USING THE RADIO
Mains Connection
1 Check that the voltage indicated on the rating
plate on the back of your System corresponds to
the voltage of your mains electricity supply.
2 Attach the speakers by plugging the cables from
the speakers into the Speaker terminals in the
back of the stereo according to the colour codes:
grey/white wire to the “RED”terminal, black wire
to the “BLACK” terminal.
3 Inserting the mains plug into a wall socket, press
the AC ON/OFF Switch in the back of the system
to "ON" position, the system will be initiated in
"Stand-By" Mode. Press the "Stand-By" button
to switch on. The sound can be muted by
pressing the MUTE button on the remote control.
Reading the LCD Display
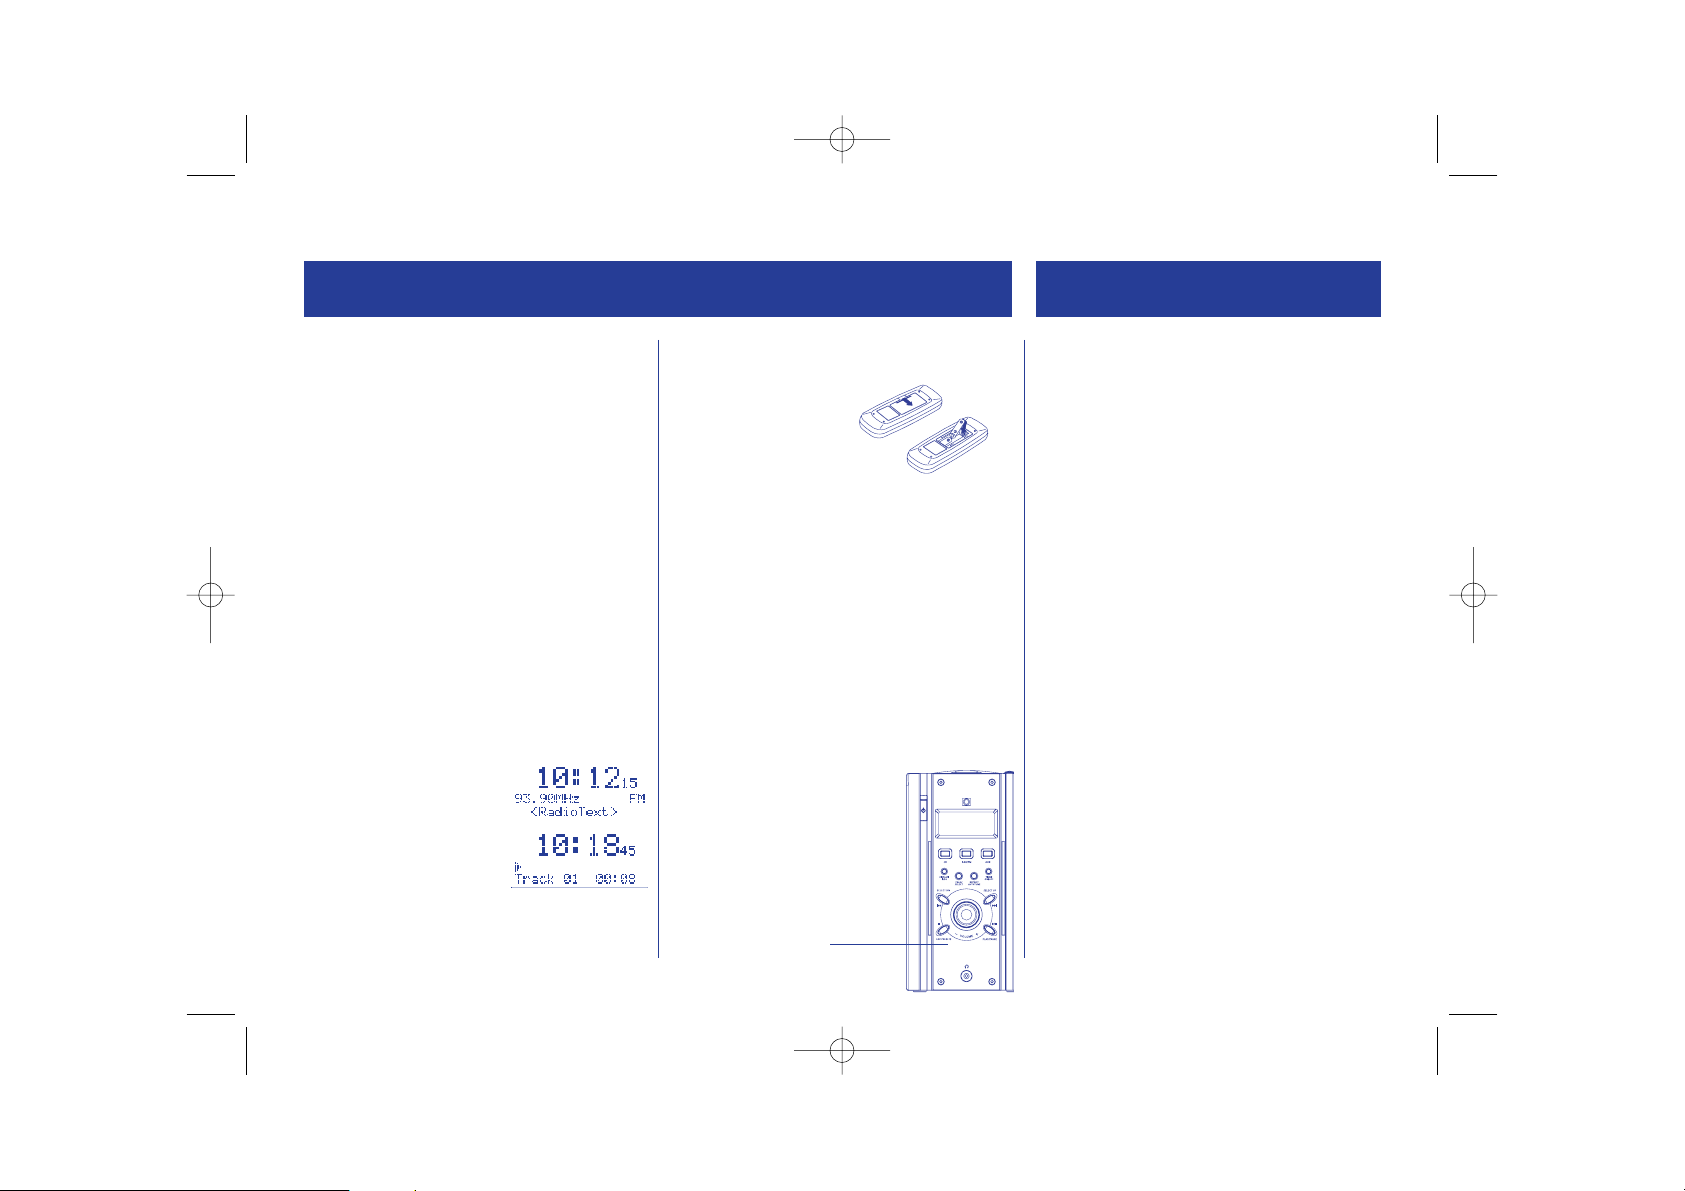
The display shows the time set on the stereo, the
current mode, and any programs set.
The display will show when the radio is on:
The display will show when a
CD is on:
Positioning the
antenna
To receive the best signal from your player fully
extend the wire antenna and place in a vertical
position.
4
Remote control
Insert 2xAA batteries in
to the remote control,
ensuring the batteries
match the polarity
marked inside the
control.
Headphone Socket
(Headphones are not included)
• Insert the jack plug of your headphones into
the socket on the front of the system. Note: if
your headphone jack does not fit the
Headphone Socket you may need to use an
adaptor
• Turn the Volume Control Dial on the System to
MIN. before using the headphones, then adjust
the volume to suit
CAUTION:You should not expose yourself to
continuous play at loud volume levels while
using your headphones. You
may damage your hearing. If
you experience ringing in your
ears, reduce the volume or
stop using your System. If
symptoms persist, see your
doctor.
DAB Radio Operation
1 As soon as the player is switched on DABmode
will be automatically entered. Mute the sound
by pressing MUTE on the remote control.
3 Your player will automatically start searching
for stations. The display will show the progress
of how many stations have been found.
4 When the search is complete the first station
alphabetically will be selected.
5 Adjust the volume to suit.
Manually Tune the Radio
1 Press and hold the PROG/SELECT until the
display shows ‘Manual Tune’. Mute the sound
by pressing MUTE on the remote control.
2 Scroll through the DAB channels by pressing
SELECT UP or DN. The display will show the
frequencies and the name of the radio station
selected.
3 To confirm your choice of station press
PROG/SELECT.
NOTE: You can scroll through the radio stations
found by pressing and holding SELECTUP or DN
when auto select is on. Release the button to
select the chosen station.
HEADPHONE
SOCKET
1
CRN 3299DB Draft 5.qxd 8/19/05 12:34 PM Page 5
MULTI FUNCTION DISPLAY
Page 5
USING THE RADIO LISTEN TO CDs
Radio Reception
FM - to switch to FM press the DAB/FM button, the
display will show ‘Switching to FM.’
NOTE: Try to keep metallic objects away from your
System.
Store Favourite Stations
In DAB or FM mode you can store up to 10 favourite
stations:
1 Once you have tuned in the desired station
press and hold the FAV PRESETbutton until the
display shows ‘PRESET#’.
2 Select a number to store the station to by
pressing SELECTUPor DN. To confirm your
selection press FAV PRESET.
3 To listen to a stored station press the FAV
PRESET button, then press SELECT UP or DN to
scroll to the saved number for that station.
EQ Preset
By pressing the EQ button on the Remote control
you can choose between Flat, Jazz, Rock, Classic and
Pop.
5
Before Use
• Place only one compact disc at a time in the CD
compartment
• Always place compact discs in the CD
compartment with the label facing upwards.
• Fingerprints and dust should be carefully wiped
off the compact disc’s reflective surface with a
soft cloth. See ‘Compact Disc’s’ on page 7.
Loading the Disc
1 Mute the sound by pressing MUTE on the
remote control.
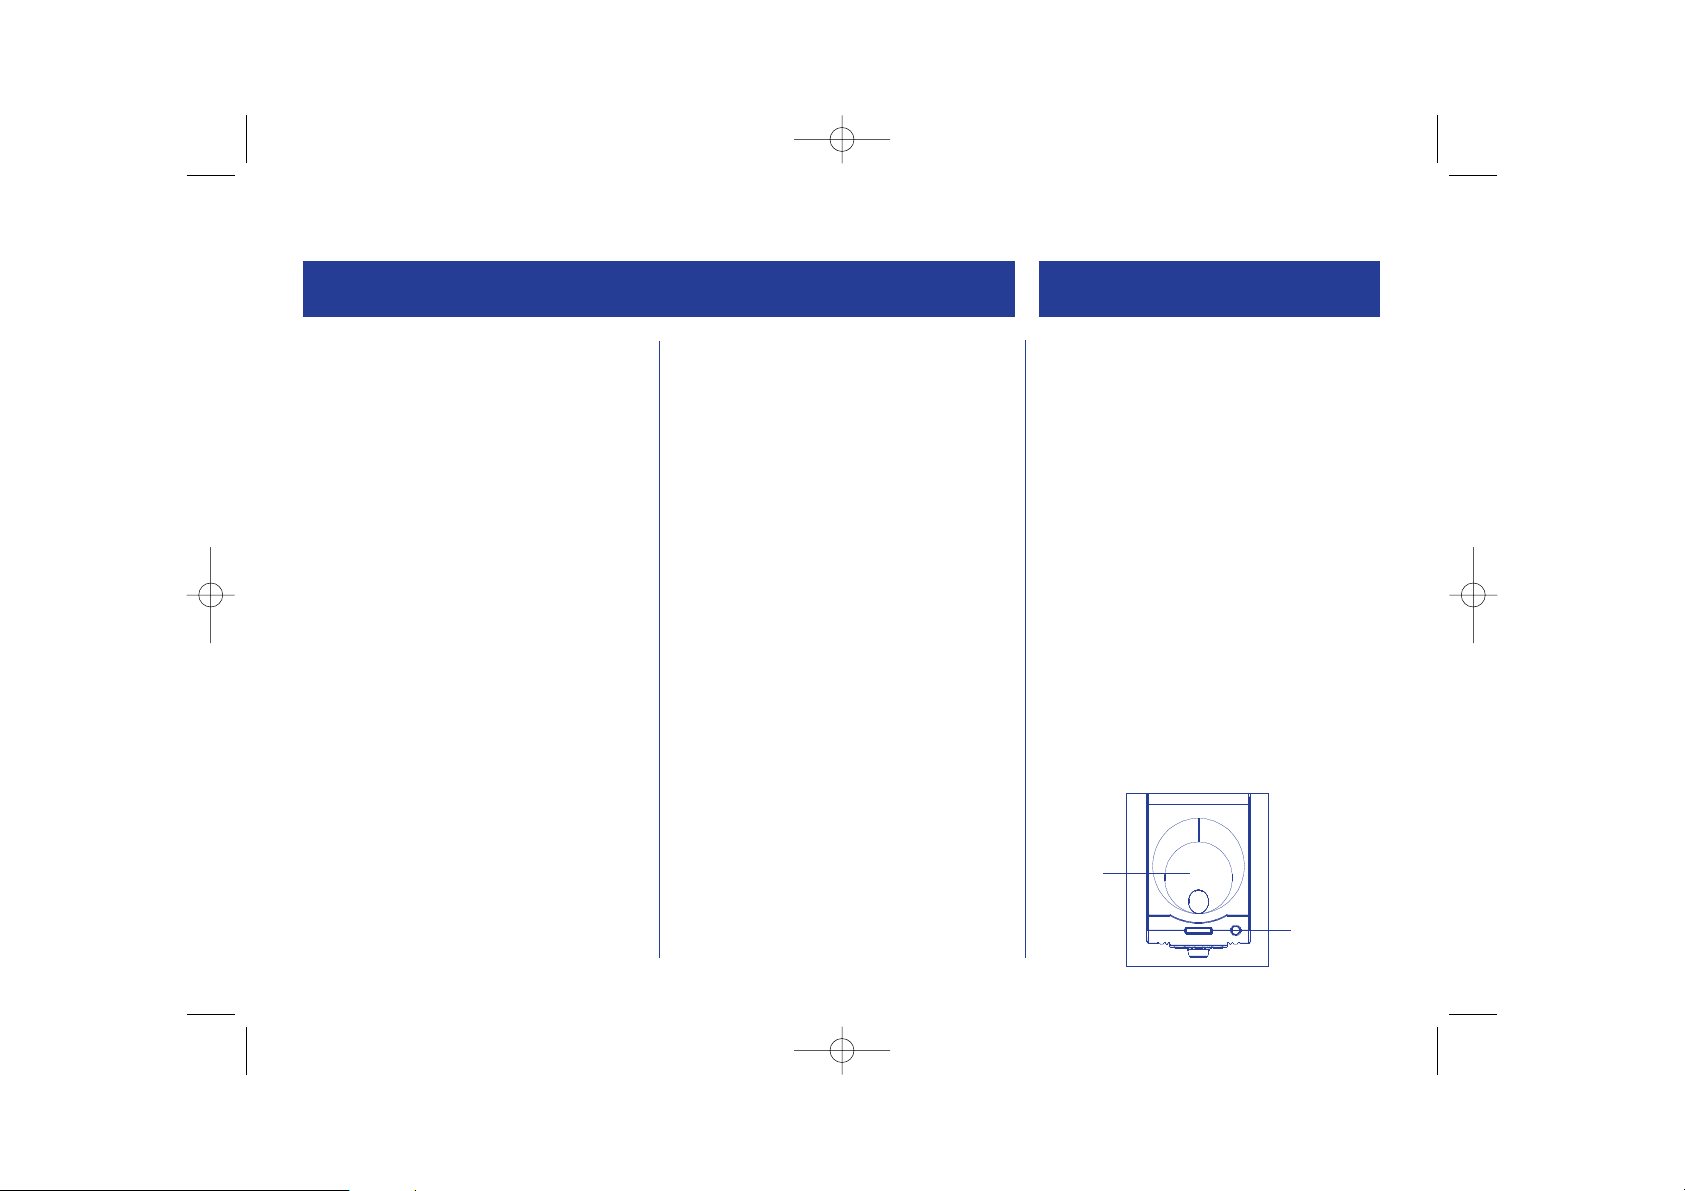
2 Press the CD button to switch to CD.
3 The CD Lid is motorised, do not force open or
closed. Open the CD Lid by pressing OPEN and
place the compact disc over the central spindle,
make sure that it is securely in place by
pressing down on it hard and that the label
side is facing up.
4 Press the OPEN/CLOSE button to close the CD
lid automatically.
Info button
Press the Info button to scroll through all settings
for each different mode on your stereo:
FM Mode: Radio text
Programme type
Signal strength
Time/Date
Frequency
Audio mode
Timer status
DAB Mode: Ensemble/Multiplex
(Group name)
Signal Strength
Time/Date
DLS (scrolling text)
Programme Type
Timer status
CDPlay mode: Current track & elapsed time
Current track & remain time
Timer status
CDStop mode: Total tracks and time
Timer status
CD DOOR
CD DOOR
OPEN/CLOSE
BUTTON
CRN 3299DB Draft 5.qxd 8/19/05 12:34 PM Page 6
Page 6

Program Mode
This allows you to program selected tracks on a
compact disc to be played in your chosen order. Up
to 20 tracks can be programmed for playback.
1 Press the PROG/SELECT button, the display will
flash ‘PROGRAM-01’.
2 Press SELECTUPor DN button to choose the
first track, then press PROG/SELECT to confirm
the selected track.
3 Select a track using either the Next or Back
buttons. The Display Screen will show the
selected track number.
4 Repeat the above steps to select the rest of the
tracks for your program. (Up to 20 tracks).
5 Once you have finished adding tracks press the
PLAY/PAUSE button to begin. PROG will appear
on the LCD display screen.
6 To delete the program press the STOP button
twice whilst the program is playing.
Alternatively opening the CD door will erase
the programmed tracks.
Note: The System can only be programmed when
the CD Player is in the STOP mode.
6
LISTENING TO CDs
Track Search
1 Press and hold down either the SKIPUP/FF or
DN/FR buttons during disc play to quickly
return or advance to any position on the disc.
2 Press the PLAY/PAUSE button to continue disc
play.
3 To advance or return to a particular track number,
press either the SKIPUP/FF or DN/FRbuttons, one
press at a time until the track number is displayed.
Repeat Mode
This function allows all the tracks on the compact
disc or a particular track to be played repeatedly.
To repeat the same track:
• Press the REPEAT button once during play, on
the track you wish to hear repeatedly, Repeat
One, will appear in the Display Screen
To repeat the whole disc:
• Press the REPEAT button twice during play (on
any track). Repeat All will appear in the Display
Screen
To turn the Repeat function off:
• Press the REPEAT button again until neither
Repeat One or Repeat All is shown. The STOP
button cancels all Repeat functions
Playing a Compact Disc
1 Press the PLAY/PAUSEbutton once, then adjust
the volume to suit.
2 Disc play will begin from track No.1.
The Display Screen will show the track number,
as they are played.
3 Press the STOP button to stop play at any time.
4 When the last track has been played, the CD
Player will stop and the Display Screen will
show the last track number on the disc.
5 To start play from a designated track, press
either the SKIPUP/FF (FAST FORWARD) or
DN/FR (FAST REWIND) buttons repeatedly until
the desired track number is shown in the
Display Screen. Play will start from the
beginning of the selected track.
Pause Mode
1 Press the PLAY/PAUSE button during play, the
timer in the display screen will flash.
2 Disc play will stop temporarily.
3 Press the PLAY/PAUSE button again to end the
pause mode. Play will resume at the paused
position.
CRN 3299DB Draft 5.qxd 8/19/05 12:34 PM Page 7
Page 7
USING THE TIMER MAINTENANCE
Setting the Time
The alarm can be set in either CD, DAb or FM radio
mode.
1 Press and hold the TIMERbutton until ‘Timer
On Set’ and the clock appears on the display.
2 The minute counter will flash, press the SELECT
UP or DNbuttons to choose the correct minute.
Press the PROG/SELECT button to confirm.
3 Press and hold the PROG/SELECT button again.
The minute indicator will flash.
4 Use the SKIPDN or SKIPUP buttons to adjust the
time.
5 Press and hold the PROG/SELECT button again
to confirm the time.
6 Timer On Mode will be displayed, Use Skip Up/
Down to select the mode (DAB, FM, CD) and
confirm by pressing the PROG/SELECT button.
Factory Reset
By resetting your stereo all stored stations and
programs will be lost.
1 Unplug the stereo from the mains.
2 Whilst reconnecting to the mains press and
hold the SELECT button.
3 When System Reset appears on the display
release the SELECt button.
4 The stereo will complete an Autotune full scan.
This will take approximately 1 minute. The radio
will now display the first station found.
7
Using the Sleep Function
1 Press the SLEEP button on the remote control
to activate SLEEP function.
2 The LCD display will show "SLEEP 90 mins",
repeatedly press the SLEEP button and time will
change to 60, 30, 10, release at the desired
SLEEP time. The Display will show "SLEEP
confirmed" and "SLP" will appear.
3 Press SLEEP button again at any later time to
end SLEEP function, "SLP" will disappear from
LCD display.
4 The unit will switch off the radio or CD Player
automatically when the sleep cycle is ended.
Auxiliary sound source connection
This micro system can playback output from
external stereo audio sources. Connect the Left (L)
and Right (R) output of the source equipment to
the AUX L and R sockets in the back of the
system (Audio Line Cables NOT included). Press AUX
button and adjust the Volume to suit. The LCD
display will show AUX mode in play.
Cleaning
Do not use abrasive cleansers or chemical solvents.
Clean by lightly wiping with a soft cloth.
CD Player Lens
The CD lens is located within the CD compartment.
It should NEVER be touched. Never look directly into
the laser beam please see page 8 (safety)
To assure continuing high performance from your CD
Player, the CD lens should be cleaned regularly, using
a CD lens cleaner. Follow the instructions on
the packaging.
Compact Discs
• If the compact disc skips or will not play, it may
need cleaning. Wipe the compact disc from the
centre out with a cleaning cloth (either with or
without CD cleaner fluid).
• Compact discs should be returned to their cases
after use.
• Do not expose a compact disc to direct sunlight,
high humidity or high temperature.
• Do not stick paper or write anything with a ball
point pen on a compact disc.
• Do not use cleansers or antistatic sprays on
compact discs.
CRN 3299DB Draft 5.qxd 8/19/05 12:34 PM Page 8
Page 8
• Do not use with an extension lead.
• Do not place anything on top of, or around
your System that will impede ventilation.
• During use, place your System in a location with
adequate ventilation, to prevent heat build up.
• Your System is designed for use in moderate
climates (5ºC-35ºC). If your System is brought
directly from a cold location to a warm location,
or is placed in a very damp room, moisture may
condense on the lens inside the CD Player.
Should this occur, the CD Player will not operate.
Remove the CD and leave the system for about
an hour until the moisture evaporates.
• Close supervision is necessary when the System
is used by children or a person suffering from
any physical impairment.
• Do not drop the System or subject it to strong
shocks as this could result in damage or failure.
• This System should not be mounted on a wall
or ceiling.
• Do not take the System into or near a bathroom,
swimming pool or any other location where it is
likely to come into contact with water.
• The System should not be used next to heat
sources such as fires or other appliances.
• Do not use in humid or dusty locations.
This product was designed and manufactured to meet
strict quality and safety standards. There are, however,
some operational precautions that you should be
aware of:
• Laser beam caution. If your System is operated
whilst the outer casing is removed, invisible
laser light could cause damage to the eye.
• To prevent a fire or shock hazard, do not
expose the unit to rain, moisture or any form
of naked flame, such as a lit candle.
• To avoid electric shock - never immerse in
water or allow water to drip or be splashed
onto your System. Do not try to open the unit
itself. Always refer servicing to a qualified
service centre.
• Should any heavy object or liquid fall on/into
your System, unplug the System and have it
checked by a qualified service centre only.
• A small amount of current continues to flow to
the System when not in use but still plugged
into a mains socket. Unplug from the mains if it
is not to be used for an extended period of time.
• To disconnect the mains lead, pull out by the
plug itself - never disconnect by pulling the lead.
CLASS I
LASER PRODUCT
SAFETY
8
WARNING
IT IS HAZARDOUS FOR ANYONE OTHER
THAN AUTHORISED SERVICE
PERSONNEL TO CARRY OUT SERVICING
OR REPAIRS WHICH INVOLVE THE
REMOVAL OF COVERS.
TO AVOID THE RISK OF AN ELECTRIC
SHOCK DO NOT REMOVE THE COVER
AT THE BACK OF THIS UNIT.
CRN 3299DB Draft 5.qxd 8/19/05 12:34 PM Page 9
Page 9

SAFETY TECHNICAL SPECS
9
General
Power output 4.5W RMS x 2
Power consumption 14.6 W
Speaker Impedance 1.5 inch tweeter, 3”
speaker. 4 Ohm
Power source AC 230V ~ 50Hz
Remote Control 2x1.5v, UM3 not included
Dimensions of Unit 130x 215 x 235 mm approx.
(WxDxH)
Speaker 100x 205x 235 mm
Weight 5.2 Kg approx.
Radio Section
FM 87.5-108 MHz
DAB 174-240 MHz
Antenna wire antenna
CD Section
S/N Ratio : 50dB
Wow & Flutter not detectable
Pick up laser 3 Beam laser
Pick up laser wavelength 780 nm
Aux Input 700mV-1000mV @ 4,7K
Ohm
• Do not use in locations exposed to heavy
vibration.
• Do not use on unstable or tilted surfaces.
• Do not situate on beds, sofas, rugs or similar
surfaces which may block the Systems
ventilation openings.
• The mains lead should be sited in such a way
so that it will not cause an accident or
obstruction.
• Remove batteries from the remote control if it
will be unused for a long period of time.
• Do not mix old batteries with new ones as the
remote control will not function properly.
CRN 3299DB Draft 5.qxd 8/19/05 12:34 PM Page 10
Page 10

10
_
_
CRN 3299DB Draft 5.qxd 8/19/05 12:34 PM Page 11
D onation Form
Yes I would like to support Morley for Thirukovil. Here is my cheque / postal order for:
£______________________ made payable to Morley for Thirukovil
Donors Name: ___________________________________________
Address:
___________________________________________________________________________________________________________________________
___________________________________________________________________________________________________________________________
Post Code: ___________________ Tel No: _________________
This section to be completed only if you wish to gift aid your donation
Gift Aid Declaration - Donor Details
Title …… Forename …….…………. Surname ...………………
Address
…………………………………………………………………………………………………...................................................................................
Signature …………………………………….. Post Code …………………
Notes
1. You must pay an amount of income tax and/or capital gains tax at least equal to the tax the charity reclaims on your donation
in the tax year (currently 28p for each pound you give)
2. If you pay tax at a higher rate you can claim further tax relief in your self -assessment income tax return.
Registered Charity No. 1108832
Morley For Thirukovil
Please return to Morley For Thirukovil, Halcyon, Parkway, Gildersome, Leeds LS27 7DZ
Page 11

CRN 3299DB Draft 5.qxd 8/19/05 12:34 PM Page 12
Page 12
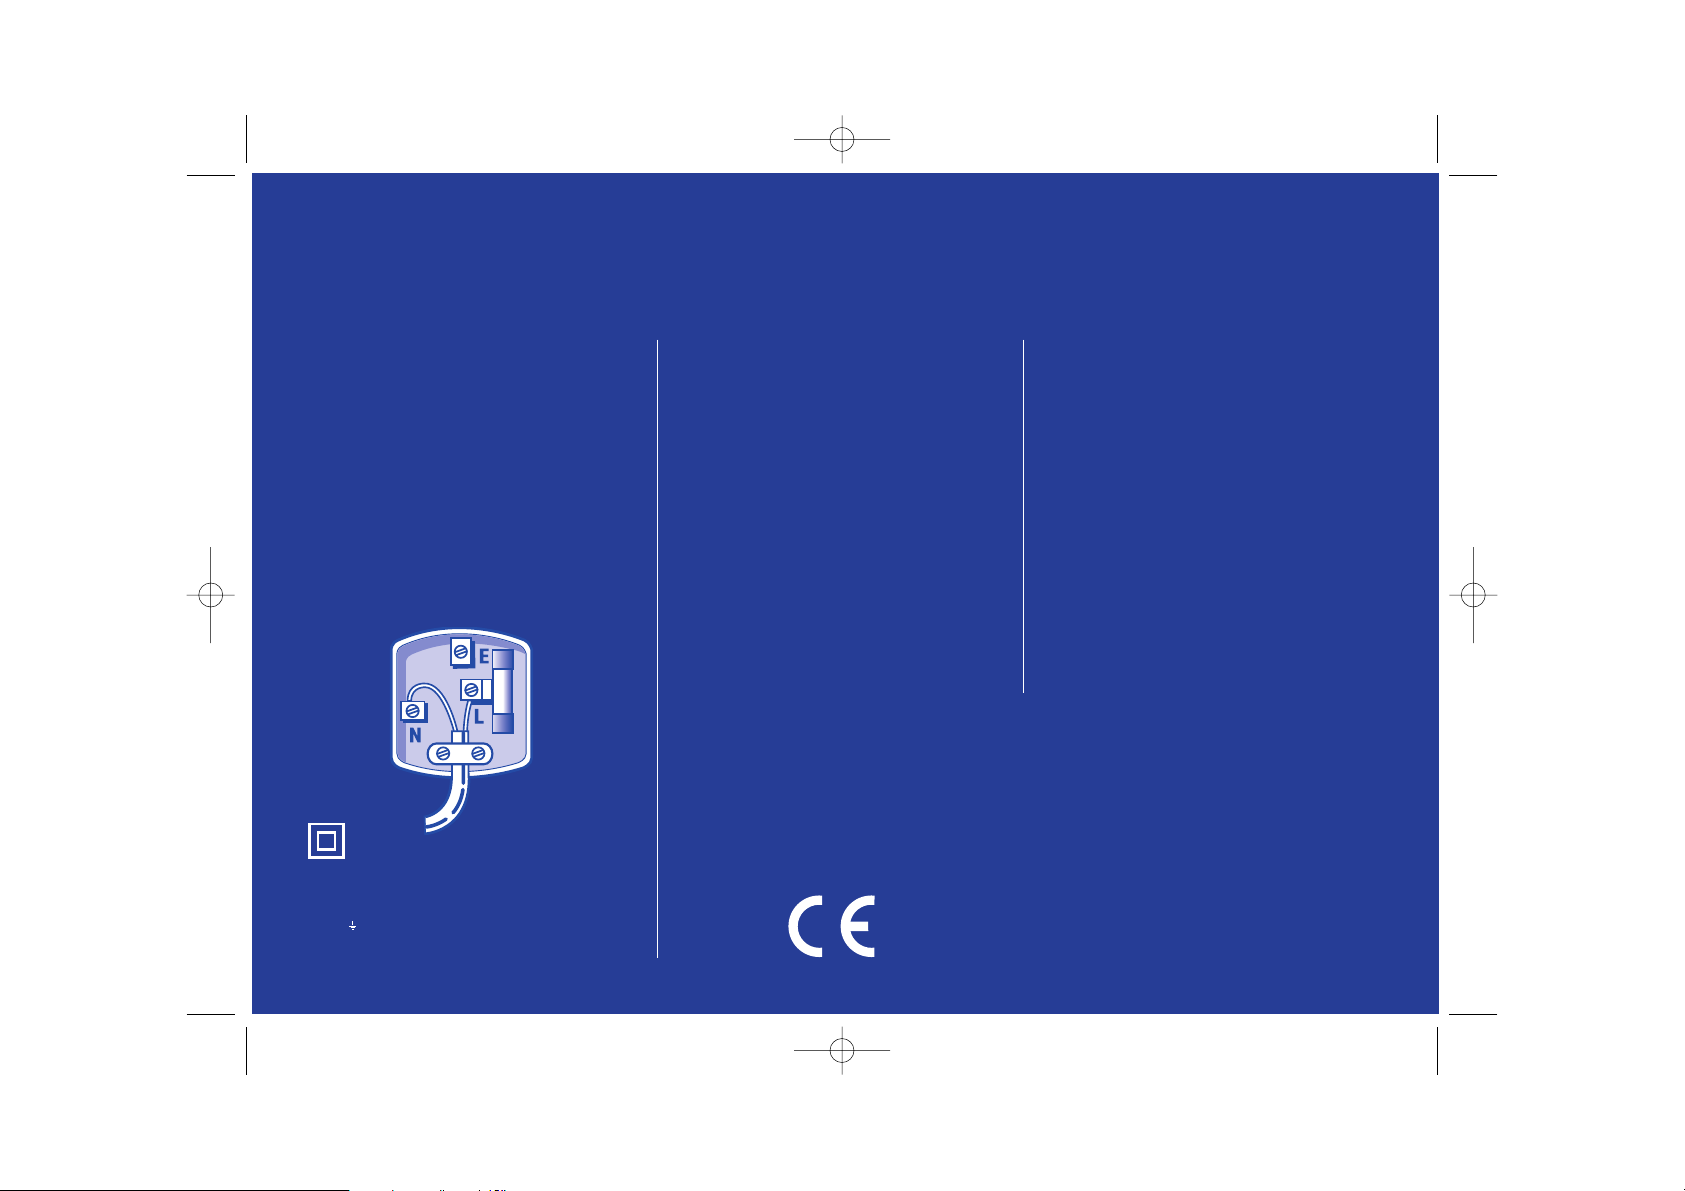
This appliance is fitted with a fused three pin plug
TO BS 1363 which will be suitable for use in all
houses fitted with sockets to current specifications.
If the fitted plug is not suitable for your socket
outlets it should be cut off and carefully disposed
of. to avoid a possible shock hazard, do not insert
the discarded plug into a socket.
Fitting a new plug
If for any reason you need to fit a new plug, the
flexible mains lead must be connected as shown here.
The wires in the mains lead fitted to this appliance
are coloured in accordance with the following code:
ELECTRICAL CONNECTIONS
If the colours of the wires in the mains lead of this
appliance do not correspond with the coloured
markings identifying the terminals in your plug,
proceed as follows:
The wire which is coloured Blue MUST be connected
to the terminal which is marked with the letter N or
coloured black. The wire which is coloured Brown
MUST be connected to the terminal which is marked
with the letter L or coloured Red. Before refitting
the plug cover, check that there are no cut or stray
strands of wire inside the plug.
Use a 3 Amp BS1362 fuse, only BSIor ASTA
approved fuses should be used. If you are in anyway
unsure which plug or fuse to use refer to qualified
service personnel.
Note: After replacing or changing a fuse on a
moulded plug which has a fuse cover, the fuse
cover must be refitted to the plug, the appliance
must not be used without a fuse cover. If lost,
replacement fuse covers can be obtained from an
electrical shop.
This appliance complies with the following EEC
Directives: 73/23 EEC (Low Voltage Directive),
89/336 EEC (EMC Directive).
Crown Corporation (UK) Limited
Express Way, Whitwood,
Wakefield, WF10 5QJ
Tel: 0871 2204600 Fax: 01977 603159
www.crowncorporation.co.uk
CONNECT
BROWN TO
LIVE (L)
CONNECT
BLUE TO
NEUTRAL (N)
MAKE SURE THE OUTER
SHEATH OF THE MAINS
LEAD IS SECURELY HELD
BY THE CLAMP
This appliance is double insulated and must not be
connected to the earth terminal of the plug, which
maybe marked with the letter E or by the earth
symbol or coloured green and yellow.
For further information please contact the
Crown Service line on 01422 203676
3 AMP
CRN 3299DB Draft 5.qxd 8/19/05 12:34 PM Page 1
 Loading...